E RAE Electronics Industry Co PDT-423BKA PDP Monitor User Manual 90 X 42 X3NM BDMI 00
E-RAE Electronics Industry Co Ltd PDP Monitor 90 X 42 X3NM BDMI 00
UserManual.wiki
>
E RAE Electronics Industry Co
>
PDT 423BKA User Manual
Users Manual
Navigation menu
Upload a User Manual
Namespaces
Wiki Guide
HTML
PDF
Info
Views
User Manual
Discussion / Help
Navigation


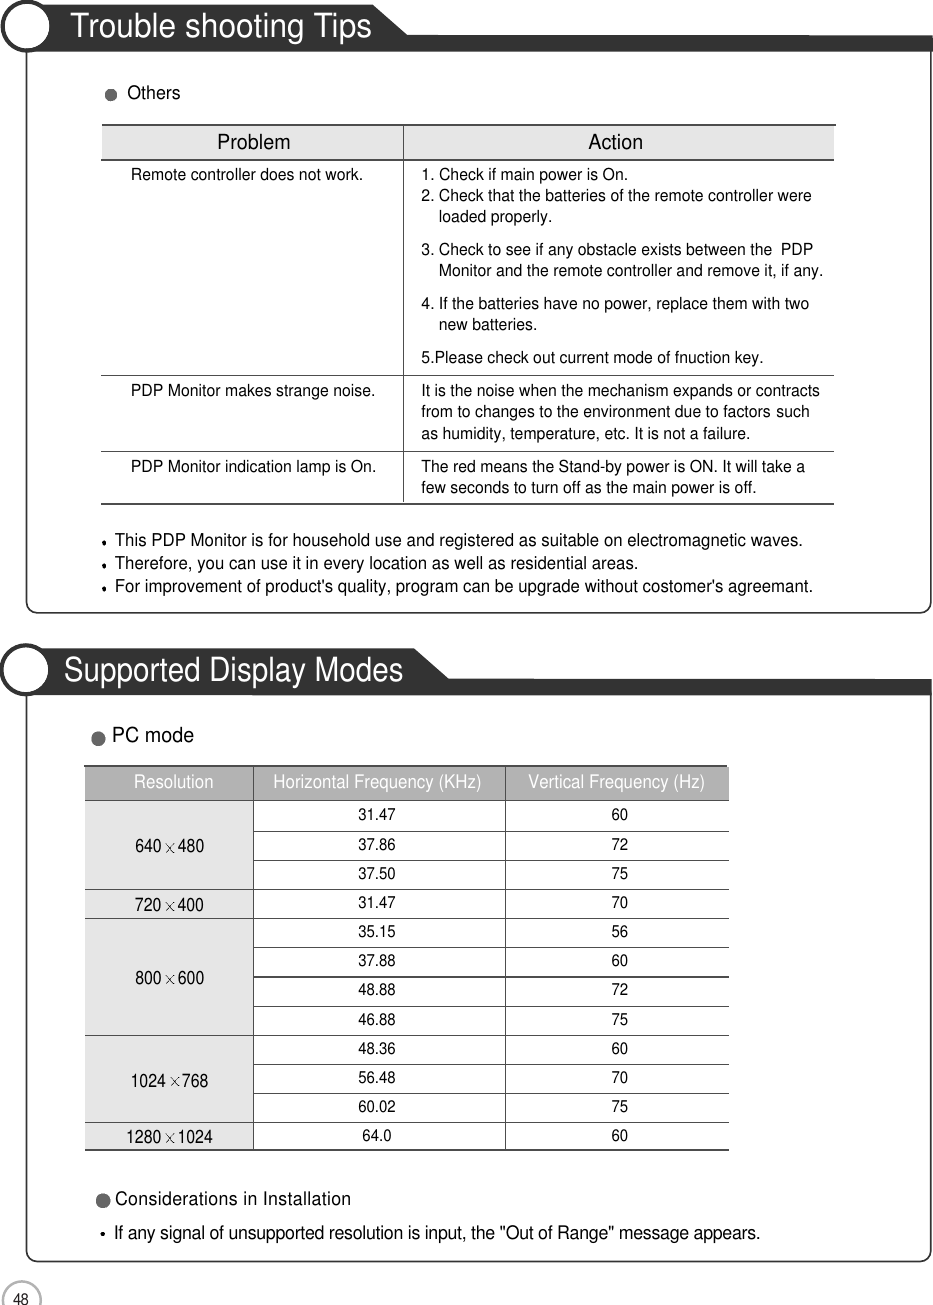
![49Maintenance and ServiceSupported Display ModesIf any signal of unsupported resolution is input, the "Out of Range" message appears.Component Mode [Y, Cb(Pb), Cr(Pr)]Resolution Horizontal Frequency (KHz) Vertical Frequency (Hz)720 480 15.73 60.00 SDTV, DVD 480i720 576 15.63 50.00 SDTV, DVD 576i720 480 31.47 59.94 SDTV, 480p720 576 31.25 50.00 HDTV, 576p1280 720 37.50 50.00 HDTV, 720p1280 720 45.00 60.00 HDTV, 720p1920 1080 28.12 50.00 HDTV, 1080i1920 1080 33.75 60.00 HDTV, 1080iPIP Matrix Table](https://usermanual.wiki/E-RAE-Electronics-Industry-Co/PDT-423BKA/User-Guide-689097-Page-49.png)