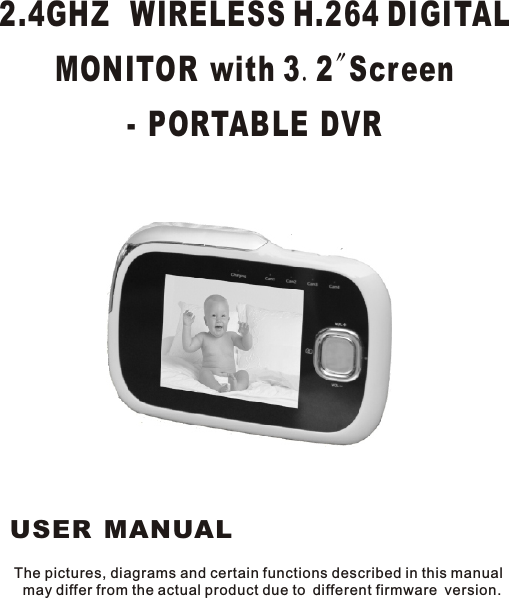
E TECS ET-DM32 H.264 DIGITAL MONITOR WITH 3.2" SCREEN User Manual DM32

E-TECS LIMITED H.264 DIGITAL MONITOR WITH 3.2" SCREEN DM32

Users Manual

The pictures, diagrams and certain functions described in this manual may differ from the actual product due to different firmware version.2.4GHZ  WIRELESS H.264 DIGITAL MONITOR with 3.2"Screen- PORTABLE DVR USER MANUAL
SAFETY AND GENERAL INFORMATIONImportant information on safe and efficient operation of this product. Before operating your Wireless Baby Monitor, please read all these safety and operating instructions completely and then retain for future reference.1. Your Baby Monitor is designed to be an aid and should not be used    as a substitute for responsible and proper adult supervision.2. Do not place the camera on any surface or mount it on any wall    where the camera or the AC adapter cords are within baby's reach.3. Never place the camera inside your baby's crib, bed or playpen.4. Never cover the camera and monitor (e.g. with clothes, towels or    blankets).5. Position the camera, monitor and AC adapters to allow adequate    ventilation.6. Never use or place your camera and monitor in moist places or    near water. For example, do not use near a bathtub, washbowl,    laundry tub, kitchen sink, in a wet basement, etc.7. To prevent overheating, keep the camera, monitor and AC    adapters away from heat sources such as radiators, heat    registers, stoves or other appliances (including amplifiers),    which produce heat.8. Keep the camera out of direct sunlight.9. Disconnect the AC adapter from wall outlets during long periods    of non-use.10. Use only the AC adapters provided. Use of any others may     damage the camera and/or monitor.11. If traveling abroad, make sure that the voltage shown on the     power adapters corresponds to the local power, before plugging     in the AC adapters into the electric outlets.
 FCC Notice to Users   This equipment has been tested and found to comply with the limits for a Class B digital device, pursuant to Part 15 of the FCC Rules. These limits are designed to provide reasonable protection against harmful interference in a residential installation. This equipment generates, uses and can radiate radio frequency energy and, if not installed and used in accordance with the instructions, may cause harmful interference to radio communications. However, there is no guarantee that interference will not occur in a particular installation. If this equipment does cause harmful interference to radio or television reception, which can be determined by turning the equipment off and on, the user is encouraged to try to correct the interference by one or more of the following measures: -- Reorient or relocate the receiving antenna -- Increase the separation between the equipment and receiver. -- Connect the equipment into an outlet on a circuit different from that to which the receiver is connected. -- Consult the dealer or an experienced radio/TV technician for help.  This device complies with Part 15 of the FCC Rules. Operation is subject to the following two conditions: (1) this device may not cause harmful interference, and (2) this device must accept any interference received, including interference that may cause undesired operation.    The manufacturer is not responsible for any radio or TV interference caused by unauthorized modifications to this equipment. Such modifications could void the user's authority to operate the equipment.  The antenna used for this transmitter must be installed to provide a separation distance of at least 20 cm from all persons and must not be co-located or operated in conjunction with any other antenna or transmitter
CARE AND MAINTENANCE1. Keep all parts and accessories out of children's reach.2. Fingerprints or dirt on the lens surface can adversely affect   camera performance. Avoid touching the lens with your fingers.3. Should the lens become dirty, use a blower to blow off dirt and   dust, or a soft dry cloth to wipe the lens.4. Keep the camera dry. Precipitation, humidity and other liquids    contain minerals that will corrode electronic circuits.5. Do not use or store in dusty, dirty areas.6. Do not use or store in hot areas. High temperatures can shorten    the life of electronic devices and warp or melt certain plastics.7. Do not store in very cold areas. When the system warms up, the    moisture can form inside the case, which may damage electronic    circuit boards.8. Do not attempt to open the case. Non-expert handling of the    device may damage the system.9. Avoid dropping or strong shocks.10. Operate the product using only the AC adapters included or    provided as an accessory.11. Do not overload electrical outlets or extension cords. This can    result in a fire or an electric shock.
TABLE OF CONTENTMain Features··············································································1Monitor Diagrams····················· ································2Preparing Baby Monitor for First Time Use···································3Using the Receiver(Monitor)·························································6Receiver(Monitor) Main Menu ·····················································7Register  Camera·······································································8Photo Album/Taking Pictures······················································13Motion Detection/Audio/Video Recording·····································15Additional Remarks···································································· 18·····················
MAIN FEATURES* Digital H.264 encoding & decoding technology* Transmit rate:20-25Frames/second* Transmits up to 600 feet range in open area* Friendly On Screen menu for easy adjustments* Supports up to 4 cameras* Baby Monitor works in 2modes:Audio & Video or Audio only* In auto scan mode, the cycle time between cameras can be   adjusted from 10-60 seconds* Digital zoom with selectable regions* Voice Activation(VOX) Feature* Feeding Alarm setup Feature* Multi-Languages Support* Recording & photo function, Review* Recording to TF micro SD card--Manual or with motion detection* Built-in Rechargeable Batteries for Camera and MonitorBOX CONTENT1 x transmitter with integrated camera1 x receiver with 3.2"TFT display and loud speaker2 x 5V DC 1000mA adaptors (for Transmitter and Receiver)1 x rechargeable lithium ion battery for receiver1 x integrated rechargeable lithium ion battery for transmitter1 x USB cable1 x camera mounting bracket1 x monitor PU stand 1 x user manualNOTE:You can purchase replacement accessories for the        receiver and transmitter.Please use only original replacement accessories. We shall not accept any responsibility of material damage or personal injuryin the event you do not heed these instructions,in which caseall guarantee claims shall become null and void.01
MONITOR① Up button(Volume adjustment/Select camera/Menu navigation)② Down button(Volume adjustment/Select camera/Menu navigation)③ Left button(Take a snapshot/Menu navigation)④ Right button(Audio/Video Recording/Menu navigation)⑤ Menu/OK button⑥ RESET button⑦ ON/OFF/ESC button⑧ Charging indicator LED⑨ Active Camera indicator    LEDs⑩ Mini USB connectionNOTE:ON/OFF: Press and hold button for 3 to 5 seconds.           ESC:Press and quickly release button.7698452311002
1. PREPARING BABY MONITOR FOR FIRST TIME USE1.1 INSTALLING RECHARGEABLE BATTERY IN RECEIVER● Open battery compartment by pressing and pushing the battery   cover down as show in Fig 1.● Insert rechargeable battery in the battery compartment as show   in Fig 2. Align battery so the small plastic corner pieces above   and below the metal pins in the battery compartment,align with   the cut-out portions of the battery as show in Fig 3 and Fig 4.● Close the battery compartment by aligning the cover with the   battery compartment and pressing and pushing the cover up as  show in Fig 5.Warning! There is a danger of explosion in the event  the rechargeable batteries are not  . Never use conventional batteries only use rechargeable lithium ion batteries. properly disposed offPUSH DOWNFig 1Fig 2Fig 3Fig 4Fig 5PUSH UP03
1.2 INSTALLING TF CARDIMPORTANT: Turn off monitor power before installing the TF card● To access TF card slot, open the battery compartment by pressing  and pushing down on battery compartment cover and  remove   rechargeable battery (if already installed)● Push the TF card holder shell down to unlock it and then flip it open.●  Put the TF card in the card slot aligning it with the TF card  OUTLINE printed in the slot.● Close card holder shell and push it up to lock it. ● Close the battery compartment cover.NOTE: See section 1.1 for  illustrations to open and close the battery        compartment coverPUSH U PPUSH D OWN04
1.3 CHARGING RECHARGEABLE BATTERY IN THE RECEIVER    (MONITOR)The built-in rechargeable battery   the receiver must be fully charged before the device is used for the first time y .Warning:Replace defective rechargeable battery only  with originalrechargeable battery. Conventional battery must not be used in thereceiver.NOTE:The receiver will automatic  turn on when plugged            or  '     .  ● To charge the rechargeable battery, plug the     (100-240 V AC/50Hz, 5 V DC/1000mA) into Mini USB socket.● The battery starts charg  automatically                . When the receiver is turned on,  the   charging status indicator LED turns on red and the battery symbol   on the display flashes. When the receiver is turned off, the   charging   indicator LED still turn on red  and the battery   symbol on the display shows battery symbol with charging status. ● The charging time for a fully   rechargeable battery when    the device is turned off is approximately 5 hours. The charging time    is doubled if the receiver is turned on while the battery is being   charged.The charging status indicator LED turns OFF (very dim   RED) when the battery is fully charged..inon batter  powerally intoAC power computer s USB portAC adaptering once the receiver is connected to AC adapterstatusdischargedReceiver battery can be charged using AC adapter or via computer's USB port using a USB cable05
3. USING THE RECEIVER(MOINTOR)● Insert receiver in the PU cover/stand and s    lace the receiver.●   receiver  , recharg-   eable battery, or  . NOTE:The receiver automatically turn on when power is supplied         using an AC adapter or via computer’s USB port. ● The receiver     when the ON/OFF/ESC     pressed for 5 seconds. The welcome screen is displayed.  After a short start-up phase the     CONNECTING CAMERA 1.    .         .Note:If the camera is powered ON and within range but the       monitor displays:CONNECTING CAMERA 1.Please reregister       camera.The camera can be registered via the MULTI CAMERA      menu  .● When                  ’     ,                         .4. RECEIVER    following buttons to navigate:MENU/OK button -  -  to display main menu and to confirm selection.UP and DOWN buttons - - to move through  individual menu                        or   volume and  .LEFT and RIGHT buttons - - to move through individual menu                    or   snap  and    / .ON/OFF/ESC button - - to return to the main menu press and quicklyrelease.NOTE: All   within approximately 10 seconds,         .elect flat surface topPower can be supplied to the by using AC adapterfrom computer's USB port using a USB cablecan also be powered on button isvideo from camera is displayed or message is displayed on the monitor screenPressing ON/OFF/ESC button for 5 seconds turns monitor offoption, see section 4.6 for detailsthe monitor is plugged into AC adapter or computer sUSB port charging status indicator LED will be bright redindicating battery is getting charged (MONITOR) MAIN MENUUse theoptionschange brightness optionstake shots do audio video recording(                             )selections must be made  else the monitor will return to audio/video mode06
4.1 MAIN MENU.     Menu/OK → Main Menu4.2 VOLUME  volume.        Menu/OK → Main Menu → Volume Use left or right (up or down) navigation keys to adjust volume.N:If up and down navigation keys are not assigned to manually switch between cameras(see section 4.13 for details) the Volume can also be adjusted directly by us  Up(Vol+) and down(Vol-) navigation keys4.3 BRIGHTNESS.        Menu/OK → Main Menu → BrightnessUse left or right (up or down) navigation keys to adjust brightness.Press the Menu button to display Main Menu on the monitor screen, use navigation keys to pick a menu option and then OK button to confirm selection.  Press Esc key to exit from the Main MenuUse this option to adjustOTEing    .Use this option to adjust screen brightness07
4.4 ZOOM IN enlarge the picture or   a specific of the picture,choose from 5 different specific regions:Center,TopRight,Top Left,Bottom Right or Bottom Left.The specific region enlarged or zoomed in by 2X.Chose OriginalSize to cancel the enlarge or zoom out.         Menu/OK → Main Menu → Specific Regions, Original Size4.5 LANGUAGE set the Screen Menu Display Language,hoose from 5 different languages: English, French, German, Italian   Spanish.        Menu/OK → Main Menu → Languages4.6 REGISTER/PAIR CAMERA register camera            ,before us  it for the first time.This menu         camera(s).  .A camera must be registered before . Before register  please turn on     receiver and transmitter.         Menu/OK → Main Menu→ Register Camera → Camera 1         → Register Camera 1? → Yes         n transmitter/camera → On/OffNote:Press and quickly release  the ON/OFF/PAIR button on the       CAMERA to complete pairing process.'Thumbs up' sign is displayed on the camera list next to registered  cameras. And the camera number LED turns blue.Choose "No" to cancel the registration operation. NOTE:If the registration process is not successful,repeat this process again. You can unregister a camera in the event that you no longer need it. This is done the same way as camera .    Use this option to zoom in on regionUse this option tocorUse this option to if it is not already registereding option is also used toregister additional This monitor supports up to 4 camerasthe monitor can receive audio/video from iting camera both theO is registered08
4.7 CAMERA SELECTION .        Menu/OK → Main Menu → Camera Selection        → Manual Selection   watch.        Menu/OK → Main Menu → Camera Selection        → Auto Scan     cycle time for camera display.   camera   display. N:                                       ,        "Never".4.8 ALARM(MORNING CALL)      MORNING CALL and the FEEDING ALARMS.         Menu/OK → Main Menu →   → Morning Call   In order to set the respective alarm, select ALARM TIME. Using the UP and DOWN buttons to change the hours and minutes. Pressing MENU/OK button       hour  to minute . Press MENU/OK once more in order to confirm the setting.NOTE:ALARM STATUS must be turn  on    .        ff is default  .The FEEDING ALARM           as MORNING CALL.Use this option to manually select registered cameras or enable Auto Scan modeSelect any of the registered cameras (Thumbs up sign next to the camera) toUse this option to select Eachregistered gets ed on the monitor for the duration selected under Auto ScanIMPORTAN OTE To disable auto scan or if only one camerais registered set Auto scan toThis option is used to set individualAlarmto move from s sed to use  Alarm functionO settingis set the same way09
4.9 VOICE ACTIVATION set the standby time   turn off screen to save  power or   Audio Only mode.If the camera   not detect sound in the set time,he screen turn  off automatically      .        Menu/OK → Main Menu → Voice Activation        → Close video time→ Never,15,30,60,90,120If you                      ,        "Never".The screen turn  on automatically when the camera detect  sound,nd the sound     louder than the set sensitivity.There   3 level    sensitivity to choose   Low,Medium,High.Or choose "Never" under close video Time to disableAudio Only ode.        Menu/OK → Main Menu → Voice Activation        → Sensitivity →, , Medium, : Voice Activation feature (switching from audio only mode to audio/video mode) can be disabled by setting      "Never"(                  " ").hen Activation         "Never" and monitor is in Audio Only Mode,the monitor will not switch to audio/video mode when sound is detected, it will only switch to audio/videomode if a key is pressed on the monitor.Note:In Audio/Video mode,when there is no sound detected above set sensitivity level for 5 minutes, the speaker sound is muted.The sound is activated when sound above set sensitivitylevel is detected.Sound does not mute         " ".             : Use this option to tobattery setupdoes ts and switches to Audio Only Modewant the audio and video to be on all the time set closevideo time tos sa level isare s of fromMNever Low HighIMPORTANTactivationsensitivity to Sound is always on when activationsensitivity is set to NeverW sensitivity is set towhen sensitivity is set toNeverSee Table on next page for details10
Close Video TimeVoice Activation Sensitivity  Monitor Mode NotesNever Audio & Video always onNeverLow, Medium, HighSpeaker never mutes ,and Audio &  Video are always on.  Speaker volume mutes after no sound is detected above the sensitivity level set for 5 minutes(video stays on).  Volume is activated when sound above sensitivity level setting is detected Speaker never mutes.  Once monitor switches to Audio Only mode,it staysin that mode even when sound is detected.  The only way monitor switches back to audio & video mode (displays video from the camera)is if a key is pressed on the monitor.Speaker volume mutes after no sound is detected above the sensitivity level set for 5 minutes. Once monitor is in power save mode(Black Screen),it switches back to Audio & Video mode when sound above sensitivity level setting is detectedSwitches to Audio Only mode (Black Screen) after time setting in Close Video Time has passed without sound detection15, 30, 60, 9015, 30, 60, 90Switches to Audio Only mode (Black Screen) after time setting in Close Video Time has passed without sound detectionLow, Medium, HighNeverNeverAudio & Video always on11
4.10 VIDEO REVIEW.        Menu/OK → Main Menu → Video ReviewT.,●   ●   :          ( )                                     .       ●   ●    .●      ..  &  . .Use this option to view recorded videoshe recorded videos are saved as  files on the memory card (TF memory card is sold separately), the video files are saved in a folderThere is a separate folder for each date  all files recorded on a particular date are saved in that folder.Use Up and Down keys to select the folder and press OK/Menu button to open that folder.Use UP and Down keys  to select the file from the file list and pressOK/Menu to play that video.NOTE  To DELETE a file highlight select  the file from the file list  and press left key marked with symbolUse Left and Right keys to play next or previous recorded video in the selected folder.Use UP and Down keys to adjust volumePress MENU/OK or ON/OFF/Esc key to exit preview modeNOTE: To view recorded videos, TF card must be installed in the monitor (see section 1.2 for instructions to install the card and there must be recorded videos on the TF card – See section 4.16 14 16 2 for instructions to record videos12
4.11 PHOTO ALBUM    ( )               .        Menu/OK → Main Menu → Photo Album●   ●       :          ( )                                       .      ●       ●     .  .4.11.1 TAKE PICTUREST ake photo  use the RIGHT   button,it   the shortcutkey for      nd is          .Press          take    picture."     !"           .Use this option to view snapshots photos taken and saved onthe TF memory cardThe snapshots are saved as files on the memory card (TF memory card is sold separately), the photos are saved in a folder. Thereis a separate folder for each date, all pictures taken on a particulardate are saved in that folder.Use Up and Down keys to select the folder and press OK/Menu button to open that folder.Use UP and Down keys  to select the file from the file list and pressOK/Menu to display picture.NOTE  To DELETE a file highlight select the file from the file list  and press left key marked with symbolUse Left and Right keys to display next or previous picture in the selected folder.Press ON/OFF/Esc key to exit preview modeNOTE: To view pictures, TF card must be installed in the monitor (see section 1.2 for instructions to install the card and there must be saved pictures on the TF card – See section 4.11 1 for instructions to take pictureso t s navigation istaking pictures a marked with symboling and releasing the button s aPicture is saved message is displayed on the screen13
4.12 SETTINGS(DATE AND TIME) set the date, time and the time format (12hour/24hour).         Menu/OK → Main Menu → Settings → Date and Time4.13 SETTINGS(UP&DOWN BUTTONS FUNCTION)       UP and DOWN buttons ,.        Menu/OK → Main Menu → Settings        → Up&Down Buttons Function4.14 SETTINGS(BACKGROUND).        Menu/OK → Main Menu → Settings → Background Display4.15 SETTINGS(SYSTEM INFORMATION) display System ID, firmware version .        Menu/OK → Main Menu → Settings →System InformationUse this option toUse this option to assign function to the on the monitor.  By default, up and down buttons are assigned Volume control function, but if multiple cameras are being used and you want to manually switch between cameras, then use this menu option to assign Camera Selection function to up and down buttons.  NOTE: Once camera selection is assigned to the Up and Down button  the Volume menu option must be used from the Main Menu to adjust volume (see section 4.2)Use this option to select blue background or no background (black).  Blue or black background is displayed when an error message is displayed on the monitor or when monitor is switching between cameras (multi-camera in use)Use this option to ,firmware release date and size of the installed memory card14
4.16 MOTION DETECTIONUse this option to enable or disable  manual or  motion detection based audio/video recording,and enable or disable motion alert(beeps).To disable motion detection set Motion Detection to "Never" .         Menu/OK → Main Menu → Motion Detection        → Motion Detection → :              ,                                   (Settings are not changed).,               " ".        Menu/OK → Main Menu → Motion Detection        → Motion Detection →         Menu/OK → Main Menu → Motion Detection        → Motion Detection Recording→ ,●●                       . ,/OK or ON/OFF/ESC   ."     "           .    .NeverNOTE Once Motion Detection is set to Never then MotionDetection Recording and Motion Detection Alert aredisable4.16.1 MANUAL RECORDINGFor manual recording  Motion Detection must be set to “Never” orMotion Detection Recording must be set to DisableNeverDisableWhile monitor is displaying video  press and release RIGHT navigation key, which is marked by red   symbol on the monitor, to start  video recording.  Red   with timer is displayed in upperleft corner indicating video is being recorded Press this key againMENU  key to stop video recordingVideo is saved message is displayed on the screenNOTE: See section 4.10 for instructions to view recorded videos 15
4.16.2 MOTION DETECTION RECORDINGTo enable automatic audio video recording when motion is detected set Motion Detection to Low Medium or High and MotionDetection Recording to Enable .orEnablePress and release On Off Esc Key until video is displayed andthen press and release RIGHTred   symbol on the monitorA red  with timer is displayed near upper left corner indicatingmonitor has enabled motion detection based recording In thismode monitor will record at least 10 seconds audioMENU  key or RIGHTred   symbol on the monitorNOTE See section 4 10 for instructions to view recorded video  /,     ,          " "        Menu/OK → Main Menu → Motion Detection        → Motion Detection → Low,Medium   High         &        Menu/OK → Main Menu → Motion Detection        → Motion Detection Recording→       / /                       navigation key,which is marked by ●    . ●                               .                    /video everytime motion is detected. The recording time could be longerif motion is detected for more than 10 seconds. To cancel motion detection based recording,press and release /OK or ON/OFF/ESC      navigation key marked by ●    . :      .             .16
4.16.3 MOTION DETECTION ALERTThis feature is used to enable or disableo enable MDetection Low Medium or High M D AEnableor EnableDisableThis baby monitor uses software based motion detection, in which monitor compares the change in video displayed on the monitor.  The Low, Medium and High settings determine what level of changein video should trigger motion detection alert to start video recording.With “Low” setting a significant change in displayed video will generate motion detection trigger to start video recording whereas with “High” setting even a small change in displayed video will generate motion detection trigger to start video recording.  Motion Detection Alert works the same way    NOTE REGARDING MULTI CAMERA USEWhen more than one camera are in use with Auto Scan on andthe monitor is doing manual or motion detection based recordingof active camera e g Camera1 then the monitor will not switchto another camera unless manual recording is turned off or motiondetection based recording stops               motion alert (beeps) when ever motion is detected.T   motion alert set otion  to  ,       and otion etection lert to " ".         Menu/OK → Main Menu → Motion Detection        → Motion Detection → Low,Medium   High      &        Menu/OK → Main Menu → Motion Detection        → Motion Detection Alert→           Once Motion Detection Alert is enabled, the monitor beeps every time motion is detected.If there is continuous motion,the monitorbeeps continuously.To disable this feature set Motion Detetion Alert to " ".             .        :                      ,                          (. .  ),                                        .17
5.ADDITIONAL REMARKS5.1 BATTERY STATUSThe battery  display                    4 different .When the solid battery symbol      is displayed, the rechargeable battery is fully charged.The battery symbol      flashes when the rechargeable battery need       .5.2 ALARMIf an alarm  , the alarm symbol      will appear on the display.5.3 SIGNAL The signal           works similar to mobile phone signal strength indicator,the signal bars change indicating camera signal strength.5.4 RANGETransmission of wireless signal depends on the physical  conditions, you can determine the range of your baby monitor by testing it in your surroundings. In open area under ideal conditions achieve a range of up to 200 m(600 feet). The actual range depends mainly on conditions like the location of the transmitter, the type of building            .status indicator scharging statess to be charged is setSTRENGTH INDICATORstrength indicatorconstruction material  and presence of other wirelessdevices18

Navigation menu