EKEN GROUP H3 ACTION CAMERA User Manual Hello
EKEN GROUP LIMITED ACTION CAMERA Hello
User manual
Hello
Congratulations on your new camera! This user manual will help you learn the basics of capturing
life’s most incredible moments!
Getting Started
Turn camera ON and repeatedly press the Power/Mode Button to cycle through camera modes.
1. Video (1080p 30fps/ 720p 60fps)
Record Video
2. Playback (Event, Video or JPEG)
View your videos and photos on the screen
3. Settings (Video Settings, Photo Settings, and System Settings)
Repeatedly press the Shutter/Select Button to cycle through three settings. Use the Up or Down
Button to cycle through the Settings options and press Shutter/Select to select desired option.
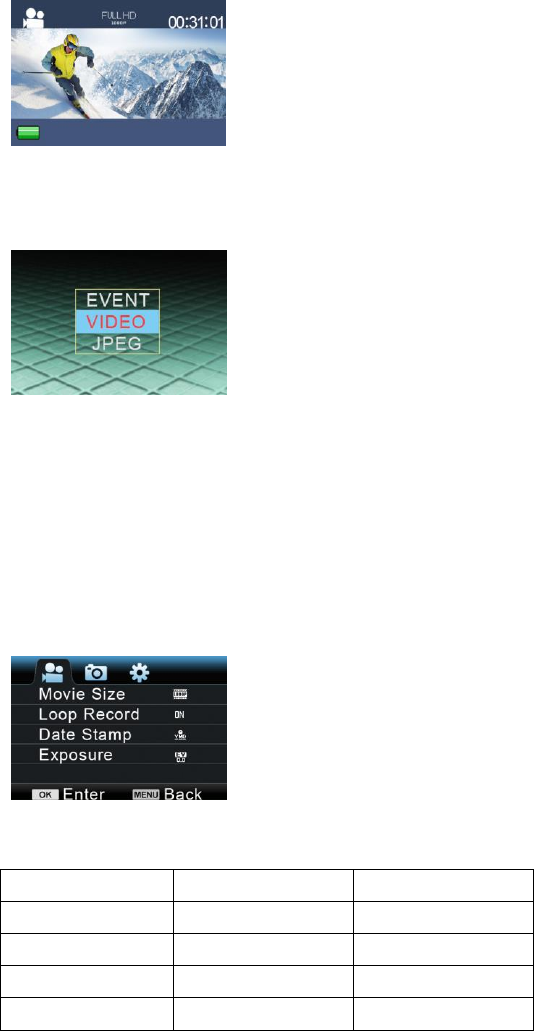
a. Video Settings:
1) Movie Size: 1080p 30fps or 720p 60fps
Micro SD Card
1080p 30fps
720p 60fps
32 GB
240 mins
320 mins
16 GB
120 mins
160 mins
8 GB
60 mins
80 mins
4 GB
30 mins
40 mins

2) Loop Record: On/Off
3) Date Stamp: Off/Date/Date & Time
4) Exposure: +-2.0/+-1.7/+-1.3/+-1.0/+-0.7/+-0.3/0
b. Photo Settings:
1) Resolution: 2M
2) Single Shot: On/Off
3) Treble Shot (Burst Photo 3 photos): On/Off
4) Selftimer (Time Lapse): OFF/5 Seconds/ 10 Seconds/ Double Shoot a series of photos at set
time intervals
5) Continuous (Burst Photo): 2, 3, 5, 10, 20, 30 or 60 second intervals
c. System Settings:
1) Sounds: On/Off, Start-up 1/2/3/None, Beep On/Off, Volume 0/1/2/3
2) Power Frequency: 50Hz/60Hz/Auto
3) Panel Protect (Screen Saver): Off/1 mins/3 mins/5 mins
4) Power Save: Off/1 mins/3 mins/5 mins
5) Date & Time: YY/MM/DD
6) Language: English/Simplified Chinese/ Traditional Chinese/ France/ Spanish/ Italian/
Portuguese/ Dutch/ Polish/ Russian/ Japanese
7) Format: No/Yes
8) Rotate: 180 On/Off
9) Reset All: No/Yes
10) Version
Capturing Video + Photos
Press the Shutter/Select Button to start/stop recording. Press the Down/Shutter Button to take a
picture. You can also change video and photo settings in the Settings menu.
Storage/MicroSD Cards
This camera is compatible with 4GB, 16GB, and 32GB capacity microSD, microSDHC, and
microSDXC memory cards. You must use a microSD card with a Class 10 speed rating. We
recommend using brand name memory cards for maximum reliability in high-vibration activities.
Charging the Battery
If recording is occurring when battery reaches 0%, the camera will save the file and power OFF.
To charge the battery:
1. Connect the camera to a computer or USB power supply.
2. The Charging Status Light remains ON while the battery is charging.
3. The Charging Status Light will turn OFF when the battery is fully charged.
Connecting to the iSmart DV App (Wi-Fi Edition Only)
The iSmart DV App lets you control your camera remotely using a smartphone or tablet. Features
include full camera control, live preview, photo playback and sharing of select content and more.
1. Download the iSmart DV App to your smartphone or tablet at the Apple App Store or Google
Play.
2. Press the Power/Mode Button to power camera ON.
3. Press the Up/Wi-Fi On/Off button to turn on Wi-Fi*.
4. In your smartphone or tablet’s Wi-Fi settings, connect to the network called “Sports Cam 8”
followed by a series of numbers.
5. Enter the password “1234567890”.
6. Open the iSmart DV App on your smartphone or tablet.
* Press and hold the Up/Wi-Fi On/Off button for three seconds to turn off Wi-Fi.
Compatibility
The iSmart DV App is compatible with some smartphones and tablets listed below.
For Apple iOS:
• iPhone 5 & 5S (iOS 7)
• iPad Air & Mini (iOS 7)
For Android:
• Android 4X Quad-core devices
* Compatibility varies by device. Content playback, sharing and access to the camera's memory
card might be not available on some devices.
FCC Compliance:
1. This device complies with Part 15 of the FCC Rules. Operation is subject to the following two
conditions:
(1) This device may not cause harmful interference, and
(2) This device must accept any interference received, including Interference that may cause

undesired operation.
2. Changes or modifications not expressly approved by the party responsible for compliance could
void the user’sauthority to operate the equipment.
NOTE: This equipment has been tested and found to comply with the limits for a Class B digital
device, pursuant to Part 15 of the FCC Rules. These limits are designed to provide reasonable
protection against harmful interference in a residential installation. This equipment generates, uses
and can radiate radio frequency energy and, if not installed and used in accordance with the
instructions, may cause harmful interference to radio communications. However, there is
no guarantee that interference will not occur in a particular installation. If this equipment does
cause harmful interference to radio or television reception, which can be determined by turning
the equipment off and on, the user is encouraged to try to correct the interference by one or more
of the following measures:
-- Reorient or relocate the receiving antenna.
-- Increase the separation between the equipment and receiver.
-- Connect the equipment into an outlet on a circuit different from that to which the receiver is
connected.
-- Consult the dealer or an experienced radio/TV technician for help.