ELECTRONICS TECHNOLOGY SP6020 Tablet User Manual ZL9 SP6020 UserMan
ELECTRONICS TECHNOLOGY(DONG GUAN)COMPANY LIMITED Tablet ZL9 SP6020 UserMan
ZL9-SP6020 UserMan
1
Index
1.1 Foreword (2)
1.2 SmartPhoneHandling (2)
1.3 Safety Instructions (2)
1.4 Abbreviations and Terminology(2)
1.5 SmartPhoneOperation&Setup (3)
1.6 Phablet Status and Messages (3)
2. Quick Start Guide (3)
2.1 Key Functions (3)
2.2 Key Functions (3)
3. Startup and Shutdown (3)
3.1 Open and Close Screen (4)
3.2 Touch Screen (4)
3.3 Home Page (5)
3.4 Application Procedures (6)
3.5 USB Connection (7)
3.6 Virtual Keypad (7)
3.7 Management (8)
4. Basic Settings (8)
4.1 SIM Management (8)
4.2 Wireless and Internet (11)
4.3 Bluetooth (13)
4.4 Data Management (16)
4.5 Additional Options (17)
4.6 Contextual Model (20)
4.7 Display (22)
4.8 Storage (24)
4.9 Battery (25)
4.10 Application Program (26)
4.11 Account and Sync (27)
4.12 Location Service (28)
4.13 Securing your Phablet (28)
4.14 Language & Input (29)
4.15 Backup and Reset Function (31)
4.16 Date and Time (31)
4.17 Fixed-time Startup and Shutdown (32)
4.18 Assistance Function (32)
4.19 Engineer Selection (33)
4.20 About Your Phablet (34)
5 Multimedia (34)
5.1 Music (34)
5.2 Video (35)
5.3 Photo Gallery (36)
5.4 Camera (37)
6. Communications (37)
6.1 Phone (37)
6.2 Text Messages (38)
6.3 Contact List (39)
7. Internet (40)
7.1 Browser (40)
7.2 Email (41)
8. Other Applications (42)
8.1 Clock (42)
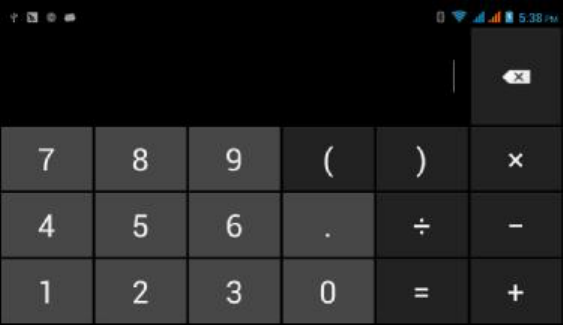
8.2 Calculator (43)
8.3 File Manager (44)
8.4 Recorder (46)
9. Installation (47)
9.1 Uninstall (47)
10. Troubleshooting (47)
2
1.1
Foreword
Thank you for choosing our SmartPhone Model M66AYG-P high definition Phablet with a 6”
LCD Screen. This manual introduces you to the features and functions of your new Phablet.
This manual also includes recommendations which we encourage you to follow such in
order to assure proper operation of your Smartphone.
1.2 SmartPhone Smart Handling
•Please make sure to keep the Phablet in a dry and proper place. To avoid circuitry
and hardware damage do not expose the phone, battery and charger to direct
sunlight, wet or moist environments.
•Please avoid sudden shake or shock since it may permanently damage the
Smartphone.
•If your phone has been running for long periods of time, especially in hot
environments, heat may be pushed to the surface of the phone. If your phone is
overheating, cease using it immediately and unplug it from any power source to let it
cool down. Do not hold on to the phone for too long to avoid burn injuries.
•Under any circumstance attempt to repair or change parts, otherwise this will render
the manufacturer’s warranty void.
1.3 Safety
Instructions
•Never use the PHABLETwhile driving a car, in order to ensure safe driving. The
primary responsibility of every driver is the safe operation of his or her vehicle.
Responsible drivers understand that no secondary task should be performed while
operating a vehicle whether it be eating, drinking, talking to passengers, or using a
mobile device — unless the driver has measured the driving conditions and is
confident that the secondary task will not interfere with their primary responsibility.
•Do not engage in any activity while driving a moving vehicle which may cause you to
take your eyes off the road or become so absorbed in the activity that your ability to
concentrate on the act of driving becomes compromised. Our commitment is aimed
at responsible driving and giving drivers the tools they need to understand the
potential hazards of distractions.
•Switch your mobile device off in health care facilities when any regulations posted in
these areas instruct you to do so. Hospitals or health care facilities may be using
equipment that could be sensitive to cellular signal interference.
•Switch your mobile device off before boarding an aircraft. The use of wireless
portable devices in aircraft is prohibited and may be dangerous to the aircraft’s
operation. Check with appropriate authorities before using any function of a mobile
device while on an aircraft.
•Always follow any special regulations applicable, and always switch your mobile
device off whenever it is forbidden to use it, or when it may cause interference or
hazard. When connecting the mobile device or any accessory to another device, read
its user’s manual.
•Switch your mobile device off when in any area with a potentially explosive
atmosphere and obey all signs and instructions. Sparks in such areas could cause an
explosion or fire resulting in bodily injury or even death. Users are advised to switch
the mobile device off while fueling or other area where you would normally be
advised to shut down your vehicle engine.
•Your SmartPhone is not a toy. Do not allow children to play with it because they
could hurt themselves and others, damage the mobile device. Keep the mobile
device and all its parts and accessories out of the reach of small children.
Your mobile device is a radio transmitter and receiver. It is designed and manufactured not to
exceed the exposure limits for Radio Frequency (RF) energy set by your
local authority.
3
1.4 Abbreviations and Terminology
Abbs/
Terminology Device
Name
Description
PHABLET Mobile Internet
Device Mobile Internet Terminal
WIFI Wireless Fidelity
Based on standard Nº IEEE802.11b wireless
Lan
TF TransFlash Alternate name for Micro SD, Super
Miniature Memory Card
RF Radio Frequency
A frequency or band of frequencies
suitable for telecommunications
1.5SmartPhone Operation and Set Up
Battery Charging
Your Smartphone is powered by rechargeable standard li
-ion battery. A Wall/ USB charger is
included with your SmartPhone for charging the battery.
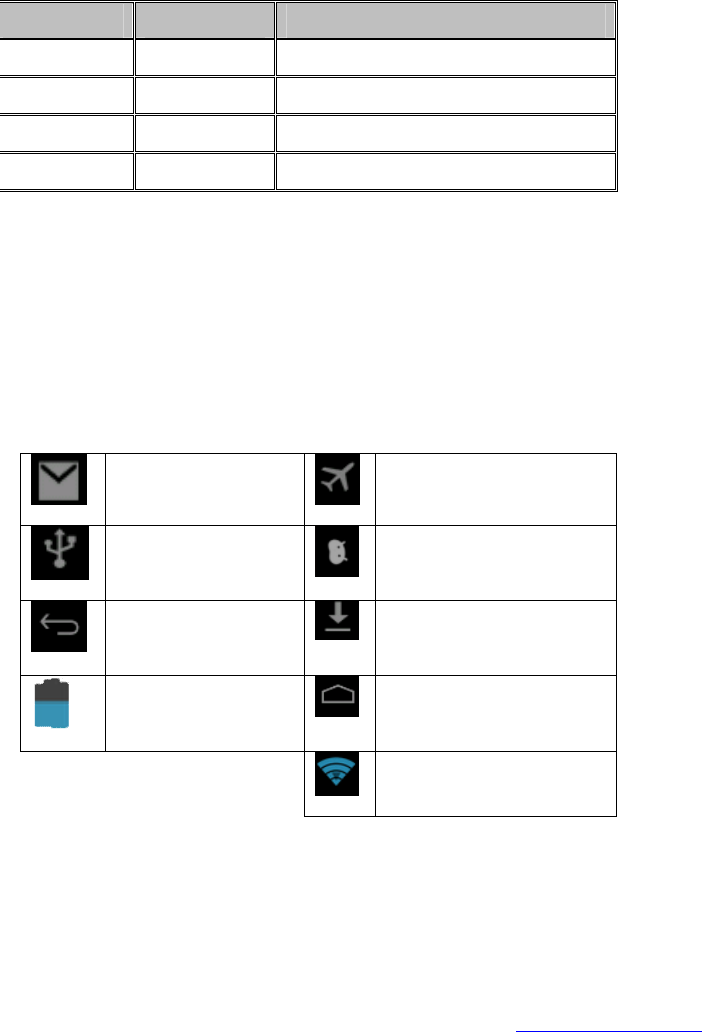
1.6 Phablet Status and Messages
Message Icons
When message icons appears or pops up on the screen, click o
n the message column and slide
across the screen to open the selection list. Choose the menu you need, and confirm the
information. You may close the message window by clicking on the option and sliding up. Below
you will find status icons:
Incoming Message
(Email)
Airplane Mode
Connected to USB
Port
Debugging Via USB
Return
Download in Process
Current Battery Level
Start Button
Conectado al WIFI,
disponibilidad de Internet
2. Quick Start Guide
2.1 Keys Function
Keys Function Description
Power button: Turn Off/On
- Long Press; Sleep Mode Off/On – Short Press.

4
Power button Short press to sleep/activate, long press for startup
and shutdown.
Volume +(up) Increase the volume
Volume -(down) Decrease the volume
Home
Button Will return to Home Screen, regardless of the
application being used.
Back
Button Will return to the previous option and/or screen.
Menu
Button This button will display the main menu.
Setting
Button Displays recent browsing history.
3. Startup and Shutdown
Startup
Press the POWER key for three seconds (long) and the Home Screen will appear and the system
enters into screen a lock status.
Shutdown
1. Press the POWER key for three seconds and a shutdown prompt will appear and select
whether you want to shutdown;
2. Or select other option such as mute mode, airplane mode or reboot.
3. Shutdown would be the last option on the popup window.
3.1 Open and Close Screen
While the phone remains idle and for energy saving purposes, it automatically switches to sleep
mode.
1. If you wish to activate the sleep mode, short press the POWER button.
2. If in Sleep Mode, short press the POWER button and the screen will light up. The
screen will appear on the lock mode, just like in the picture shown below, and slide
to the right side to view the Home Screen or to the right for Camera mode.

5
Image 3.1
3.2 Touch Screen
Phablet Operation
In order to view the Home Screen, you will have the following options.
Touch (click)
Keyboard is a virtual QWERTY keyboard that allows you to enter text by touching keys on the
screen. The keypad includes predictive text, which matches your key touches to common words
so that you can select the word to enter it into your text.
Applicatio
ns
If you need to open an application (ex. Textbox, application or a webpage’s link) just select it
with your finger (click on it).
Gliding/Sliding Across the Screen
This function allows to glide/or slide throughout the screen and wander across to select
the
desired application, function or command.
Release
Before you release, first select the desired target application select and then release.
Rotate
Orientation L
ock: Touch to enable or disable Orientation Lock. When enabled, the screen
orientation locks in the current orientation (horizontal or vertical) and will not rotate when you
rotate the device
6
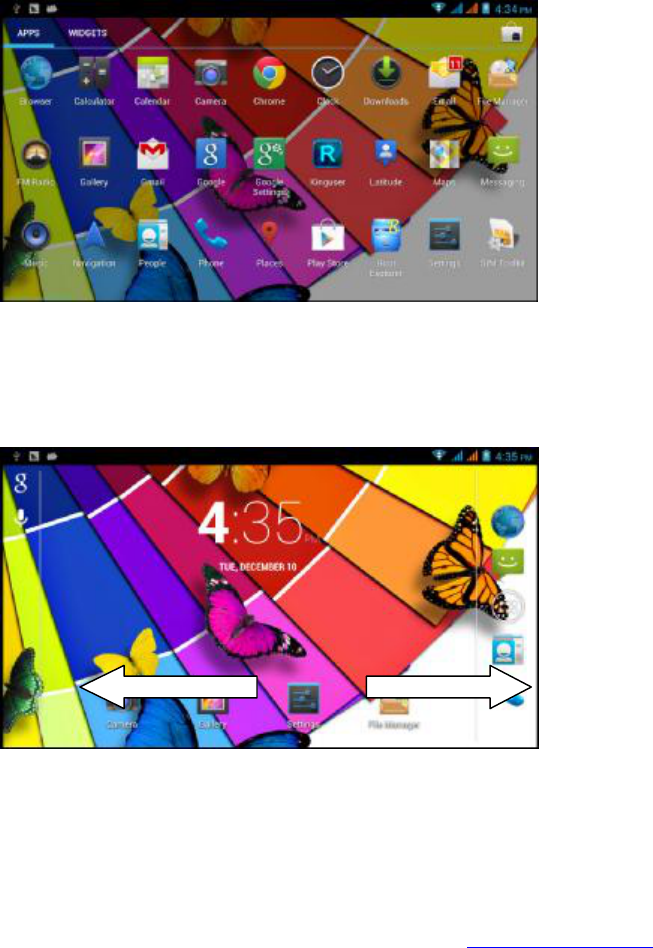
3.3 Home Page
Main interface as below picture 3.2, long pres
s the blank and it will popup windows to set
wallpaper, folder, widgets, and shortcut.
Image 3.2
Extended Home Screen (landscape)
The Home screen consists of the Home panel, plus (panels) that extends beyond the
display
width to provide more space for adding shortcuts, widgets and folders. You can also add panels
further panels. Slide your finger horizontally across the screen to scroll to the left or right side
panels. The examples shown in image 3.3 comprise two
sections.
Image 3.3
Desktop
Shortcuts
To create a shortcut in the desktop
1.
Drag the icons you would like to put together on one icon (multiple icons can be
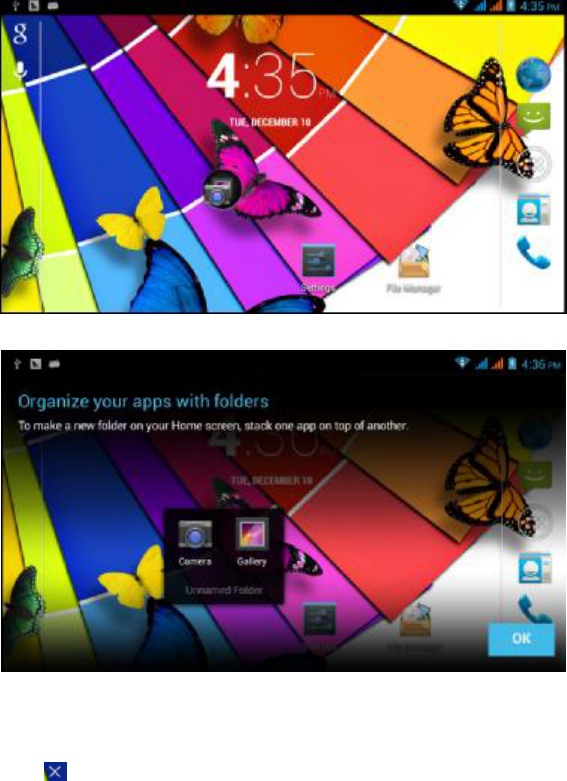
7
overlapped) as shown in Image 3.4.
2.
The overlapped icons can be placed in folders as shown in image 3.5.
Select the folder in t
he black box and the virtual keyboard will appear where you will be able to
enter the folder’s name. The folder’s names can be changed by pressing the text field below
the icon.
Image 3.4
Image 3.5
Remove
Desktop Icons
T
o remove icons from the desktop long press the selected icon and on the upper right hand side
will appear a
icon.
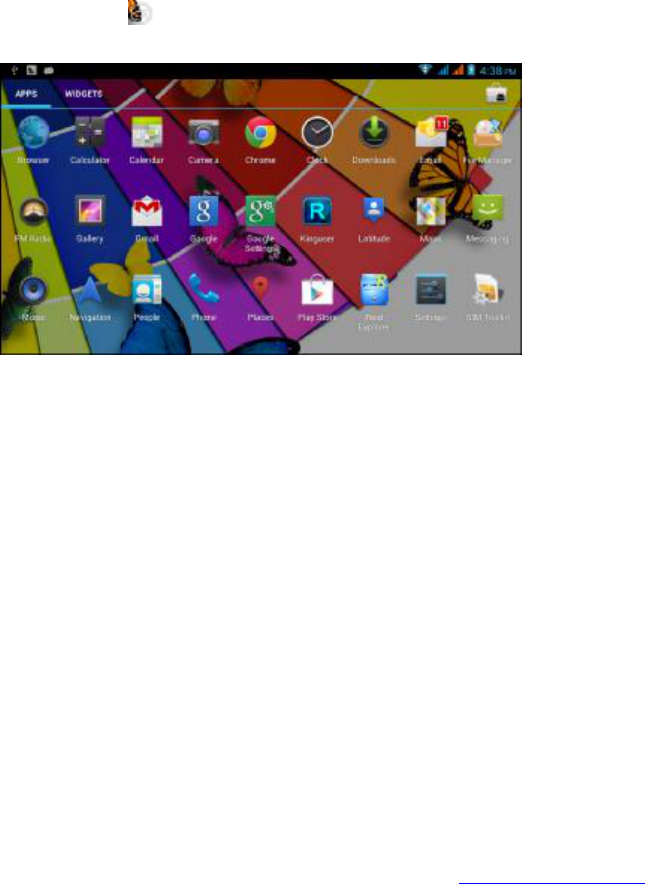
8
Drag the selected to the remove (X) which will turn red and release.
Changing the Desktop
’s Wallpaper
Long press any blank space in main screen, a popup window will appear allowing you to change
the wallpaper.
You may change select your wallpaper or personal image at the Gallery option.
3.4 Application (Procedures
)
Select the menu icon (click)
on the upper right hand side, as shown in Picture 3.2; allowing
you (Picture 3.6) to choose the desired application procedure.
Image 3.6
3.5 USB Connection
Phablet storage setup
Before transferring documents, you must setup your storage directory:
1. Connect the Phablet to your PC with an USB cable followed by a popup message.
2. Open the message board; Check the Phablet’s status and a message on learning how
to use the message board.
3. On the USB message board, select the “USB Connected” option (see Picture 3.4),
then select “open USB storage configuration”.
4. At this point the device should be successfully connected to the PC.

9
Image 3.7
Saving/Copying a document into the storage media
1. Connect the Phablet to the PC using an USB cable.
2. A message will appear, successfully connected to PC.
3. Select “My computer” on your PC’s desktop, check any items listed as “removable
disc” (you may see a Mass Storage message)
4. Copy the documents you need into “removable disc” (you may drag & drop, copy &
paste).
5. Once the desired files are copied & pasted, select “shutdown USB storage
configuration” to uninstall.
Please note that you will not be able to see the data (files, images, music and video) on the
Phablet’s memory card while connected to the PC. Once the cable is disconnected from the PC
you will be able to see the information on the Phablet’s me
mory.
3.6
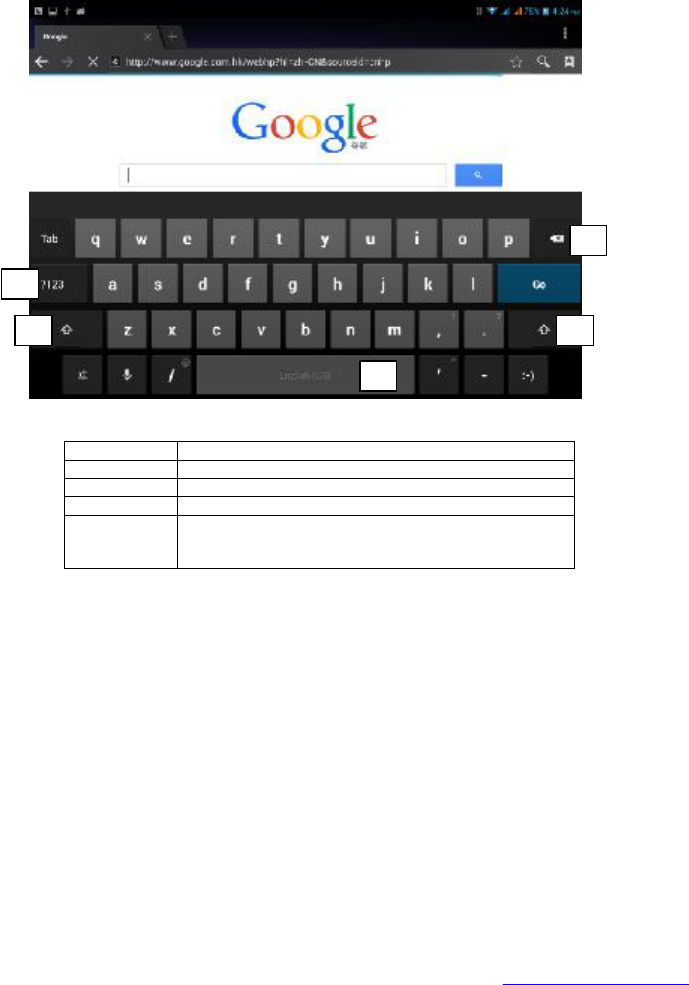
Virtual Keypad
Use the screen keypad
This is a custom virtual QWERTY keyboard, featuring predictive text. Input characters by
tapping the onscreen keys with your finger, or use speech recognition. As you enter characters,
predic
tive text matches your key touches to common words and displays them. Select a word
from the display to insert it into your text. When you start the procedure or choose the words
or numbers edition, it will show the screen keyboard. The keyboard contains b
elow typing
options:
1. Android keyboard
Choose the desired typing option
1. Select Setting on applications.
2. Select Language and Keyboard.
3. The Text Setting will show the installed typing options offered by your Phablet.
4. Select your typing option.
10
Use and switch input options
Image 3.8
1 Toggle between upper/lowercase.
2 Switch to numeric input.
3 Insert space.
4 Execute command (input).
5 Deletes the character to the left side of the
cursor; to delete all characters on the left side of
the cursor select and hold.
3.7Management
Widgets Menu
In the application menu,
select widgets option on the upper area of the screen, or slide the
screen which will alternate between widgets. In order to create a short cut, long press the
desired widget.
Create a desktop shortcut for an application
In the application or widgets men
u, long press any icon, drag, hold and drop the iconto any
position within the desktop area.
Note that if no space is available in the desktop area, you will not be able to create a shortcut.
1
2
3
4
5
11
4 Basic Setting
s
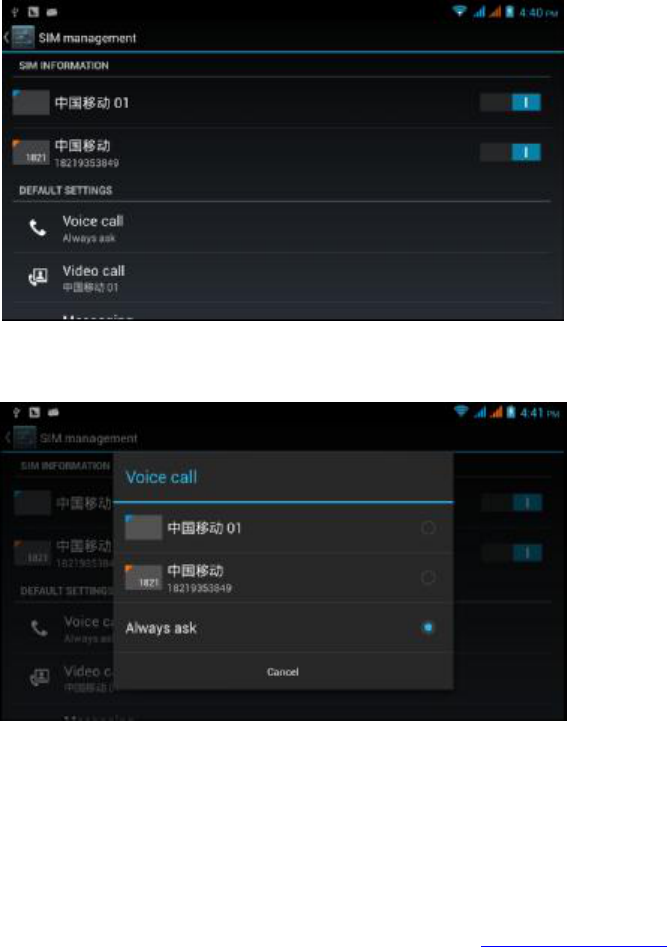
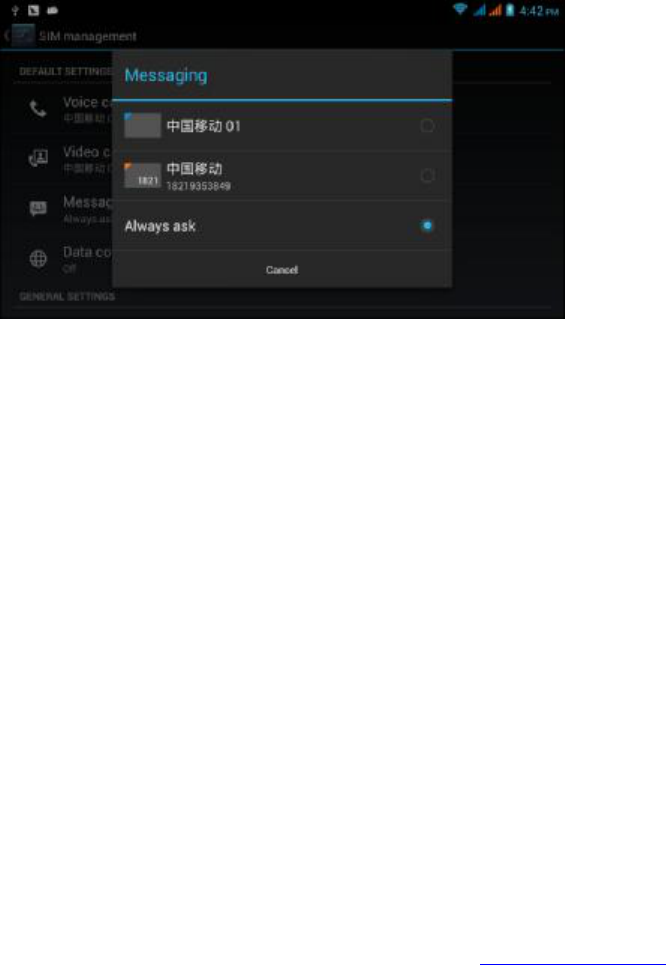
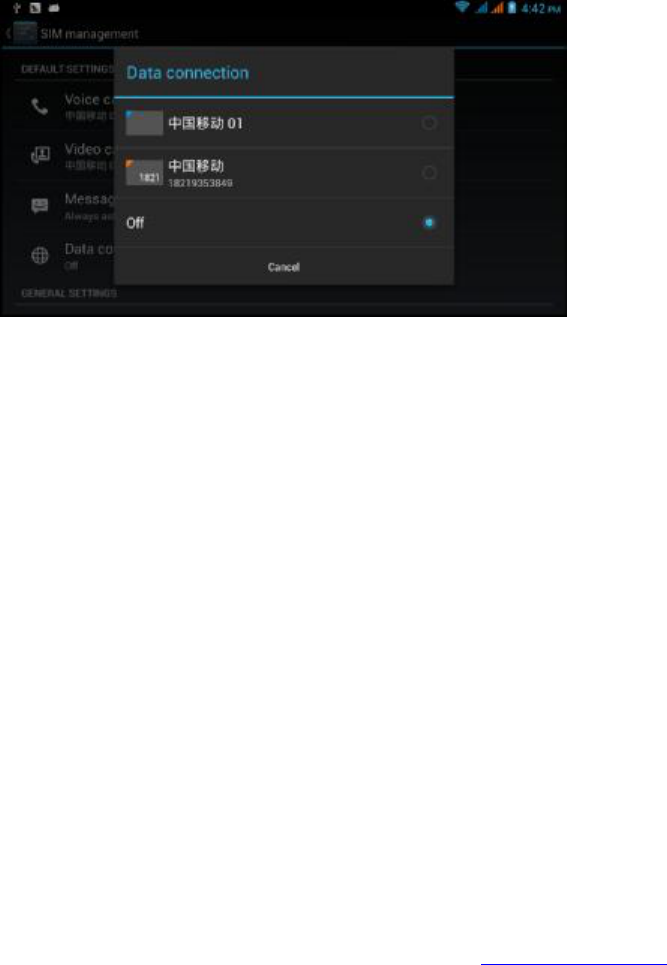
4.1 SIM Managem
ent
4.1
-1 Voice call
Select settings in Main Menu and choose SIM Management, as shown in Picture 4.1.
Image 4.1
Select voice call and select default SIM card, as shown in Image 4.2
Image 4.2
4.1
-2 Video Call
Select settings option in main menu, choose SIM Management, and select video call, while
making the video call it will select the default SIM card, as shown in image 4.3.
14
4.2 Wireless and Internet
1. Wi
-Fi Network Connection
1. In the main menu option, selectsetting application.
2. Select WLAN, open WiFi, the Phablet will automatically search for available Wi-Fi’s.
As shown in image 4.6.
3. Select the desired Wi-Fi, if protected, a popup password window will appear, enter
password and select connect.
Image 4.6
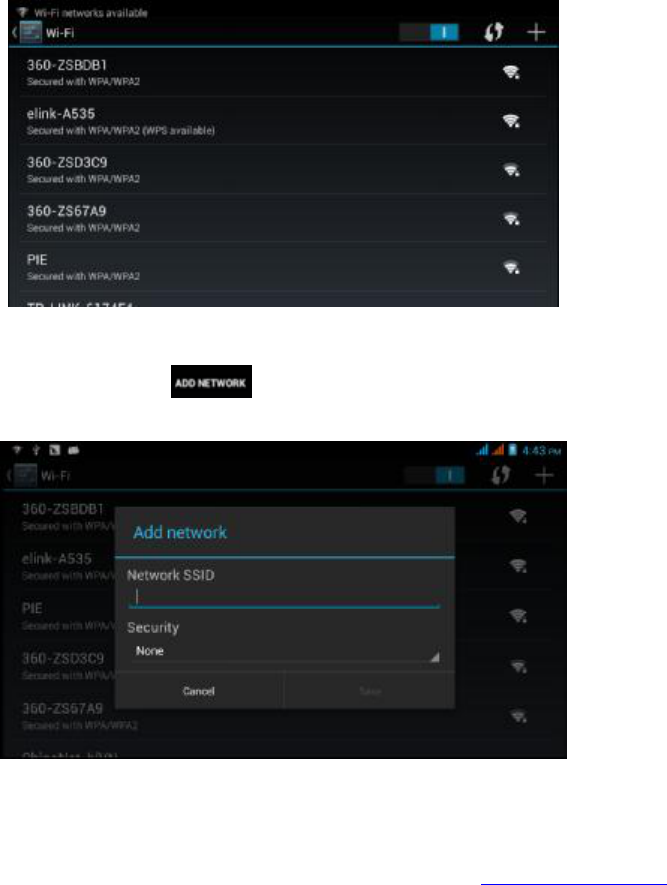
2. Add Network
1) Select the icon in right hand side upper corner, as shown in
Image 4.7
Image 4.7
2) Enter network SSID, the Wi-Fi’s name and save.
15
3) Select username already saved and connect in order to join the network,
as shown in Image 4.8.
Image 4.8
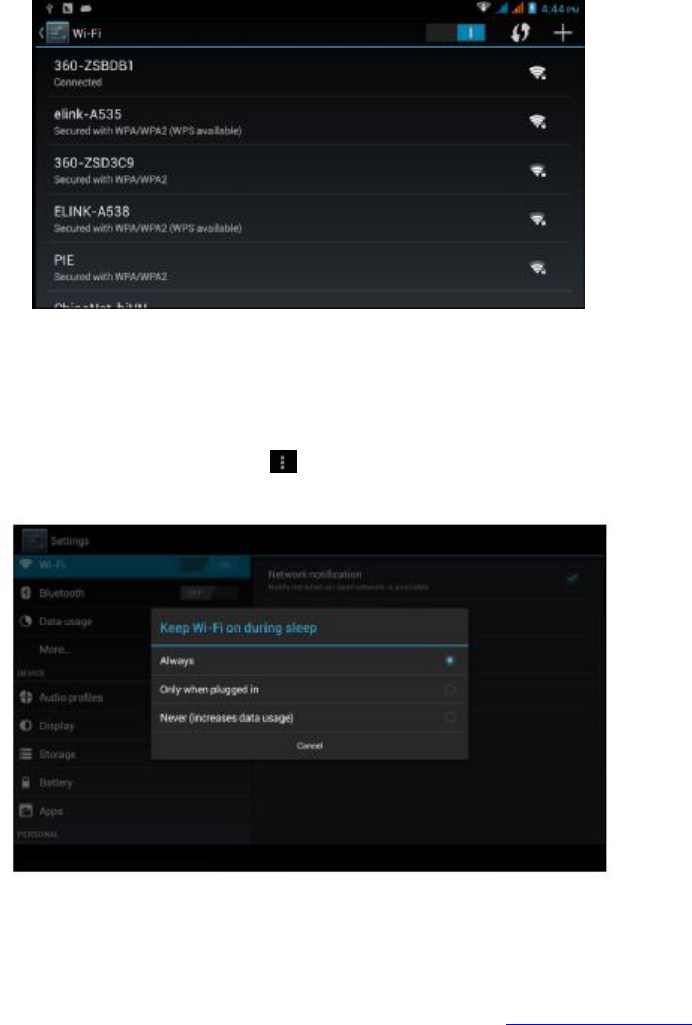
3. Network Message
When you open a Network Message, the WIFI signal is displayed on the lower right
hand side corner(WLAN network available), as shown in Image 4.6
4. Keep WI-FI on during sleep mode
1. Select the menu icon on the right hand side corner, as shown in
image 4.8, select advanced.
2. Select “Keep WI-FI on during sleep”, as shown in Image 4.9.
Image 4.9
4.3 Bluetooth

16
Bluetooth Function & Operation
1. Select setting application in Main Menu.
2. Select Bluetooth and open it.
3. If a Bluetooth is open within your range, select search device in the upper right hand
side corner, then the Phablet will automatically search for Bluetooth devices
nearby, as shown in image 4.10.
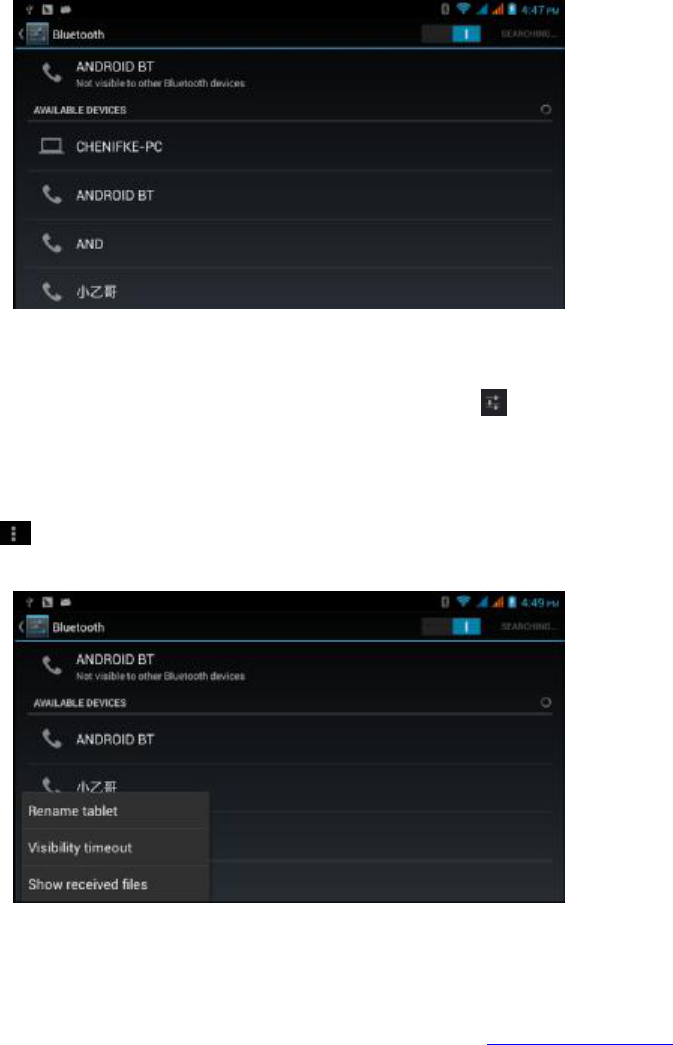
17
Image 4.10
4. Click the available Bluetooth device, it will popup request window, enter into related
password, and match the device to connect.
5. After match successfully, choose the operation you want to, click to enter into
Picture 4.11.
(Picture 4.11)
Bluetooth setting
Rename tablet
Click
icon in right hand side upper corner, as shown in image 4.12, select rename tablet
and enter desired name.
Image 4.12
2.
Verify visibility timeout

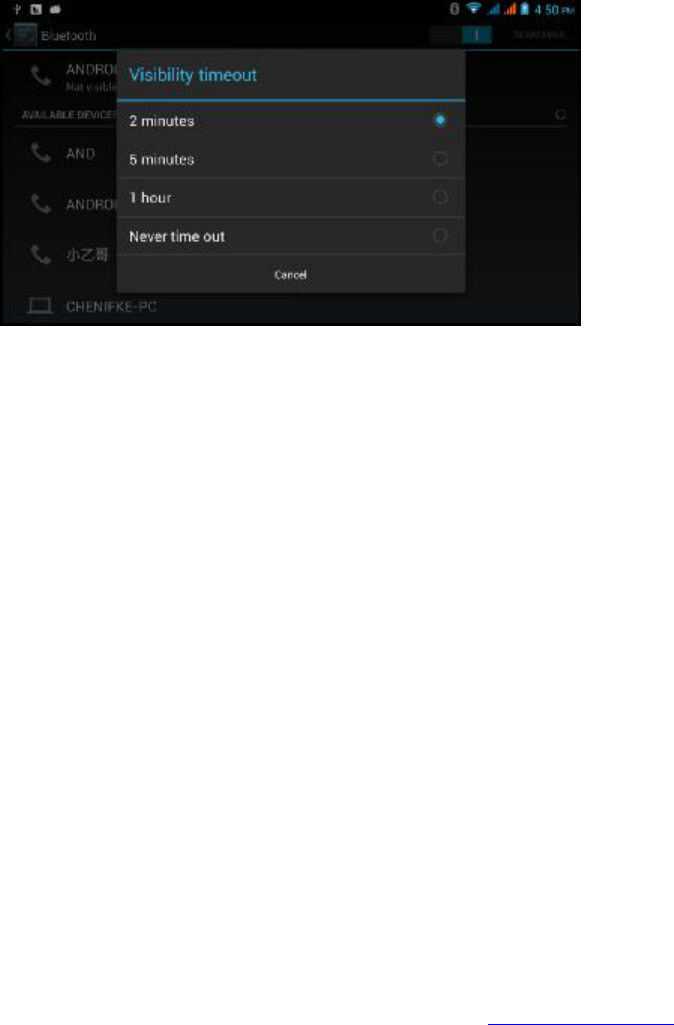
21
Image 4.16
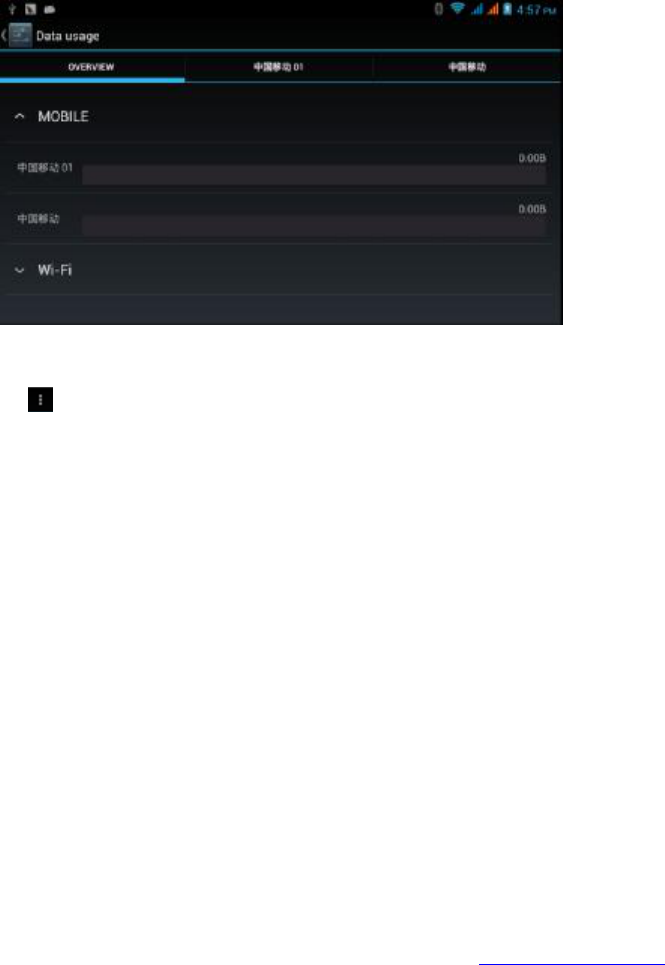
4.5
Additional Options (More)
4.5
-1 Airplane Mode
When airplane mode
is activated, your device’s wireless connections are disabled, and you will
not be able to connect to networks. While in airplane mode, you can use other features of your
device, such as playing music, watching videos or other applications.
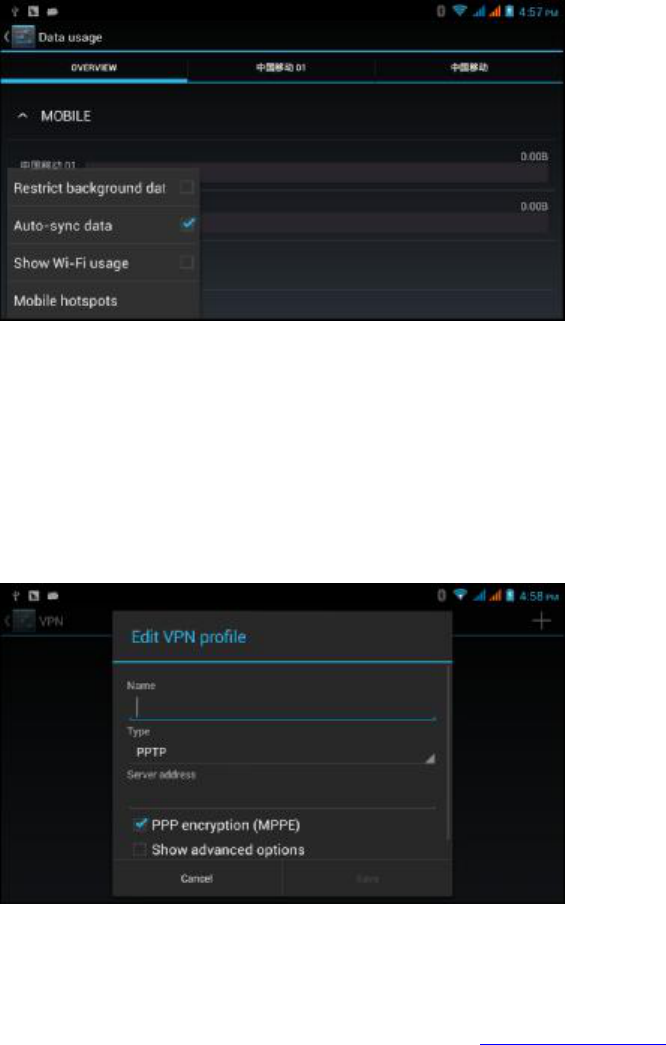
4.5
-2 VPN
To
open a VPN (Virtual Private Network), select add VPN network, as shown in Image 4.17.
Enter the
name and server address then save.
Image 4.17
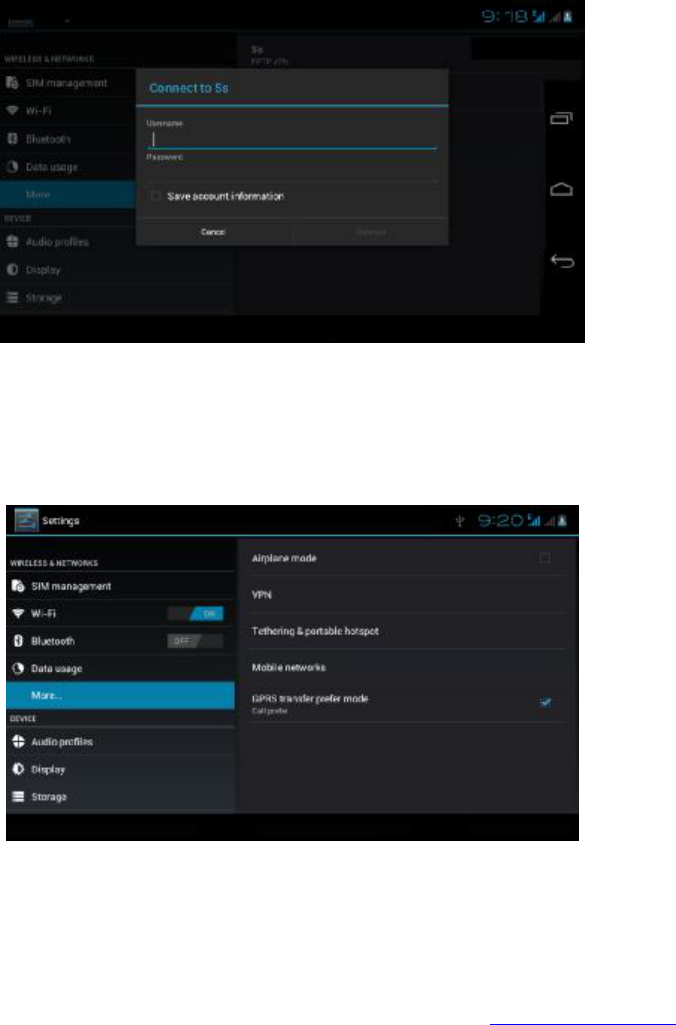
22
Select VPN, as shown in picture 4.18, select the desired VPN, enter your user name and
password then select connect.
Image 4.18
4.5
-3 Network sharing and portable hotspots
Portable WI
-FI hotspots
1. Select setting application in main menu.
2. When a connection with a reliable source is achieved, open network share > portable
hotspot
Image 4.19
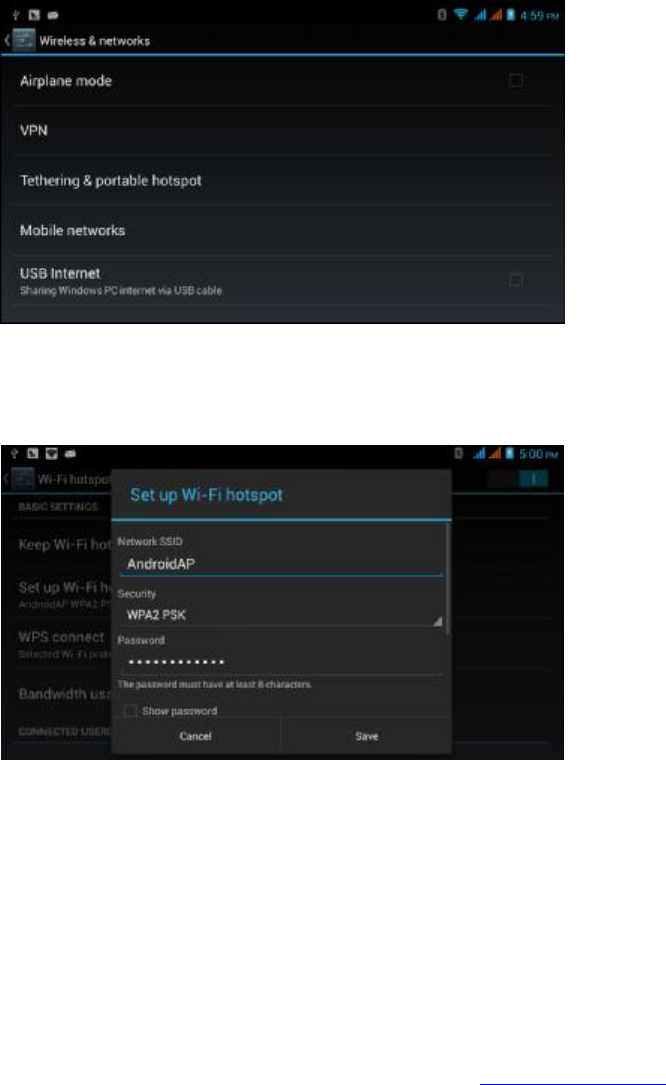
23
Image 4.20
3. Select keep WI-FI hotspots on, then select open time.
4. Return to the previous menu, open portable WLAN hotspots, select configure
WI-FI hotspots.
Image 4.21
5. To request a password to enter your device as hotspot and set a password.
4.5
-4 Mobile Networks
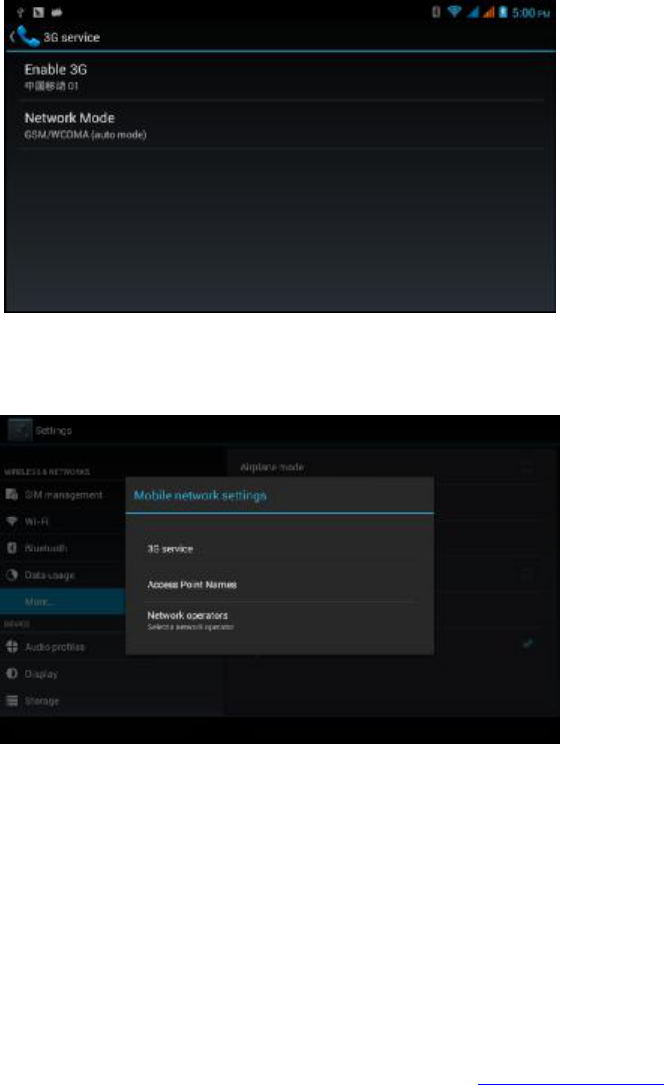
1. 3G Service
Select 3G services shown in image 4.22, select available default SIM card, GSM is 2G network,
WCDMA is 3G network.
25
Image 4.24
Note: CMWAP transmitters data through GPRS, Please visit wap’s website, and for CMNET for
further support and please bear in mind that charges may vary).
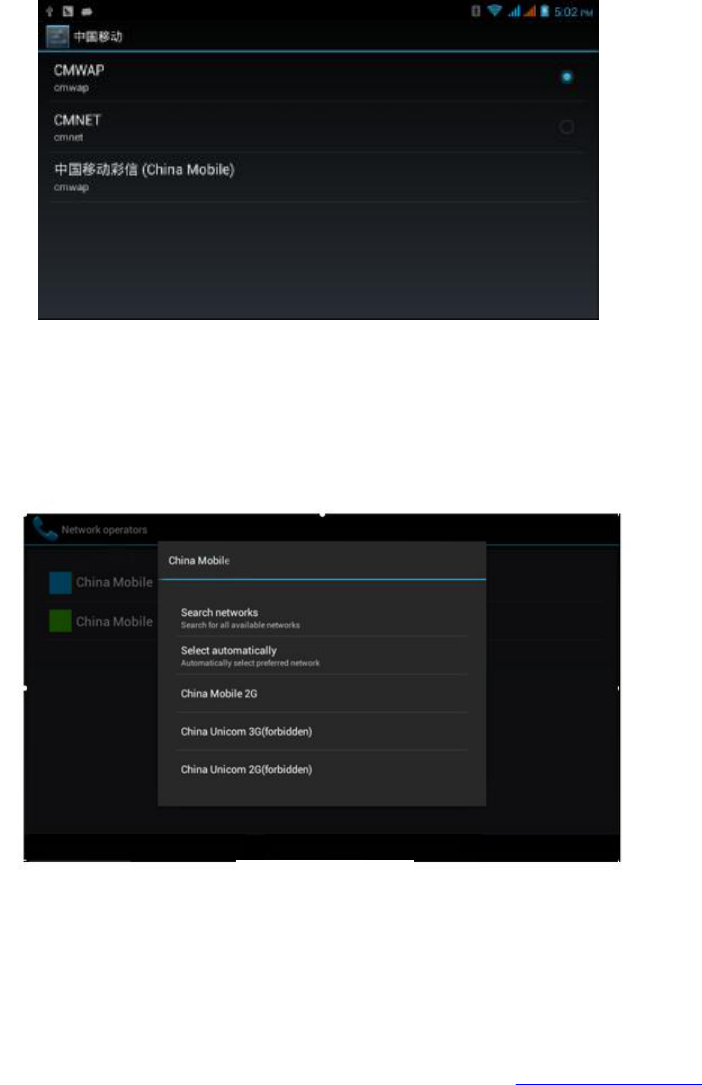
3.
Network Operator
Select the network operator>select the
desired SIM card and the system will search for
available GSM and WCDMA networks
, as shown on image 4.25.
4.5
-5 GPRS data prior mode
After Opening the GPRS data prior mode, systems will establish pri
ority to select the desired
network.
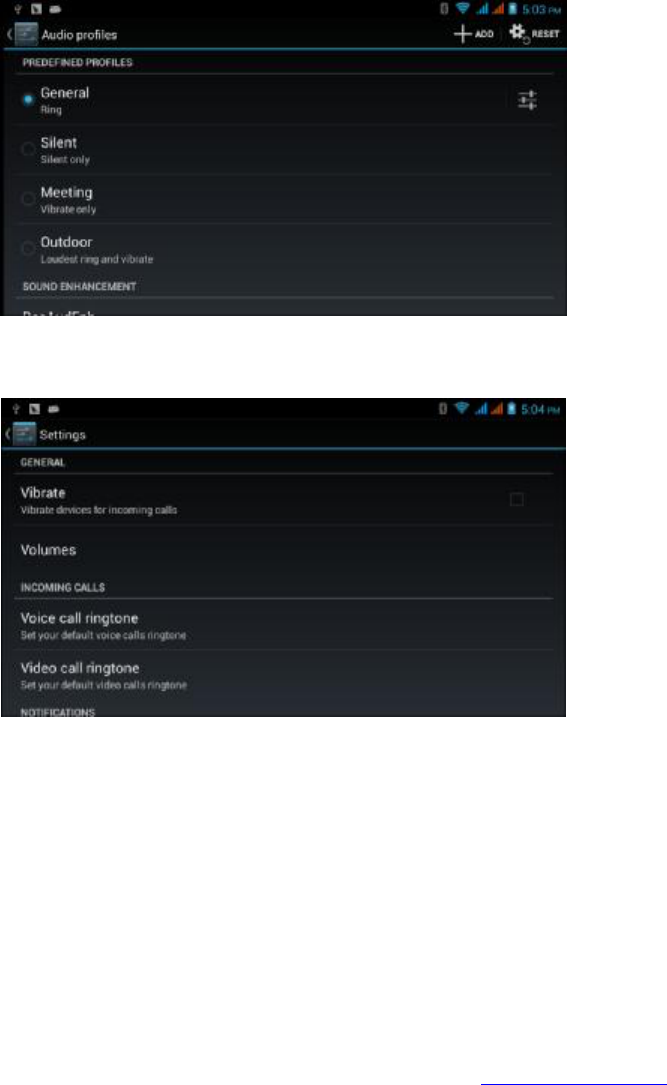
4.6 Contextual Model
1. Open settings, click contextual model, as Picture 4.26,
Image 4.25
26
Image 4.26
2.
Select standard to enter as shown on image 4.27
Image 4.27
1. Vibrate
Select Vibrate, the Phablet will vibrate during incoming calls. Please refer to the
menu shown on Image 4.27.
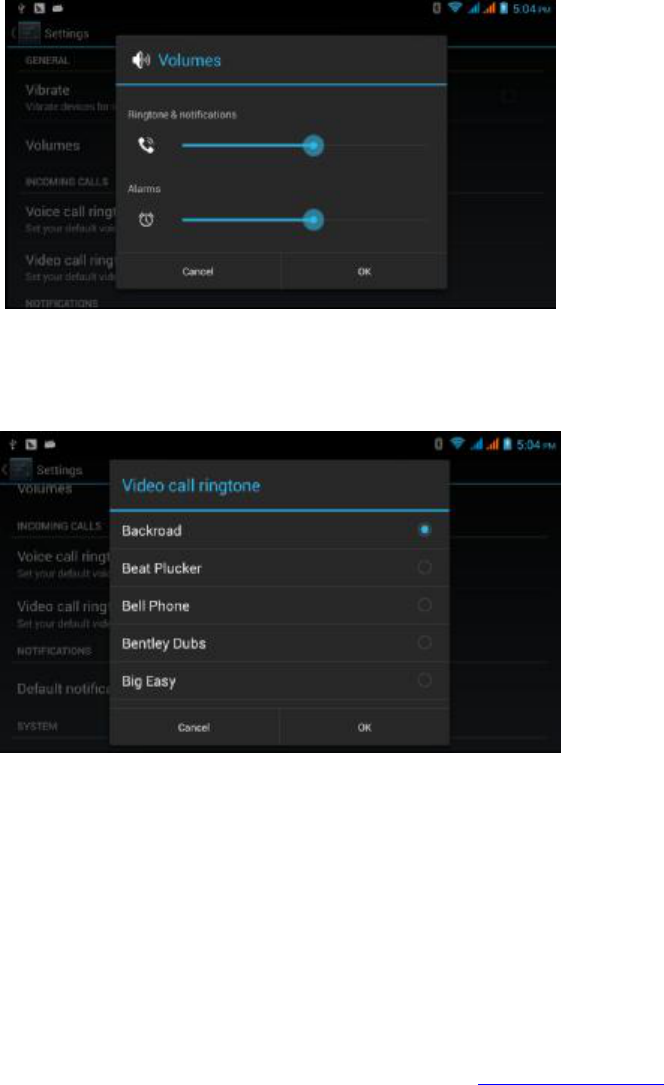
2. Volume
To select the desired volume level, you may do so by means of a ringtone,
message and alarm volume, as shown on image 4.28.
28
Image 4.30
(Note: These options will NOT work while on the following modes: standard, silent, meeting,
outdoor)
4.7 Display
4.7
-1 Adjust the Screen Brightness
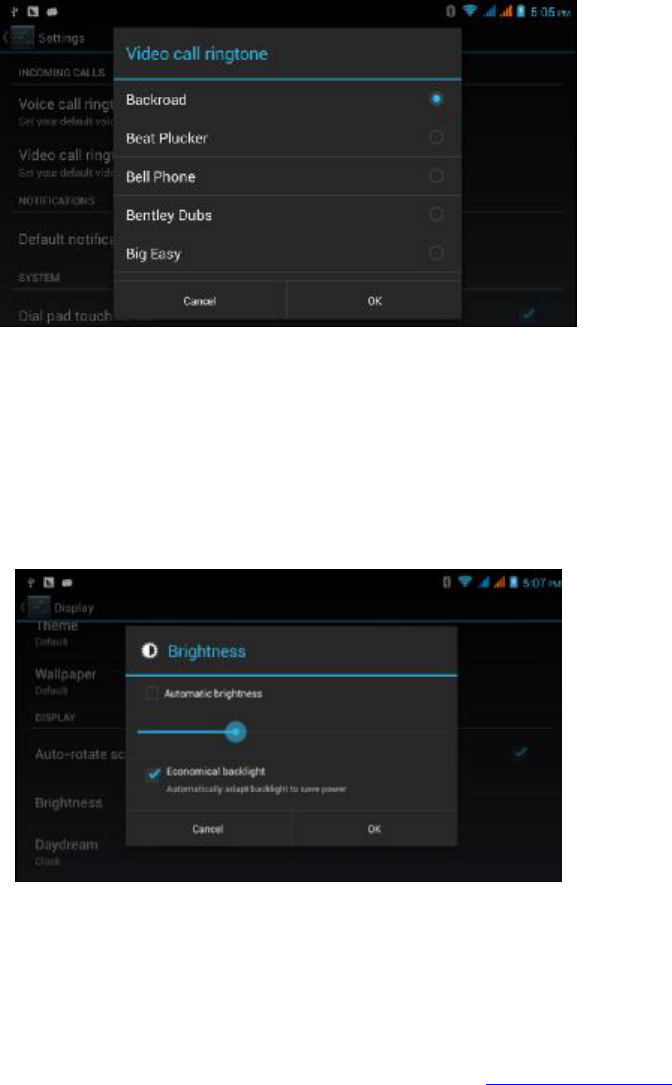
1 . Select Setting application.
2. Select Display, brightness,
3. Drag the slider to set the brightness as shown in Image 4.31
Image 4.31
4. Once the desired brightness is set, select OK after brightness is set.
4.7-2 Wallpapers
1. Select the Setting application.
29
2. Select Display and select Wallpaper.
3. You may select from an array of wallpapers (Gallery, Live Wallpapers, Pre-
Loaded Wallpapers) as shown in Image 4.32.
Image 4.32
4.7
-3 Auto rotation Mode
The system has
an open auto rotation feature by default. When turned off, the system will not
enable the G
-sensor.
4.7
-4 Sleep
1. Select Setting Application.
2. Select Display Mode.
3. Select Sleep Mode.
4. Set the desired Sleep Time as shown in image 4.33.
Image 4.33
4.7
-5 Font Size
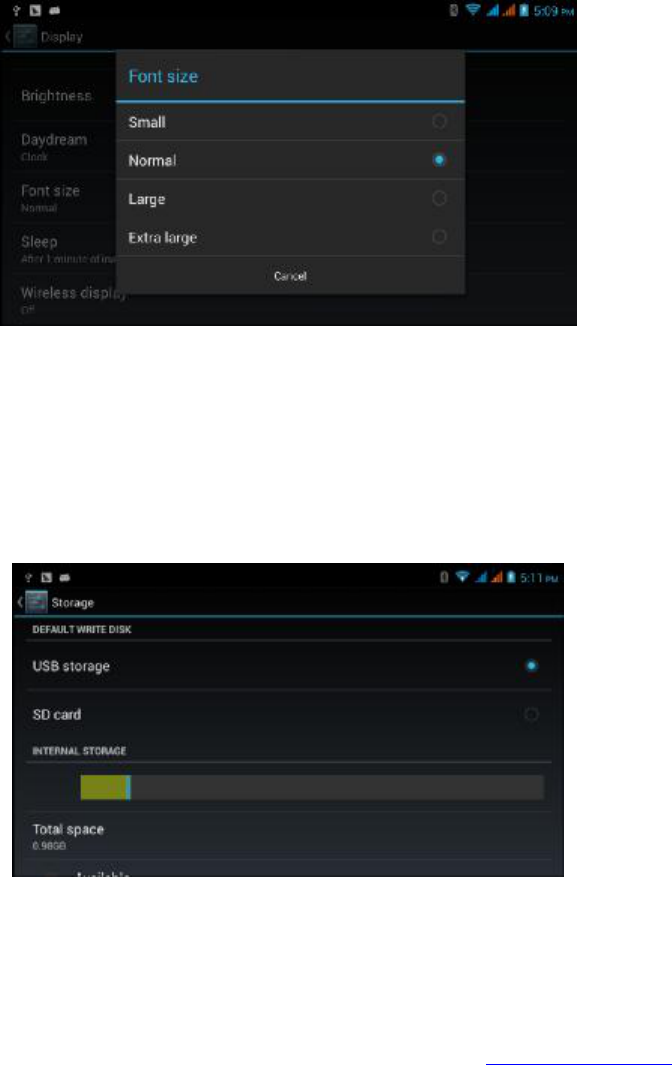
30
Select
Font Size to set the desired size, as shown in image 4.34.
Image 4.34
4.8
Storage
Open Setting function, select Memory, select
preferred install location, select install new
application and target directory.
Check SD card and Phablet’s storage space.
1. Open Setting Application.
2. Select storage, check storage space.
1. Internal storage (built-in memory)
(1) System storage
System storage is the Phablet’s built in memory
, as shown in image 4.38.
Image 4.38
(2) Internal storage
The Phablet’s Built in Internal storage is NAND based, as shown in image 4.39. You may view
and check stored files using the Main Menu.
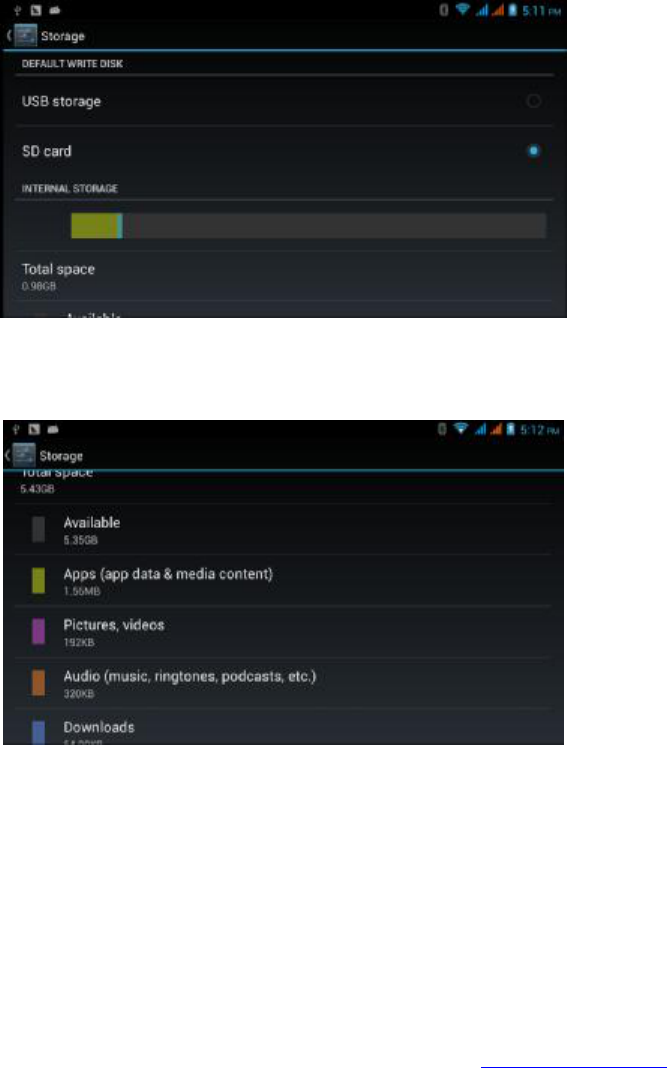
31
Image 4.39
2.
SD card
You may also check the SD’s card storage space availability, as shown in Image 4.40.
Image 4.40
SD Card Removal
1. Select Setting Application.
2. Select memory.
3. Select Uninstall SD card.
4. Remove the SD card.
Note: Safe removal of the SD Card will increase the card’s lifecycle.
4.9
Battery
Select Setting then battery. The battery status can be viewed in Image 4.41
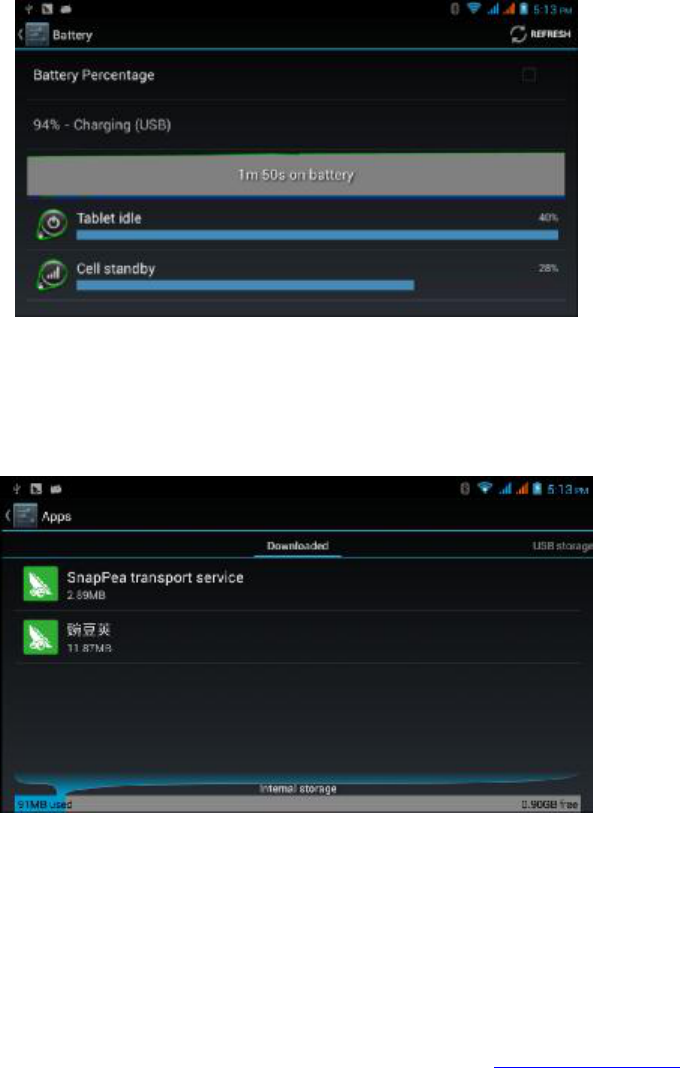
32
Image 4.41
4.10 Application Program
1. Select Setting application.
2. Select application, after pressing enter, you will be able to manage and delete
application; check disk space availability, as shown in Image 4.4.2.
Image 4.42
3. This option will enable you to view internal storage available, as shown in Image
4.43
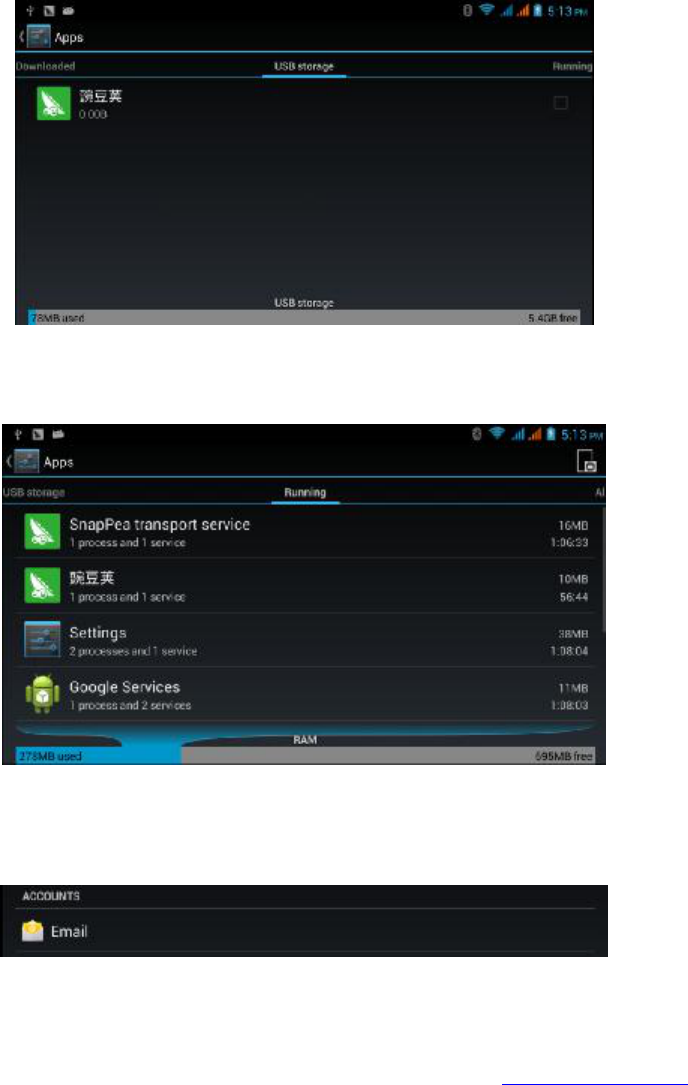
33
Image 4.43
4. This option will enable you to view external storage available (USB Flash Drives,
SD Card) as shown in Image 4.44.
Image 4.44
4.11 Account and Sync
1. Select Setting Application
2. Select Add an Account, as shown in image 4.46
Image 4.46
3. Once the application loads, it will open the Sync function as shown in Image 4.47.


35
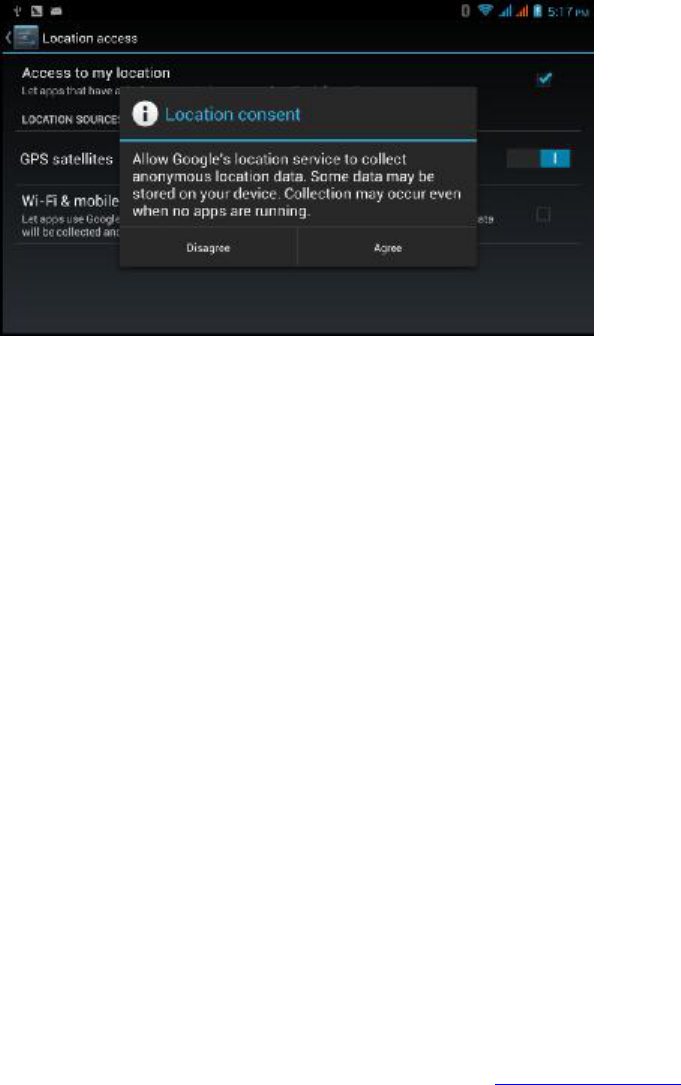
4.12 Location Service
Select
setting, then Location Service, as shown in Image 4.48.
Image 4.48
1. Google’s Location Service
Open Google Location Service, you may do so through your local network.
2. GPS
Open GPS satellite, you may use the GPS feature to position the Phablet.
3. GPS Assistance
By using the Open GPS Assistance feature, the positioning speed will increase,
but It will require a SIM card for data transfer.
4. EPO (Extended Prediction Orbit) Setting
Select the EPO Setting, as shown in image 4.46, then make sure that the EPO
positioning feature is on and auto download activated.
36
Image 4.49
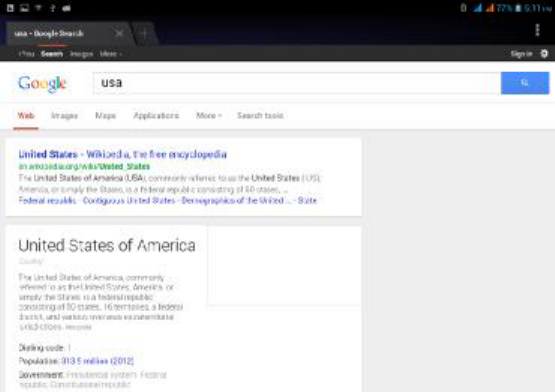
5. Location and Google Search
Select & Open a location, Google Search. In order to enhance positioning you may
enter your current location (ex. Address).
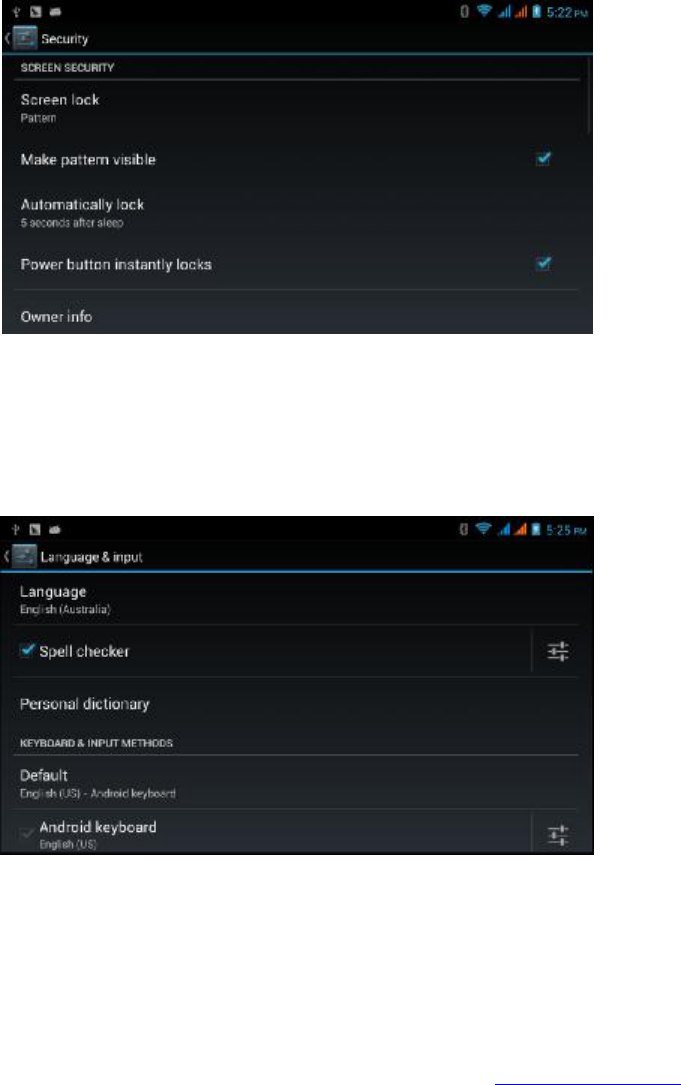
4.13 Securing your Phablet
Screen Lock
To secure your Phablet, you may lock the screen using the “lock” icon or the POWER button.
A password can also be set.
Note: Once your screen is secured (locked), you may need to use as a password to unlock such.
Unlock Icon
1. Select Setting Application (Main Menu).
2. Select Safe.
3. Select Lock Screen.
4. Select Icon in text setting field.
5. Select next step after the notification message.
6. The Unlock Pattern Screen will popup, displaying nine touch spots and
you will have to connect 4 points in any direction in a single trace. As shown in
Image 4.10, once you finish tracing your unlock pattern, remove your finger
and the system will save your established trace.
7. Select Continue.
8. When you see the notification message, make sure to enter the Unlock
Pattern then Confirm.
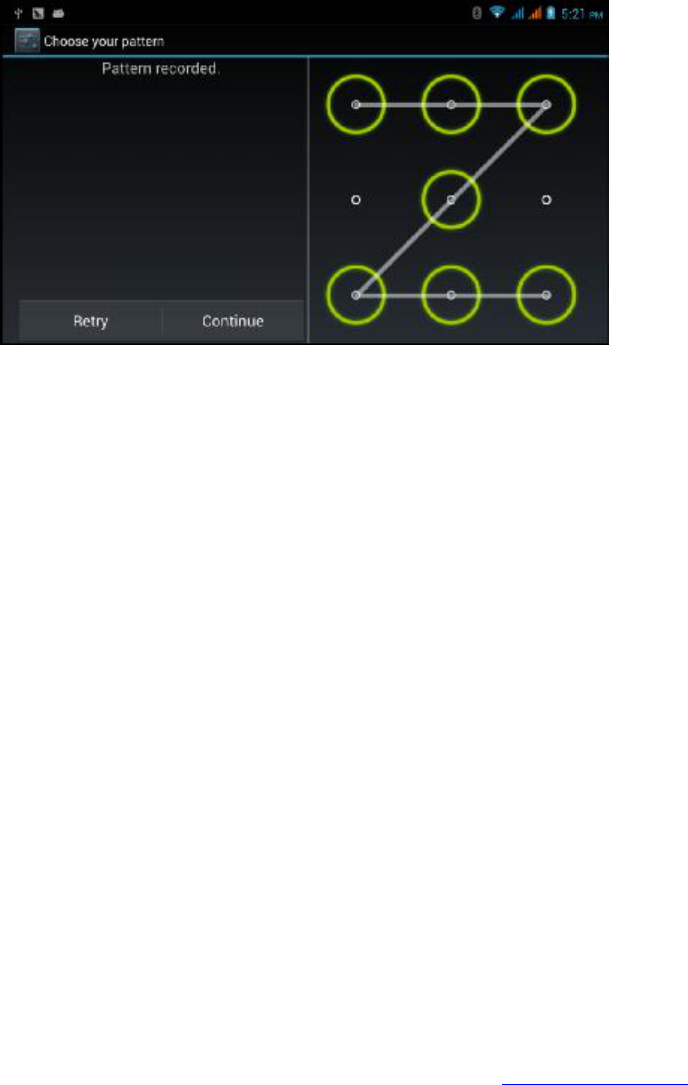
37
Image 4.53
Unlock PIN code
1. Select Setting application in Main Menu.
2. Select Safe.
3. Select Screen Lock.
4. Select PIN in text setting area.
5. Enter new PIN code (number) and select Continue.
6. Re-enter new PIN code and Confirm.
Set unlock password
1. Select Setting application in Main Menu.
2. Select Safe.
3. Select Screen Lock.
4. Enter password in text field.
5. Enter the new password (alphanumerical) and then select
Continue.
6. Re-enter the password and Confirm.
Unknown source
1. In Main Menu, Select Setting.
2. Select Safety.
3. Select Unknown Source, as shown in Image 4.54.
38
Image 4.54
Please note that in order to install application files the unknown source option must be active.
4.14 Language & Input
Select Setting, then language and input option, select the desired language and/or feature
– see
below.
Image 4.55
Select
Setting,language and input, select Android keyboard setting, select the desired
language features, as shown in Image 4.56.
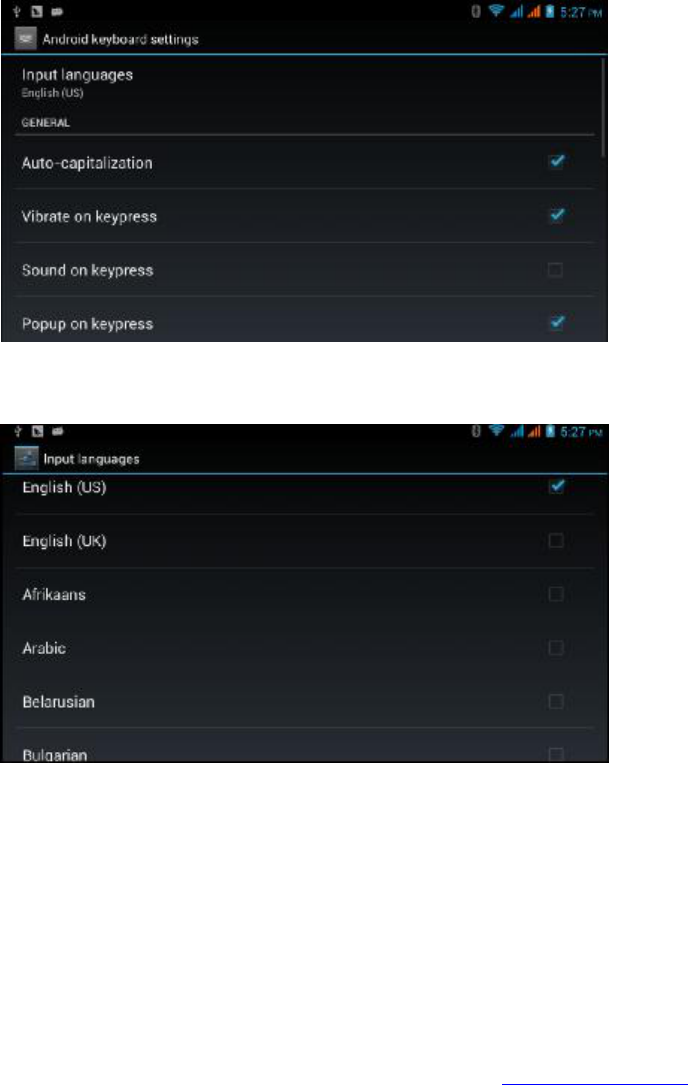
39
Image 4.56
Select the desired language displayed in the language list, as as shown in image 4.57.
Image 4.57
4.15
Backup and Reset Function
Connect to an available WIFI and login to your Google account, Select
Backup My Data and the
system will backup your data into a Google server.
If you need to reset the entire system, select RESE, as shown in Image 4.59.
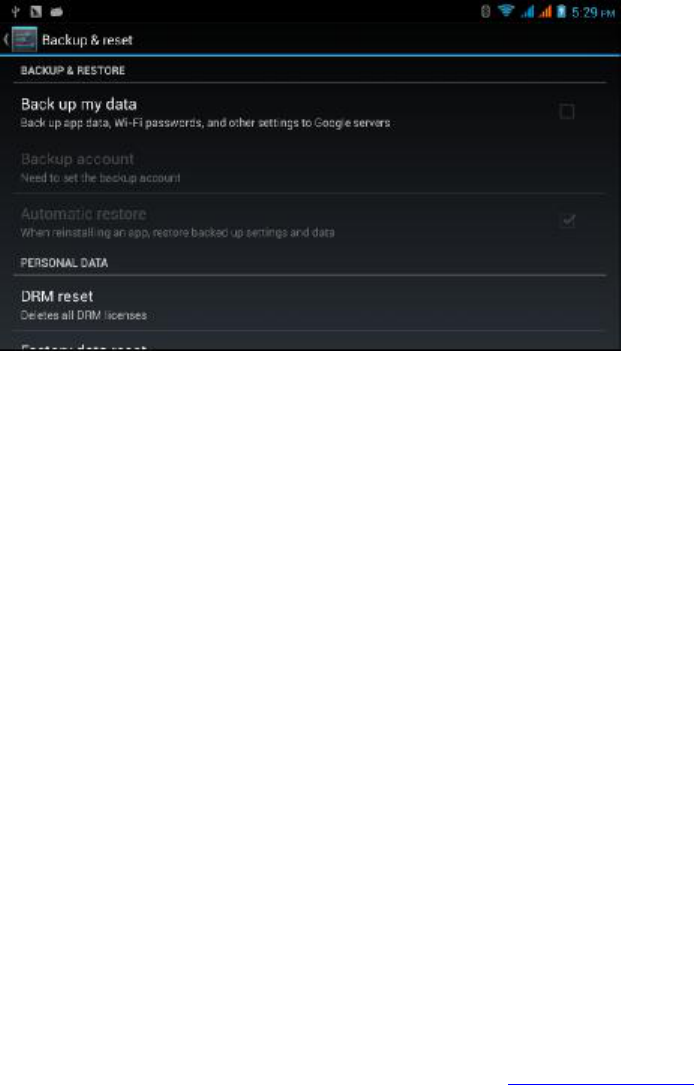
40
Picture 4.59
Please note that the Reset option will erase any information stored in the NAND memory (built
-
in) and before doing so, please make sure to remove any SD Cards.
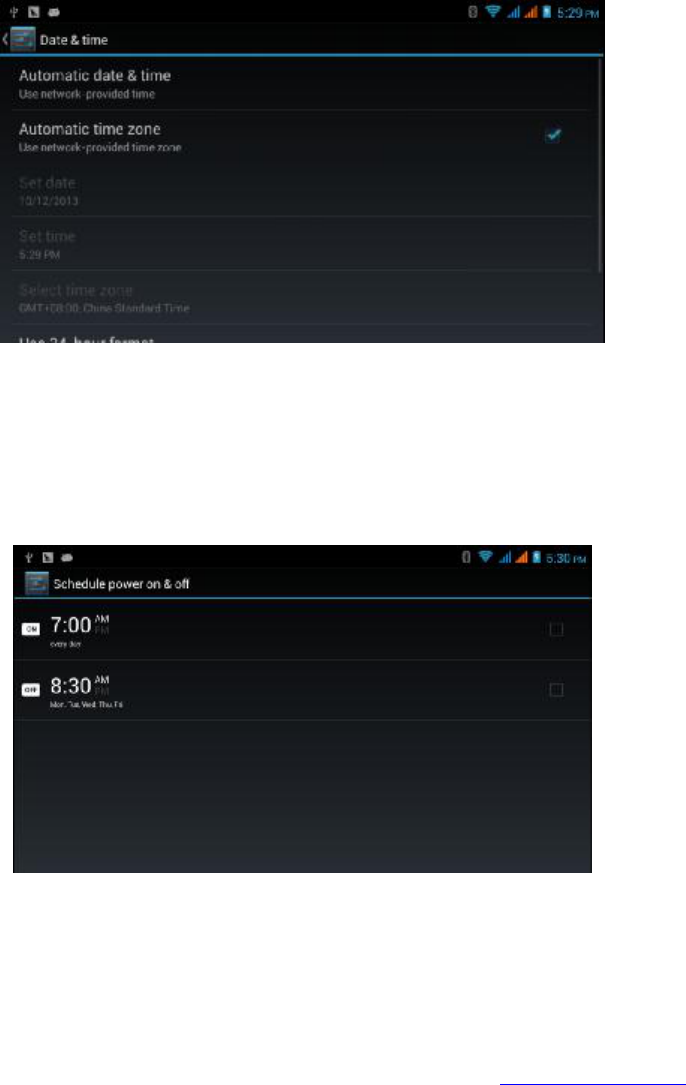
4.16
Date and Time
The system will automatically apply the date, zone, and time established by your Internet
Service Supplier.
Date, time and zone manual setup.
1. Select Setting application.
2. Slide [scroll] down the screen, select date and time.
3. Turn off “auto setting of date and time”.
4. Turn off “auto setting zone’.
5. Select Zone, then choose your time zone shown on the dropdown list. Many
other time zones are included in this feature.
6. Select Date Setting, then with the up/down selector adjust date, month, and
year, and select Settingonce again.
7. Select Time setting, then with the up/down selector adjust hour and minute,
click AM or PM to change morning or afternoon. Click Settingto finish.
8. Select 24-hour format, switch between 12-hour or 24-hour format, this
format will be used for the alarm clock.
9. Select date format setting then select the time format you want to show on
the Phablet.
41
Image 4.60
Note: If you use the time internet provided, you will not able to set the date, time and time
one.
4.17 Fixed
-time Startup and Shutdown
1. Select Setting application.
2. Select fixed-tine startup and shutdown.
3. Handle this function as shown below (Image 4.61)
Image 4.61
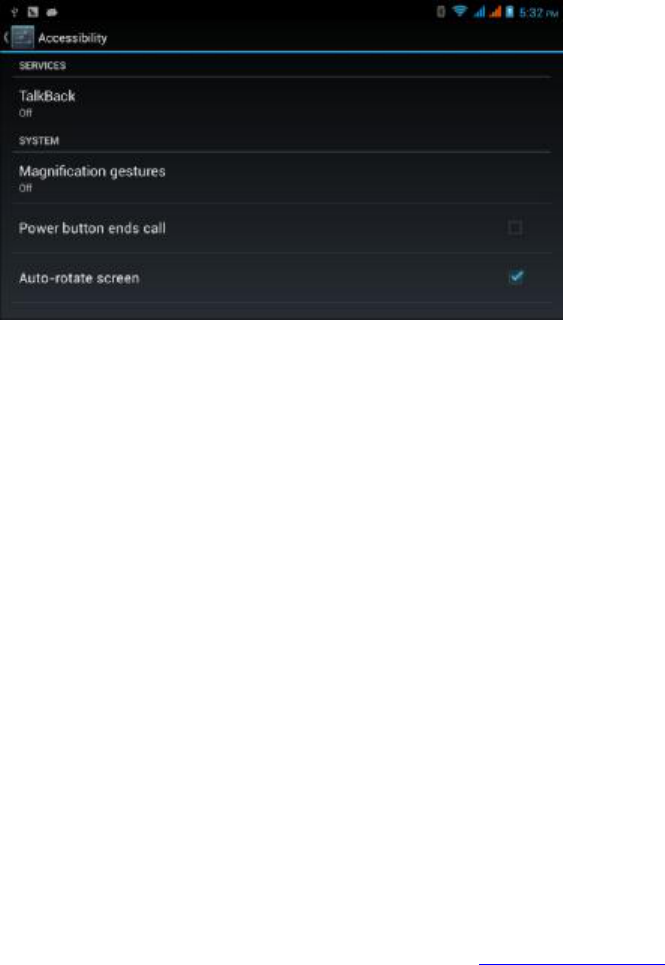
4.18Assistance Function
4.18
-1. Large Size Font
This function must be selected to change font size.
42
4.18
-2. Click Power Button to End Calls
A call can be ended by pressing the POWER button.
4.18
-3. Touch and Hold Delay
Select touch and hold delay to increase timeframe, as shown in Image 4.62
Image 4.62
4.18
-4Install Webpage Script
Once the system is open,
It will allow you install webpage scripts (while increasing browsing
risks).
4.19 Engineer Selection
4.19
-1 USB Adjustment
This option will allow you can use the Phablet’s software, but if the USB adjustment option is
turned on,
the USB storage will require manual settings.
4.19
-2 Continuous Active State
If your device is set in this option, it will not enter into a sleep mode as long as your Phablet is
charging.
43
4.19
-3 Pointer Location
If you open the Pointer Location mode,
it will display touch-trace for vertical and horizontal
direction.
4.19
-4 Show Touches
If you open this option, it will display touch areas on the screen and. it is suggested to have this
option match the pointer’s location.
4.19
-5 Show Screen Update
Th
is option will display given areas being refreshed.
4.19
-6 Show CPU usage
The information about the status of the Phablet’s CPU will appear on the upper right hand side
corner as shown on image 4.63.
Image 4.63
4.20 About Your Phablet
Check the Phablet’s Status
1. Check Setting application.
2. Select About tablet, check State Message, Model, Android Version, Version # among
other information.
3. Select the State Message, check Battery State, Battery Volumne, SIM State, IMEI #, IP
Address.
5 Multimedia
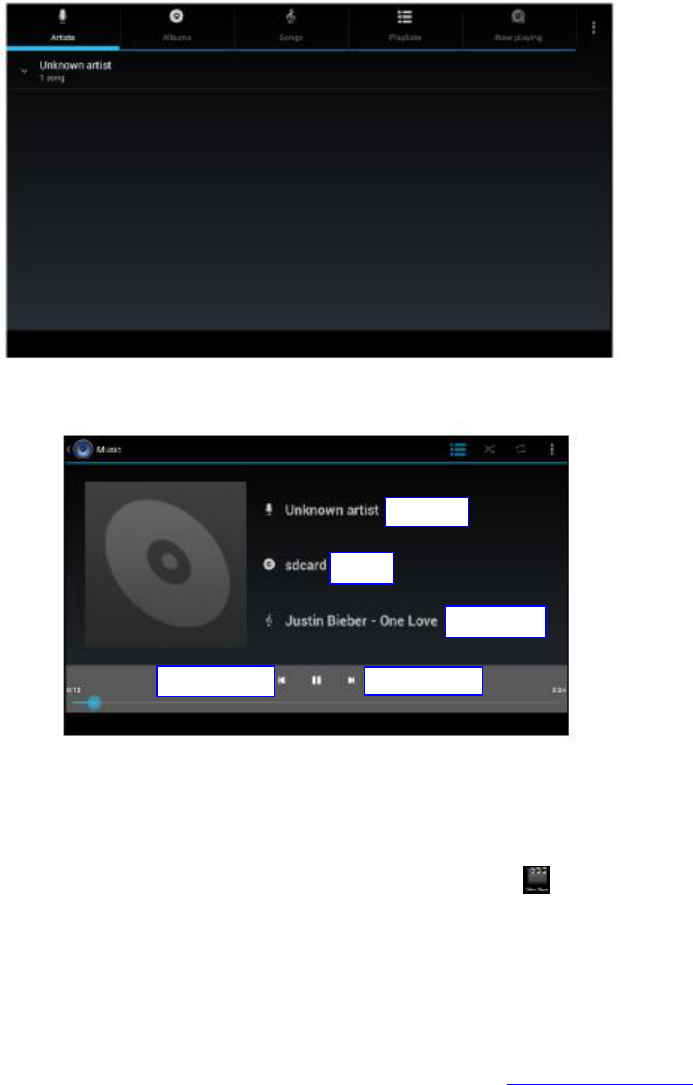
5.1
Music
To enter into the music player: On the menu or desktop select the music
icon, and choose
the music you want to play, as shown in Image 5.1.
44
Image 5.1
Image 5.2
l Drag the selector to modify the track’s state.
l Image of an active track being played as shown in Image 5.2
5.2 Video
l To enter into the video player: In the Main Menu, select video player application
then select the video you wish to play.
l The video player buttons are shown in Image 5.3.
Album
Next song
Previous song
Artist
Song

45
Image 5.3
5.3 Photo Gallery
In the
Photo gallery application you can search for photos and video files stored in the SD card
and this function will organize all photos and videos in a folder
. You can use the Photo Gallery
option to view and edit photos, set the photos as wallpaper and watch the video.
View pictures
1. Select Photo Gallery option in the main menu.
2. Once inside the Photo Gallery, select the desired folder and open any image.
3. Select the picture you want to view and the system will automatically display it in a full
screen mode.
4. The pictures can be zoomed in and out, to zoom out place two fingers on the screen
and slide them apart and to zoom in, bring your fingers together.
Please
note that when you browse through your pictures you can do it from left to right and
vice versa.
Edit and set pictures
When pictures are in full screen mode, select Menu to display menu options, you may select the
image to be edited.
l Slide Show
1. Open a picture use virtual key to select Menu, this option will display the Menu.
2. Select Slide Show, it will auto loop by default play (or choose button in picture
folder)
l Crop
1. Select the Menu key to display menu options.
2. Select Crop and then select & drag the cropped area enabling the crop function.
3. Select cropper and you may drag it in or out and this will allow to operate with any
given section of the image.
4. After adjust the desired area or size, select Crop.
5. You may cancel the crop option and the image will remain unchanged.
Adjust play
progress
Play/Pause

47
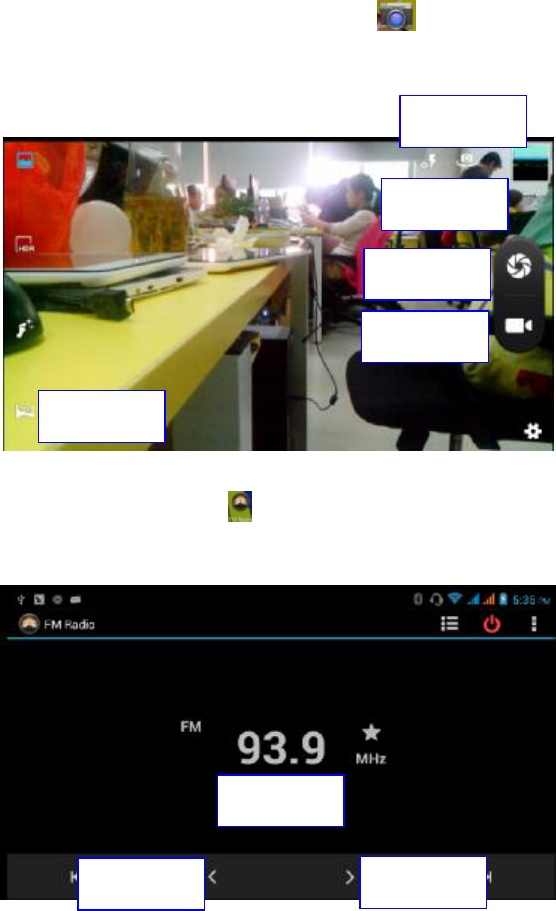
5.4 Camera
To select the camera application in the main menu or desktop
, then you will enter into
the camera option.
l Camera option: select the Menu key, then select switch front/back camera, as
shown in Image 5.4
5.5
FM Radio
In the Main Menu option select FM Radio
.
l The instruction to use the radio are shown in image 5.5.
Picture 5.5
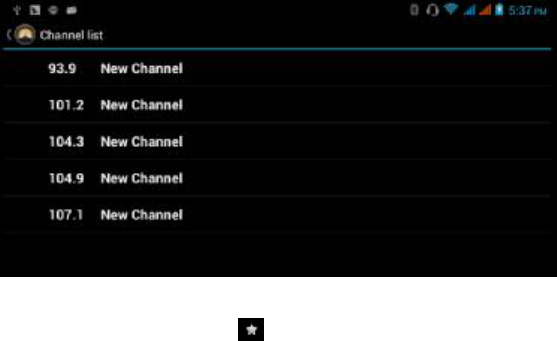
To search for a FM station, follow details shown on image 5.6
Normal camera
mode
Switchfrontto
back
Camera
Shooter
Camera
mode
Full Screen
Play
CurrentFrecue
ncy
PreviousStatio
n
PreviousStatio
n
48
Image 5.6
l To save stations Select the star button, and will be added to a list.
Please bear in mind that you will need to plug in your earphones in order to activate the radio
(the earphone’s cable works as the Phablet’s Ant
ennae).
6 Communications
6.1 Phone
1 Select
Phone application
1 Please follow details shown in Image 6.1.

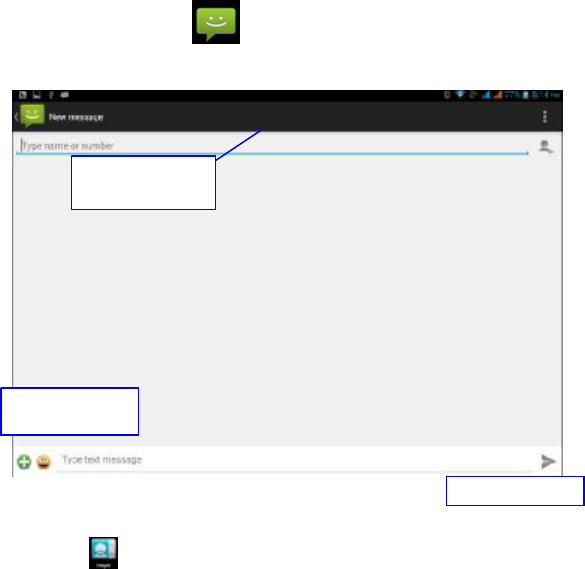
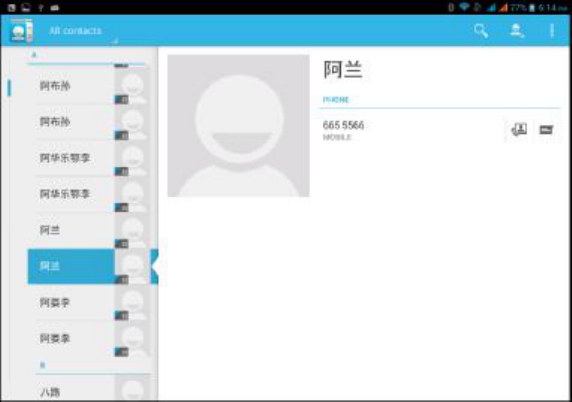
52
l
Search contact: Select button, enter into search function
l
Add contact: Select button, enter into add contact function.
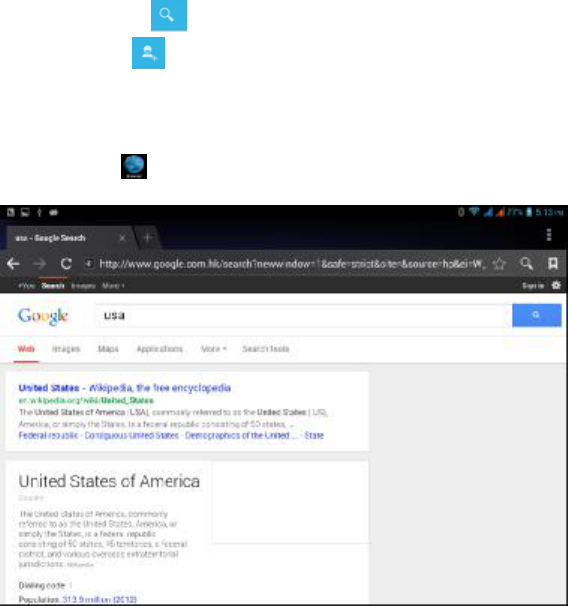
7. Internet
7.1 Browser
You may connect or open internet via Wi
-Fi or mobile network (please refer to Section 4.1),
Select the browser icon
in the main menu or desktop to as shown in Image 7.1.
Image 7.1
Type in the desired website, select start and this should lead you to a
webpage, then you may
browse the website information, as shown in image 7.1.2 you will be able to refresh, save
bookmarks, share pages, view browsing history and special settings.
55
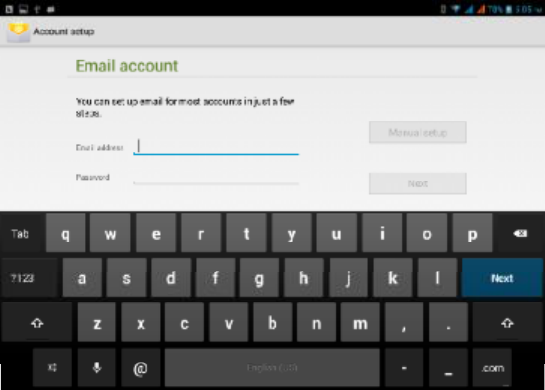
a. Email Setting
1. After you select the email icon , you will see the email setup instructions.
2. Enter your email and password.
3. Select “Next step” button, choose your email type: POP3 or IMAP.
4. Select “Next Step” button to check if the email box service can receive or send
messages.
5. Enter the email account and text in the subject field, and press Finish.
6. If the email mailbox is available, you will have immediate access.
b. Delete an email account
You may delete
POP3 or IMAP email accounts from your Phablet by selecting icon.
1. Enter to your mailbox.
2. Press the Menu key.
3. Select Account
4. Select the account to be deleted.
5. You will be prompted to confirm.
c. Send E
-mail
1. Select the icon.
2. Select inbox refreshing with new incoming emails and select the messages to be read.
3. Select Menu option and a popup screen will appear.
4. Select Edit to draft or edit new messages.
5. Enter the recipient’s email address.
6. Enter subject and email content.
7. To add an attachment, select the menu key and a popup screen will appear.
8. Select “Attach File” (photo, music, video, contacts).
9. Click “Send” to send message.

58
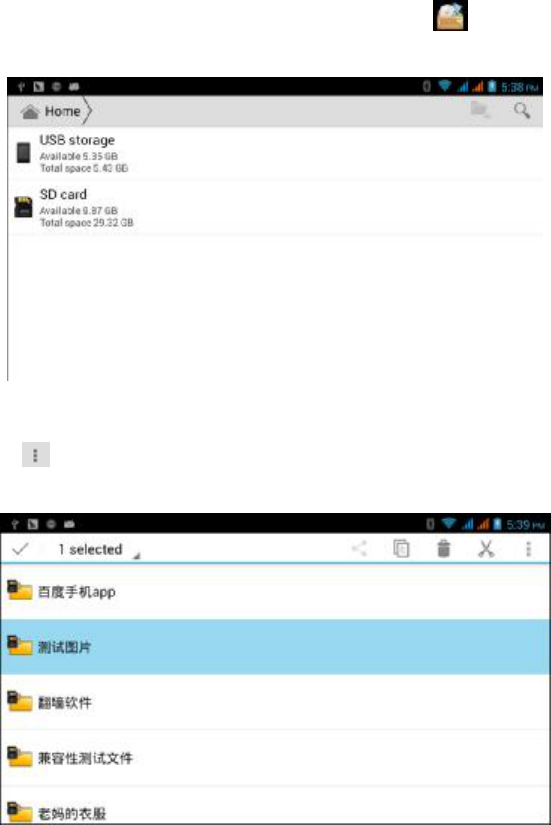
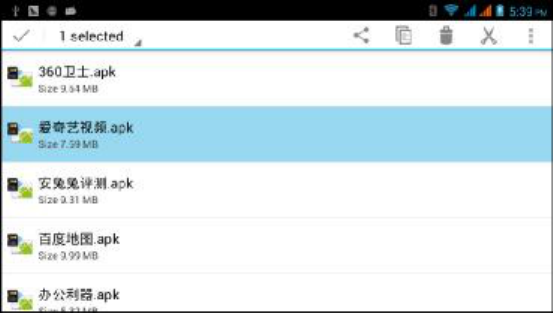
8.3 File Manager
The File Manager will allow you to copy, cut, delete, rename documents in the built
-in (NAND)
memory or SD Card; share the files, install applications and other features.
To enter into the File Manager, main menu, then the File Manager icon
to view the
document manager.
Picture 9.3
To paste, copy or cut a file then you will be able to paste the chosen file (see Image 9.5),
Select the
icon located on the upper right hand side corner, enabling you view the
following screen (Image 9.6).
Image 9.4
60
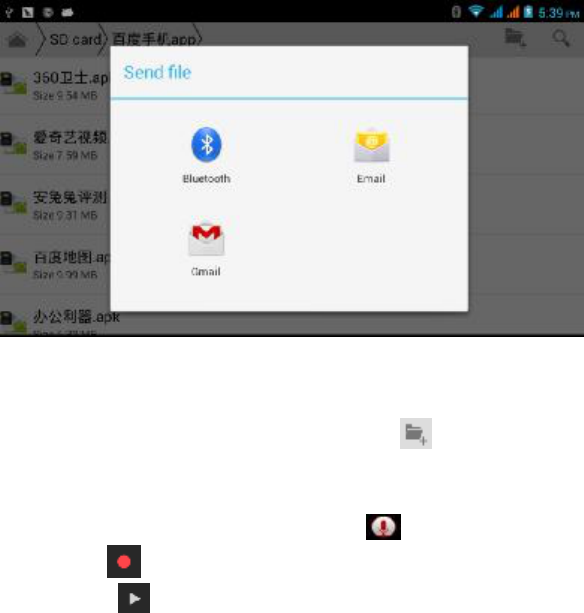
To share a file: Select the desired file (long
press) a popup share option will appear, offering
share options, such as those shown on Image 9.6.
Image 9.6
To install an application: Choose the file’s suffix (.apk) shown in the file manager, allowing
toinstall third party software.
New folder: Choose the location for the new file, select the
icon on the upper right hand
side corner choose New Folder.
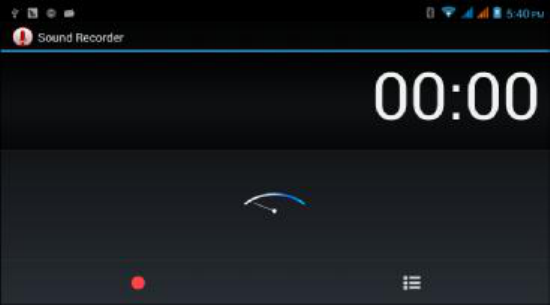
8.4 Recorder
In the main men u or desktop,
select the recorder icon launching the recording screen,
press record key
to start and to stop recording (a pause button will appear). For playback
press the Play key
. The system will prompt you in case you choose not to save and this
takes place manually.
The recorded file can be viewed in the source manager, and played either at a music and/or
video player.
62
Third Party Software Installation
9. Installation
Third Party Application Setup
1. Select “File Manager” application; choose the application to be installed.
2. Hold the application to be installed.
3. A popup install message will appearselect install apk.
4. Complete installation.
Please note that all third party applications are suffixed with .apk.
9.1 Uninstall
Select setting icon in the Main Menu.
Select Manage Application, showing a list of all applications available.
Select the APK you want to delete then select uninstall.
Select confirm to finish.
The File Manager offers many options to delete applications.
10 Troubleshooting
1.
Slow Startup
• Once the Phablet software is upgraded and updated, the applications will be installed
and this could take between 3 and 5 minutes. Once the information is uploaded
startups will faster.
2.
No Wi-Fi Connection
• Check that wireless routers are working properly and your Wi-Fi connection is active
(ON).
• In case of wireless router connections, make sure you have a proper distance
between the router and Phablet without obstacles.
• Check and confirm your access login and password.
3.
The Phablet Feels Hot
• When using multiple applications simultaneously and/or a high brightness intensity
setting the Phablet will warm up.
4.
Email Problems.
• Make sure to have a proper Internet connection.
• Make sure your email is properly configured.
• Make sure your time zone is properly set.
5. The System is not Working Properly.
When third party applications are installed, it could generate abnormalities and you may press
the Reset Key to restart the Phablet.
63
6. Cannot Open Webpages
• Please make sure to have a proper distance between the Phablet and signal source
(ex. Router, access point).
• Please reset WIFI and try again.
7.
The Phablet Performs Slow
This can happen from time to time. If your Phablet is running multiple applications, you may
close those not being used and if necessary, delete third party applications.
FCC RF Exposure Information and Statement
The SAR limit of USA (FCC) is 1.6 W/kg averaged over one gram of tissue. Device types Tablet (FCC ID: ZL9-
SP6020) has also been tested against this SAR limit. The highest reported SAR values for head, body-worn
accessory, product specific (wireless router), and simultaneous transmission conditions are 0.38 W/kg, 0.41 W/kg ,
0.36 W/kg, and 0.56 W/kg respectively. Compliance with FCC RF exposure requirements, use accessories that
maintain a 10mm separation distance between the user's body. The use of belt clips, holsters and similar
accessories should not contain metallic components in its assembly. The use of accessories that do not satisfy
these requirements may not comply with FCC RF exposure requirements, and should be avoided.
FCC Warning
This device complies with Part 15 of the FCC Rules. Operation is subject to the following two conditions:
(1) This device may not cause harmful interference, and (2) this device must accept any interference received,
including interference that may cause undesired operation.
NOTE 1: This equipment has been tested and found to comply with the limits for a Class B digital device,
pursuant to part 15 of the FCC Rules. These limits are designed to provide reasonable protection against harmful
interference in a residential installation. This equipment generates, uses and can radiate radio frequency energy
and, if not installed and used in accordance with the instructions, may cause harmful interference to radio
communications. However, there is no guarantee that interference will not occur in a particular installation. If this
equipment does cause harmful interference to radio or television reception, which can be determined by turning
the equipment off and on, the user is encouraged to try to correct the interference by one or more of the following
measures:
- Reorient or relocate the receiving antenna.
- Increase the separation between the equipment and receiver.
-Connect the equipment into an outlet on a circuit different from that to which the receiver is connected.
-Consult the dealer or an experienced radio/TV technician for help.
NOTE 2: Any changes or modifications to this unit not expressly approved by the party responsible for
compliance could void the user's authority to operate the equipment.