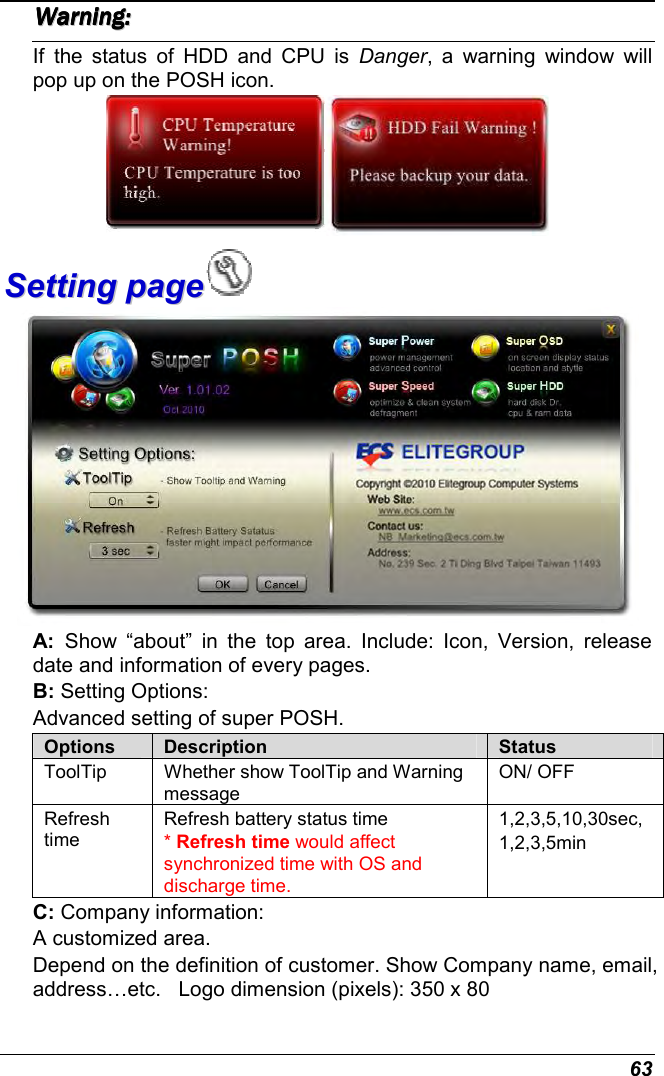
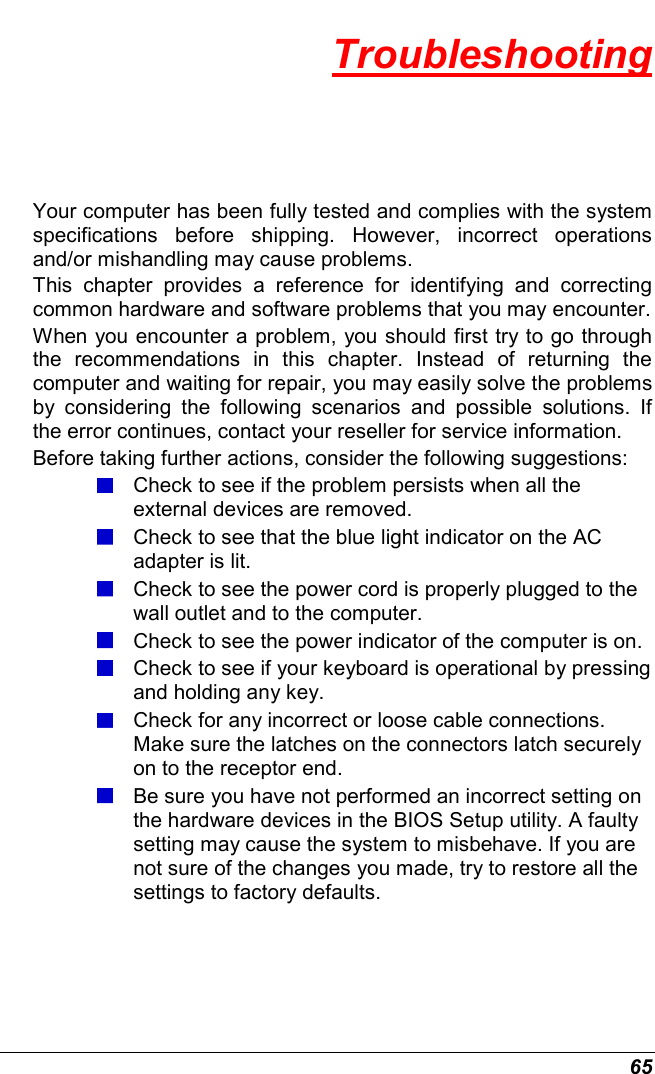
ELITEGROUP COMPUTER SYSTEMS BR45IIX6230 Notebook Computer User Manual BR45II7 english
ELITEGROUP COMPUTER SYSTEMS CO., LTD Notebook Computer BR45II7 english
UserManual.wiki
>
ELITEGROUP COMPUTER SYSTEMS
>
BR45IIX6230 User Manual
user manual
Navigation menu
Upload a User Manual
Namespaces
Wiki Guide
HTML
PDF
Info
Views
User Manual
Discussion / Help
Navigation


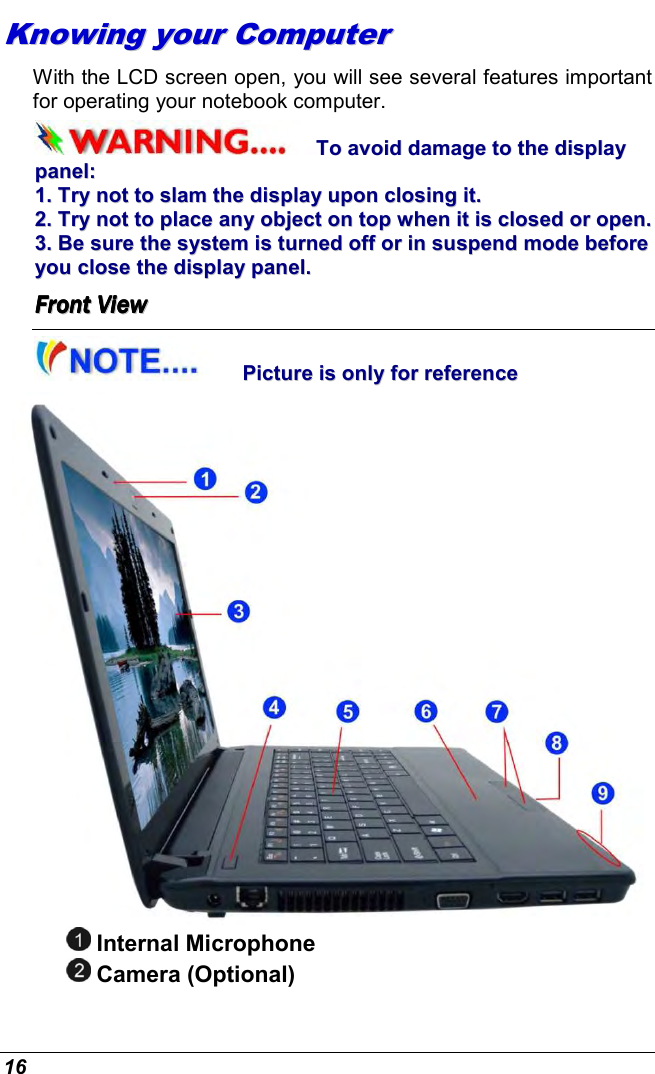
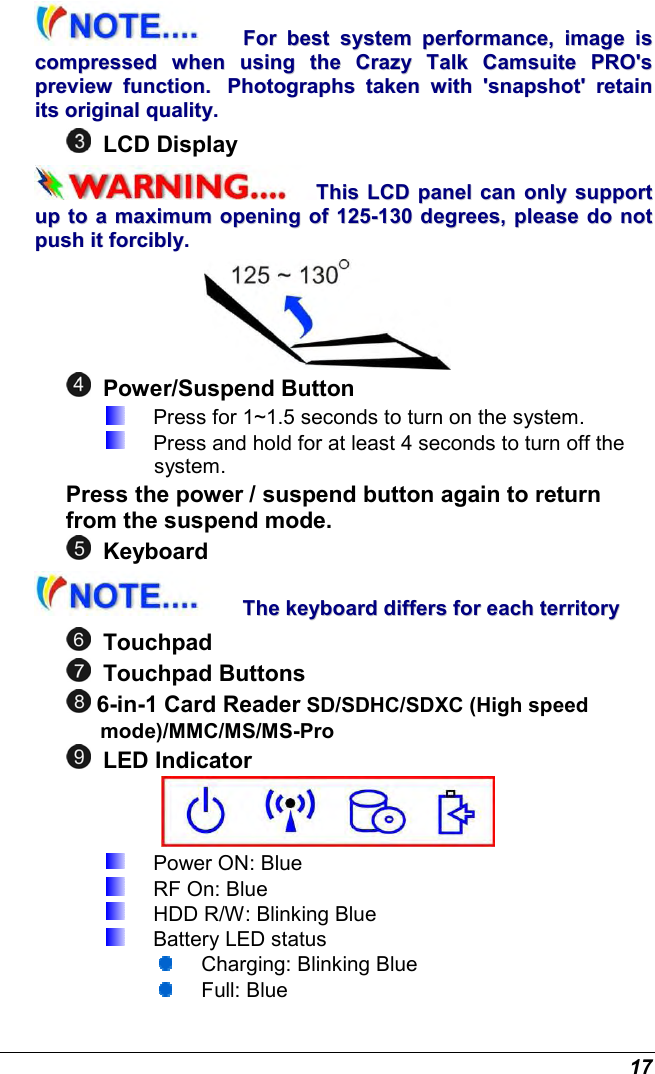
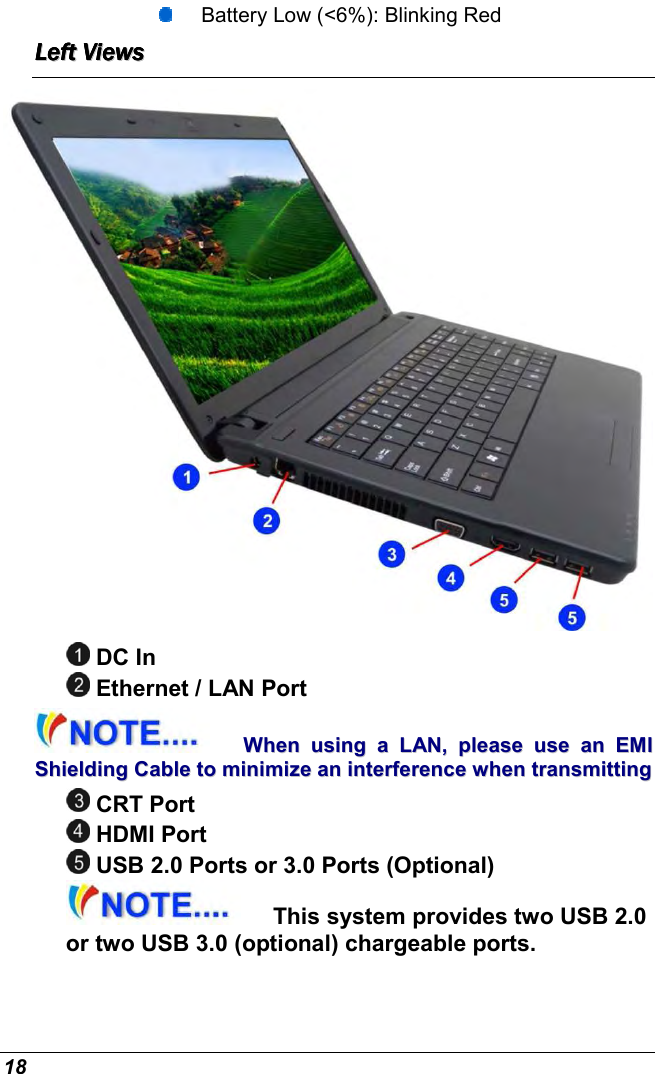


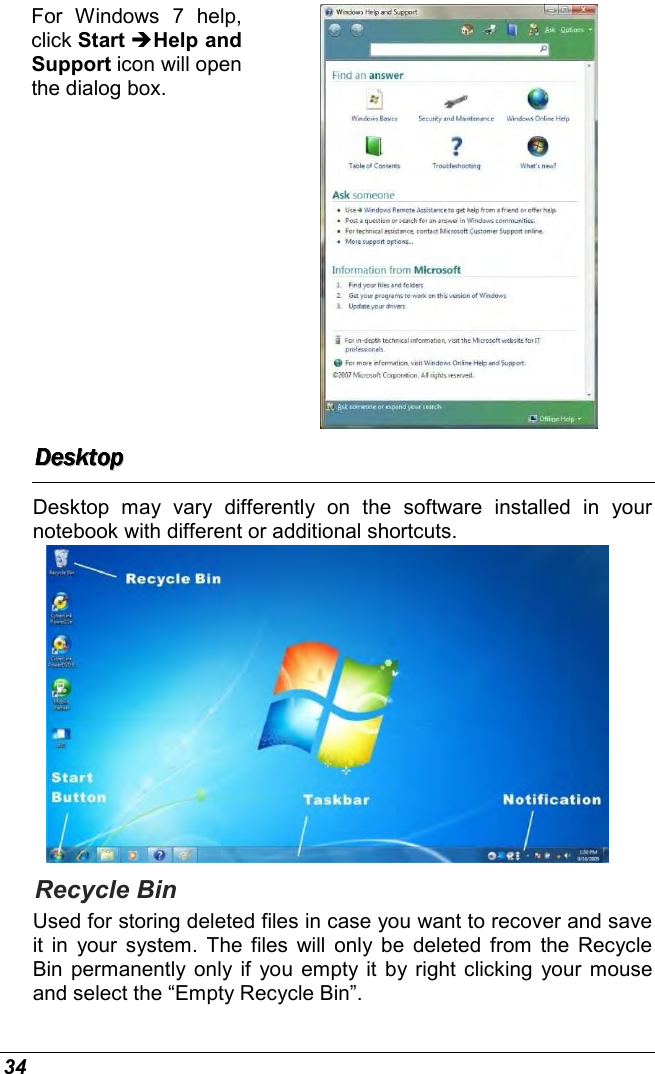
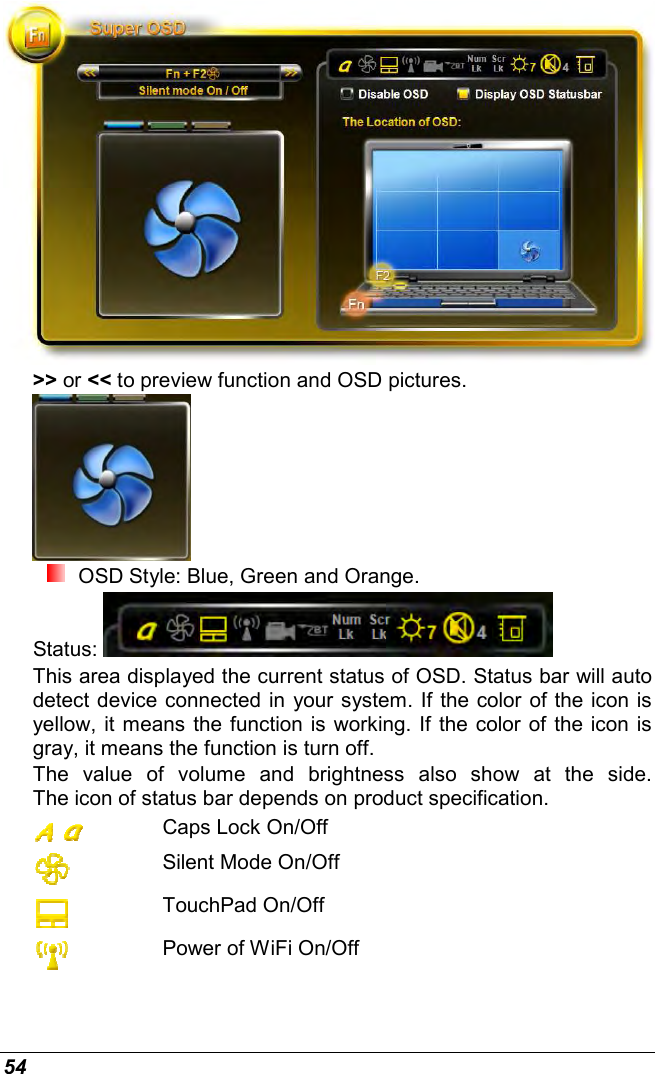
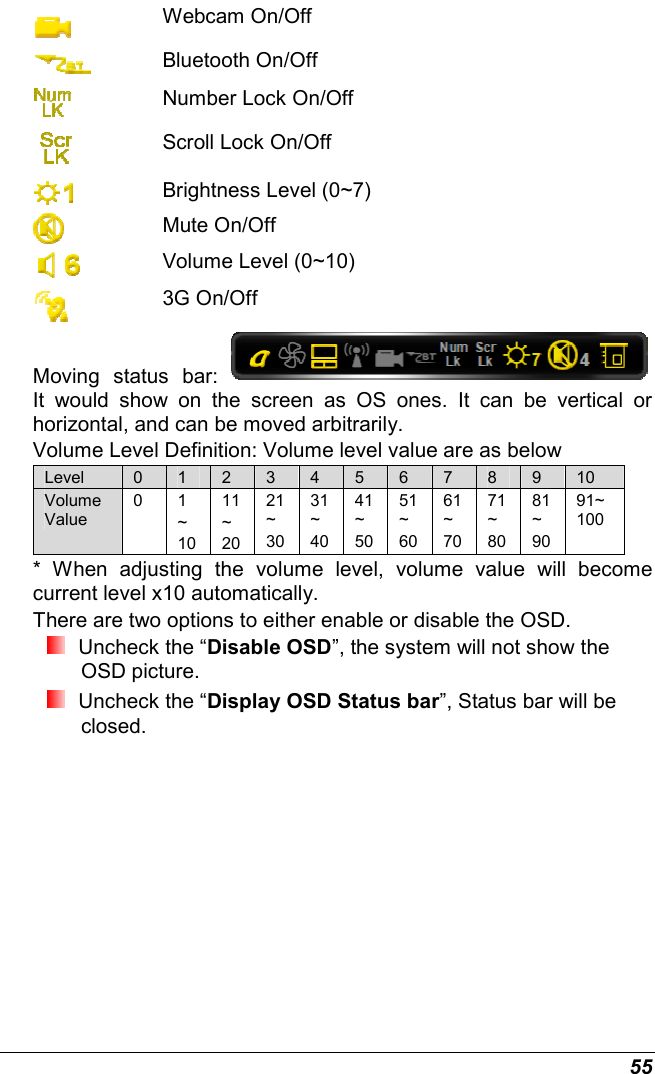
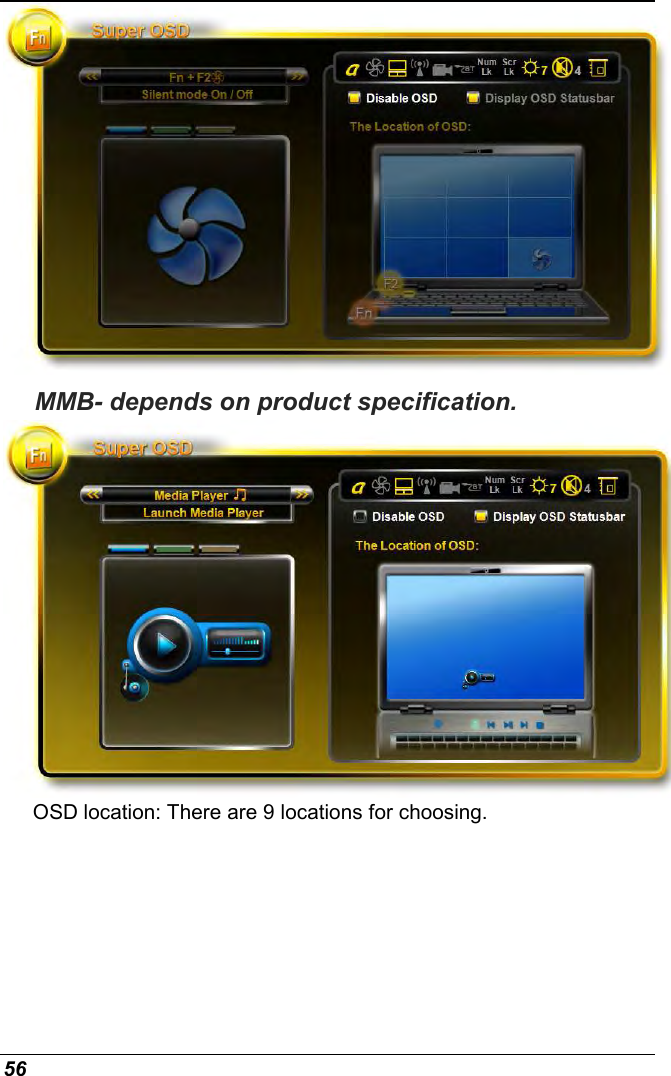
![28 You can switch between these display configurations by pressing the key combination [Fn] + [F4]. TThhee NNootteebbooookk’’ss HHoott KKeeyy CCoonnttrroollss Fn + ESC Enable/Disable Bluetooth Fn + F1 Enters Suspend Mode. Fn + F2 Enable/Disable Silent mode (power management) Fn + F3 Mute On/Off. Fn + F4 Changes Display Mode: LCD-only, CRT/HDMI-only and simultaneous LCD&CRT/HDMI Fn + F5 Decrease the speaker volume. Fn + F6 Increase the speaker volume. Fn + F7 Decrease the brightness level. Fn + F8 Increase the brightness level. Fn + F9 Enable/Disable Touchpad Fn + F10 Enable/Disable WLAN Fn + F11 Enable/Disable the CCD camera AA rreevvoolluuttiioonnaarryy ssoolluuttiioonn ffoorr aarrcchhiitteeccttuurraall lliigghhttiinngg,, wwhheerree mmaaxxiimmuumm lliigghhtt iinntteennssiittyy iiss rreeqquuiirreedd.. PPrreessss tthhiiss bbuuttttoonn wwiillll iinnccrreeaassee oorr ddeeccrreeaassee tthhee lliigghhtt iinntteennssiittyy ooff yyoouurr ssccrreeeenn ddiissppllaayy..](https://usermanual.wiki/ELITEGROUP-COMPUTER-SYSTEMS/BR45IIX6230/User-Guide-1532828-Page-33.png)
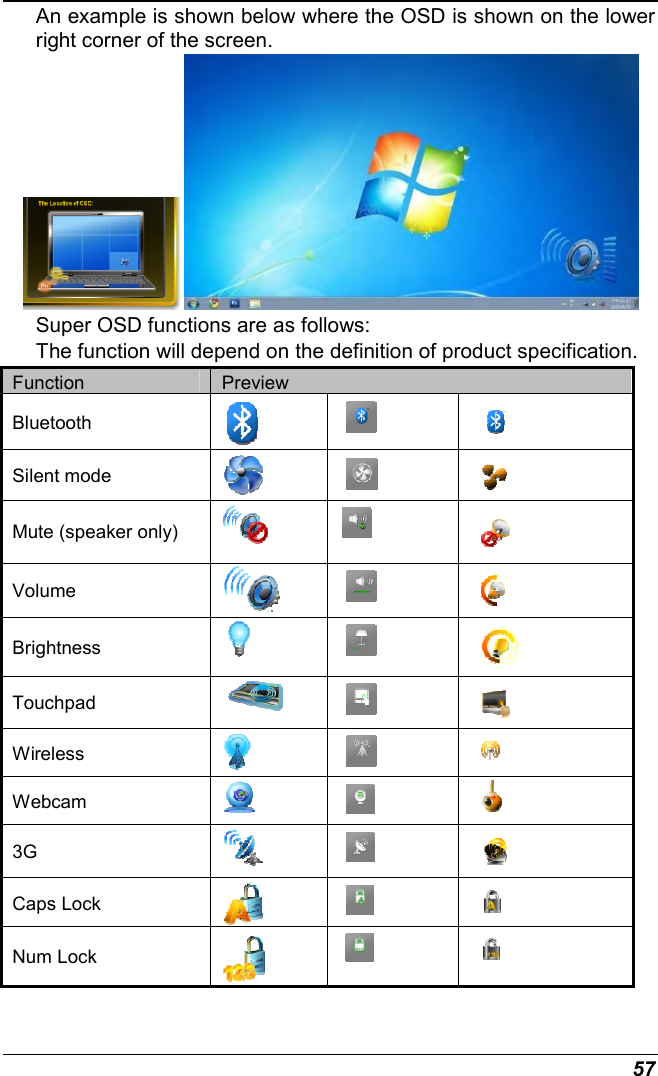
![33 RReesseettttiinngg tthhee SSyysstteemm After installing a software application package, you may be prompted to reset the system to load the changed operating environment. To reset the system, or “reboot,” press the [Ctrl]+[Alt]+[Delete] keys simultaneously. This is known as “warm boot.” This key combination acts as “software” reset switch when you encounter hardware or software problems, which lock up the notebook. If this key combination does not shut down the notebook, you can reset the notebook by using the notebook’s power button. Should the notebook lock up for some reason, pressing this button powers the notebook off. AAddjjuussttiinngg tthhee BBrriigghhttnneessss To adjust the brightness on the LCD screen, press and hold down the [Fn] key in the lower left hand corner of the keyboard and press the [F8] key to increase the brightness or [F7] to decrease the brightness. UUssiinngg tthhee WWiinnddoowwss HHHHHHHHeeeeeeeellllllllpppppppp WWWWWWWWiiiiiiiinnnnnnnnddddddddoooooooowwwwwwwwssssssss](https://usermanual.wiki/ELITEGROUP-COMPUTER-SYSTEMS/BR45IIX6230/User-Guide-1532828-Page-38.png)