ELPRO Technologies ELPS01 Spread spectrum transmitter with input / output de User Manual man 905 2 1
ELPRO Technologies Pty Ltd Spread spectrum transmitter with input / output de man 905 2 1
Contents
- 1. Users manual
- 2. User manual
- 3. Revised 905U User Manual
- 4. New users manual
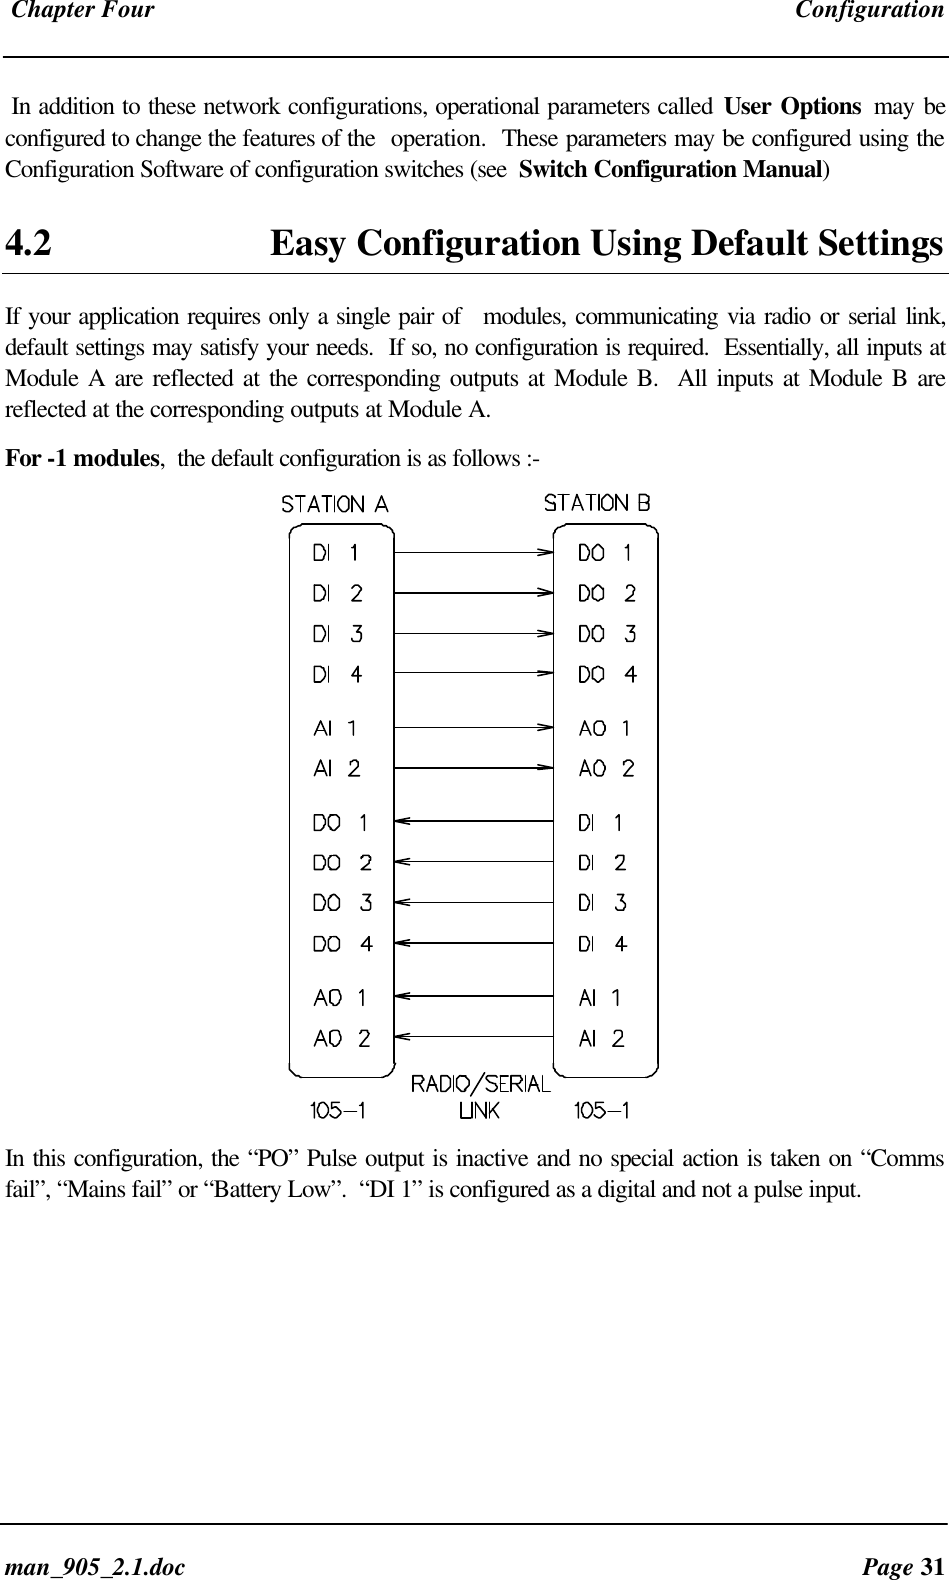
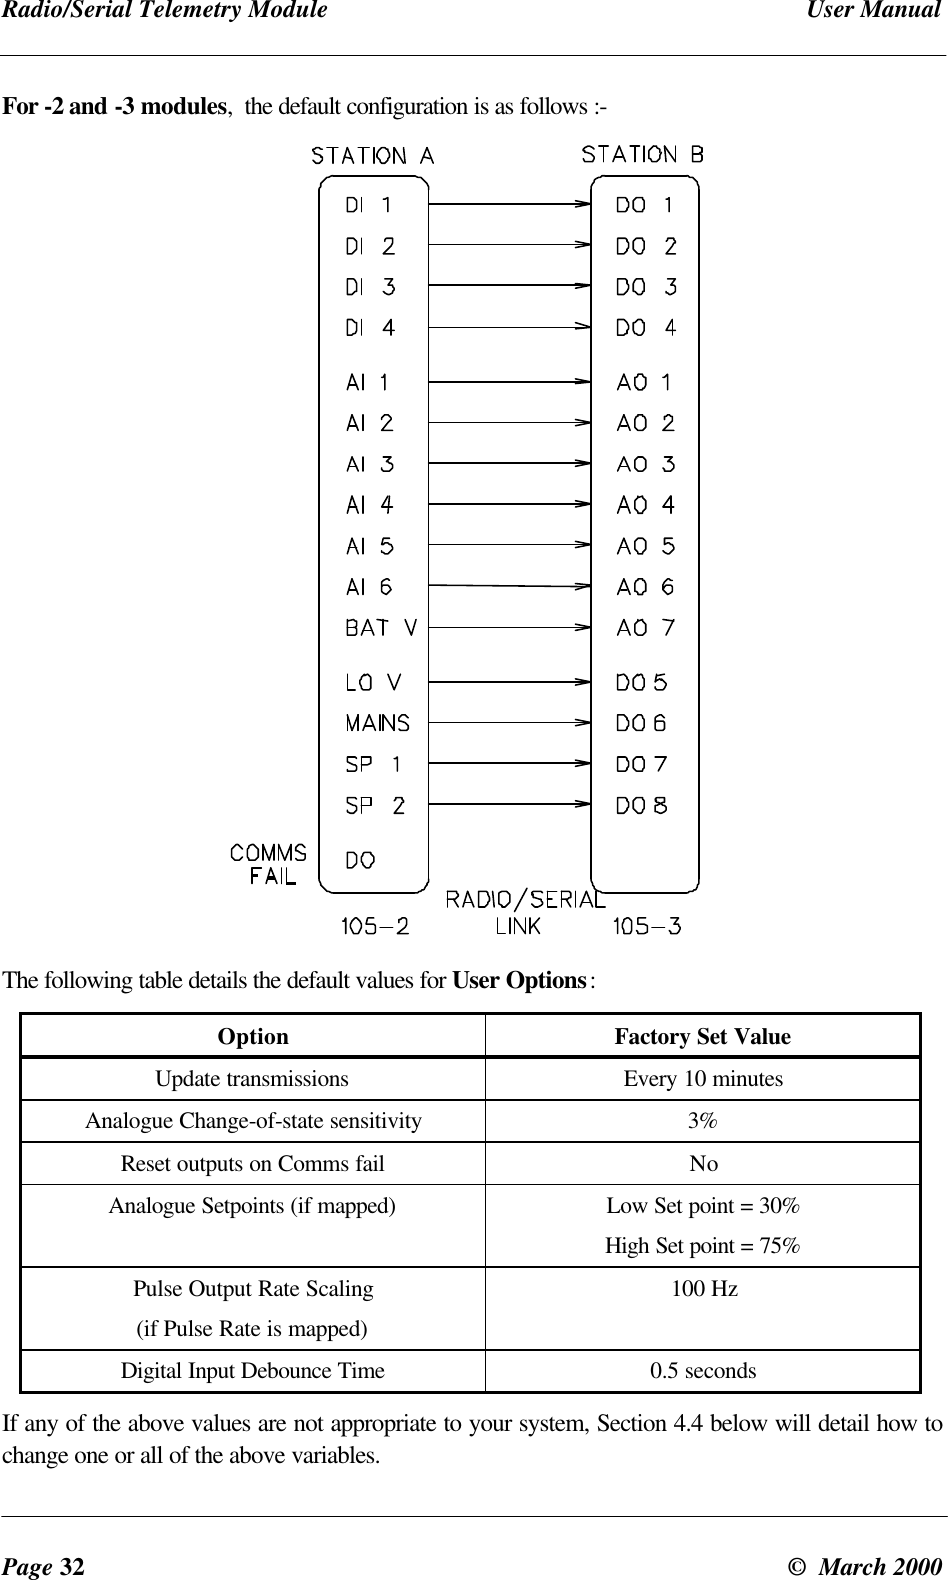
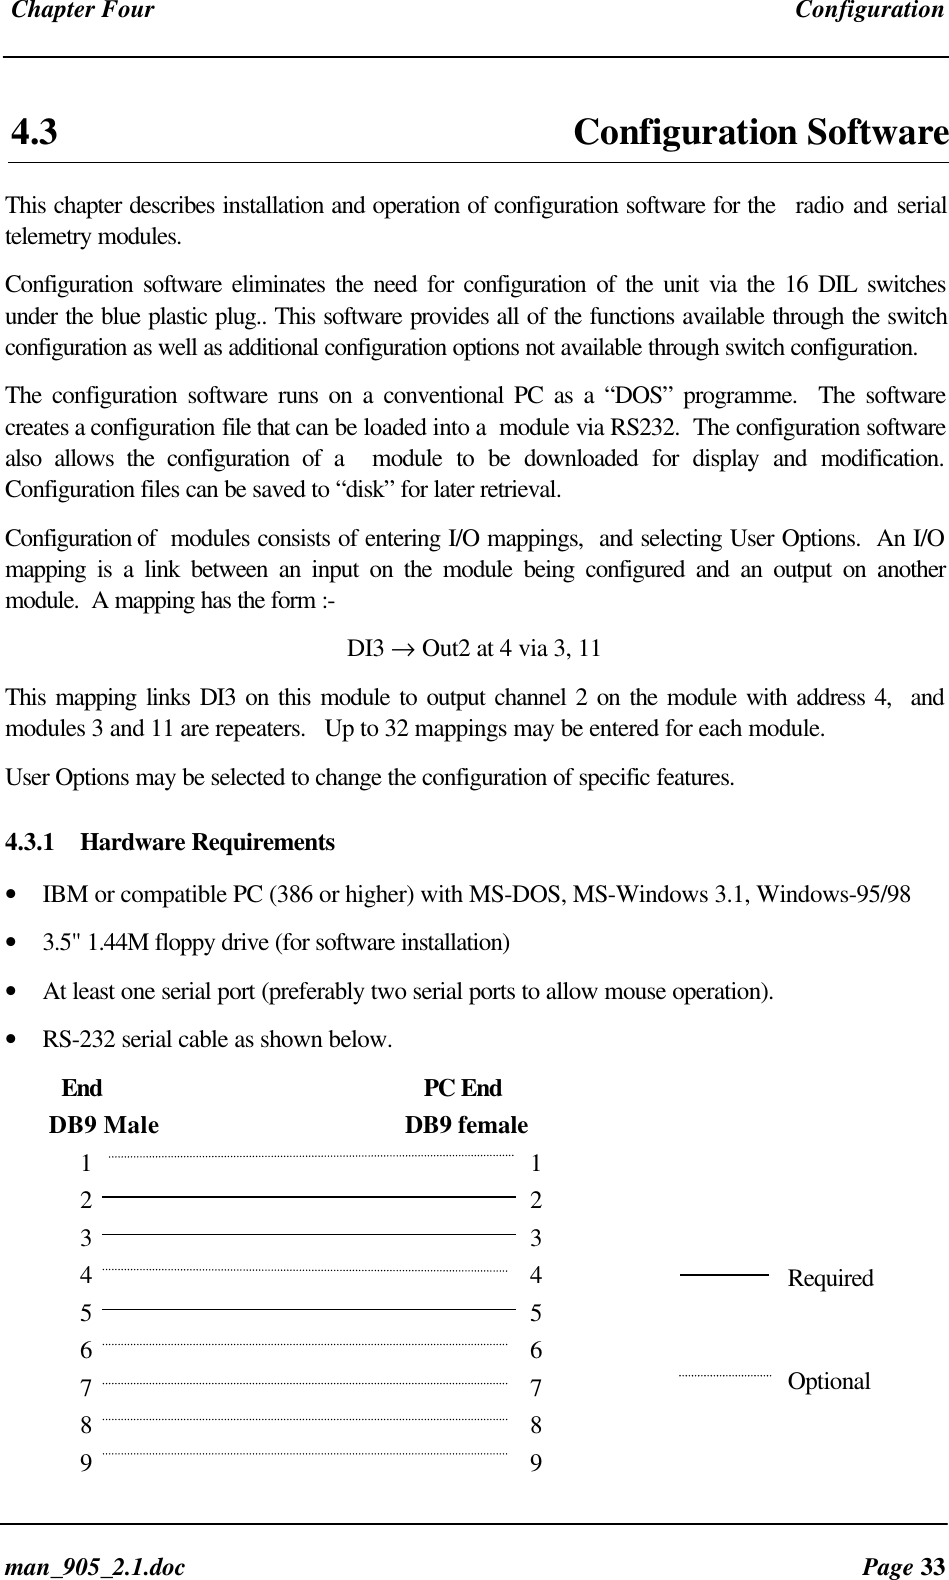
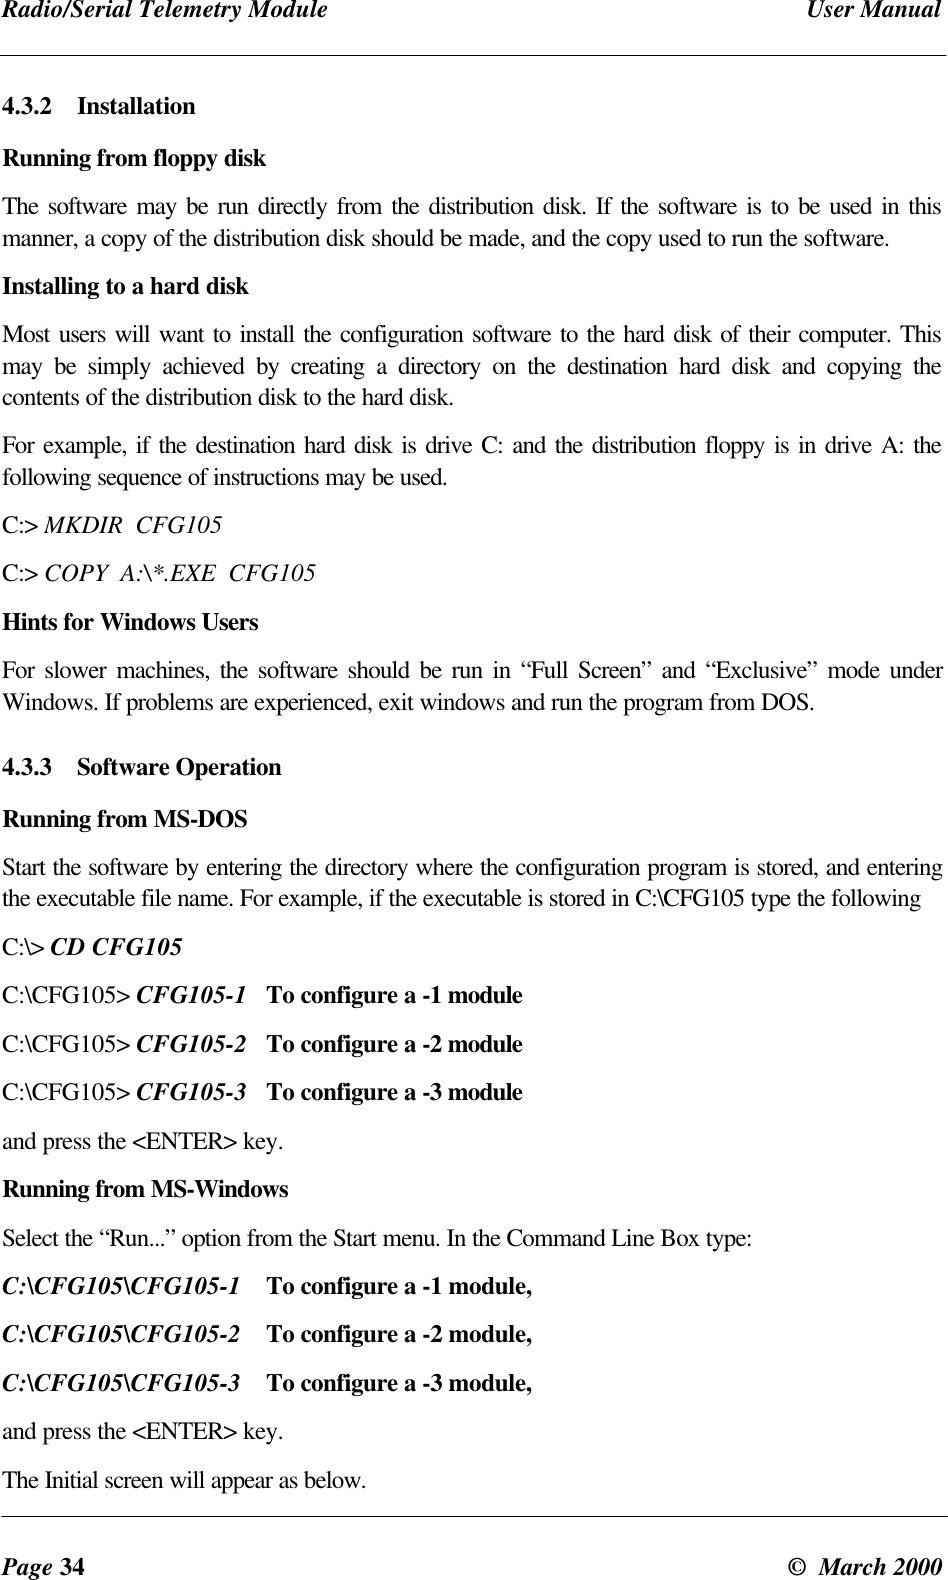
New users manual