EUTRONSEC S p A AAC USB Key User Manual CryptoIdentity User Guide v2 4 1
EUTRONSEC S.p.A. USB Key CryptoIdentity User Guide v2 4 1
UserManual.wiki
>
EUTRONSEC S p A
>
AAC User Manual
Users Manual
Navigation menu
Upload a User Manual
Namespaces
Wiki Guide
HTML
PDF
Info
Views
User Manual
Discussion / Help
Navigation
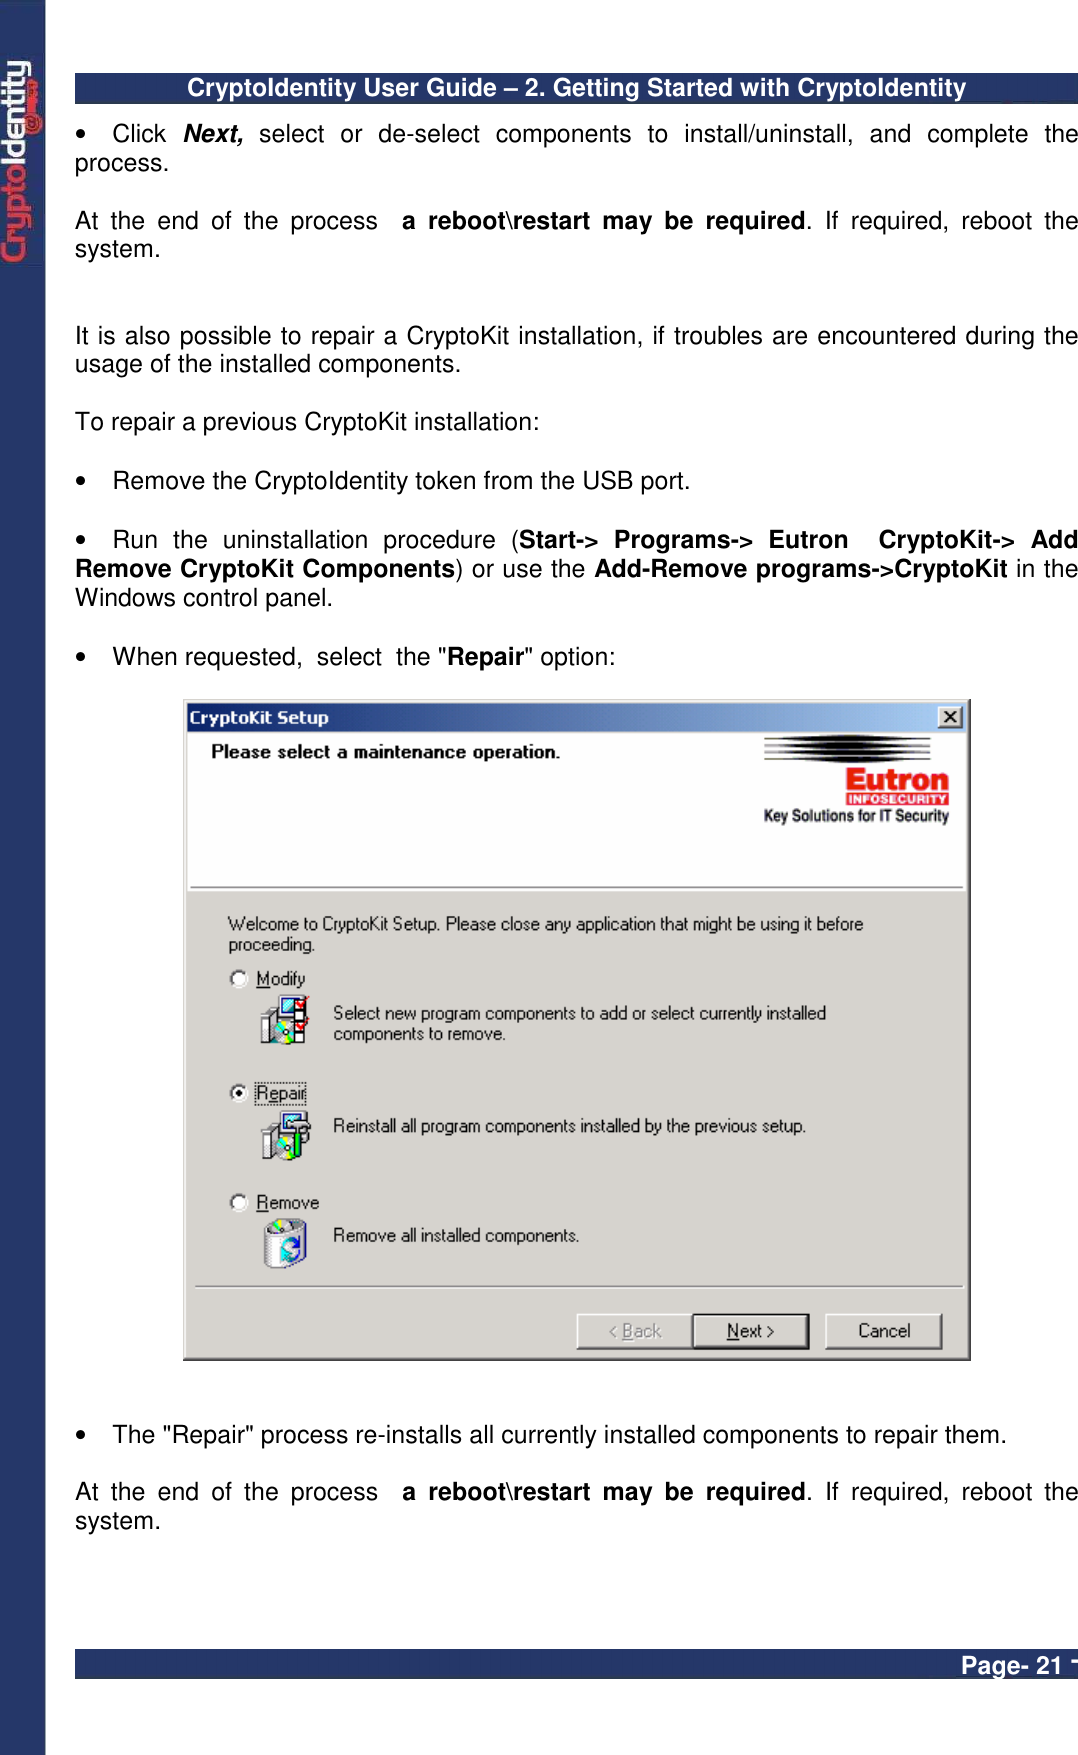
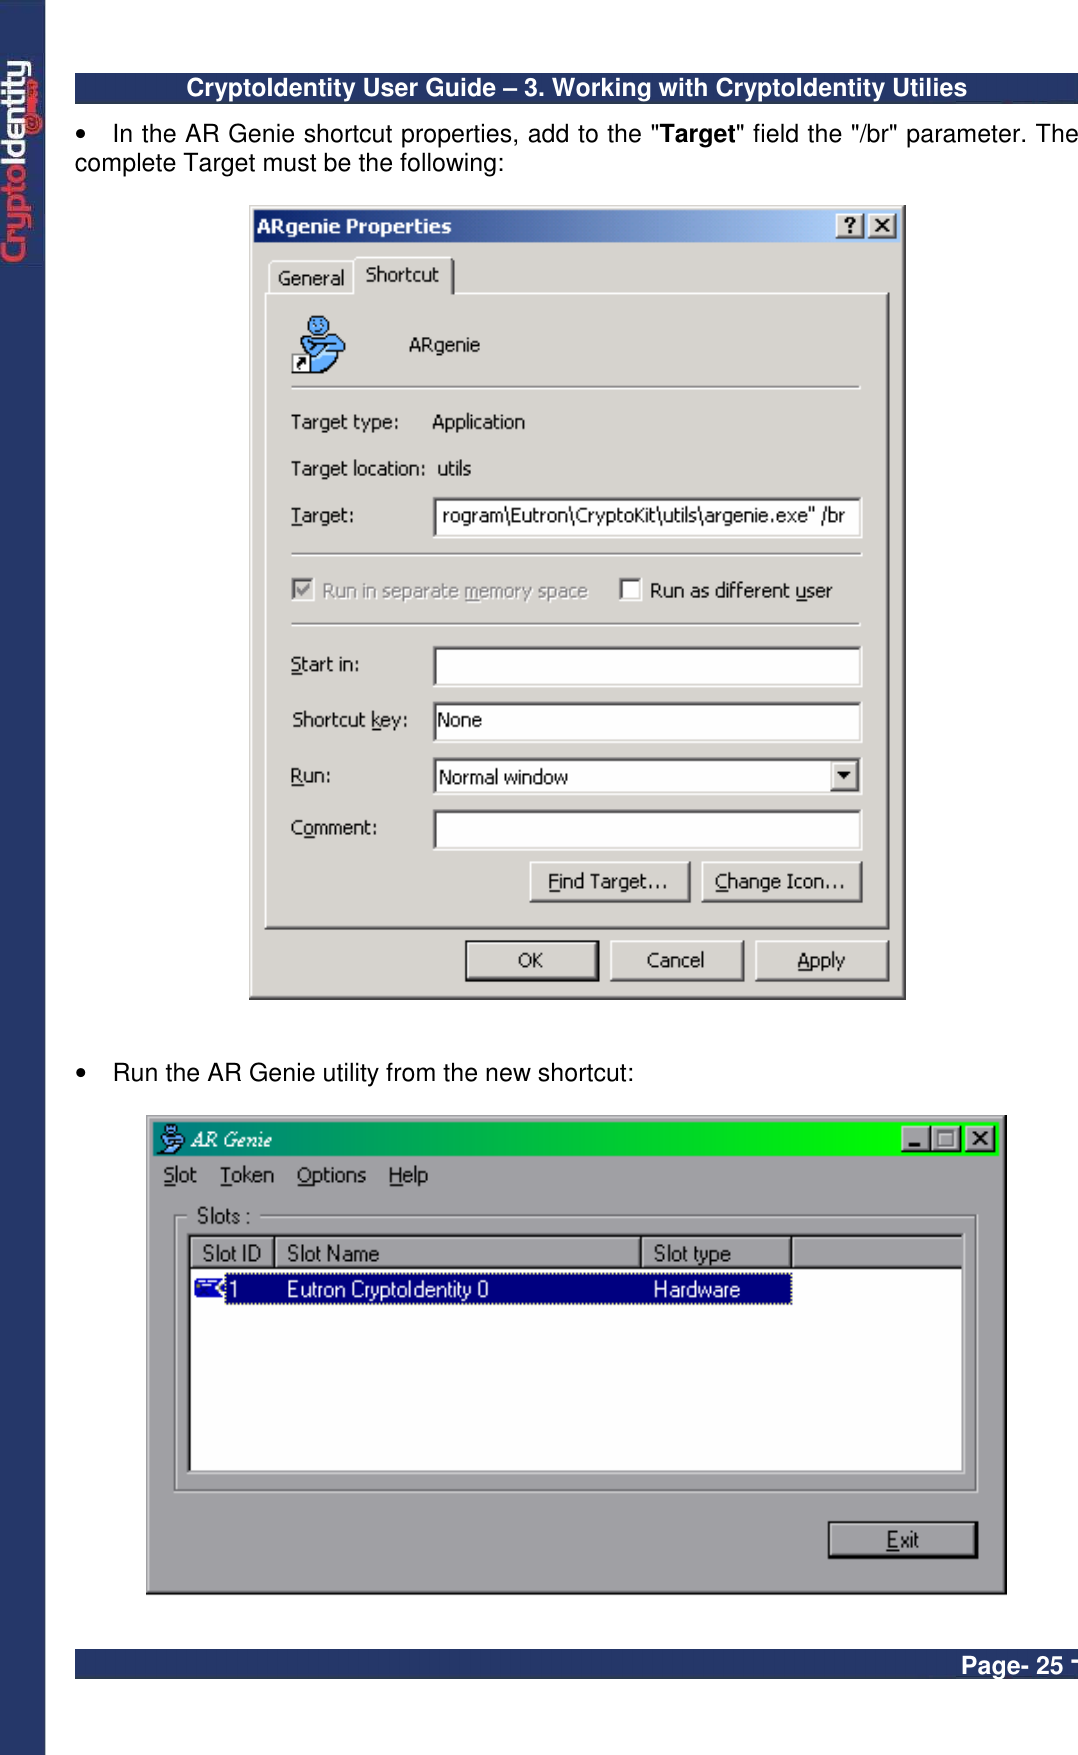
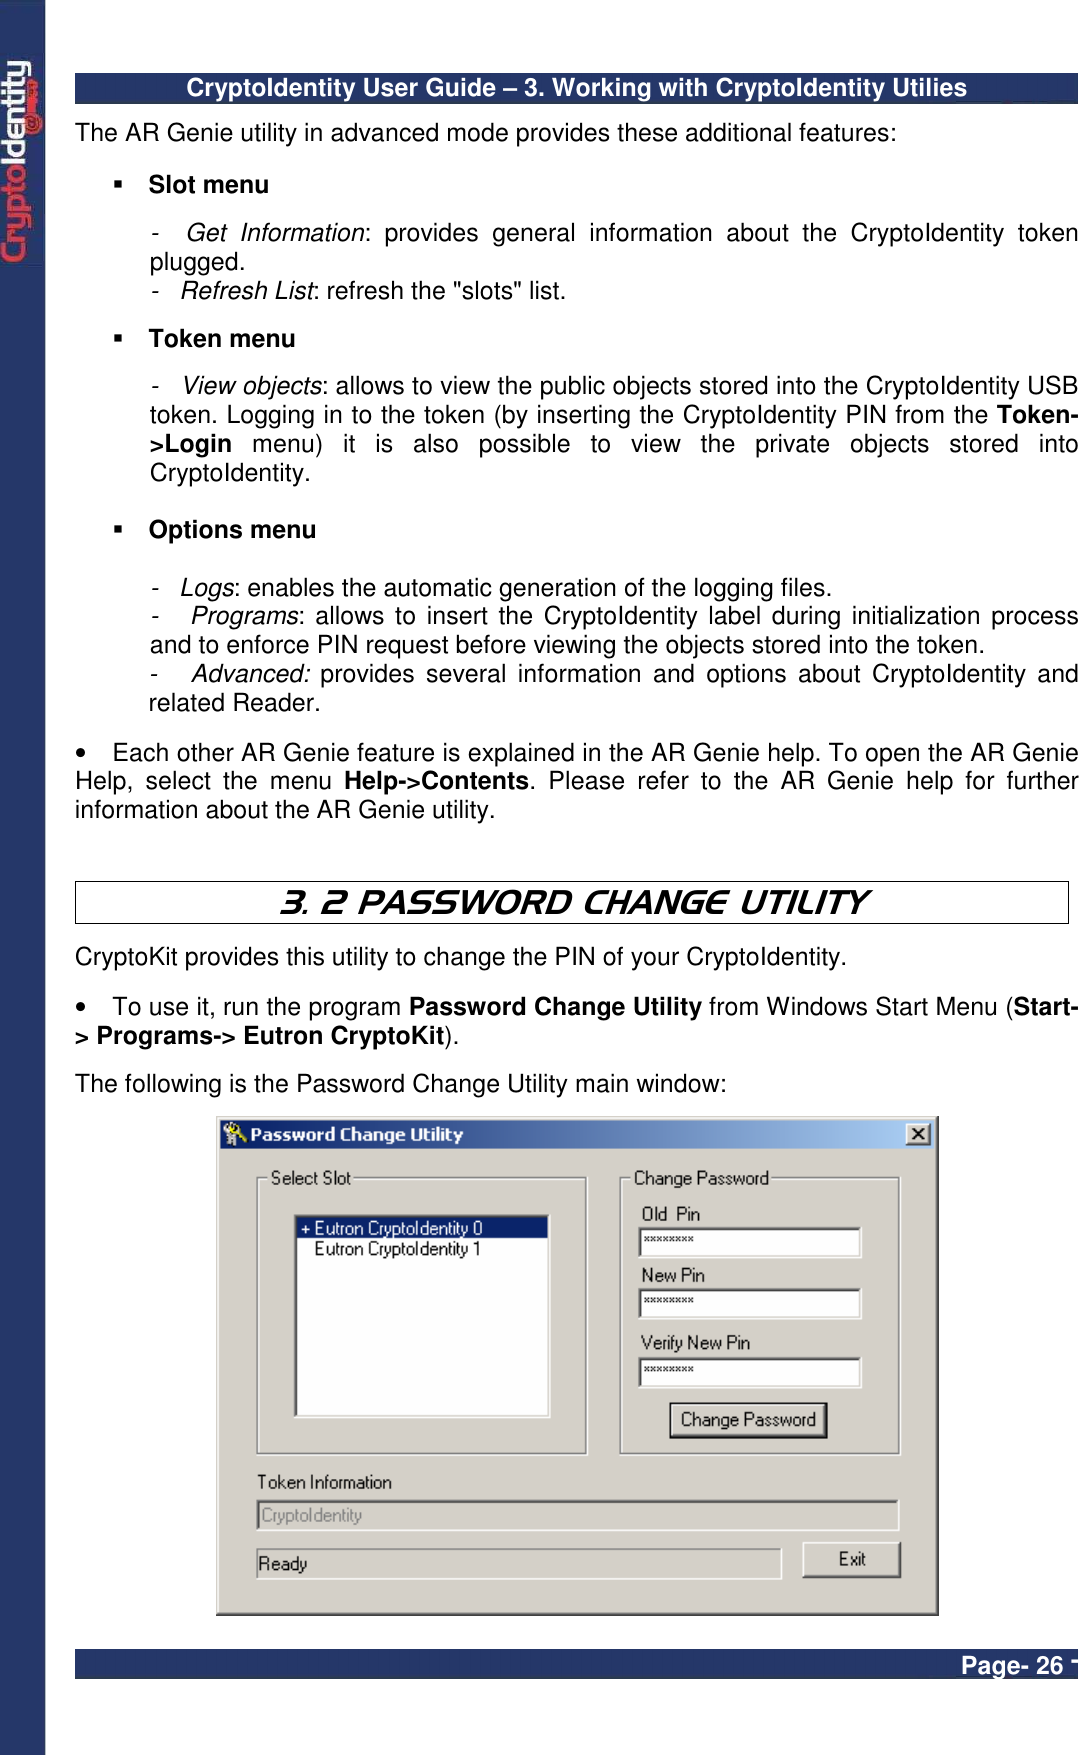
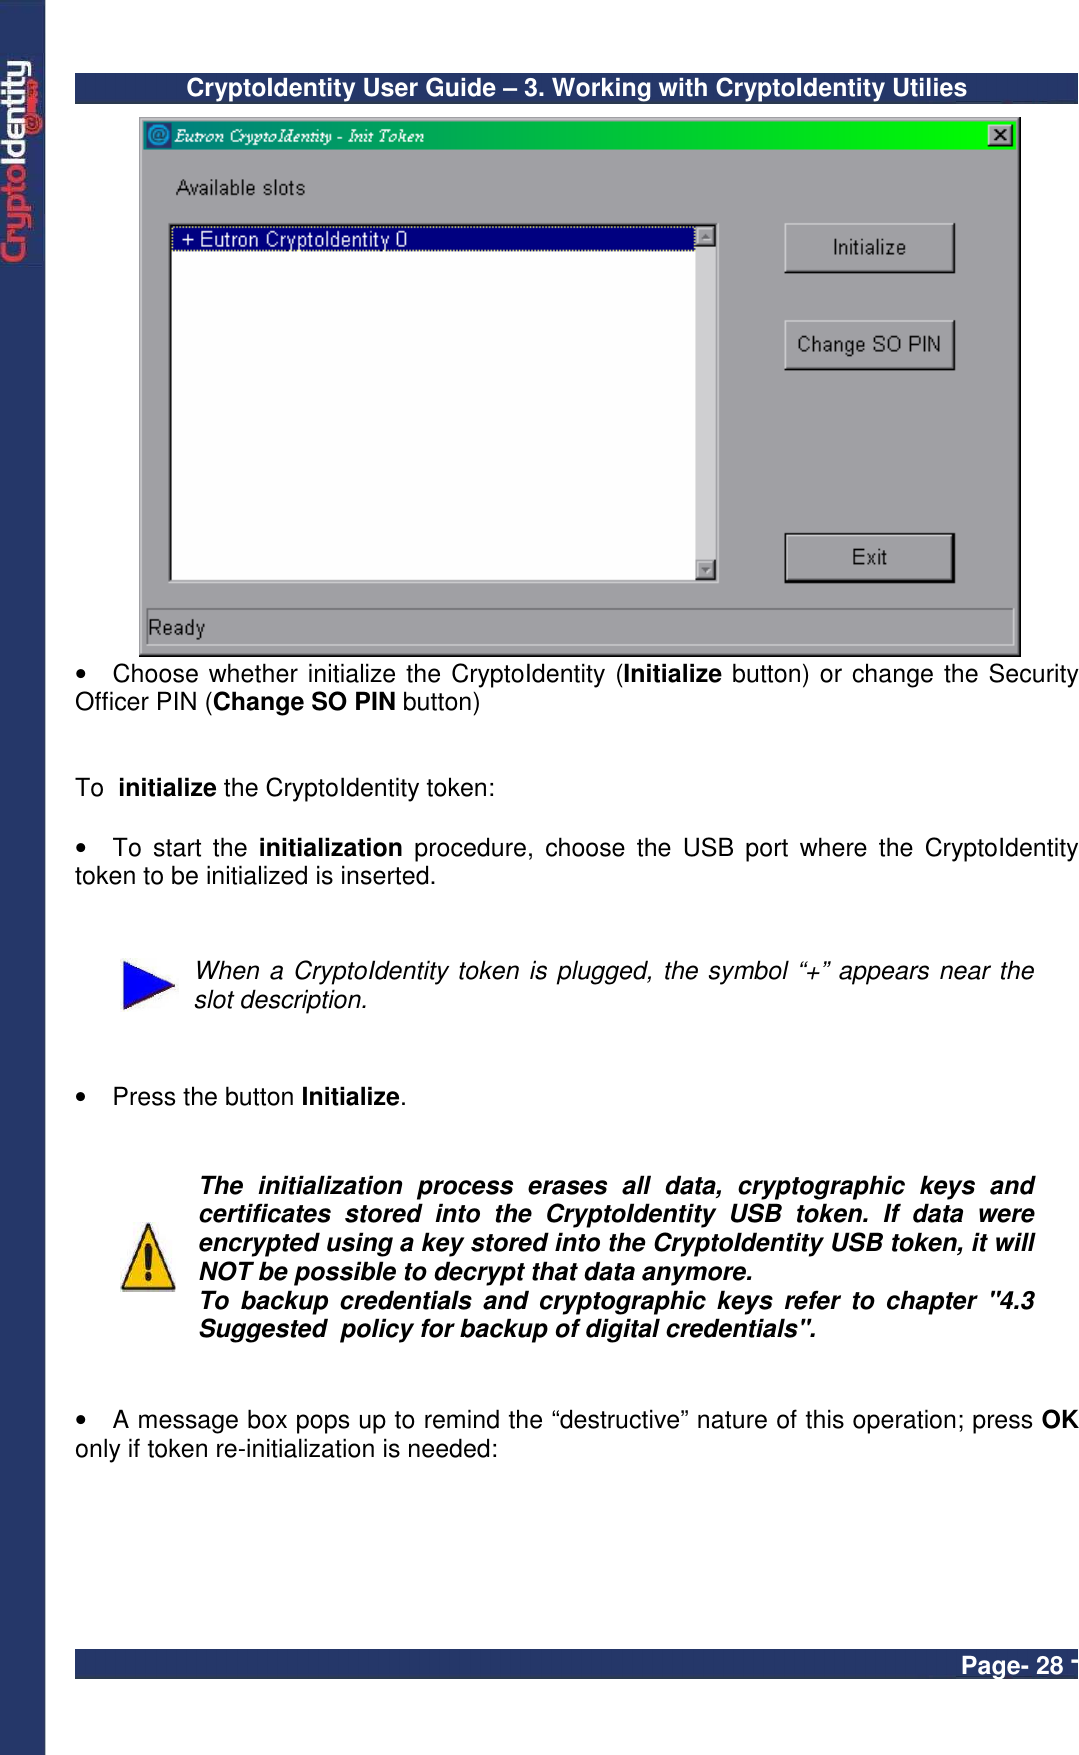
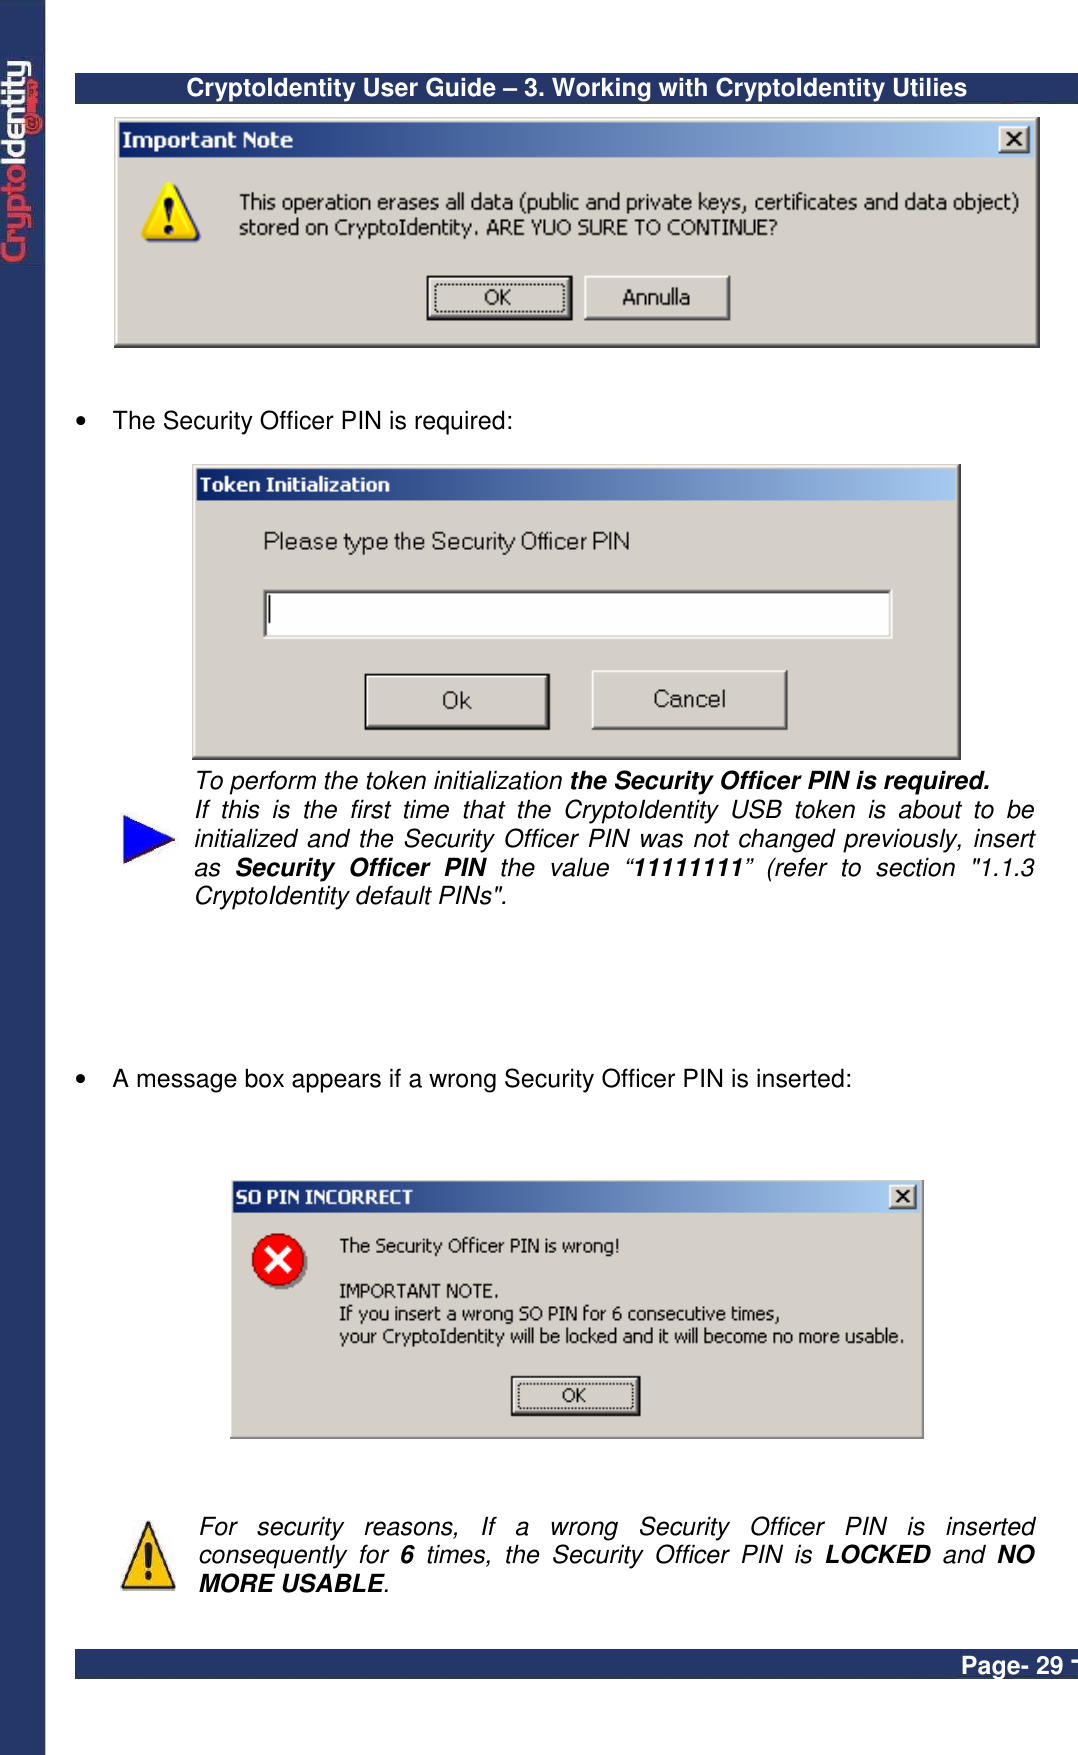
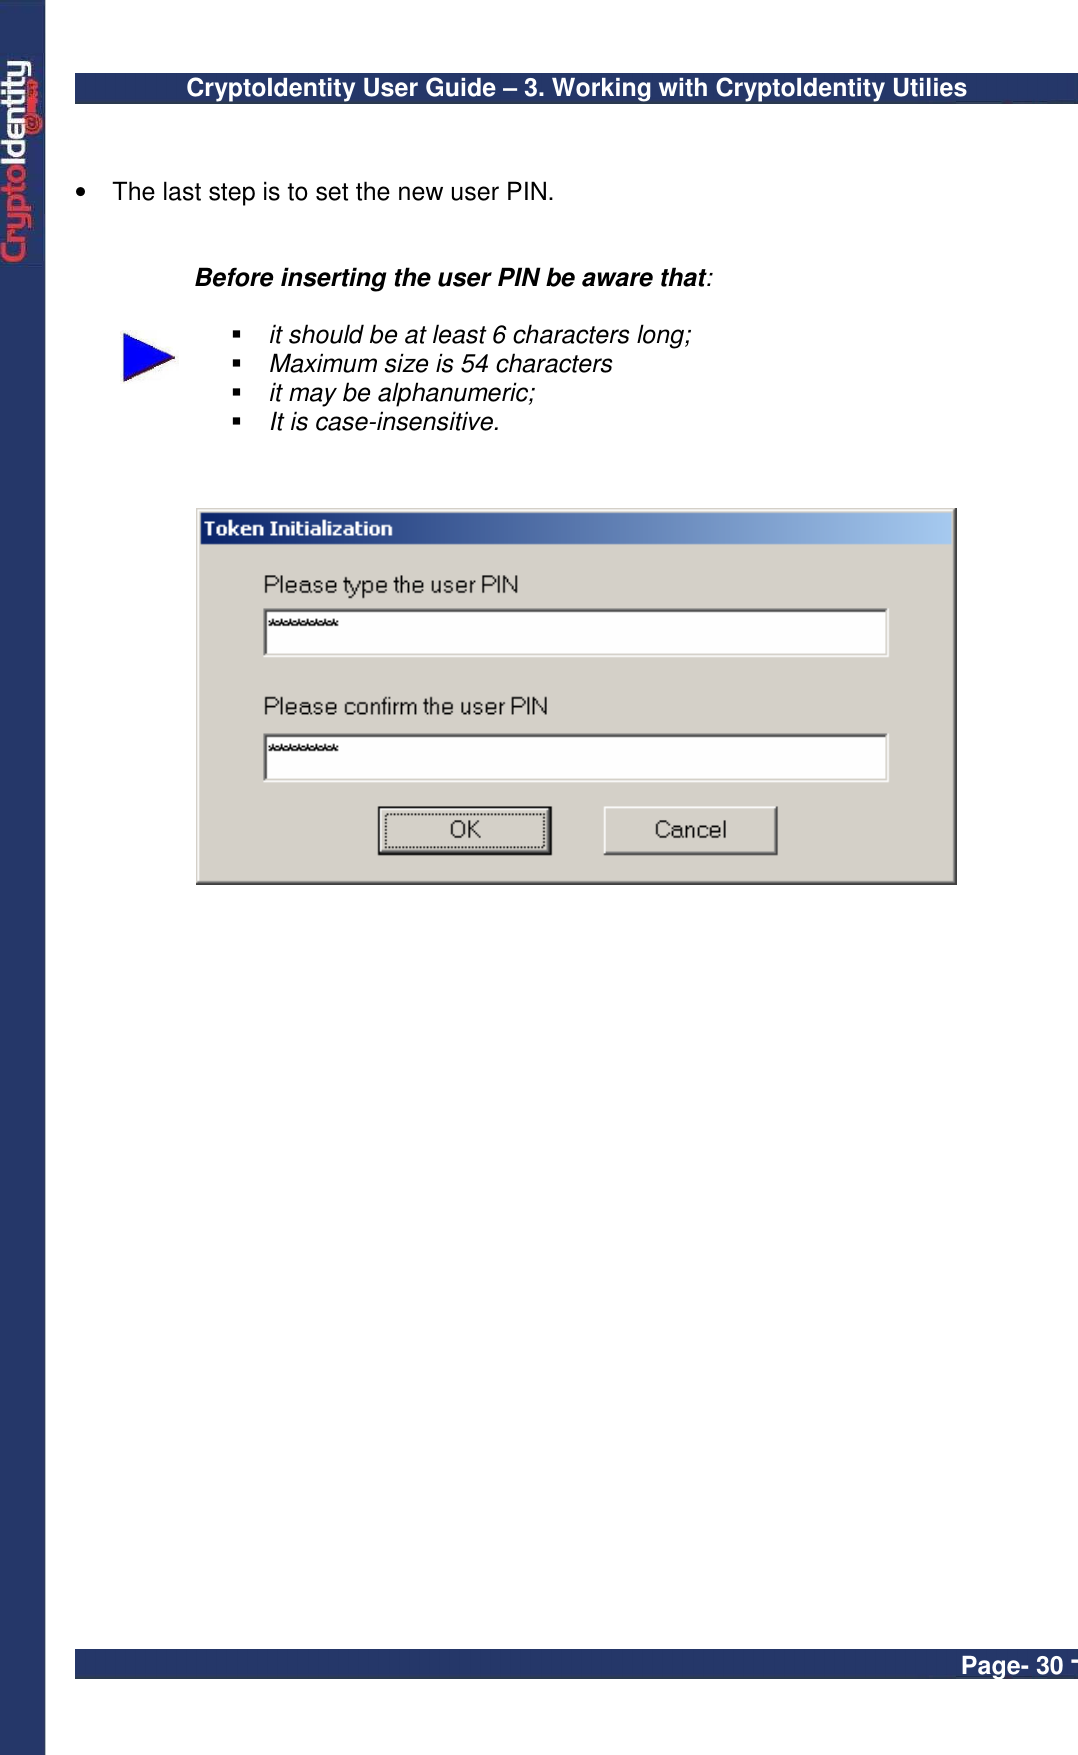
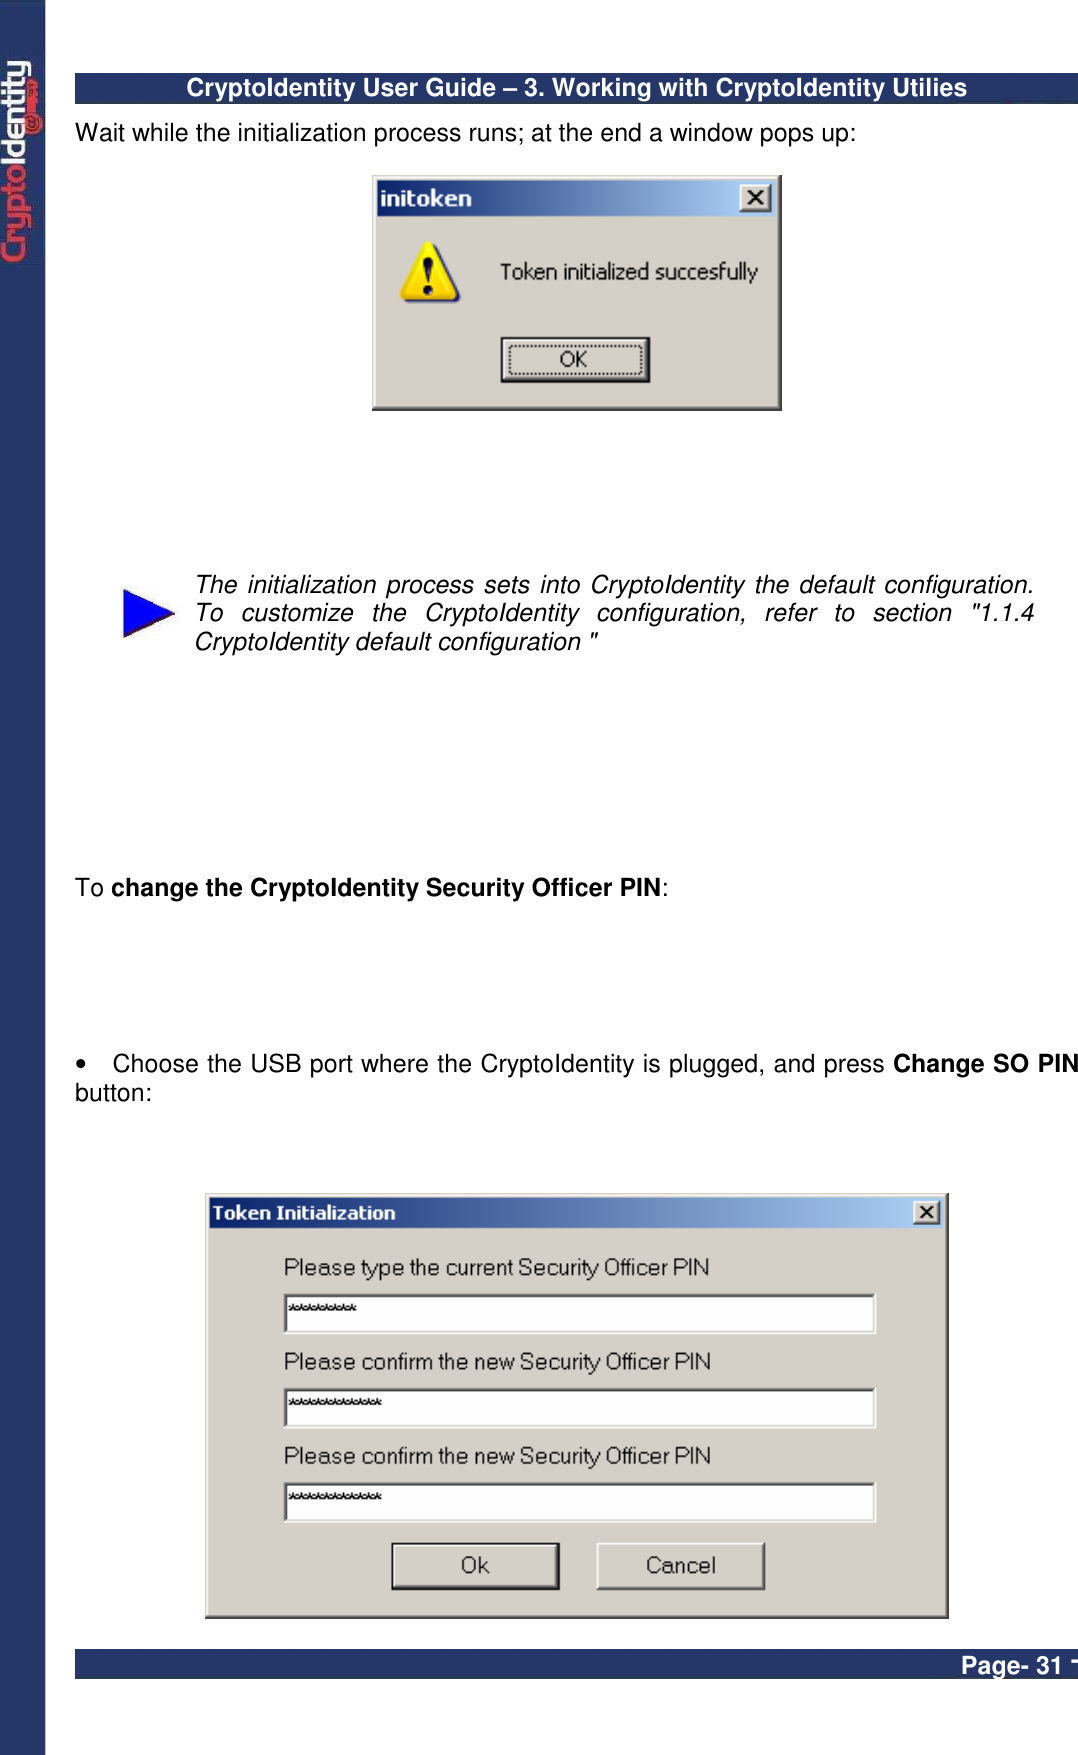
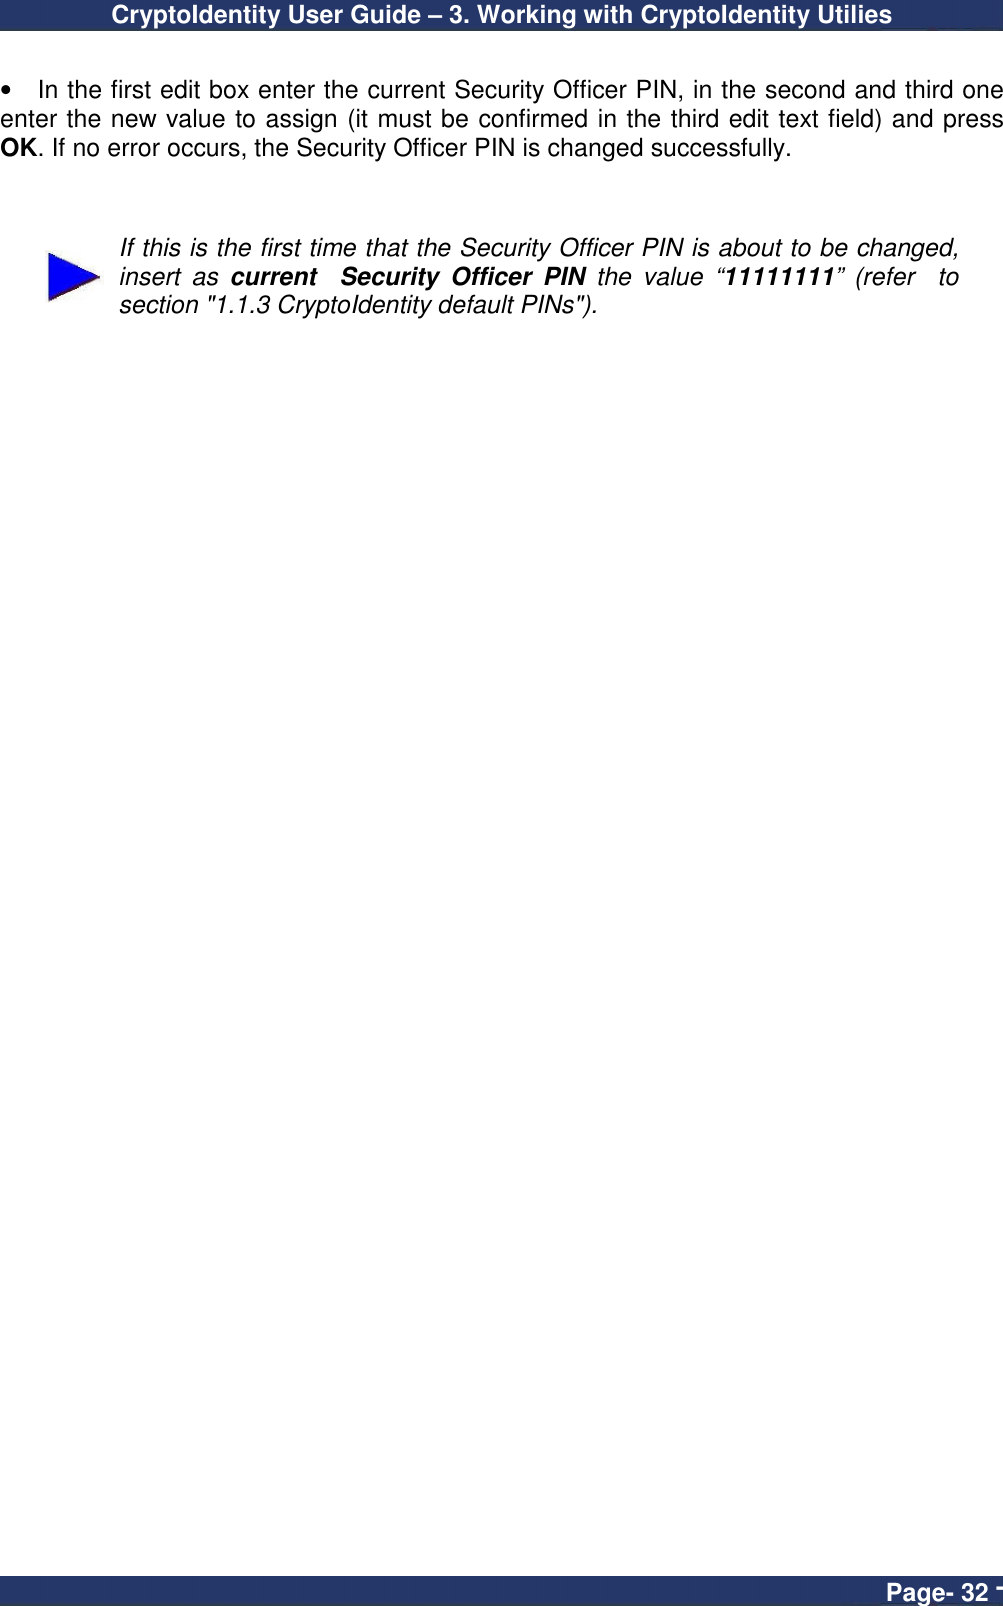
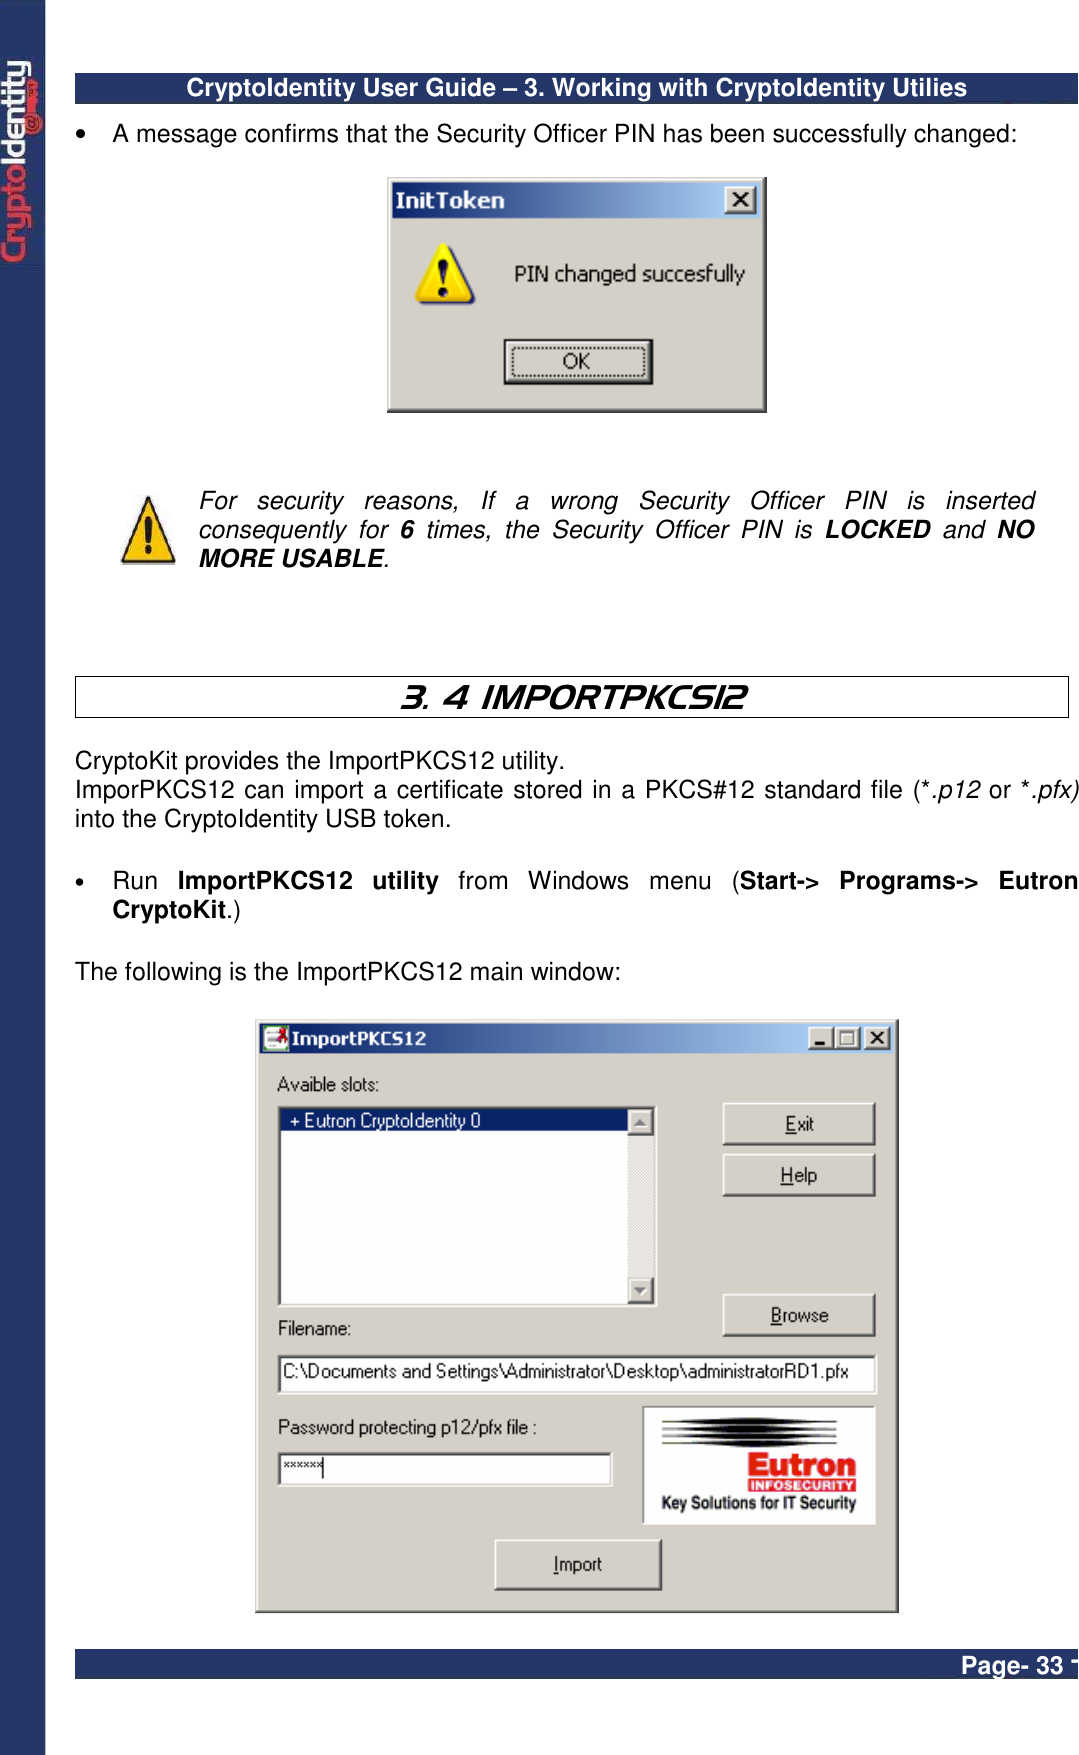
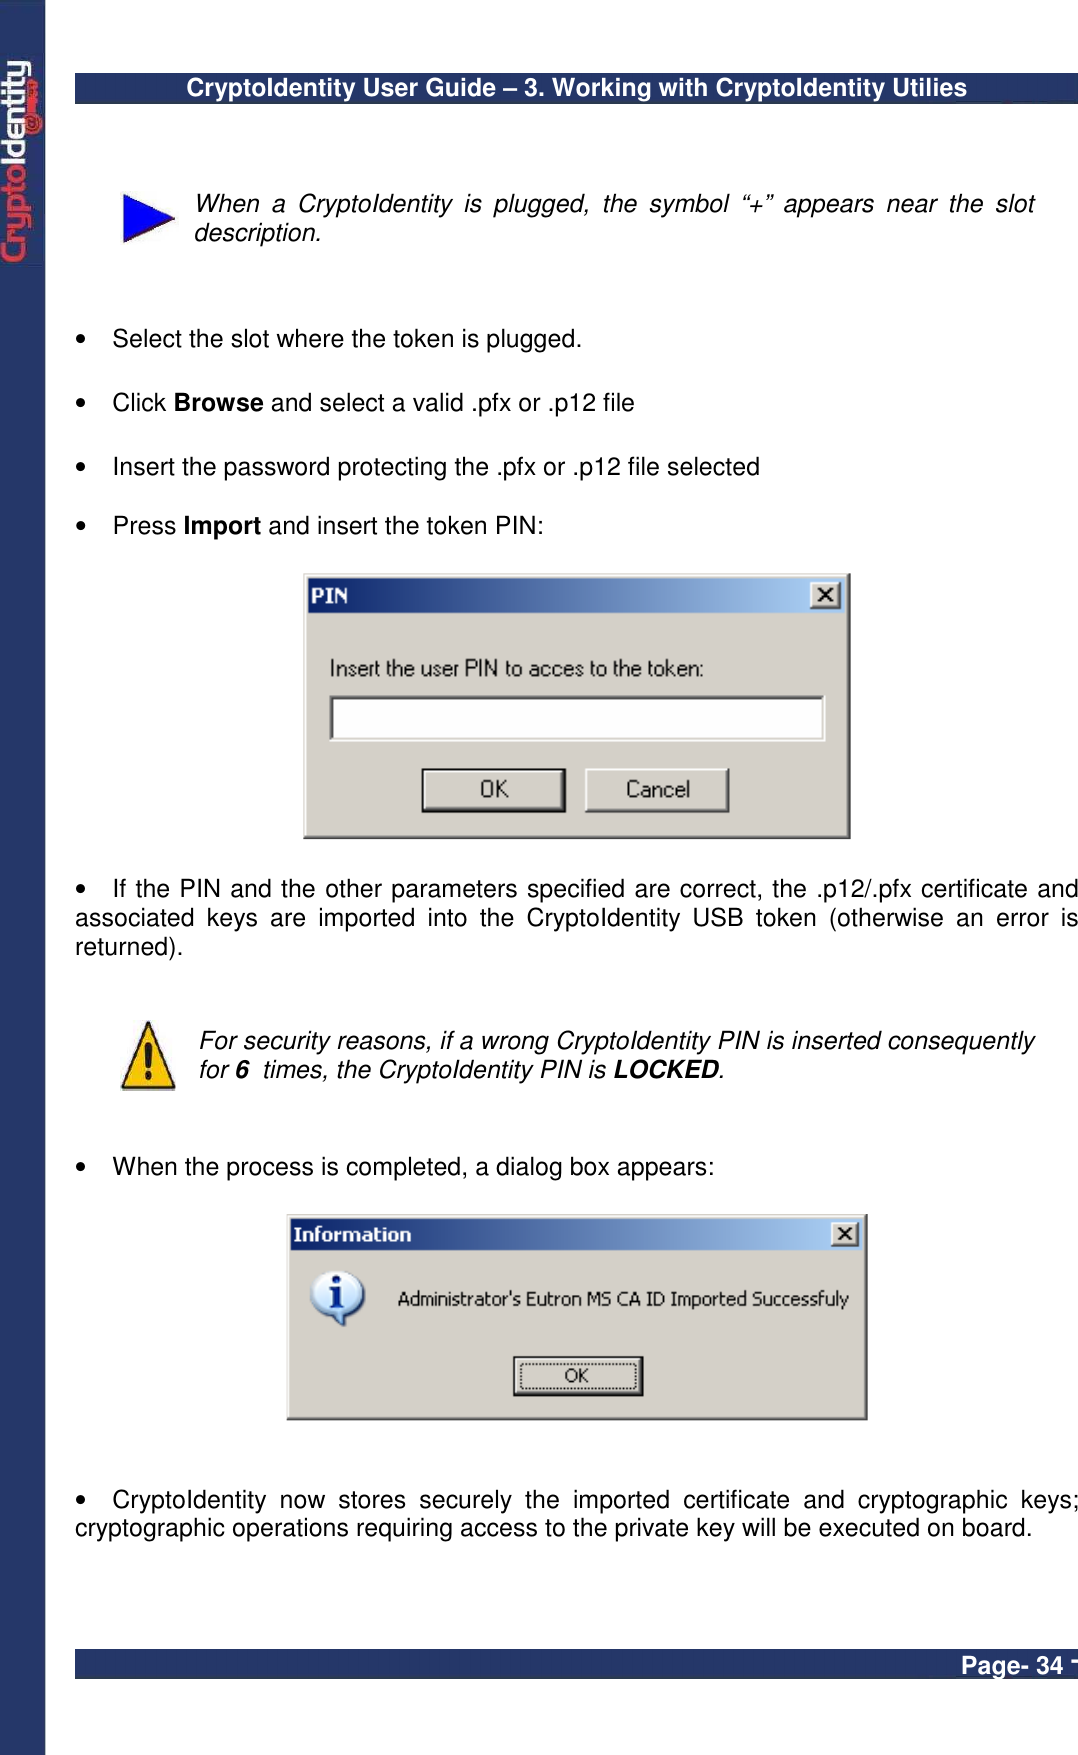
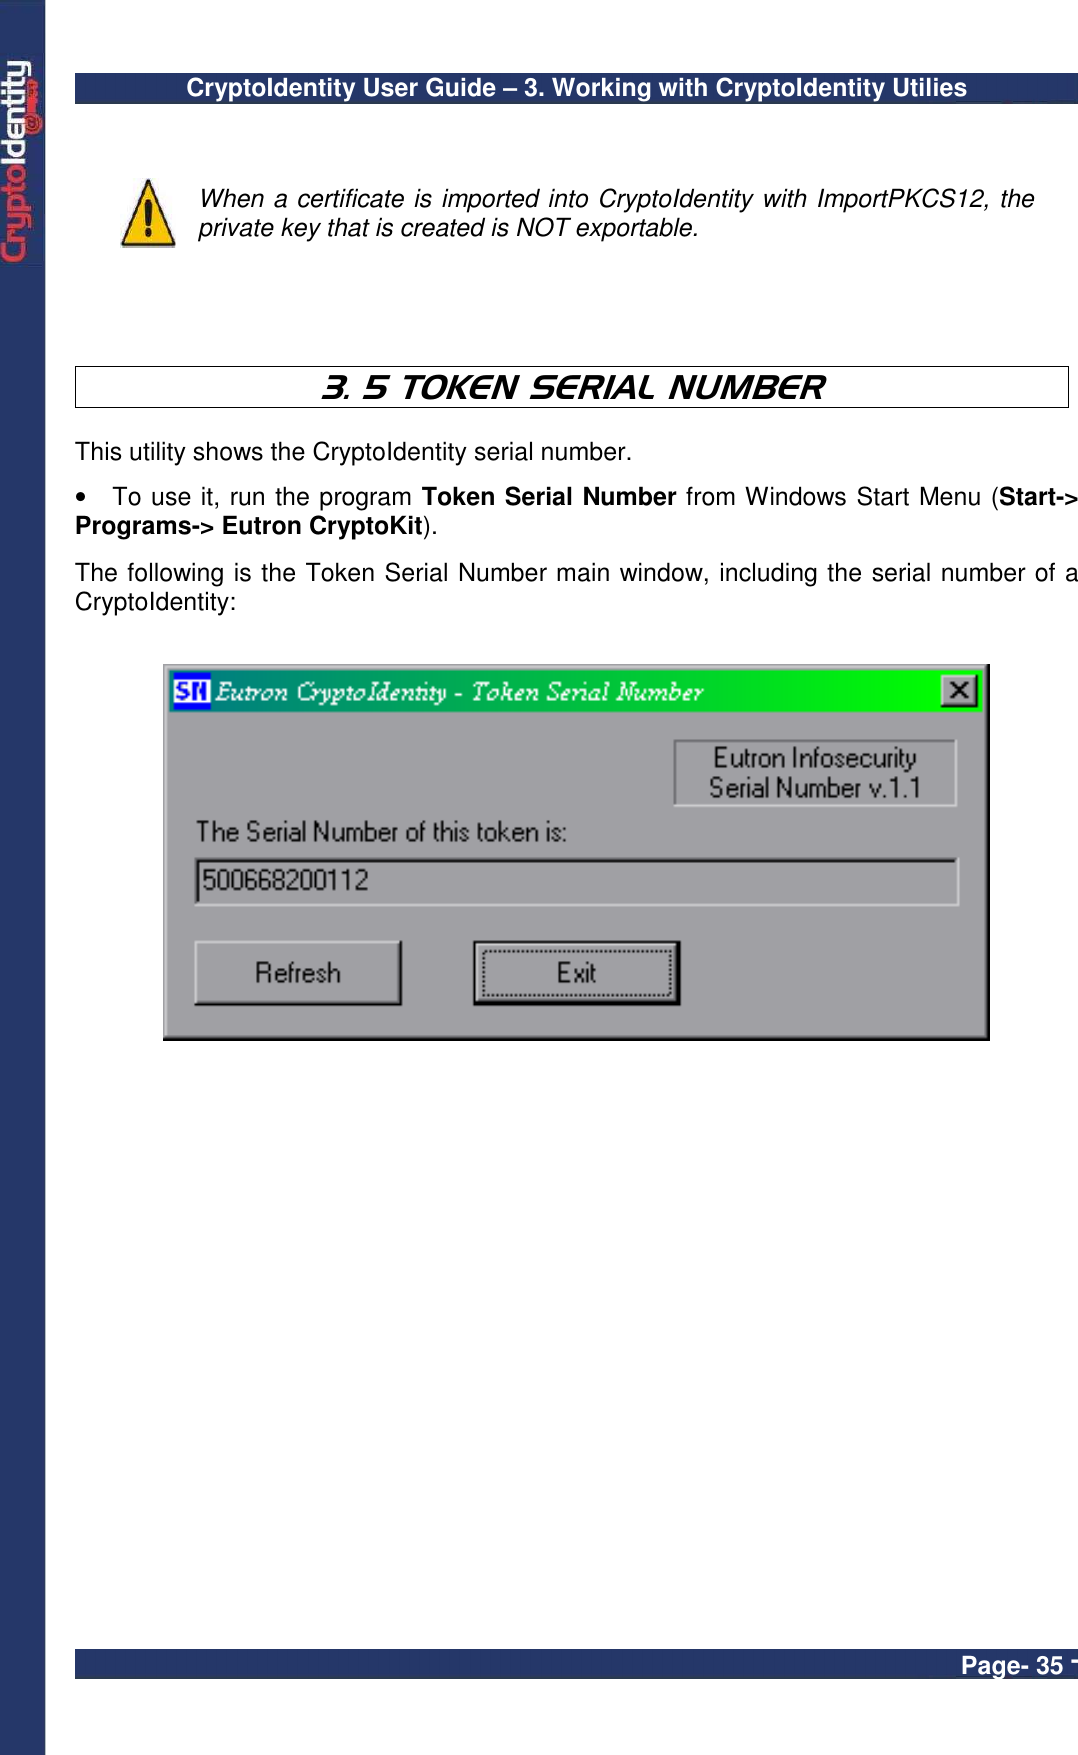
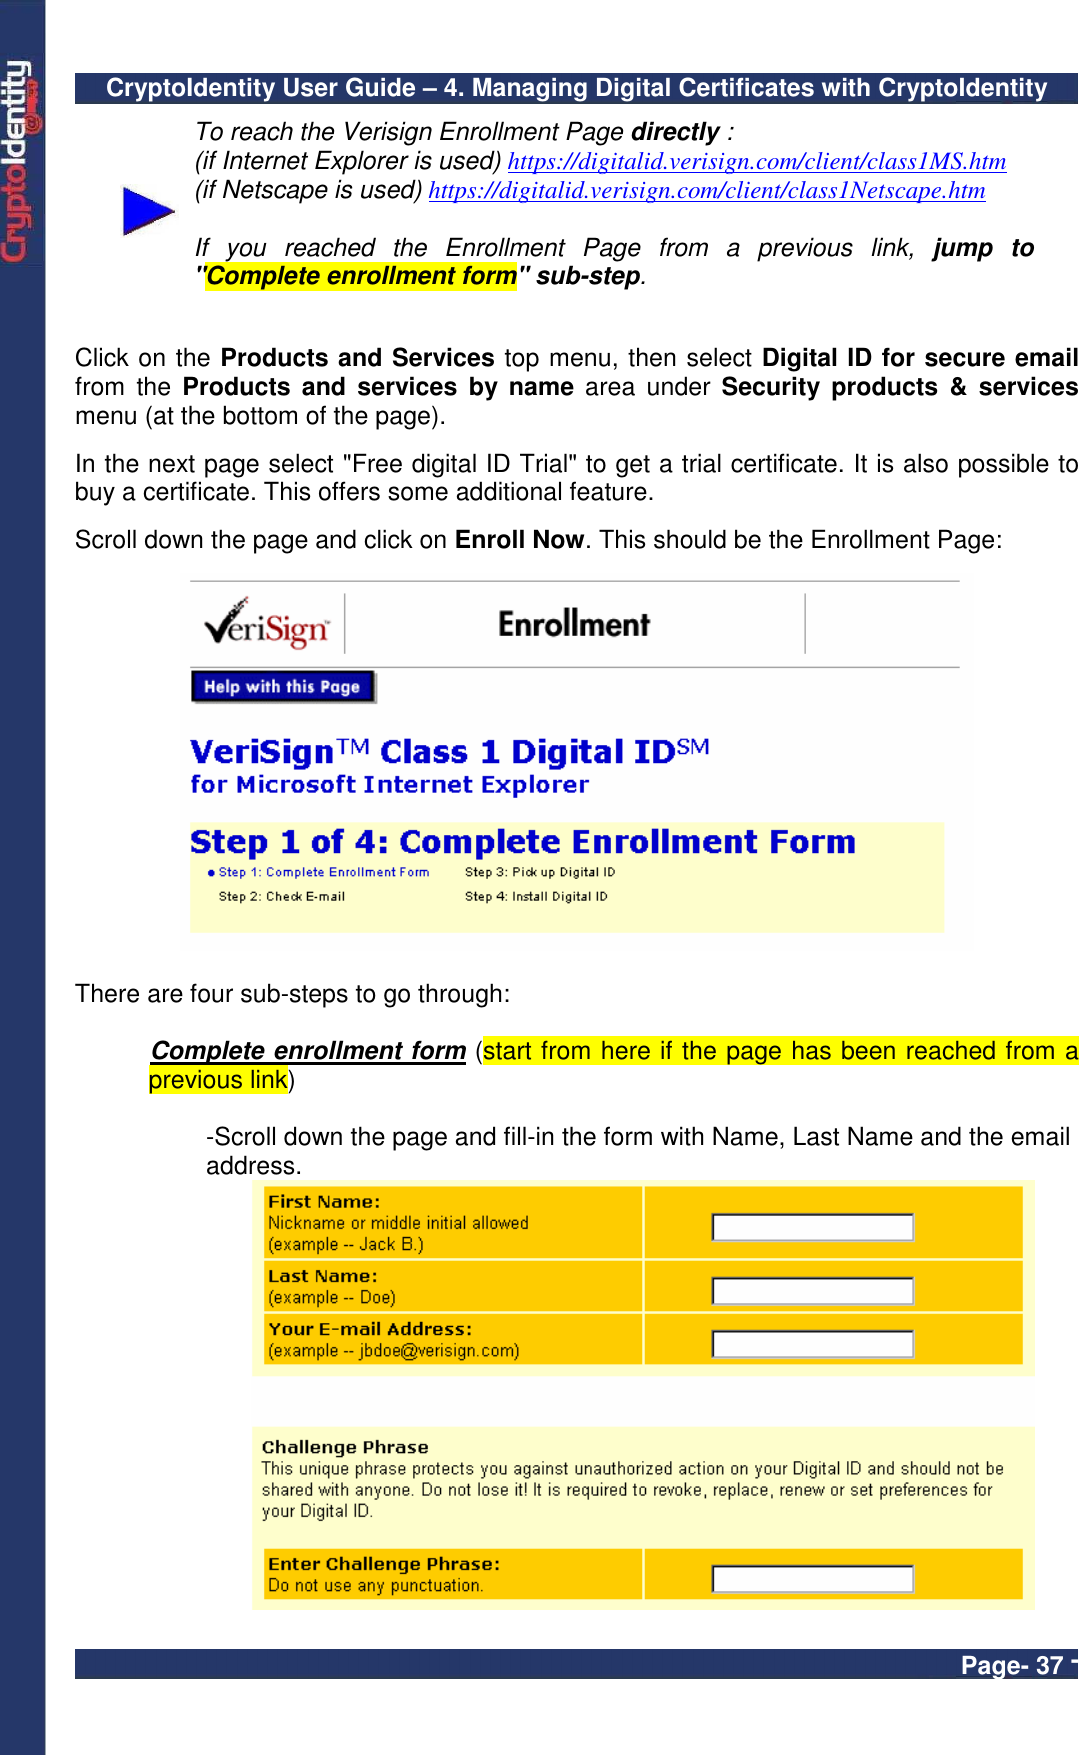
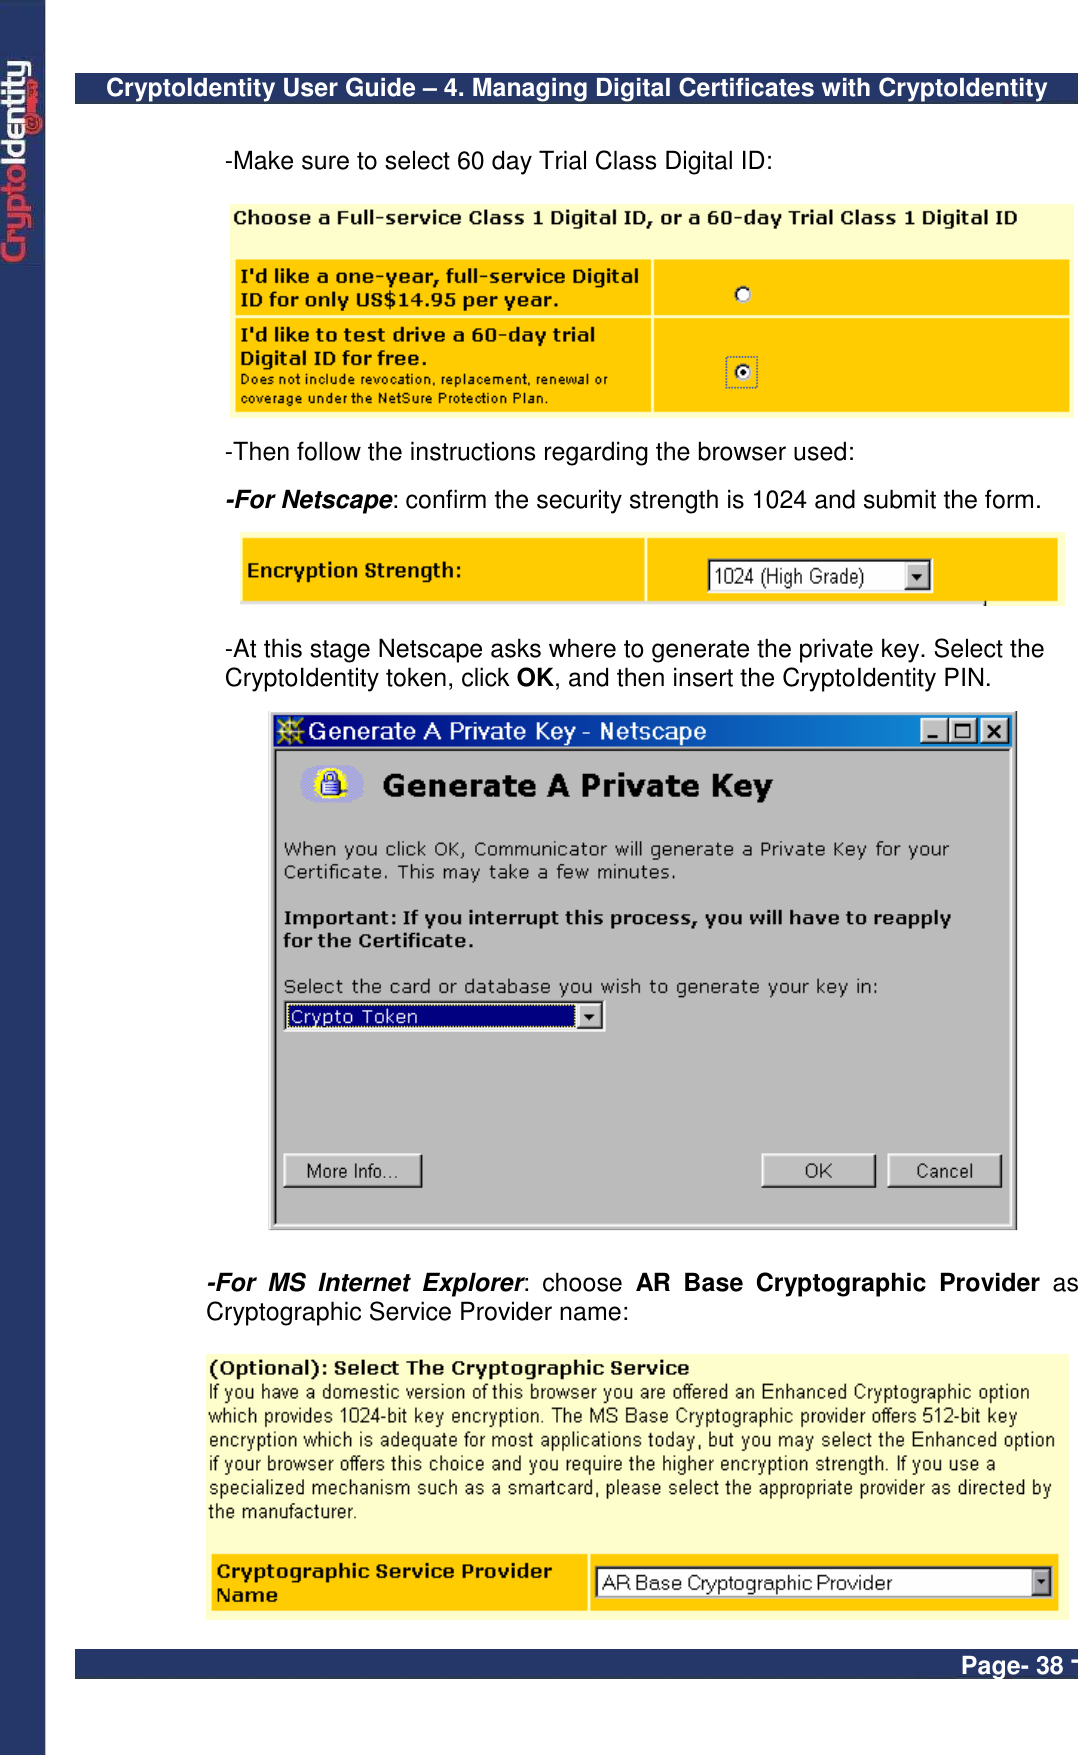
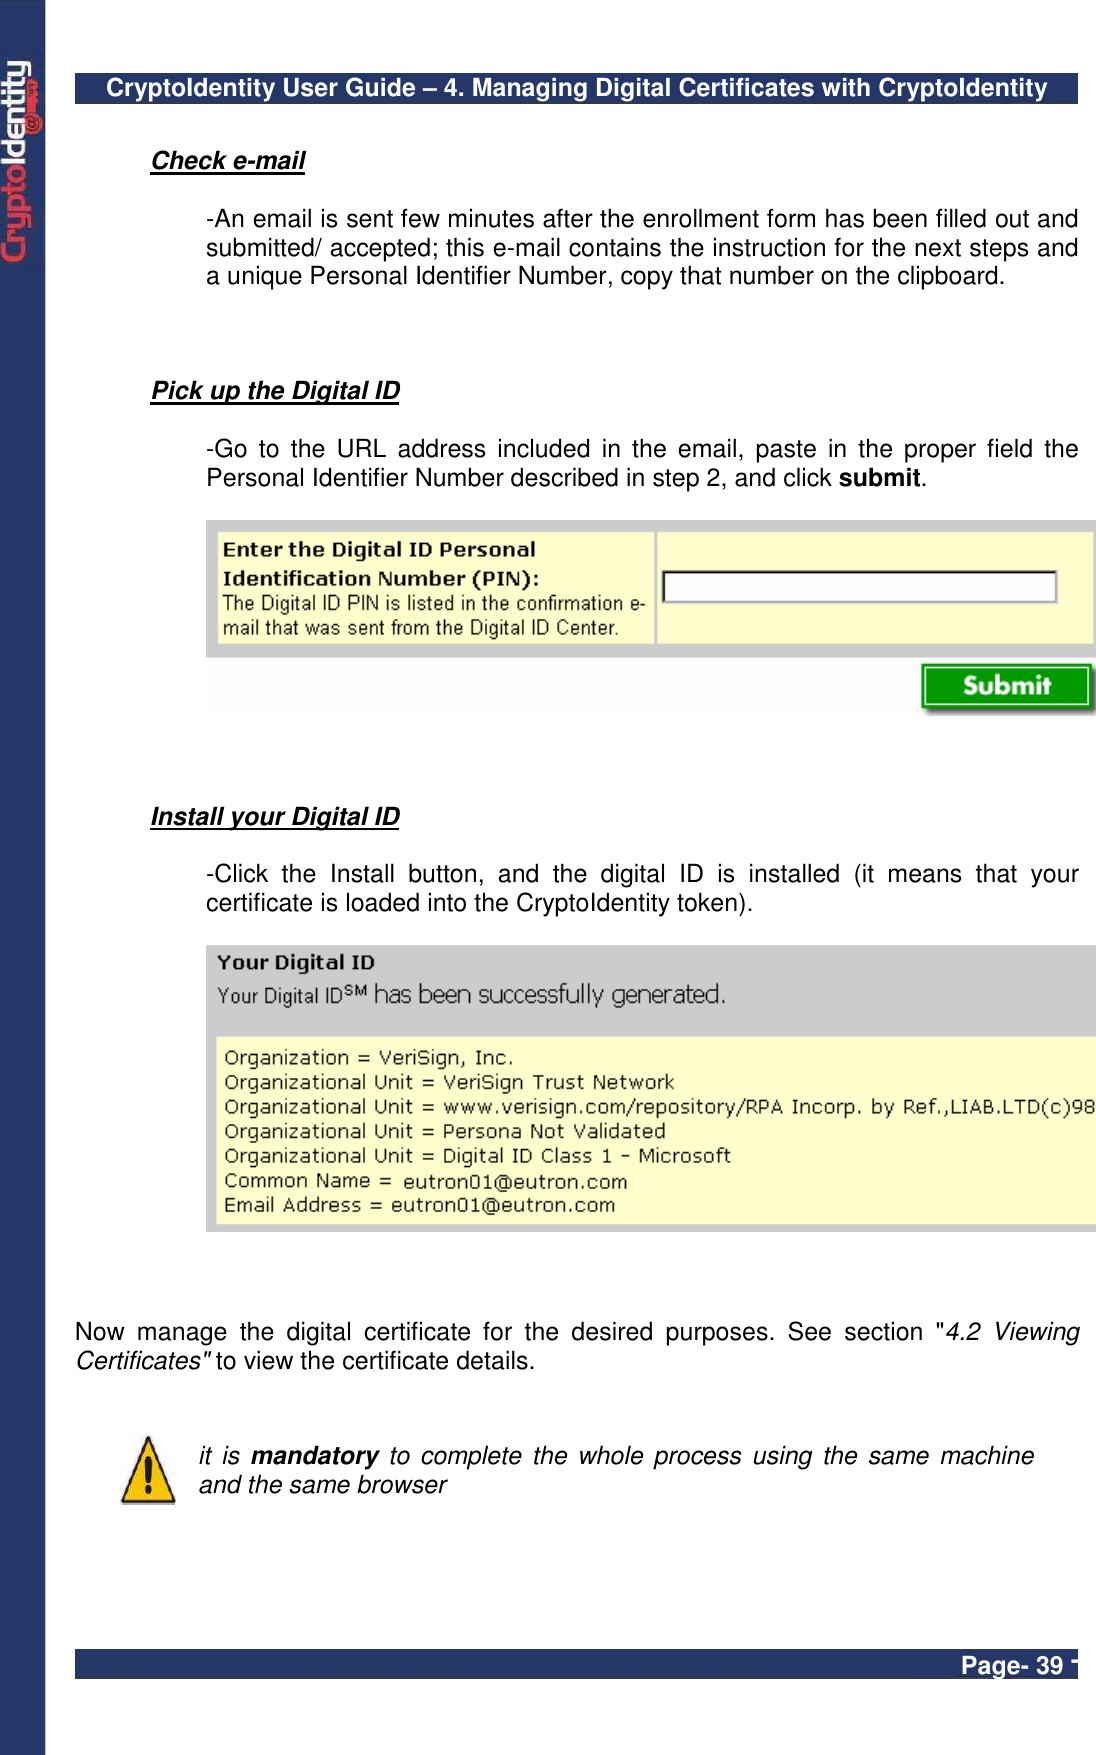
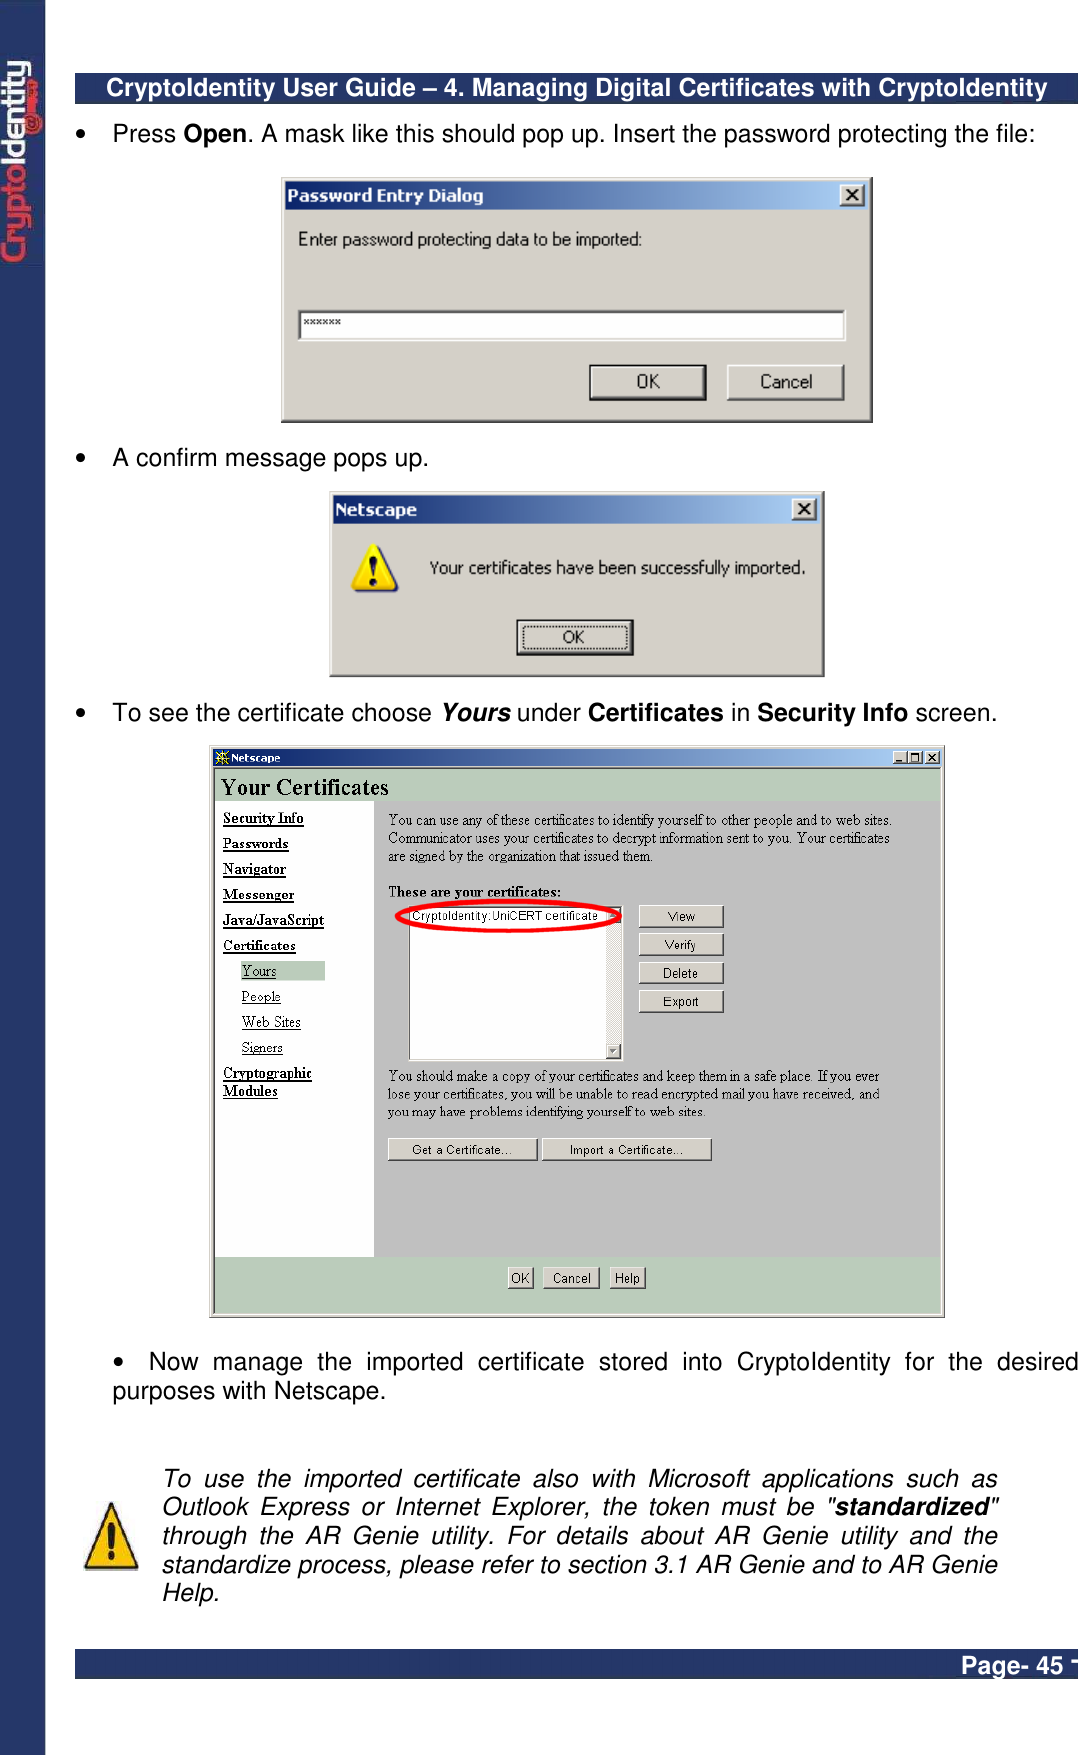

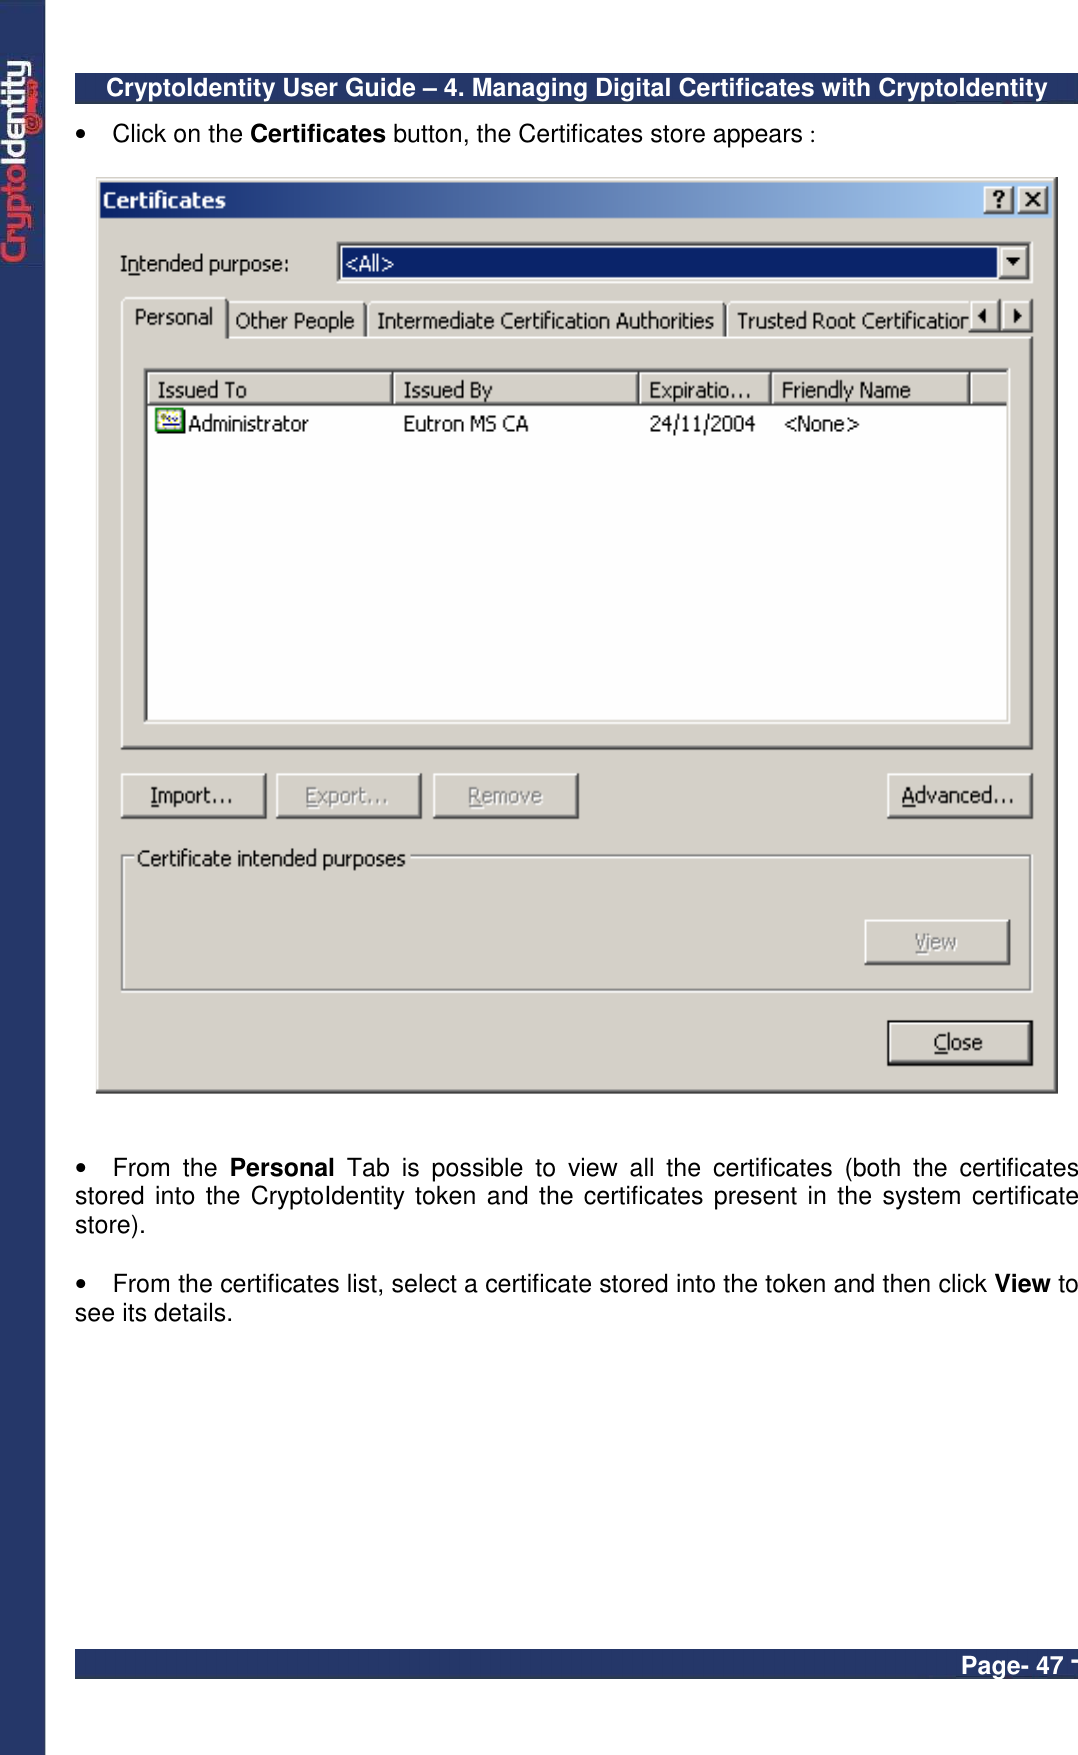


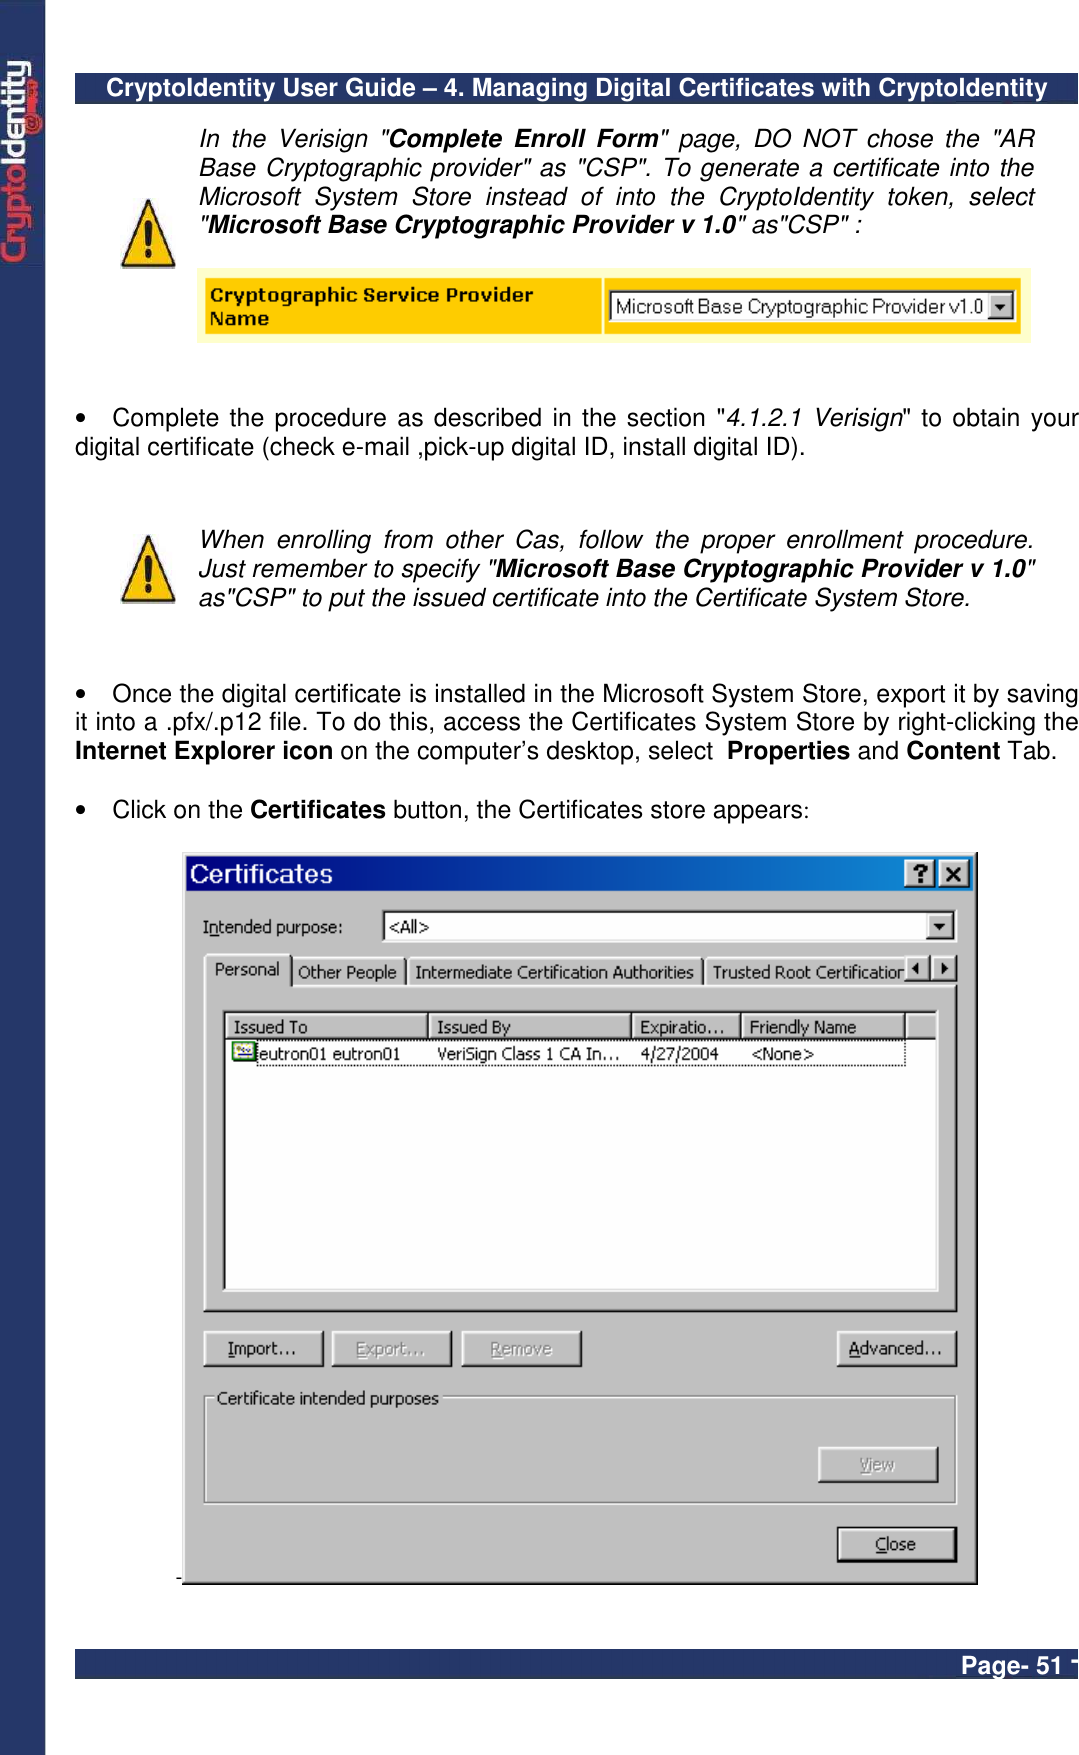
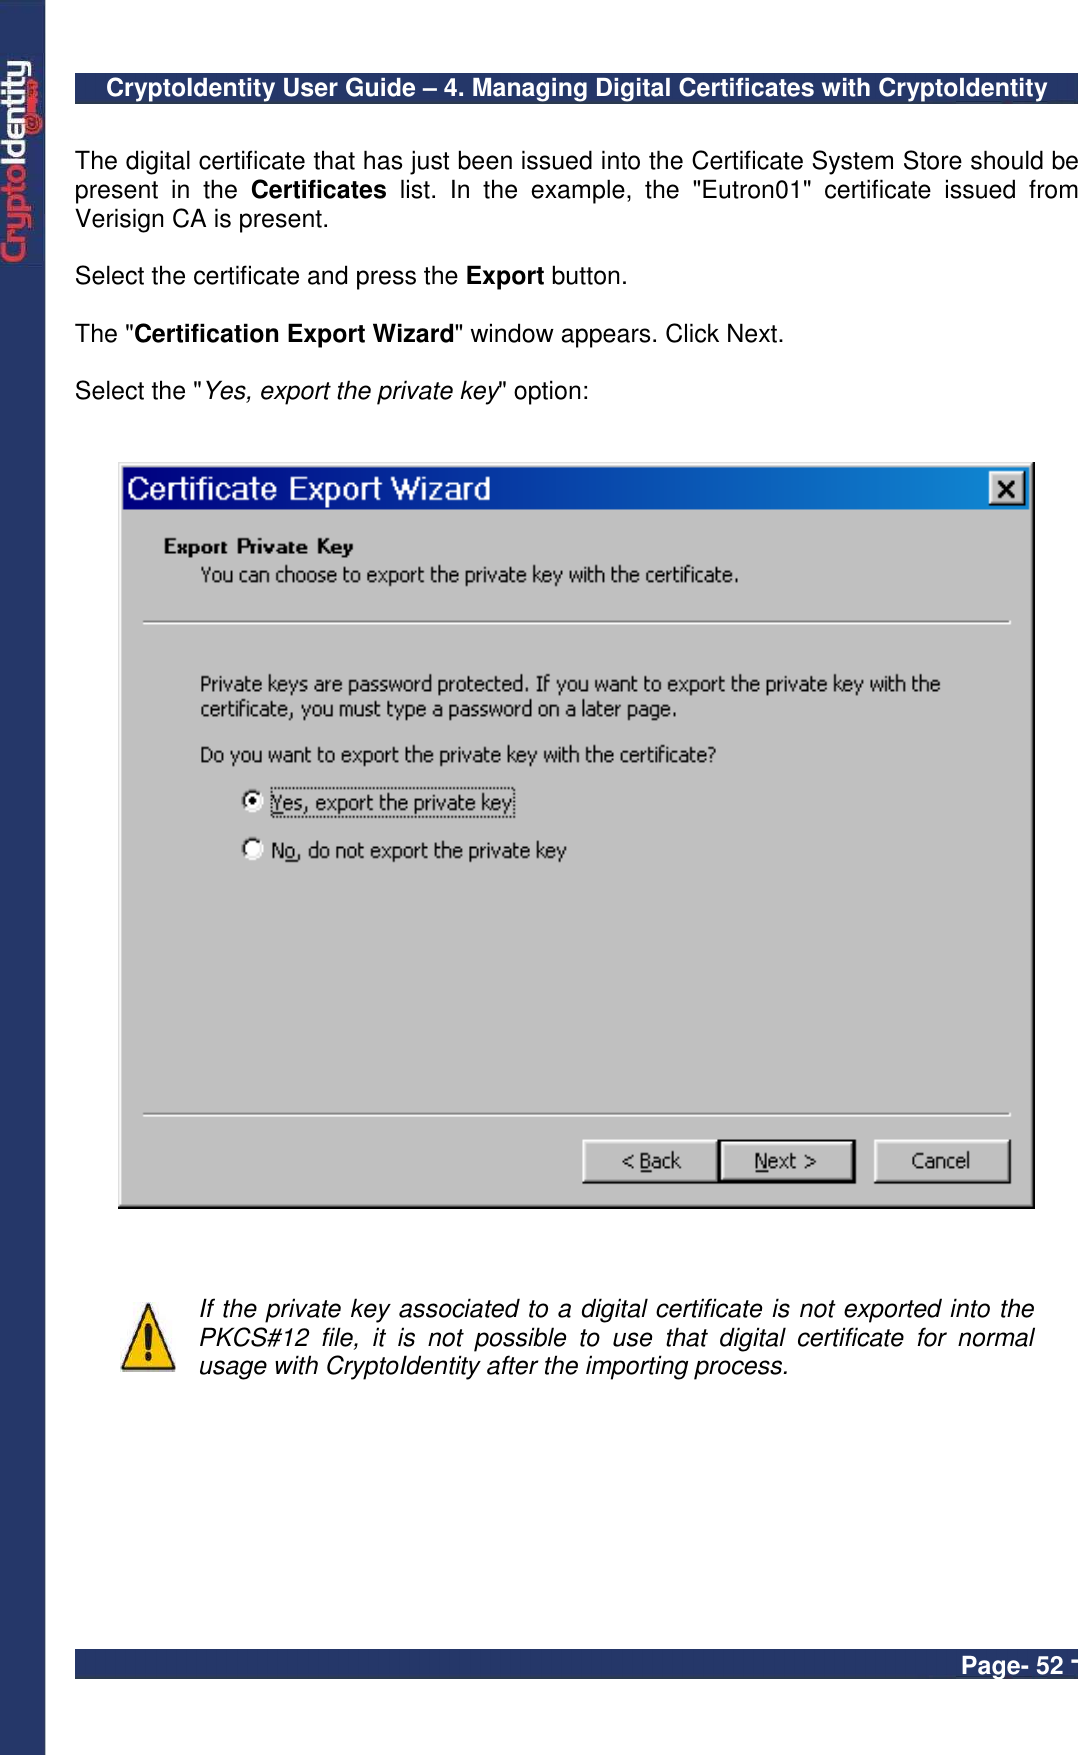
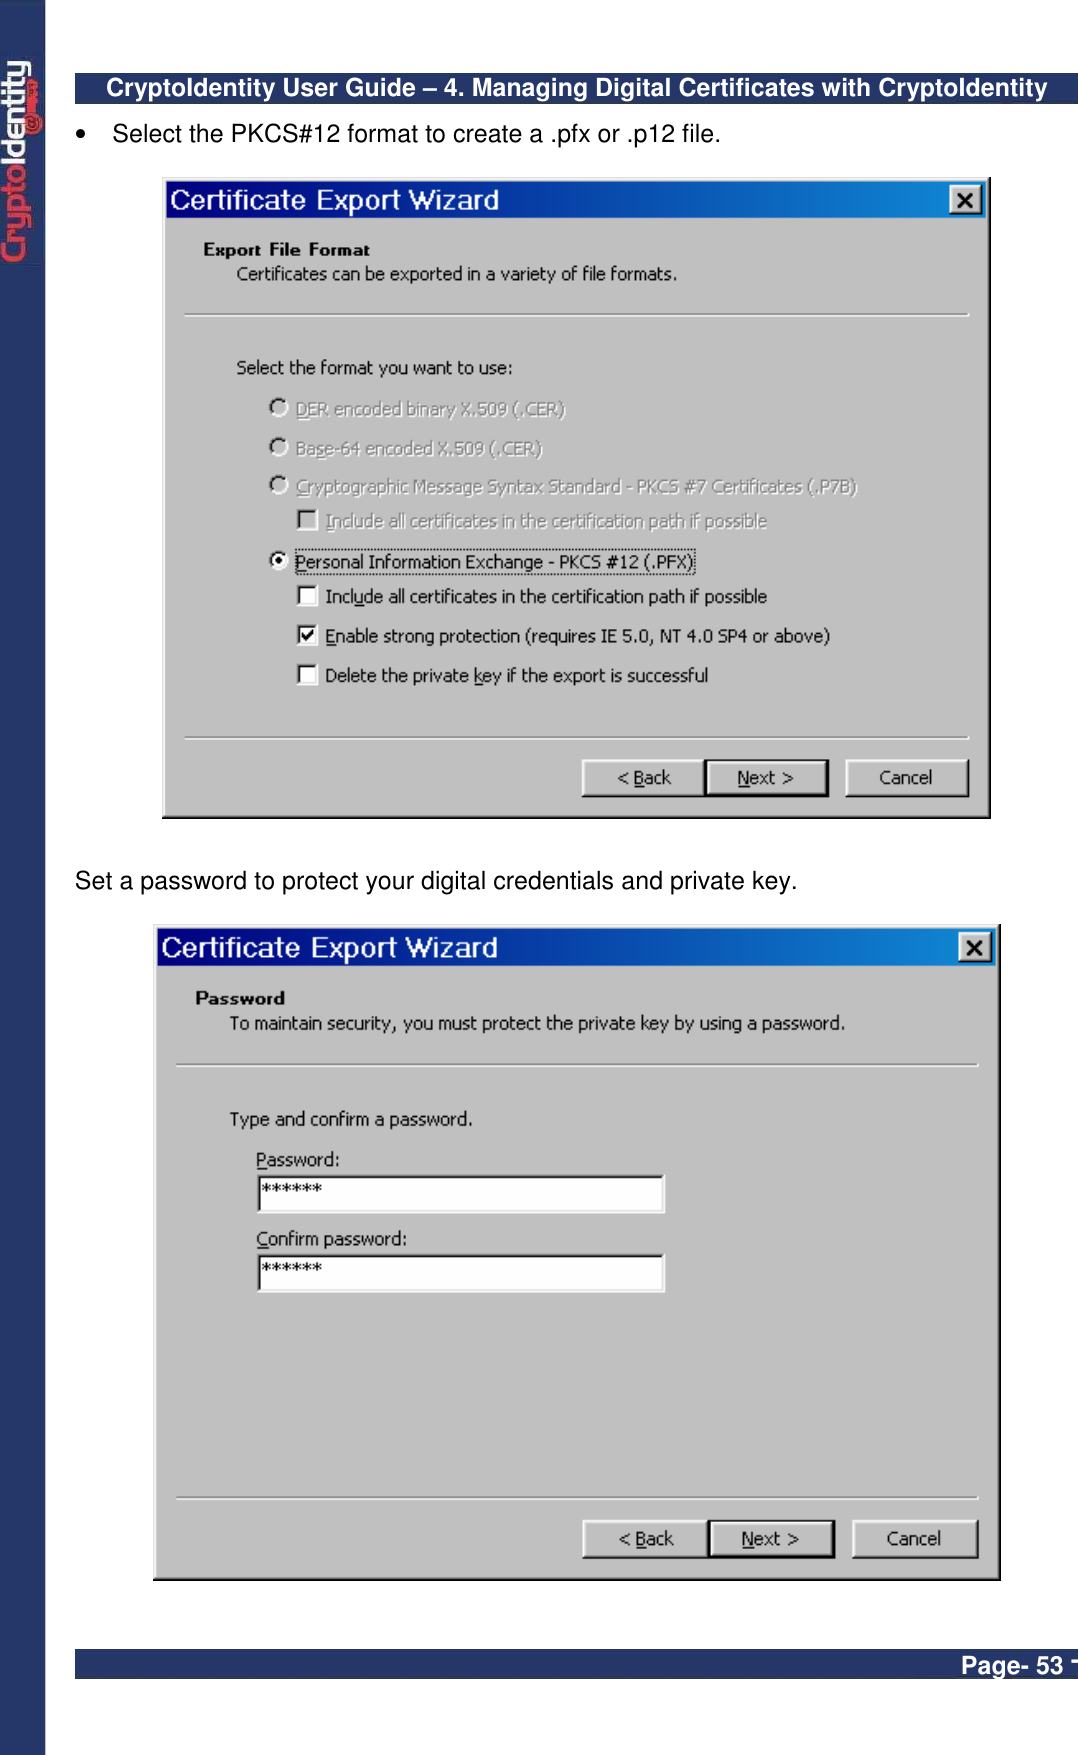
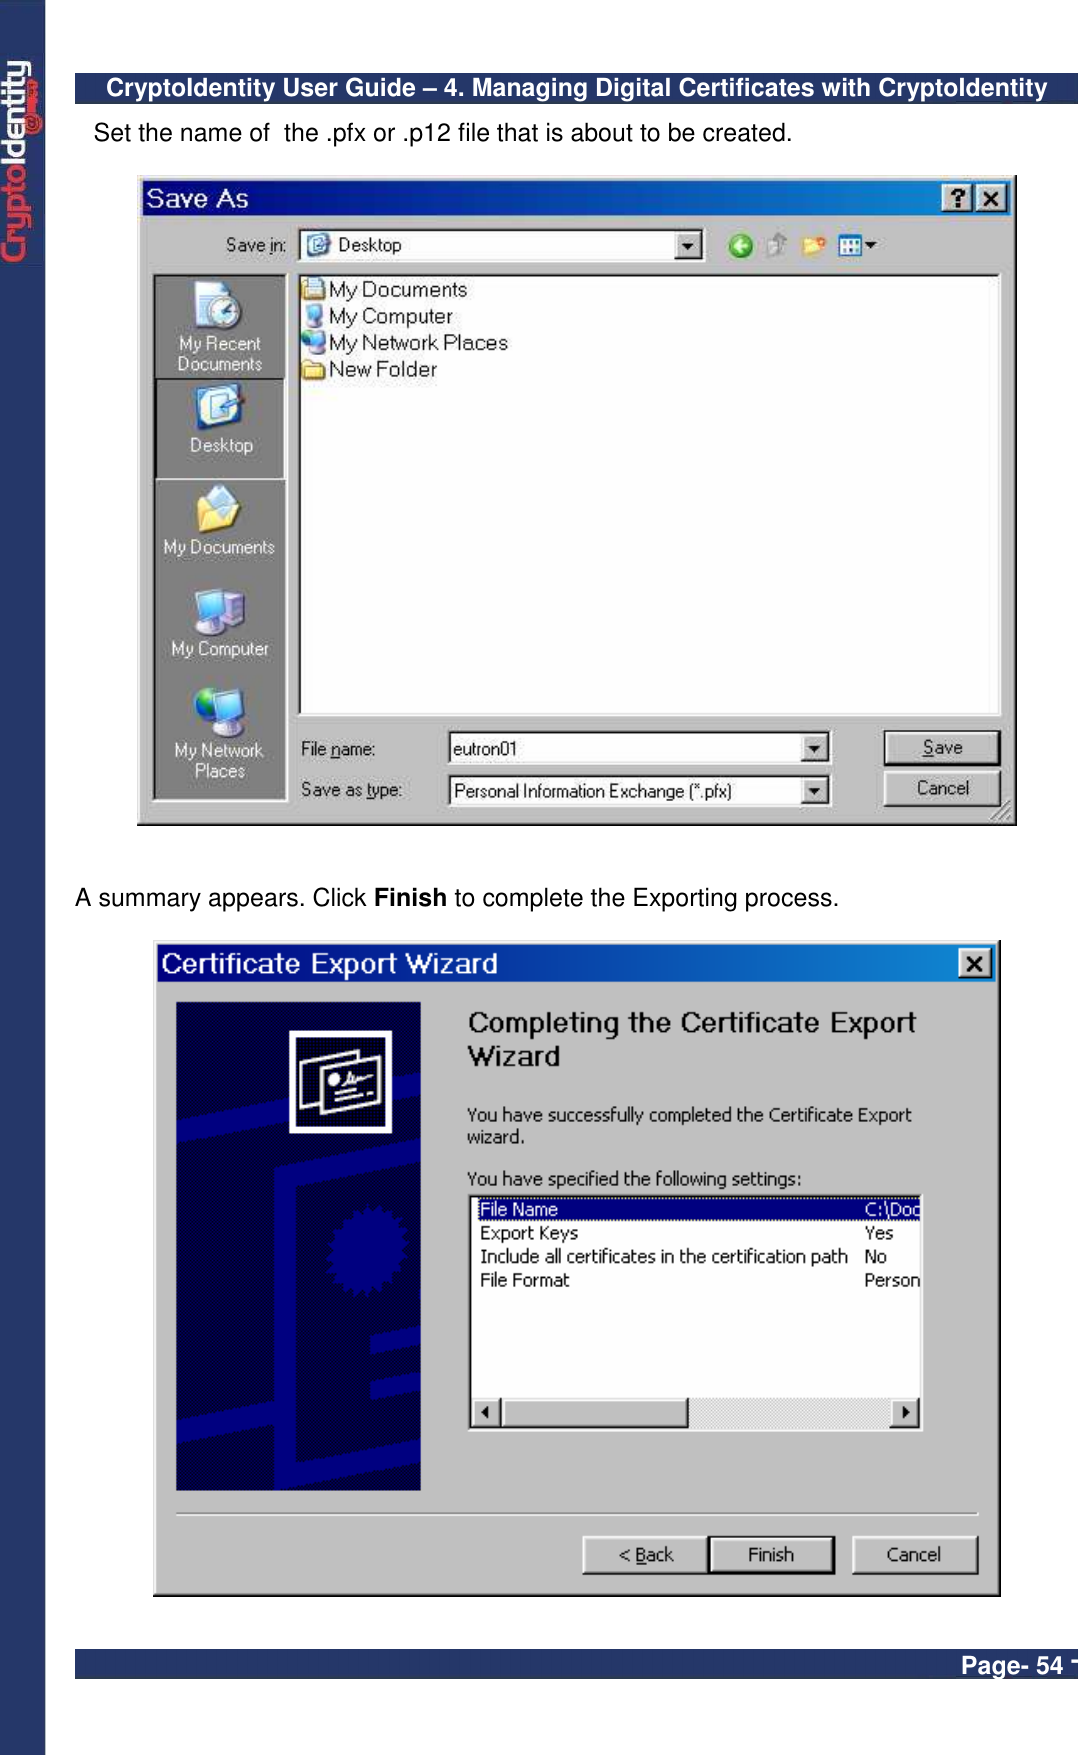
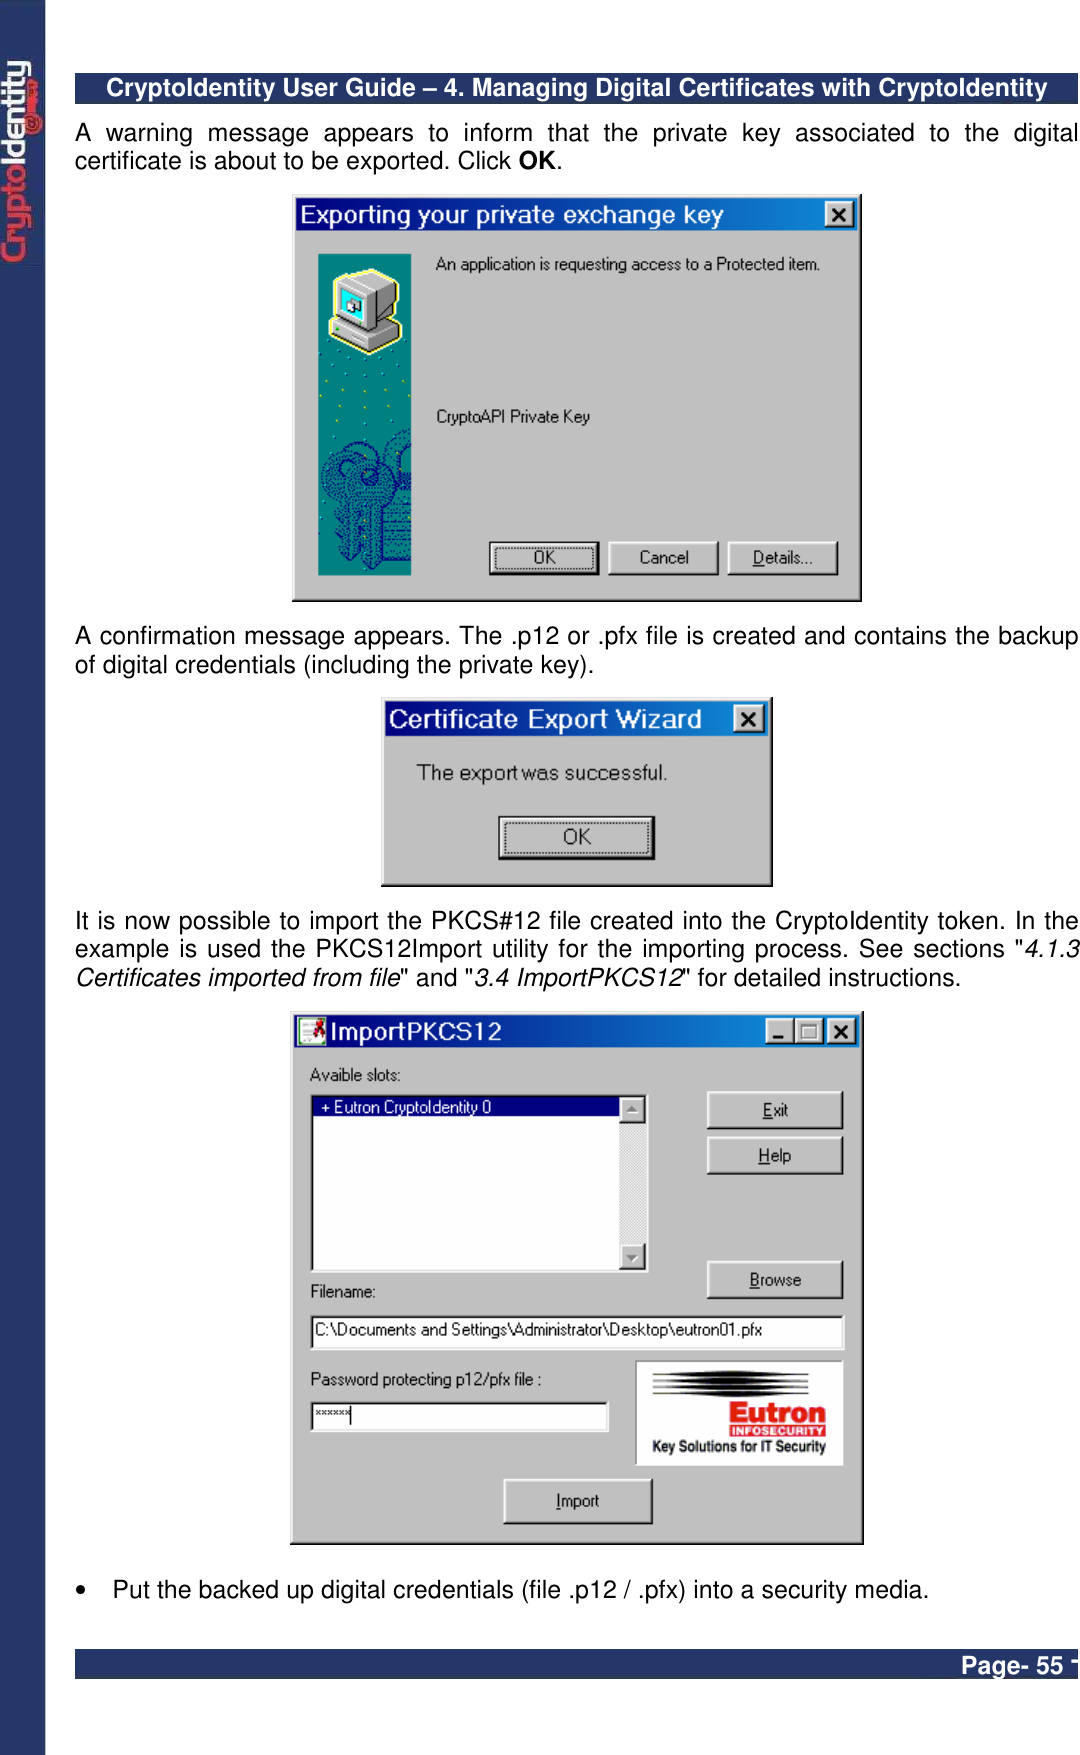

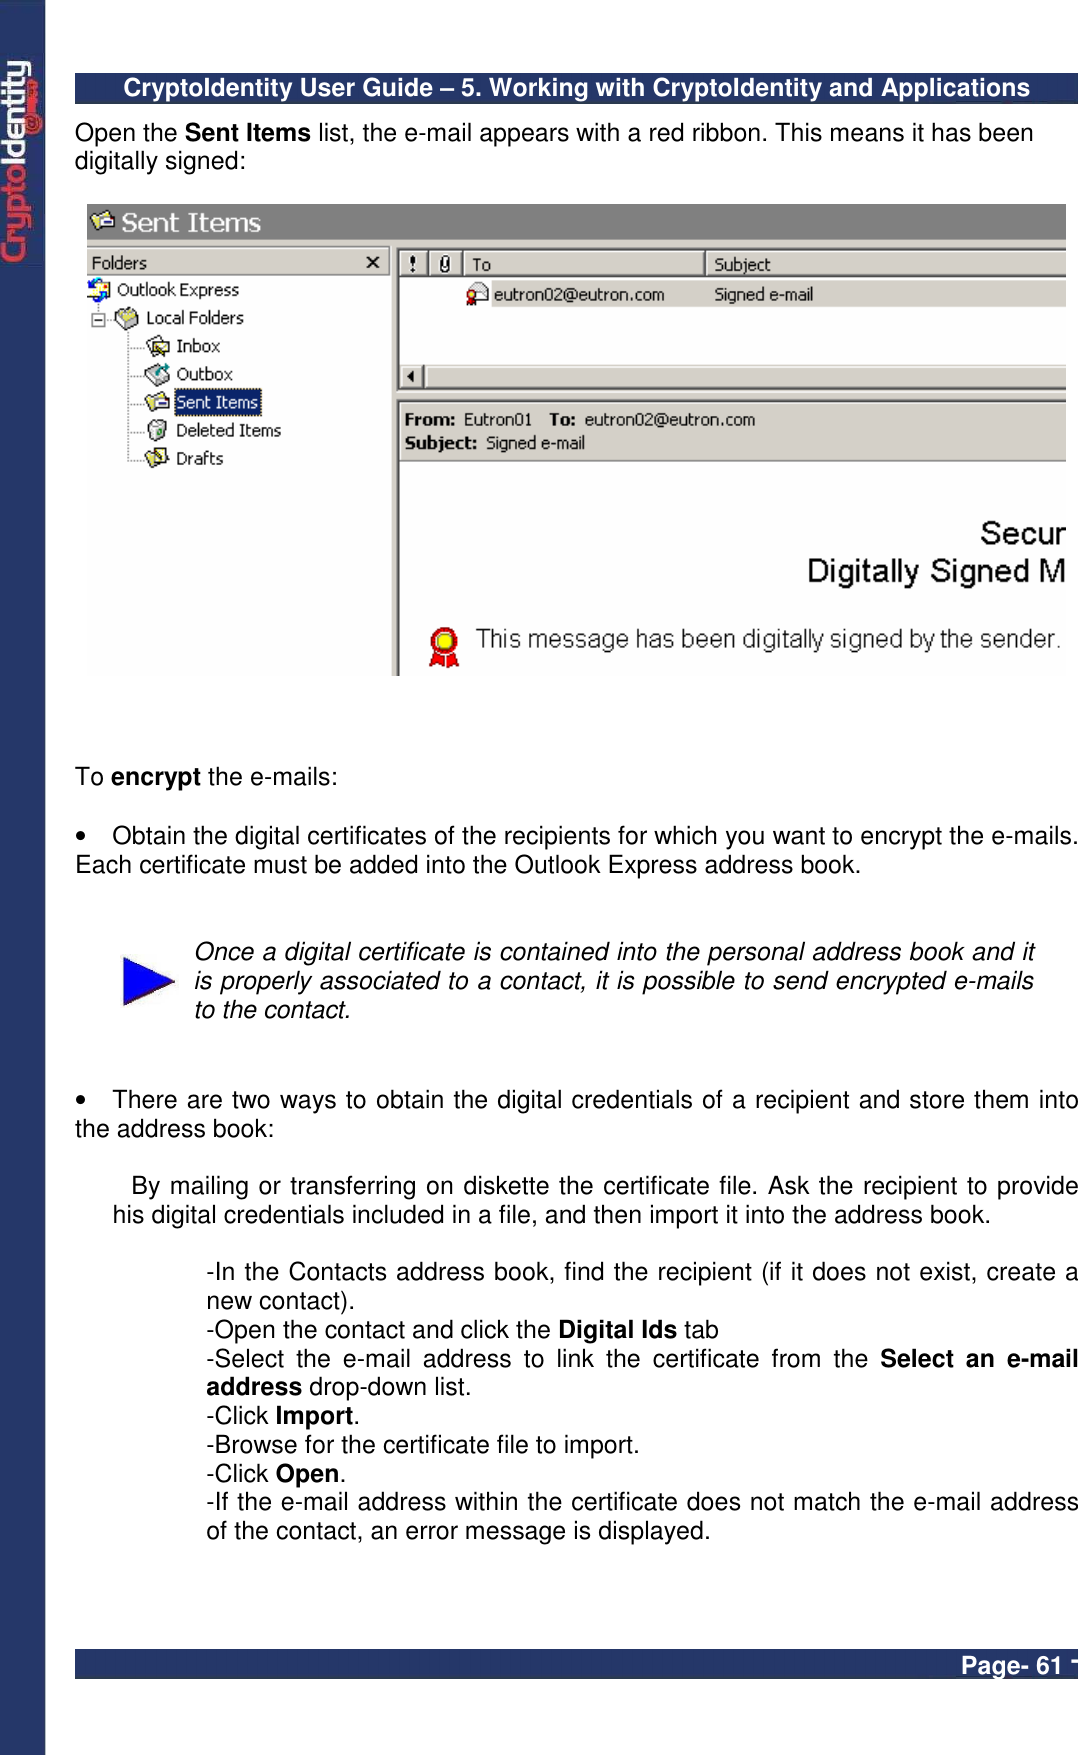
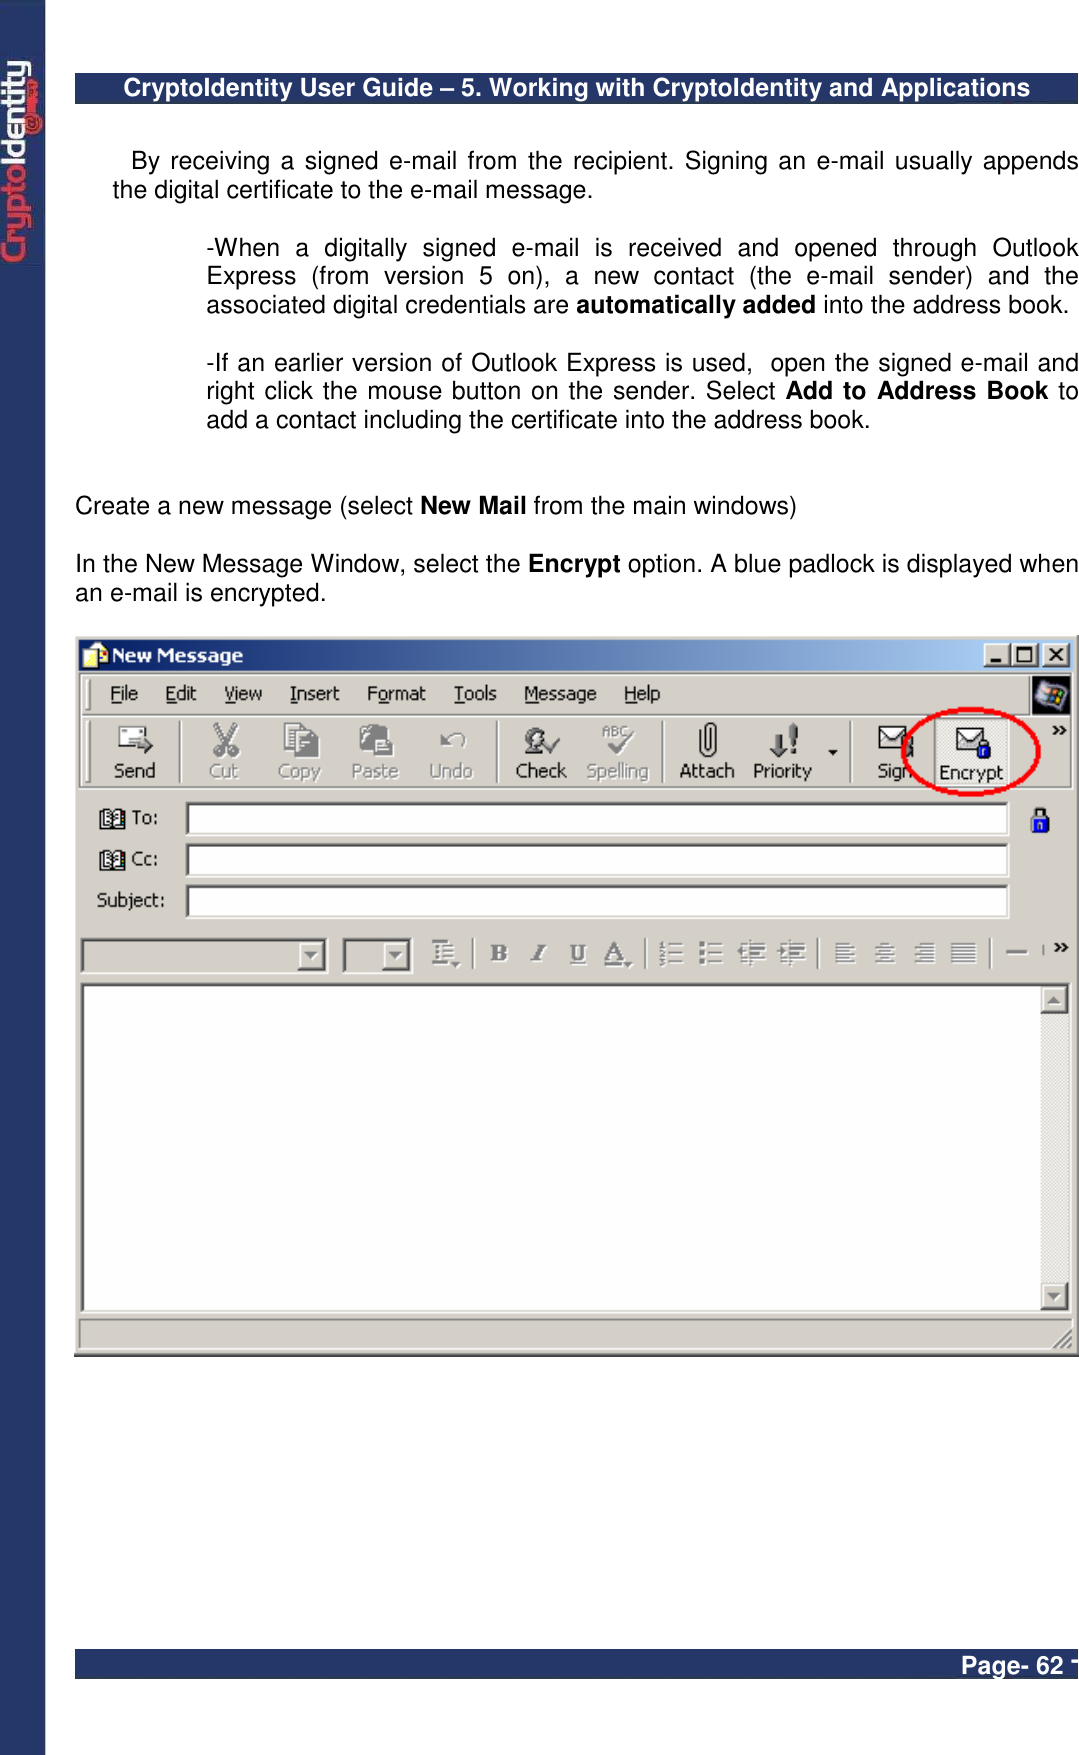
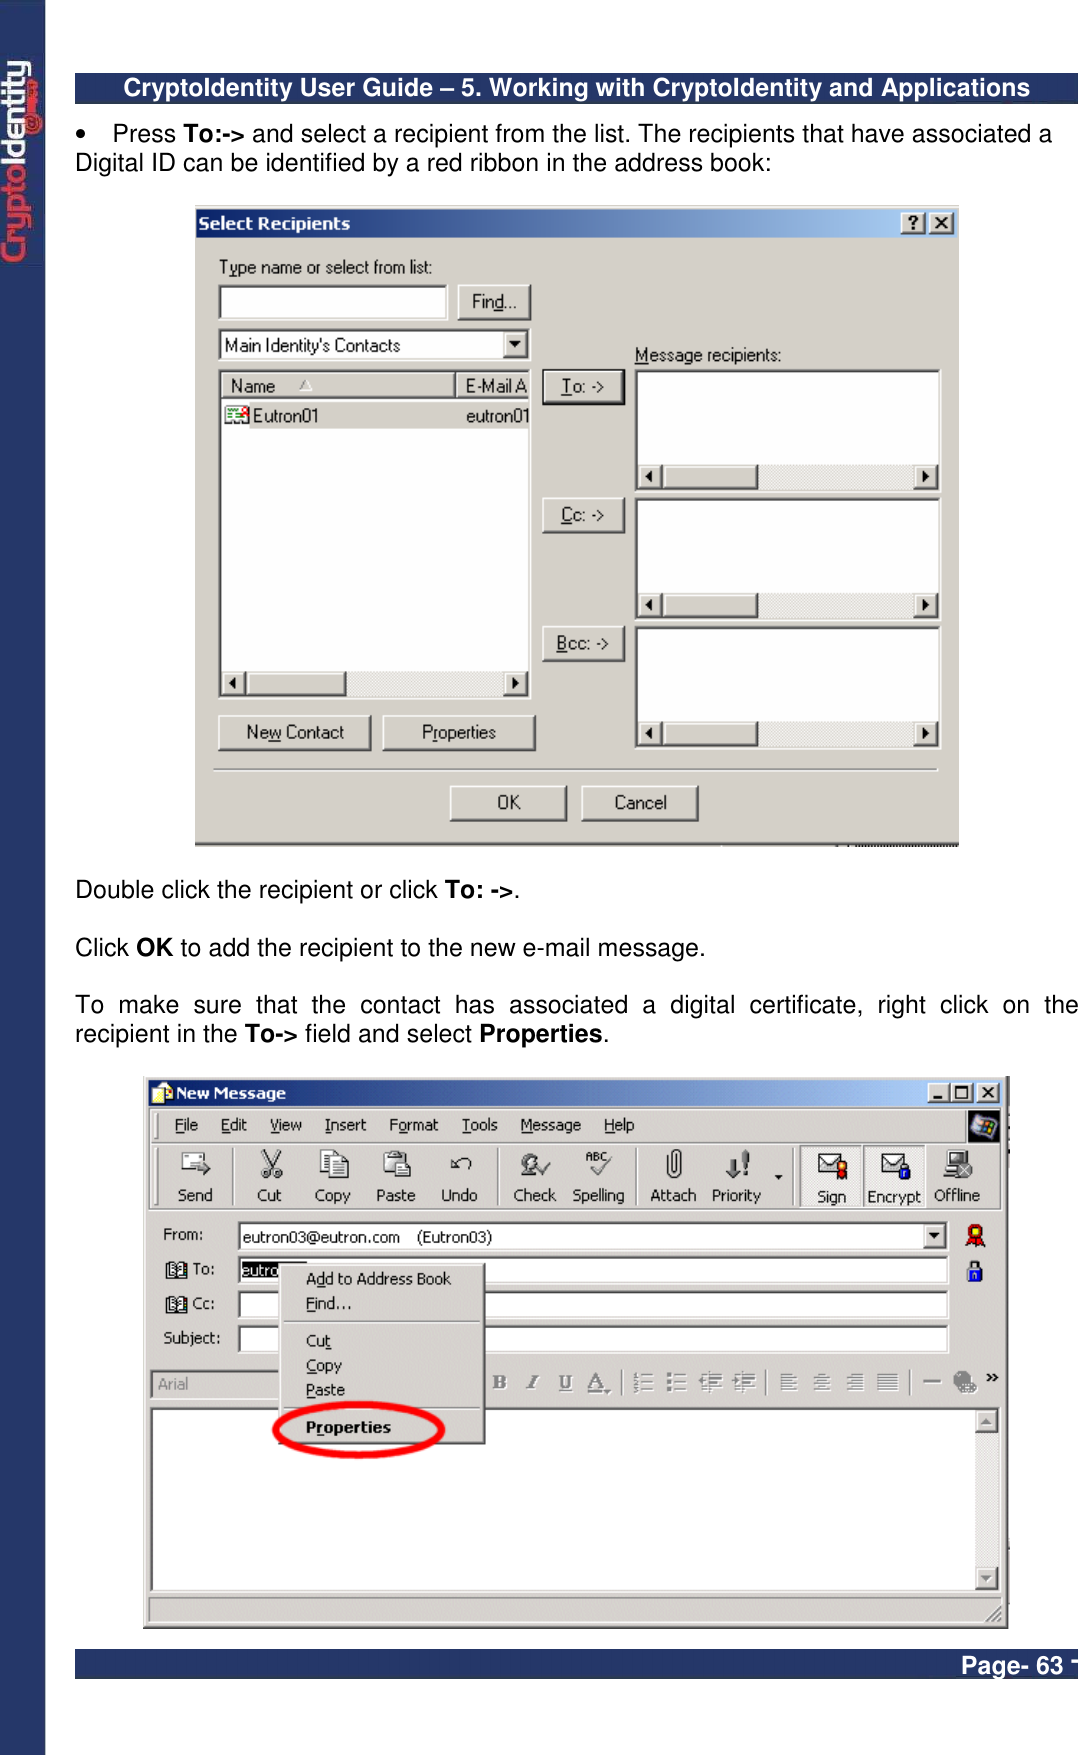

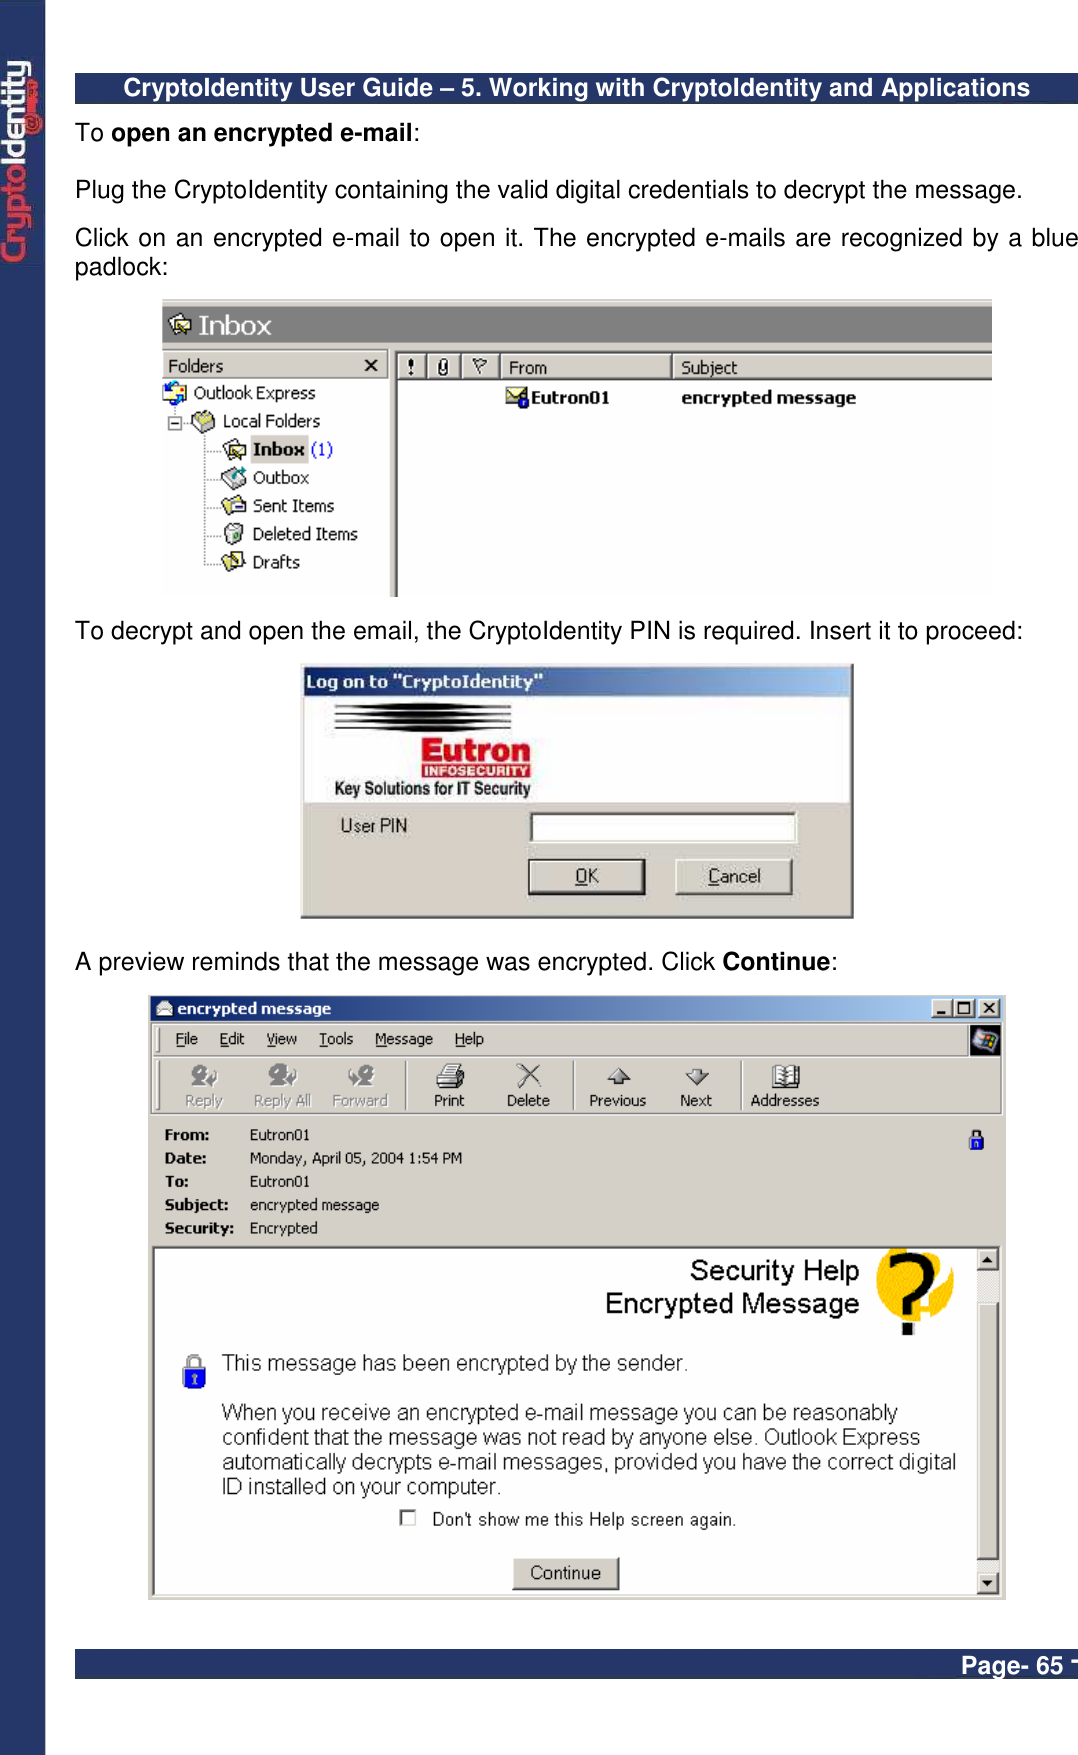
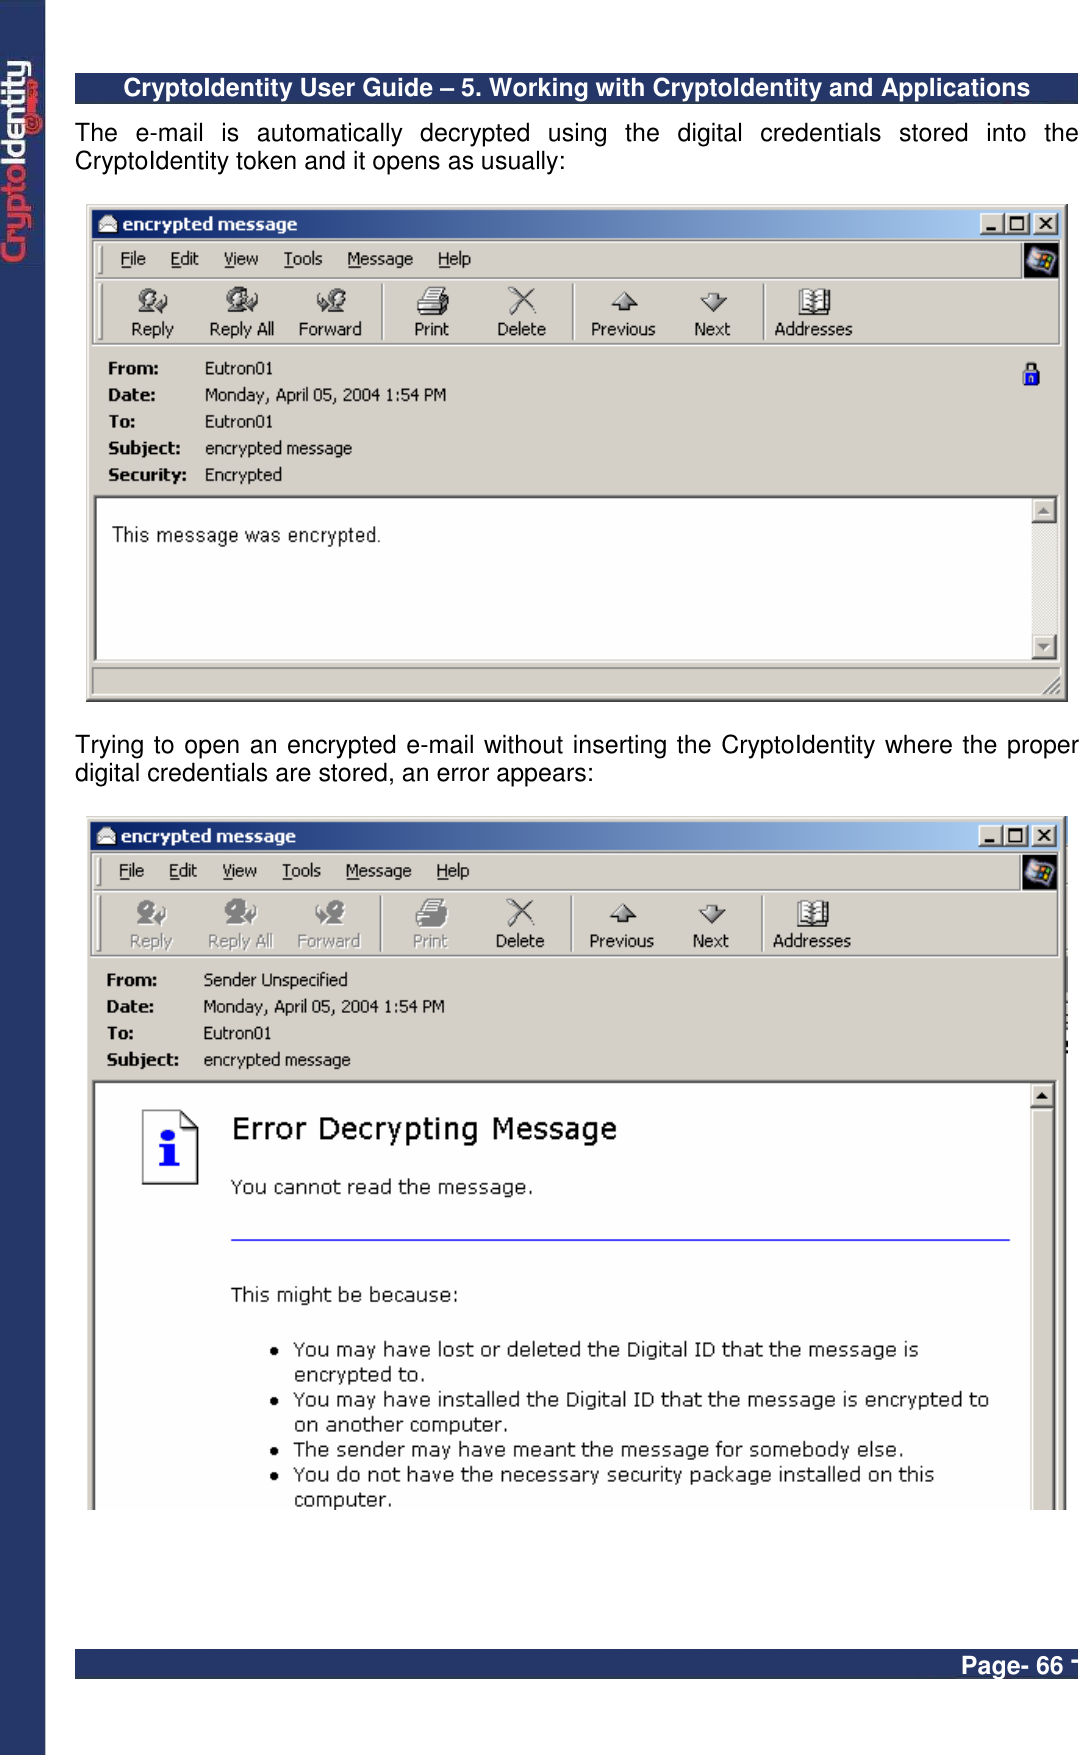
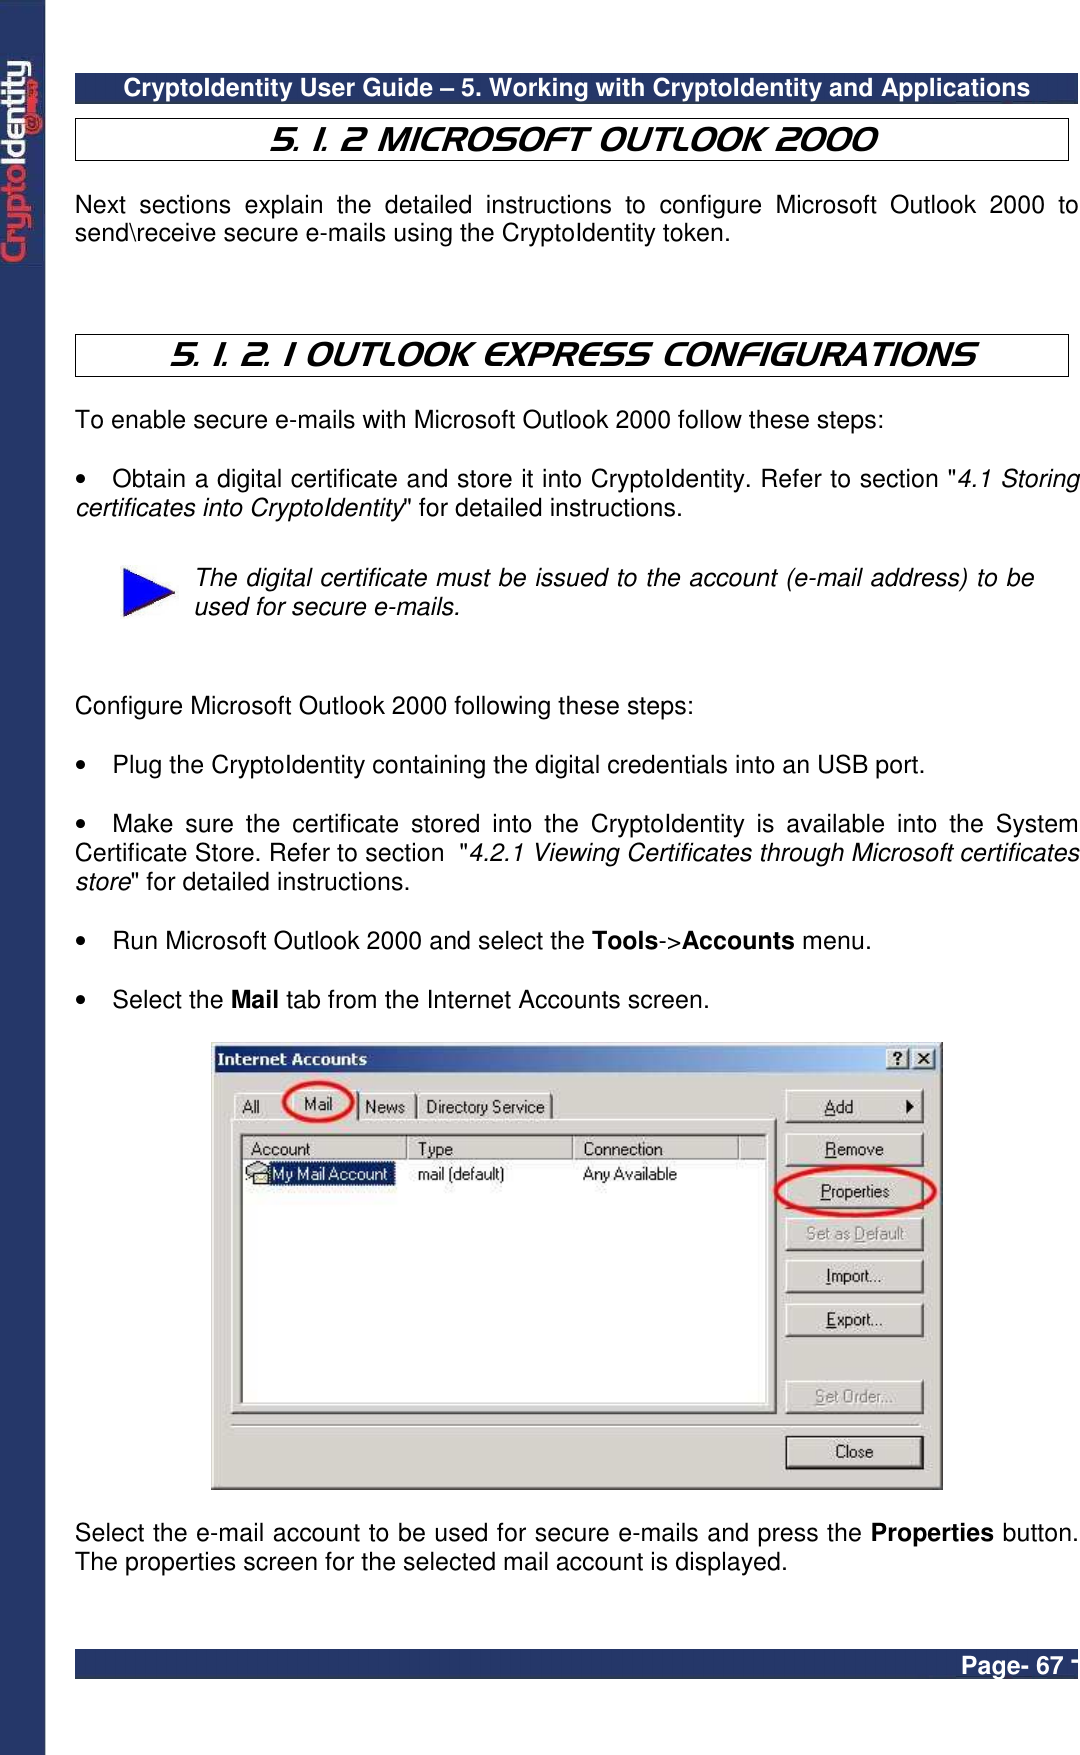
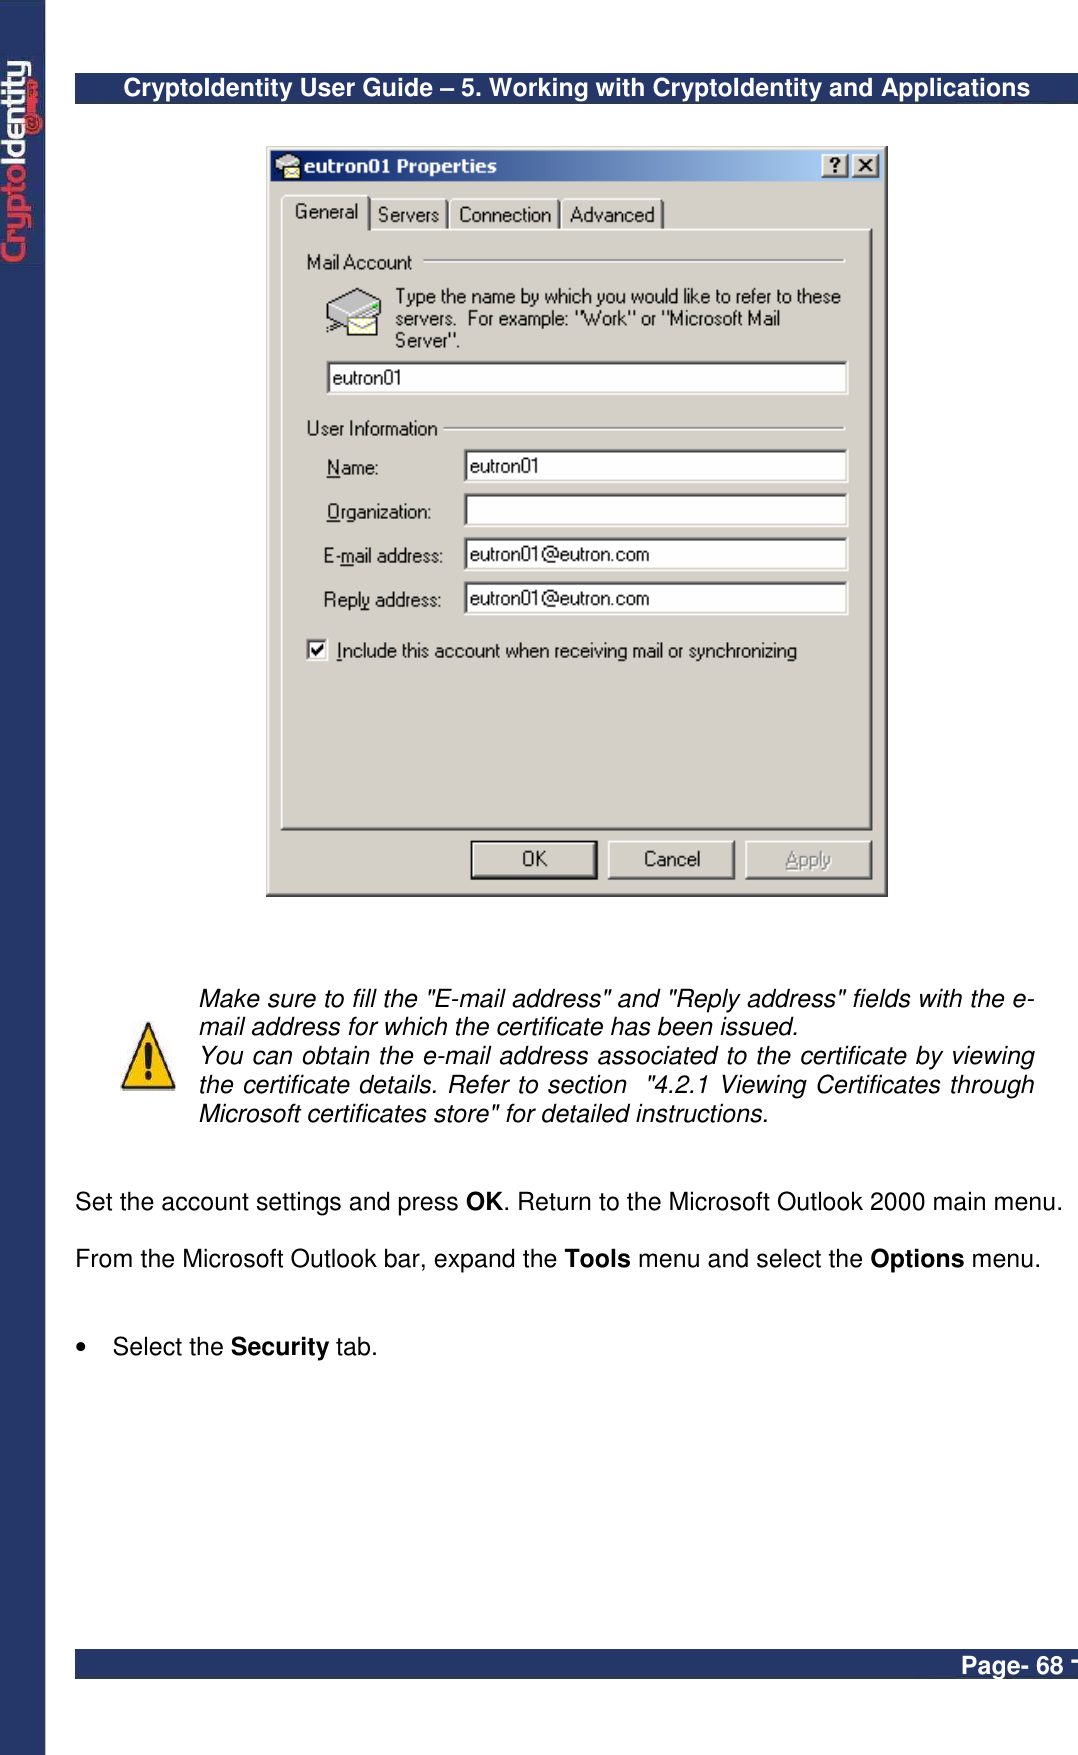
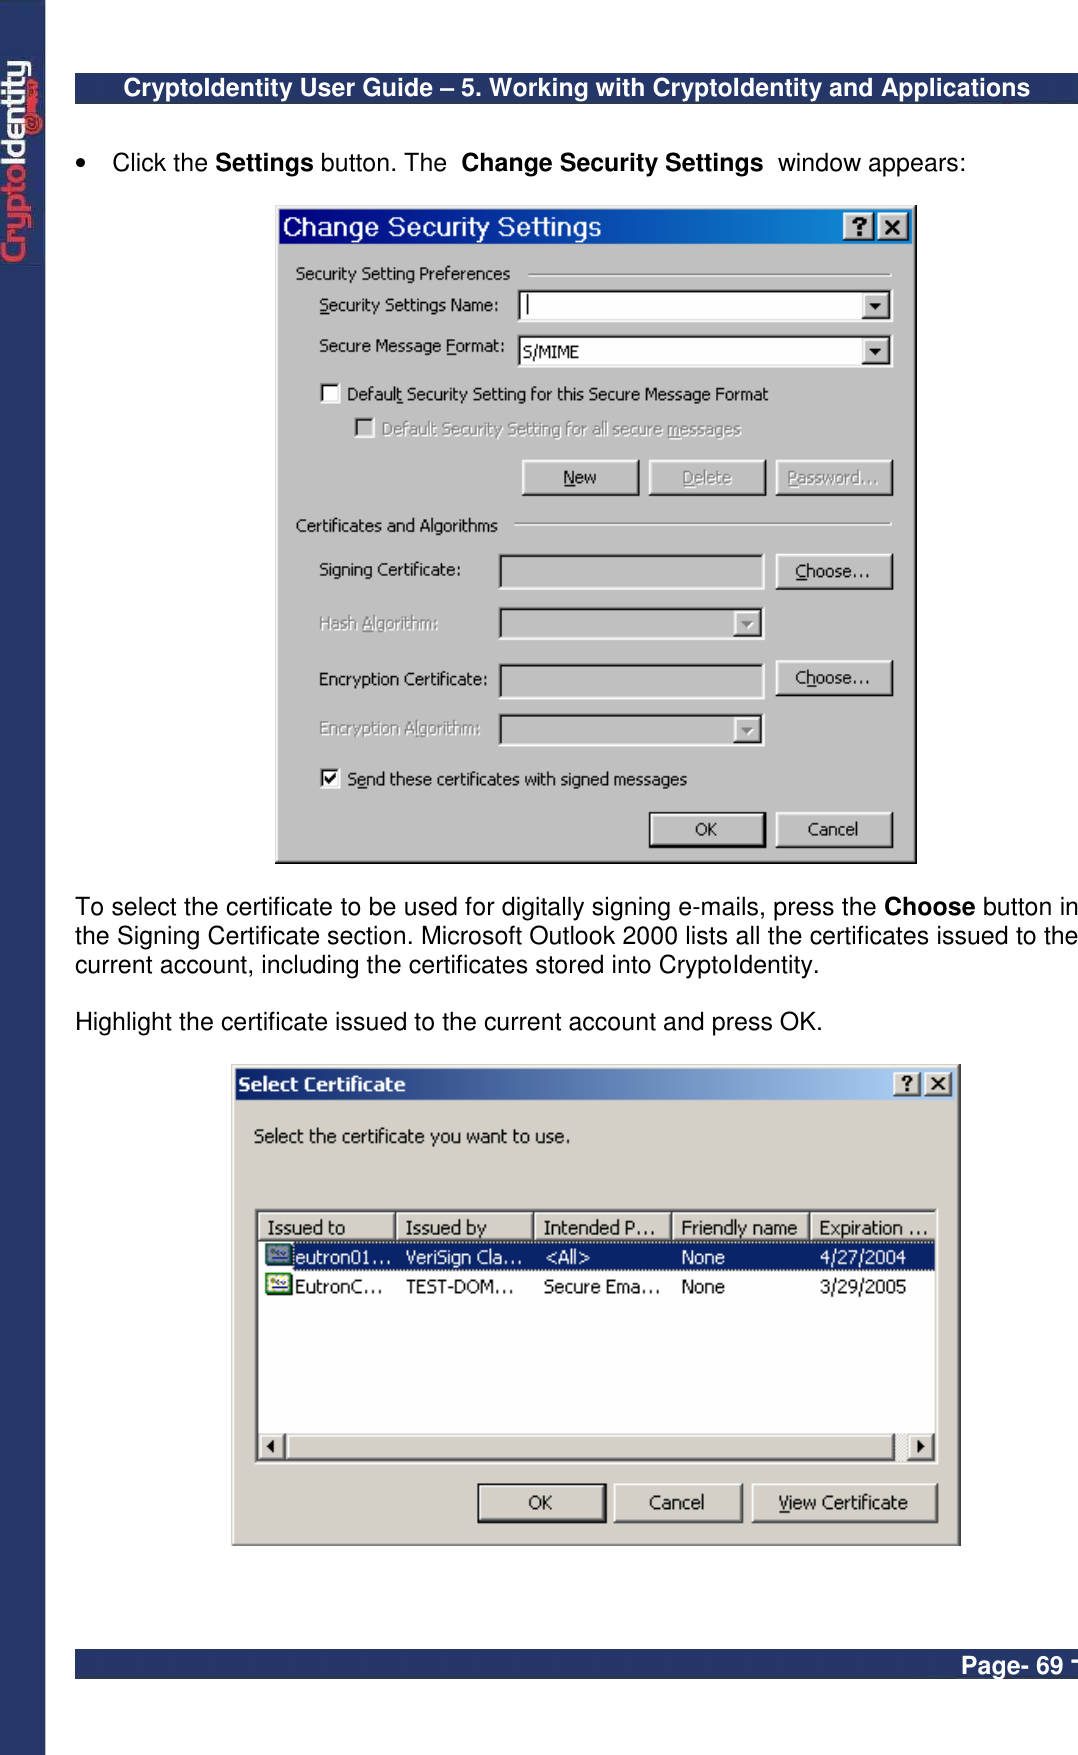
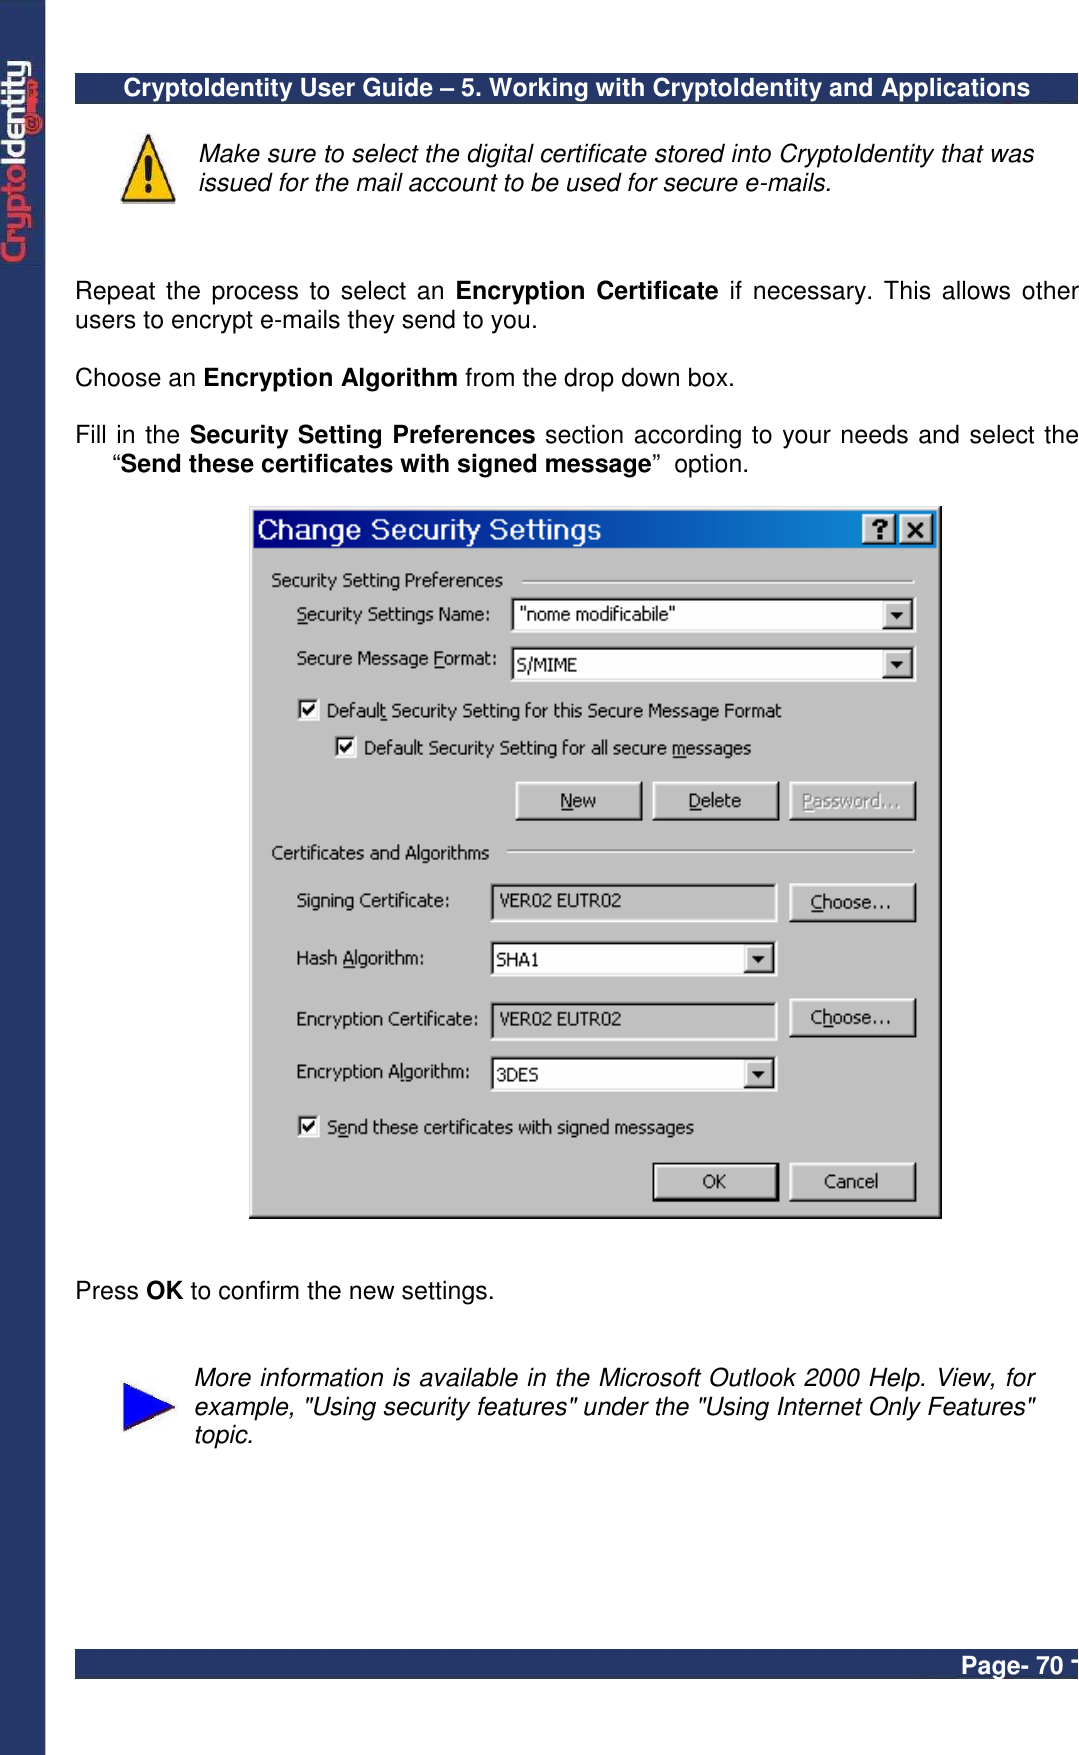
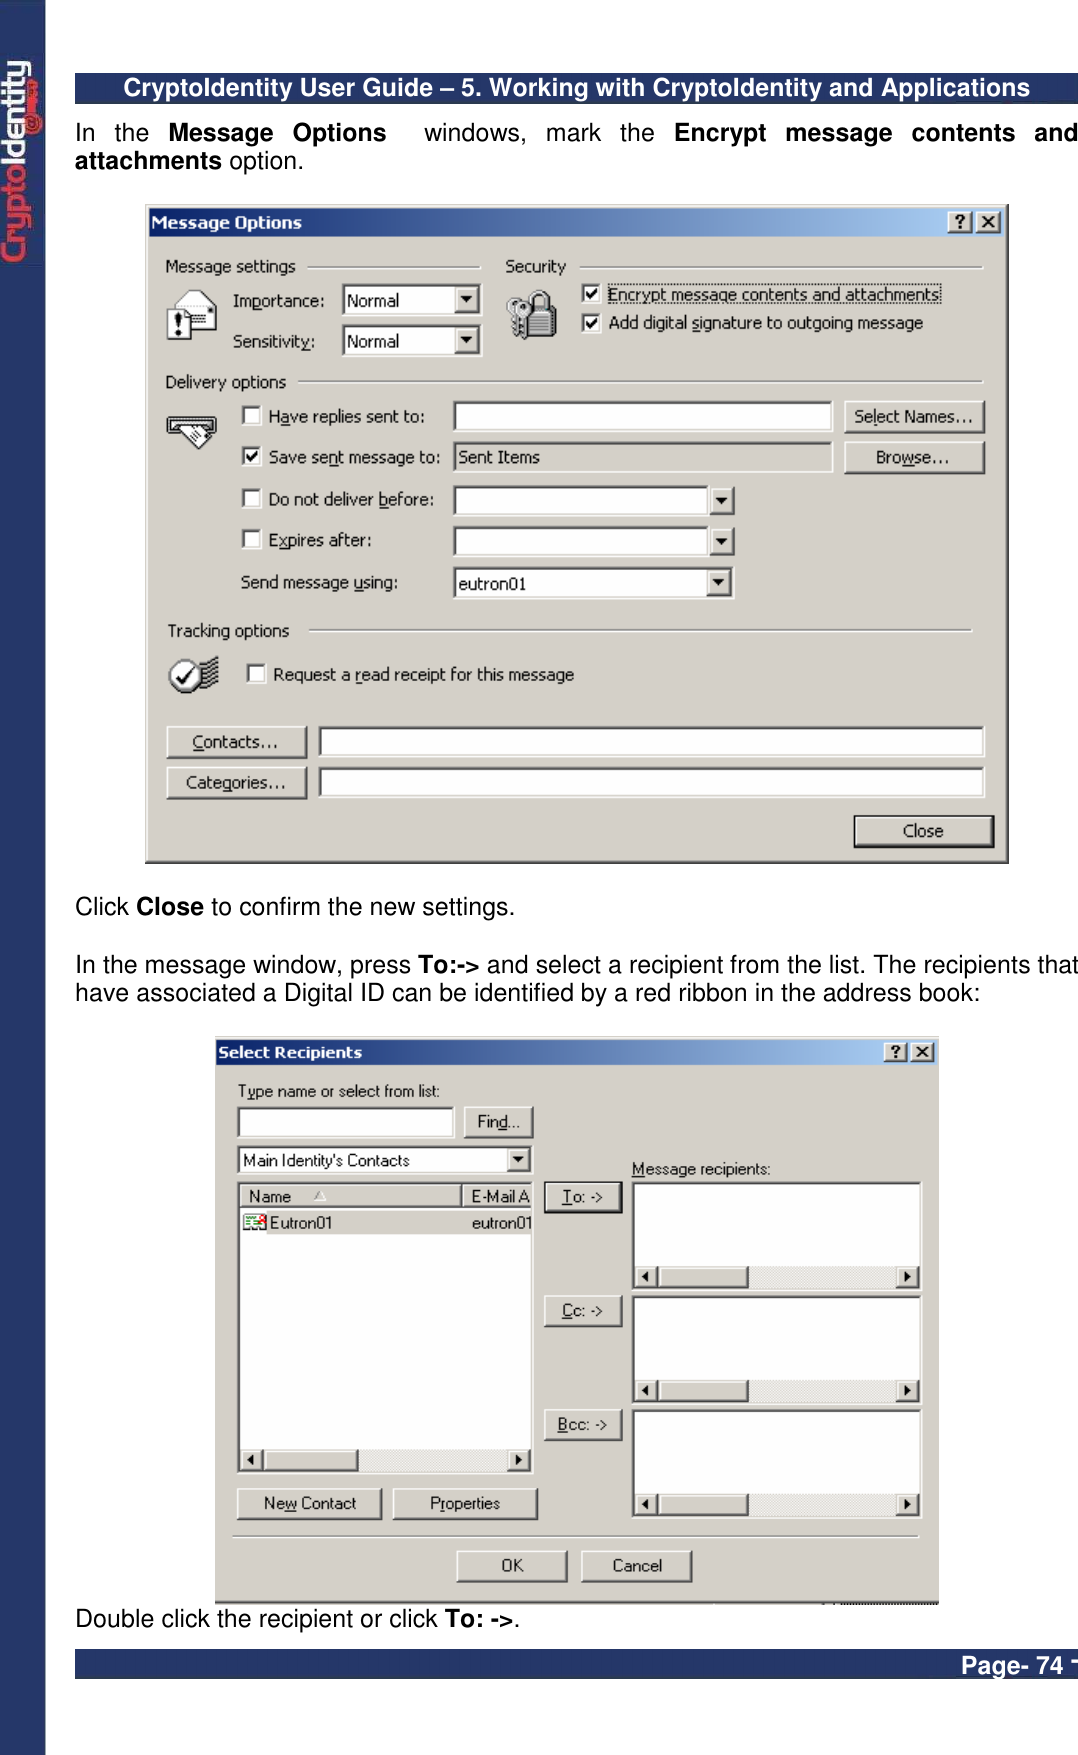
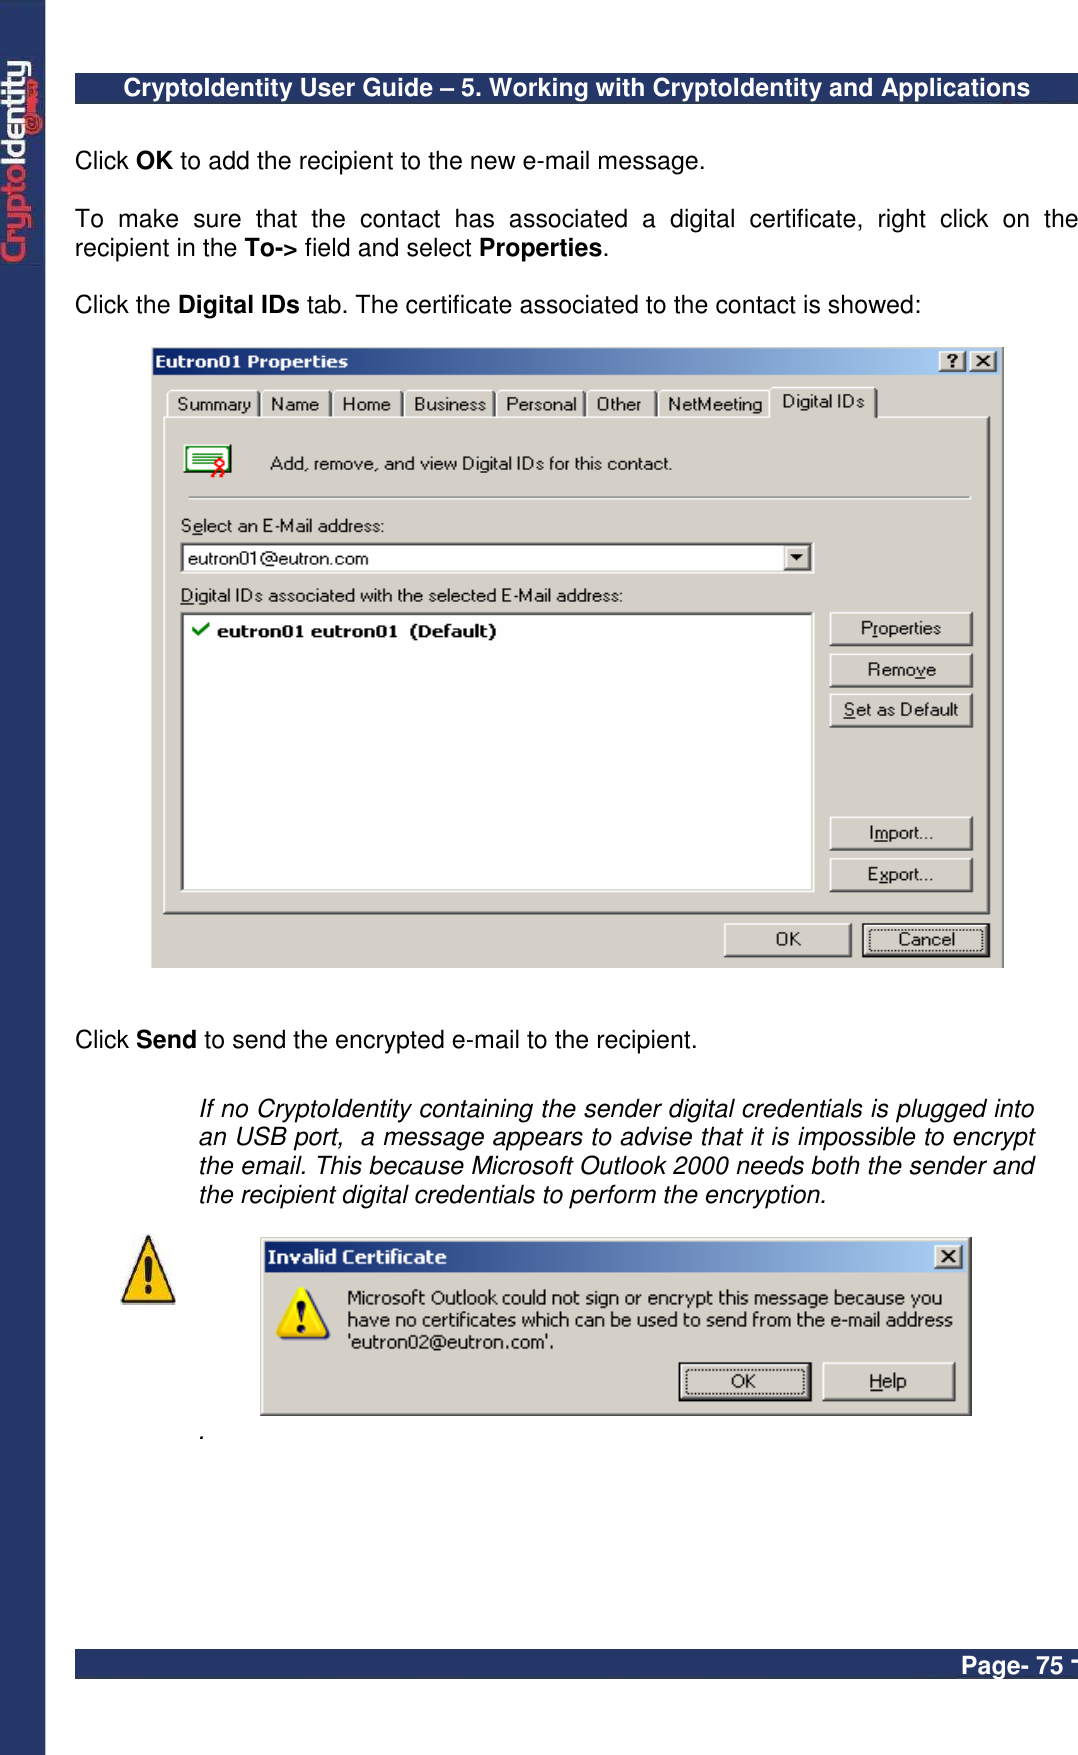
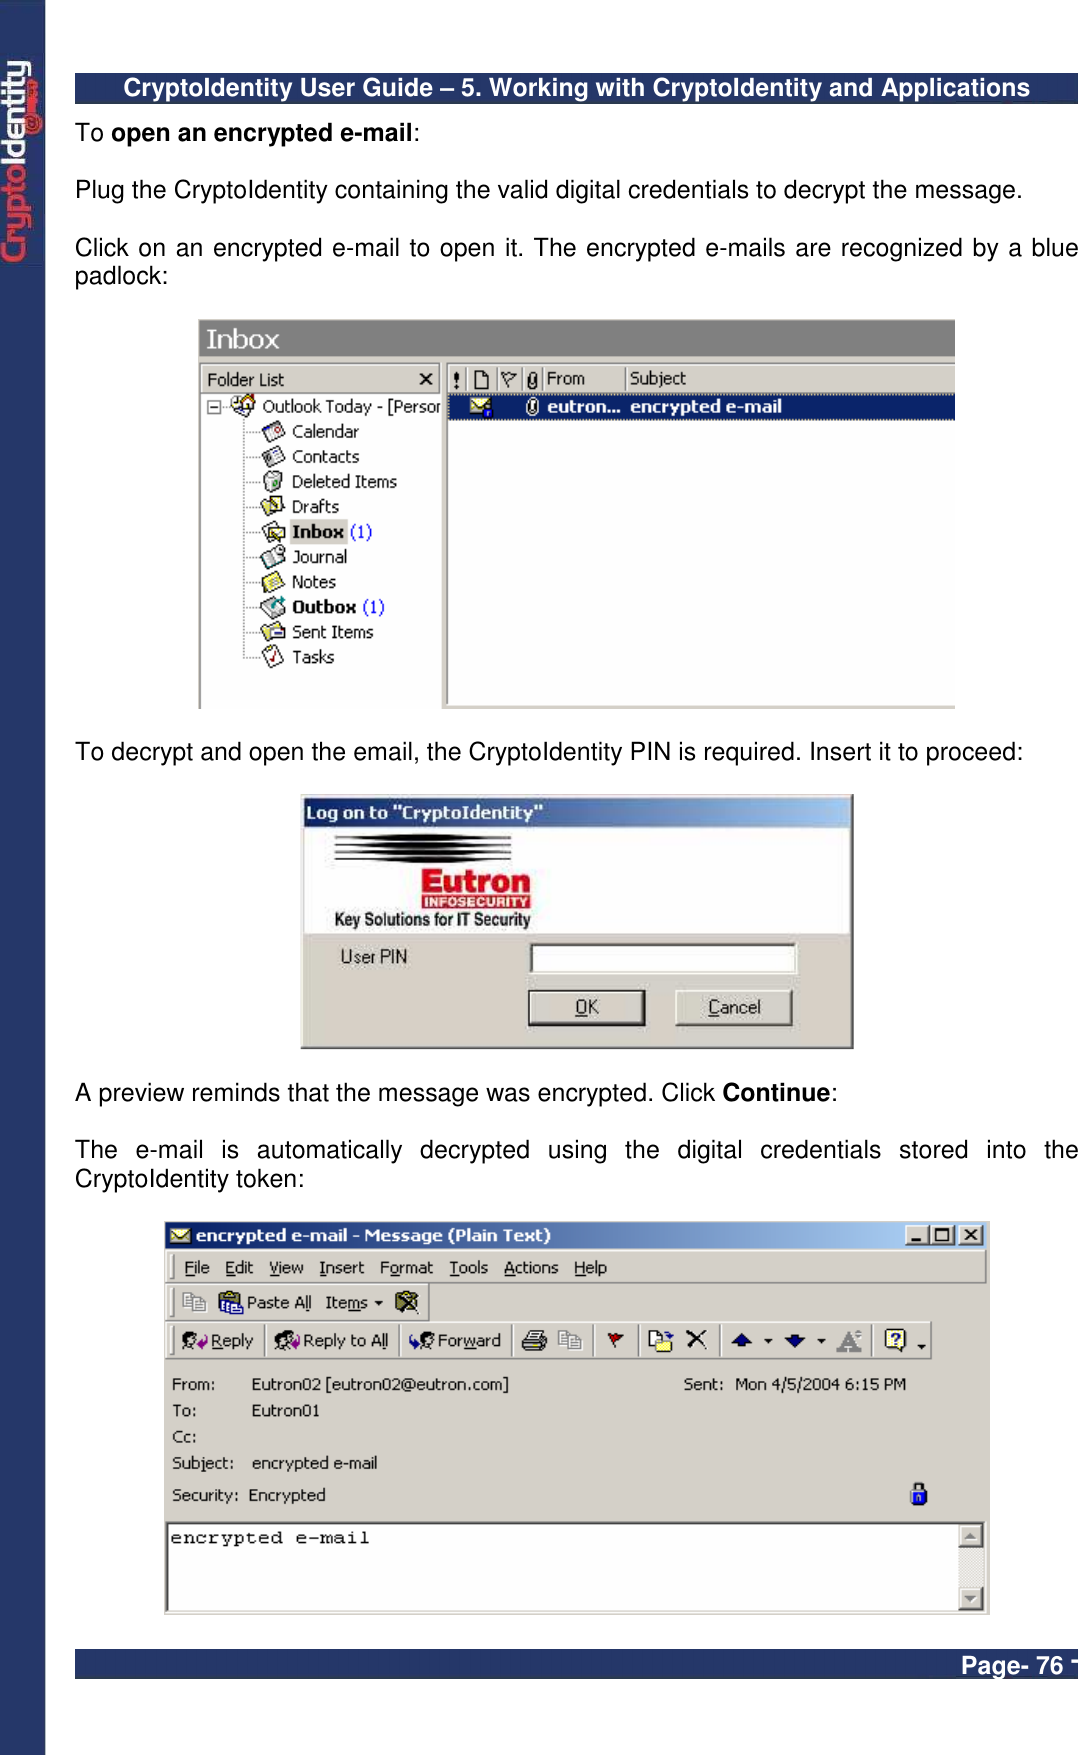
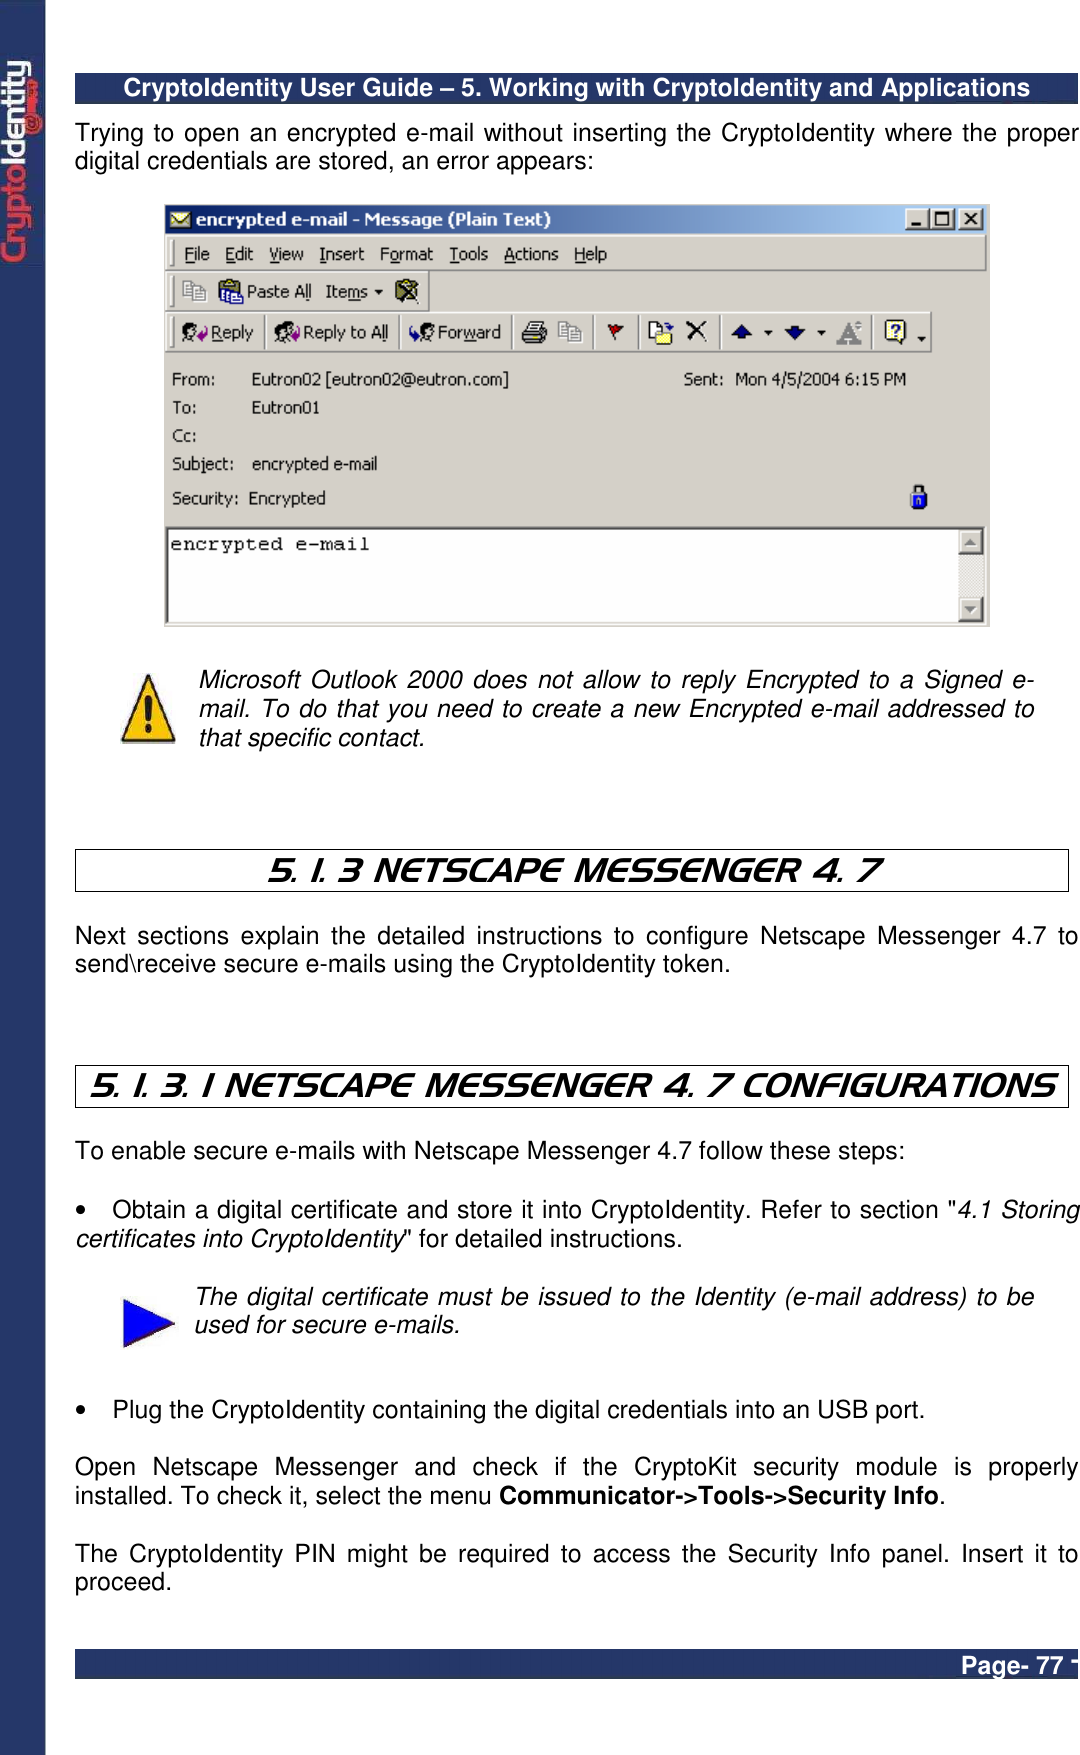
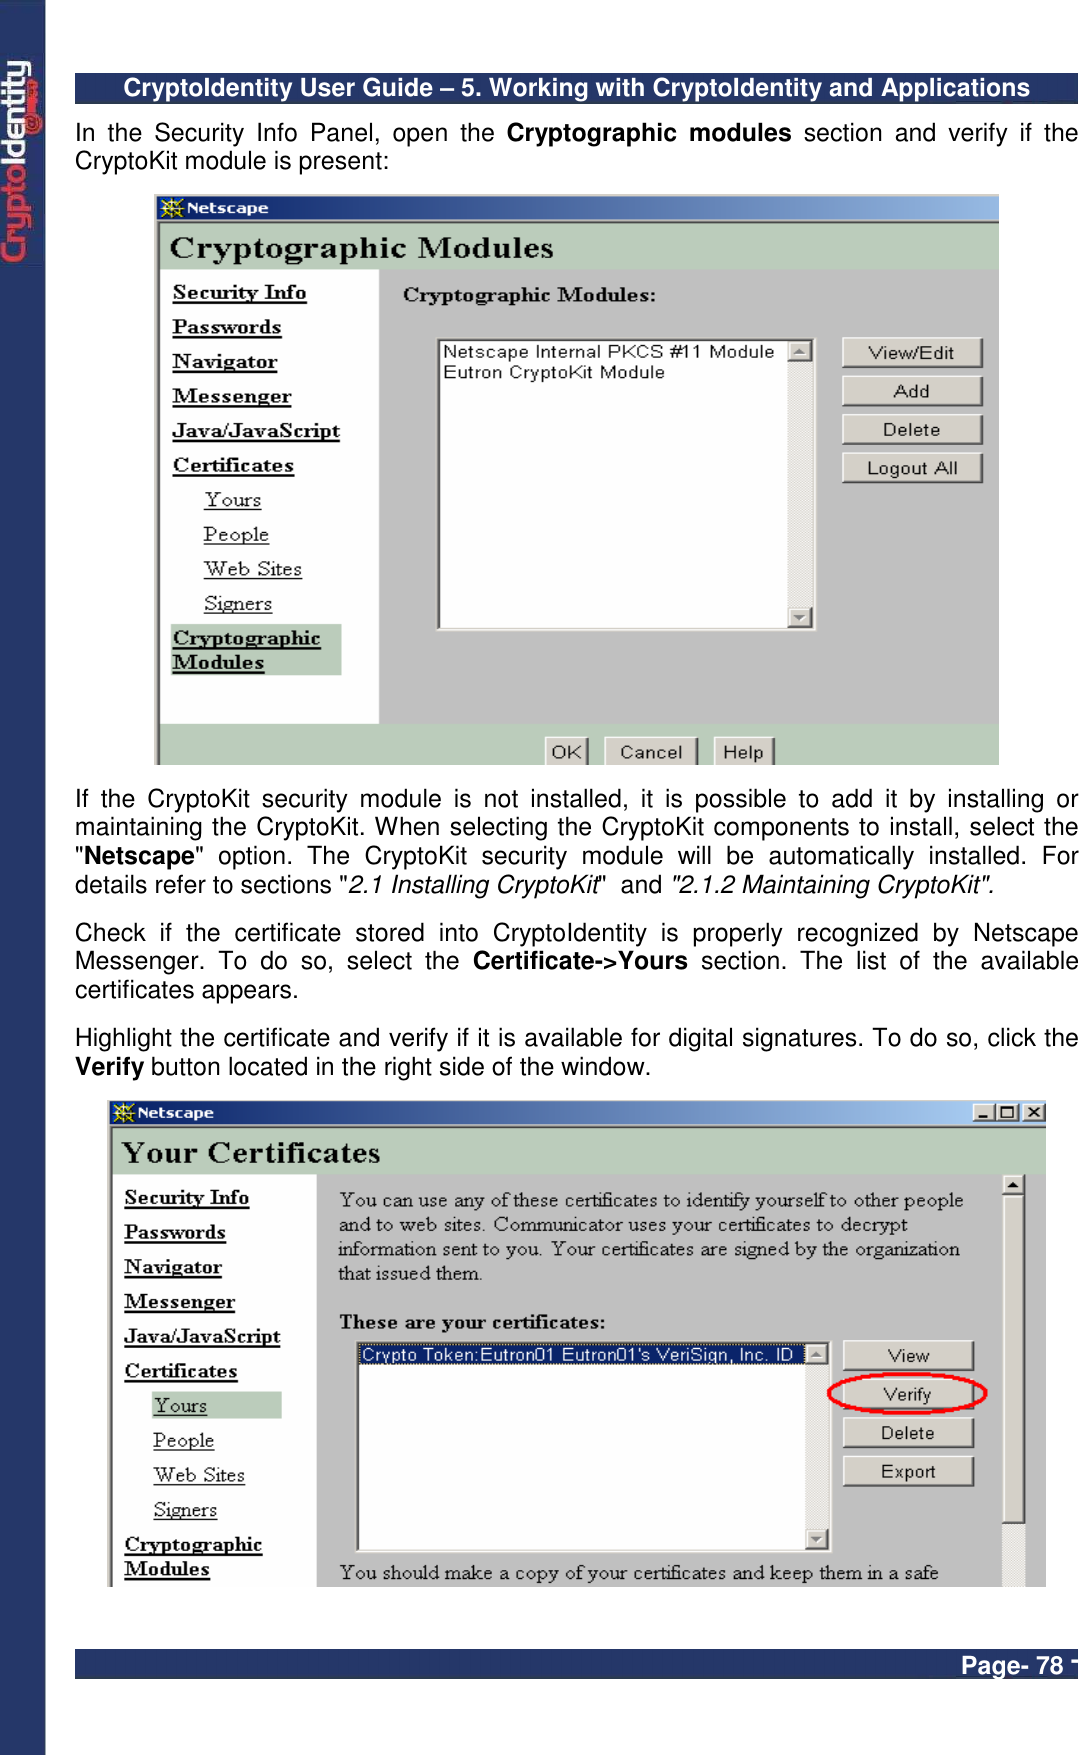
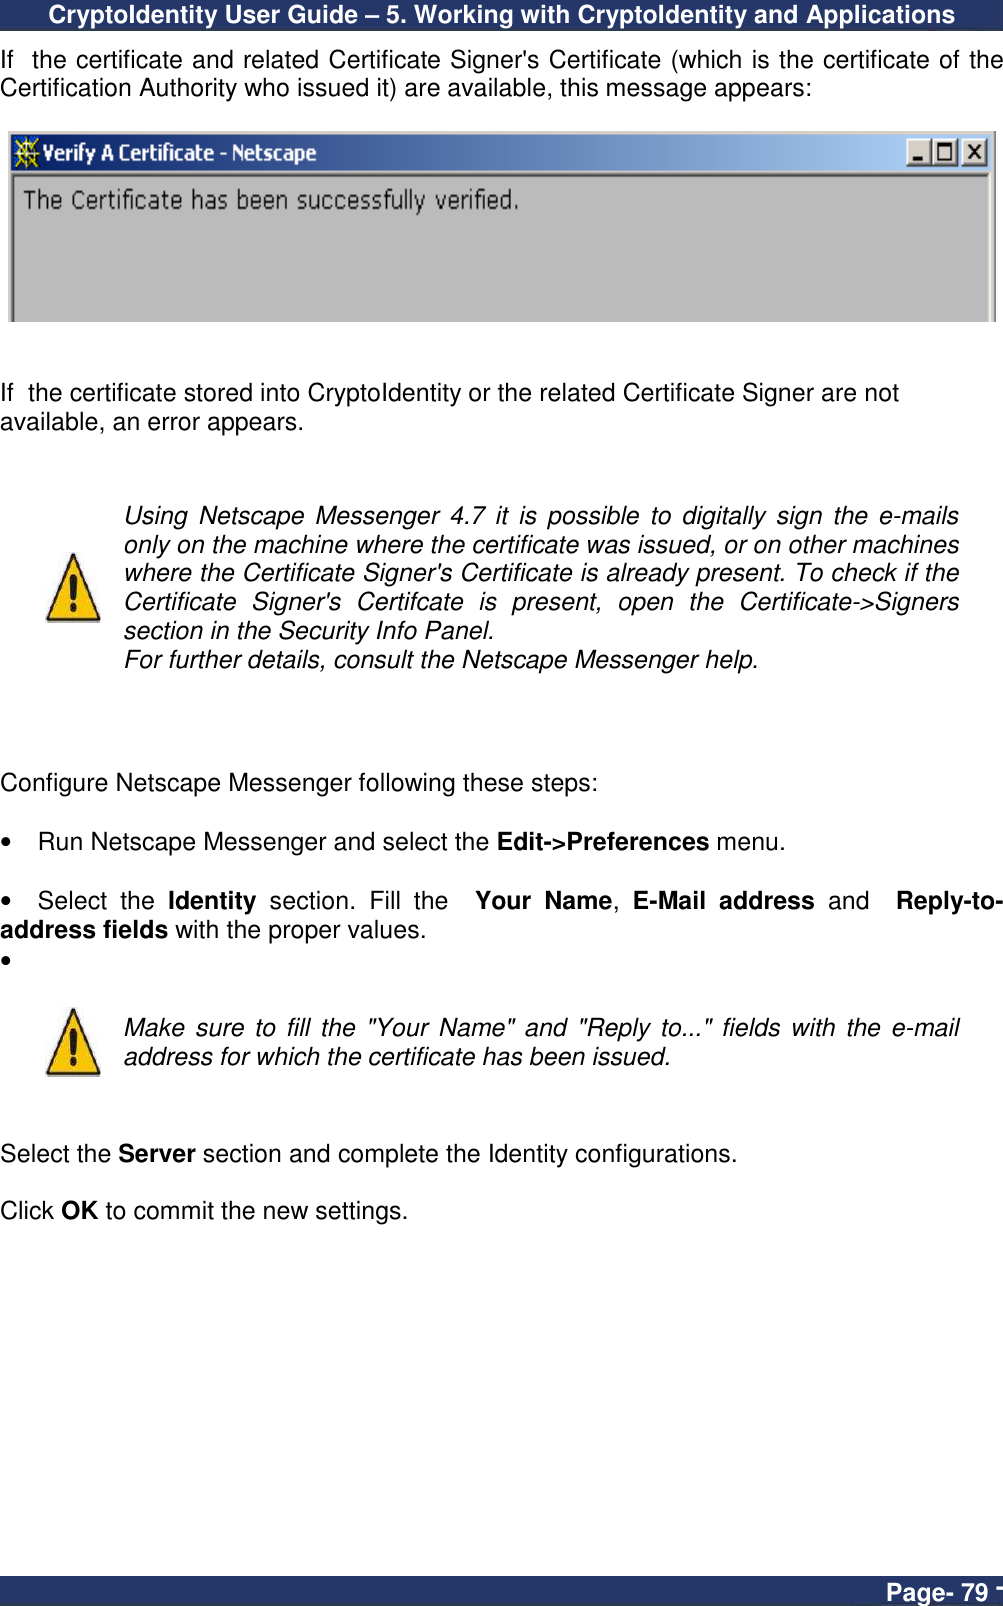
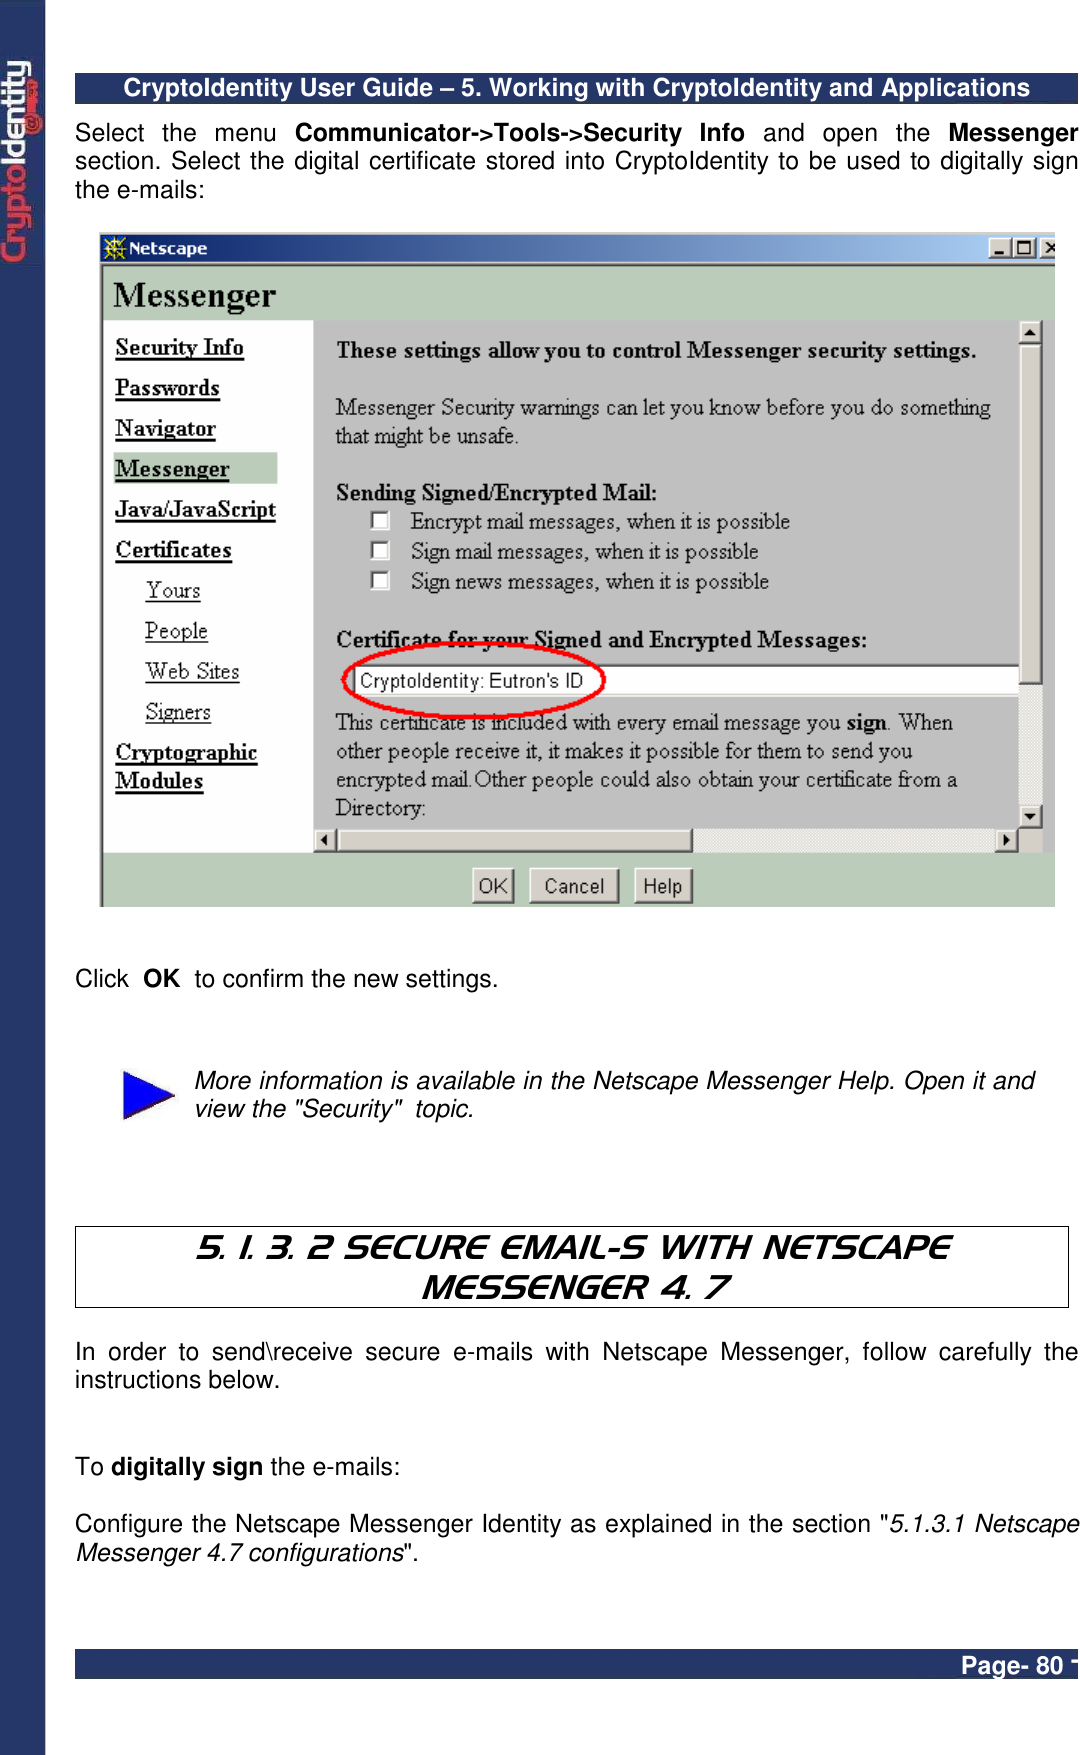
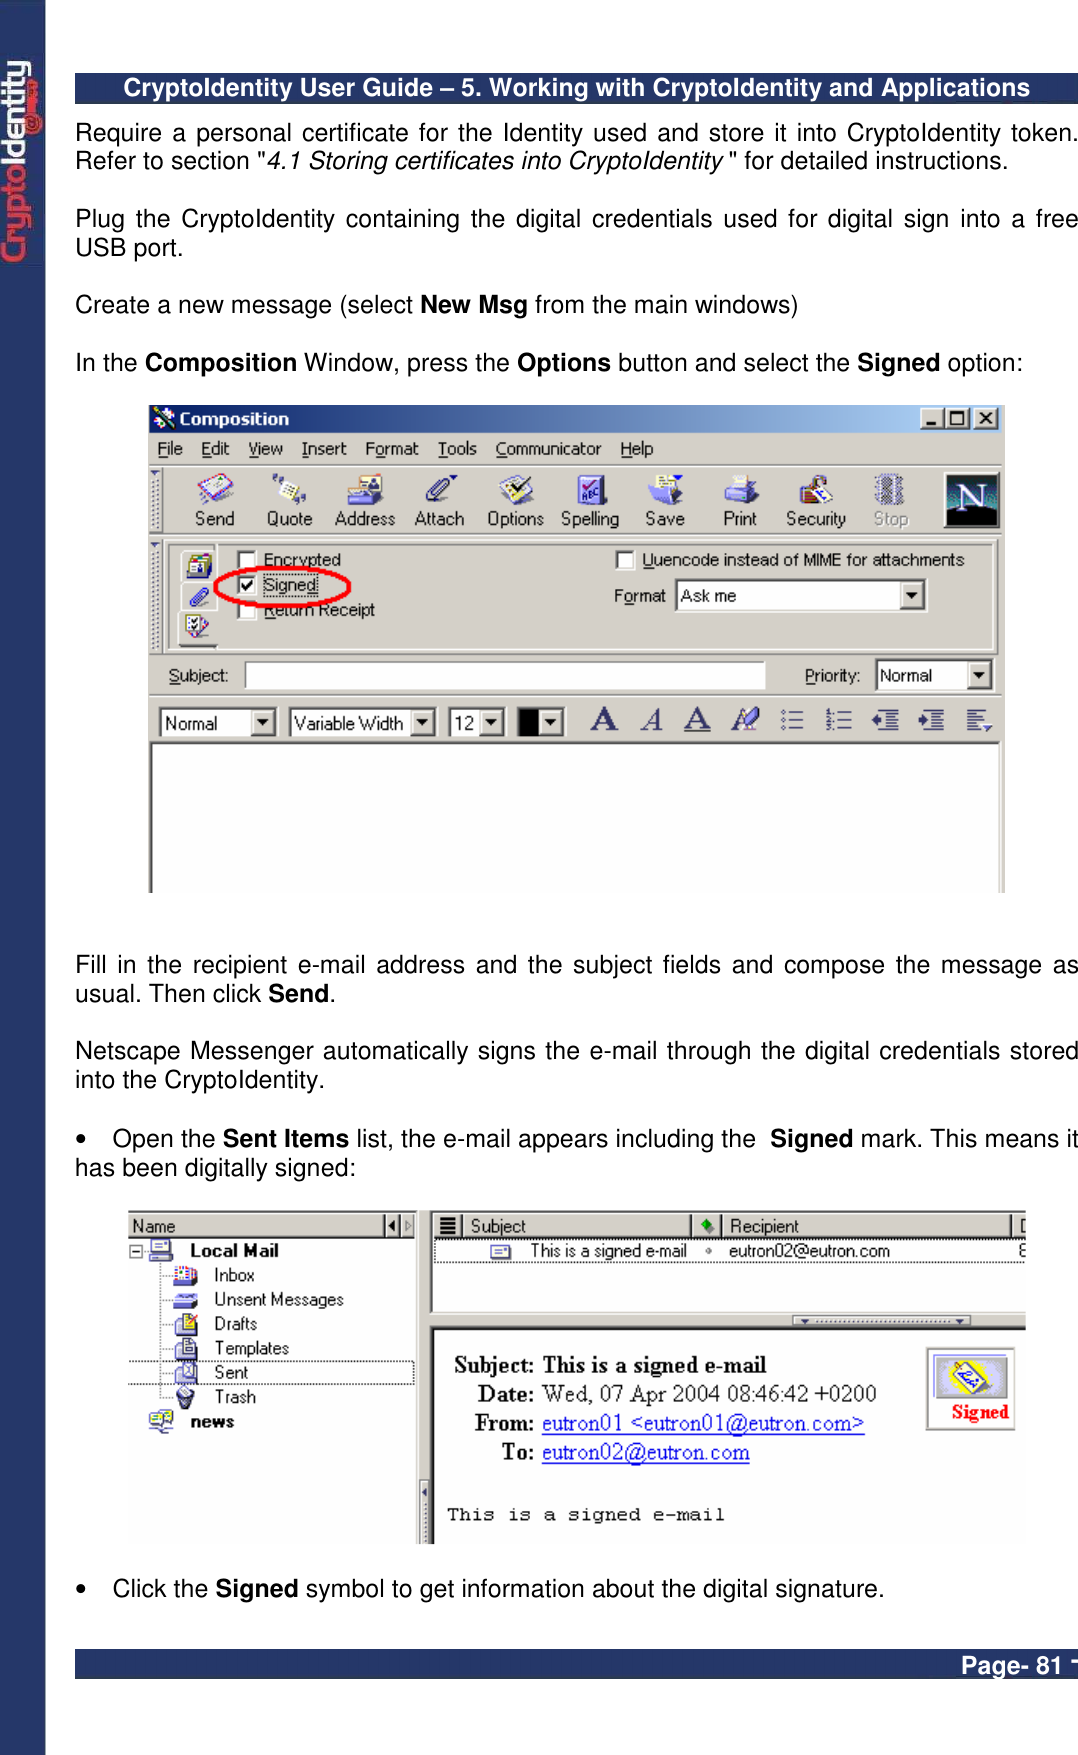

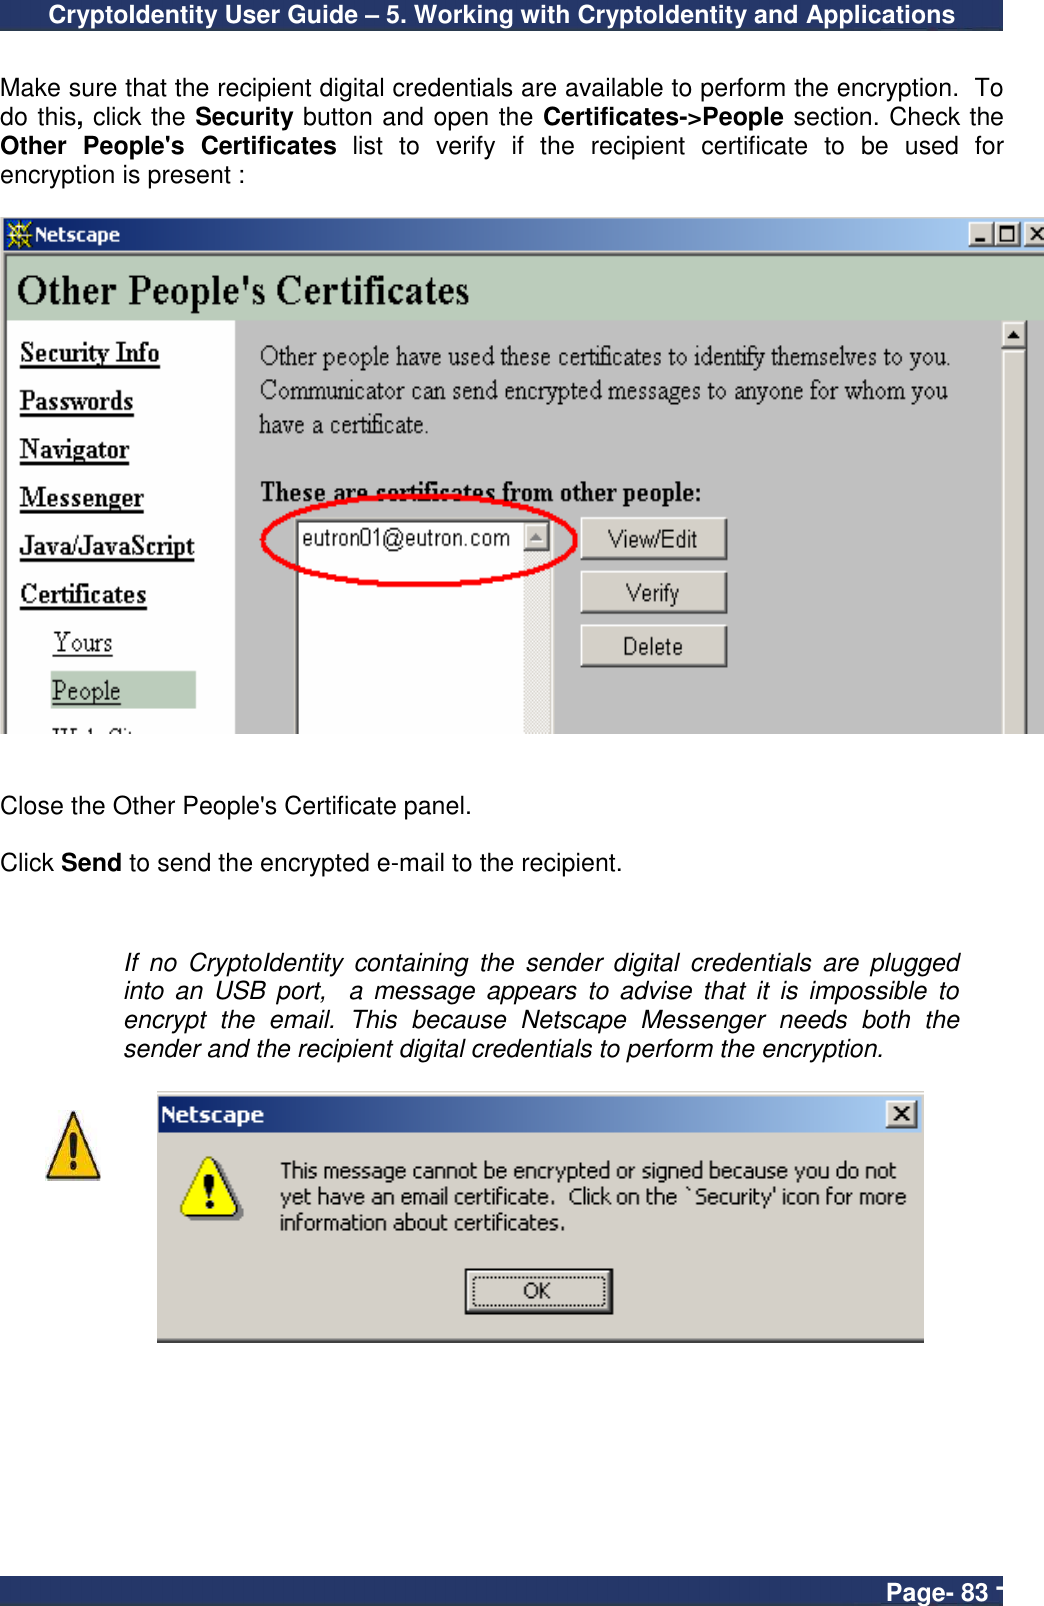
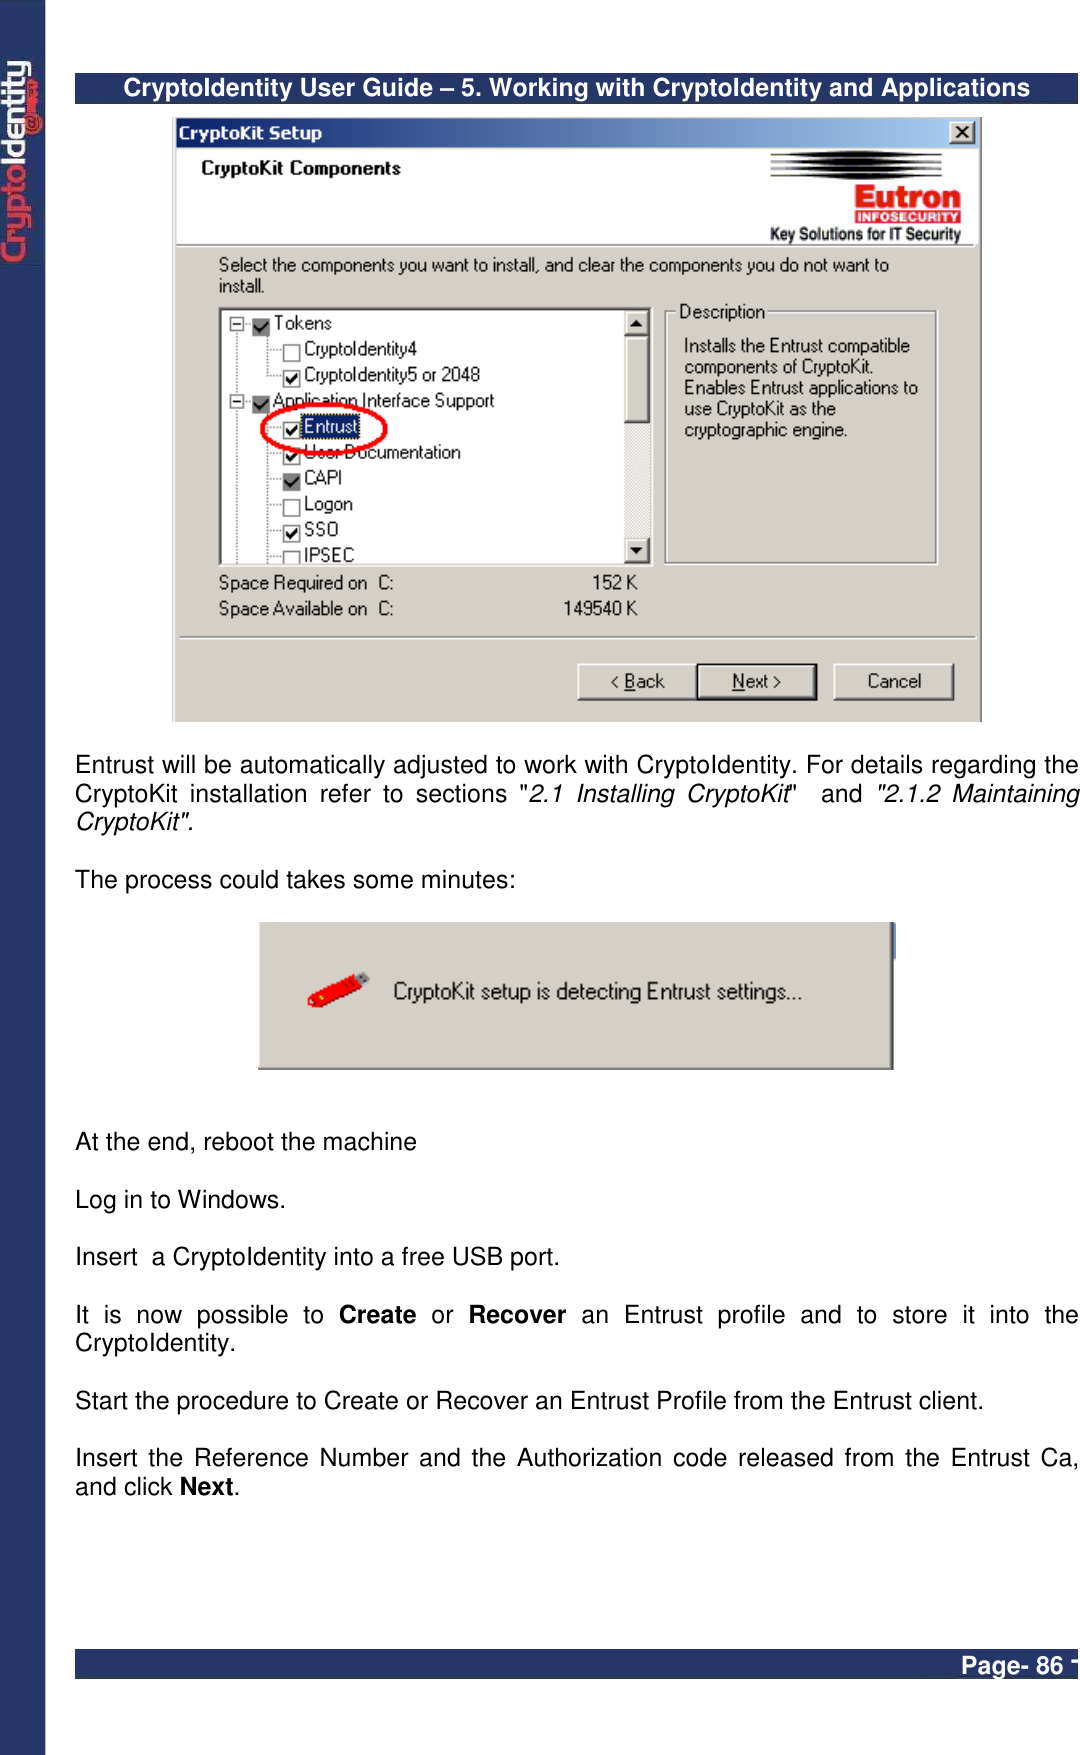
![CryptoIdentity User Guide – 5. Working with CryptoIdentity and Applications Page- 85 - 5. 2 MICROSOFT VPN To authenticate to a Microsoft VPN using digital credentials stored into a CryptoIdentity token, please refer to the "Microsoft VPN PPTP with CryptoKit" guide (file "CK_VPN_PPTP.pdf") located in the "<CRYPTOKIT INSTALL DIR>\doc" folder. 5. 3 MICROSOFT SMARTCARD LOGON To authenticate to a LAN through Microsoft Smartcard logon and CryptoIdentity, please refer to the "CryptoIdentity for Windows 2000/XP Token Logon" guide (file "CryptoIdentityLogon.pdf") located in the "<CRYPTOKIT INSTALL DIR>\doc" folder. 5. 4 PKI PRODUCTS CryptoIdentity support several PKI infrastructures. Next section explains the instructions to configure Entrust. For other PKIs, please send an e-mail to helpdesk@eutron.com to obtain help for configurations. 5. 4. 1 ENTRUST To allow Entrust to take advantage of the CryptoIdentity functionalities, follow carefully the following instructions. Install the Entrust client on the machine and choose to NOT create a new profile. Reboot the machine and enter Windows. Search on your hard-drive the "entrust.ini" file. It includes the Entrust parameters. Edit it, and set the [FIPS MODE]->FipsMode parameter to 0: Install CryptoKit. If CryptoKit was already installed, it is possible to maintain it. During CryptoKit setup, choose the "Entrust" option in the components to install:](https://usermanual.wiki/EUTRONSEC-S-p-A/AAC/User-Guide-766650-Page-85.png)