EVIEW TECHNOLOGY EV-07S GPS Tracker User Manual GPS GSM VEHICLE TRACKING SYSTEM
SHENZHEN EVIEW TECHNOLOGY CO.LTD GPS Tracker GPS GSM VEHICLE TRACKING SYSTEM
Users Manual
GPS tracking system
- 1 -
USER GUIDE
GPS TRACKING SYSTEM
GPS tracking system
- 2 -
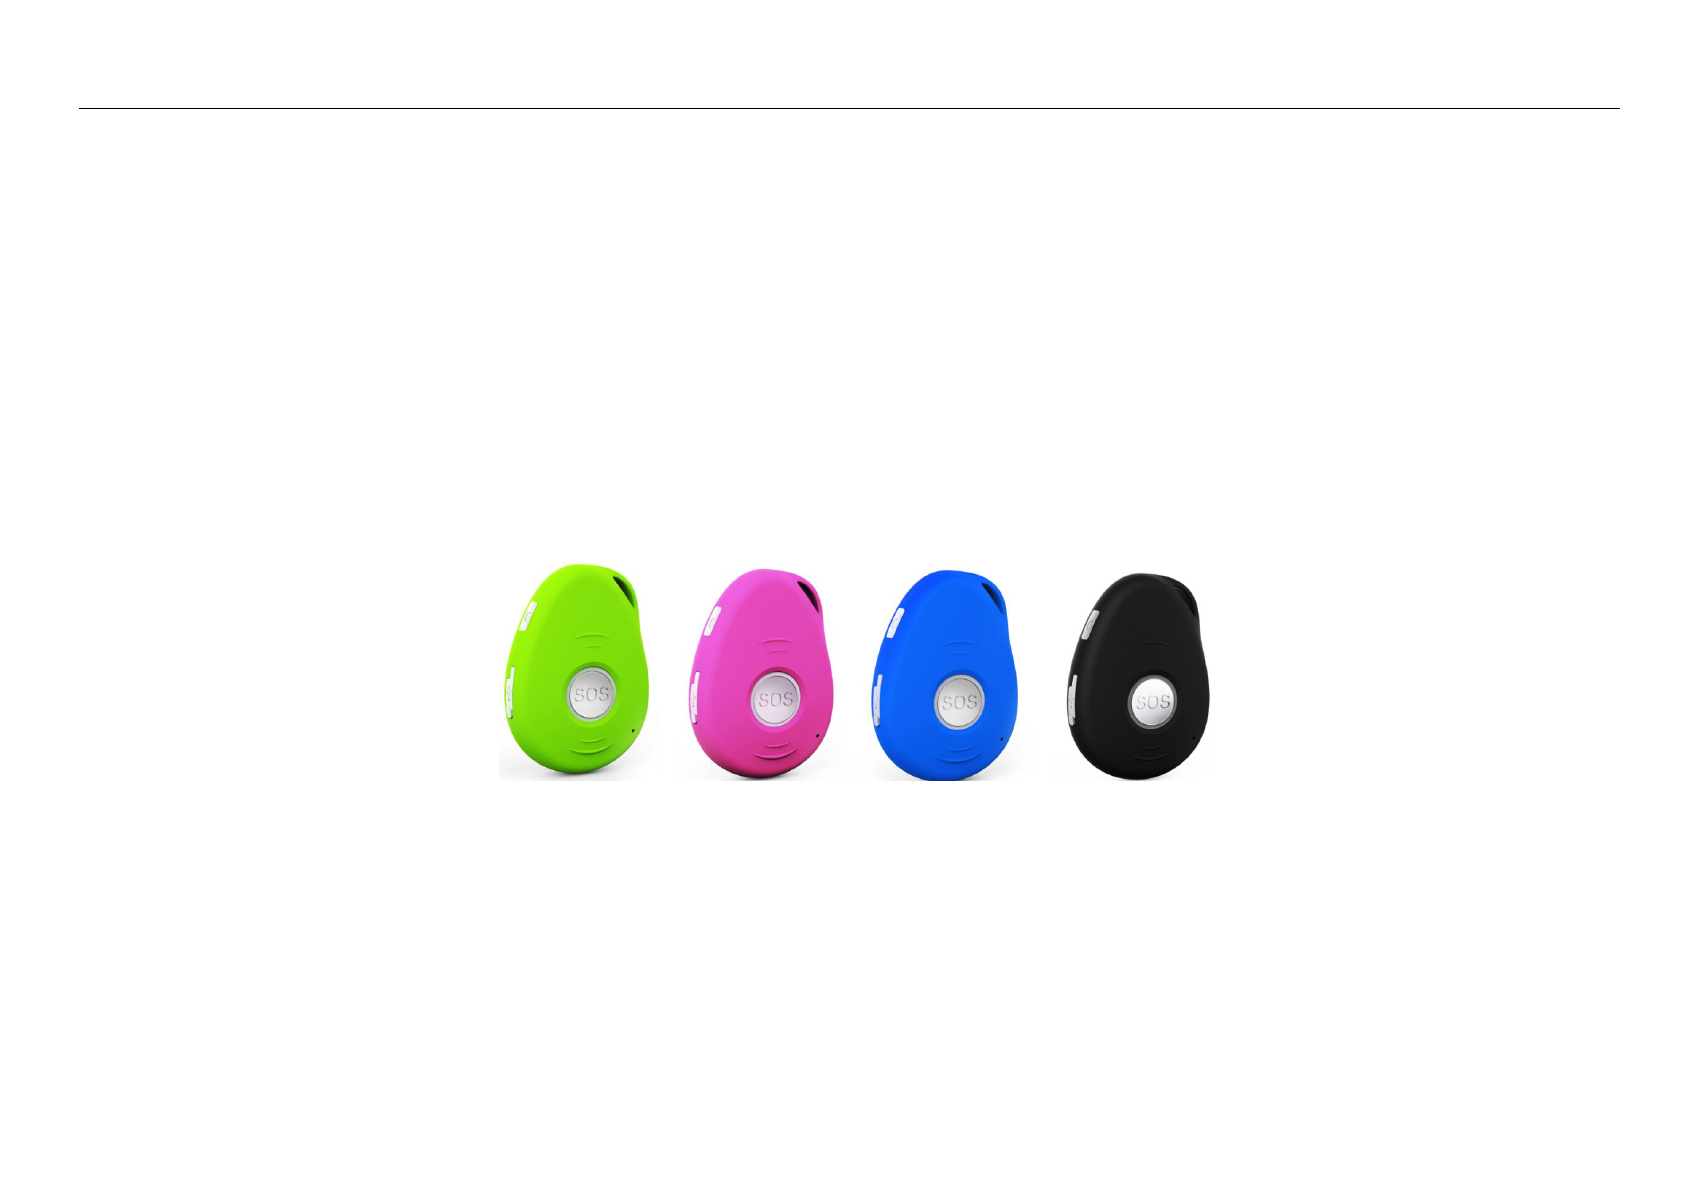
Product Overview
Thank you for purchasing EV-07S. This device is a waterproof IPX6, innovative miniature size personal remote positioning device with
built-in U-blox GPS and GSM/GPRS technology. It’s for monitoring and protecting people and property. It can be used in all walks of life
from traveling lone workers and mobile nursing staff to children and the elderly, Dementia etc.
GPS tracking system
- 3 -
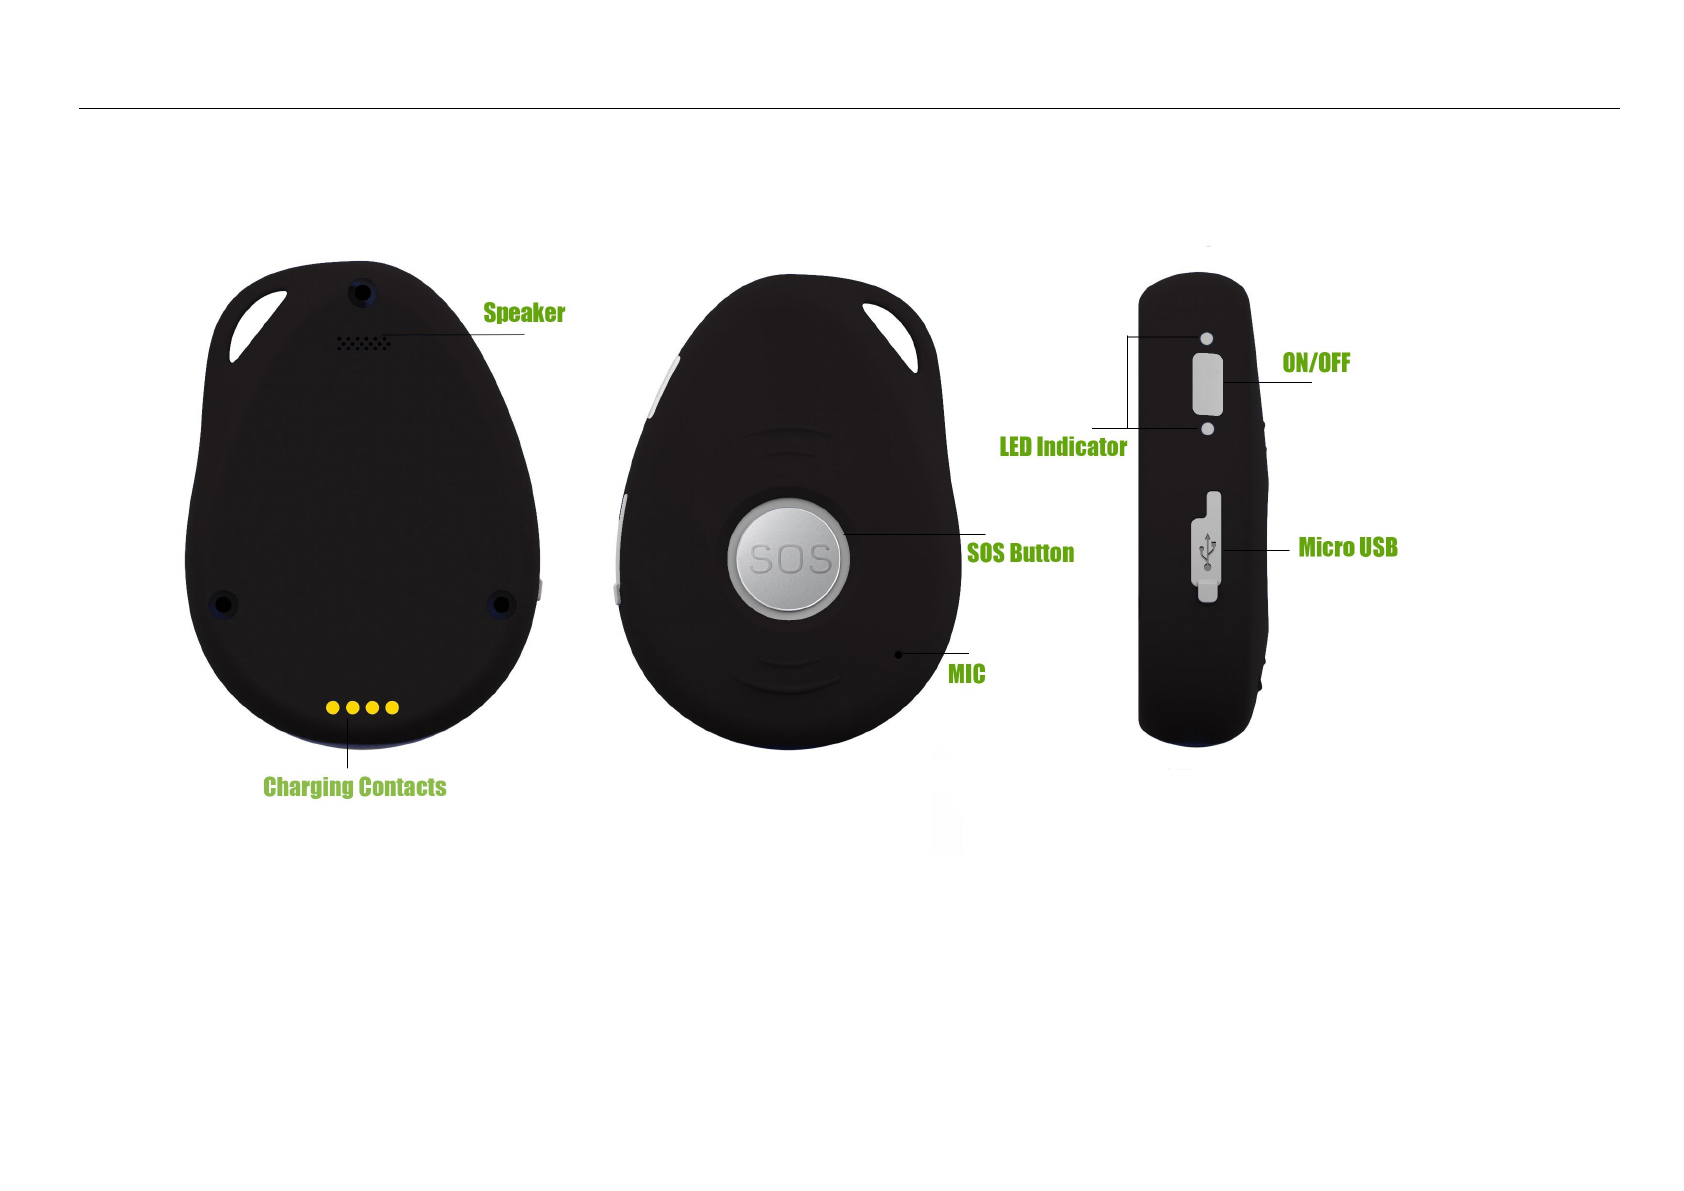
Getting to know your device

GPS tracking system
- 4 -
SIM card Installation
The SIM card is not included in the package. A Micro SIM card is available from the user's local operator.
- Unscrew the back cover and remove the cover.
- Insert SIM card and make sure it’s activated with credits
- Put the cover back and tighten the screws.
Note: Before installing the SIM card, check if the SIM card has PIN code or not, if yes, please use a cell-phone to unlock the card's PIN code.
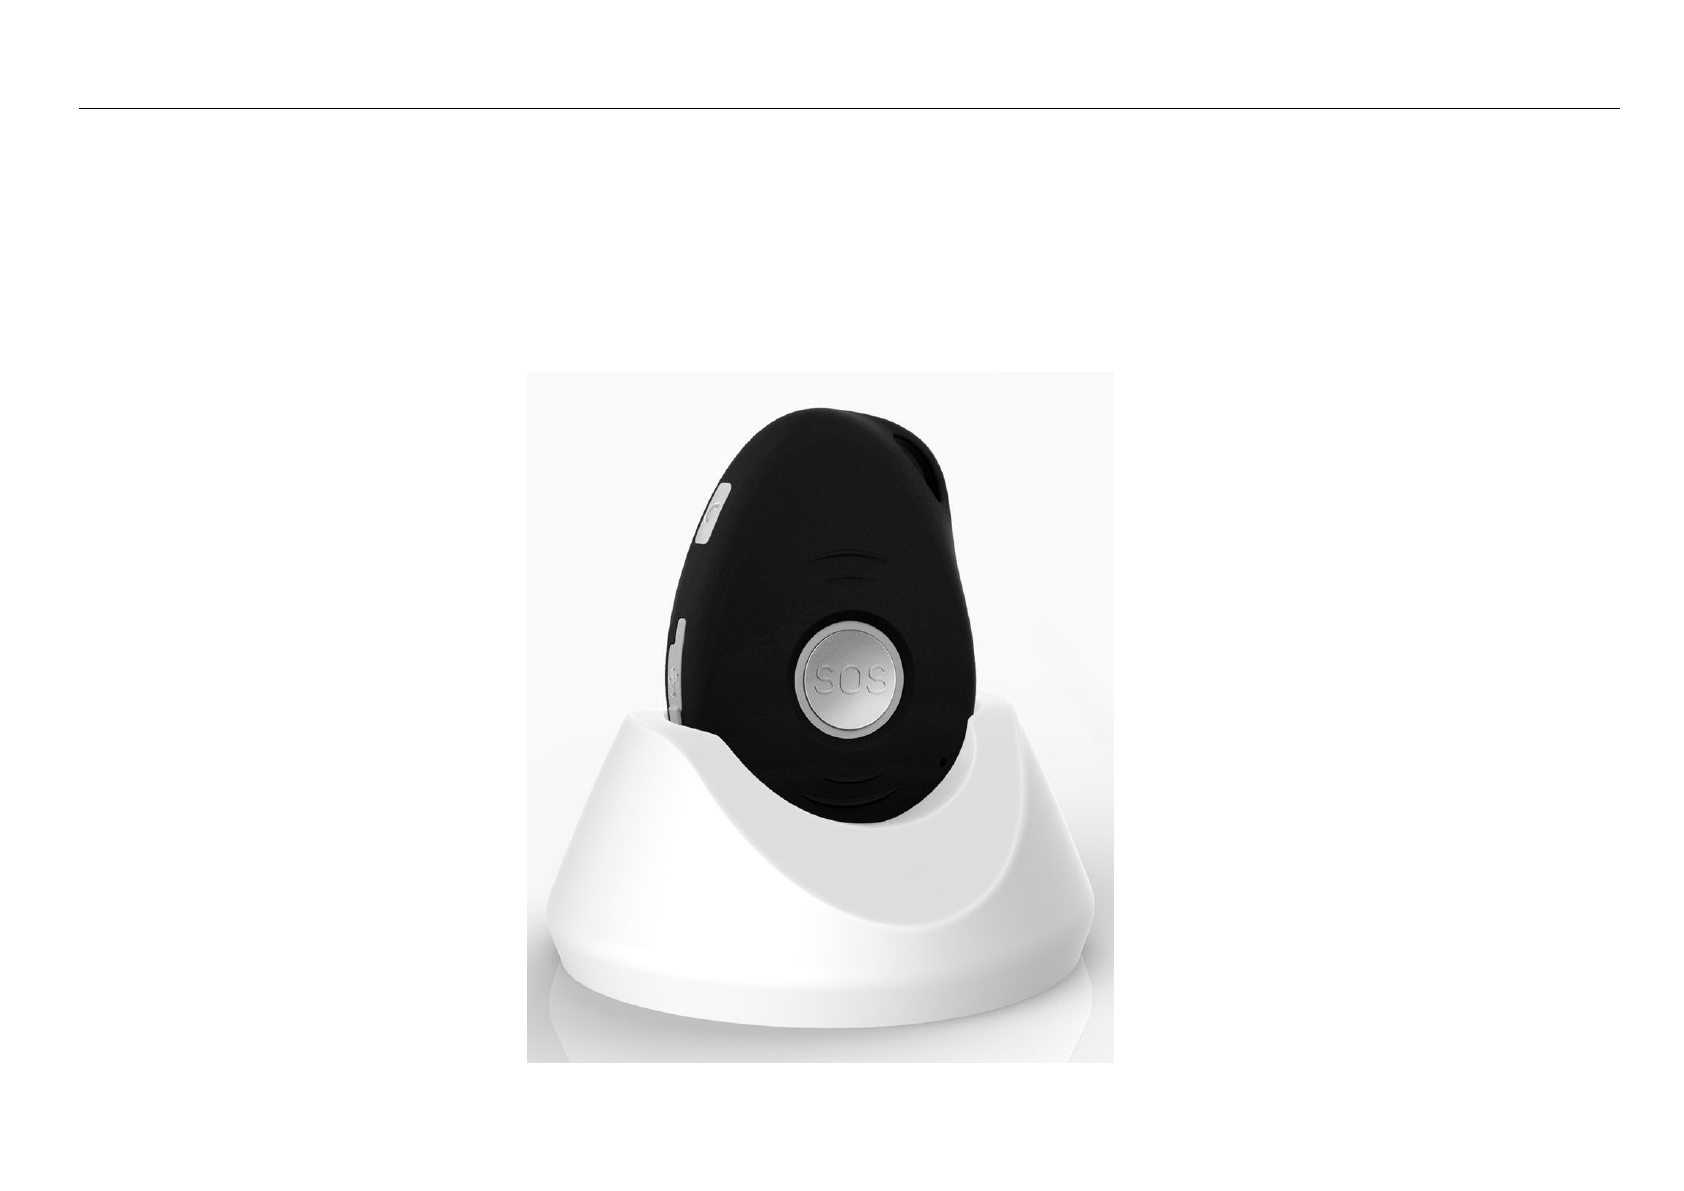
Device Charging
For the first time use, please fully charge the battery for around 2~3 hours
Using the USB charger or using docking station to charge
- Place the device on the docking station.
- Connect the Micro USB side of the cable to the docking station port and connect the other end of the cable to the designated AC power source (USB/AC
adaptor).
- When charging, the RED LED (on docking station) will be blinking (solid). After fully charging, the RED LED will solid.
GPS tracking system
- 5 -
Switching the device on and off
-To turn on the device: press the side power button for 1 second, all the LEDs will flash rapidly. Device can be also turned on automatically by charging
via USB or put it into the docking station.
※To get an initial location, use outdoors or near a window so the device may fix onto the satellites.
-To turn off the device: press and hold the side button and SOS button together for 1 second until the LEDs off.
What do the lights mean?
Power Status LED
LED
Blue ON(solid)
Blue Blinking Quickly
Blue Off or blinking slowly
State
The device is charging
Battery power is lower than 15%
Device has been fully charged or not charging
GSM LED--GREEN
LED
Light shows a single flash rapidly every 3
seconds
Light shows a double flash rapidly
every 3 seconds
Light shows a slow flash every 3
seconds
Light Solid (not flashing)
State
The device is connected to the GSM
network
The device is registered to the
GPRS network
The device is connecting to the
GSM network
No SIM Card is detected
GPS tracking system
- 6 -
GPS LED--BLUE
LED
Light shows a single flash rapidly every 3
seconds
Light shows a slow flash every 3 seconds (every
1 second on and 3 seconds off)
Blue Off(when device not charging)
State
The device has a GPS positioning fix
The device has no GPS fix
The GPS chip is sleeping
Activating an SOS Alarm
Press and hold the SOS button for 3 seconds until the device vibrates, and then green light will start to flash rapidly to confirm the request. After that, an SOS
Alarm "Help me!" will be sent to all authorized phone numbers and to the platform. It will also the dial the 3 authorized numbers in sequence. If the tracker
fails to connect to the first number, it will call the second one. In case the second number fails to be connected as well, the system will connect to the third
number. if device fails to call all 3 numbers, it will start to dial the numbers again after 5 minutes. This will continue until one of the phones answer the call.
To end the call, press the SOS button.
Making a Phone Call
To make a call, press and hold the side button for 3 seconds and you will hear a beep. The green light will flash rapidly to confirm the request, and then it will
dial the second number. To end the call, press the SOS button.

GPS tracking system
- 7 -
Configuration and Operation by SMS
1. To Set the Authorized Number
※It is not mandatory for all three of the authorized numbers to be set, however a minimum of one must always be set.
Command:A1 or A1,phone number
Note: With no spaces in the text, case-insensitive.
Example: A1 or a1,123456789
※Using your mobile phone, send A1 to the phone number of the device, it will reply: ·Set mobile number 1 OK!
※To delete this number, you can send A0 to the tracker.
②Command:B1 or B1,phone number
Example: B1 or b1,123456789
The device will reply: ·Set mobile number 2 OK!
※To delete this number, you can send B0
③Command:C1 or C1,phone number
Example: C1 or c1,123456789
The device will reply: ·Set mobile number 3 OK!
※To delete this number, you can send C0

GPS tracking system
- 8 -
2. Modify the Time zone
Command:TZ++00/-00
Note: the time must amounts be in 2 digits and at maximum 23 hours in value. “+” in the “time zone” portion of the text indicates east. The symbol “-“ in the
“time zone” indicates west.
Example: tz+02, the system will add 2 hours based on the UTC time.
tz-02, the system will minus 2 hours based on the UTC time.
※UTC time has been set as default time.
3. User defined name in SMS content
Command: name1, user name
Example: name1,Emma, the tracker will reply “Add name ok!”
※To delete name, you can send name0
4. Location request
4.1 Reply with coordinates and web link
Command: loc
The device will reply “GPS Info! Time: xxxxx; Lat: xxxx; Lon: xxxx; Spd: xxxxx, Altitude:xxxx Bt: xxx
maps.google.com/maps?q=loc:22.647379,114.030998
※Put coordinates to Google earth or Google maps. Click on search button, then you will find the position fixed.
※Click on the link then the location can be shown directly on Google Map on your mobile phone.

GPS tracking system
- 9 -
4.2 Reply with Address
Command: add
Notes: This function needs GPRS function support.
The device will reply “Add: Donghuan 1st road, Bao’an, UK;
5. Low battery alarm
When the unit’s battery is less than 15%, it will send an SMS alarm “BAT: LOW!” to all authorized numbers. If battery is less than 15%, the blue light will flash
rapidly to warn the user to charge the device as soon as possible.
Command: Low1
To turn off this function, please send Low0 the device.
6. PIN LOCK
Command: 123456lock
After send this command, then it will require a password in front of all commands (except reboot and RESET!). For example 123456LOC, 123456A1 etc.
(default password is 123456)
Remove password protection, just simply send 123456unlock
7, Change password:
Command:Old password + H + new password
Example: 123456H666666
The password now is changed to 666666
※The pre-set password won’t be erased by changing a new sim card.

GPS tracking system
- 10 -
※Be sure keep the new password in mind, otherwise you have to ask your distributor to restore the original setting in case of losing the new password.
※Make sure the new password is in 6 digits, or else the tracker can not recognize the password.
8. GEO-Fence Alarm
Command: G+X, Y, Z, xxxM/KM
Example: G1,1,1,100M
Notes: No spaces in between.
X=No. of Geo fence (1~3), user can set 3 Geo fences
Y=0 means to turn off the function
Y=1 means to turn on the function
Z=1 means to set alarm when the tracker enters the preset area
Z=0 means to set alarm when the tracker breaches the district
xxx is the preset distance to the tracker’s original place, must be 3 digitals. M means meters, KM means kilometers
The device will send the message to the authorized numbers as “Geo fence alarm!+GPS info” when it enter the area you set.
(User must set this function when the blue light is flashing rapidly.)
To turn off this function, please send G1,0 or G2,0 or G3,0
9. Over-Speed alert

GPS tracking system
- 11 -
Command: speed1,+ Speed
Notes: The speed must be in km/h in 2 or 3 digitals. (01~255km/h)
Example: speed1,100
Suppose the over-speed alert that we want to set is 100km/h, when the device exceeds 100km/h, it will send the message “Over-speed! +GPS Info” to all
registered phone numbers.
To turn off this function, please send speed0 to the device.
10. Movement Alert
Command: M1, xxxM/KM
Notes: xxx must be 3 digitals. M means meters, KM means kilometers
The tracker must be stationary when setting this function
Example: m1,100m
When the tracker moves beyond 100 meters, it will send an SMS alarm to all registered phone numbers.
To turn off this function, please send M0 to the device.
(The settings must be at least 50 meters)
11. Listen-in (Voice wiretapping)
Command: L1
A1, B1, C1 can make a silence call to the tracker, the track answers the call automatically and allows the caller to hear what is happening around the tracker.
There is no voice indication that the call is in progress.
To turn off this function, please send L0 to the device.

GPS tracking system
- 12 -
12. Motion alarm
Command: V1, xx S/M/H
Note: No spaces in between, S means seconds, M means minutes, H means hours, xx means the time you set and must be two digitals.
Example: V1,05M
Device will detect motion every 5 minutes and will send an SMS warning alarm to all registered phone numbers.
To turn off this function, please send V0
13. Turn off 3 LEDs
Command: LED1
The device will reply “LED off” and later LEDs will stop flashing, but the device is actually on.
To turn on LEDs, please send LED0
14. AGPS
Command: AGPS1, latitude, longitude
Example: AGPS1,22.647606,114.022583
Assisted GPS (abbreviated generally as A-GPS and less commonly as aGPS) is a system that is often able to significantly improve the startup performance or ti
me-to-first-fix (TTFF) and improve the GPS location to be more precise, of a GPS satellite-based positioning system.
To turn off this function, please send AGPS0

GPS tracking system
- 13 -
15. Fall detection
A simple fall may cause a devastating consequence. The authorized numbers will be alerted without the user pushing SOS button when the fall sensor is
activated.
Command: FL1
The device must sense both impact and angle.
To turn off this function, please send FL0
16. Check settings
Command: status
The device will reply E.g. A+8613812345678 B13912345678 C13712345678; Speed: 0,100km/h; GEO:0,0,0; VB:1,10S; MV:1,100; LED:0; TZ:2.0; LI: 1; PS:1;
DS:0,3M; FL:1; Bat: 95%; SMS:0;LOCK:0
To recognize the meaning of “0”& “1”
The number “0” implies that the function is turned off; whilst “1” indicates that the function is turned on.

GPS tracking system
- 14 -
Device 5 working modes
1. Live Tracking Mode (1)
Command: PS0
In this mode, Both GSM and GPS are on all the time, Battery can last 18~24 hours.
2. Smart Power Saving Mode (2) (default working mode)
Command: PS1
In this mode, the gsm chip is working and receives calls, SMS and transmits location. The GPS chip is activated by motion, incoming calls and SMS. The GPS
chip is off when there is no movement or no phone usage. Battery life is not wasted when the device isn't moving.
Under normal use, battery can last 3 ~ 7 days.
3. Deep Sleeping Mode (3)
Command: DS1 or DS1,xxM/H
Both GSM and GPS chip will be off to save power, the device is unable to receive calls or SMS.
It can be only activated by movement. Once movement is detected, it will run for the set time and sleep again if no movement is detected.
Battery can last 40 days if no movement at all.
To turn off this function, send DS0
4, Working mode (4)
Command: Mode4

GPS tracking system
- 15 -
In this working mode, device can always receive SMS, calls. But GPS chip only wakes up and updates location to the tracking platform if user press button or
receive phone call/text message.
Without press button or phone call/text message, GPS chip will always sleep.
5, Time interval working mode (5)
Command: Mode5,xxS/M/H
Example: Mode5,10M
Device will update location to the tracking platform every 10 minutes.
In this working mode, device can always receive SMS, calls. And it updates location to the tracking platform according to the time you set.
Real time tracking on www.smart-tracking.com
Our web based tracking system incorporates the TCP/IP protocol and allows users to monitor it in real time over the internet or sends an e-mail to the
predefined e-mail address.
How to connect device to the platform for real time tracking via GPRS
1. Get IMEI number
Command: version
The device will reply” IMEI: 123456789123456; GSM CSQ:xxxx; Soft:V07.20.10.1345”
2. Go to the website www.smart-tracking.com and login with your account.

GPS tracking system
- 16 -
3. On the left side, click "Manage→Add Tracker”
Note:
- Hardware Version: Select EV07
- Type tracker name and IMEI number, make sure IMEI numbers are correct.

GPS tracking system
- 17 -
4. GPRS Setting
In order to use the GPRS function, the user needs to setup the APN by sending SMS command.
--What is APN? Access point name (APN) is the name used to identify a general packet radio service (GPRS) bearer service in the GSM mobile network. The
APN defines the type of service that is provided in the packet data connection.
※Make sure that the SIM card in the tracker supports the GPRS function.
※The APN can be acquired from your local GSM operators.
Command: S1, APN, user name, password
Notes: Some access point name without user name and password, so please leave it blank.
Example: S1,internet
“internet” is the APN from the SIM card provider; therefore the user must set their particular APN for their own country which the unit resides.
After sending the command, the device will reply “Set APN OK! GPRS connecting”
After send S1,APN, wait for a while then you will see device is online.
Set GPRS Time interval by SMS (this can be also set from platform)
Command: TIxxS/M/H
The meaning of “xx”, The setting must be in 2 digitals and maximum 99 in value, which means 01~99.
xxS is the time interval in second with range(30~99)
xxM is the time interval in minute with range(01~99)
xxH is the time interval in hour with range(01~99)
Example: TI01M

GPS tracking system
- 18 -
The device will reply “Set updating time interval OK!” and then device will update the time by every 1 minute on the website.
Disable GPRS
Command: S0
The device will reply “GPRS OFF”.
Reconnect GPRS
Reconnect the website via GPRS for real time tracking, please send S2
Check APN & IP, Port
Command: G1
The device will reply “APN: internet; Name: xxx; Password: xxxx; Port: 5050; IP:www.smart-tracking.com”
Change IP and Port
Command: IP1,IP/domain name,port
Example: IP1,103.21.211.11,5050 or IP1,www.smart-tracking.com,5050
Disable SMS alert
Command: SMS0
It only send alarms via GPRS to the platform and without text message to the authorized numbers.
Enable SMS and GPRS alarms, just simply send SMS1 (default setting)

GPS tracking system
- 19 -
Reboot device
Command: reboot
The device will restart itself without changing any settings.
Initialization:
Command: RESET!
Note: This is to make all settings back to the factory default.
Built-in Memory
The device built in 8MB flash memory inside. It will store the GPS information when do not have GSM network coverage (i.e., very low population density
areas, some mountainous terrain, underground areas etc). The device will transmit GPS locations to the WEB server automatically once the GSM network is
recovered.
Delete stored tracking history data
Command: flush
The device will stop sending the stored tracking history data to tracking platform.

GPS tracking system
- 20 -
Cautions:
Please comply with the instructions to extend the unit life:
1. Don’t use & store the unit in dusty places.
2. Don’t put the unit in overheated or over cooled places.
3. Clear the unit with a piece of dry cloth. Don’t clean in chemicals, detergent.
4. Don’t disassemble or refit the unit.
5. Using other batteries will cause unwanted situation
Hardware Specification:
Content Specs.
Mainframe Dimension 61mm*43mm*16mm
Net Weight 15g
GSM Frequencies 900/180/850/1900Mhz
GPS chip U-blox 7 (Support AGPS)
GPS sensitivity Cold start: -148dBm Hot start: -162dBm
GPS accuracy <2.5m
Time to First Fix Cold start 32s, Warm start 11s, Hot start 1s
Charging Voltage 5V DC
Battery Chargeable 3.7V 800mAh
Standby Current ≤2mAh
Storage Temperature -40°C to +85°C
Operation Temperature -20°C to +80°C
Humidity 5%-95% non-condensing
FCC Caution:
Any Changes or modifications not expressly approved by the party responsible for
compliance could void the user's authority to operate the equipment.
This device complies with part 15 of the FCC Rules. Operation is subject to the following two
conditions: (1) This device may not cause harmful interference, and (2) this device must
accept any interference received, including interference that may cause undesired operation.
Note: This equipment has been tested and found to comply with the limits for a Class B digital
device, pursuant to part 15 of the FCC Rules. These limits are designed to provide reasonable
protection against harmful interference in a residential installation. This equipment generates,
uses and can radiate radio frequency energy and, if not installed and used in accordance with
the instructions, may cause harmful interference to radio communications. However, there is
no guarantee that interference will not occur in a particular installation. If this equipment does
cause harmful interference to radio or television reception, which can be determined by turning
the equipment off and on, the user is encouraged to try to correct the interference by one or
more of the following measures:
—Reorient or relocate the receiving antenna.
—Increase the separation between the equipment and receiver.
—Connect the equipment into an outlet on a circuit different from that to which the receiver is
connected.
—Consult the dealer or an experienced radio/TV technician for help.
Specific Absorption Rate (SAR) information
SAR tests are conducted using standard operating positions accepted by the FCC with the
phone transmitting at its highest certified power level in all tested frequency bands, although
the SAR is determined at the highest certified power level, the actual SAR level of the sample
while operating can be well below the maximum value, in general, the closer you are to a
wireless base station antenna, the lower the power output.
For face up and body worn operation, this model sample has been tested and meets the FCC
RF exposure guidelines, users can obtain FCC information on RF exposure and compliance.