EYO ASIA ELECTRONIC F52 GSM Mobile Phone User Manual 1
EYO ASIA ELECTRONIC CO.,LTD GSM Mobile Phone 1
User Manual
1
GSM Mobile Phone
User Guild
Congratulations on your purchase of this GSM mobile phone.
Please read this User Guide before you use your mobile phone.
Notice: If there is any differences(such as features,color, etc.) between the User Guide
and the mobile phone, please refer to the mobile phone. Improvements and changes to this
User Guide maybe made by our company at any time and without notice. Such changed will,
however, be incorporated into new editions of this User Guide.
Contents
1. FOR YOUR SAFETY ................................................................................................................................................................ 3
2. PRODUCT INSIDE PACKAGE ............................................................................................................................................... 3
3. KEY FUNCTIONS IN STANDBY MODE ............................................................................................................................... 3
4. ICON INDICATORS ................................................................................................................................................................. 4
5. GET STARTED .......................................................................................................................................................................... 6
6. TELEPHONE ............................................................................................................................................................................. 6
6.1. MAKE A CALL ............................................................................................................................................................................. 6
6.2. ANSWER A CALL ......................................................................................................................................................................... 7
6.3. DURING A CALL .......................................................................................................................................................................... 7
7. CONNECTIVITY ...................................................................................................................................................................... 7
8. MAIN MENU .............................................................................................................................................................................. 8
8.1. PHONEBOOK ............................................................................................................................................................................... 8
8.2. MESSAGES .................................................................................................................................................................................. 8
8.2.1 SMS...................................................................................................................................................................................... 8
8.2.2 MMS .................................................................................................................................................................................. 10
8.3. CALL CENTER ........................................................................................................................................................................... 11
8.3.1 Call history ........................................................................................................................................................................ 11
8.3.2 Call settings ....................................................................................................................................................................... 11
8.4. USER PROFILES ......................................................................................................................................................................... 12
8.5. SETTINGS .................................................................................................................................................................................. 12
8.5.1 Quad SIM Setting .............................................................................................................................................................. 12
8.5.2 Phone settings.................................................................................................................................................................... 12
8.5.3 Network setup .................................................................................................................................................................... 13
8.5.4 Security setup .................................................................................................................................................................... 13
8.5.5 Connectivity ....................................................................................................................................................................... 14
8.5.6 Restore factory settings ..................................................................................................................................................... 14
8.6. MULTIMEDIA ............................................................................................................................................................................ 14
8.6.1 Camera .............................................................................................................................................................................. 14
8.6.2 Image viewer ..................................................................................................................................................................... 15
8.6.3 Video recorder ................................................................................................................................................................... 15
8.6.4 Video player ....................................................................................................................................................................... 15
2
8.6.5 Audio player ...................................................................................................................................................................... 15
8.6.6 Sound recorder .................................................................................................................................................................. 16
8.6.7 FM radio ........................................................................................................................................................................... 16
8.7. FILE MANAGER ........................................................................................................................................................................ 17
8.8. FUN AND GAMES ...................................................................................................................................................................... 17
8.8.1 Games ................................................................................................................................................................................ 17
8.9. ORGANIZER .............................................................................................................................................................................. 17
8.9.1 Calendar ............................................................................................................................................................................ 17
8.9.2 Alarm ................................................................................................................................................................................. 17
8.9.3 Tasks .................................................................................................................................................................................. 18
8.9.4 Calculator .......................................................................................................................................................................... 18
8.9.5 World clock ........................................................................................................................................................................ 18
8.9.6 E-Book reader ................................................................................................................................................................... 18
8.10. WEB ....................................................................................................................................................................................... 18
8.10.1 STK .................................................................................................................................................................................. 18
8.10.2 Internet service ................................................................................................................................................................ 18
9. FAQ ............................................................................................................................................................................................ 19

3
1. For your safety
SWITCH ON SAFETY
Do not switch your product on when mobile phone use is prohibited or when it may cause
interference or danger.
DRIVE SAFETY
Obey all local laws, keep your hands away from your product when you are driving
SWITCH OFF IN HOSPITALS
Follow any restrictions. Switch your product off when near the medical equipments.
SWITCH OFF IN AIRCRAFT
Follow any restrictions. Switch your product off when you are in aircraft
SWITCH OFF WHEN REFUELING
Do NOT use near fuel or chemicals
SWITCH OFF NEAR BLASTING
Do NOT use your product when blasting is in progress.
WATER-RESISTANCE
Your product is NOT water-resistant; keep it dry at any time, especially when it is charging.
INTERFERENCE
All wireless devices may be susceptible to interference, which could affect performance.
BATTERIES AND CHARGERS
Use only approved batteries and chargers. The use of any other types may invalidate any
approval or warranty, and maybe dangerous.
WARNING!!
INCORRECT OPERATION MAKES WARRANTY INVALIDE!
2. Product inside package
The devices listed below are packaged in the box, Please make sure they are
correct and available. If the answer is NO, please connect with the local dealer.
Mobile phone 1
USB data cable 1
Charger 1
headset 1
Battery 1
User guide 1
Warranty card 1
3. Key functions in standby mode
Name
Type
Function description(in standby mode)
4
LSK
Short press
Enter main menu
RSK
Short press
Enter phonebook
SEND
Short press
Show call history of SIM card A
SEND2
Short press
Show call history of SIM card B
SEND3
Short press
Show call history of SIM card C
SEND4
Short press
Show call history of SIM card D
END
Short press
End a call
END
Long press
Power off
OK
Short press
Same as LSK
0..9,*,#
Short press
Input number in dialing screen
0
Long press
Enable hand light
2..9
Long press
1. Make a call to the associated fast dial number
when they are set.
2. If there is no associated fast dial number,
System will enter dialing screen and show
the associated number
#
Long press
Switch on/off silence mode according to current
profile setting
*
Long press
Enter character ‘+’ in dialing screen
Name
Type
Function description(in standby mode)
END
Short press
End a call if on incoming call screen
END
Short press
To lock keypad if on idle screen
END
Short press
Return to idle screen from submenu
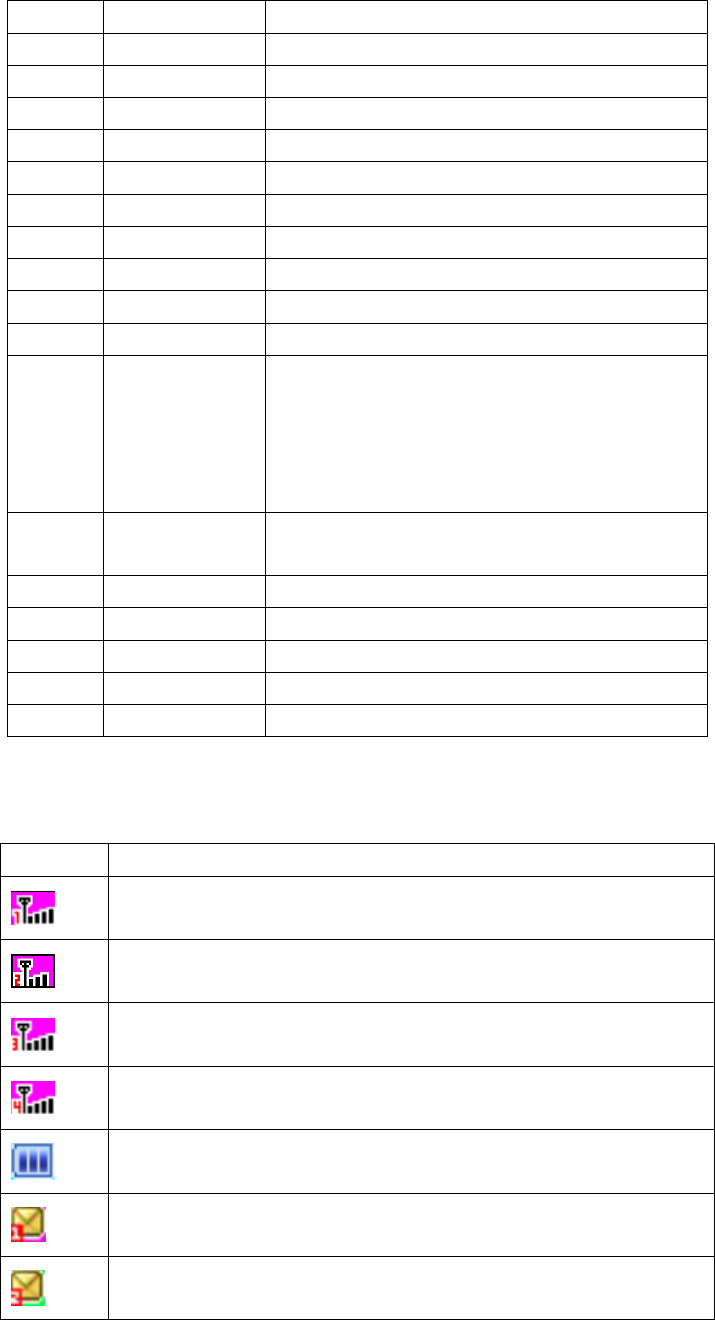
4. Icon indicators
Indicators
description
The signal strength of network attached to SIM Card A
The signal strength of network attached to SIM Card B
The signal strength of network attached to SIM Card C
The signal strength of network attached to SIM Card D
The battery charge level
You have one or more unread messages received by SIM Card A
You have one or more unread messages received by SIM Card B

5
You have one or more unread messages received by SIM Card C
You have one or more unread messages received by SIM Card D
You have one or more unread MMS received by SIM Card A
You have one or more unread MMS received by SIM Card B
You have one or more missed phone calls in SIM Card A
You have one or more missed phone calls in SIM Card B
You have one or more missed phone calls in SIM Card C
You have one or more missed phone calls in SIM Card D
General mode of profiles is active now
Meeting mode of profiles is active now
Outdoor mode of profiles is active now
Headset mode of profiles is active now
Bluetooth mode of profiles is active now
All calls to SIM Card A are forwarded to another number
All calls to SIM Card B are forwarded to another number
All calls to SIM Card C are forwarded to another number
All calls to SIM Card D are forwarded to another number
SIM Card A is active
SIM Card B is active
SIM Card C is active
SIM Card D is active
One or more alarms are active

6
Keypad lock
5. Get Started
Insert/remove the battery
Always switch your product off and disconnect the charger before removing the battery.
When you insert the battery, please align the contacts of batter with the corresponding
connectors on the battery compartment.
Insert/Change the SIM card
Before changing the SIM card, please make sure your product is switched off and the battery
is removed.
Make sure that the contact area on the card is facing the connectors on your product and
that the beveled corner is correct with the indicator, then insert the SIM card
Charge the battery
Please make sure the battery is inserted correctly.
Connect the power cord to the device and then connect a compatible charger to a wall
outlet or connect the computer via USB data cable.
Your battery has been pre-charged at the factory, but the charging level may vary. To
reach the full operation time, charge the battery until is has been fully charged
according to the battery level indicator.
The batter method is to recharge the battery when it runs out, this operation will
continue at least 3 times after you get your mobile phone.
If a long time not using your mobile phone, it will take a few minutes to show the
charging animation.
WARNING: moving or taking off the battery during charging is forbidden.
6. Telephone
Your mobile phone is a Quad-card quadruple standby single pass style. Where
Quad-card means it supports four SIM cards, quadruple standby means all the SIM cards
work in standby mode, single pass means only ONE SIM card can answer or make a call, the
other is sleeping at the same time until the call is end.
6.1. Make a call
Important: if keypad of the mobile has been locked, activate the phone function at first
(See Keypad lock)
To Make a call, enter the phone numbers (sometimes including the area code when you
call a foreign area number) on the dialing screen, and press send key. If ‘Quad SIM open’
7
mode in handset setting is active and these 4 SIM card is available, you need chose
which one is the initiator.
Also, you can make a call through phonebook list or call history directly via the item is
focused and select <Call> from option menu.
6.2. Answer a call
To answer a call, select <Answer> from option menu when the call is incoming.
To reject the call, press <Reject> on the screen or press <End>.
6.3. During a call
There are some options to use when you select <Options> during a call. Press <RSK> to
enter/exit hand free mode. In options menu, you can choose.
Set volume – to increase or decrease the volume
Hold single call – to keep current call.
End single call – to end current call.
New call – to make a new call via input numbers.
Phonebook – to view the record in phonebook.
Message center – to enter message center to view message.
Sound recorder – to start recorder to remember the content.
Mute – to make the other side can not hear you what you say.
DTMF – to enable/disable DTMF tone.
7. Connectivity
This mobile phone offers options to connect to another device or computer. Wireless
method includes Bluetooth. It also supports a wired solution with a USB(Universal Serial
BUS) cable connection.
USB cable connection
Using a USB data cable, you can connect the mobile phone to a compatible computer.
Connect the USB data cable to the USB connector of the mobile phone.
If the mobile is power off, you will see the driver name in your computer.
If the mobile is power on, you can select the feature you want to use: storage or webcam.
Bluetooth
See Bluetooth
8
8. Main menu
8.1. Phonebook
Quick search
To search the name you want to use in the phonebook list. You can look for the name
according to your input alphabet.
Search contact
Search the name you want to use in the phonebook list. You can look for the name according
to your input.
Add new contact
Add a new record to phonebook list, including name, number, etc. you can select the
position to store. The content of every record in SIM card is composed of name and ONE
number.
NOTES: The count of every SIM card may be different.
Batch operations
Multi Delete – delete the selected item in phonebook list
Copy all—copy contract from SIM Card A to SIM Card B, or from SIM Card A to handset,
or from SIM Card B to handset,or from SIM Card A to SIM Card C, or from SIM Card A to
D , or the opposite direction.
Delete all —delete all the records in SIM Card A or SIM Card B or SIM Card C or SIM
Card D or handset, or one by one.
Settings
To set the feature of phonebook, you can view the memory status, set caller groups, owner
numbers for SIM Card A or SIM Card B or SIM Card C or SIM Card D, preferred storage
position to save number, caller picture, ring tone, etc.
8.2. Messages
8.2.1 SMS
SMS can contain simple pictures, sound effects, animations, character strings and melodies.
Before you use SMS
You must have a service center number. The number is supplied by your service provider
and is usually saved on the SIM card, or you must enter the number yourself.
To enter a service center number
1. From standby select Menu > messages > SMS setting > SIM 1/SIM 2/SIM 3/SIM 4 message
setting > profile settings > profile (1..4) > Edit
2. If there no number shown, chose the item to EDIT, especially the SC address, enter the
service number, when finished, press <OK> to save.
You are notified when you receive a message. Messages are automatically saved in the
phone memory or SIM card according to your setting.
To save a message on phone
From standby select MENU > Messages > SMS settings > SIM 1/SIM 2/SIM 3/SIM 4 message
9
setting > preferred storage > phone
To save a message on the SIM card
From standby select MENU > Messages > SMS settings > SIM 1/SIM 2/SIM 3/SIM 4 message
setting > preferred storage > SIM
To write and send a SMS
1. From standby select MENU > Messages > Write message.
2. write the message and select <Options> and you can select
Send to – to enter send options.
Input method – to change the input method you want to use.
Insert templates – to insert a template to message content.
Advanced – to insert an object,number,name,or bookmark to message content,and to
set text format
Save to Drafts – to save the message to drafts box.
Inbox
List all received SMSs (including read and unread).
SIM Card A Inbox: received messages via SIM card A.
SIM Card B Inbox: received messages via SIM card B.
SIM Card C Inbox: received messages via SIM card C.
SIM Card D Inbox: received messages via SIM card D.
When a message is focused, press <OK>, you can see the details of this message. Select
options you can choose
View – to view the message content
Reply – to answer this message to the initiator
Call sender – to make a call to the sender
Forward – to transfer this message to some other.
Delete – to delete this message directly.
Delete all – to delete all the messages in this Inbox (SIM. Phone or both)
Save to Phonebook – to save the sender number to phonebook
Mark as unread – to mark the message as unread
Advanced – to copy or move the message,details as the following:
Copy to SIM/Phone – to copy this message between SIM and phone.
Move to SIM/Phone – to move this message to the other storage.
Copy all – to copy all messages between SIM and phone.
Move all – to move all messages to the other storage
Outbox
List all received SMSs (including read and unread).
SIM Card A Outbox: send messages via SIM card A.
SIM Card B Outbox: send messages via SIM card B.
SIM Card C Outbox: send messages via SIM card C.
SIM Card D Outbox: send messages via SIM card D.
Options are same as Inbox, please see Inbox
Templates
To view the list of template can be use, press <Option> to the operation list, you can choose
Use – to use this template to write a new message.
10
Edit – to edit this template
Remove – to set this template empty
SMS settings
Profile setting – to enter a service center number
Common settings – to enable/disable the delivery report and reply path
Memory status – to show the status of storage (SIM card and phone)
Preferred storage – to set where the message store firstly.
8.2.2 MMS
MMS means Multimedia Message Service. The content can be text, pictures, ring tone and
melody.
Write Message
To write the MMS, you can set the number or email for To, Cc, Bcc and edit the message
content.
When editing the content, you can press <Options> to enter the option list, where you can
choose
Done – to finish editing the content
Input method – to select the input method you want to use
Add picture – to add a picture to the message content
Add audio – to add a audio resource to the message content
add video – to add a video resource to the message content
add attachment – to add some files to the message content
Add slide before – to insert a new slide before this slide
Add slide after – to insert a new slide after this slide
Delete slide – to delete current slide
Next slide – to change to next slide
Add bookmark text – to add a bookmark to message content
preview – to preview the content
Slide timing—to set the slides change time.
Inbox, Outbox, Drafts
To list all received/sent/stored MMSs (including read and unread).
SIM Card A received/sent/stored messages via SIM card A.
SIM Card B received/sent/stored messages via SIM card B.
When one message is focused, press <Options> you can choose the operation View, Send,
Delete, Delete all, Save as template or Properties to see the details.
Templates
To chose or edit the template defined by user himself or system.
MMS setting
To set the MMS’s parameters such as compose parameters(Parameter when writing
message),send parameters(parameters when sending message), retrieve
parameter(parameters when retrieving message), filter parameter, server profile(choice the
operator’s supporting network or MMS’s profile),also you can see the memory status in
Memory Status.
11
8.3. Call center
8.3.1 Call history
SIM Card A/ SIM Card B/ SIM Card C/SIM Card D call history
Press <send A/B/C/D> key, you can choice
SIM Card A/ SIM Card B/ SIM Card C/SIM Card D There will show a symbol list for you to
select, you can select any symbol from the screen to insert into content. All calls
SIM Card A/ SIM Card B/ SIM Card C/SIM Card D missed calls
SIM Card A/ SIM Card B/ SIM Card C/SIM Card D dialed calls
SIM Card A/ SIM Card B/ SIM Card C/SIM Card D received calls
In every submenu, for every call list, press <OK> to view the details (including date, time,
name, number and times), Press <Options> to enter the option menu, where you can choose
Call – to make a call to current record’s number
Send text message – to write a new SMS and send to current record’s number
Send multimedia message – to write a new MMS and send to current record’s number
Save to phonebook – to save current record’s number to phonebook
Add to black list – to add current record’s number to blacklist(See Black List)
Edit before call – to edit the current record’s number information before make a call
Delete – to delete current record;
Delete all – to delete missed calls, dialed calls, received call or delete all.
Press <OK> to enter the Advanced menu, where you can choose
SIM Card A/ SIM Card B/ SIM Card C/ SIM Card D call times
To see the period of last call time, total send, total receive, or to reset all time to zero.
SIM Card A/ SIM Card B/ call cost
To see the cost of last call, total, to reset all total to zero, to set the max cost, or to set the
price per unit (Needs PIN code)
SIM Card A/ SIM Card B SMS/ SIM Card C/ SIM Card D text msg. counter
To see the count of sent and received SMS, select<Reset> to set the count to zero.
SIM Card A/ SIM Card B GPRS counter
To see the count of last time, total sent, total received, or to reset every value to zero.
8.3.2 Call settings
SIM Card A/SIM Card B/ SIM Card C/ SIM Card D setting
To set the call parameter for SIM Card A/SIM Card B/ SIM Card C/ SIM Card D, you can see
Caller Id – Set by network, hide ID or Send ID,
Call Waiting – Activate, deactivate or query status
Call divert – Set the condition for divert
Call barring – set the condition for barring, and the password
Line switch – change the associated line, press <Switch>to change
Advanced
Auto redial
To enable/disable audio dial back.
Call Time display
12
To show/hide the period of current call, press <On>/<Off> to switch show/hide.
Call time reminder
To set the reminder time as none, single or periodic, when select periodic, you should
enter the period (from 30 to 60 seconds)
Auto quick end
To set the status and the time (from 1 to 9999 seconds)
Reject by SMS
To enable <Reject by SMS> menu which will be displayed in the incoming call option.
8.4. User profiles
There are 6 profiles for you to select one as current profile:
General
Meeting
Outdoor
Indoor
Headset
Bluetooth
In every profile item, press <OK> to enter Activate and Customize.
In Customize, you can choose
Tone settings – to customize the tone of SIM Card A/SIM Card B incoming call, Power
on/Power Off, SIM Card A/SIM Card B message, keypad tone, there is a list for you to
choice.
Volume – to set the volume for ring tone and volume for keypad.
Alert type – to select one type from ring, vibrate only, vibrate and ring or vibrate then
ring.
Ring type – to set the type from Single (only once), repeat to Ascending.
Extra tone – to enable warning, error, camp on, and connect tone. If one of them is
marked, the associated information will cause a sound.
Answer mode – When any key is marked, when a call is coming, pressing any key will
answer this call.
8.5. Settings
8.5.1 Quad SIM Setting
To set the work status of this four SIM cards or Flight mode(no SIM Card open).
NOTES: an existed SIM card may NOT be open, but the content in this SIM can also be
viewed, such as phonebook, message, etc.
8.5.2 Phone settings
Time and date
You can set the home city, current time and date, and the format to show
13
Schedule Power on/off
To set the power on/power off as you like.
Language
To change the system language as you like.
Blacklist
To disable a call associated special number incomes when the status is on.
When the status is on, the black list number can enter number directly or select from
phonebook list
Pref. input methods
There are several input methods supported by your mobile phone, the number of them
may change according to the number of languages.
Multitap ABC
You could type a character via virtual keypad on screen which will help you directly
input the right character you want.
multitap abc
Same as Multitap ABC, the difference is the character is small case.
Numeric
You could select a number via virtual keypad on screen which will help you directly
input the right number you want.
Insert symbols
There will show a symbol list for you to select, you can select any symbol from the
screen to insert into content.
Display
Wallpaper – set the wall paper image
Screen saver – set the screen saver status, images/animation and period
Power On/Power off display – set the image/animation when system turn on/turn off
Show owner number – show/hide SIM Card A/SIM Card B’s associated Operator’s
information(Name or label)
Auto update of date and time
To set date and time auto update on/off if timezone of location has changed.
Misc. settings
Expand as the following:
LCD backlight
To set the brightness level and period of backlight
8.5.3 Network setup
To set network selection mode and Preferred network for SIM Card A/SIM Card B/SIM Card
C/SIM Card D.
8.5.4 Security setup
To manage your mobile phone security and to make it safe.
Phone lock
To change the phone lock status, if the status is on, the password is needed when power
14
on.
NOTES: the default password is 1122, please change it as soon as possible after you
get your mobile phone.
Auto keypad lock
To enable (also need set the waiting time) or disable the keypad lock in standby mode.
NOTES: If the keypad is locked, please do the action according the popup hint on the
screen to unlock the keypad, or the keypad does NOT work.
Change password
To change the password of your mobile phone.
8.5.5 Connectivity
Bluetooth
To set parameters for the Bluetooth connectivity. When enter this application, you can
choose
Power – to power on or power off the Bluetooth in your mobile phone.
Inquiry audio device – to search the Bluetooth device around your mobile phone.
My device – to list all Bluetooth devices you found or search new one.
Active device – to active some other Bluetooth device in list, or search new one.
Settings – to set the Bluetooth parameters, including visibility, changing device
name, whether need authentication and changing audio path.
About – to view the information for your Bluetooth.
NOTES: for safety, when pairing with other Bluetooth device, the password may need input, please
input the same password as the device you want to connect
Data account
To list all the data account supported, you should select one of them and edit them
according to the real parameter.
The account parameters sometimes may changed by the OPERATOR, so if there is
some error, please connect with your OPERATOR and change it.
8.5.6 Restore factory settings
To restore the original device settings. To do this, you need your phone lock code. After
resetting, the device may take a longer time to power on.
8.6. Multimedia
8.6.1 Camera
To preview and capture the images. In preview state, press <Options> to enter the Options
menu, you can choose –
Photos – to view the images already exist in photo album, see image viewer.
Camera settings – to set the camera parameters: Shutter sound, EV, Banding, Delay
timer or the status of continue shot.
Image settings – to set the image size and the quality of image you want to capture.
White balance – to select one balance mode to use, the default mode is auto
15
Scene mode – to set the mode normal or night in order to capture image in day and
night.
Effect setting – to set the image color effect according to your interesting.
Storage – to select the storage for camera
Restore default – to restore the original parameter settings
8.6.2 Image viewer
To view the image exists in photo album. Press <Options>, you can choose—
View – to view current image in display
Browse style – to change the style of view image list
Send – to transfer current image via MMS, or Bluetooth
Use as – to set current image as wallpaper, screen saver, power on/power off display or
image for somebody in phonebook
Rename – to rename the file name of current image
Delete – to delete current image
Sort by – to sort all the image files according to name, type, time, size when you view
image list.
Delete all files – to delete all files in current folder
Storage – to select the storage for image viewer.
8.6.3 Video recorder
When enter this function, you will preview the images, press<OK> to enter recording state,
press <Stop> to stop record and save to file or exit. Press<Options> to enter setting menu,
you can choose
Camcorder settings – to set the parameters of white balance, EV, Night mode and
banding.
Video settings – to set the quality level of video from low to high
White balance – to select one balance mode to use, the default mode is auto
Effect settings – to set the effect according to your interesting
Storage – to select the storage for video recorder
Restore default – to restore the original parameter settings
8.6.4 Video player
To view the video files stored in storage, focused on one file, press<Options>, you can
choose
Play – to play current video file
Send – to transfer current file via MMS or to Bluetooth to some others.
Rename – to change name of current video file
Delete – to delete current video file
Delete all file – to delete all video file in current folder
Sort by – to sort the files in view list according to name, type, time, or size.
Storage – to select the storage for video player.
8.6.5 Audio player
To play the audio file stored in storage
16
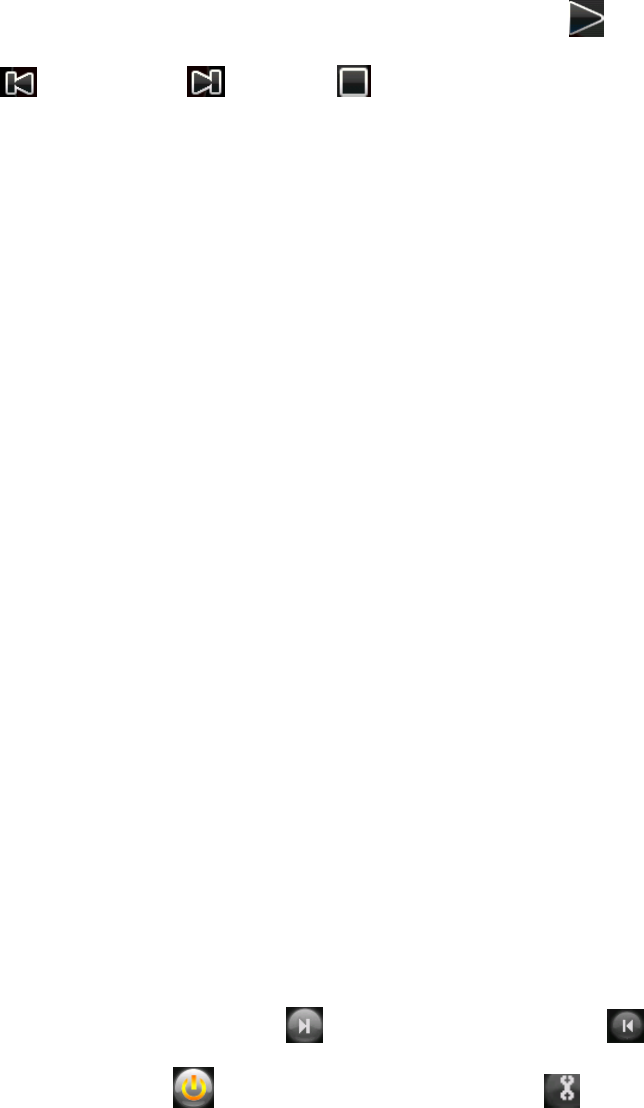
When there is no files, press<Options> to select the position where has the audio files. When
there are some audio files, in audio player screen, the icons control playing: means play
or pause, means previous, means next, means stop.
Press <list>in audio player screen, you can see the files exist in current storage. Select one
file and press <Options>, you can choose
Play – to play current audio file
Details – to view information of current audio file
Add to ringtones – to add current audio file to ring list in ring tone setup of profile, see
profile
Refresh list – to refresh the list in order to synchronize files in current storage.
Settings – to set the parameter for audio player, including storage, list auto generate,
repeat type, shuffle, background play, Bluetooth, headset, sound effect, lyrics display
status.
8.6.6 Sound recorder
To list all the files in current storage, if the folder is empty, press<Options> to select Record
to start a new record, to select settings to set the recorder parameters, including file format
and audio quality.
When start a new record, the animation and time will start, the process is working, you can
press<LSK>to pause or continue, press <Stop> to stop and save the record with the
filename you input.
When a record file is focused, press <Options>, you can choose
Play – to Play current record file
Append – to append new record to current record file
Rename – to rename current record file
Delete – to delete current record file
Delete all files – to delete all record file in current folder
Use as – to add current file to ring list in ring tone setup of profile, see profile
Send – to transfer current file via MMS or Bluetooth to some others.
8.6.7 FM radio
Warning: If you want to use FM radio, please insert headset first.
In FM screen, the icons control playing: means next channel/frequency, means
previous channel/frequency, means Power on/Power off FM radio, means to set
parameters.
Press<Options>, you can choose
Channel list – to view the channel list already exist, you can change or edit them.
Manual input – to set current frequency to the point you input
Auto search – to auto search channel and save to channel list
Settings – to set the status of background play and whether use loud speaker.
17
8.7. File Manager
To view the file folders in system storage (phone or memory card)
In every folder, the options for them are
Open – to open current folder
New folder – to create a new folder
Format – to format current storage(Phone or memory card)
Rename – to rename current folder or to rename current file
Delete – to delete current folder of to delete current file
Sort by – to sort the folders and file by name, type, time or size.
Play – to play the audio file
View – to view image file
Transfer – to transfer current file via MMS, Bluetooth or to special use
Copy, move – to copy or to move this file to other position.
Default folders description
Received – to store the files received through Bluetooth.
Ebook – to store the files that can read by E-book application directly.
My music -- to store the audio file played by audio player directly.
Photos – to store the images captured by camera and viewed by image viewer.
Video – to store the video file played by video player and record by video recorder.
Audio – to store the void memo recorded by sound recorder.
8.8. Fun and Games
8.8.1 Games
You can setting the sound effect for all the games first, or select the game you interested in.
8.9. Organizer
8.9.1 Calendar
Show the calendar according the date of mobile phone. Press <Option>, you can choose
View – to view the events list of the date.
View tasks – to view all the events list
Add event– to add a new events to events list.
Delete event – to delete event according to selected option.
Jump to date – to jump to the date you input.
Go to weekly/monthly view –to switch view between week and month
Hijri info – to know about Hijri information of the date
Indian calendar – to know about Indian calendar information of the date
8.9.2 Alarm
18
There are 5 alarms can be used. For every alarm, press <Edit> you can set: Status (on or off),
Time, Repeat status (when it is Days, can also set the weekday), Audio (Alarm tone), Snooze
period and Alert type.
8.9.3 Tasks
To add a schedule to a special day. If there is no task, you can press<Add> to add the type
and fill the content according requirement. Or press <Options>, you can choose
View – to view the detail of current task
Add – to add a new task
Edit – to edit current task content
Delete – to delete current task
Delete overdue – to delete overdue tasks
Delete all – to delete all tasks
Jump to date – to jump to the date to check tasks list
Send Calendar – to send current task as vCalendar via SMS,MMS, Bluetooth or save as
file
Save as file – to save task as a file.
8.9.4 Calculator
It will help you to resolve calculation problems as you want. And it’s easy to deal with
the operations ,since you could directly select numbers or operators to make it work.
8.9.5 World clock
To set timezone and homecity for mobile phone.
8.9.6 E-Book reader
To read the text stored in storage. Now only support .txt format files. When focused one file,
press<Options>, you can choose
Open E-Book – to open current file
Clean up bookshelf – to delete all the bookshelf
Global setting – to set the view parameter, including font type, font size, scroll type,
scroll speed, full screen status, encoding format and storage memory.
Book info – to view the information of current file
Delete – to delete current file
Delete all files – to delete all file in current folder
Sort by – to sort the files in list according to name, type, time or size
Apply global setting – to use the global parameter as current setting
Help – to know how to use this application.
8.10. Web
8.10.1 STK
To show all the service inside in your SIM card, the name and service should be different
according to your SIM card and OPERATOR
8.10.2 Internet service

19
This service is support by OPERATOR, if you do NOT know whether your SIM card
supports, please connect with the OPERATOR for more information.
Enter this service menu, you can choose
Homepage – to enter the homepage via WAP web.
Bookmarks – to list all the book marks, you can edit them or enter them directly.
Recent pages – to view rent pages
Offline pages – to view offline pages
Input address – to enter the address you enter directly
Service inbox – to list all the service
Settings – to set the WAP parameters, including SIM Cards selection, Profile you want
to use, browser’s settings, service message settings, and to clear cache and cookies.
9. FAQ
These lists just for reference, if your problem can NOT be reserved according them, please
sends it back to the after-sale department or other company who in charge of this mobile
phone.
questions
reason and reserve solution
Can NOT power
on
Must long press the POWER key at least 1 second
Check the battery is installed correctly
Whether the battery runs out, charge it and wait a few minutes
Can NOT attach
the network
The strength of signal is weak, please move to other place where
the signal is stronger.
Maybe you move out of the service area of your OPERATOR.
Check whether your SIM card is validated or connect with your
OPERATOR.
There are some
popup messages
Check whether the SIM Card is inserted correctly.
The mobile phone is locked, you must input the password.
The PIN code is needed if your SIM card is locked by you or some
others.
The PUK code is needed when you input wrong PIN code more than
3 times, input the correct PUK code or connect with your
OPERATOR.
The voice quality
is NOT good
during call
Check the column is suitable.
Check the signal strength in signal indicator, if the level is low, you
should move to another place the level is high
The time is the call rush hour, the network can not carry enough
calls
The standby time
of battery
becomes short
The low signal strength level will shorten your battery standby
time.
The battery runs out its life, please change the battery.
SIM card error
SIM card connect point is dirty, please clean it with soft clothe or
something.
SIM card is NOT inserted correctly.
SIM card is broken, please connect with your OPERATOR.

20
Can NOT make a
call
Make sure you press <SEND> or <SEND2> after dialing numbers.
Make sure you have enough money associated with your SIM card.
Make sure your SIM card is validated.
Check whether the call out function is barred in call settings.
Check whether the FDN is set in call settings.
Can NOT be
called by others
Make sure your mobile phone is ON, and the network is attached.
Make sure there is enough money associated with your SIM card.
Make sure your SIM card is validated.
Check whether the incoming call is barred in Call Settings.
Check whether the caller number is in black list.
Can NOT charge
the battery
Check the connecter connects well.
Check the temperature is suitable.
Battery or charger is damaged, please change a new one.
Some functions
do NOT work
Check the operation is correct
Make sure the operation is support by your OPERATOR or your SIM
card.
Make sure the condition needed by this function is meted.
FCC RF Exposure Information and Statement
The SAR limit of USA (FCC) is 1.6 W/kg averaged over one gram of tissue.
Device types: F52(FCC ID: ZJN-F52) has also been tested against this
SAR limit. The highest SAR value reported under this standard during product
certification for use at the ear is 0.284W/kg and when properly worn on the body
is 0.993W/kg. This device was tested for typical body-worn operations with the
back of the handset kept 1.5cm from the body. To maintain compliance with FCC
RF exposure requirements, use accessories that maintain a 1.5cm separation
distance between the user's body and the back of the handset. The use of belt
clips, holsters and similar accessories should not contain metallic components
in its assembly. The use of accessories that do not satisfy these requirements
may not comply with FCC RF exposure requirements, and should be avoided.
This device complies with part 15 of the FCC rules. Operation is subject to the
following two conditions: (1) this device may not cause harmful interference,
and (2) this device must accept any interference received, including
interference that may cause undesired operation.
NOTE: The manufacturer is not responsible for any radio or TV interference
caused by unauthorized modifications to this equipment. Such modifications
could void the user’s authority to operate the equipment.
NOTE: This equipment has been tested and found to comply with the limits for
a Class B digital device, pursuant to part 15 of the FCC Rules. These limits
are designed to provide reasonable protection against harmful interference in
a residential installation. This equipment generates uses and can radiate
radio frequency energy and, if not installed and used in accordance with the
instructions, may cause harmful interference to radio communications.
However, there is no guarantee that interference will not occur in a particular
installation.
If this equipment does cause harmful interference to radio or television
reception, which can be determined by turning the equipment off and on, the
user is encouraged to try to correct the interference by one or more of the
following measures:
- Reorient or relocate the receiving antenna.
- Increase the separation between the equipment and receiver.
-Connect the equipment into an outlet on a circuit different from that to which
the receiver is connected.
-Consult the dealer or an experienced radio/TV technician for help.