User Manual

Report No: BWS-03-EF-0026
FCC ID Q9JEZMP-2000
Date of Test : Jun 14, 2003
EZMAX Co., Ltd.
Digital Audio Player EZMP-2000
Appendix 6. User Manual
Refer to the following pages
(N.B.) Copyright © 2003 by EZMAX Co., Ltd. All rights reserved.
The use of user's manual, pictures, software and other related documents of
this product requires the prior permission of EZMAX, whose violation would be
followed by a legal action or suit.
The content of user's manual are subject to change without any prior notice
due to improvements in the product.
EXMAX CO., LTD.
http://www.ezmax.co.kr

1
Features
Thank you for purchasing this product.
Make sure to use it after carefully reading the user's manual.
This device is small, light and easy to carry, and plays digital music that meets MP3
and WMA standards.
This device has been so improved that It could last for 40 hours with only one small
battery (AAA battery).
In addition, it adopts JOG button to easily use various functions and enables the
user to upgrade the functions without any inconvenience of visiting A/S center in
person.
If you want to upgrade to the latest software or have any inquiries, visit our website
at http://www.ezmax.co.kr.
Now, you can enjoy convenience of digital storage device and delicacy of digital
music our player provides.
2
Contents
Getting Started
1. What's in the box ..............3
2. PC System Requirements ..4
3. Cautions for Safety .............5
Name of Parts
1. Name of Parts ....................6
2. Name of LCD Window Display
...............................................7
Preparation
1. Install Manager Program ....6
2. Install USB Driver ...............9
3. How to Connect Player to PC
.................................................11
How to Use Manager Program
1. Description of Manager Screen .....
.
2. Download ............................ 14
3. Save File ............................15
4. Set Equalizer ...................... 16
5. Set Play Order/Delete File .. 17
6. Format Flash Memory ....... 18
How to Use MP3 Player
1. Power ON / Play .................19
2. Power OFF / Pause ............ 20
3. Volume Control ................... 21
4. Select Next/Previous Track 22
5. Menu Mode ........................23
6. How to Insert Battery .......... 29
Others
1. Troubleshooting .................. 30
2. Specification ....................... 31
3. MP3/WMA Responding Music
Format ................................ 32
3. Service Information(A/S) .... 33
4. Warranty .............................34
3
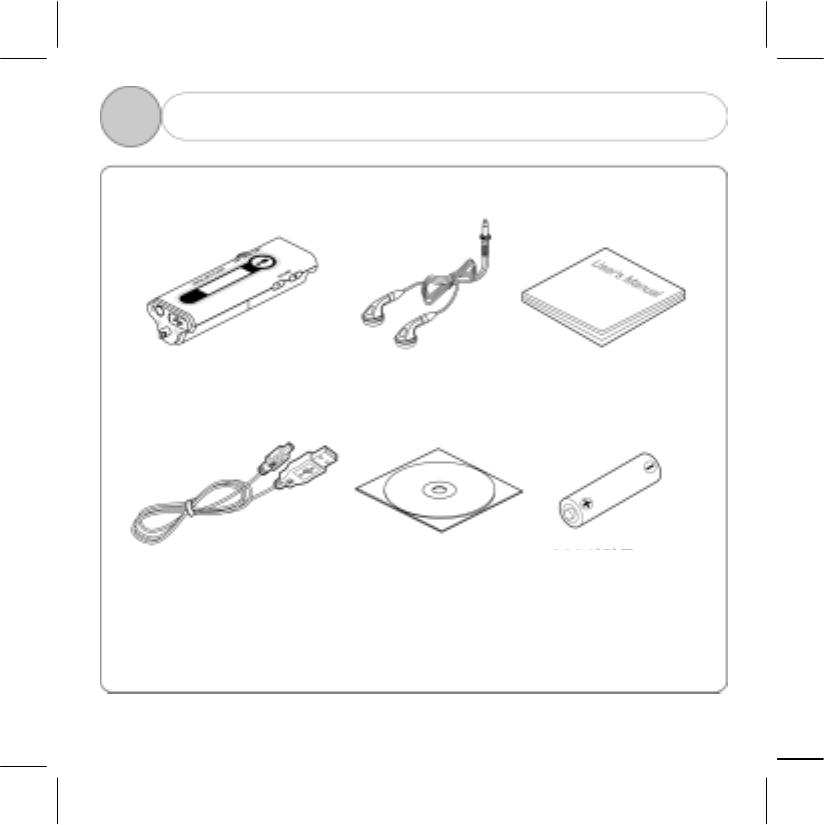
1 What's in the box
Necklace Earphone User’s Manual
MP3 Player
USB Cable Install Program CD
A
AA Size Batte
r
y
4
1 2. PC System Requirements
There are basic requirements for PC to install software and use mp3 player.
Make sure to check recommendations before use.
Windows 98SE / ME / 2000 / XP
Pentium 200MHz or above
USB port supports
CD-ROM drive
64 MB RAM or above
Free space of hard disk over 20MB
(Additional space required for saving music file)

5
1 3. Cautions for Safety
For Listening to Music
Output level of this equipment guarantees quality sound at its middle volume. Since
listening at its high volume for a long time may cause a serious damage to your
hearing sense, listen at its proper volume.
Keep away from Strong Impact or Vibration.
Giving impact to or felling the main product or accessories on the floor may give a
severe damage to the player.
For Storage
Avoid any place with a severe change in temperature, high humidity or strong
magnetic field.
For Cleaning
Wiping the players with chemicals may change the color or give damage to the
surface.
Wipe out the players using soft fabrics.
Battery
Do not insert battery when you don't use player for a long time.
! Note: Never disassemble, repair or remodel in person.
6
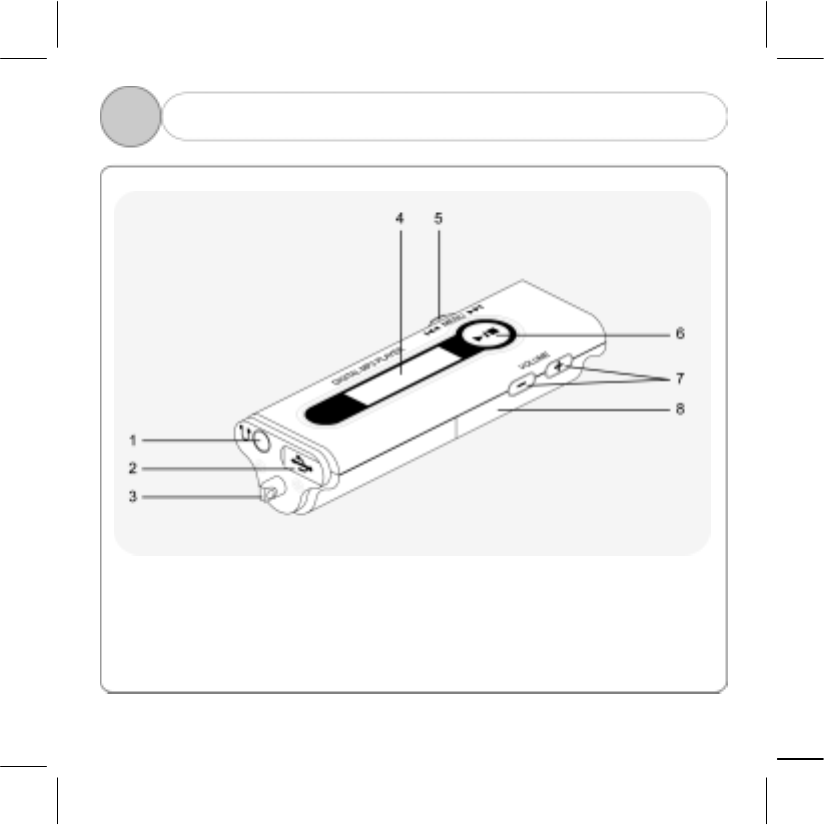
2 1. Name of Parts
1. Earphone Jack
2. USB Port
3. Necklace connection hole
4. Operation Status LCD window
5. MENU Switch
6. Power( on/off /Play/Stop) button
7. Volume button
8. Battery cover
7
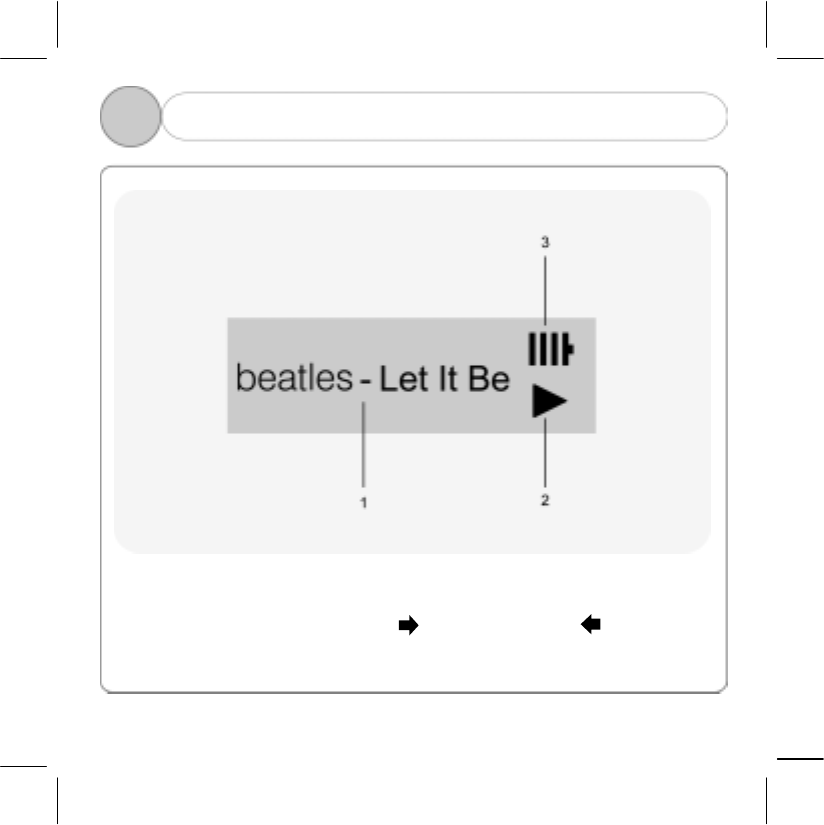
2 2. Name of LCD Window Display
1. Name of song selected or in play.
2. Progress status
( ▶ : Play / ■ : Pause / : Fast Forward / : Rewind )
3. Battery level
8
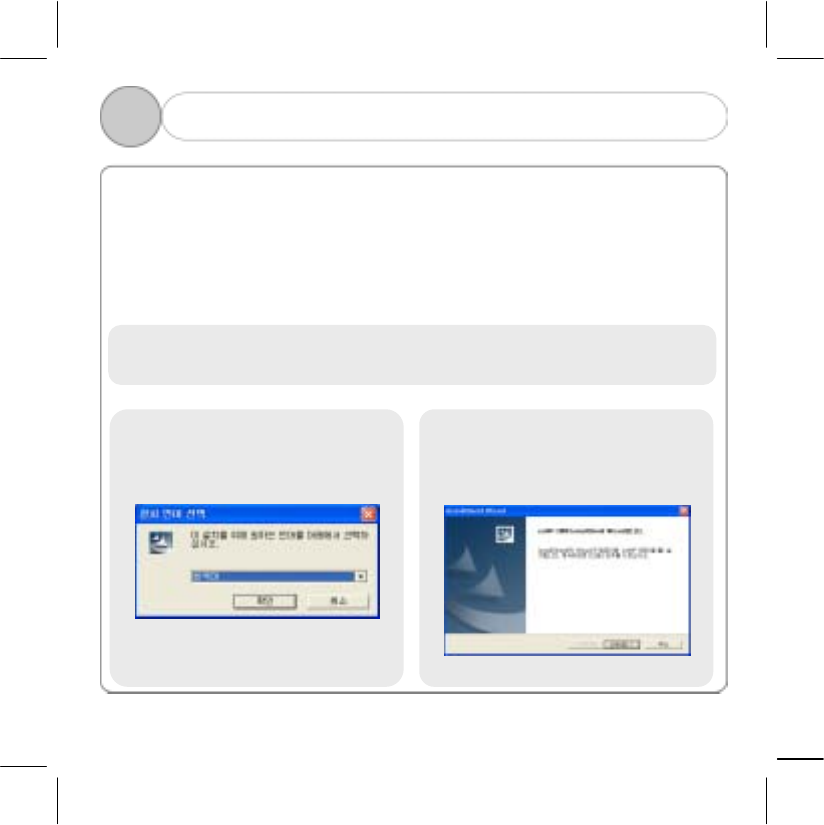
3 1. Install Manager Program
To install manager program, make sure that USB cable isn’t connected to PC while
you follow the steps below
Insert Install CD into CD-ROM drive, and the following screen will appear and
installing will start.
(This explanation is an example> of WIN XP. If you are a user of other OS, visit and
refer to our website. )
! Note: Insert install CD into CD-ROM drive only when you install program at the
beginning, and then remove it after installing is finished.
1) Select language to select and
press the "OK" button.
2) Click the “Next” button.
9
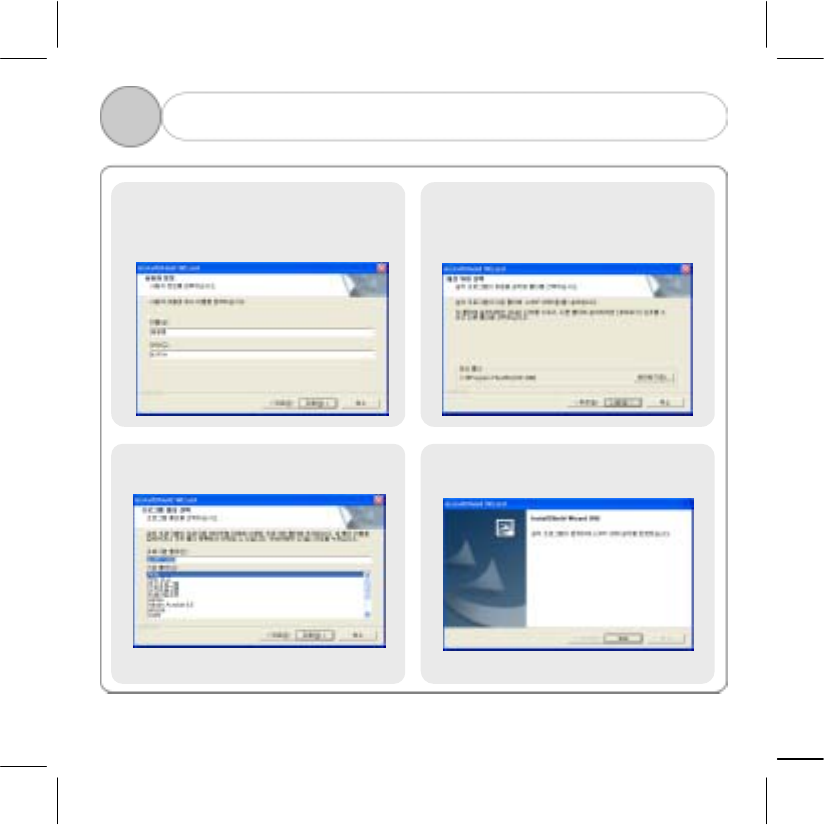
3 1. Install Manager Program
5) Click the “Next” button. 6) Click the “Finish” button.
4) Click the “Next” button.
3) Enter user information and
then click the "Next" button.
10
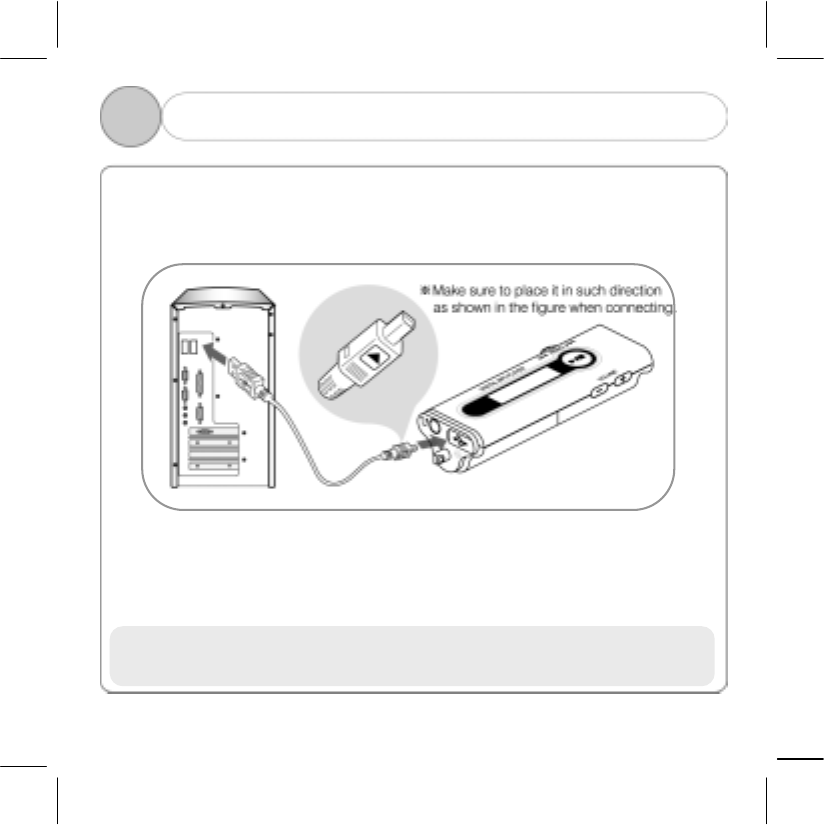
3 2. How to Connect Player to PC
To download MP3 file from PC, you should use USB cable to connect PC USB
PORT and MP3 player.
( You should use USB cable provided when you purchase EZMP-2000. )
1) Connect the rectangle end of Universal Series Bus (USB) cable to
USB port of PC.
2) Connect the square end of Universal Series Bus (USB) cable to
USB port connection part of player.
! Note: Separate earphone from MP Player when you download or upload.
Turn off MP3 and remove the battery.
11
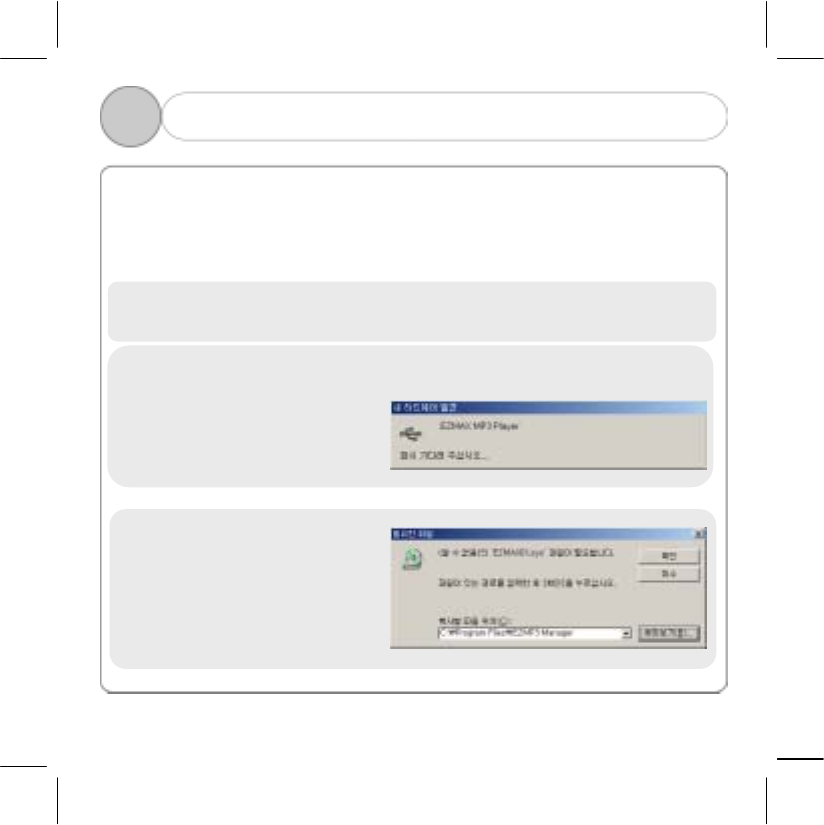
3 3. Install USB Driver
The following explanation is an example> of WIN98.
Since different figures may appear depending on OS of user PC, visit our website
and find appropriate information.
1) Connect USB cable to MP3 player and USB port.
2) A message “New Hardware
Found” automatically appears
on PC screen.
3) If a message "(Unknown)
‘EZMAX01.sys’ file is
required" appears, set the path
as shown in the figure and
check.
12
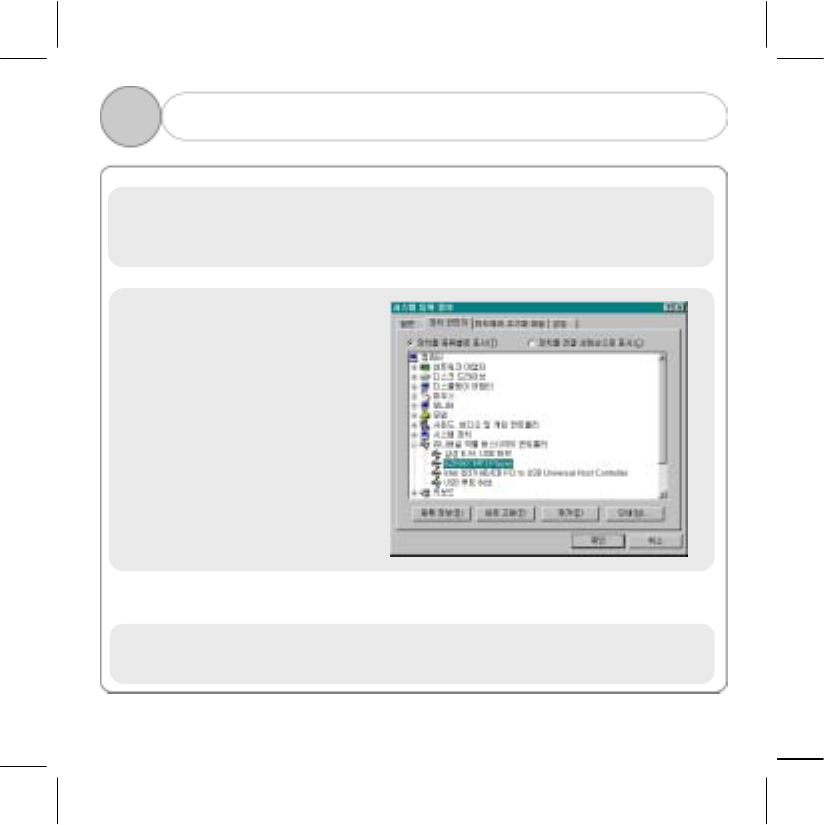
4) When you press the "Finish" button after file is copied, installing USB driver
is finished.
5) To check whether USB driver is
properly set, double-click the
"System" icon in [Start] -
[Setting] - [Control Panel].
Click “Device Manager” Tab and
click "+" of “Universal Series
Bus (USB)” controller.
3 3. Install USB Driver
!Note: When “EZMAX MP3 Player” appears, driver is successfully installed.
13
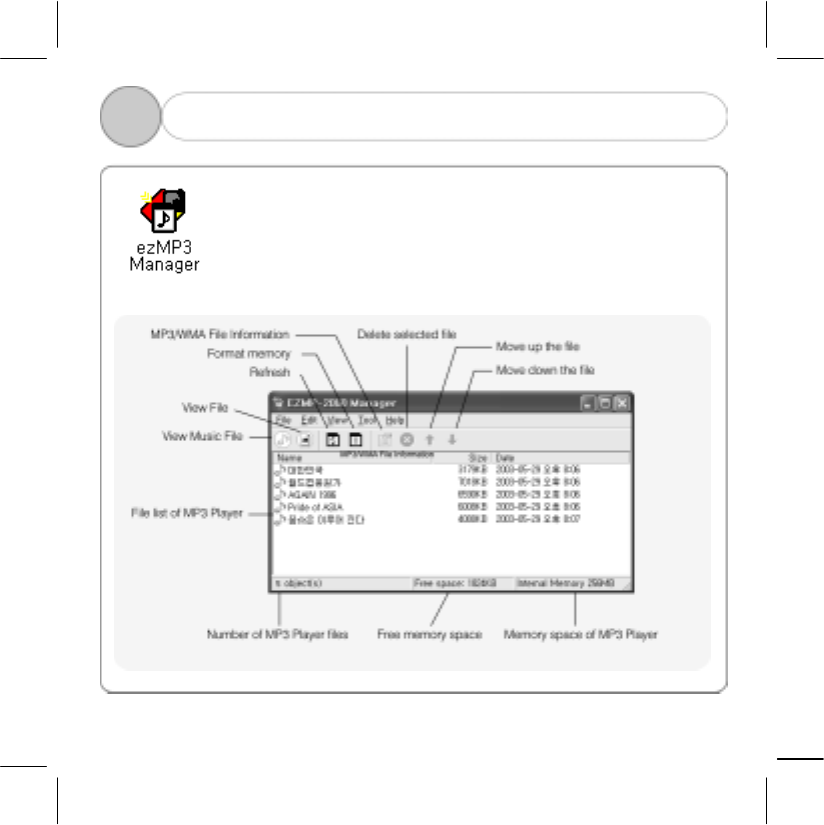
4 1. Description of Manager Screen
Click the [ezMAX] icon on the desktop or click [Start] [Program]
[ezMAX] to execute program.
When MP3 player is connected with USB connection cable, it
automatically reads the memory and displays the files on the screen
displaying the memory..
14
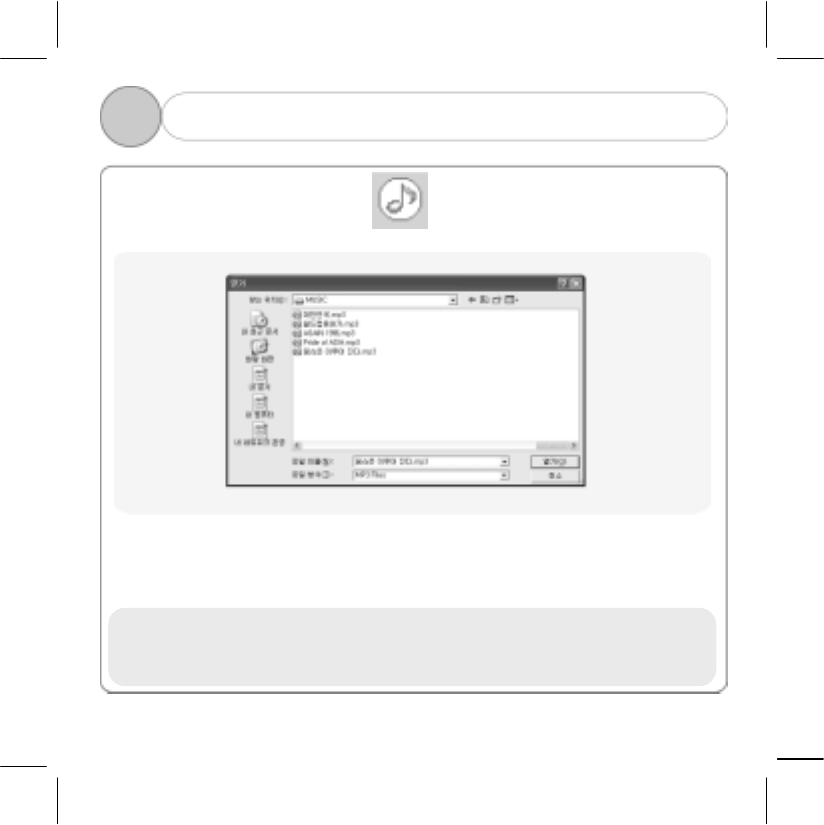
4 2. Download(Transmit Music File from PC to MP3 Player)
1) Click the “View Music File” icon ( ) in the menu bar.
2) Select [File]→[Download] in the menu bar.
3) Find the directory where MP3 / WMA file is located and select the file you want.
4) Click the [Open] button to copy the file to the player.
(Select it with a mouse and drag it to the manager window.)
!Note: MP3 / WMA file downloaded from Music Mode is prohibited from being
upload by law.
15
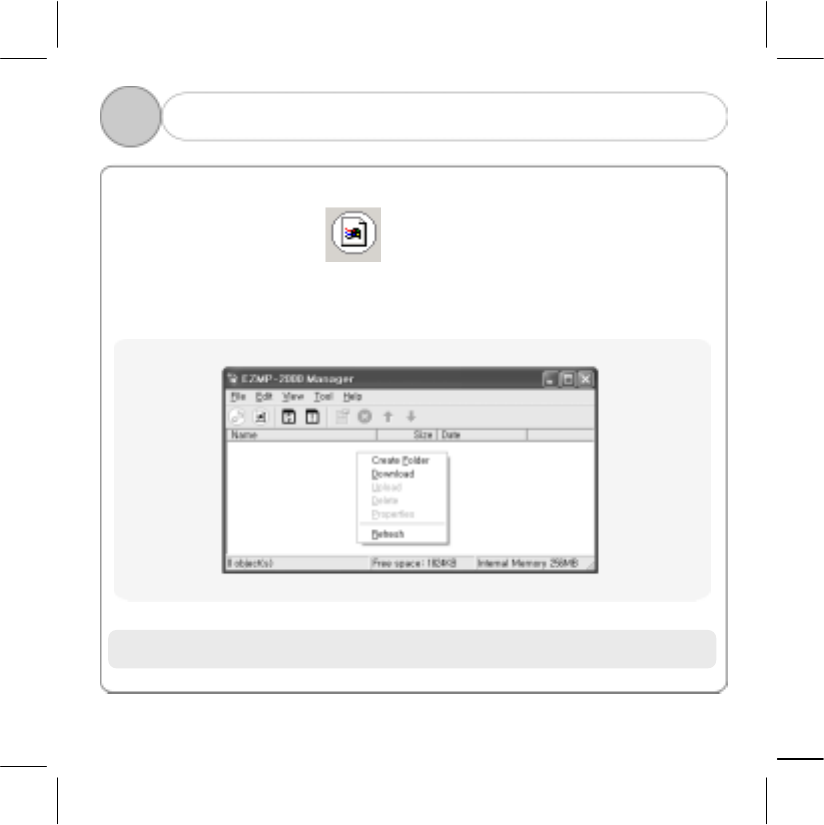
You can save files(Ex. extension file, bmp, doc, zip, etc.) in the internal memory of
MP3 Player without mobile storage device.
1) Click the "View File" icon ( ) in the menu bar.
3. Save File
4
2) Right-click the mouse, select “Download”, and then save the file you want to save
from computer to MP3 Player.
To the contrary, if you want to transmit files in MP3 player to the computer, select
“Upload” and transmit the file to the computer.
! Note: In the "View File" mode, downloaded MP3 / WMA file will not be played.
16
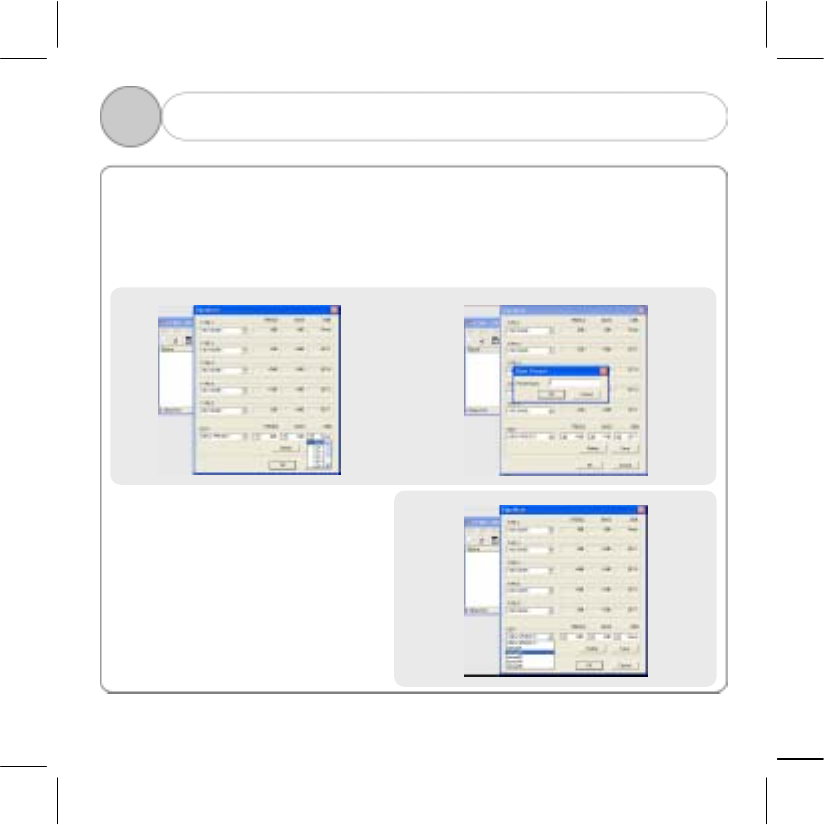
4 4. Set Equalizer
1) Select Tool Equalizer in the menu bar.
In Equalizer window, you can set various types of sounds such as TREBLE,
BASS and DBB and save it in the name you want in the EDIT window.
(The following example shows that user sets TREBLE, BASS and DBB in the
EDIT window, and saves in the name of “User Mode 1”.)
2) You can select each type you set in
TYPE-1, TYPE-2, TYPE-3, TYPE-
4, TYPE-5 window as shown
above to set the Equalizer you
want.
17
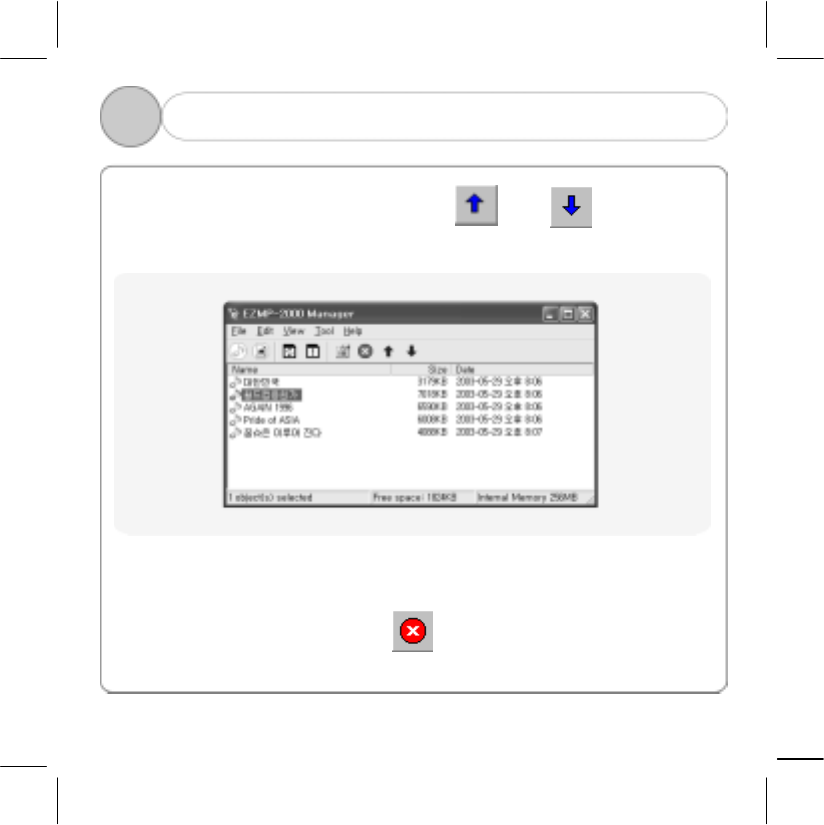
4 5. Set Play Order and Delete
1) Set Play Order
: Select the file you want and then click " " or " " button in the
menu bar.
2) Delete MP3 / WMA File
: Select the file you want and click " " in the menu bar.
18
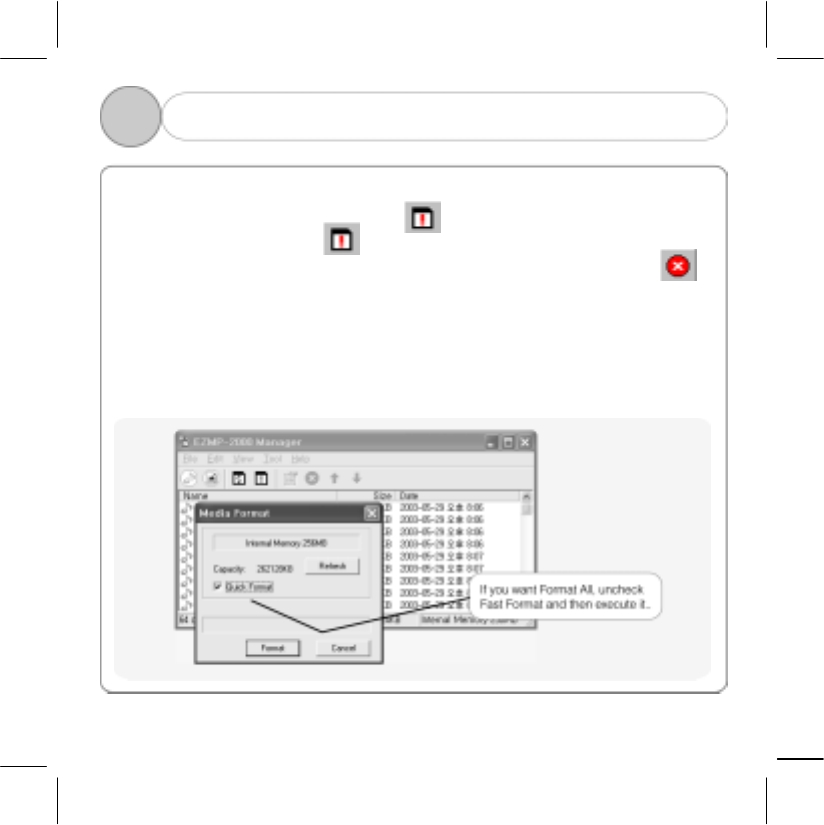
All files(MP3/WMA file, effect sound setting file and other files saved by user) are all
deleted when you select Format button( ). If you delete MP3 file alone, select
the file you want and click " " button. If you want to initialize all memory, or
manager program cannot recognize MP3 player, initialize memory with ( )
button.
6. Format Flash Memory
4
There are 2 kinds of format such as Fast Format and Format All. It supports fast
format by default. Select and execute Format All as shown in the figure if user
wants.
(You can listen to music with clearer quality if you use MP3 Player after executing
Format All once in 2-3 months, and arranging internal memory.)
19
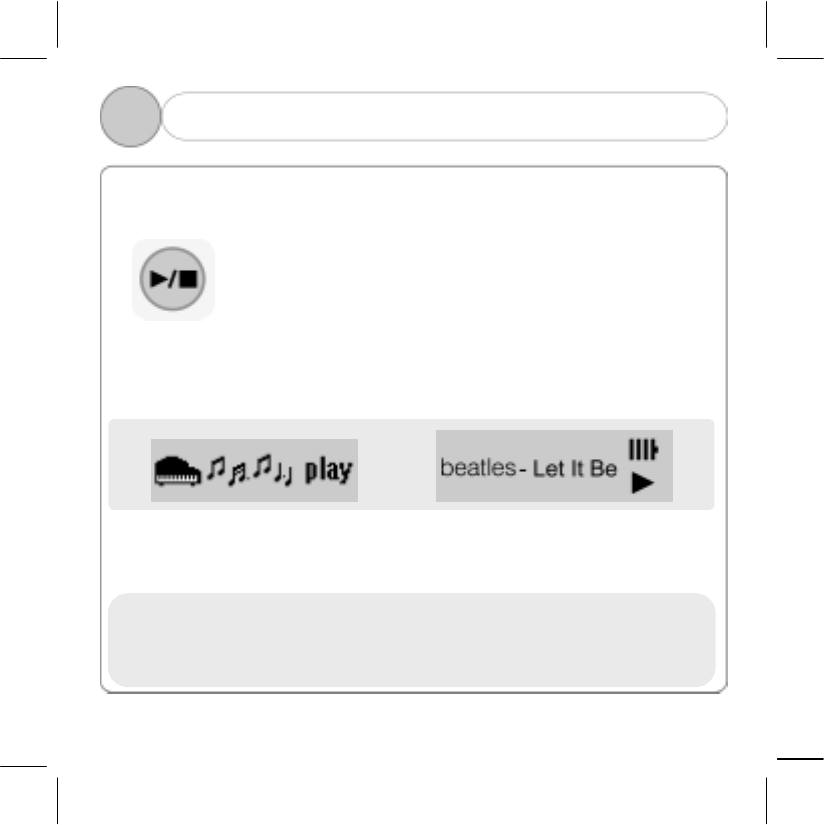
5 1. Power ON / Play
Power ON / Play( MP3, WMA )
If you press [POWER button] a little long, power will be turned on
and automatically play music under the same as the environment
where the previous music played(sound quality, music to be
played, play mode, etc...).
If you press [Power button] again in Pause status, Play[ ▶ ] will
start.
! Note: Play(Power ON) does not work, if there is no song downloaded in the
memory. ▶(PLAY) is displayed on the lower right of LCD in accordance
with the mode selected by user so as to check the progress status.
20
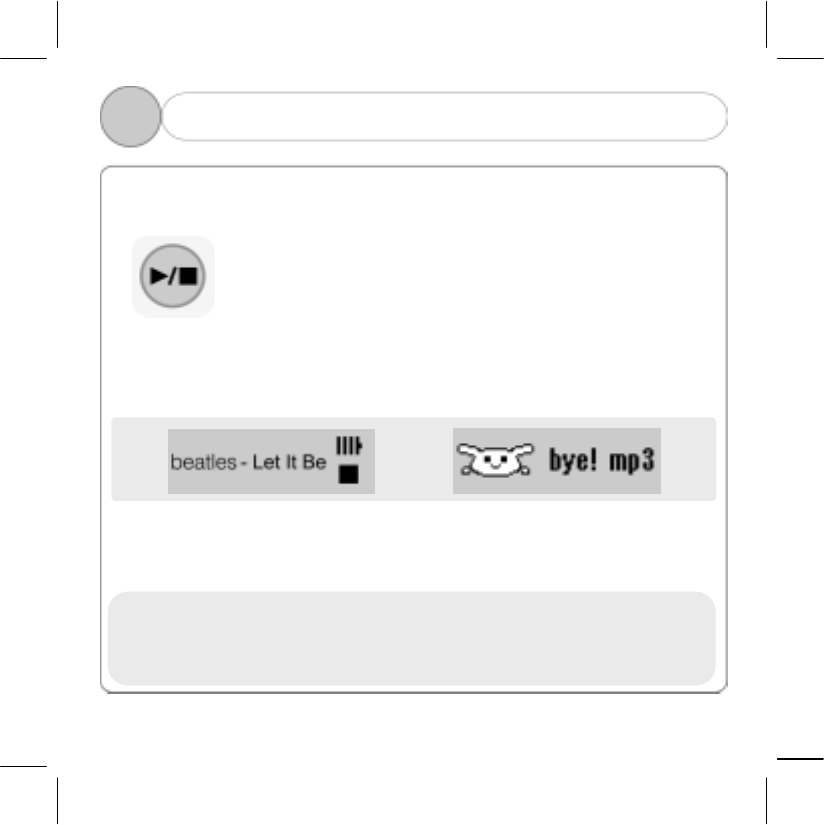
5 2. Power OFF / Pause
Power OFF / Pause
If you press [POWER button] a little long, power will be turned off.
At this time, the environment is saved inside and will be applied
when power is turned on in the next time.
If you press [POWER button] while a file is played, it will become
Pause ( ■ ) status. If you press [POWER button] again in Pause
status, it will start playing [ ▶ ] again.
! Note: If there is no key operation for over 30 seconds in PAUSE status, power will
be automatically turned off.
■(PAUSE) is displayed on the lower right of LCD in accordance with the
mode selected by user so as to check the progress status.
21
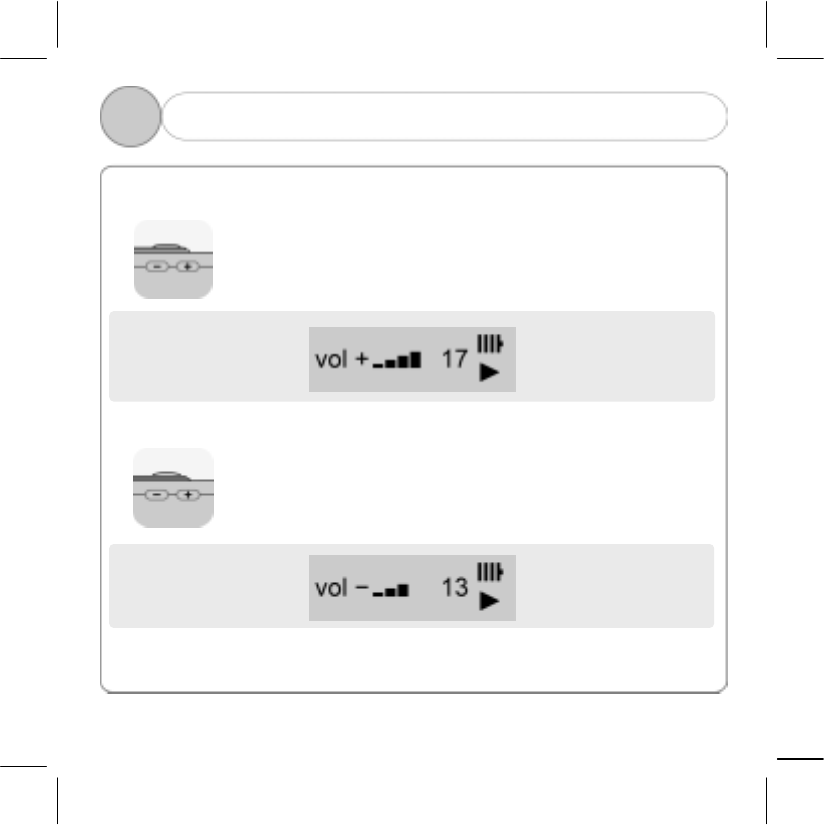
5 3. Volume Control
1) Volume Up
Press [ + ] button to volume up while a file is in play(stop)
status.
2) Volume Down
Press [ - ] button to volume down while a file is in play(stop)
status.
! Note: Volume consists of a total of 20 stages.
22
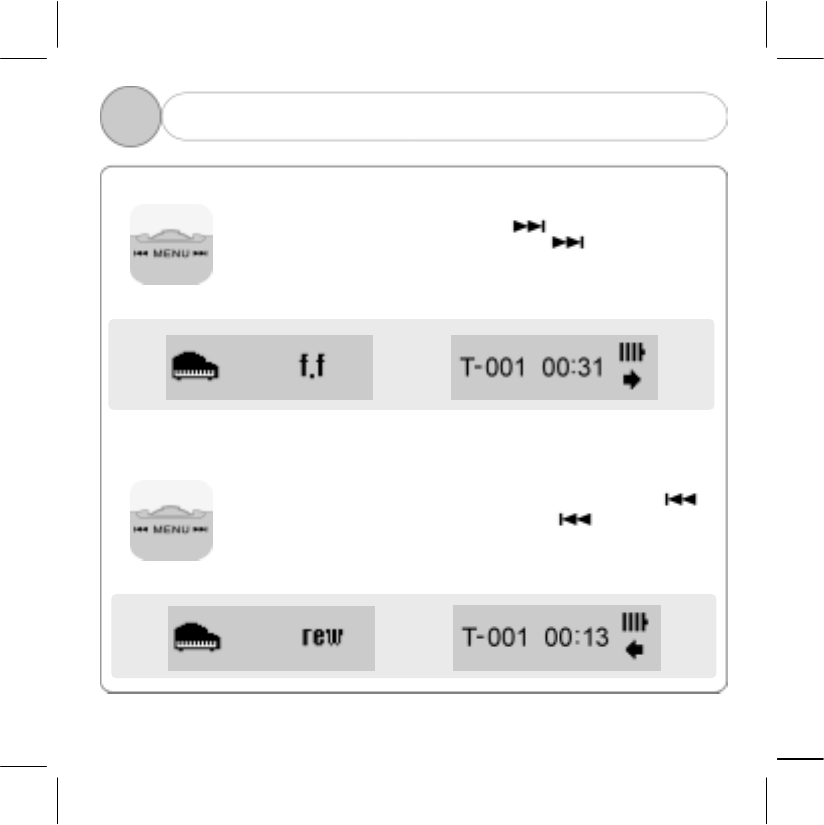
5 4. Select Next/Previous Track(Fast Forward/Rewind)
1) Select Next Track (Fast Forward )
To select the next track, push it to [ ] direction while it is
played. If you want to fast-forward, press [ ] a little long to
select fast forward while it is played.
At this time, effect sound you selected in Manager Program will
come out.
2) Select Previous Track ( Rewind )
To select the previous track, push it as in the direction of [ ]
while it is played. If you want rewind, press [ ] a little long to
select rewind while it is played.
At this time, the effect sound you selected in Manager Program will
come out
23
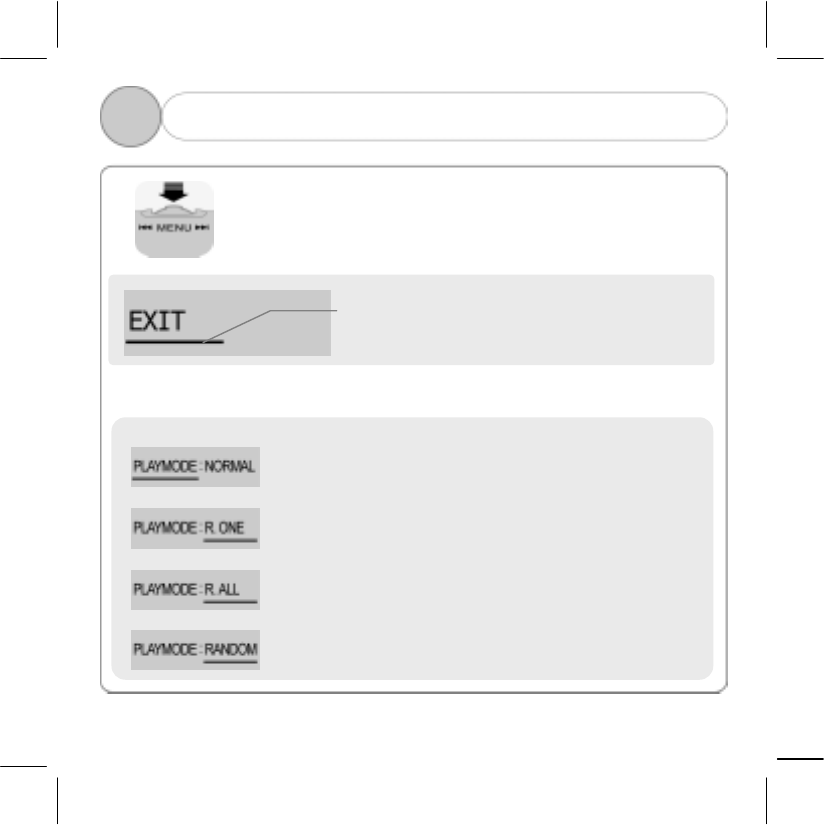
5 5. MENU MODE
The following functions are in menu mode.
If you press the MENU switch in the direction of the arrow as
shown in the figure while it is in Play(Stop) status, the following
screen will appear.
Underline displays Progress(Selection) status.
Selection is moved when you click in the direction
of the arrow
1) PLAY Mode ( Default Setting : NORMAL )
: Play all songs once in an order
: Repeat the song selected alone
: Repeat all songs in an order
: Play all songs randomly without order
24
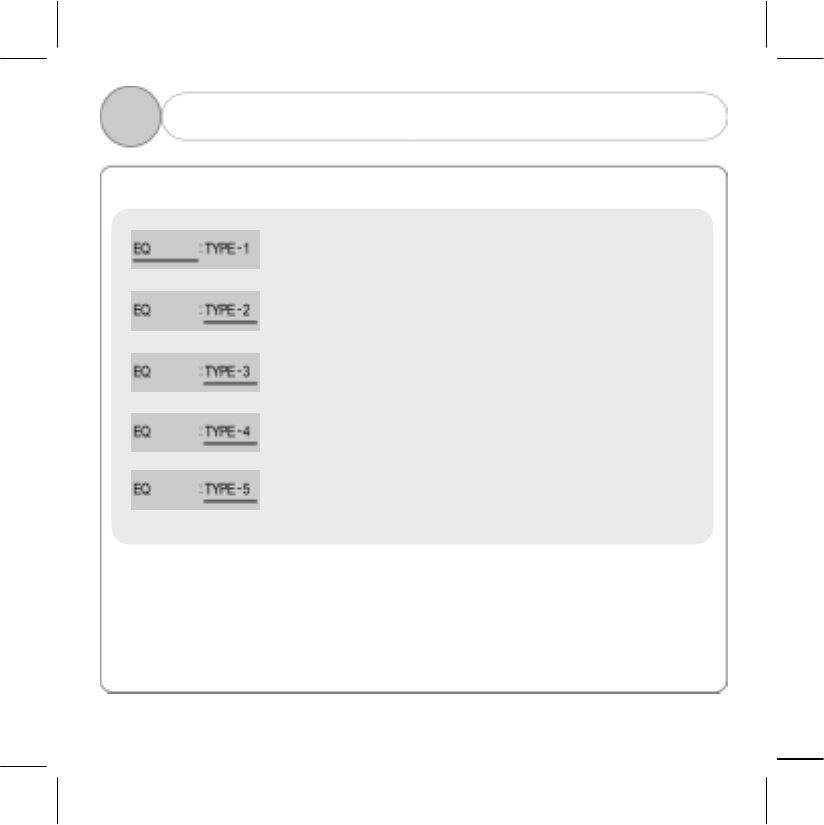
5 5. MENU MODE
2) EQ Mode ( Default Setting : TYPE-1 )
You can save 5 types such that users could select
one of them they want.
! Note: Users can directly enter each type at Edit window of Manager Program by
adjusting TREBLE, BASS and DBB3. Each type is selected whenever
pressing EQ switch. (Refer to 4-5. How to Set Equalizer)
25
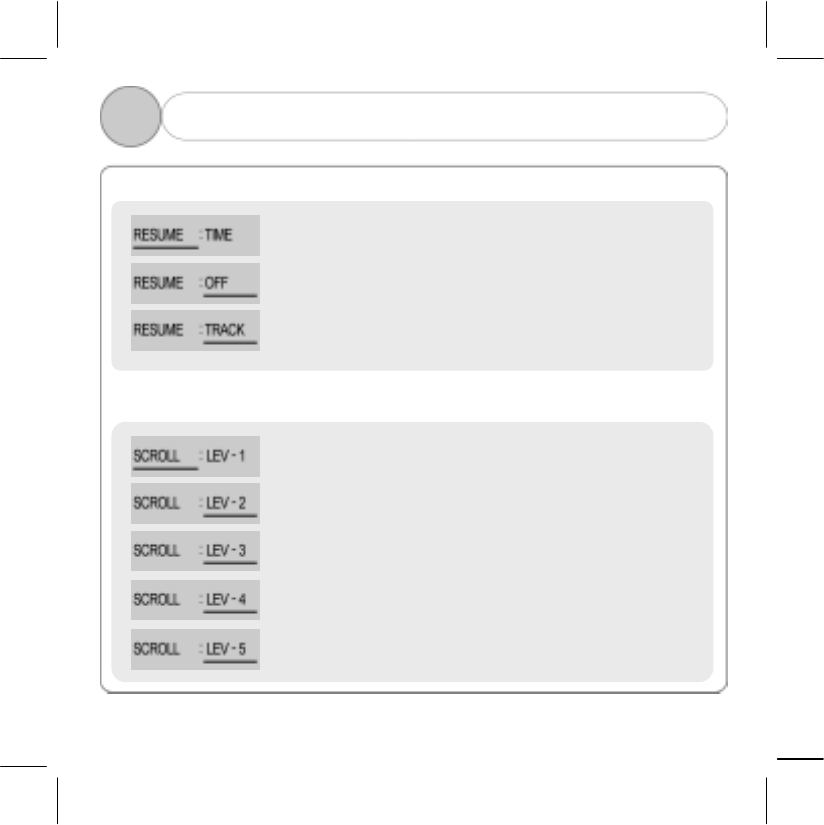
5 5. MENU MODE
3) RESUME Mode ( Default Setting : TRACK )
4) SCROLL Mode ( Default Setting : LEV-3 )
: Listen from the song played last
: Listen from the first song in the music file list
: Listen from the beginning of the song played last.
It is to adjust the screen moving speed of LCD window.
“LEV-1” is slowest and “LEV-5” is fastest.
26
5 5. MENU MODE
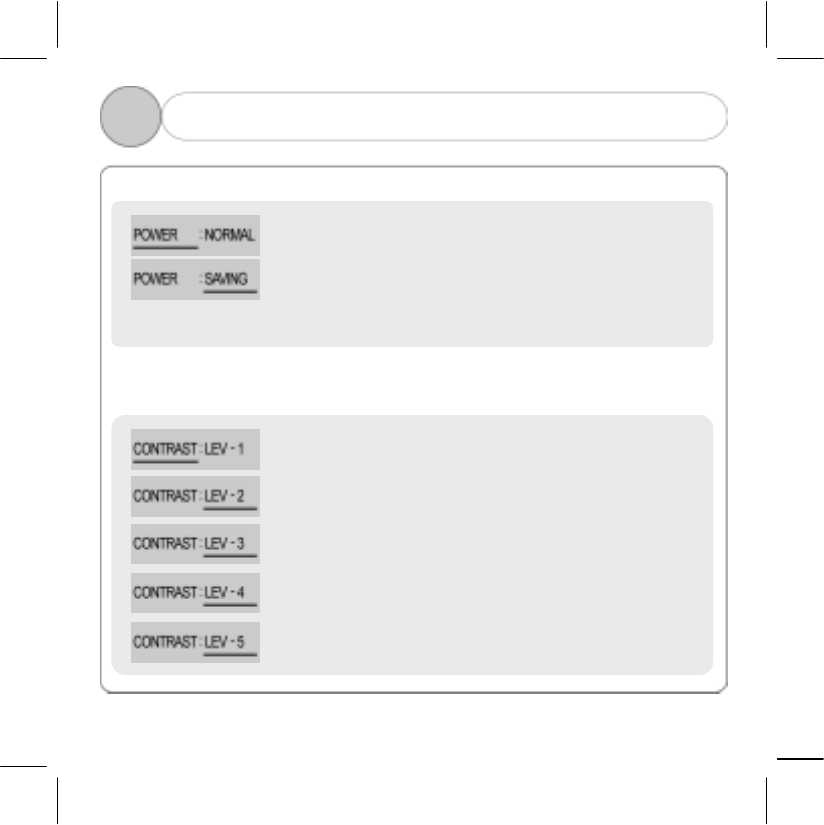
5) POWER Mode ( Default Setting : NORMAL )
.
! Note: If you set the POWER mode to “saving”, you can use battery longer
6) CONTRAST Mode ( Default Setting : LEV-3 )
:
Operation status is always displayed on the LCD window.
:LCD screen is turned off in 30 seconds after the last Key is
input., when the next key is entered, operation status will be
displayed on the LCD window.
It is to adjust operation status brightness(contrast) of the
LCD window. “LEV-1” is dimmest and “LEV-5” is darkest

27
5 5. MENU MODE
7) LIGHT Mode ( Default Setting : NORMAL )
8) KEY-MODE Mode ( Default Setting : MUSIC )
: Light is turned on for 10 seconds and off, after
the last Key is input
: Light On/Off repeats itself at the interval of 1 second.
: Always Light On
: Always Light Off
: Music Listening Mode
: This mode supports block repetition.
Press the menu switch [ , ] to designate the
section to repeat
28
5 5. MENU MODE
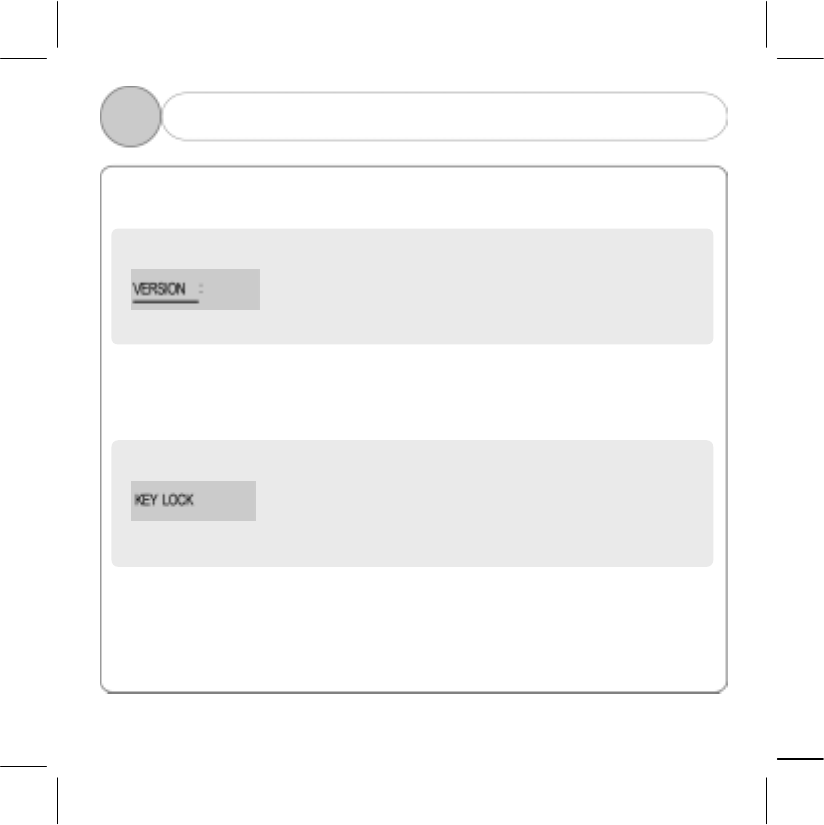
9) VERSION Mode
Display the current version of Firmware
10) KEY LOCK Mode
If you push the Menu button for a few seconds,
all the keys is locked.
If you push another time, they're unlocked.
29
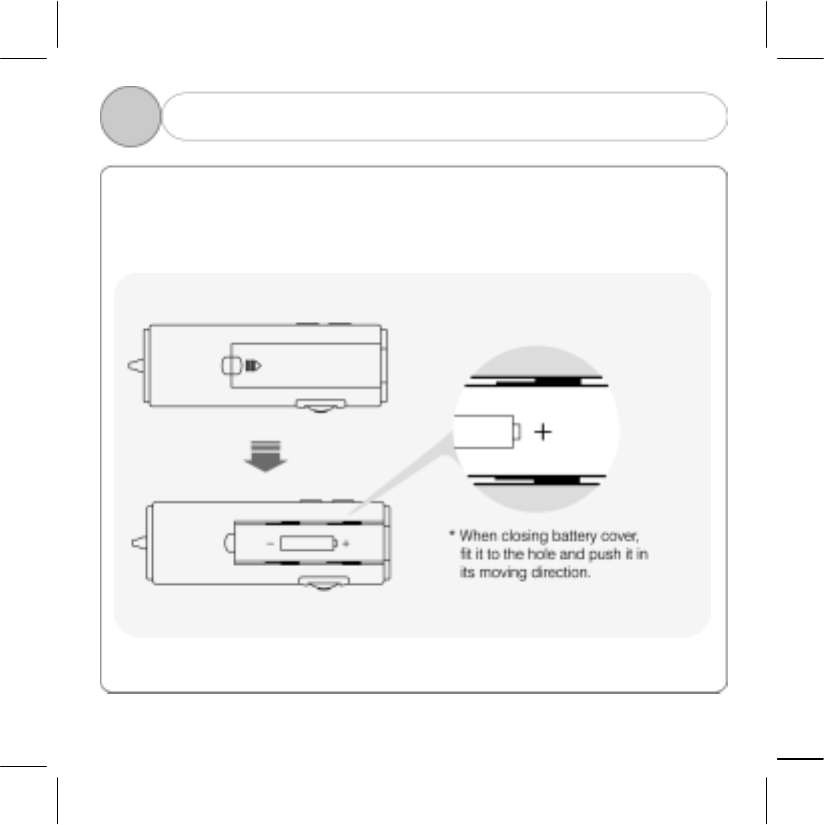
5 6. How to Insert Battery
Open the battery cover and insert a “AAA” battery in accordance with its proper
polarity [ + ], [ - ].

30
6 1. Troubleshooting
Check the followings if any problem occurs when you use products.
Key does not work?
・Check”+”, “-” polarity of battery.
・Check the remaining level of battery.
Cannot be downloaded?
・Check whether USB cable is properly connected between player and PC.
・Check whether USB driver is properly installed.
・Check whether empty space of memory is sufficient.
Strength of sound is not constant?
・When you make an audio CD or WAV file as MP3 file using MP3 encoder
software, the strength of sound played in the player may not be constant
depending on the strength of sound.
When well-worked player is not recognized?
・When well-worked player is not recognized in the manager program, check
whether USB drive in the device manager is well accepted as “EZMAX MP3
Player” and if it is accepted as another name, check the cable connection status
again and then start manager program again.
31
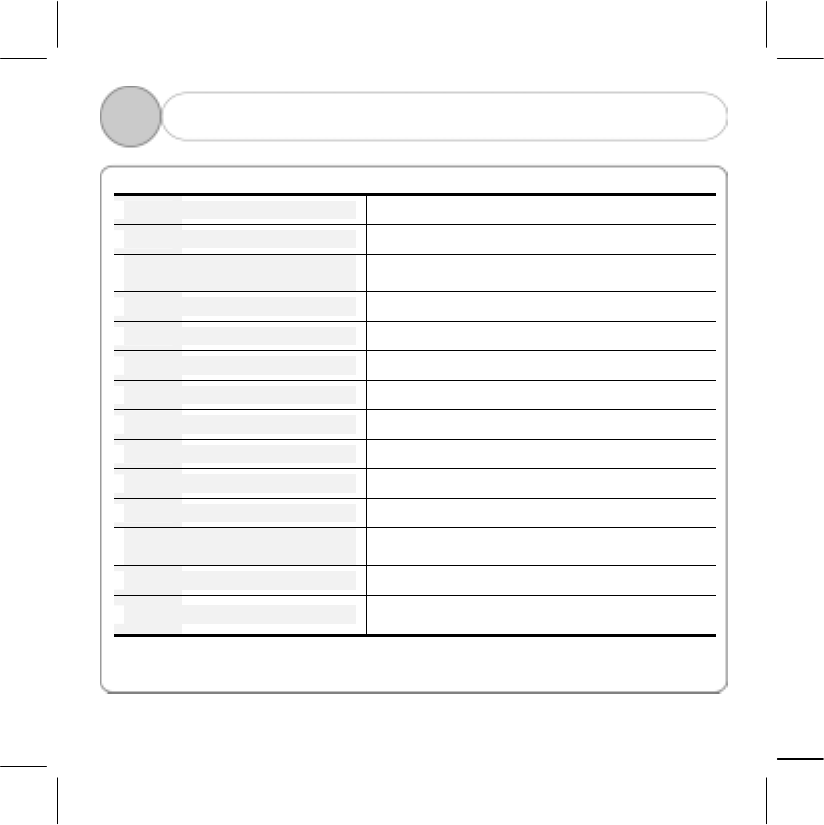
6 2. Specification
Memory Capacity Internal memory 64MB/128MB/256MB
PC Interface USB 1.1
Maximum speed of file
transmission 4Mbps
DISPLAY LED BACKLIGHTING GRAPHIC LCD
Power DC 1.5V
Maximum output of earphone 4mW + 4mW (16Ω)
Signal to Noise ratio > 85dB
Battery AAA size x 1
Range of frequency 20Hz ~ 20kHz
Distortion ratio < 0.1%
Weight 22.5g (Excluding battery)
Maximum time of continuous
usage About 40 hours
Dimension 28 (Width) x 83(Length) x 19.5(Height) mm
Responding music format MP3 / WMA ( Refer to next page )
* Specification and appearance of this product are subject to change without notice
for an improvement of performance.
32
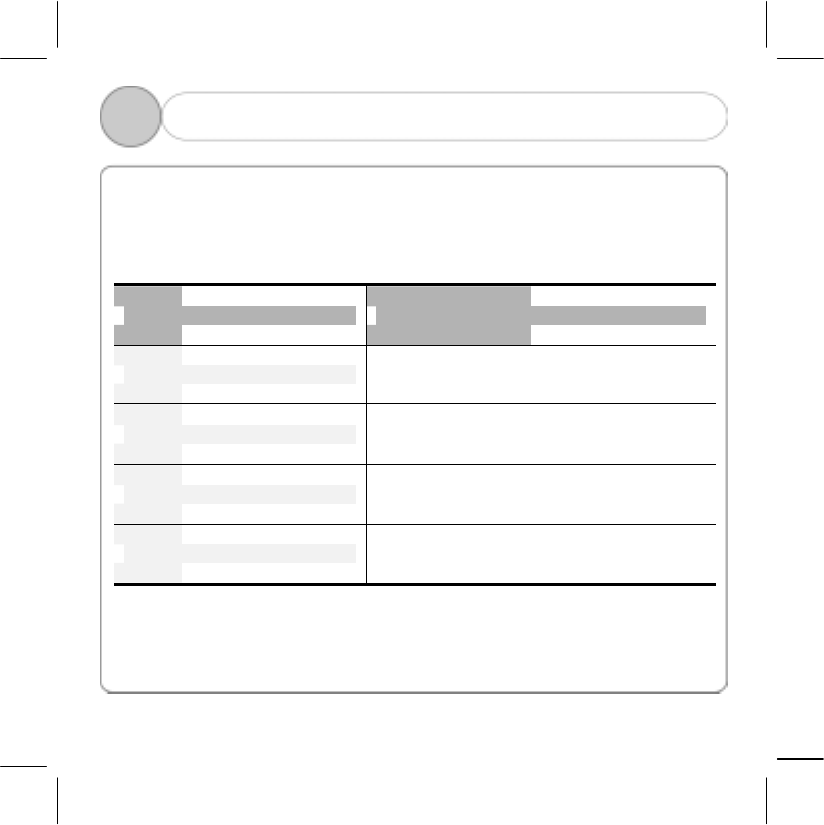
6 3. MP3 / WMA Responding Music Format
1) MPEG1, MPEG2, MPEG2.5 ( all sampling frequencies, all bit rates )
2) WMA ( High Rate defined by Microsoft )
Sampling Frequency Bit rate (bps)
48 kHz 128k, 160k, 192k
44.1 kHz 48k, 64k, 80k, 96k, 128k, 160k, 192k
32 kHz 48k, 64k
22.05 kHz 32k

33
6 4. Service Information (A/S)
If you want latest information about updated Manager or MP3 player,
visit our website.
Homepage: www.ezmax.co.kr
Address : # 302, Keumbong Techno Valley, 59-3 Dangjeong-dong, Gunpo city,
Gyeonggi-do
Tel : 031-457-9184
Fax : 031-457-9187
e-mail : webmaster@ezmax.co.kr
! Note: If you want A/S due to some breakdown, you can visit our main office
and receive it, or send mail(registered mail and home delivery).
But, please note that we cannot give receiver-pay service.
34
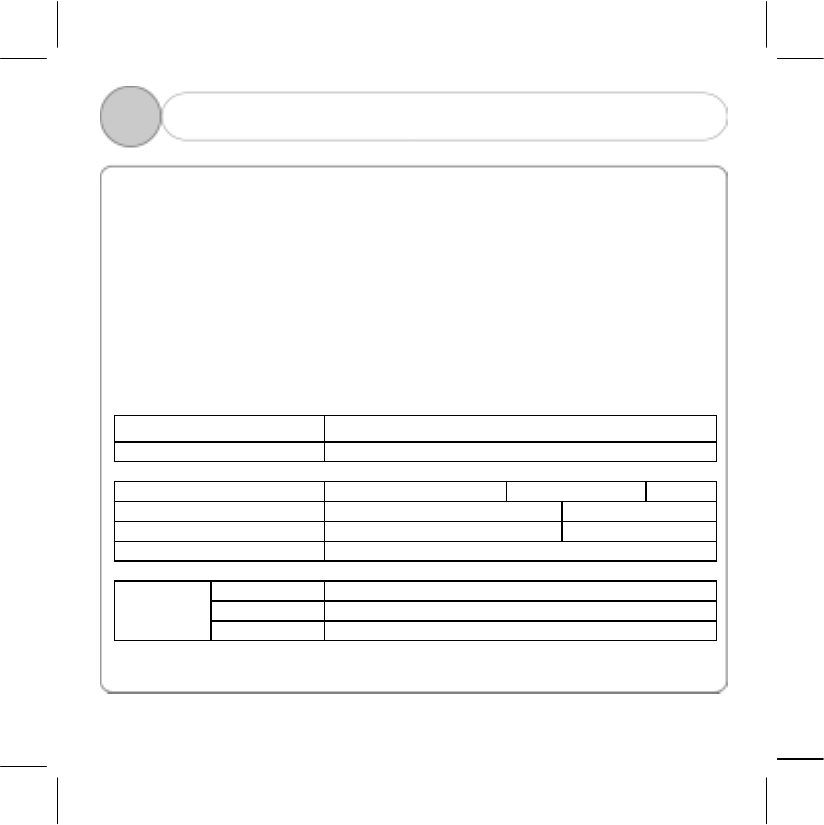
Warranty
We hereby certify as follows:
1. This product is manufactured through strict quality control and inspection
process.
2. You can receive free A/S for 1 year after purchase if the product with
warranty period is out of order. (If it falls under the case of paid service in this
written warranty even if it is within warranty period, you should pay.)
3. This warranty is domestically valid.
4. Make sure to present this warranty if this product requires repair.
5. Keep this warranty carefully since it is not reissued.
6. If this product is out of order, contact the branch office you purchased the
product.
Product Name
Model Name
Date of Purchase Warranty Period Year
Branch Store Price
Checked by Branch Store Won
Tel
Address
Name
Customer
Tel
Make sure to make this filled out when you purchase the product.
NOTICES TO USER
This device complies with Part 15 of the FCC Rules. Operation is subject to the following two
conditions:
(1) this device may not cause harmful interference, and (2) this device must accept any
interference received, including interference that may cause undesired operation.
This equipment generates or uses radio frequency energy. Changes or modifications to this
equipment may cause harmful interference unless the modifications are expressly approved in the
instruction manual. The user could lose the authority to operate this equipment if an unauthorized
change or modification is made.
INFORMATION TO THE USER
This equipment has been tested and found to comply with the limits for a Class B digital device,
pursuant to Part 15 of the FCC Rules.
These limits are designed to provide reasonable protection against harmful interference in a
residential installation.
This equipment generates, uses and can generate radio frequency energy and, if not installed and
used in accordance with the instructions, may cause harmful interference to radio
communications. However, there is no guarantee that the interference will not occur in a particular
installation. If this equipment does cause harmful interference to radio or television reception,
which can be determined by turning the equipment off and on, the user is encouraged to try to
correct the interference by one or more of the following measures:
· Reorient or relocate the receiving antenna.
· Increase the separation between the equipment and receiver.
· Connect the equipment to an outlet on a circuit different from that to which the receiver is
connected.
· Consult the dealer for technical assistance.
FCC WARNING