Eastman Kodak UGPZ4 EasyShare printer dock plus series 3 User Manual urg 00467
Eastman Kodak Company EasyShare printer dock plus series 3 urg 00467
UserManual.wiki
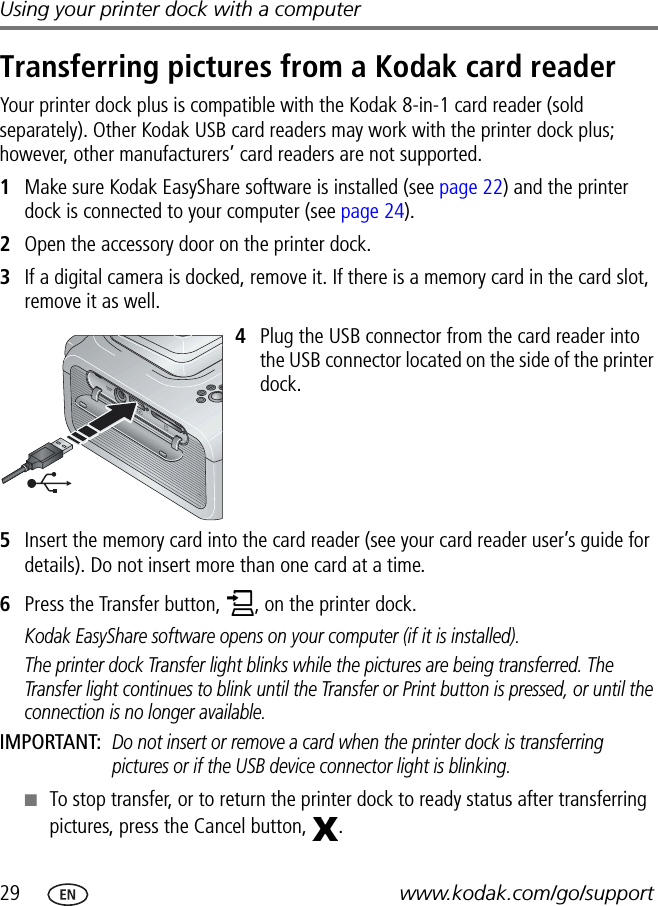
>
Eastman Kodak
>
UGPZ4 User Manual
Users Manual
Navigation menu
Upload a User Manual
Namespaces
Wiki Guide
HTML
PDF
Info
Views
User Manual
Discussion / Help
Navigation