Edco Electronics BTSPK48 Bluetooth Speaker User Manual
Edco Electronics Inc. Bluetooth Speaker
User manual
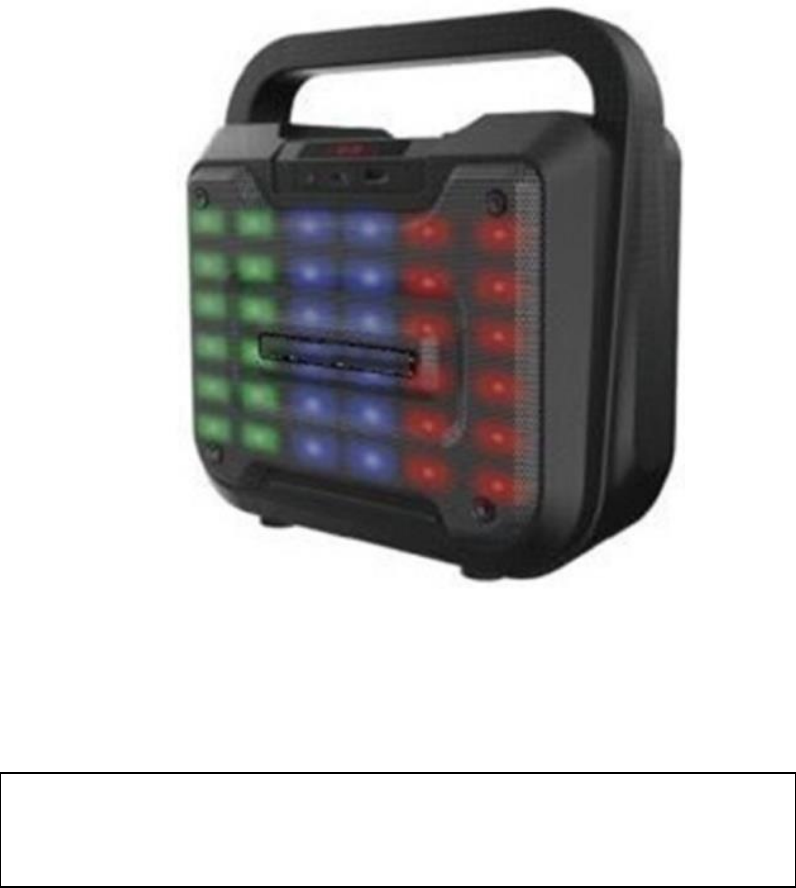
Portable Bluetooth
Speaker System
BTSPK48
PLEASE READ THIS USER MANUAL COMPLETELY BEFORE
OPERATING THIS UNIT AND RETAIN THIS BOOKLET FOR
FUTURE REFERENCE.

Conforme aux limitesd'exposition de rayonnement RF ISEDC établiespour un environnement non controlé.
This equipment complies with ISEDC RF radiation exposure limits set forth for an uncontrolled environment.
conjunction with any other antenna or transmitter.
ISEDC
(2) l'utilisateur de l'appareil doit accepter tout brouillage radioélectrique subi, même si le brouillage est susceptible
E-1
IMPORTANT SAFETY INSTRUCTIONS
1. Read these instructions carefully.
2. Keep these instructions in a safe place.
3. Follow all instructions.
4. Do not use this product near water.
5. Cleaning: Do not use liquid cleaners or aerosol cleaners. Clean only with a dry cloth.
6. Do not place near any heat sources such as radiators, heat registers, stoves, or other apparatuses (including
amplifiers) that produce heat.
7. Only use attachments/accessories specified by the manufacturer.
8. Refer all servicing to qualified service personnel. Servicing is required when the product has been damaged in any
way, such as liquid has been spilled or objects have fallen into the product, the product has been exposed to rain or
moisture, does not operate normally, or has been dropped.
9. This product shall not be exposed to dripping or splashing water and that no object filled with liquids such as vases
shall be placed on or near the product.
10. Object Entry: Never push objects of any kind into this product through the openings.
FCC Warning
This device complies with part 15 of the FCC Rules. Operation is subject to the following two conditions: (1) This device
may not cause harmful interference, and (2) this device must accept any interference received, including interference that
may cause undesired operation.
NOTE 1: This equipment has been tested and found to comply with the limits for a Class B digital device, pursuant to part
15 of the FCC Rules. These limits are designed to provide reasonable protection against harmful interference in a
residential installation. This equipment generates, uses and can radiate radio frequency energy and, if not installed and
used in accordance with the instructions, may cause harmful interference to radio communications. However, there is no
guarantee that interference will not occur in a particular installation. If this equipment does cause harmful interference to
radio or television reception, which can be determined by turning the equipment off and on, the user is encouraged to try to
correct the interference by one or more of the following measures:
-Reorient or relocate the receiving antenna.
-Increase the separation between the equipment and receiver.
-Connect the equipment into an outlet on a circuit different from that to which the receiver is connected.
-Consult the dealer or an experienced radio/TV technician for help.
NOTE 2: Any changes or modifications to this unit not expressly approved by the party responsible for compliance could
void the user’s authority to operate the equipment.
ISEDC
Warning
This
device
complies
with
license-exempt
RSS
standard(s).
Operation
is
subject
to
the
following
two
conditions:
(1)
this
device
may
not
cause
interference,
and
(2)
this
device
must
accept
any
interference,
including
interference
that
may
cause
undesired
operation
of
the
device.
Thank you for your purchase.
FCC Radiation Exposure Statement:
This equipment complies with FCC radiation exposure limits set forth for an uncontrolled environment .
This transmitter must not be coÿlocated or operating in conjunction with any other antenna or transmitter.
Le présent areil est conforme aux CNR d'ISEDC licables aux areils radio exempts de licence.
L'exploitation est autorisée aux deux conditions suivantes:
(1) l'areil ne doit pas produire de brouillage, et
d'en compromettre le fonctionnement.
ISEDC Radiation Exposure Statement:
This transmitter must not be co-located or operating in
Cet appareil est
Cetémetteur ne doit pas être co-implanté oufonctionner en conjonction avec toute autreantenne ou transmetteur.
E-2
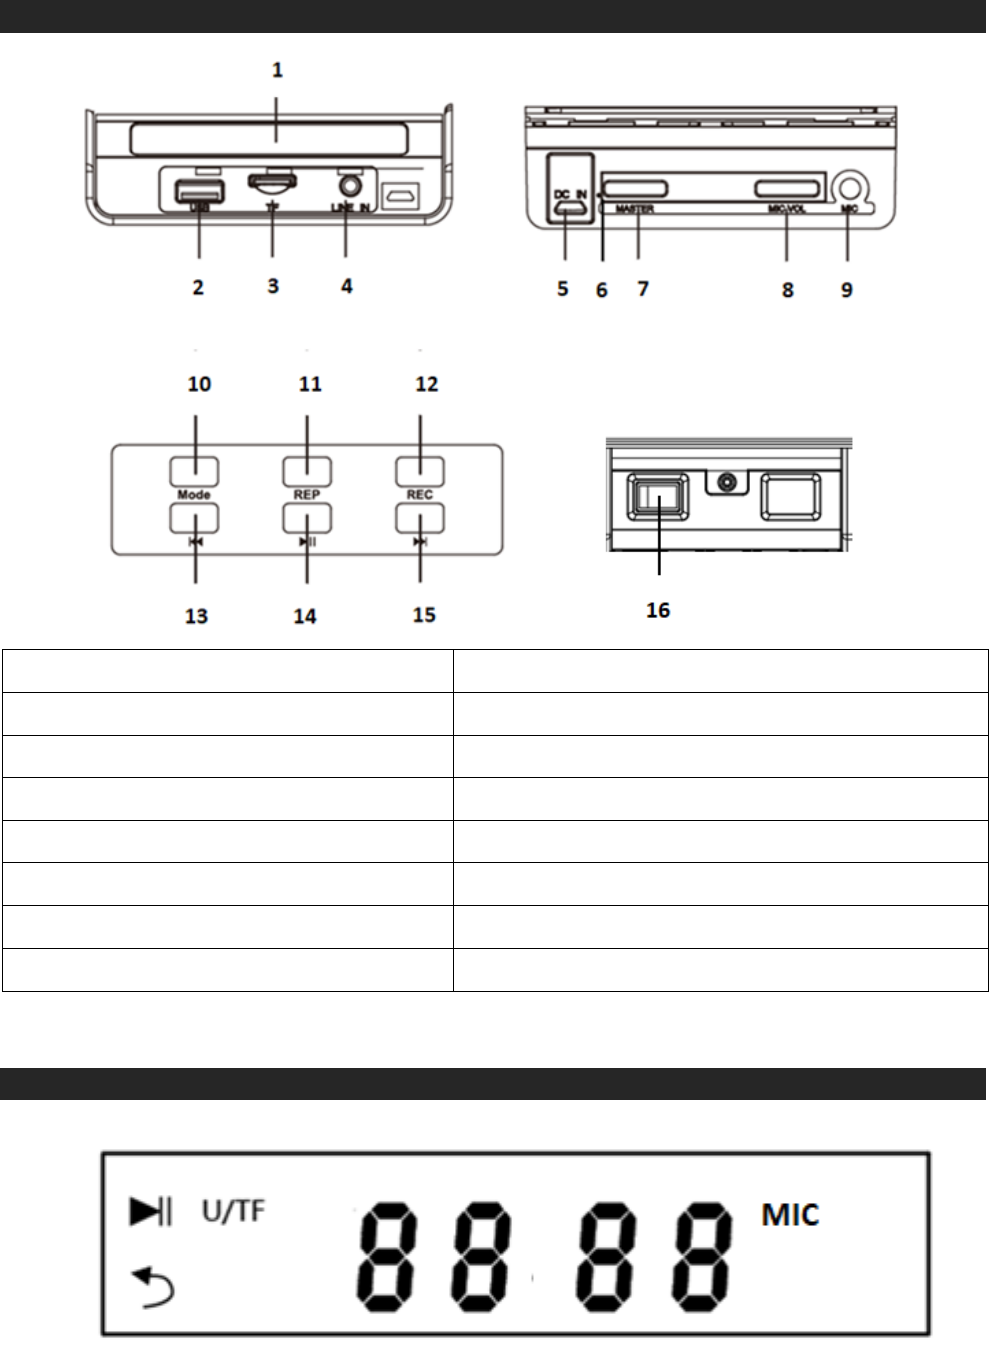
LOCATION OF CONTROLS
LED SCREEN DISPLAY
1. LED Display Screen 9. MIC Jack
2. USB Slot 10. Mode Button
3. Micro SD Card Slot 11. Repeat Button
4. Aux / Line-in Port 12. REC Button
5. Micro USB Charging Port (DC 5V) 13. Skip Backward/FM Channel Down Button
6. LED Charging Indicator Light 14. Play/Pause/FM Auto Scan Button
7. Master Volume Control 15. Skip Forward/FM Channel UP Button
8. MIC Volume Control 16. ON/OFF Switch
E-3
FUNCTIONS
This speaker has multi-functions:
Bluetooth Mode
Aux Mode
FM Mode
USB Mode
Micro SD Card Mode
PA / Karaoke Function
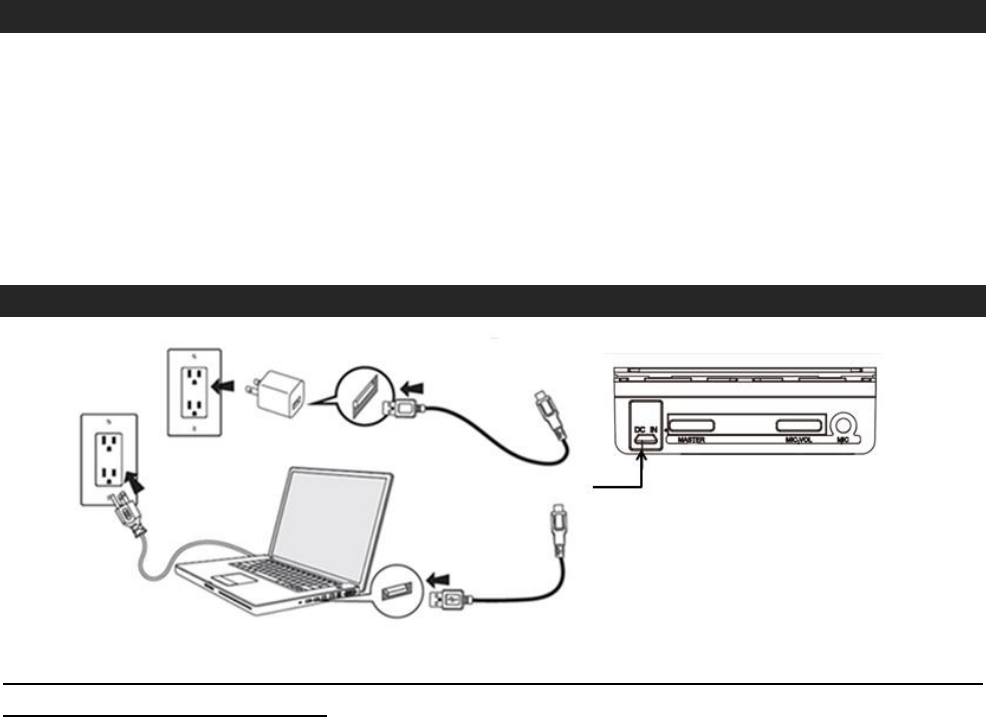
CHARGING THE SPEAKER
Note: When charging the unit for the first time, charge it for more than 12 hours to ensure
you have a FULL initial charge.
Using the Charging Cable provided, plug the Micro USB Tip into the Micro USB Charging Port
(Fig. 5) and plug the other end (USB Tip) into a USB port on your computer or USB wall charger (not
included).
The LED Charging Indicator Light (Fig. 6) on the back the unit will illuminate while charging and turn
off when completed.
When the battery level is low, the speaker will say “Low Power” and this is an indication that you
need to recharge the speaker.
A full charge will take approximately 5 to 6 hours.
Product and Battery Disposal
This product contains a built-in lithium battery and should not be disposed of in normal household
waste. The battery in this device is not intended to be removed by the individual or end user. For
disposal and recycling, please contact your local waste management authorities. The recycling and
processing of electronic waste will make a significant contribution towards helping protect the
environment.
Warning: To reduce the risk of fire and burns, do not disassemble, crush, puncture, short external
contacts or dispose of in fire or water.

E-4
POWER ON/OFF
To turn on and off the speaker, move the ON/OFF Switch to the desired position.
Note:
To turn off the front LED lights, press and hold the REP button until the LED lights go out. To turn on
the front LED lights, press and hold the REP button until the lights turn on.
BLUETOOTH MODE
Pairing a Bluetooth Enabled Device for the First Time
NOTE: Refer to the user manual for your Bluetooth enabled device for instructions on pairing and
connecting Bluetooth devices.
1. Keep the unit and your Bluetooth enabled device within 1 metre at all times during the pairing
process.
2. Move the ON/OFF Switch to the ON position and you will hear “Bluetooth Mode”. You will
see “bLue” on the LED Display Screen and the colored LED lights will randomly flash from
the center and move outward. You are now in the Bluetooth pairing mode.
3. Turn on the Bluetooth function on your Bluetooth enabled device and search for Bluetooth
devices. When the search is complete, select “BTSPK48” from the Bluetooth device list.
4. When the Bluetooth connection is successful, a voice prompt “You Are Now Connected”
will indicate that you are connected and the colored LED lights will randomly flash and move
around
NOTE:
If pairing was unsuccessful, turn off the speaker first and repeat the steps above to re-pair
again.
After successful pairing, paired devices will remember each other. Unless pairing information
is deleted, re-pairing is not required after the first time.
If you want to pair the unit with other Bluetooth enabled devices, please disconnect the
existing device and pair with the new device according to the steps above.
5. Once you are successfully connected, you can use the controls on the speaker and the
controls on your Bluetooth device.
6. To increase or decrease the volume on the speaker, adjust the Master Volume Control on
the back of the unit to your desired level.
7. To skip songs forward or backward, press the Skip Backward or Skip Forward Buttons.
8. To pause and resume playback, press the Play/Pause Button anytime during playback.
9. If you disconnect the Bluetooth mode from your device you will hear “Bluetooth
Disconnected” from the speaker.

E-5
USB MODE & MICRO SD MODE
This speaker allows you to play music from an USB thumb drive or a Micro SD memory card with
MP3 formatted files.
1. After you turn on the speaker, insert the USB thumb drive or Micro SD card containing your
favourite tunes. You will hear “MUSIC” and the speaker will automatically start playing your
MP3 formatted files.
2. To increase or decrease the volume on the speaker, adjust the Master Volume control on the
back of the unit to your desired level.
3. To skip songs forward or backward, press the Skip Backward or Skip Forward Buttons.
4. To pause and resume playback, press the Play/Pause Button anytime during playback.
Note:
To insert the Micro SD card, use your fingernail to help push it in all the way until it clicks in.
To remove the Micro SD card, push it in all the way and it will click out.
The USB thumb drive or a micro SD memory card (not both) can be left in the speaker or
taken out. It will not affect the function of the speaker as you cycle through the different
modes.
Repeat Function
To use the repeat function, press the REP (Repeat) Button to repeat one song, repeat all songs
or to select random playback of all songs.
You will see on the display either ALL, for repeat of all songs, ONE, to repeat a single song, rAn, for
random play of all songs.
AUX-IN (AUDIO LINE IN MODE)
This speaker has an aux-in (audio line in) feature to connect your smartphone, MP3 player or other
digital music player.
After you turn on the speaker, insert one end of an aux-in cable (not included) into the Aux-in Port on
the speaker and the other end into the earphone/headphone jack of your external device. The
speaker will automatically enter the Aux-in Mode and you will hear “Audio Line In Mode” and see
LINE displayed on the LED Display Screen.
Pressing the Play/Pause button anytime during playback will mute the music playing and to hear the
music again, press the Play/Pause button once more.
When you disconnect the aux-in cable, the speaker will automatically enter into Bluetooth Mode.
PA / KARAOKE MODE
This speaker has MIC jack built in so you can use the speaker as a portable PA (Public Address)
system, or sing along with your favourite tunes.
Insert the ¼” plug from your Microphone (not included) into the MIC jack, you will see MIC displayed
on the LED Display Screen.
Then set to the desired volume level required by adjusting the MIC/VOL control.

E-6
FM MODE
1. After you turn on the speaker, press the Mode Button repeatedly till you hear “FM MODE”.
The last radio station the unit was on, will illuminate on the LED Display Screen.
2. Press and hold the Play/Pause Button and it will start to auto scan all available FM stations
from 87.5 to 108.0 MHz with strong signals and save them from Channels 01 through 20
3. Once the auto scan is complete, press the Skip Backward or Skip Forward Buttons to cycle
through the stations found.
4. To manually find a station, press Skip Backward or Skip Forward Buttons to manually search
for your desired station.
5. To mute the audio while the FM radio is playing, press the Play/Pause button. To continue to
hear the audio, press the Play/Pause button again.
Tips for Best Reception:
If the FM reception is weak, try repositioning the unit near a window until you get the best
reception.
RECORD MODE
Note:
The record mode can only be used with a USB Thumb Drive or a Micro SD Card that
has MP3 formatted files on it and with memory available on the device.
Making a recording.
1. Insert the ¼” plug from your Microphone (not included) into the MIC jack and adjust to the
desired volume by adjusting the MIC/VOL control.
2. Turn on the speaker and insert the USB thumb drive or Micro SD card containing your MP3
music. You will hear “Music” and the speaker will automatically start playing your MP3
music.
3. To start the recording, press and hold the REC Button until the music stops playing, the
digital counter starts counting upwards. Now speak clearly into the microphone.
4. To stop the recording press and hold the REC Button, the digital counter will stop counting
and the recording will automatically play back.
5. While in this mode, if you have made more than one recording you can press the Skip
Backward or Skip Forward Buttons to hear the other recordings.
6. To go back to playing your MP3 music, momentarily press the REC button.
Playback of recordings while listening to music.
7. While the MP3 music is playing, momentarily press the REC button. The unit will play the last
recording that was made.
8. While in this mode, if you have made more than one recording you can press the Skip
Backward or Skip Forward Buttons to hear the other recordings.
9. To go back to playing your MP3 music, momentarily press the REC button.
Borne is the trade mark or registered trademark.
E-7
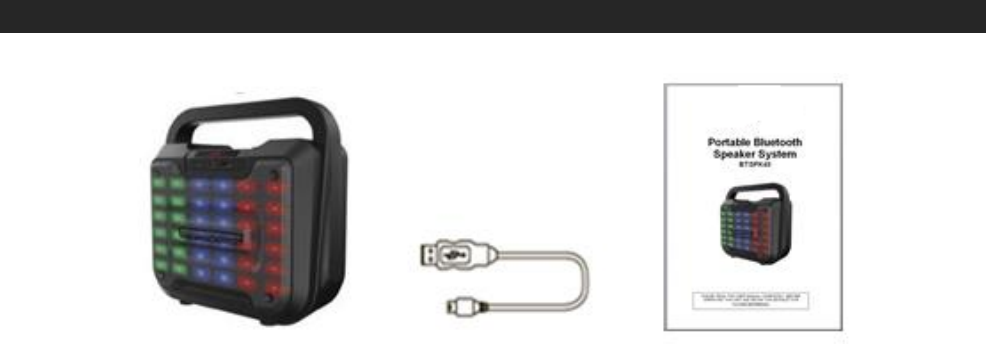
CONTENTS IN THE BOX
Wireless Speaker System x 1
Micro USB Charging Cable x 1
User Manual x 1
Need help? Please call us.
If you encounter any difficulties with this product, please call us and our
representatives will be ready to help you.
Toll free: 1-800-593-6669 (Monday to Friday: 9am – 5pm EST)
UK toll free: 0800 954 1053 extension 165
Thank you for your purchase. We want you to start enjoying your product.