Edco Electronics MS500B Bluetooth CD AM/FM Micro System User Manual MS500B ENGLISH MANUAL
Edco Electronics Inc. Bluetooth CD AM/FM Micro System MS500B ENGLISH MANUAL
User Manual
WARNING
TO PREVENT FIRE OR ELECTRIC SHOCK, DO NOT USE THIS PLUG WITH
AN EXTENSION CORD, RECEPTACLE OR OTHER OUTLET UNLESS THE
BLADE TERMINALS CAN BE FULLY INSERTED TO PREVENT ANY
EXPOSURE. TO PREVENT FIRE OR SHOCK HAZARD, DO NOT EXPOSE
THIS PRODUCT TO RAIN OR MOISTURE.
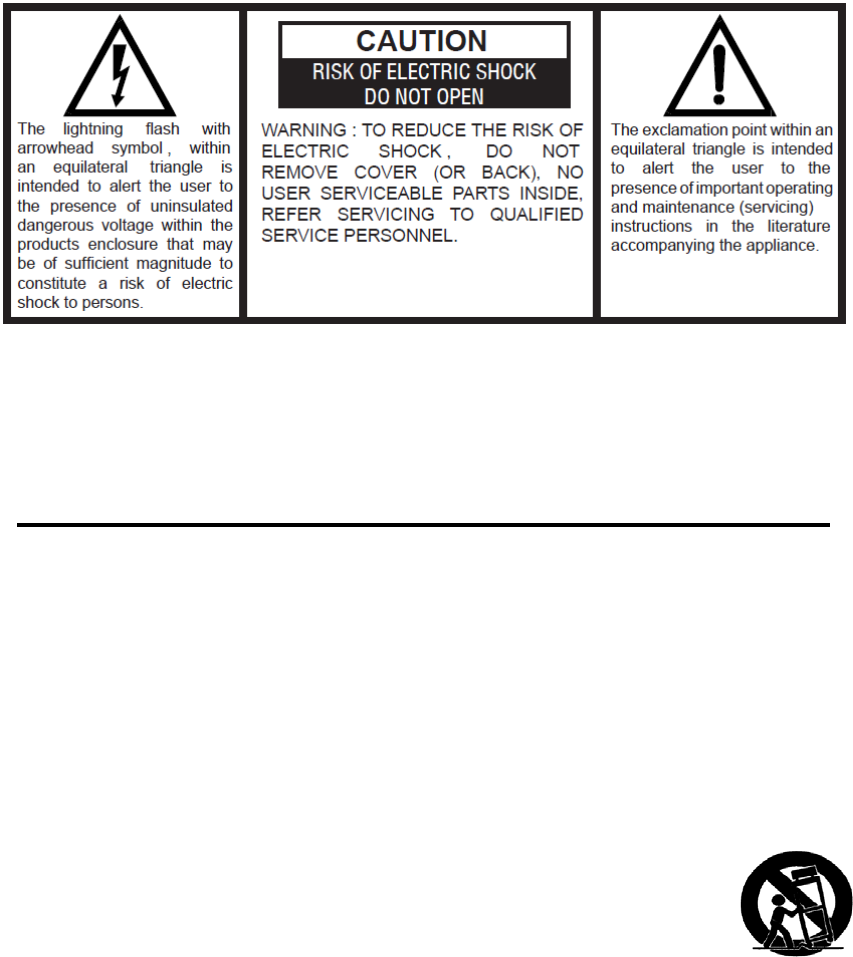
The Caution Marking is located at the bottom enclosure of the product.
IMPORTANT SAFETY INSTRUCTIONS
1. Read these instructions carefully.
2. Keep these instructions in a safe place.
3. Heed all warnings.
4. Follow all instructions.
5. Do not use this product near water.
6. Cleaning: Unplug this product from the wall outlet before cleaning. Do not use
liquid cleaners or aerosol cleaners. Clean only with a dry cloth.
7. Do not block any ventilation openings. Install in accordance with the
manufacturer’s instructions.
8. Do not place this product on an unstable cart, stand, tripod, bracket,
9. or table. The product may fall, causing serious injury to a child or
adult and serious damage to the product. Use only with a cart,
stand, tripod, bracket, or table recommended by the manufacturer,
Or sold with the product. Any mounting of the product should follow the
manufacturer’s instructions, and should use a mounting accessory recommended by
the manufacturer. A product and cart combination should be moved with care-quick
stops, excessive force and uneven surfaces may cause the product and cart
combination to overturn.
10. Do not install near any heat sources such as radiators, heat registers, stoves, or
other apparatuses (including amplifiers) that produce heat.
11. If the provided plug does not fit into your outlet, consult an electrician for
replacement of the outlet.
MS500B_User Manual
12. Protect the power cord from being walked on or pinched particularly at plugs,
convenience receptacles, and the point where they exit from the product.
13. Only use attachments/accessories specified by the manufacturer.
14. Unplug this product during lighting storms or when unused for a long periods of
time.
15. Refer all servicing to qualified service personnel. Servicing is required when the
product has been damaged in any way, such as the power-supply cord or the
plug is damaged, liquid has been spilled or objects have fallen into the product,
the product has been exposed to rain or moisture, does not operate normally, or
has been dropped.
16. This product shall not be exposed to dripping or splashing water and that no
object filled with liquids such as vases shall be placed on the product.
17. Do not overload the wall outlet. Use power source only as indicated.
18. Use replacement part as specified by the manufacturer.
19. The product may be mounted to a wall only if recommended by the
manufacturer.
20. Upon completion of any service or repairs to this product, ask the service
technician to perform safety checks.
21. Power Sources: This product should be operated only from the type of power
source indicated on the marking label. If you are not sure of the type of power
supply to your home, consult your product dealer or local power company. For
products intended to operate from battery power, or other sources, refer to the
operating instructions.
22. Object and Liquid Entry: Never push objects of any kind into this product
through openings as they may touch dangerous voltage points or short-out parts
that could result in a fire or electric shock. Never spill liquid of any kind on the
product.
23. This appliance is not intended for use by persons (including children) with
reduced physical, sensory or mental capabilities or lack of experience and
knowledge unless they have been given supervision or instructions concerning
the use of the product by a person responsible for their safety.
24. Damage Requiring Service: Unplug this product from the wall outlet and refer
servicing to qualified service personnel under the following conditions:
a) When the power-supply cord or plug is damaged,
b) If liquid has been spilled, or objects have fallen into the product,
c) If the product has been exposed to rain or water,
d) If the product does not operate normally by following the operating
instructions. Adjust only those controls that are covered by the operating
instructions as an improper adjustment of other controls may result in
damage and will often require extensive work by a qualified technician to
restore the product to its normal operation.
e) If the product has been dropped or damaged in any way, and
f) When the product exhibits a distinct change in performance - this indicates a
need for service.
SAVE THESE INSTRUCTIONS
CAUTION
Follow the advice below for safe operations.
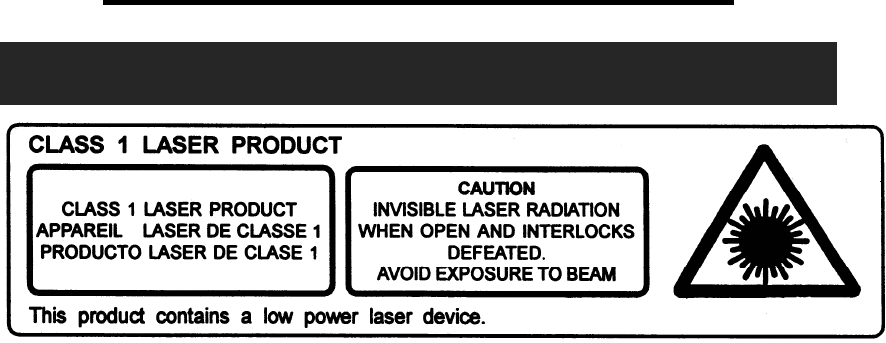
ON PROTECTION AGAINST LASER ENERGY EXPOSURE
As the laser beam used in this compact disc player is harmful to the eyes, do not
attempt to disassemble the casing.
Stop operation immediately if any liquid or solid object should fall into the cabinet.
Do not touch the lens or poke at it. If you do, you may damage the lens and the
player may not operate properly.
Do not put anything in the safety slot. If you do, the laser diode will be ON when
the CD door is still open.
If the unit is not to be used for a long period of time, make sure that all power
sources are disconnected from the unit. Remove all batteries from the battery
compartment.
This unit employs a laser. The use of controls or adjustment or performance of
procedures other than those specified here may result in exposure to hazardous
radiation.
Should any trouble occur, remove the power source and refer servicing to qualified
personnel.
WARNING
Changes or modifications to this unit not expressly approved by the party responsible
for compliance could void the user's authority to operate the equipment
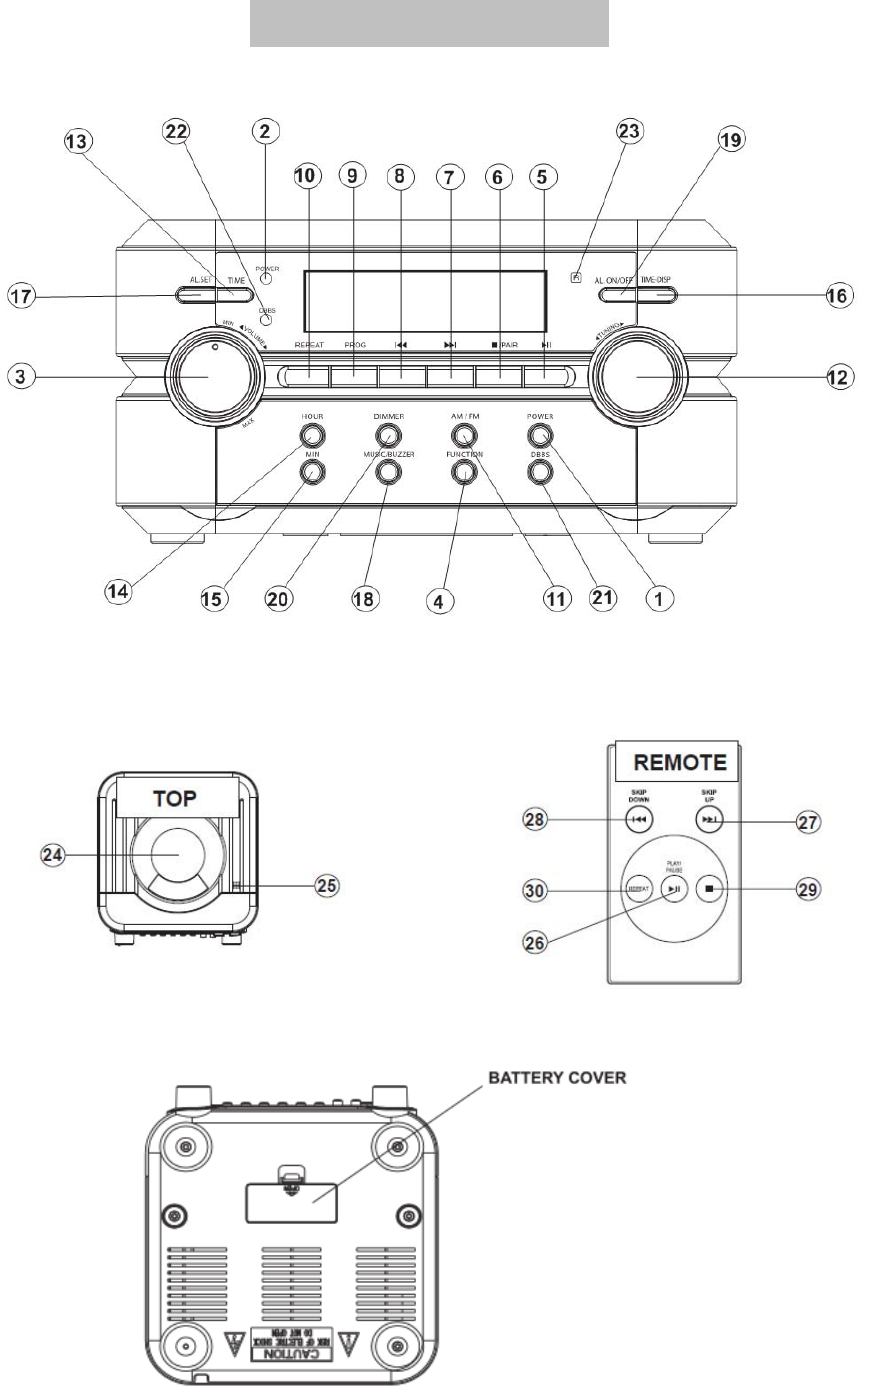
LOCATION OF CONTROLS

1. POWER button 16. DISPLAY button
2. POWER Indicator Light 17. ALARM SET button
3. Volume Control Knob 18. MUSIC / BUZZER button
4. FUNCTION button 19. ALARM ON / OFF button
5. PLAY / PAUSE button 20. DIMMER button
6. STOP/PAIR button 21. DBBS button
7. NEXT / F.FWD button 22. DBBS Indicator Light
8. PREV / F.REV button 23. Remote Sensor
9. PROGRAM button 24. CD Door
10. REPEAT button 25. OPEN / CLOSE
11. AM / FM button 26. PLAY / PAUSE button (REMOTE)
12. Radio Tuning Knob 27. NEXT / F.FWD button (REMOTE)
13. TIME SET button 28. PREV / F.REV button (REMOTE)
14. HOUR button 29. STOP button (REMOTE)
15. MINUTE button 30. REPEAT button (REMOTE)
Battery Installation for the Power Backup - Requires 2 AAA Batteries -
(Not Included)
In the case of a Power failure, the Power backup will keep the Clock & Alarm
times accurate,until the main power has been restored.
NOTE: The product will operate properly with or without batteries except
in the case of power loss.
• Open the Battery Cover on the bottom of the unit.
• Insert 2 AAA batteries (not included) following the + / - polarity as indicated in
the compartment.
• Close the Battery cover.
IMPORTANT:
• Be sure that the batteries are installed correctly.
• Wrong polarity (+ or -) may damage the unit and void the warranty.
• For best performance and longer operating time, we recommend using good
quality Super Alkaline type batteries.
CAUTION
• Do not mix old and new batteries.
• Do not mix alkaline, standard (carbon-zinc) or rechargeable (nickel-cadmium)
batteries.
• If the unit is not going to be used for an extended period of time, remove the
batteries from the unit.

• Old or leaking batteries can cause damage to the unit and may void the
warranty.
• Do not dispose of batteries in fire as batteries may explode or leak.
IMPORTANT:
• This unit operates on AC 120V~ 60Hz.
• Do not attempt to operate this unit on any other power source. You could
cause damage to the unit and void your warranty.
• Please be sure the power outlet you plug this unit into is working and
receives constant unswitched power.
POWER
1. Plug the attached AC power cord into a 120V AC~ 60Hz wall outlet.
2. Press the POWER button (1) once to turn the unit ON. The Power
Indicator Light (2) will turn ON. Press the POWER button (1) again to turn the
unit OFF.
VOLUME
Adjust the Volume Control Knob (3) to the desired volume level.
PLAYING A CD
1. Press the FUNCTION button (4) repeatedly until “CD”appears on the LCD screen.
2. Press the OPEN / CLOSE button (25) to open the CD door.
3. Insert a CD with the label facing Up.
4. Gently Close the CD door.
5. Press the PLAY / PAUSE button (5) or (26) to start CD playback from the first track.
6. Press the PLAY / PAUSE button (5) or (26) again to momentarily pause playback.
7. To Stop playback, press the STOP button (6) or (29).
SKIPPING TRACKS
• During CD play, press the PREV / F.REV button (8) or (28) to move to the previous
track
• Press the NEXT / F.FWD button (7) or (27) to move to the next track.
SEARCHING TRACKS
• During CD play press and hold the PREV / F.REV button (8) or (28) to scan
Fast Reverse through the current track.

• Press and hold the NEXT / F.FWD button (7) or (27) to scan Fast Forward
through the current track
PROGRAMMED PLAYBACK
1. Up to 20 tracks can be programmed to play in any desired sequence.
2. Press the PROGRAM button (9) until "PROG" flashes in display.
3. Press the NEXT / F.FWD button (7) or (27) or the PREV / F.REV button (8)
or (28) to select a desired track to be programmed.
4. Press the PROGRAM button (9) to program the track.
5. Repeat steps 3 & 4 to program more tracks.
6. Press the PLAY / PAUSE button (5) or (26) to start playing.
7. To cancel program play, press the STOP button (6) or (29) twice.
REPEAT PLAY
To Repeat a Single Track
• Press the REPEAT button (10) or (30) while the track you want to repeat is
playing. "REP 1" is shown in display.
• To repeat another track, press the PREV / F.REV button (8) or (28), or the
NEXT / F.FWD button (7) or (27) button.
• To cancel repeat play, press the REPEAT button (10) or (30) twice.
To Repeat All Tracks
• Press the REPEAT button (10) or (30) twice during play. "REP ALL" will
appear in the display.
• All tracks will be played through in sequence and then the sequence will be
repeated continuously.
• To cancel repeat play, press the REPEAT button (10) or (30) once.
LISTEN TO AM/FM STEREO RADIO
1. Press the FUNCTION button (4) repeatedly to select the RADIO function.
2. Press the AM/FM button (11) to select AM or FM.
3. Turn the RADIO TUNING KNOB (12) to select the desired Radio station.
4.While in Radio Mode, the LCD Display will indicate the current station frequency.
To view the current time, press the DISPLAY button (16) the time will be shown
on the LCD display and will disappear automatically.
NOTE: You cannot set the time or the alarm while the Radio is in use

ANTENNAS
The AM & FM antennas are built-in to the cabinet of this player. To improve
reception of radio stations simply move the entire player to another location
until reception improves.
SETTING THE CLOCK
1. Turn the unit power OFF before setting the time.
2. To set the clock, press and hold the TIME SET button (13).
3. While holding the TIME SET button (13) press the HOUR (14) or the
MINUTE (15) buttons respectively until the correct time is displayed.
4. Release the TIME SET button (13) when the correct time appears in the
LCD display.
SETTING THE ALARM
1. Turn the unit power OFF before setting the alarm.
2. Press and hold the ALARM SET button (17) to set the alarm time.
3. While holding the ALARM SET button (17) press the HOUR (14) or the
MINUTE (15) buttons respectively until the proper time is set.
4. Turn on the alarm function by pressing the ALARM ON / OFF button (19)
until the Alarm icon appears in the LCD Display.
5. To turn off the alarm, press the ALARM ON / OFF button (19) until the Alarm
icon disappears from the LCD Display.
6. After setting the Alarm to your desired time, press the MUSIC / BUZZER
button (18) to the desired selection.
• If you are waking to CD press the MUSIC / BUZZER button (18) until “CD”
appears in the LCD Display.
• If you are waking to RADIO press the MUSIC / BUZZER button (18) until “ ♪ ”
appears in the LCD Display.
• If you are waking to BUZZER press the MUSIC / BUZZER button (18) until
only the Alarm icon appears in the LCD Display.
7. To Stop the Alarm while it is playing, simply press the ALARM ON / OFF
button (19) once.
Bluetooth
·
Press the
Function button (4)
repeatedly to switch to
BT
mode
-
then press
the Pair (6)
button
so the unit
will
enter
pairing mode.
·
Using the
native controls
on your
BT
device, select
the

“
MS500B
”
in your
BT
settings to
pair
with.
·
If your
device requests
a
password, enter
the
default password
“
0 0 0 0
”.
·
After
initial
pairing,
the unit will
stay paired unless unpaired
manually
by the user or
erased due to a
reset
of the
device.
·
If your
device should become unpaired
or
above steps
or
press
the Pair
button to start
the
p
airing
process pairing
again.
·
Use the
native controls
on the
connected
Bluetooth
Device
to select
a
t
r
ack.
·
To play,
pause
or skip the
selected track,
use the
native controls
on the
connected Bluetooth
Device
or
press
the
Play/Pause
or
T
un/Skip/S
e
a
r
ch
but
t
ons.
AUX-in
Requires a 3.5mm audio cable (not included).
1. Connect one end of the 3.5mm auxiliary audio line in cable to the 3.5mm
Line In jack on the back of
the music system. Plug the other end into a smartphone, tablet or MP3 player
or other audio source.
2. Use the native controls on the connected device to play, pause and control
music output through the connected music system.
3. When the 3.5mm auxiliary audio line in cable is connected to the music
system, the CD and Radio modes will be deactivated.
USING THE DIGITAL BASS BOOST FEATURE
• To enhance the low frequency bass sound, press the DBBS button (21).
The DBBS Indicator Light (22) will turn ON.
• Press the DBBS button (21) again to turn the Digital Bass Boost OFF.

TROUBLESHOOTING GUIDE
SYMPTOM CAUSE SOLUTION
CD player will not turn
on
•AC Cord not connected
properly
•Plug AC Cord into power
outlet
CD player will not turn
on
•Disc inserted incorrectly
•Defective compact disc
•CD compartment not closed
•Moisture condensation on
disc
•Reinsert disc with label side
facing up
•Try another compact disc
•Close CD compartment
•Wipe disc with soft cloth
Erratic CD playback •Dirty or defective disc •Clean or replace disc
No sound •Plug not inserted property
•Volume control set to
Minimum
•Defective compact disc
•Aux Input cable connected
•Reinsert Speaker Plug into
Speaker jack
•ncrease the volume
•Try another compact disc
•Remove Aux cable from
input jack.
Noise or Sound
distorted on
radio
•Station not tuned properly
for AM or FM
•Unit is not positioned
correctly
•Retune AM or FM broadcast
station
•Rotate unit until best
reception is obtained

This device complies with part 15 of the FCC Rules. Operation is subject to the following two
conditions: (1) This device may not cause harmful interference, and (2) this device must accept
any interference received, including interference that may cause undesired operation.
Note: This equipment has been tested and found to comply with the limits for a Class B digital
device, pursuant to part 15 of the FCC Rules. These limits are designed to provide reasonable
protection against harmful interference in a residential installation. This equipment generates,
uses and can radiate radio frequency energy and, if not installed and used in accordance with the
instructions, may cause harmful interference to radio communications. However, there is no
guarantee that interference will not occur in a particular installation. If this equipment does cause
harmful interference to radio or television reception, which can be determined by turning the
equipment off and on, the user is encouraged to try to correct the interference by one or more of
the following measures:
—Reorient or relocate the receiving antenna.
—Increase the separation between the equipment and receiver.
—Connect the equipment into an outlet on a circuit different from that to which the receiver is
connected.
—Consult the dealer or an experienced radio/TV technician for help.
Note: The Grantee is not responsible for any changes or modifications not expressly approved by
the party responsible for compliance. such modifications could void the user's authority to operate
the equipment.
The device has been evaluated to meet general RF exposure requirement.
To maintain compliance with FCC's RF exposure guidelines, the distance must be at least 20 cm
between the radiator and your body, and fully supported by the operating and installation
configurations of the transmitter and its antenna(s).
This device complies with Industry Canada licence-exempt RSS standard(s). Operation is subject
to the following two conditions: (1) this device may not cause interference, and (2) this device must
accept any interference, including interference that may cause undesired operation of the device.
Le présent appareil est conforme aux CNR d'Industrie Canada applicables aux appareils radio
exempts de licence. L'exploitation est autorisée aux deux conditions suivantes : (1) l'appareil ne
doit pas produire de brouillage, et (2) l'utilisateur de l'appareil doit accepter tout brouillage
radioélectrique subi, même si le brouillage est susceptible d'en compromettre le fonctionnement.
RF warning statement:
The device has been evaluated to meet general RF exposure requirement. To maintain
compliance with RSS-102 — Radio Frequency (RF) Exposure guidelines, this equipment
should be installed and operated with a minimum distance of 20cm between the radiator and
your body.
le dispositif de a été évalué à répondre général rf exposition exigence.pour maintenir la
conformité avec les directives d'exposition du RSS-102-Radio Fréquence (RF). ce matériel doit
être installé et exploité à une distance minimale de 20 cm entre le radiateur et votre corps.