Edimax Technology Co 9530111504 Low Powered Camera Gateway User Manual IC 3011DP QIG V10 20151102
Edimax Technology Co Ltd Low Powered Camera Gateway IC 3011DP QIG V10 20151102
Users Manual
IC‐3011DP
QuickInstallationGuide
(QIG)
V1.0
2015‐11
2
TableofContents
I.ProductInformation...............................................................................3
I‐1.PackageContent.....................................................................................................................3
I‐2.LEDStatus(Gateway)...............................................................................................................3
I‐3.LEDStatus(Camera)................................................................................................................4
I‐4.Pairing.....................................................................................................................................5
I‐5.Reset.......................................................................................................................................6
II.GatewayInstallation...............................................................................7
III.CameraInstallation.............................................................................8‐9
IV.CameraSetup–UsingMobileAPP...................................................10‐11
V.CameraSetup–MobileAPPInstruction...............................................12
VI.FCCStatement......................................................................................13
3
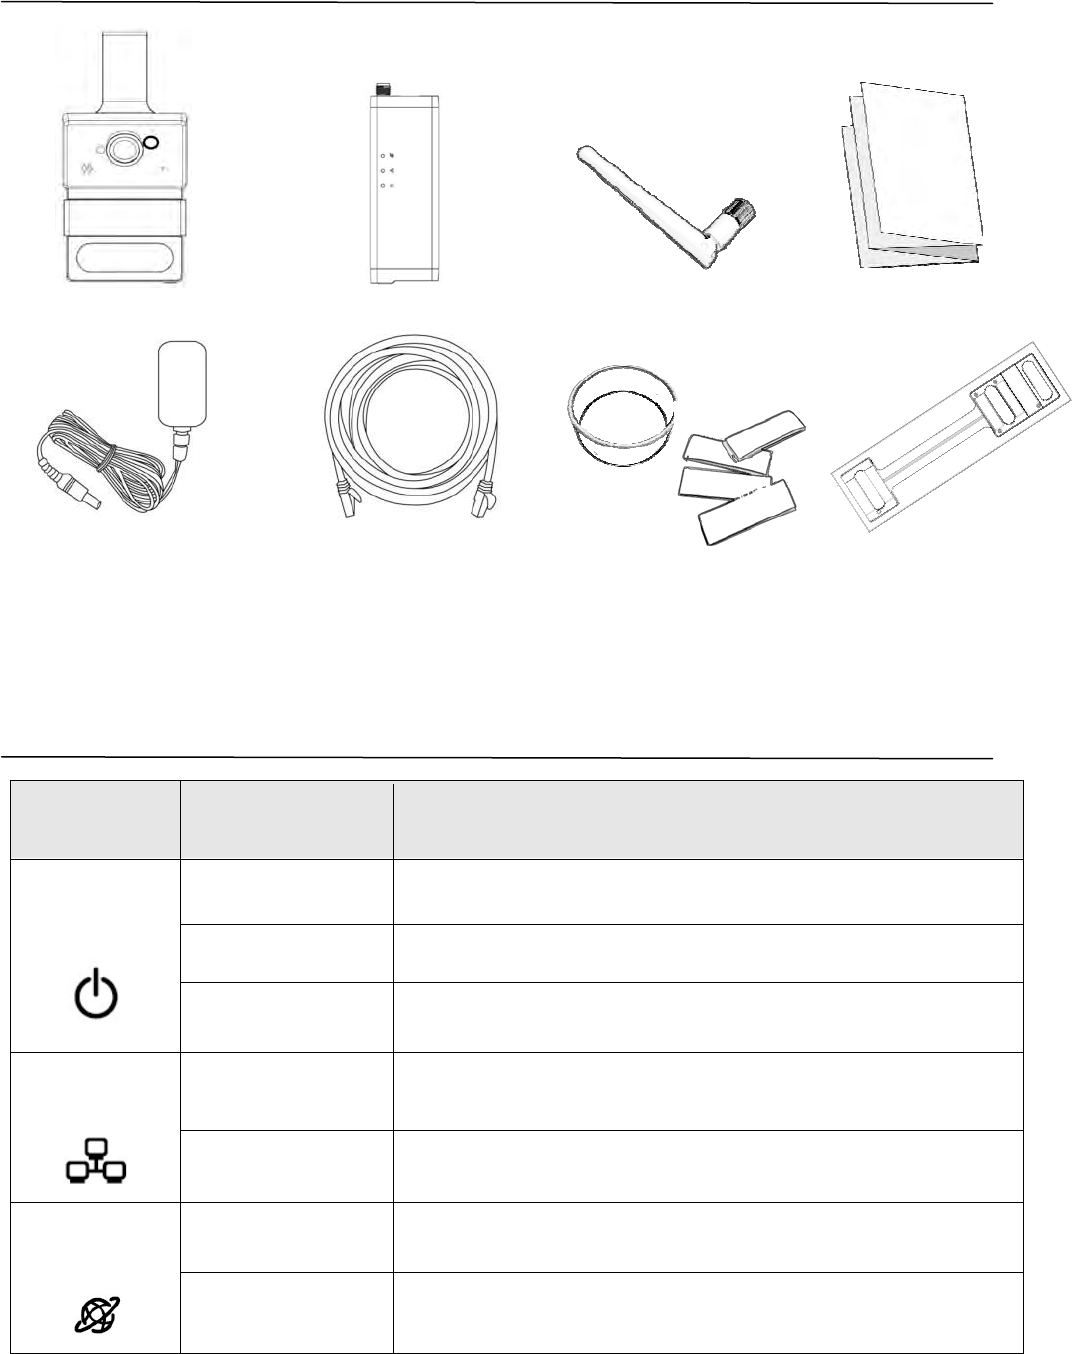
PackageContents
LEDStatus(Gateway)
LEDColorLEDStatusDescription
GreenQuickFlashingPairedcameradatahasbeencleared.
QuickFlashingThegatewayisrestarting.
SlowFlashing Pairingisactivating.
GreenOnThegatewayisconnectedtothelocal
network.
QuickFlashing Thegatewayistransferringdata.
Orange
OnThegatewayisconnectingtointernet.
SlowFlashingThegatewayisnotconnectedtointernet.
Antenna
CameraGateway
Hook
Template
QIG
Power
Adapter
Ethernet
Cable
Velcro&
SiliconBand
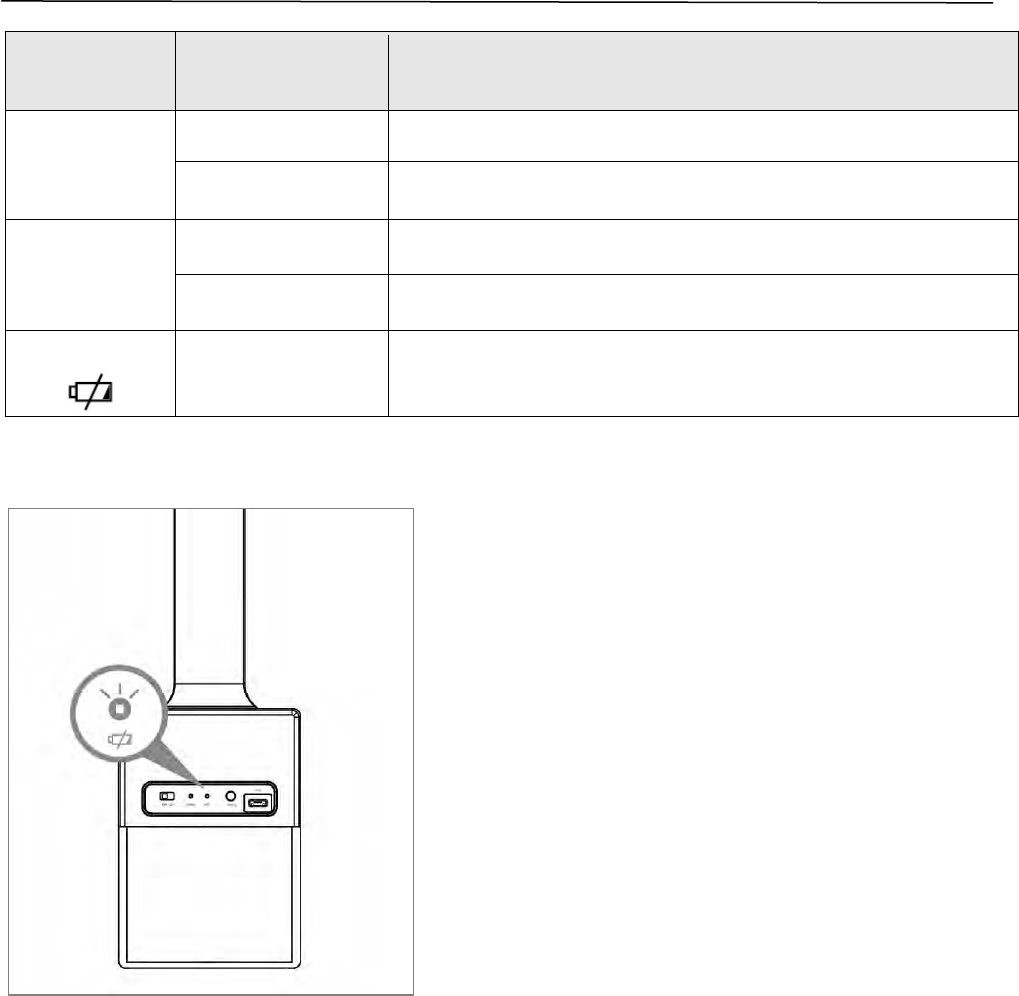
4
LEDStatus(Camera)
LEDColorLEDStatusDescription
Green
(Status)
OnThecameraisinuse.
SlowFlashingPairingisactivating.
Orange
(Status)
QuickFlashingSuccesspairing(Blinksfor5seconds).
SlowFlashing PIReventtrigger.
Red
SlowFlashing Batterylowpowerwarning.(Figure1)
(Figure1,Batterylowpowerindication)

5
Pairing
The“Pair”buttonisaquickandeasyalternativetoestablishasecurewireless
connectionbetweenyourcameraandgateway.
1. PressandholdthePairbuttononyourgatewayfor2secondstoactivate
pairing.
Thepairbuttonforgateway
‐ Hold2‐4secondsforpairingtoactivate.
‐ Holdmorethan5secondstocleanallpairedcameradata.
2. Within30seconds,pressthe“Pair”buttononthecamerafor1–2
secondstoactivatepairing.TheStatusLEDwillflashquicklyinto“orange”
whichindicatesthatpairingissuccessful.
Onegatewaycanpairupto4cameras.

6
Reset
Ifyouexperienceproblemswithyournetworkcamera,youcanresetthe
camerabacktoitsfactorydefaultsettings.Thisresetsallsettingsbackto
default.
1. PressandholdtheResetbuttonfoundonthebackpanelforatleast10
seconds.Releasethebuttonwhenthe…LEDisflashingquicklyinto
“green”.
2. Waitforthegatewaytorestart.
7
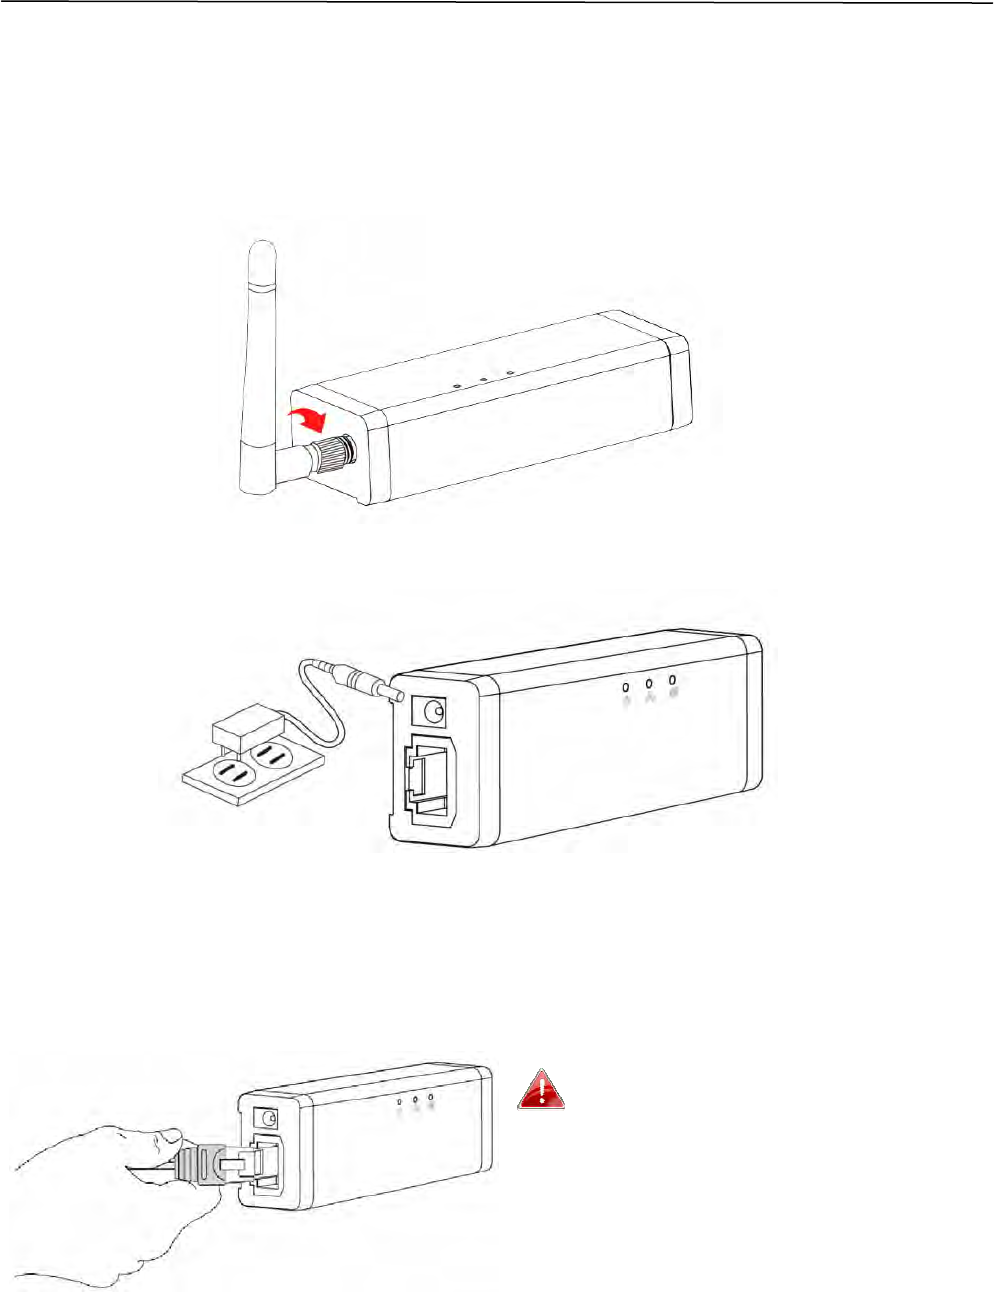
GatewayInstallation
Followtheinstructionsbelowtoensureyourcameraisproperlyconnected
andreadyforsetup.
1. Screwontheincludedantennatotheproduct’sgatewayunit.
2. Connectthepoweradaptertothegatewayandtoapowersupply.
3. UseanEthernetcabletoconnectthegateway’sLANporttoaWireless
AP/Router’sLANport,asshownbelow.
4. Waitamomentforthecameratopoweron.Thecameraisreadywhen
thePowerLEDofthecameradisplaysonorflashing.Pleasereferto
GatewayLEDStatusonPage.3.
Forcloudservice,ensureyour
WirelessAP/Routercanaccesstothe
internet.

8
CameraInstallation
1. Forcamerapowersupply,youcanchoosebatterypoweredorUSBpower
bank,asshownbelow.(FigureAandFigureB)
2. Thedoorgapmustbemorethan2.5mmasshownbelow.
(FigureA,Batteryinstallation)(FigureB,USBPowerbankinstallation)
Forbetterperformance,pleaseuse
Alkaline/rechargeablebatteries.
(Heavydutyisnotrecommended!)
Pleaseturntheswitch“off”
beforepluggingtheUSB
powersource.
9
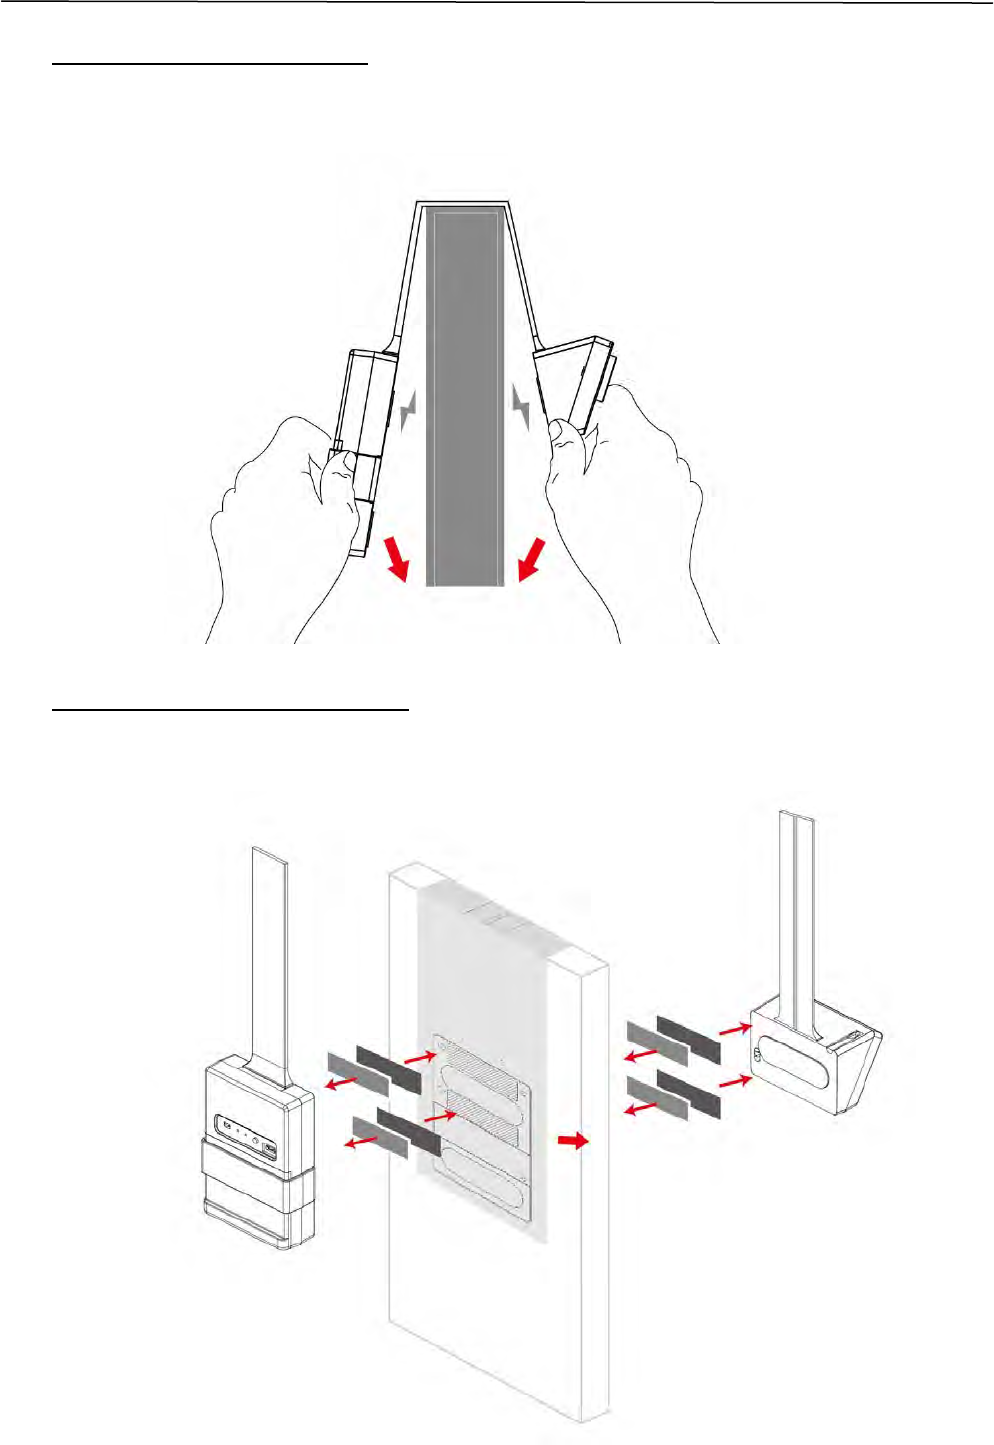
CameraInstallation
3. Hookonthemetaldoor.
With5strongmagnets,youcaneasilyinstallandadjustonametaldoor
withoutanytools.
4. Hookonthenonmetaldoor
Fixandstickwiththe“HookTemplate”andthe“Velcro”onthenonmetal
doorasshownbelowforthe“assemblingdiagram”.
10
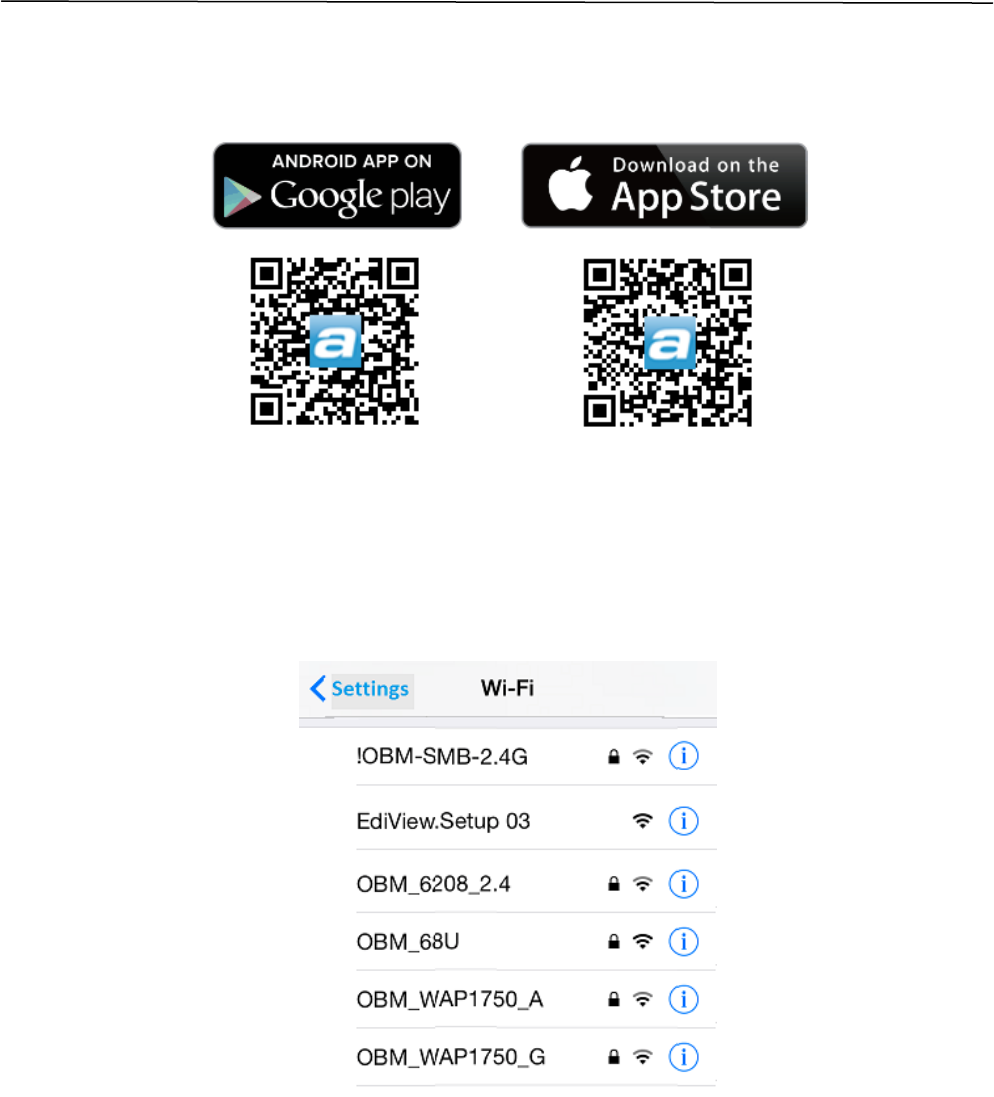
CameraSetup–UsingMobileApp
1. Useasmartphoneortablettosearch,downloadandinstallthe
AcelinkViewIIappfromGooglePlayortheAppleAppStore.
2. ForiOS/Androidusers,gotoWi‐FisettingsandconnecttoyourWireless
AP/Router’sSSID(ensurethecameragatewayconnectedviaLAN,see
Step.3onPage.7),beforeopeningtheAcelinkViewIIapp.

11
CameraSetup–UsingMobileApp
3. FirsttimerunningtheAPP,click“+”icontoaddcamera(FigureC)andyou
willseethecameraIPaddressonthelistwhichhasconnectedonyourlocal
network(FigureD).
4. Enterthepassword(Thedefaultpasswordis1234),itwillpopupa
messageifaddedsuccessfully,asshownbelow.
(FigureC,addcamera)(FigureD,cameralist)
Reminder:Outdoorandotherareawherethecameraisexposedtospeciallightingwillhave
somecolorshifting.Thisimageisverycommonandperfectlynormal.It’sduetothespecial
designofourcameralens.
12
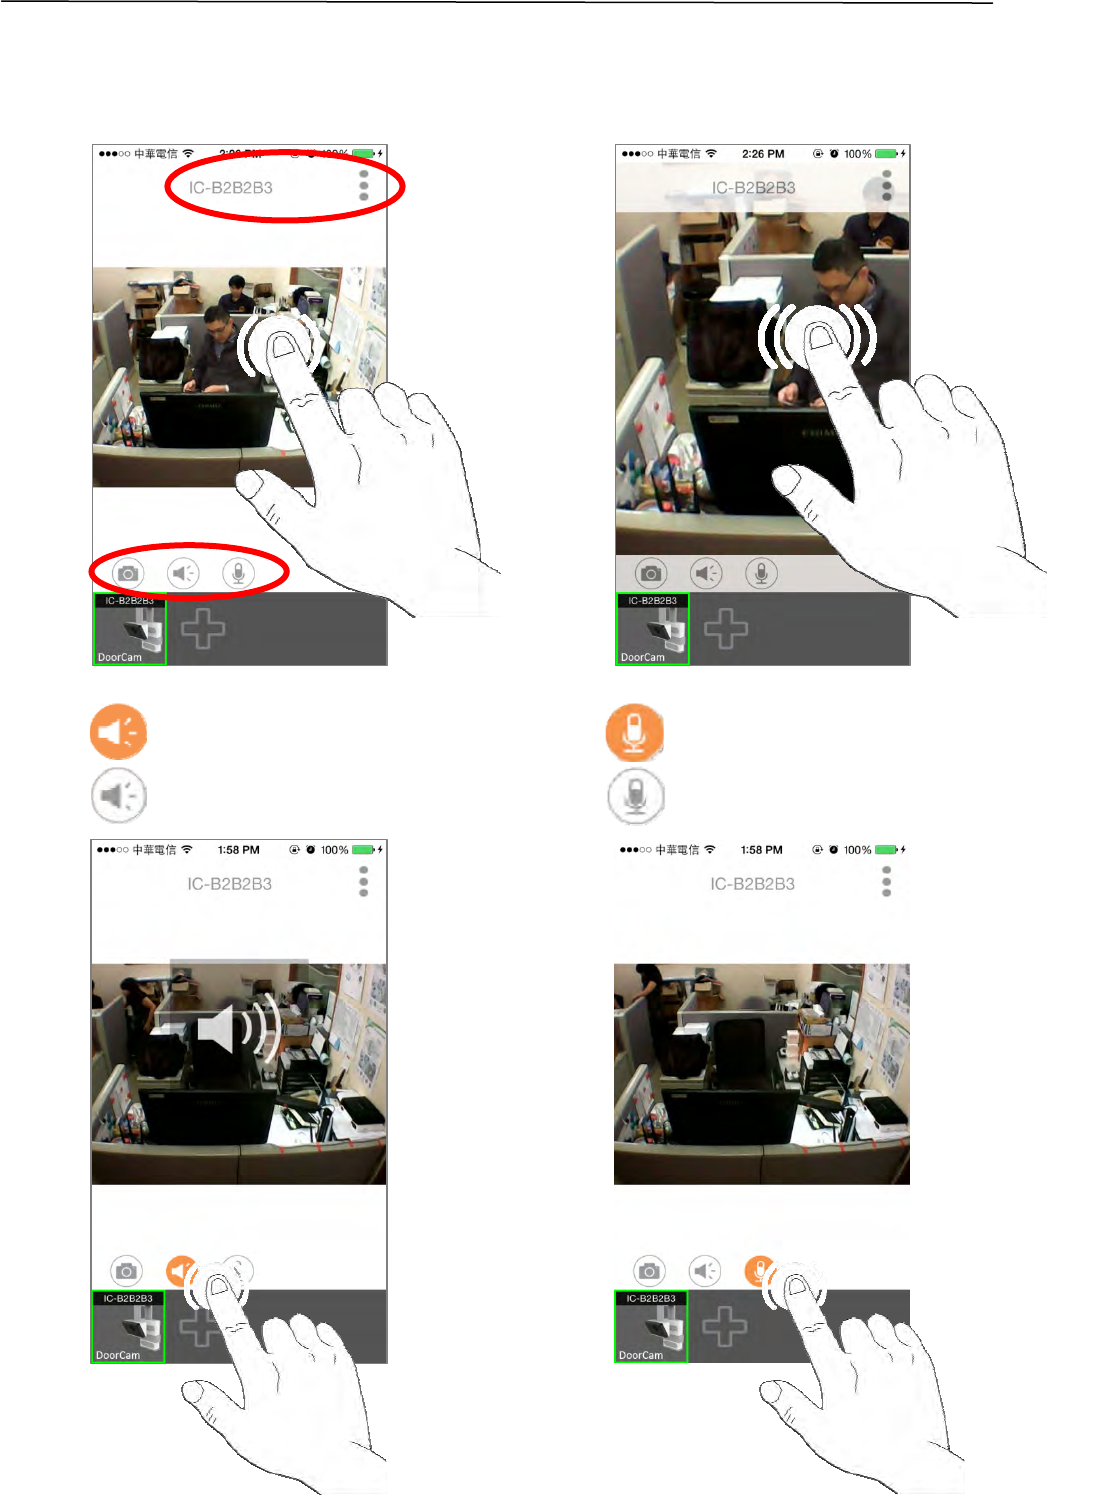
CameraSetup–MobileAppInstruction
1. Singleclick:Show/Hidequickbuttons,cameranameandothersettings.
Doubleclick:Zoomin/outvideoimage.
2.
CameraMicOn(HearfromtheCamera)
CameraMicOff
CameraSpeakerOn(TalktotheCamera)
CameraSpeakerOff
13
FederalCommunicationCommissionInterferenceStatement
ThisequipmenthasbeentestedandfoundtocomplywiththelimitsforaClassBdigitaldevice,pursuanttoPart
15ofFCCRules.Theselimitsaredesignedtoprovidereasonableprotectionagainstharmfulinterferenceina
residentialinstallation.Thisequipmentgenerates,uses,andcanradiateradiofrequencyenergyand,ifnot
installedandusedinaccordancewiththeinstructions,maycauseharmfulinterferencetoradiocommunications.
However,thereisnoguaranteethatinterferencewillnotoccurinaparticularinstallation.Ifthisequipmentdoes
causeharmfulinterferencetoradioortelevisionreception,whichcanbedeterminedbyturningtheequipment
offandon,theuserisencouragedtotrytocorrecttheinterferencebyoneormoreofthefollowingmeasures:
1. Reorientorrelocatethereceivingantenna.
2. Increasetheseparationbetweentheequipmentandreceiver.
3. Connecttheequipmentintoanoutletonacircuitdifferentfromthattowhichthereceiverisconnected.
4. Consultthedealeroranexperiencedradiotechnicianforhelp.
FCCCaution
Anychangesormodificationsnotexpresslyapprovedbythepartyresponsibleforcompliancecouldvoidthe
authoritytooperateequipment.
ThisdevicecomplieswithPart15oftheFCCRules.Operationissubjecttothefollowingtwoconditions:(1)this
devicemaynotcauseharmfulinterference,and(2)thisdevicemustacceptanyinterferencereceived,including
interferencethatmaycauseundesiredoperation.
FCCRadiationExposureStatement:
ThisequipmentcomplieswithFCCradiationexposurelimitssetforthforanuncontrolledenvironment.This
equipmentshouldbeinstalledandoperatedwithminimumdistance20cmbetweentheradiator&yourbody.
ForproductavailableintheUSA/Canadamarket,onlychannel1~11canbeoperated.Selectionofotherchannels
isnotpossible.
Thisdeviceanditsantenna(s)mustnotbeco‐locatedoroperatinginconjunctionwithanyotherantennaor
transmitter.
R&TTEComplianceStatement
ThisequipmentcomplieswithalltherequirementsofDIRECTIVE1999/5/ECOFTHEEUROPEANPARLIAMENTAND
THECOUNCILofMarch9,1999onradioequipmentandtelecommunicationterminalequipmentandthemutual
recognitionoftheirconformity(R&TTE).TheR&TTEDirectiverepealsandreplacesinthedirective98/13/EEC
(TelecommunicationsTerminalEquipmentandSatelliteEarthStationEquipment)AsofApril8,2000.
Safety
Thisequipmentisdesignedwiththeutmostcareforthesafetyofthosewhoinstallanduseit.However,special
attentionmustbepaidtothedangersofelectricshockandstaticelectricitywhenworkingwithelectrical
equipment.Allguidelinesofthisandofthecomputermanufacturemustthereforebeallowedatalltimesto
ensurethesafeuseoftheequipment.
EUCountriesIntendedforUse
TheETSIversionofthisdeviceisintendedforhomeandofficeuseinAustria,Belgium,Bulgaria,Cyprus,Czech,
Denmark,Estonia,Finland,France,Germany,Greece,Hungary,Ireland,Italy,Latvia,Lithuania,Luxembourg,Malta,
Netherlands,Poland,Portugal,Romania,Slovakia,Slovenia,Spain,Sweden,Turkey,andUnitedKingdom.TheETSI
versionofthisdeviceisalsoauthorizedforuseinEFTAmemberstates:Iceland,Liechtenstein,Norway,and
Switzerland.
EUCountriesNotIntendedforUse
None