Edimax Technology Co 9564851502 AC1200 Wireless LAN Concurrent Dual Band Gigabit Router User Manual
Edimax Technology Co Ltd AC1200 Wireless LAN Concurrent Dual Band Gigabit Router
Users Manual

Package Contents .......................................................................... Page 1
Build Network Connections ......................................................... Page 2
Network Setup ............................................................................... Page 3
Package Contents
Before starting to use this router, please check if there’s anything missing in the package, and
contact your dealer of purchase to claim for missing items:
□ Broadband Gigabit Router (main body, 1 pcs)
□ Quick Installation Guide (1 pcs)
□ User Manual CD-ROM (1 pcs)
□ A/C Power Adapter (12VDC / 1.5A) (1 pcs)
□Operating Temperature (32 °F to 104 °F (0 °C to 40 °C)
Quick Installation Guide
AC1200 Wireless LAN Concurrent
Dual Band Gigabit Router
1WAN + 4LAN
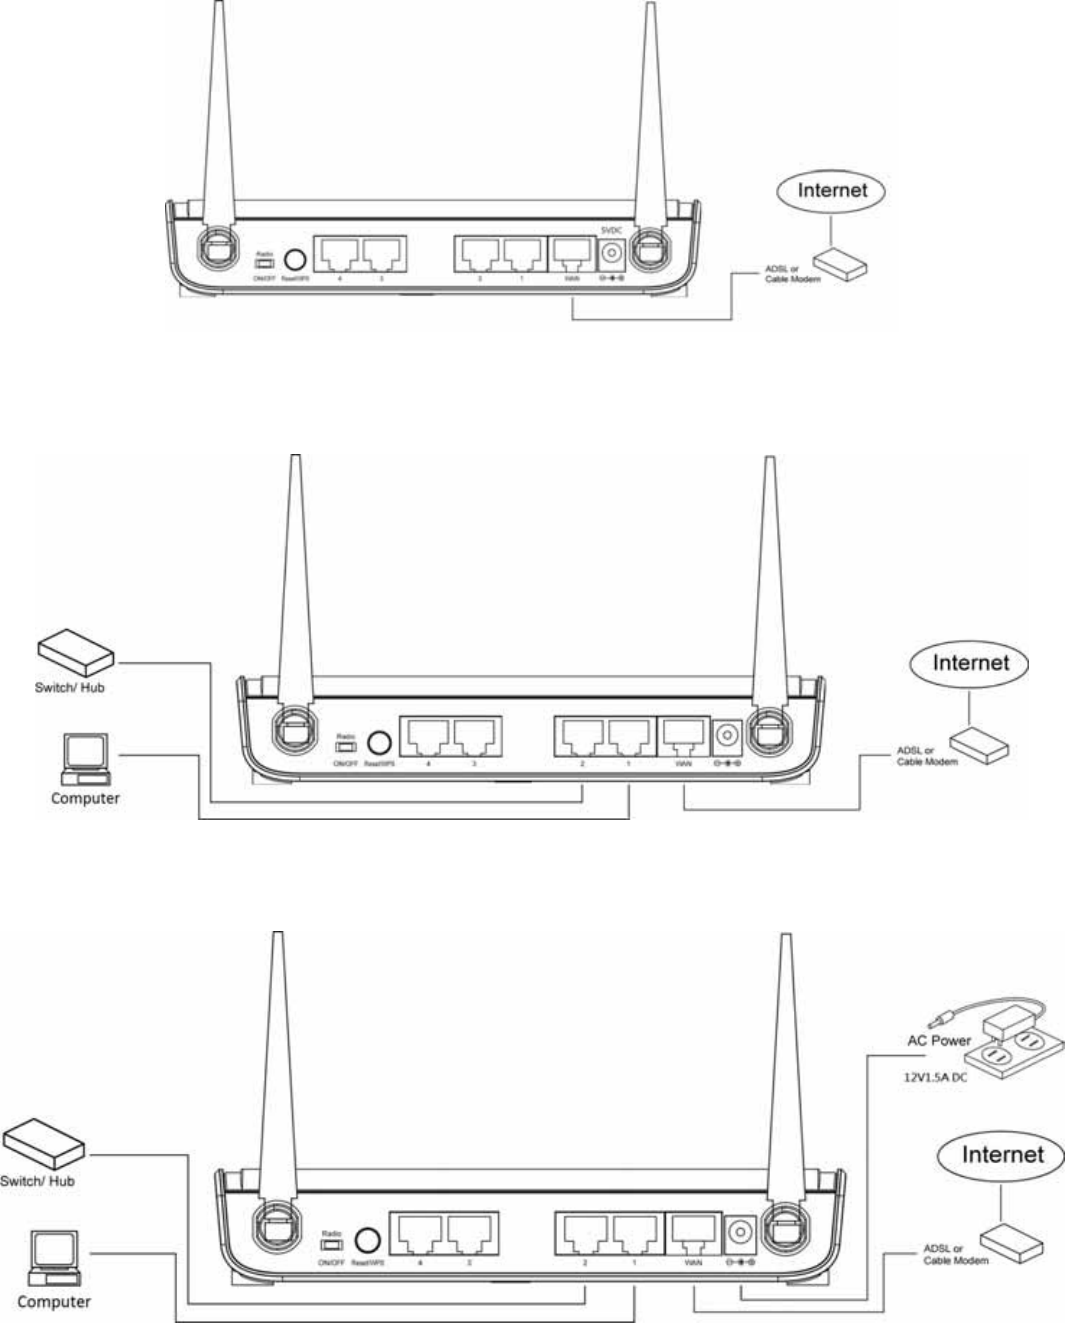
Build Network Connections
Please follow the following instructions to setup wireless router:
1. Connect your xDSL / Cable modem to the WAN port of router by Ethernet cable.
2. Connect all your computers, network devices (network-enabled consumer devices other than
computers, like game console, or switch / hub) to the LAN port of the router.
3. Connect the A/C power adapter to the wall socket, and then connect it to the ‘Power’ socket
of the router.
Please check all LEDs on the front panel. ‘PWR’ LED should be steadily on, WAN and LAN
LEDs should be on if the computer / network device connected to the respective port of the
router is powered on and correctly connected.
If ‘PWR’ LED is still off and you’re sure that all cable connections are connected properly,
please contact your dealer of purchase for assistance.
Network Setup
Please use the web browser to configure the wireless router. A computer with wired
Ethernet connection to the wireless router is required for this first-time configuration.
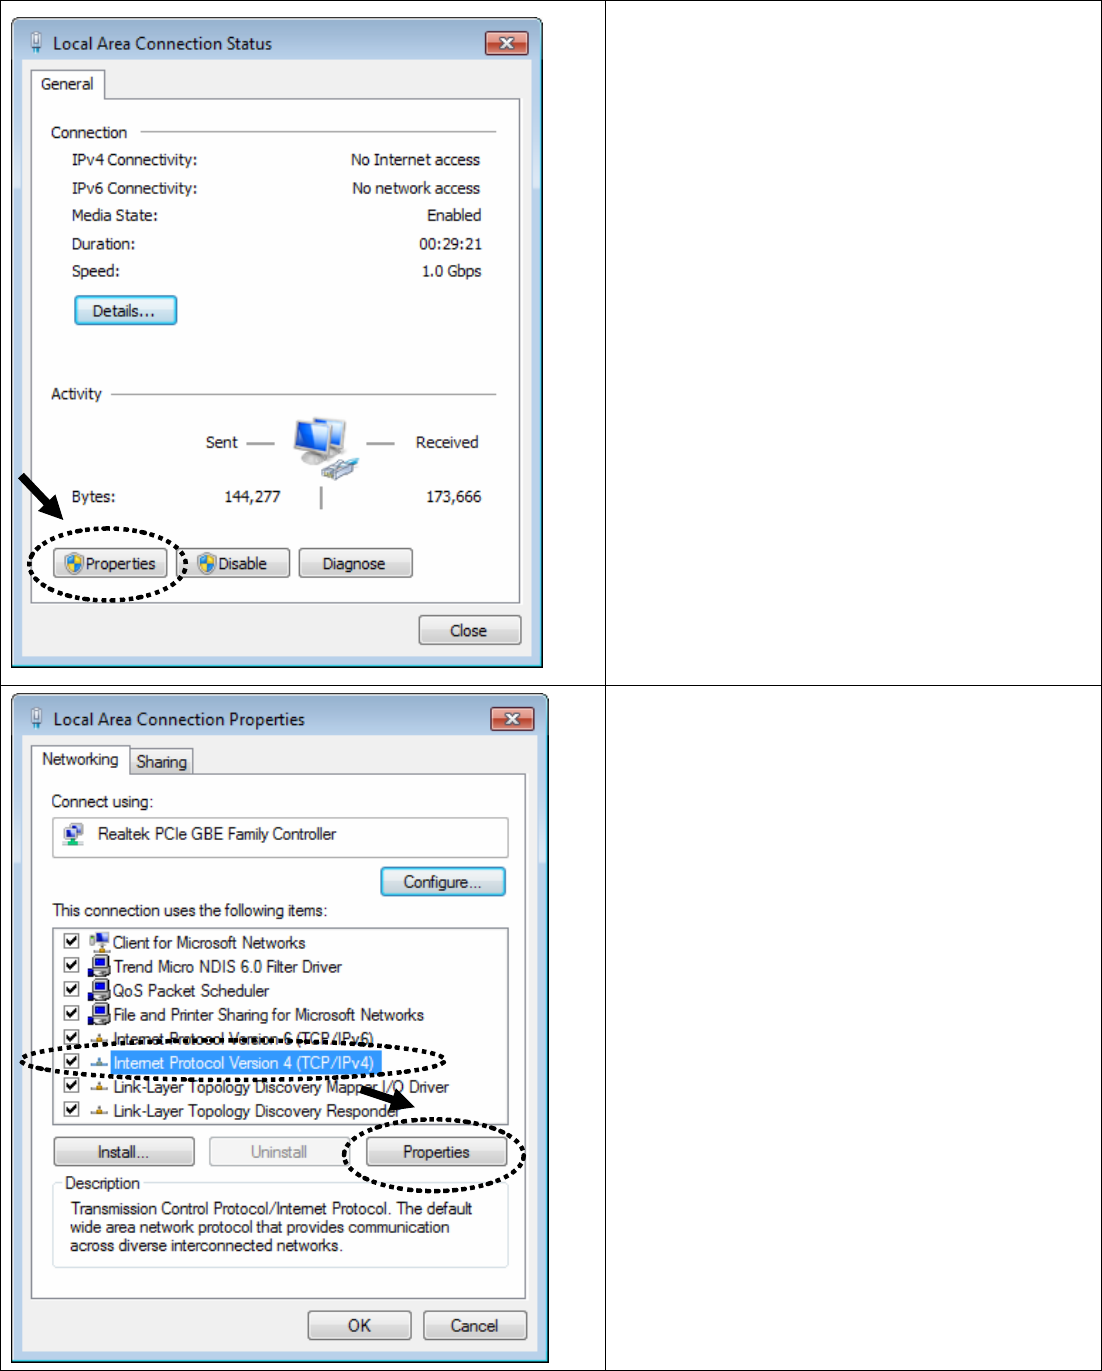
1. Set your computer to obtain an IP
address from wireless router: click
‘Start’ button (it should be located at
lower-left corner of your computer),
then click control panel. Click
Network and Sharing Center, then
click Local Area Connection. Click
‘Properties’.
2. Local Area Connection
Properties window will appear. Select
Internet Protocol (TCP/IP), then click
‘Properties’.
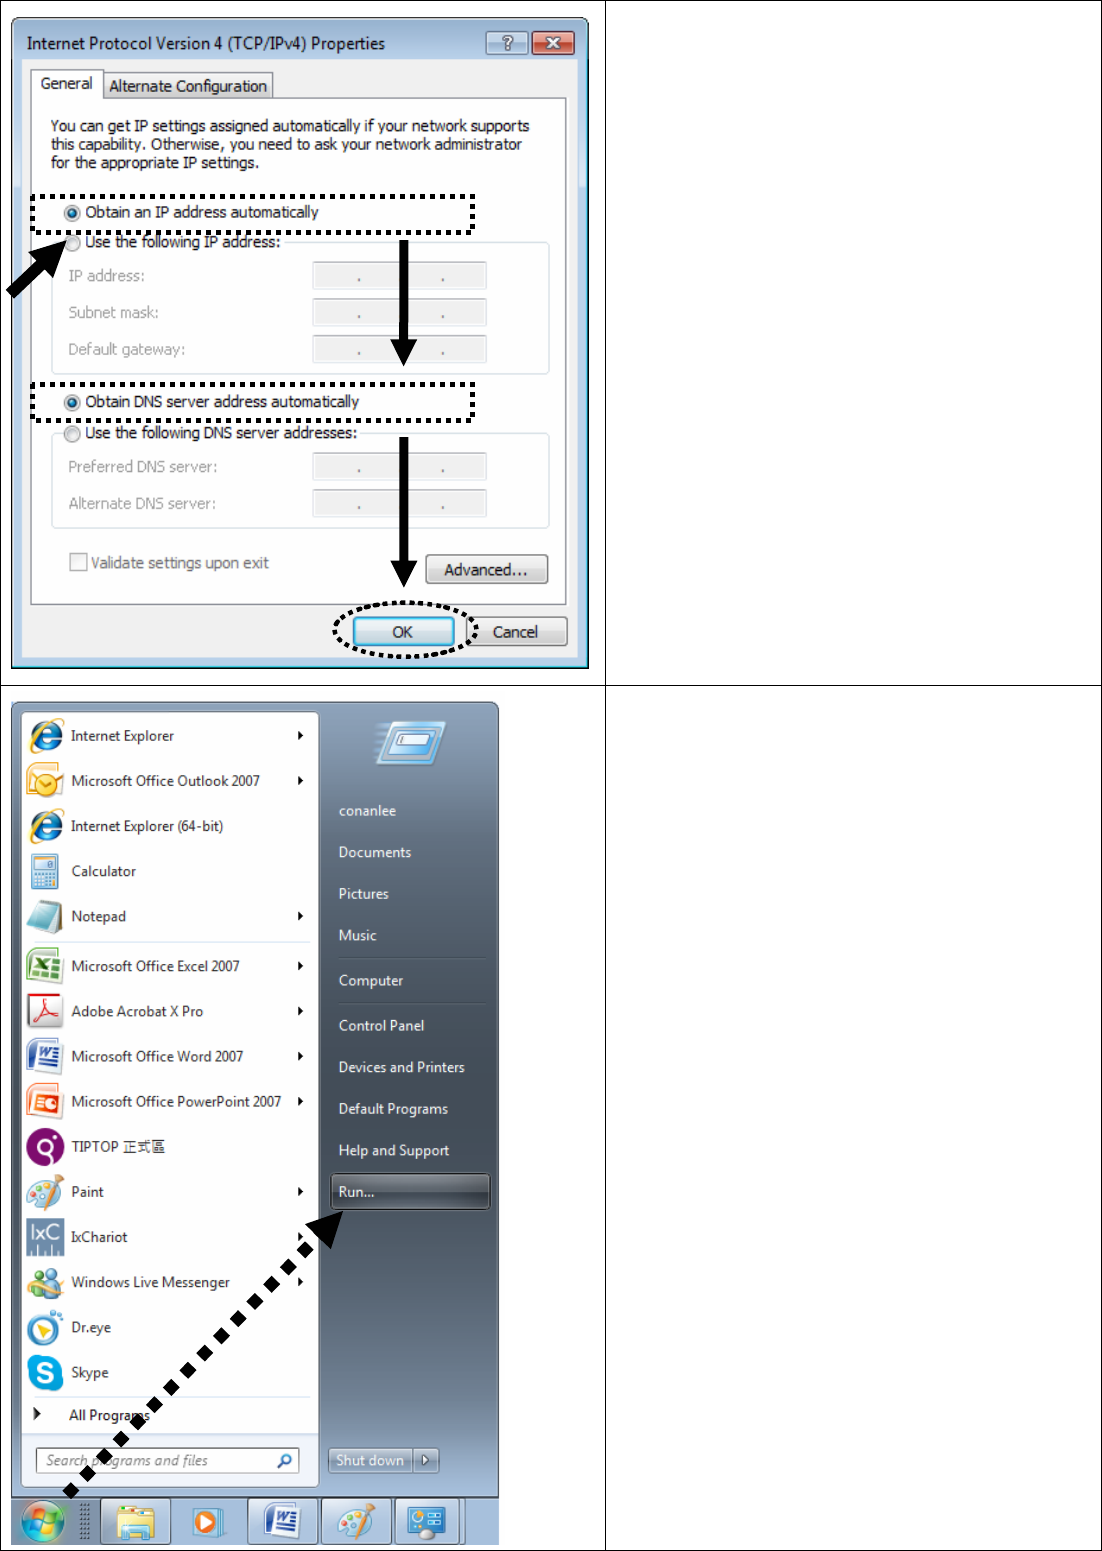
3. Select ‘Obtain an IP address
automatically’ and ‘Obtain DNS server
address automatically’, then click
‘OK’.
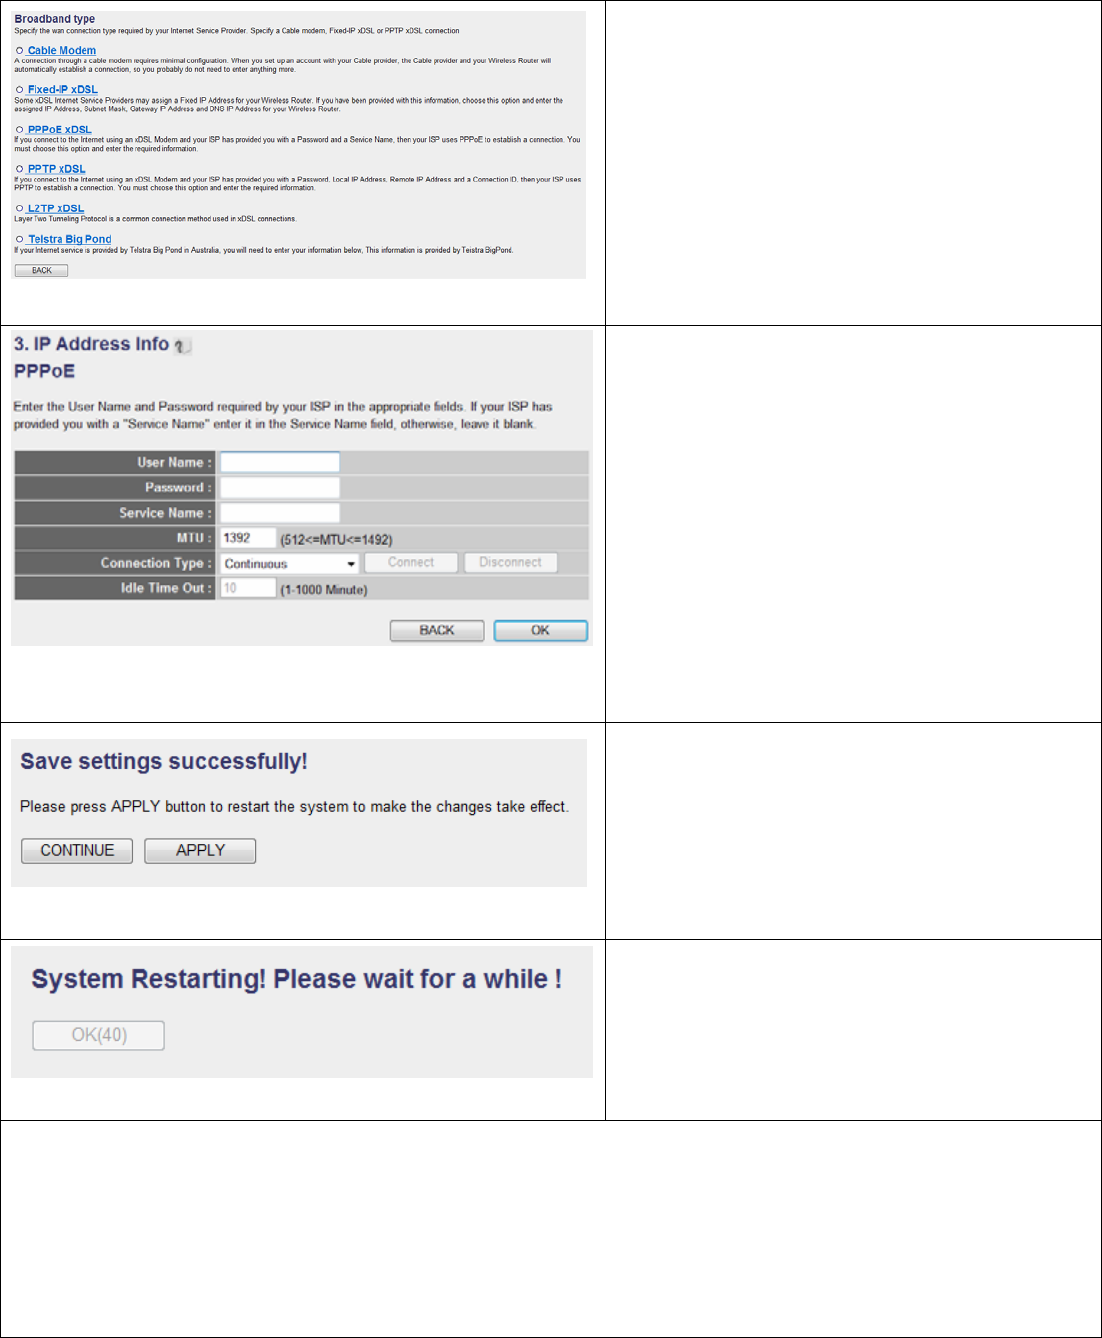
4. After the IP address setup is
complete, please click ‘Start’ -> ‘Run’
at the bottom-lower corner of your
desktop, then input ‘cmd’ and click
‘OK’.

5. Input ‘ipconfig’, then press
‘Enter’ key. Please check the
IP address followed by
‘Default Gateway’ (In this
example, the IP address of
router is 192.168.2.1)
Please note that this value
may be different.
6. Start the web browser and input the
IP address of wireless router in
address bar, and the following
message should be shown. Please
input user name and password, then
click ‘OK’ to access web management
interface of wireless router.
Default User name: admin
Default Password: 1234
7. Click ‘Quick Setup’
8. Select time
zone of the area
where you live,
then click ‘NEXT’.
HERE!
HERE!
9. Select a broadband type of the
Internet connection you’re using, then
click ‘NEXT’.
10. Please input the Internet
connection parameters, you should
use the value provided by your
Internet service provider.
Click ‘OK’ when you finish.
(The content of this page will vary
depends on the connection method
you selected in step 9)
11. Click ‘APPLY’.
12. When you see this message, the
router will be ready with new settings
within 40 seconds.
13. Please use your computer to connect to any website on Internet, or start any
Internet application and see if they’re working properly.
For instructions of advanced settings and wireless network setup, please refer to user
manual in supplied CD-ROM.

Federal Communication Commission Interference Statement
This equipment has been tested and found to comply with the limits for a Class B digital device,
pursuant to Part 15 of the FCC Rules. These limits are designed to provide reasonable protection
against harmful interference in a residential installation. This equipment generates, uses and can
radiate radio frequency energy and, if not installed and used in accordance with the instructions, may
cause harmful interference to radio communications. However, there is no guarantee that
interference will not occur in a particular installation. If this equipment does cause harmful
interference to radio or television reception, which can be determined by turning the equipment off and
on, the user is encouraged to try to correct the interference by one or more of the following measures:
z Reorient or relocate the receiving antenna.
z Increase the separation between the equipment and receiver.
z Connect the equipment into an outlet on a circuit different from that to which the receiver is
connected.
z Consult the dealer or an experienced radio/TV technician for help.
RF Exposure Warning
The equipment complies with RF exposure limits set forth for an uncontrolled environment. The
antenna(s) used for this transmitter must not be co-located or operating in conjunction with any other
antenna or transmitter.
You are cautioned that changes or modifications not expressly approved by the party
responsible for compliance could void your authority to operate the equipment.
This equipment should be installed and operated with a minimum distance of 20 centimeters between
the radiator and your body.