Edimax Technology Co 9574381301 Dual-band Wi-Fi Bridge User Manual
Edimax Technology Co Ltd Dual-band Wi-Fi Bridge
UserManual.wiki
>
Edimax Technology Co
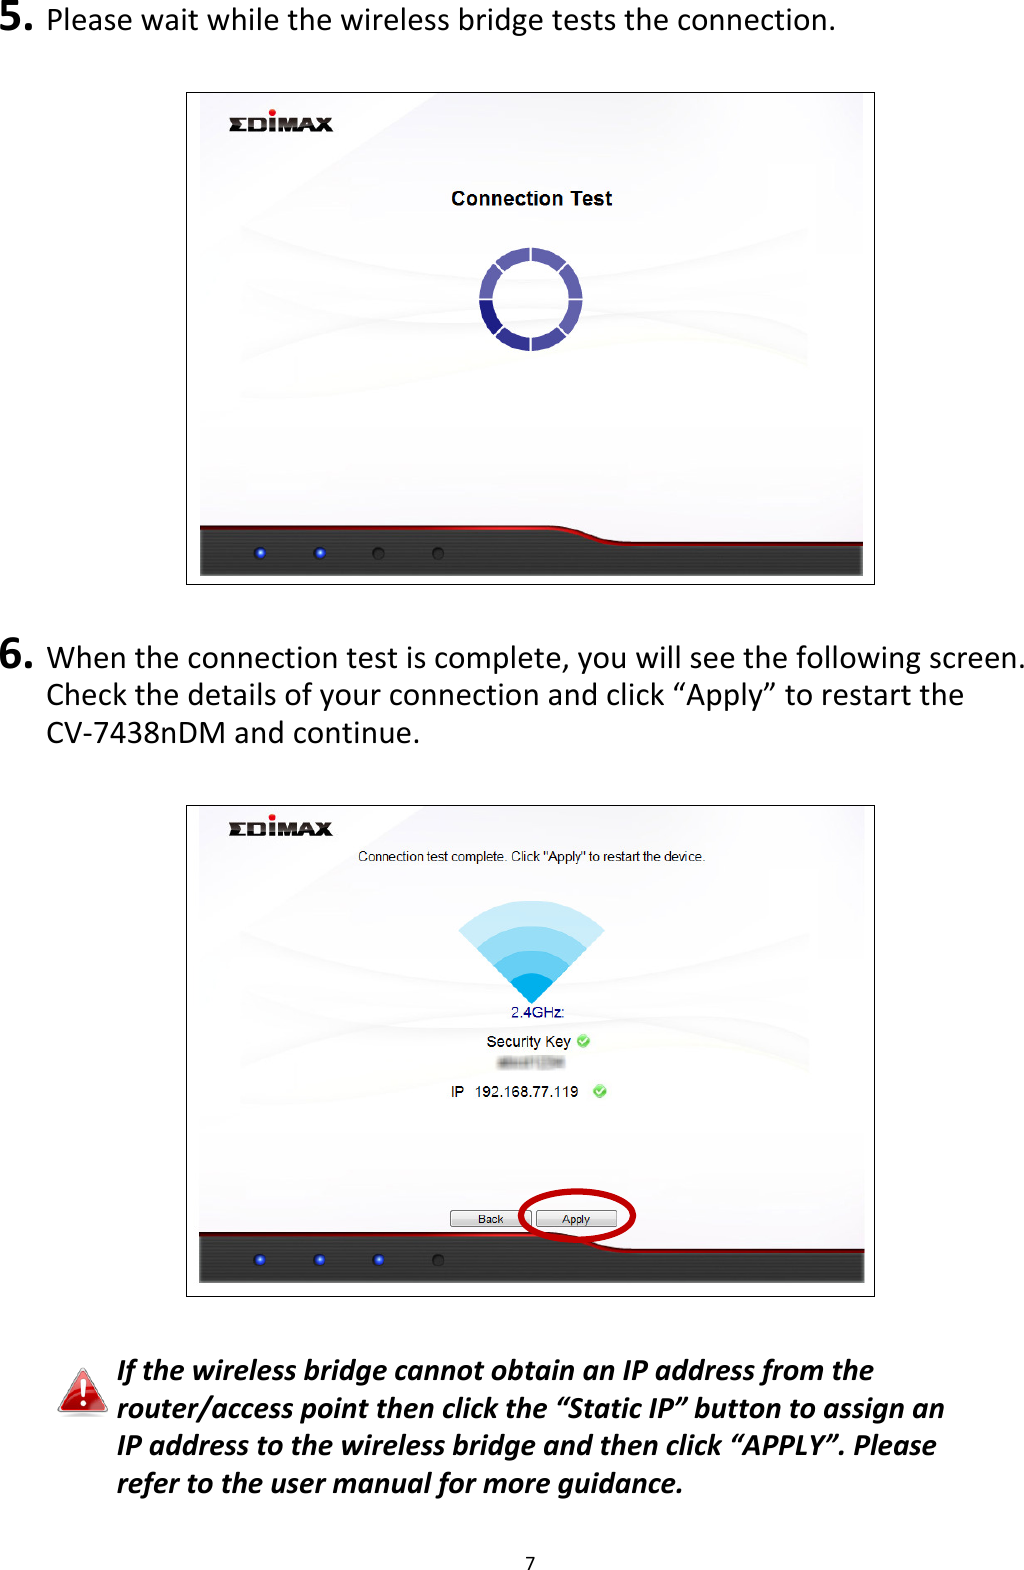
>
9574381301 User Manual
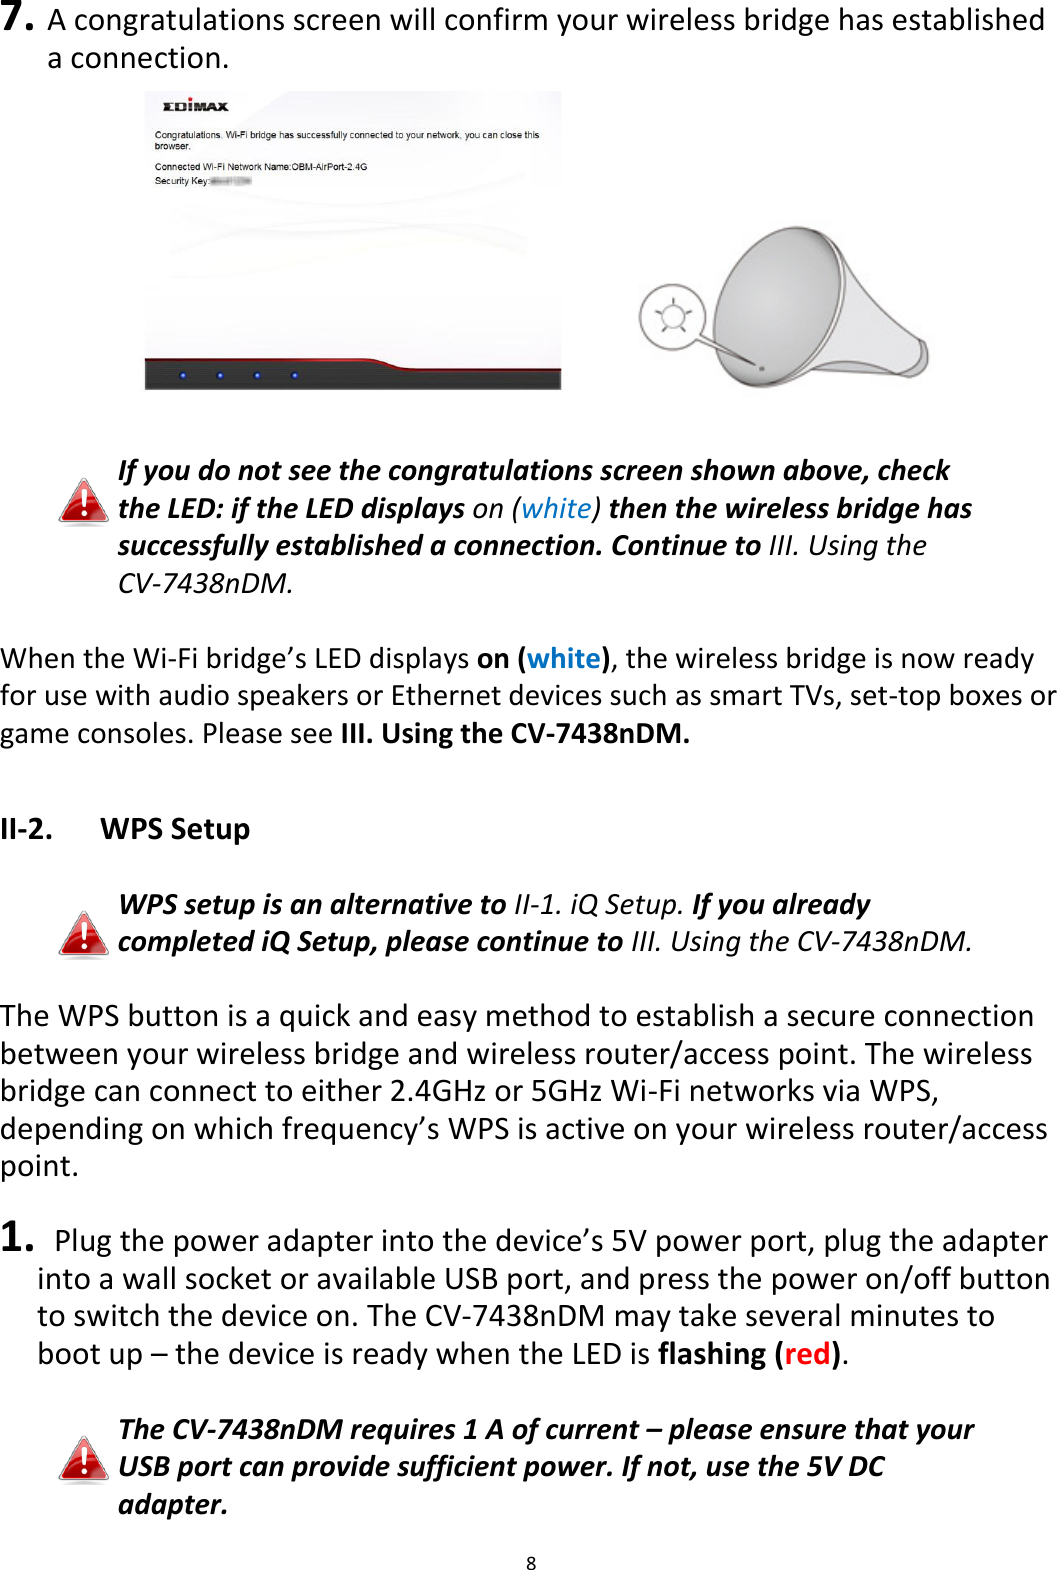
user manual
Navigation menu
Upload a User Manual
Namespaces
Wiki Guide
HTML
PDF
Info
Views
User Manual
Discussion / Help
Navigation
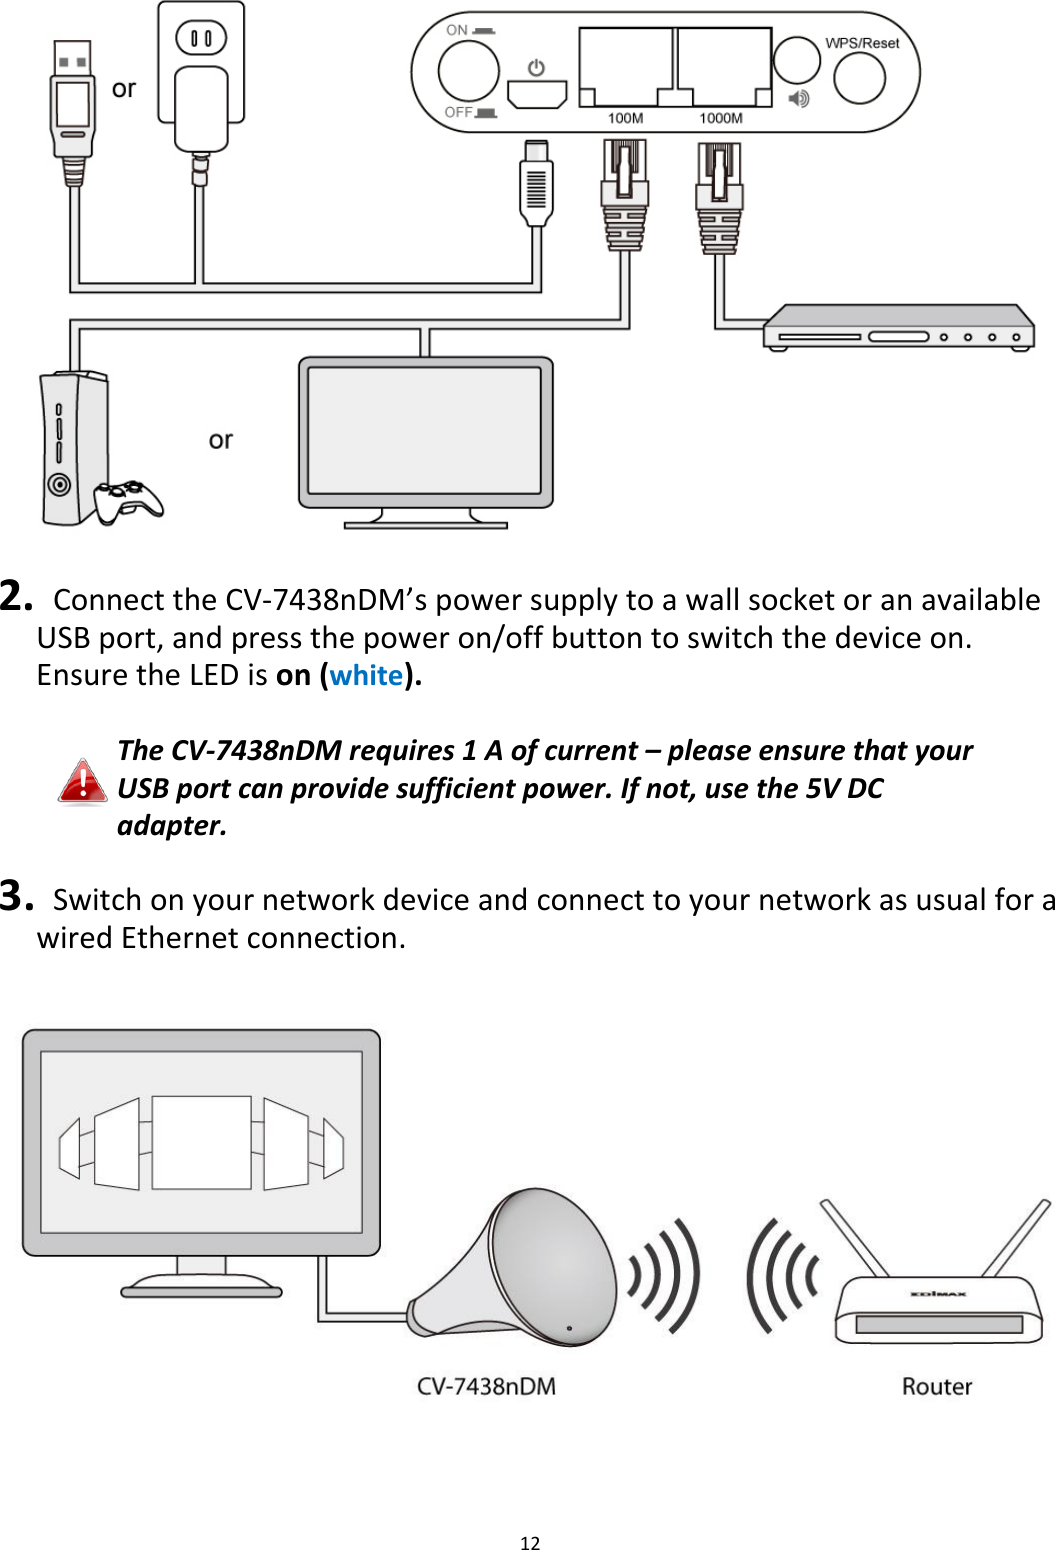
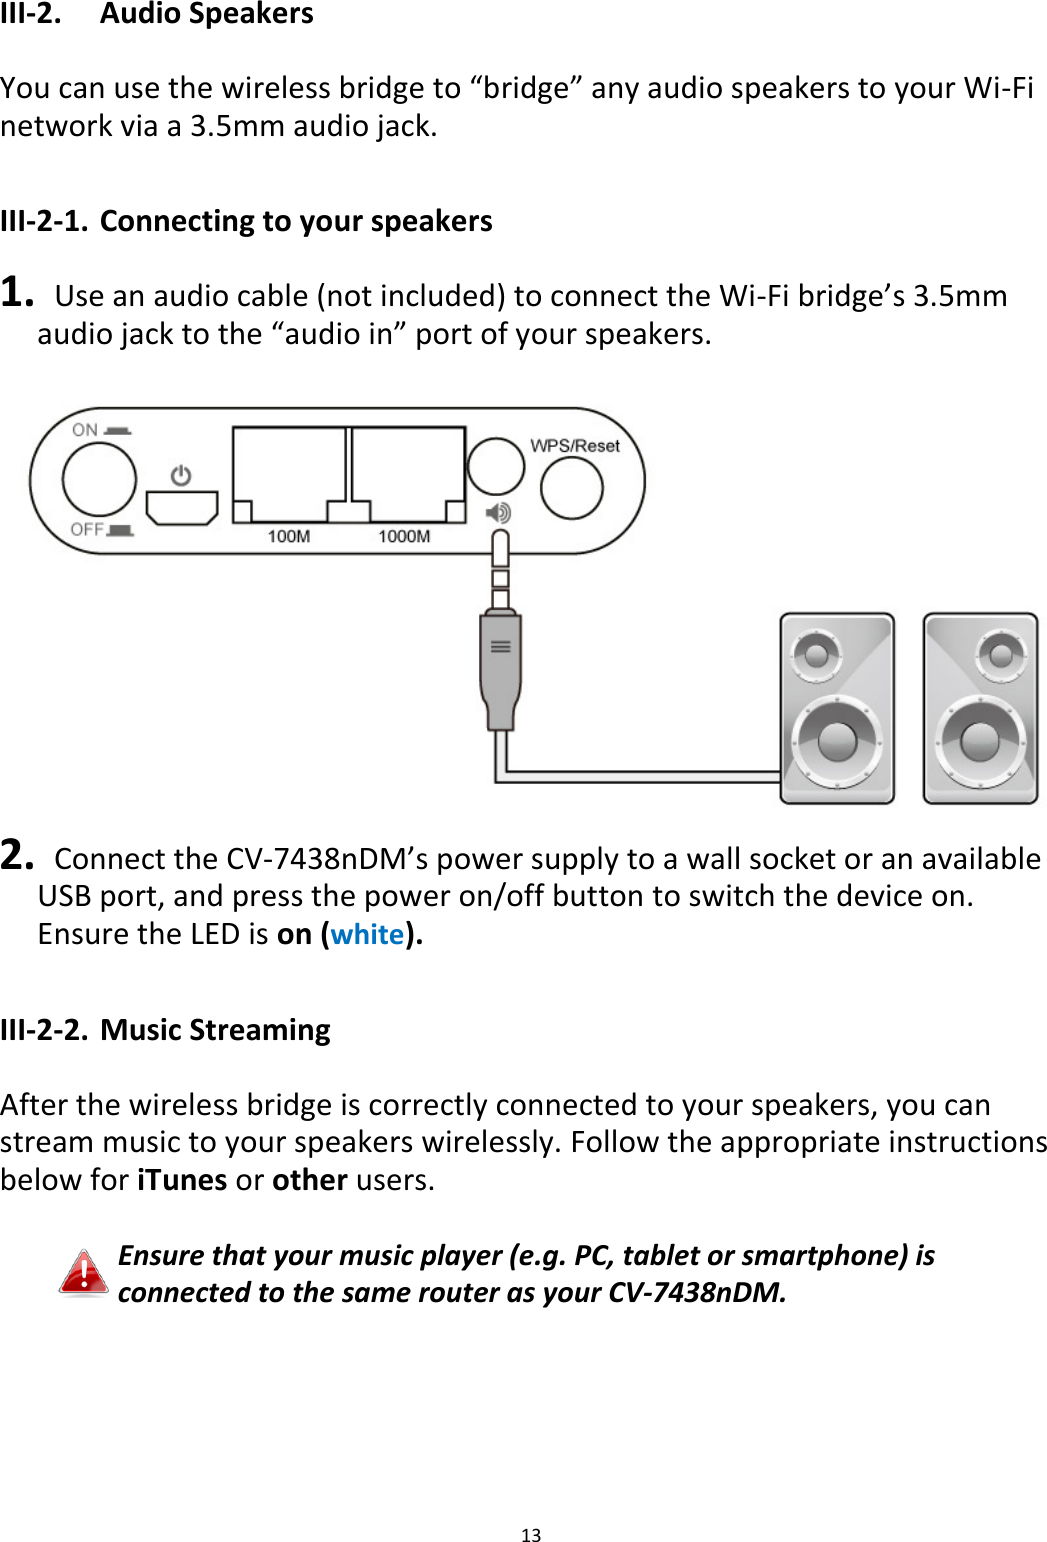
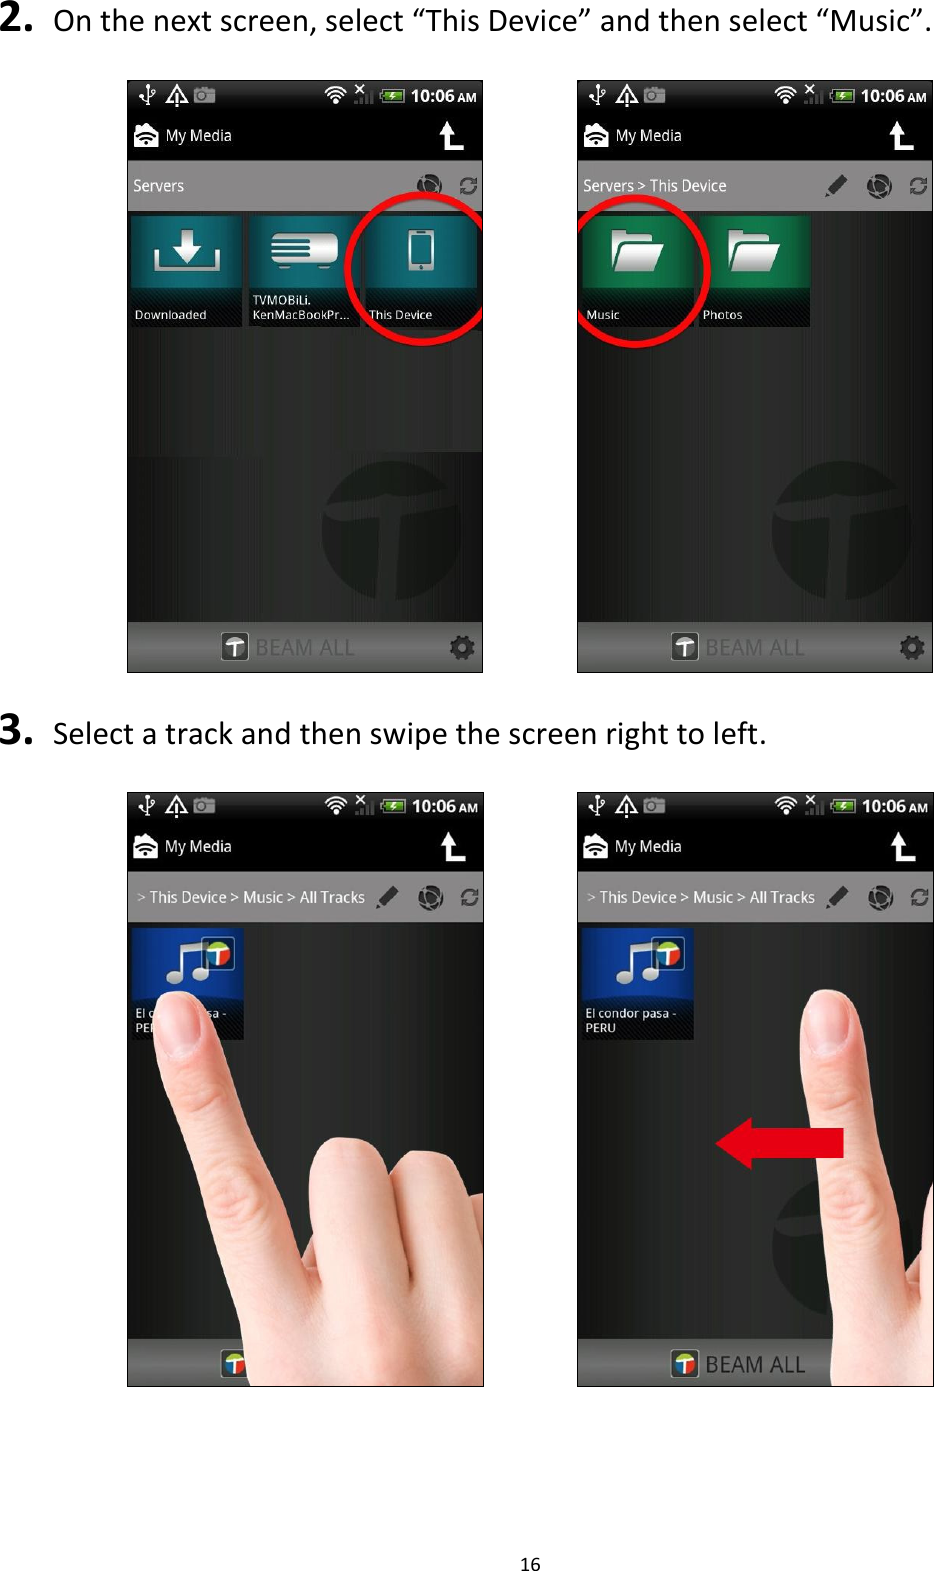
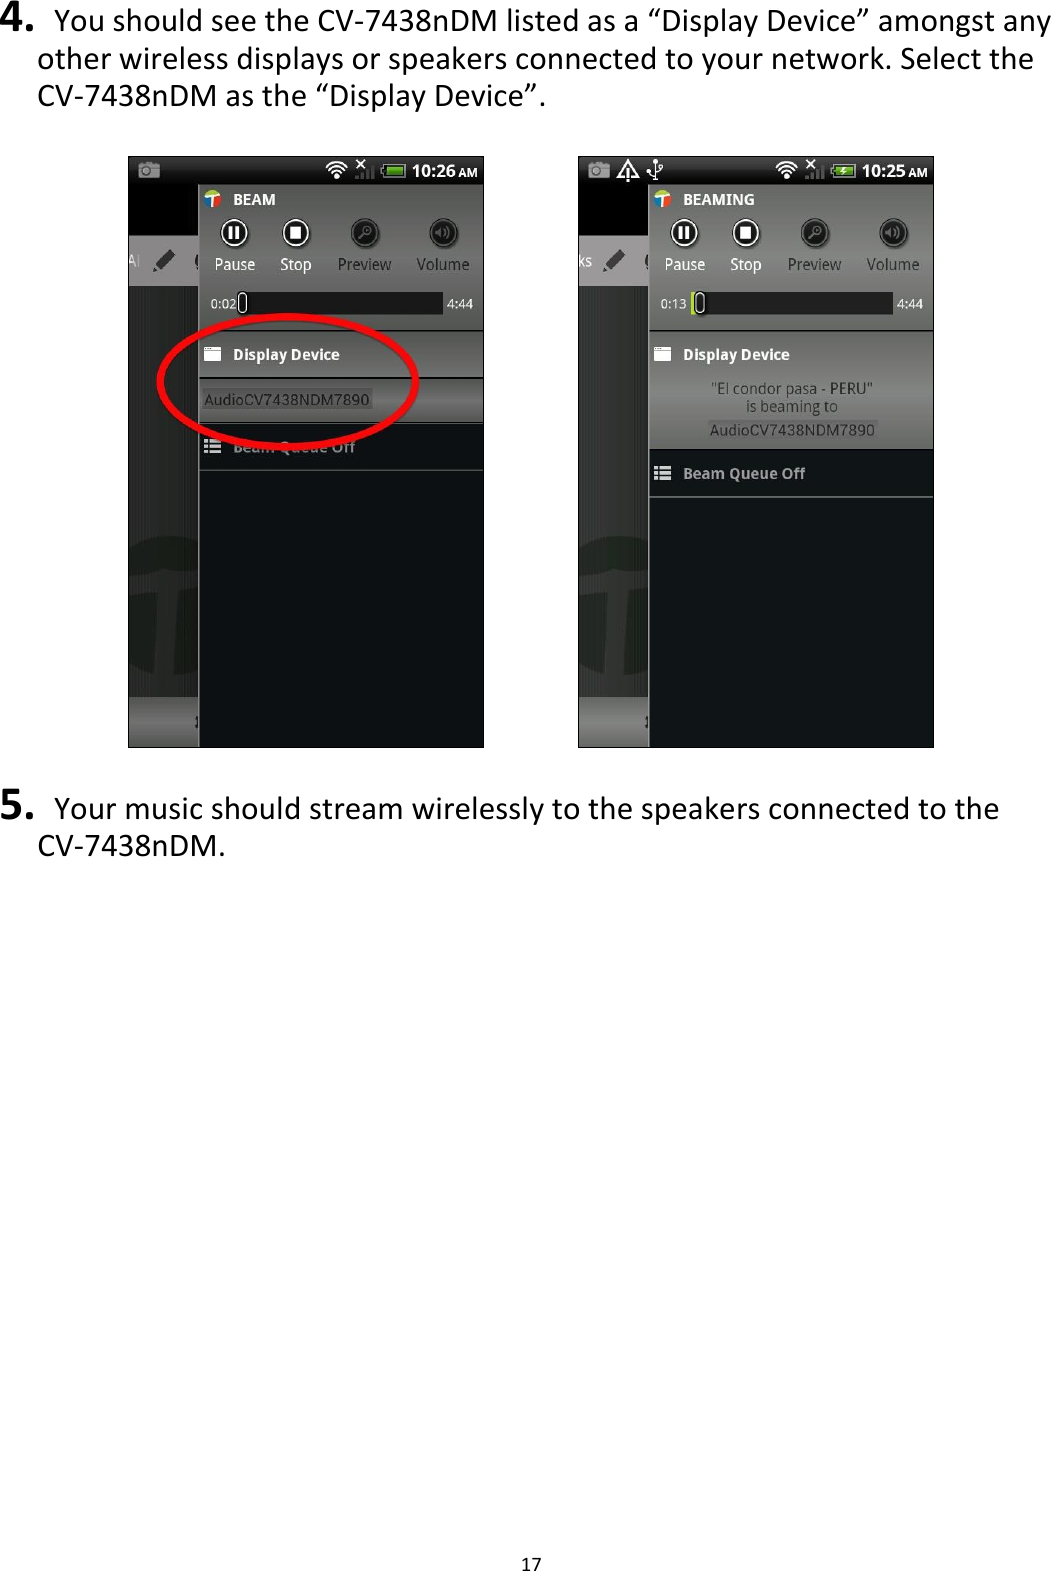
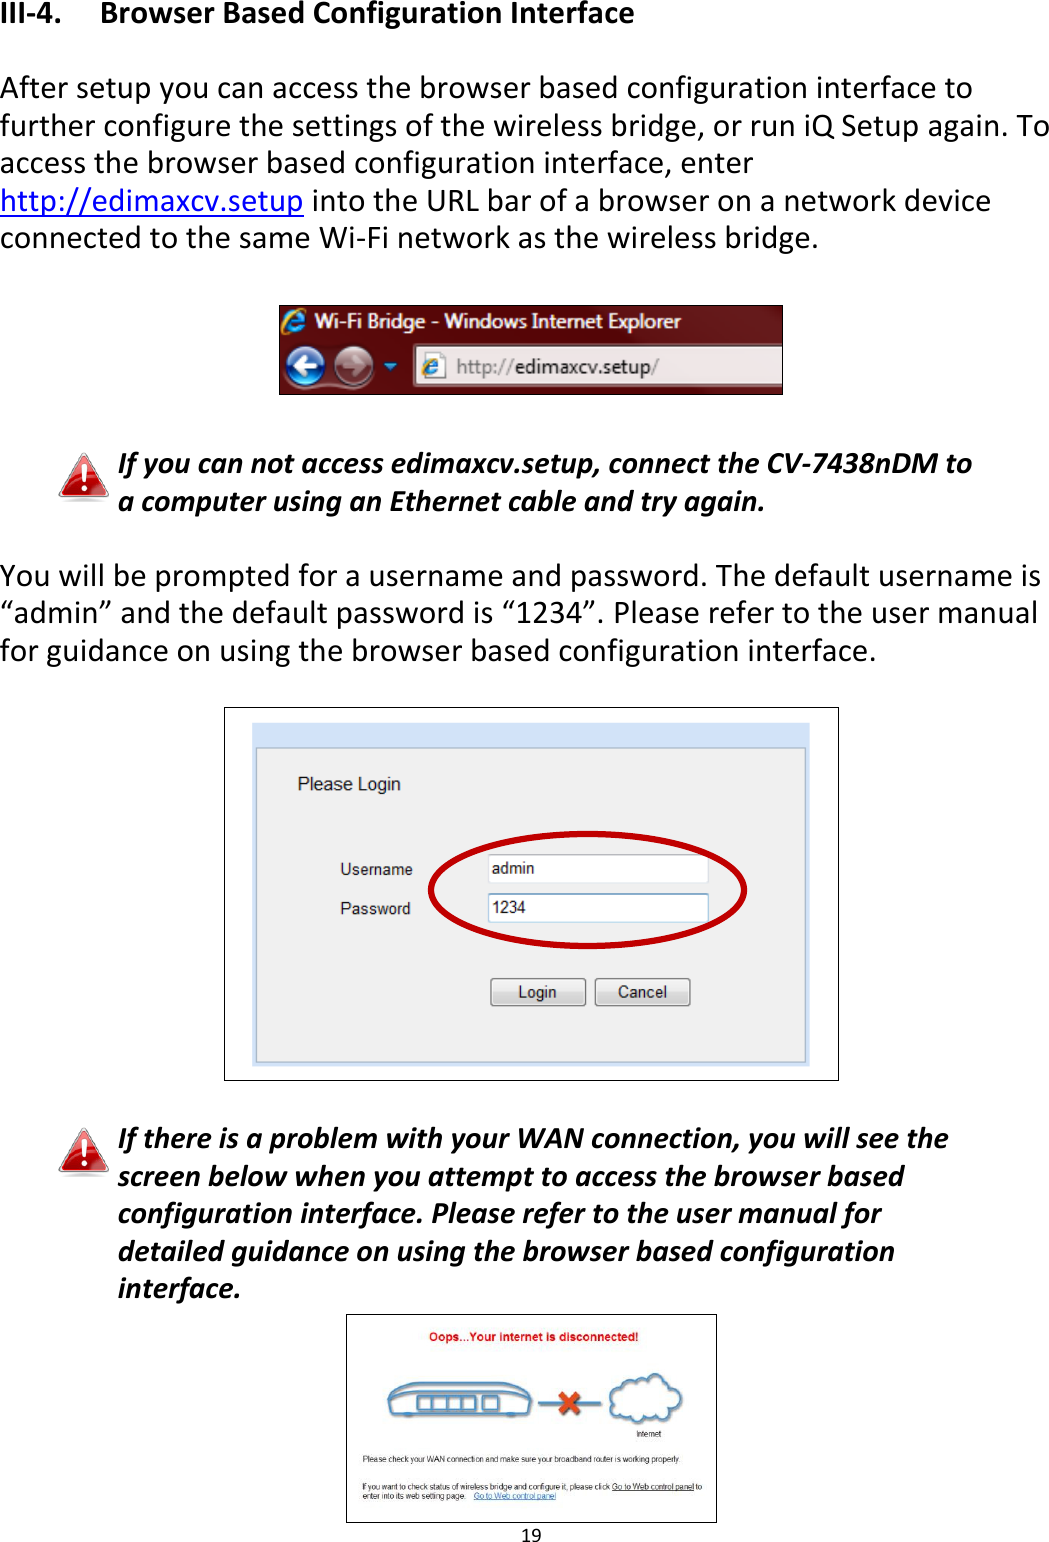
![2 I. Product Information I-1. Package Contents I-2. System Requirements - Ethernet-enabled device - Existing wireless network (2.4GHz or 5GHz) - Web browser for software configuration: Microsoft® Internet Explorer® 8.0, Google Chrome®, Firefox® or Safari®, iOS, Android latest version - iTunes 10.2 or above, iOS 4.3 or above, or 3rd party AirPlay streaming app (recommended: Twonky Beam [requires Android 4.0 or above]). Please ensure your computer, smartphone, tablet or other device can support AirPlay streaming. I-3. LED Status LED Color LED Status Description Red On Bridge is powering up or resetting. Flashing Bridge is ready to connect to a Wi-Fi network. White On Bridge is connected to a Wi-Fi network. Flashing WPS is active. Off - Bridge is switched off or LED has been manually disabled.](https://usermanual.wiki/Edimax-Technology-Co/9574381301/User-Guide-1984051-Page-3.png)