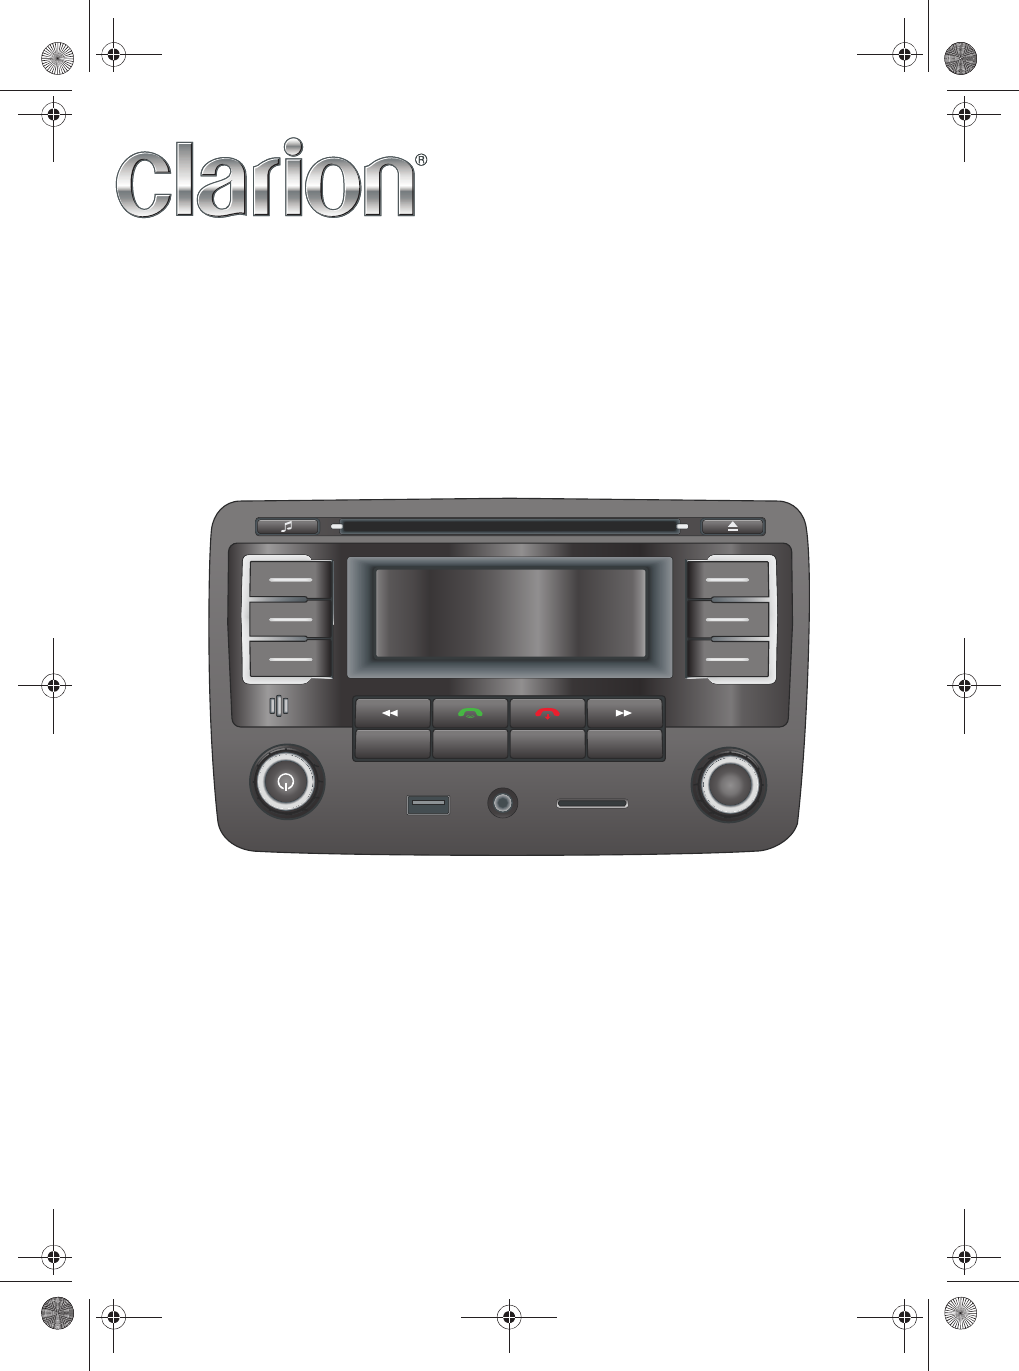
Electronica Clarion de C V BTD33-CLARION car stereo with BT radio User Manual
Electronica Clarion S.A. de C.V. car stereo with BT radio Users Manual
Users Manual
USB AUX SD
TUNEBRW
VOL
AM/FM MEDIA MENUCD
BTD3341
RADIO AM/FM, CD AUDIO/MP3/RBDS/USB/SD
CARD/AUX/BLUETOOTH/iPOD CONTROLLER
102
FCC PART 15 STATEMENTS FOR USER’S MANUAL
THIS DEVICE COMPLIES WITH PART 15 OF THE FCC RULES. OPERATION IS SUBJECT TO THE
FOLLOWING TWO CONDITIONS.
(1) THIS DEVICE MAY NOT CAUSE HARMFUL INTERFERENCE, AND (2) THIS DEVICE MUST
ACCEPT ANY INTERFERENCE RECEIVED, INCLUDING INTERFERENCE THAT MAY CAUSE
UNDESIRED OPERATION.
Warning: Changes or modifications not expressly approved by the party responsible for compliance
could void the user’s authority to operate this equipment.
Note: This equipment has been tested and found to comply with the limits for a Class B digital device,
pursuant to part 15 of the FCC Rules. These limits are designed to provide reasonable protection
against harmful interference in a installation.
General precautions
This appliance is equipped with high sensitivity buttons avoid applying force to operate, as this can
damage them and reduce their useful life.
Do not open the cover. The unit does not have parts inside that user serviceable.
Use dry cloth to clean the control panel, never use, thinner, benzine, alcohol, etc. cloths .
If the unit is too dirty apply some warm water to a soft cloth and carefully remove dirt.
Do not insert foreign devices to the auxiliary inputs (screwdrivers, knives, metal etc.). This can
damage the equipment.
103
User handbook
Table of contents
Introduction . . . . . . . . . . . . . . . . . . . . . . . . . . . . . . . . . . . . . . . . . . . . . . . . . . . . . . . . . . . . . . . . . . . 104
Signs and symbols. . . . . . . . . . . . . . . . . . . . . . . . . . . . . . . . . . . . . . . . . . . . . . . . . . . . . . . . . . . . . . 104
Use of the terms "Data carrier" and "Audio source". . . . . . . . . . . . . . . . . . . . . . . . . . . . . . . . . . . . . 104
Before using for the first time. . . . . . . . . . . . . . . . . . . . . . . . . . . . . . . . . . . . . . . . . . . . . . . . . . . . . . 104
Safety instructions . . . . . . . . . . . . . . . . . . . . . . . . . . . . . . . . . . . . . . . . . . . . . . . . . . . . . . . . . . . . . . 105
Anti-theft coding . . . . . . . . . . . . . . . . . . . . . . . . . . . . . . . . . . . . . . . . . . . . . . . . . . . . . . . . . . . . . . . 107
Language settings . . . . . . . . . . . . . . . . . . . . . . . . . . . . . . . . . . . . . . . . . . . . . . . . . . . . . . . . . . . . . 107
Device overview . . . . . . . . . . . . . . . . . . . . . . . . . . . . . . . . . . . . . . . . . . . . . . . . . . . . . . . . . . . . . . . 108
General operation . . . . . . . . . . . . . . . . . . . . . . . . . . . . . . . . . . . . . . . . . . . . . . . . . . . . . . . . . . . . . . 110
Switching on, off or mute . . . . . . . . . . . . . . . . . . . . . . . . . . . . . . . . . . . . . . . . . . . . . . . . . . . . . . . . . 110
Audio source selection . . . . . . . . . . . . . . . . . . . . . . . . . . . . . . . . . . . . . . . . . . . . . . . . . . . . . . . . . . 110
Audio settings . . . . . . . . . . . . . . . . . . . . . . . . . . . . . . . . . . . . . . . . . . . . . . . . . . . . . . . . . . . . . . . . . 110
Sound and volume settings . . . . . . . . . . . . . . . . . . . . . . . . . . . . . . . . . . . . . . . . . . . . . . . . . . . . . . . 110
Radio operation . . . . . . . . . . . . . . . . . . . . . . . . . . . . . . . . . . . . . . . . . . . . . . . . . . . . . . . . . . . . . . . 111
Operating the radio . . . . . . . . . . . . . . . . . . . . . . . . . . . . . . . . . . . . . . . . . . . . . . . . . . . . . . . . . . . . . 111
RDS radio data services . . . . . . . . . . . . . . . . . . . . . . . . . . . . . . . . . . . . . . . . . . . . . . . . . . . . . . . . . 112
Media operation . . . . . . . . . . . . . . . . . . . . . . . . . . . . . . . . . . . . . . . . . . . . . . . . . . . . . . . . . . . . . . . 114
Requirements on the data carrier and audio file . . . . . . . . . . . . . . . . . . . . . . . . . . . . . . . . . . . . . . . 114
Playback sequence with audio files . . . . . . . . . . . . . . . . . . . . . . . . . . . . . . . . . . . . . . . . . . . . . . . . 115
Playback from the data carrier . . . . . . . . . . . . . . . . . . . . . . . . . . . . . . . . . . . . . . . . . . . . . . . . . . . . 115
Inserting or removing the CD . . . . . . . . . . . . . . . . . . . . . . . . . . . . . . . . . . . . . . . . . . . . . . . . . . . . . 117
Inserting or removing the SD card . . . . . . . . . . . . . . . . . . . . . . . . . . . . . . . . . . . . . . . . . . . . . . . . . 117
USB data carrier to the USB socket . . . . . . . . . . . . . . . . . . . . . . . . . . . . . . . . . . . . . . . . . . . . . . . . 117
iPod to the USB socket (iPod mode) . . . . . . . . . . . . . . . . . . . . . . . . . . . . . . . . . . . . . . . . . . . . . . . . 118
External playback device to the AUX socket . . . . . . . . . . . . . . . . . . . . . . . . . . . . . . . . . . . . . . . . . . 118
Bluetooth functions . . . . . . . . . . . . . . . . . . . . . . . . . . . . . . . . . . . . . . . . . . . . . . . . . . . . . . . . . . . . 118
Coupling Bluetooth devices . . . . . . . . . . . . . . . . . . . . . . . . . . . . . . . . . . . . . . . . . . . . . . . . . . . . . . . 119
Disconnecting the connection to the Bluetooth device on the radio . . . . . . . . . . . . . . . . . . . . . . . . 119
Reconnecting a coupled Bluetooth device with the radio again . . . . . . . . . . . . . . . . . . . . . . . . . . . 119
Delete coupling . . . . . . . . . . . . . . . . . . . . . . . . . . . . . . . . . . . . . . . . . . . . . . . . . . . . . . . . . . . . . . . . 120
Bluetooth menu . . . . . . . . . . . . . . . . . . . . . . . . . . . . . . . . . . . . . . . . . . . . . . . . . . . . . . . . . . . . . . . . 120
Hands-free system . . . . . . . . . . . . . . . . . . . . . . . . . . . . . . . . . . . . . . . . . . . . . . . . . . . . . . . . . . . . . 121
Bluetooth audio . . . . . . . . . . . . . . . . . . . . . . . . . . . . . . . . . . . . . . . . . . . . . . . . . . . . . . . . . . . . . . . . 122
Voice memos . . . . . . . . . . . . . . . . . . . . . . . . . . . . . . . . . . . . . . . . . . . . . . . . . . . . . . . . . . . . . . . . . 122
GB
104
Introduction
This operating manual will explain how easy it is to use the device. Please take the time to read this
handbook through carefully and keep it in the vehicle in case any questions should arise later on. Please
ensure that this handbook is handed on to the next owner if you sell your car or the radio.
Signs and symbols
The following signs and symbols make it easier to read the operating manual:
Texts with this symbol indicate a situation that may lead to damage to the vehicle or radio if disregarded.
Texts with this symbol contain additional information.
Use of the terms "Data carrier" and "Audio source"
"Data carrier" is used for internal (CDs, SD cards, USB data carriers) and external data carriers (iPod,
playback devices on the AUX socket, mobile phone).
"Audio source" is used for the radio and all data carriers (see above).
Before using for the first time
Before using for the first time, carry out the following steps so that you are able to operate the
device in a safe way and so that you can use the functions provided to their full extent:
✓Observe all safety instructions Page 105
✓Familiarise yourself with the device overview Page 108
✓Use data carriers that are suitable for media operation Page 114
Bluetooth® is a registered trademark of Bluetooth SIG, Inc.
iPod® and iPhone® are registered trademarks of Apple Inc.
DANGER
●Texts with this symbol indicate a dangerous situation that results in death or severe injuries
if disregarded.
WARNING
●Texts with this symbol indicate a dangerous situation that may lead to death or severe
injuries if disregarded.
BEWARE
●Texts with this symbol indicate a dangerous situation that may lead to slight or severe
injuries if disregarded.
NOTE
105
Safety instructions
Preventive measures with laser devices:
Laser devices are classified in the safety classes 1-4 according to DIN IEC 76 (CO) 6/ VDE 0837.
The CD player of this device corresponds with safety class 1.
The laser used in class 1 devices is low-energy or is shielded so that there is no risk when used for its
intended purpose.
WARNING
Distraction of the driver can result in accident and injuries.
●Always drive attentively and responsibly.
●Select the volume settings so that acoustic signals originating from outside can be well
perceived (e. g. the siren of emergency services).
●Volume set too loud may damage your hearing. This also applies if your hearing is exposed
to loud volumes for short periods.
WARNING
Operating the radio or the Bluetooth device as well as connecting, inserting, playing back or
removing a data carrier when driving may distract you from traffic situations and lead to
accidents.
●All settings made to the radio should only be carried out when the vehicle is stationary.
●Use the data carrier only when the vehicle is stationary.
●Use the mobile phone / Bluetooth playback device only when the vehicle is stationary and
observe all legal guidelines!
WARNING
When changing or connecting an audio source, you may experience sudden fluctuations in the
volume.
●Reduce the volume before changing or connecting an audio source.
WARNING
An external device that is not secured at all or correctly can be flung through the interior of the
vehicle causing injuries as the result of sudden driving or braking manoeuvres as well as an
accident or a collision.
●Never arrange or mount the external device on the doors, on the windscreen, above or near
to the area marked with "AIRBAG" on the steering wheel, the dashboard, the backrests or
between these areas and the passengers themselves. The external device may lead to severe
injuries in event of an accident, especially when the airbags are triggered.
BEWARE
Connecting cables for external devices may impair the driver.
●Route the connecting line in such a manner that the driver is not obstructed.
WARNING
Opening the housing of a CD player may lead to injuries caused by non-visible laser radiation.
●Have CD players repaired only by a specialist company.
106
Do not press the knobs and buttons of the device too hard as this may cause damage to it. A light push
of the button is sufficient to operate the device.
Do not open the device. There is nothing inside the device that can be repaired by the user.
Use a soft and dry cloth to clean the device. Never use rough cloths, thinner, petroleum, alcohol, etc. For
heavy contamination, use a lightly moistened cloth to carefully wipe away the dirt.
Never insert foreign objects (screwdriver, penknife, metal objects, etc.) into the openings of the device as
these may damage the device. Such damage is not covered by the guarantee.
Always insert CDs into or remove CDs from the CD drive straight and at right angles to the front of the
device without tilting in order to prevent scratching.
Inserting a second CD when a CD is already inserted or is being played back may destroy the CD drive.
Always wait for the complete data carrier output.
Foreign objects stuck to a data carrier and irregular shaped data carriers may lead to damage to the CD
drive.
Use only clean standard 12 cm CDs!
- Do not glue any labels or similar onto the data carrier. Stickers may loosen and result in damage
being caused to the drive.
- Do not use printable data carriers. Coatings and prints may loosen and result in damage being
caused to the drive.
- Do not insert 8 cm single CDs and irregular shaped CDs (Shape CDs) or DVDs.
- Do not insert DVD-Plus, Dual Disc and Flip Discs as these are thicker than normal CDs.
Use a soft, non-fluffy cloth to clean the CDs. In doing so, wipe the CD in straight lines from the middle to
the outside. Intensive dirt can be removed using a commercially available CD cleaner or isopropyl
alcohol.
Always store unused CDs in a compartment intended for this purpose or in the original CD cover.
The vehicle loudspeakers may be damaged if the playback is too loud or distorted.
Under certain circumstances, you may not be able to play back CDs with copy protection and
self-made CD-R and CD-RW CDs or the playback is limited.
Observe all legal guidelines concerning copyright.
NOTE
NOTE
107
Anti-theft coding
The anti-theft coding prevents the reactivation of the device electronically when it is removed by
unauthorised persons.
If "SAFE" appears on the display for approx. 10 seconds immediately after turning on the device and
then "1000" continuously, enter the code corresponding to the device to deactivate the electronic lock.
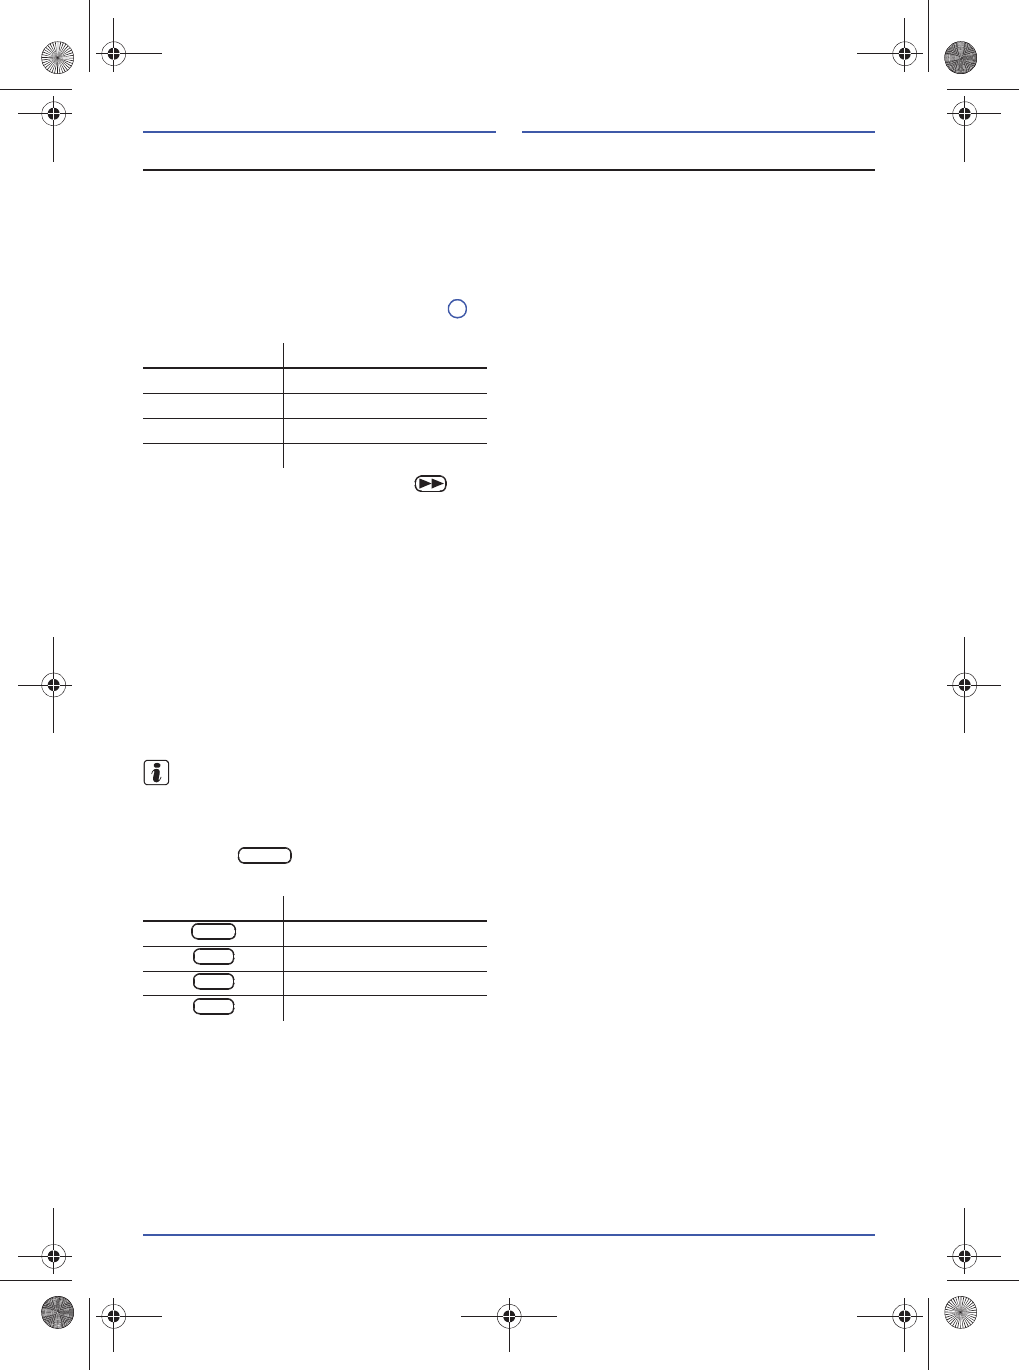
Enter the code number
After turning on the device, "SAFE" appears on the display and then, after a short period, "1000".
By pressing a function button Page 108 several times, the four digit code can be entered.
Thereby, the function buttons are allocated as follows:
After entering the four digits, keep the button pressed until the acceptance of the code has been
confirmed by an acoustic signal. Then the device is ready for operation.
Device card
The code and serial number is located on a device card supplied with the device. The device card must
be kept in a safe place. Never leave it in the vehicle. The device is only useful for thieves if they also
have the card!
Incorrect code number
If the incorrect code number is entered when disabling the electronic lock, first "SAFE" appears flashing
on the display and then "1000" again. Now the complete procedure can be repeated again. The number
of attempts already carried out will be shown to the left on the display. If an incorrect code number is
entered again, the device is blocked for approx. one hour. This means that it cannot be put into
operation for this period. The lock can be recognised by the continuous "SAFE" and the number of
attempts will be shown to the left on the display. After one hour – the device and vehicle ignition must
remain switched on for this – the display goes out and the electronic lock can be disabled again, as
previously described. The cycle – two attempts, blocked for one hour – still applies.
If the device card with code number has been lost, please contact your Volkswagen Partner.
Language settings
The display language can only be set in radio mode.
Press the button again until the current language set is displayed.
Press the respective function button for selecting the language.
Position Function button
X--- top left
-X-- centre left
--X- bottom left
---X top right
Function button Language settings
English
Portuguese
Spanish
Russian
3
MENU
ENG
PORT
ESP
RUS
108
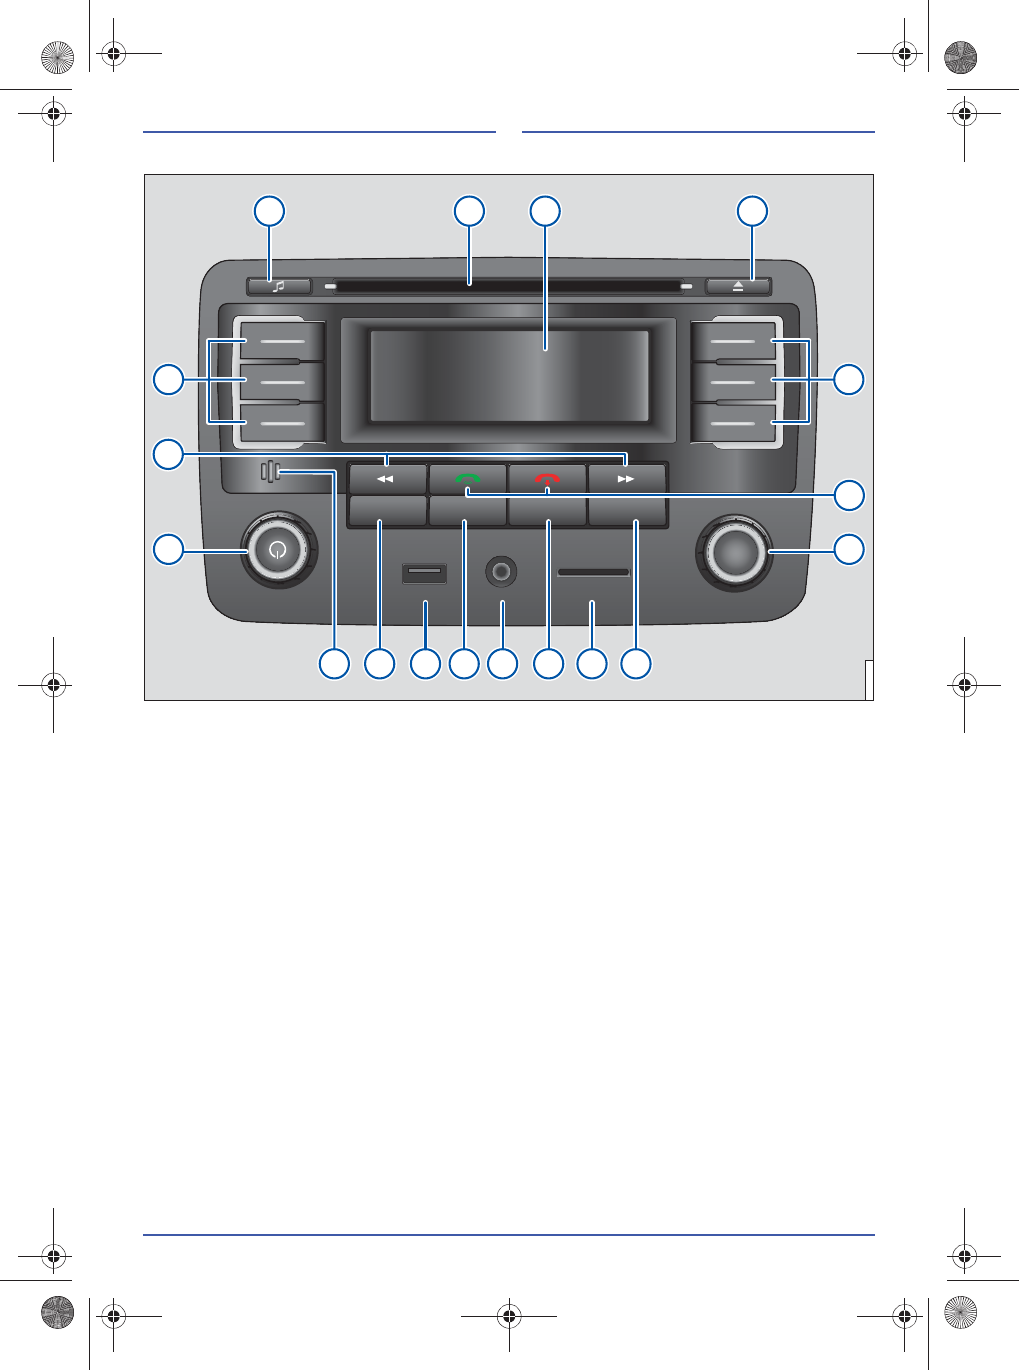
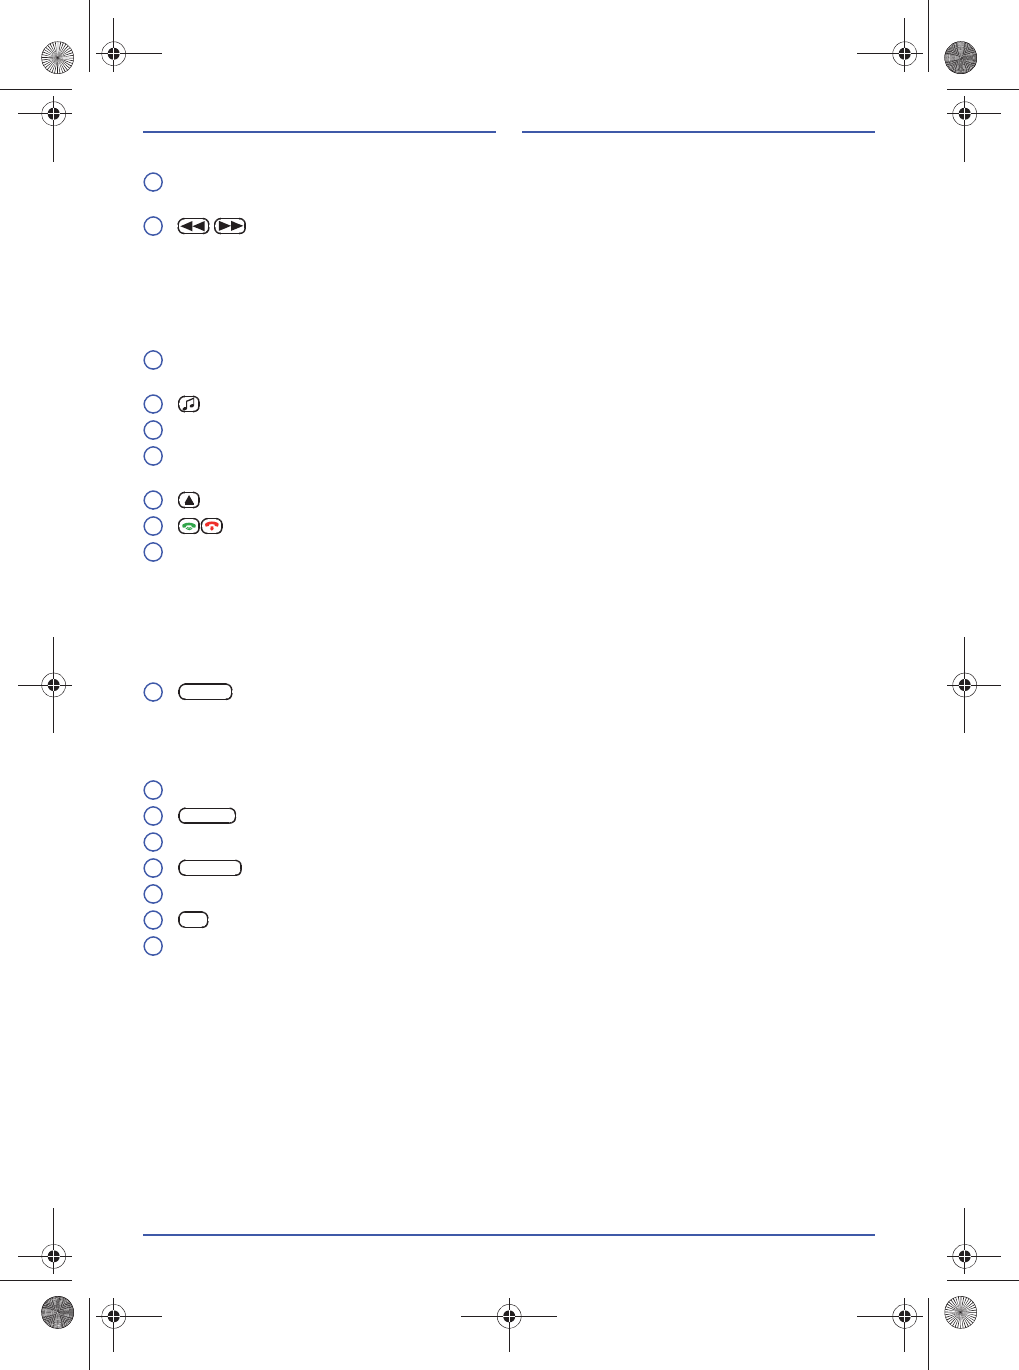
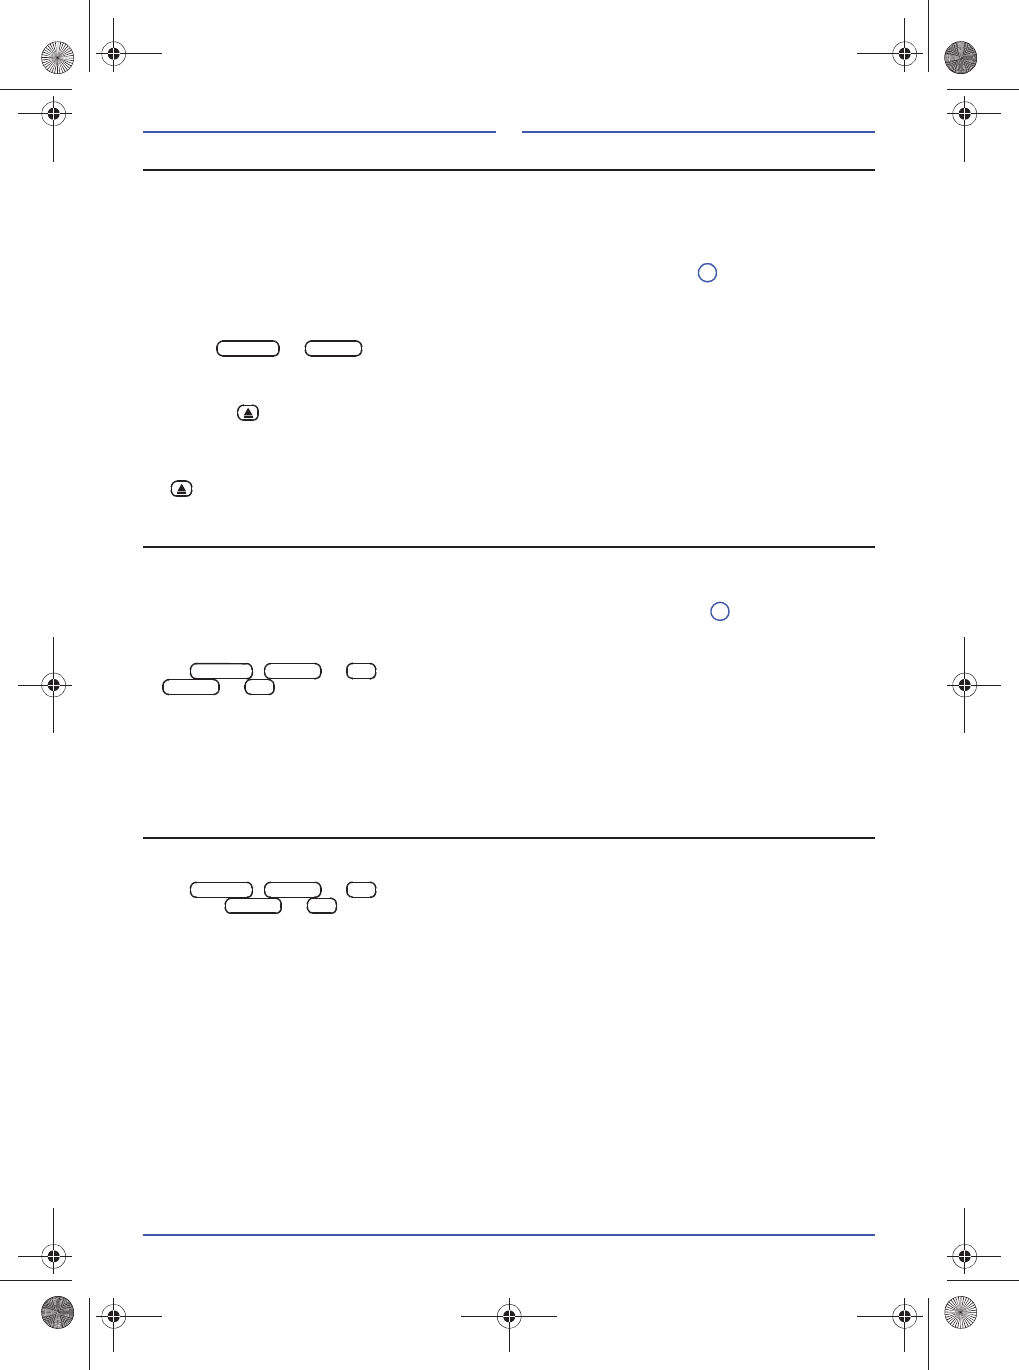
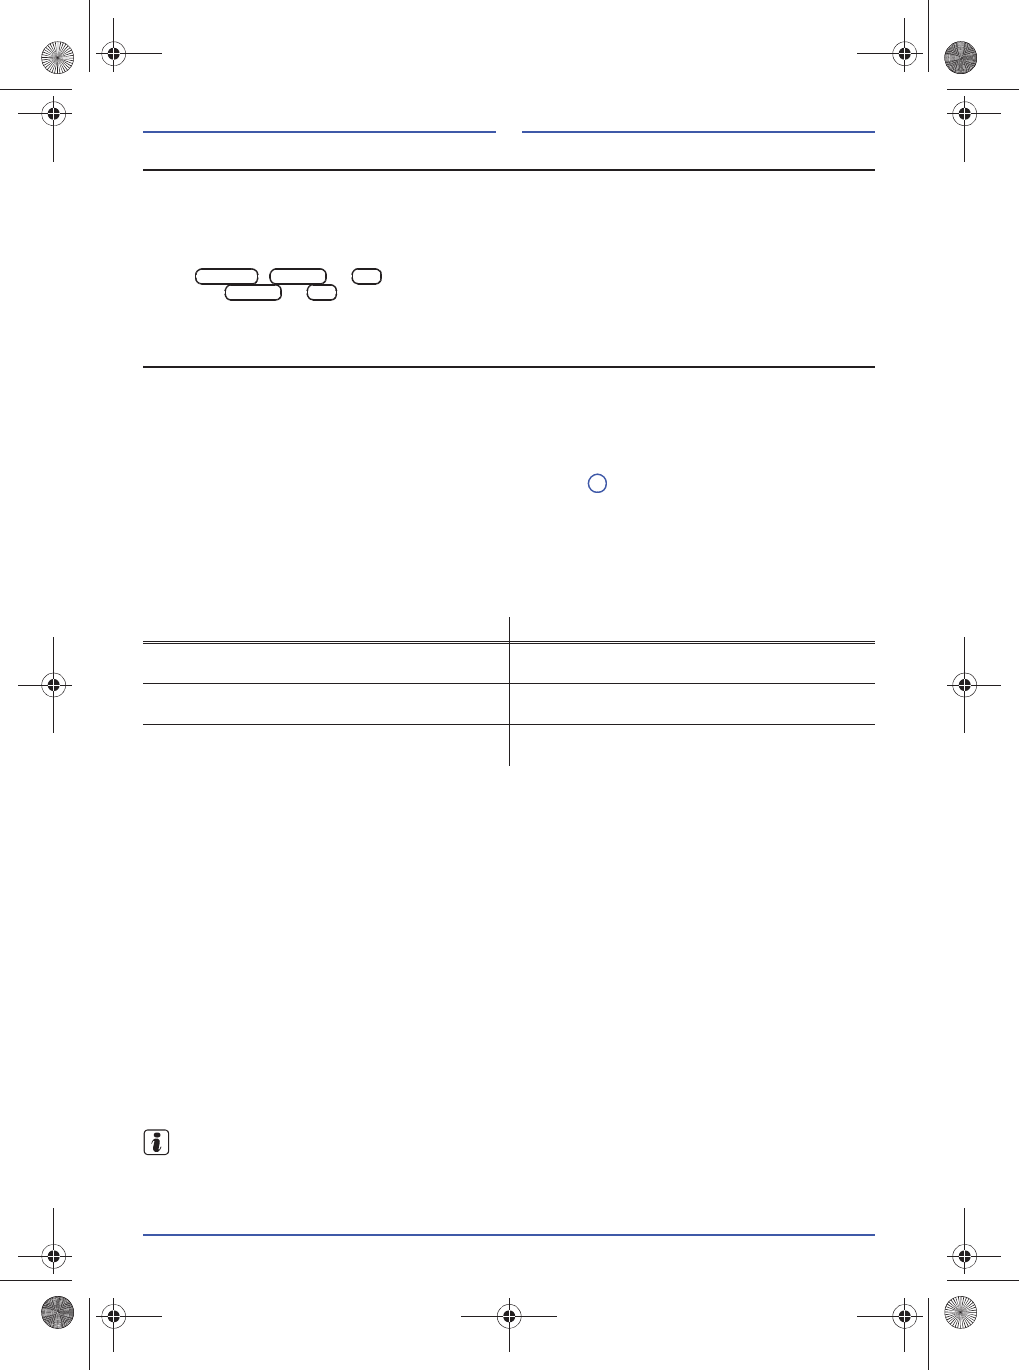
Device overview
Fig. 1 Overview of the operating elements.
USB AUX SD
TUNEBRW
VOL
AM/FM MEDIA MENUCD
1 9
4 5 6 7
1012141617 111315
8
2
3 3
VWZ-0006
109
Legend for Fig. 1
Rotary knob for switching on, off and muting of the device and for regulating the playback volume
Page 110.
keys:
- For automatic station scanning in radio mode, press briefly.
- For skipping the track forwards or backwards during audio playback from a data carrier, press
briefly.
- For skipping forwards or backwards quickly during the audio playback of a data carrier, keep
pressed.
Function buttons, in addition to the function buttons, the current button functions are also shown on
the display.
button
to call up the menu
sound and volume settings
.
CD slot for inserting and removing CDs Page 117.
Display for showing the current operating condition. If data carriers are available, these are shown
on the display.
CD eject button, the CD inserted is moved to the output position for removal
Page 117.
buttons for
accepting and ending telephone conversations
Page 121.
Rotary knob:
- Turn for manual selection of a radio station or music track.
-Press briefly
to start automatic play
Page 111 and 116.
-
In radio mode
keep pressed
to start AUTOSTORE
Page 111
.
- Depending on the menu selected, more functions can be controlled using the rotary knob (refer to
the respective chapter).
button:
- In radio mode, press briefly to call up the menu for RDS radio data services and language settings.
- Keep the button pressed to call up the menu VOICE REC to record a voice memo Page 122.
- In media mode, press briefly to call up the selection menu for
folder and track.
SD card slot Page 117.
button, press to select the audio source Page 110.
AUX socket for connecting2) external playback devicesPage 118.
button, press for radio mode and selection of the frequency range Page 110.
USB socket for for direct connection of a USB data carrier or an iPod
1)
Page 117 and 118.
button, press for media mode from CD.
Microphone for the hands-free function and voice memo Page 121 or 122.
1) iPod connecting cable required
2) Connection cable with 3.5 mm stereo jack required
1
2
3
4
5
6
7
8
9
10
MENU
11
12
MEDIA
13
14
AM/FM
15
16
CD
17
110
General operation
Switching on, off or mute
The device is switched on by briefly pressing the rotary knob or by turning on the vehicle ignition or
when inserting the vehicle key. The last audio source is played back in the previously set volume as long
as this does not exceed the maximum previously set switching on volume (see below).
By briefly pressing the rotary knob of the device switched on, you can temporarily switch on the mute
function ("MUTE"). The microphone is temporarily switched to mute by briefly pressing the rotary
knob. Press the button again to cancel the mute function.
The device is manually switched off by pressing the rotary knob for a longer period or, automatically
by turning off the vehicle ignition and removing the vehicle ignition key.
Audio source selection
Button selects radio mode.
Button selects the internal CD drive as audio source
and starts the playback.
Button cycles through the available data carrier in the sequence USB/IPOD, SD, AUX and
BT AUDIO and selects the one displayed. Data carriers are only displayed if a corresponding data
carrier has been inserted or a corresponding device is connected.
Audio settings
Playback volume
Turn the rotary knob to the left to reduce the volume or to the right to increase the volume.
During setting, the value "VOL 01...31" or "VOL MIN" or "VOL MAX" is shown on the display (not during RDS
display outputs).
If the rotary knob
is not activated for a few seconds, the current setting is saved and the
device automatically exits the menu.
Sound and volume settings
By pressing the button , the menu EQ SET is called up. In this menu, the pre-defined sound settings
POP, ROCK, CLAS or JAZZ can be selected by pressing the corresponding function button.
The respective values are shown in the display during the setting. If the rotary knob is not activated
for a few seconds, the current setting is saved and the device automatically exits the menu.
Sound and volume settings are set and saved for each of the audio sources during data carrier playback
and radio operation.
By pressing the function button the associated submenu is called up and some settings can be
made for sound and volume.
Press the desired function button and perform the settings using the rotary knob .
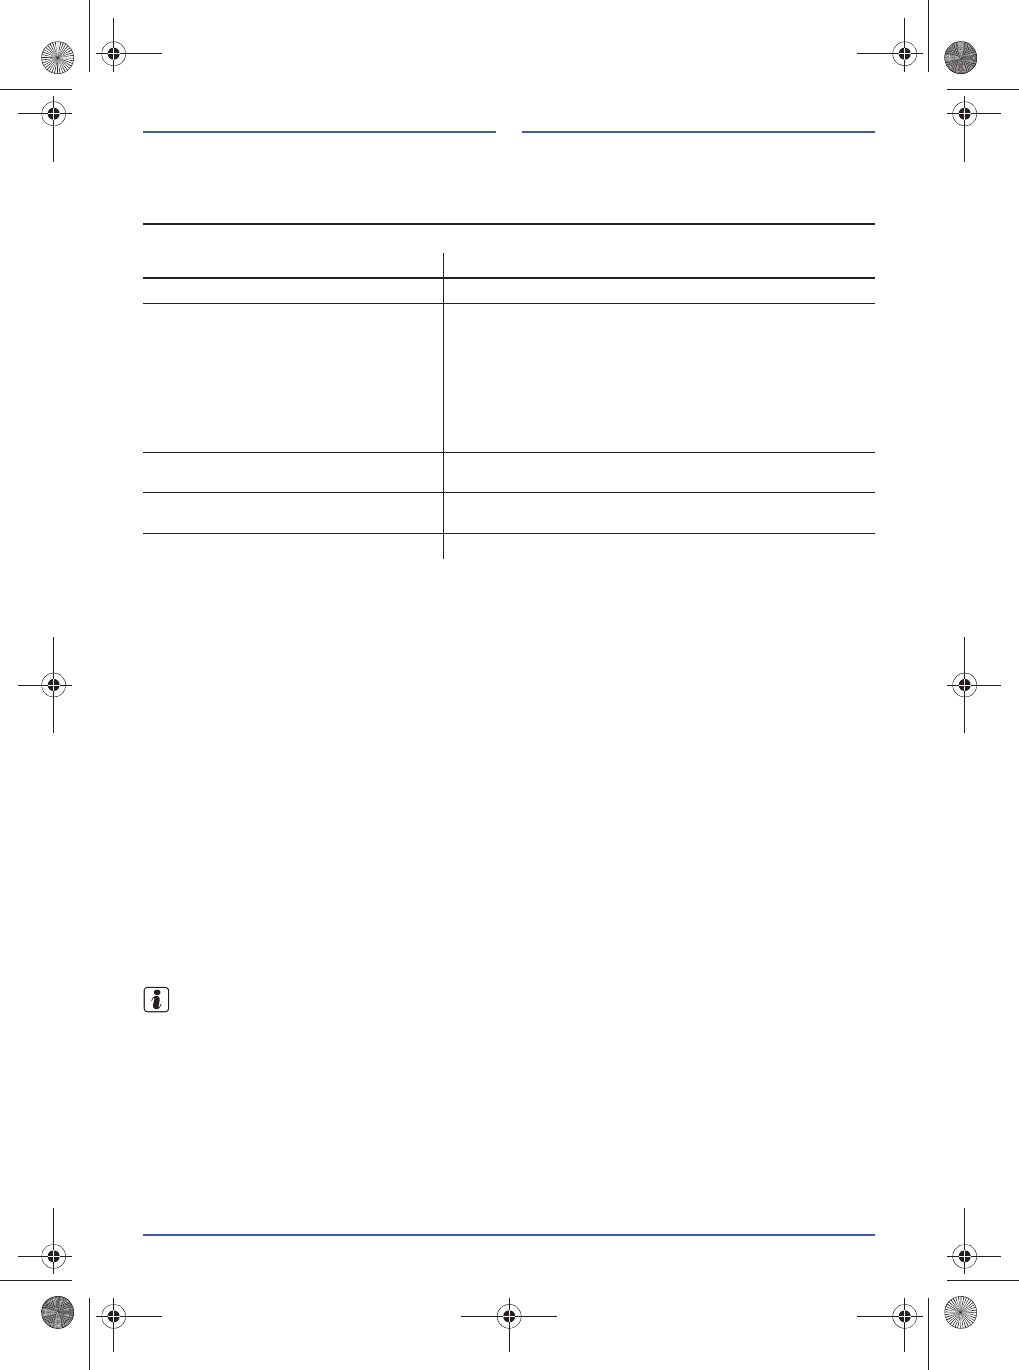
Function button Setting
low frequencies (Bass)
high frequencies (Treble)
medium frequencies (Middle)
volume distribution left and right
volume distribution front and rear
maximum switching on volume
1
S VOL
1
1
1
AM/FM
CD
MEDIA
1
1
9
USER
BASS
TREBLE
MIDDLE
BALANCE
FADE
S VOL
9
111
Radio operation
Operating the radio
Change the frequency range
The frequency ranges very high frequency (FM) and medium wave (MW/AM3)) can be received by the
radio. By repeatedly pressing the button, the desired frequency range of the radio operation
can be selected.
Automatic station scanning
Press the or keys to start an automatic station scan to the next or the previous station on the
same frequency range. Only stations that can be received are played back.
Automatic station scan and saving radio stations (AUTOSTORE)
To start the automatic station scan and saving radio stations, press the rotary knob for a longer
period. An automatic station scan is started, whereby the 6 stations with the strongest signal are saved
in the current memory level.
Setting the station manually
By turning the rotary knob , stations can be manually set.
Automatic play (SCAN)
By pressing the rotary knob , the station scan is started in the current frequency range. During the
search, "SCAN" is shown on the display and all stations that can be received are each played for a few
seconds. To select the current station being played and to end the station scan, press the rotary
knob again.
If the volume is adjusted with the
rotary knob
whilst searching for a station, the station search stops
and the last station played is selected.
Saving radio stations
There are 2 memory levels (FM1/FM2 and MW1/MW23) or AM1/AM23)), each with 6 storage spaces
available for each frequency range.
A radio station is saved as follows:
Select the desired frequency range (FM or MW/AM
3)
) and the memory level (1 or 2) by repeatedly
pressing the button .
Set the station to be saved using the automatic or manual station scan.
Keep the desired function button pressed until a signal sounds. Any stations previously saved on this
function button will be lost.
The radio station is saved and the memory level and function button are assigned.
Calling-up a saved radio station
In order to call up a stored station, select the desired frequency range (FM or MW/AM
3)
) and the memory
level (1 or 2) by repeatedly pressing the button .
The saved station is selected by briefly pressing one of the function keys .
3) Depending on the AREA selected (Page 113), the frequency range medium wave can be shown on the display as
MW or AM.
AM/FM
9
9
9
9
1
AM/FM
3
AM/FM
3
112
RDS radio data services
RDS (Radio Data System) is a radio data service that permits additional services, such as the displaying
station names, automatic station tracking, radio texts and the TP function (Traffic Program). RDS is not
provided everywhere or available via every radio station.
RDS settings can only be carried out in radio mode.
Press button to call up the menu "RDS SET".
The RDS SET menu will close automatically after a few seconds if not operated.
Traffic announcements (TA VOL) volume
The playback volume for traffic announcements (TA, see below) can be set independently of the
playback volume of the audio mode. Thus, traffic announcements are also played back if the audio
mode has been set to mute ("VOL MIN" or "MUTE").
In the menu "RDS SET", press the function button and set the desired playback volume for
the traffic announcements using the rotary knob (VOL 06...32).
The playback volume can be adjusted using the
rotary knob
. These settings are saved. The
subsequent traffic announcements are played back with this volume.
Setting the program type (PTY)
Program type (PTY) designates the classification of the station according to categories, e.g. news,
classic, pop. Only stations of this type are set according to the set program type when scanning for a
station.
In the menu "RDS SET", press the function button and, using the rotary knob select the
required program type and save by pressing the rotary knob .
The following program types are available: NO PTY (without program type setting), NEWS,
AFFAIRS, INFO, SPORT, EDUCATE, DRAMA, CULTURE, SCIENCE, VARIED, POP M, ROCK M,
EASY M, LIGHT M, CLASSICS, OTHER M, WEATHER, FINANCE, CHILDREN, SOCIAL, RELIGION,
PHONE IN, TRAVEL, LEISURE, JAZZ, COUNTRY, NATION M, OLDIES, FOLK M, DOCUMENT,
ALARM TEST
PTY is not supported by all stations. The function switched on is displayed by "PTY".
Traffic Announcements (TA)
If the traffic announcement function is activated, traffic announcements made are played in the audio
mode. Prerequisite for the playback of traffic announcements is the reception of at least one traffic
announcement station.
In the menu "RDS SET", press the function button and, using the rotary knob Select TA ON or
TA OFF and save by pressing the rotary knob .
The function switched on is displayed by "TA".
In order to ensure the reception of traffic announcements, independently from the current audio source,
in the background a traffic announcement station that can always be received automatically is set that is
switched to for the traffic announcements.
Traffic announcements being played can be cancelled by briefly pressing
the button
.
MENU
TA VOL
9
1
PTY
9
9
TA
9
9
MEDIA
113
Automatic station tracking (AF)
With the automatic station tracking function (Alternative Frequency), when driving, the frequency always
changes to the station that currently provides the best possible reception.
You can switch the automatic station tracking function on or off in the menu RDS SET.
In the menu "RDS SET", press the function button and, using the rotary knob select AF ON or
AF OFF and save by pressing the rotary knob .
The function switched on is displayed by "AF".
Due to the high detection speed of the function, jumps may occur in the frequency range during
automatic station scan with buttons and . This can be prevented by switching off the
automatic station tracking function or by using automatic play.
Regional (REG)
If the function is switched on, only alternative regional frequencies of the current station are considered
for the automatic station tracking (AF).
If the function is switched off, all frequencies of the current station are considered for the automatic
station tracking (AF). This can lead to regional programs being cancelled.
In the menu "RDS SET", press the function button and, using the rotary knob select
"REG ON" or "REG OFF" and save by pressing the rotary knob .
The function switched on is displayed by "REG".
Regional profile (AREA)
Different regional profiles (AREA) are stored in the radio. Adaptation to the application area can be
carried out using these regional profiles (e. g., display output medium wave MW or AM). Profiles
available are for Europe (EUROPE), Asia (ASIA), South America (LATIN) and the United States of
America (USA).
In the menu "RDS SET", press the function button and, using the rotary knob select the
required regional profile and save by pressing the rotary knob .
AF
9
9
REG
9
9
AREA
9
9
114
Media operation
Requirements on the data carrier and audio files
Limitations and information
Dirt, high temperatures and mechanical damage can render a data carrier unusable. Observe the
information of the data carrier manufacturer.
Quality differences with data carriers from different manufacturer may lead to problems when playing
back.
Observe all legal guidelines concerning copyright!
Configuration of a data carrier, or devices and programs used for recording, could mean that individual
tracks or the data carrier cannot be read. Information on this, such as how to create audio files and data
carriers in the best possible way (compression rate, ID3 tag, etc.) can be found on the internet, for
example.
Due to the larger data volume, it takes a little longer for reading in a data carrier with compressed audio
files (MP3, AAC, WMA, etc.) than when reading in a conventional audio CD. Complicated folder
structures can further delay this reading in.
The number of tracks that can be read is limited to 999. If more tracks are stored on the data carrier,
these are ignored from the thousandth track and cannot be played back.
The radio is compatible for the following Apple devices (iPod operation):
iPhone, Generation 1, 3, 3GS and 4
iPod classic
iPod nano, Generation 1 to 6
iPod touch, Generation 1 to 4
iPod classic Gen. 4 is a USB data carrier and not connected in the iPod mode Page 117.
Data media Pre-requirement for playback
I
Audio CDs (up to 80 min). CD digital audio specification !.
I
CD ROM, CD-R, CD RW audio file CD
up to max. 700 MB (Megabyte) according
to ISO 9660 or with the Joliet file system.
KSD cards up to max. 2GB and SDHC
cards up to max. 32GB in the file system
FAT16 and FAT32.
USB memory up to max. 32GB in the file
system FAT16 and FAT32.
MP3files with bit rates from 48 to 320 kbit/s or with a
variable bit rate.
AAC files.
WMA files up to 9.0 mono/stereo without copy protection.
File name no longer than 64 characters.
File structure with maximum ten levels.
Max. 120 folders and max. 999 files on a data carrier.
Playback from audio files via Bluetooth.External audio source must support A2DP Bluetooth
profiles and must be coupled with the radio.
External device to the AUX socket. Audio output via the connecting cable with 3.5 mm stereo
jack.
iPod to the USB socket. Audio output via iPod connecting cable.
115
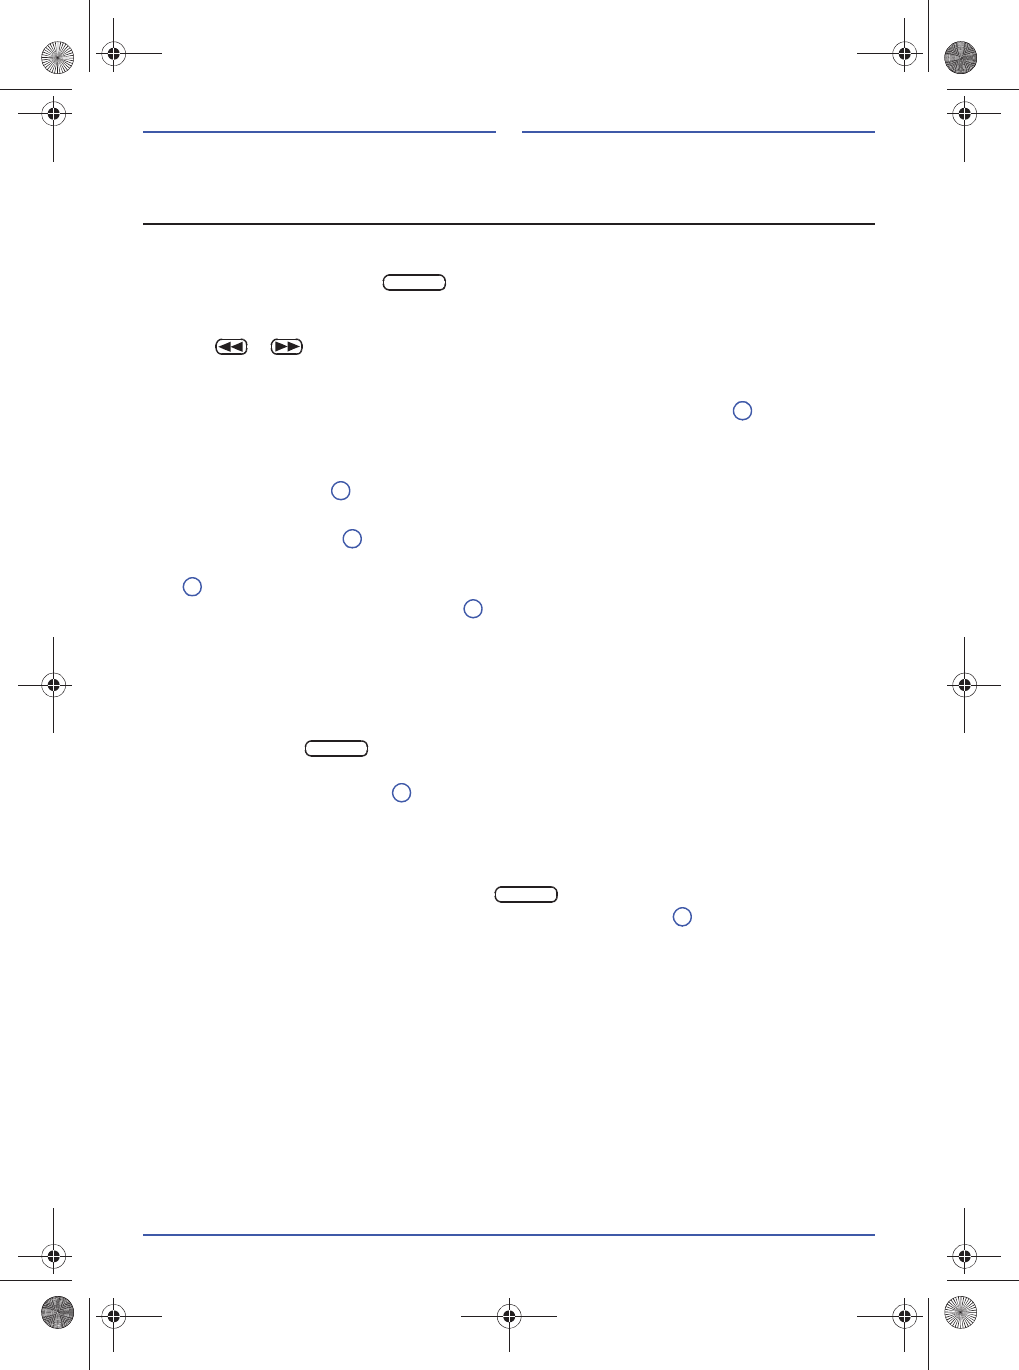
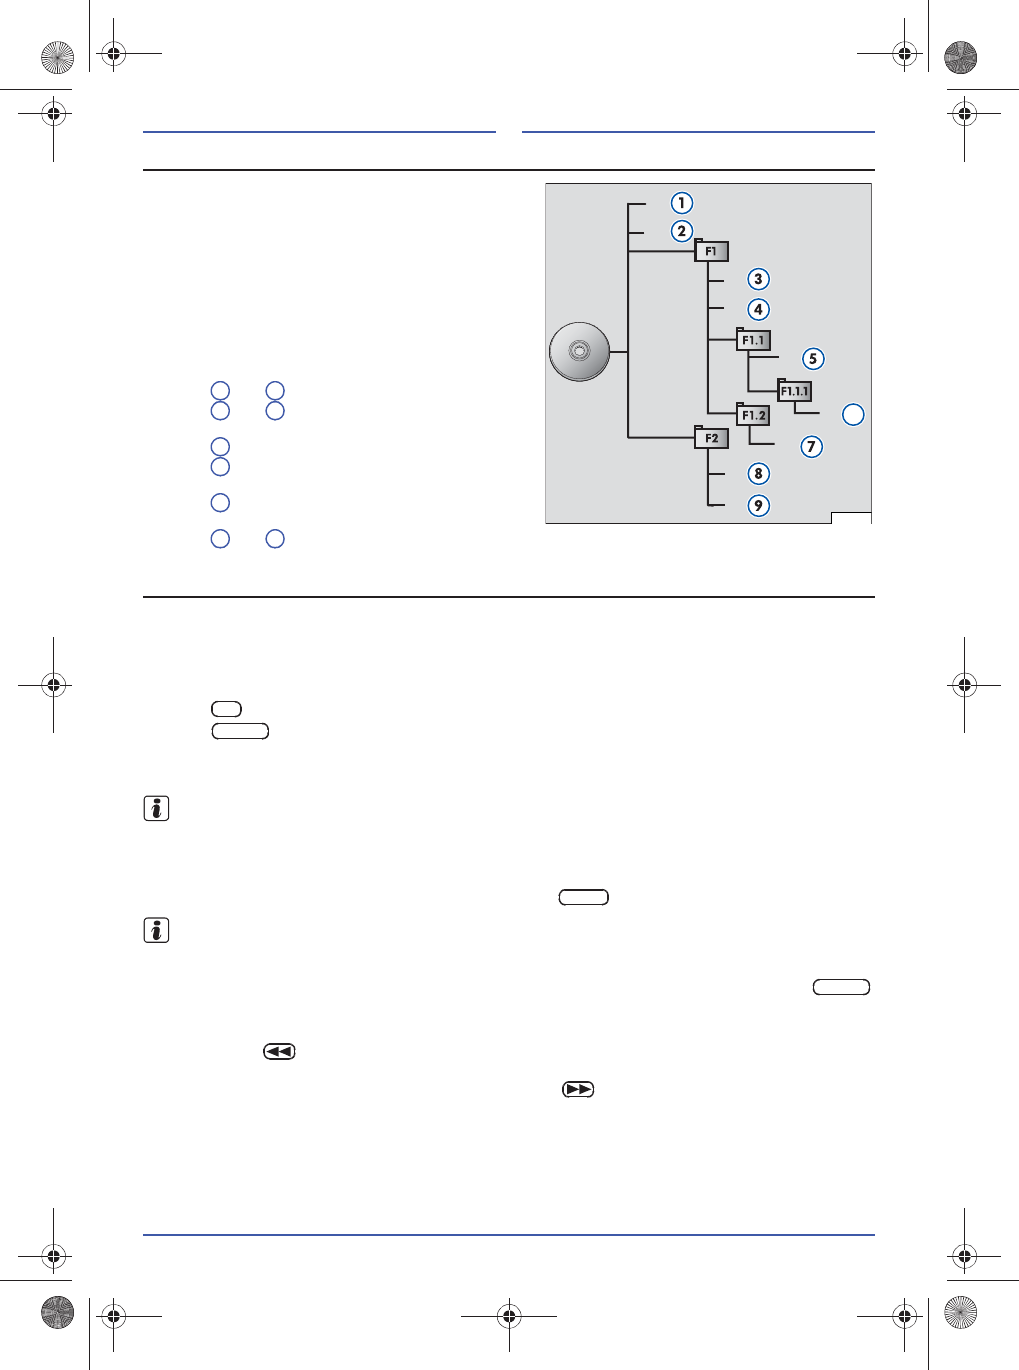
Sequence of playing audio files
To determine a specific play back sequence, audio files
(tracks) on a data carrier are often sorted into folders.
The track and folder are sorted amongst one another in
numeric and alphabetic order on the data carrier
according to their name.
In doing so, sub-folders are treated as folders and are
numbered on the CD according to their order.
As an example, Figure 2 shows a typical MP3-CD that
includes the track , folder A and subfolder.
Thus, the track and folder A of this CD are played
and displayed in the following sequence:
1. Track and in the root directory of the CD
2. Track and in the first folder F1 in the root
directory of the CD
3. Track in the first sub-folder F1.1 of the folder F1
4. Track in the first sub-folder F1.1.1 of the sub-
folder F1.1
5. Track in the second sub-folder F1.2 of the
folder F1
6. Track and in the second folder F2
Playback from the data carrier
Playback automatically starts when a CD or SD card is inserted, or a device is connected to the USB or
AUX socket. Playback of the audio source BT AUDIO must be manually started using the function
buttons.
The current available data carrier is shown on the display.
The current data carrier is presented in the background.
Press
button for
audio source
CD.
Press button again to consecutively switch through audio sources available and start playback.
Playback is resumed from the last track played of the data carrier selected.
Only playable audio files can be displayed and played from a played data carrier. Other files are ignored.
Depending on the iPod used, it is possible that not all functions described are supported.
Displaying track information
As standard, the track and the track number are displayed on the data carrier according to the
sequence. If the audio file contains track information,
the complete track (TITL) and artist (ART)
can be
faded in for a few seconds by pressing the
function button .
When operating using an iPod, no track numbers are displayed.
Play back the track
Playback starts automatically if the data carrier is selected or inserted and connected using the
button.
Select track
Using the button , you can jump to the start of the current track or when pressed again, return to the
previous track.
You can jump to the start of the next track using the button .
Fig. 2 Possible structure of an audio file CD
6
VWZ-0146
1
2
3
4
5
6
7
8
9
CD
MEDIA
INFO
MEDIA
116
Folder selection
Depending on the data carrier, the functions keys and are available where applicable.
By pressing the function button first you go to the next folder, or, with function button to
the previous folder.
The function keys are faded in independent of the data carrier selected. If no folders are on the data
carrier, the function keys have no function.
Automatic play (SCAN)
If automatic play is started by briefly pressing the rotary knob all tracks on the current data carrier are
played back for a few seconds.
If automatic play is started by pressing longer on the rotary knob all tracks in the current folder are
played back for a few seconds.
To select the track being played back and to quit automatic play, press the rotary knob .
Automatic play is also ended by starting the track repeat or random play function.
The automatic play switched on for the data carrier is displayed by "SCN". If the current folder is being
scanned, "SCN" flashes.
Repeating the track
If track repeat is started by briefly pressing the function button the current track is repeated until
another track is selected or the track repeat function is cancelled by pressing the function button .
If the track repeat is started by pressing longer on the function button all tracks of the current
folder are repeated until another folder is selected or the track repeat function is cancelled by pressing
the function button . Depending on the structure of the folder, there is a possibility that this function
is not supported on the data carrier.
The repeat track is also ended when starting the automatic play or random play function.
If track repeat is switched on for the current track, this is indicated by "RPT". If track repeat is switched
on for the current folder, "RPT" flashes.
Random play
If the random play function is started by briefly pressing the function button all tracks on a data
carrier will be played in a random order. With an iPod, all tracks of a play list are played in a random
order.
If the random play function is started by pressing longer on the function button all tracks in the
current folder will be played in a random order.
The random play is ended by pressing the function button .
The random play function is also ended when starting the automatic play or track repeat function.
If random playback for all tracks on a data carrier is switched on, this is indicated by "RDM". If random
playback for the current folder is switched on, "RDM" flashes.
View lists
If a data carrier is selected as audio source, after pressing the function button using the rotary
knob Fig. 1 specified tracks and folders A can be selected
and chosen by pressing the rotary
knob
. Using the function button the view of the lists is closed.
In the list view, higher folders can also be selected in the folder view A.
Pause button
The playback of a track can be temporarily interrupted by pressing the function button .
Playback is continued by pressing the function button .
4) iPod classic Gen. 4 is a USB data carrier and not connected in the iPod mode.
FOL+
FOL-
FOL+
FOL-
9
9
9
RPT
RPT
RPT
RPT
RDM
RDM
RDM
MENU
9
9
BACK
II
117
Inserting or removing the CD
Inserting the CD
To be able to guarantee a trouble free and high quality CD playback, only use clean CDs that do not
have scratches and are not damaged.
Hold the data carrier on the sides in order to avoid finger prints on it.
A 12 cm CD with the printed side up should be inserted into the CD slot Fig. 1 until it is automatically
drawn in.
The radio switches to CD operation and starts playback. Operating is the same as described in Chapter
"Playback from the data carrier" Page 115.
Press the or button in order to stop the CD mode and change to another audio
source.
Removing the CD
Press the button to move an inserted CD to the removal position.
If the CD is not removed from the device within 20 seconds, it is drawn back into the device
automatically to protect it against damage.
Even if the device is switched off, a CD can be inserted or ejected to the removal position by pressing
the button.
Inserting or removing the SD card
Inserting the SD card
If an SD card cannot be inserted, check the insertion position and SD card.
Insert the SD card with the cut-off corner to the right into the SD card slot Fig. 1 until it locks in place.
The radio switches to SD mode and starts playback from the data carrier. Operating is the same as
described in Chapter "Playback from the data carrier" Page 115.
Press , or button to end SD mode and change to another audio source (change
to or only when a data carrier is available).
Removing the SD card
In order to avoid damage, the SD card should only be removed when the radio is switched off.
Press on the SD card inserted. The SD card "jumps" to the removal position.
Pull out the SD card.
USB data carrier to the USB socket
If a USB data carrier is inserted in the USB socket, the radio switches to USB mode and starts the
playback. Operating is the same as described in Chapter "Playback from the data carrier" Page 115.
Press , or button to end the USB mode and change to another audio source
(change to or only when a data carrier is available). In order to avoid damage, the USB
data carrier should only be pulled out when the radio is switched off.
5
AM/FM
MEDIA
11
AM/FM
MEDIA
CD
MEDIA
CD
AM/FM
MEDIA
CD
MEDIA
CD
118
iPod to the USB socket (iPod mode)
The rechargeable battery is charged during the playback of the iPod. The control on the iPod has no
function. If the random playback function is switched on when connecting the iPod to it, this setting is
accepted by the radio and shown on the display by "RDM".
If an iPod is connected to the USB socket, the radio switches to iPod mode and starts the playback.
Operating is the same as described in Chapter "Playback from the data carrier" Page 115.
Button , or is pressed to end iPod mode and change to another audio source
(change to or only when a data carrier is available). The connection to the iPod can be
disconnected at any time.
External playback device to the AUX socket
An external playback device can be connected to the radio via the AUX socket and a connecting cable.
Audio files played back on an external playback device can be played back through the loudspeakers in
the vehicle. Control and track display on the radio is not possible.
A connected external playback device is indicated by "AUX AUDIO“.
Connecting an external playback device to the AUX socket
Reduce the volume on the radio using the rotary knob Fig. 1 .
Insert the connecting cable in the AUX socket of the radio.
The radio changes to AUX mode.
Insert the connecting cable in the respective socket of the external playback device.
Start the playback on the external playback device.
Special features when operating an external playback device on the AUX socket
Bluetooth functions
The radio can be connected with Bluetooth mobile phones or Bluetooth playback devices. If the
Bluetooth device supports the A2DP profile, audio files saved can be played back via the radio or the
vehicle loudspeakers.
If a mobile phone is connected via Bluetooth then the hands-free system integrated in the radio can also
be used.
Before establishing the
Bluetooth
connection, the Bluetooth device and the radio must have been
coupled once. The coupling data are saved in the radio for future connections.
The coupling data from up to 6 Bluetooth devices can be saved in the radio. If necessary, the coupling
data of a Bluetooth device have to be deleted ( Page 120 "Delete coupling"). Only one Bluetooth
device can be connected to the radio at a time.
After switching on the radio, a search is made for Bluetooth devices for which coupling data have been
saved. The last Bluetooth device connected will always be the first one to be searched for and then
other saved devices and connected where applicable.
When the ignition is turned on, the Bluetooth connection between the radio and the mobile phone is also
established when the radio is switched off. The radio switches on automatically when an incoming call is
registered and the call can be performed via the hands-free system.
For the Bluetooth function, restrictions can occur in conjunction with devices from other
manufacturers.
Handling Effect
Selection of another audio source on the radio External playback device continues to run in the
background.
Ends the playback or separates the connection to
the external playback device. The radio remains in the AUX menu.
Disconnecting the connecting cable from the radio. The radio starts playing back the audio source last
played.
AM/FM
MEDIA
CD
MEDIA
CD
1
119
Coupling Bluetooth device
Before coupling, the Bluetooth device must be switched on. The Bluetooth function must be activated
and there must be no other Bluetooth connection to another device.
An existing connection to a coupled Bluetooth device is disconnected on the radio automatically if a new
coupling process is started.
Keep the button pressed until "BLUETOOTH" is shown on the display.
Press function button .
"KEY" is shown on the display of the radio with a 4 digit number. This 4 digit number is the password
(PIN) required for coupling the Bluetooth.
The search for nearby Bluetooth devices starts on the Bluetooth device.
The Bluetooth device displays a list of the devices found.
Select "RMT300" from the list.
A password request appears on the mobile phone.
Enter the 4 digit value that is shown on the display of the radio. If an incorrect password has been
entered, the coupling process is cancelled and the device "RMT300" must be reselected from the list of
devices found.
Independently of the
Bluetooth device
used, a question may be displayed asking if this Bluetooth
connection should be established in the future without re-entering the password. Confirm this with "Yes",
to automatically establish the Bluetooth connection when the radio is switched on.
Independent of the
Bluetooth device
used, a question may be displayed asking if the phone book can
be transferred to the radio.
The indication "CONNECTED" is briefly shown on the display of the radio. The active Bluetooth
connection is displayed by the symbol . If a mobile phone is connected, this is also shown by the
symbol .
Subsequently, in the background, the entries and telephone numbers saved in the phone book and
mobile phone are automatically transferred and saved ("PBA SAVE").
It is possible to save up to 500 entries in the phone book. If the phone book is considerably large, the
radio can respond with a delay whilst saving/sorting.
The data in the phone book is only visible when the corresponding mobile telephone is connected
and, thus, they are not visible to other users of the vehicle.
The Bluetooth connection is automatically disconnected if the device leaves the Bluetooth reception
range of the radio or the ignition is switched off.
If the Bluetooth connection is manually disconnected from the device, this is not automatically re-
established when switching on the radio. The connection can be re-established via the Bluetooth device
or the Bluetooth menu of the radio without having to re-enter the password.
Disconnecting the connection to the Bluetooth device on the radio
Keep the button pressed until "BLUETOOTH" is shown on the display.
Press function button to disconnect the existing connection to the
Bluetooth device
.
Reconnecting a coupled Bluetooth to the radio
The Bluetooth device must be switched on and Bluetooth activated.
Keep the button pressed until "BLUETOOTH“ is shown on the display.
Press function button .
The DEVICE LIST menu opens.
Press the function button briefly to display the name of the coupled Bluetooth device.
If the desired
Bluetooth device
is displayed, keep the respective function button pressed until
"SELECTED" is shown on the display.
The Bluetooth device selected is connected. Thereby, any existing connection to another Bluetooth
device is disconnected. This procedure may take several seconds.
The Bluetooth connection can also be re-established from the Bluetooth device. Here, in the menu
of the Bluetooth device, select
"RMT300"
and connect.
PAIRIN
DIS
CON
3
120
Delete coupling
To call up the menu BT CONFIG, keep the
button pressed until "BLUETOOTH" is shown on the
display. Subsequently, press the button
.
Press the function button and, where necessary, use the rotary knob to select the coupling to
be deleted.
Confirm deletion by pressing the function button .
If this Bluetooth device should be used again, it has to be re-coupled (Page 119 "Coupling Bluetooth
device").
Bluetooth menu
In the Bluetooth menu BT CONFIG, you are able activate different functions and carry out settings.
To call up the menu BT CONFIG, keep the
button pressed until "BLUETOOTH" is shown on the
display. Subsequently, press the button
.
If no other selections are made then the menu is automatically closed after a few seconds.
Phone book transfer (APB)
The phone book automatically transferred from the mobile telephone to the radio during coupling can be
manually updated.
In the menu BT CONFIG, press the function button .
If necessary, access to the phone book data must still be authorised on the telephone.
Data transfer starts and is indicated by "PB DOWN" on the display of the radio. This may take some time
depending on the size of the data saved. At the end of the data transfer, "PBA SAVE" is shown on the
display.
It is possible to save up to 500 entries in the phone book. If the phone book is considerably large, the
radio can respond with a delay whilst saving/sorting.
Bluetooth volume (BT VOL)
When switching on, the maximum volume for playback via Bluetooth audio can be set and saved.
Hereby, adaption to different Bluetooth devices can be carried out.
In the menu BT CONFIG, press the function button .
Set the desired playback volume using the rotary knob Fig. 1 (BT VOL 06...31 or BT VOL MAX).
During playback of music tracks via Bluetooth audio, the volume can be set as usual
using the rotary
knob
Fig. 1 .
Call tone volume (RING VOL)
During an incoming call, the current audio playback is interrupted and the call tone is played back via the
vehicle speakers. The playback volume of the call tone can be set.
In the menu BT CONFIG, press the function button .
Set the desired call tone volume using the rotary knob Fig. 1 (RING VOL 03...09 or
RING VOL MAX).
The call tone volume can be adjusted during an incoming call using the
rotary knob
Fig. 1 you are
able to change the volume during the call. These settings are saved for the following phone calls.
MENU
DEL
9
SEL
MENU
APB
BT VOL
9
1
RING VOL
9
1
121
Hands-free system
Accepting, making and ending a call
An incoming call is shown on the display of the radio. The call tone is played back via the loudspeakers
of the vehicle. If the caller is saved in the phone book, the entry in the phone book is shown on the
display.
The telephone call can be accepted using the button
or
function button .
The telephone call can be rejected using the button
or function button .
To make a phone call, connections can be established by using the control elements of the radio (see
below "Select saved caller numbers").
Using the function button a
current
call
can be transferred from the hands-free system to the mobile
phone.
To make the call again using the hands-free system, press the
function button .
The hands-free system is active again as soon as a call transferred to the
mobile phone has ended.
A call can be ended using the button
or
function button .
Switch microphone to mute
The microphone is temporarily switched to mute by briefly pressing the rotary knob. Press the button
again to cancel the mute function.
Setting the playback volume of the hands-free system
Calls carried out via the hands-free system of the radio are played back using the preset volume via the
vehicles loudspeakers. Using the rotary knob Fig. 1 you are able to change the volume during the
call. The subsequent calls are played back with this volume.
The quality of communication during a telephone conversation can be improved by reducing the
ventilation in the vehicle.
Select a call number from the phone book (CALL)
Entries in the phone book can be directly selected via the control elements of the radio.
Press the button .
Press the function button .
Use the rotary knob Fig. 1 to select the person in the phone book and to call, press the rotary
knob Fig. 1 .
The standard number for the person is displayed. If several telephone numbers for this person are
saved in the phone book, these can be selected using the
rotary knob Fig. 1 .
To establish the connection to the call number displayed, press the rotary knob Fig. 1 .
T
he connection can be cancelled
using the button
or
function button
.
Redial call (REDIAL)
After pressing
the button ,
using the function button the connection to the
last person
called, or the last call number dialled, can be established via the radio.
Caller list (LAST)
After pressing the button , using the function button the caller list saved in the radio can be
opened and can be scrolled through by turning the rotary knob Fig. 1 .
Using the function button
the connection to the person or call number displayed can be
established. After disconnecting the
Bluetooth connection, the caller list saved in the radio is deleted.
The caller list is managed in the radio and must not correspond with the caller list in the mobile phone.
ACCE
REJE
HS
HF
HANG
1
1
CALL
9
9
9
9
HANG
REDIAL
LAST
9
CALL
122
Voice control (VOICE)
Depending on the mobile phone coupled, the voice control of the phone can also be used in hands-free
mode. The quality of the voice command detection depends on the mobile telephone that is being used.
The
voice control is started in the telephone menu (button )
by pressing the function button .
Bluetooth audio
With the wireless communication interface Bluetooth Audio, the music that has been saved in your
mobile phone or Bluetooth playback device is played back via the radio (audio streaming).
To be able to use the Bluetooth device, the Bluetooth device must support the A2DP profile. This
Bluetooth profile is used for wireless transferring of a stereo-audio signals in a high quality.
If a Bluetooth device is connected to the radio that is suitable for Bluetooth Audio, this is shown on the
display by the symbol .
If the Bluetooth device supports the AVRCP protocol, it can also be controlled via the radio. Operating is
the same as described in Chapter "Playback from the data carrier" Page 115.
When an incoming call is received, the music playback is interrupted for the duration of the call and
continued after ending the call.
For Bluetooth devices that do not support the AVRCP protocol, the audio playback may have to be
started on the mobile phone.
Fast forward / rewind is not supported on all mobile phones with AVRCP protocol.
The Bluetooth audio function of many Bluetooth devices is not supported at all or has limited support.
Voice memos
In order to be able to use the voice memo function, a USB data carrier must be inserted in the USB
socket or an SD card in the SD card slot of the radio. The USB data carrier or the SD card must have
available memory and not be write-protected.
When inserting a USB data carrier or an SD card, a new directory is created, RECORD. In this directory,
voice memos are saved as mp-3 files and can be played back on the radio or on a computer.
Recording a voice memo
Keep button pressed in order to open the voice memo note (VOICE REC).
Press the function button function button to start recording. Using the function button
function button, the current recording is ended and stored.
The maximum duration of a recording is 2 minutes. After ending the recording, the file name
automatically assigned is shown on the display briefly. The file name VORC001.mp3 is assigned for the
first recording and all successive recording are numbered successively.
Listen to voice memos
Keep button pressed in order to open the voice memo note (VOICE REC).
Press the function button to start the playback. The playback of a voice memo can be temporarily
interrupted by pressing the .
The playback starts with the last voice memo saved.
If several voice memos are saved, these can be selected using the buttons and , or by turning
and pressing the rotary knob . The respective file name of the voice memo is shown on the display
during selection and playback can be started using the function button .
VOICE
MENU
REC
STOP
MENU
II
9