Elentec PMP2500 PORTABLE MULTIMEDIA PLAYER WITH BLUETOOTH User Manual Microsoft PowerPoint Merlin manual eng 0621
Elentec Co.,Ltd. PORTABLE MULTIMEDIA PLAYER WITH BLUETOOTH Microsoft PowerPoint Merlin manual eng 0621
Elentec >
users manual

1
User Manual
Thank you for purchasing our product.
Please read this manual carefully before use for
your safety and convenience.
This product may change at any time without notice for better quality and performance.

2
■Contents
BEFORE USE
Safety Instructions 3
Components and Features 5
Charging Battery 6
Safe use of Battery 7
BASIC FUNCTIONS
Turning On/Off 8
Compatible files 9
PLAY/RESUME
PLAY Menu 10
Setting out of Browser display 11
Browser Pop up Menu 12
Playing Video files 13
Setting Options for playing Video files
Playing Audio files 15
Setting Options for playing audio files 16
Viewing Images 18
Viewing Texts 19
RECORDING
Connecting External Devices for recording 20
Recording 21
Setting Options for Recording 22
SET UP
General setting out 23
Display 24
System 25
Bluetooth 26
ADDITIONAL FEATURES
Installing USB driver 27
Upgrading Firmware 28
USB Hosting 29
Connecting player to PC 30
Playing PMP file with PC 31
Managing Hard Disk 32
Using as Portable Mass Storage 32
TRANSCODER
Before using Transcorder 33
Installing Transcorder 34
Using Transcorder 35
Converting file 37
Converting part of file 38
DVD PLAYER –Playing DVD 40
Using DVD Converter 41
Converting DVD file 42
Advanced DVD Converter 43
TROUBLESHOOTING 47
SPECIFICATIONS 49
PORTABLE MULTIMEDIA PLAYER
3
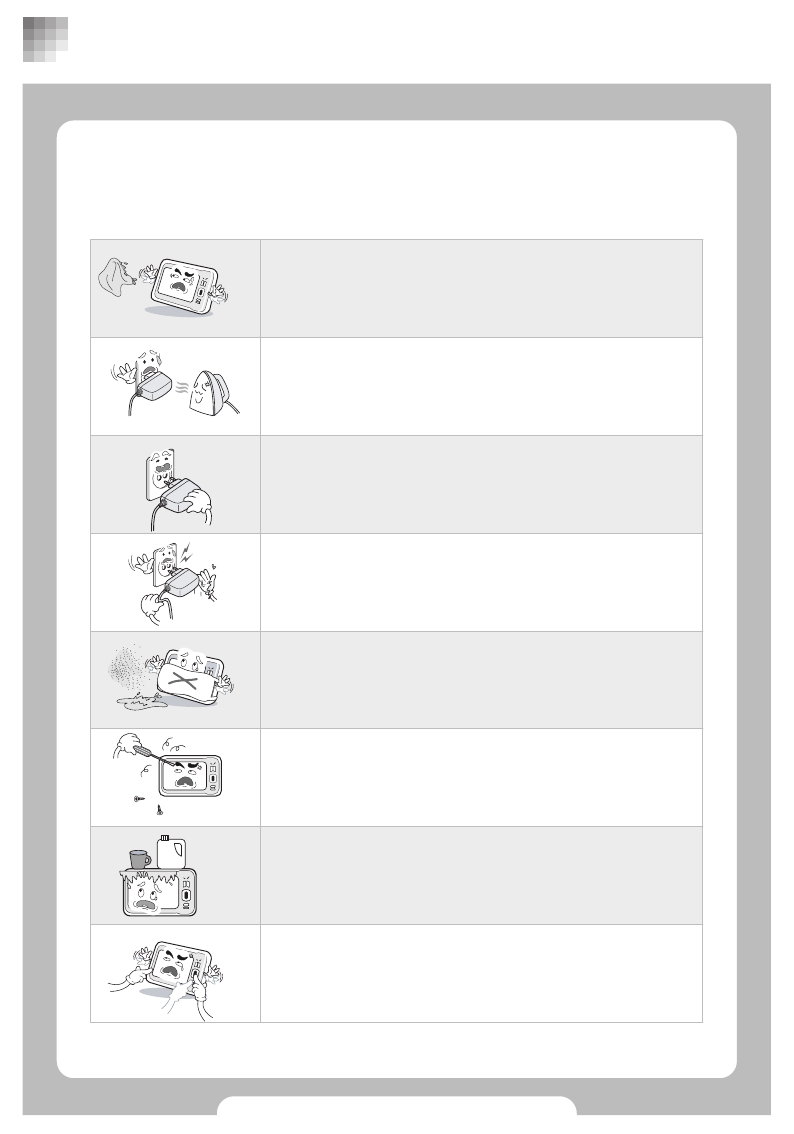
■ Safety Instructions
Do not bend electric cord or touch with wet hand, which
may cause fire or electric shock.
Placing product in wet and dusty place may cause
malfunction.
Do not dissemble, repair, or reconstruct without authorized
technician.
Avoid putting heavy objects, cup, cosmetics, chemicals, or
vessel with water on it.
Avoid using multiple buttons at one time. This may cause
malfunction or failure of product.
Avoid multiple power connection into one power point and
gently plug it out with firmly holding it.
Incomplete connection to power point may cause fire.
Avoid any heat generating metal product from the power
point.
Avoid water or chemicals and use dried cloth for cleaning.
This is to prevent damages on user’s property and to secure user safety.
Please read carefully for safe use.
BEFORE USE
coffee
THINNER
4
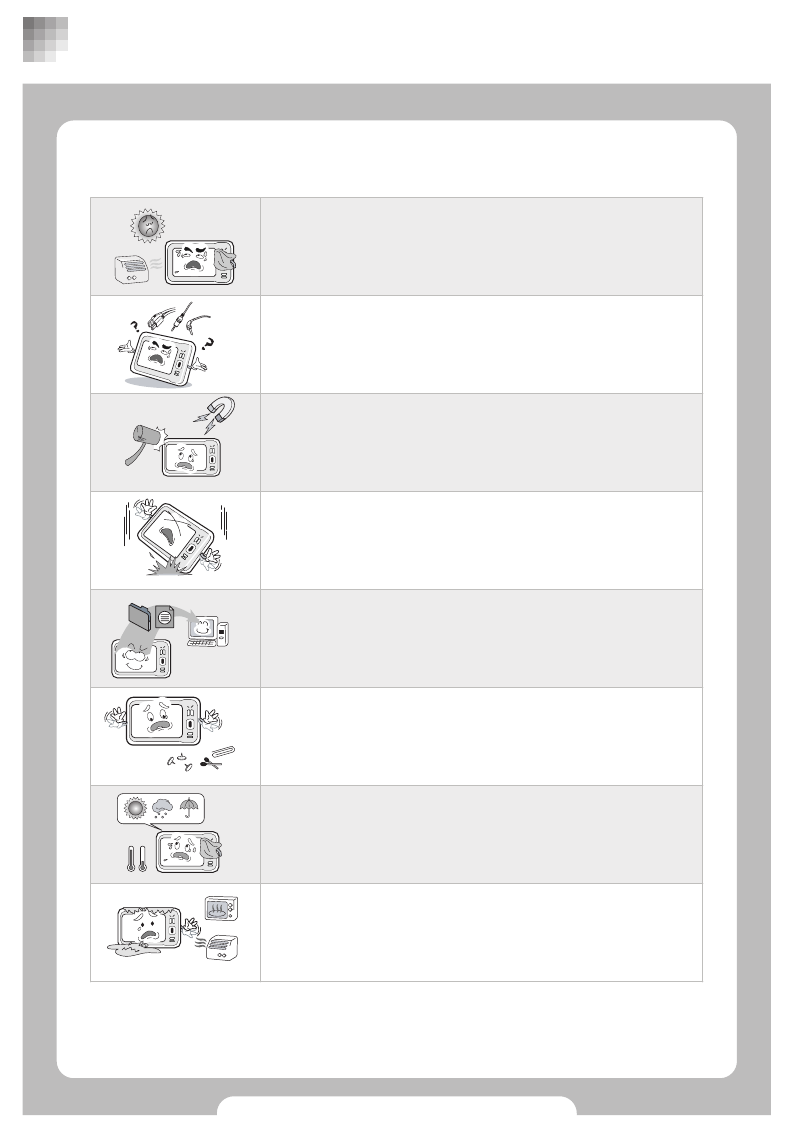
■ Safety Instructions
It is user’s responsibility for losing downloaded file or
contents. Back up all your data into your PC safely.
Prevent metallic objects such as coins or hair pins, or
flammable materials from getting into the product.
Keep the product away from too hot/cold or wet place.
Keep it away from direct sunlight or heat generating
objects.
Do not dry wet product with heater or microwave.
Dry avoiding direct sunlight after removing moisture.
Do not drop it from height. This may cause damage to the
internal hard disk. Dropping from height or external shock
may cause data loss and failure.
Avoid shock or impact on the product and keep it away
from magnetic or vibration.
Connect USB, earphone and plugs correctly as instructed.
BEFORE USE

5
■ Components and Features
Accessories
BEFORE USE
Earphone
Charger User manualPawer cable
USB cableAV RCA cable USB host cable
6
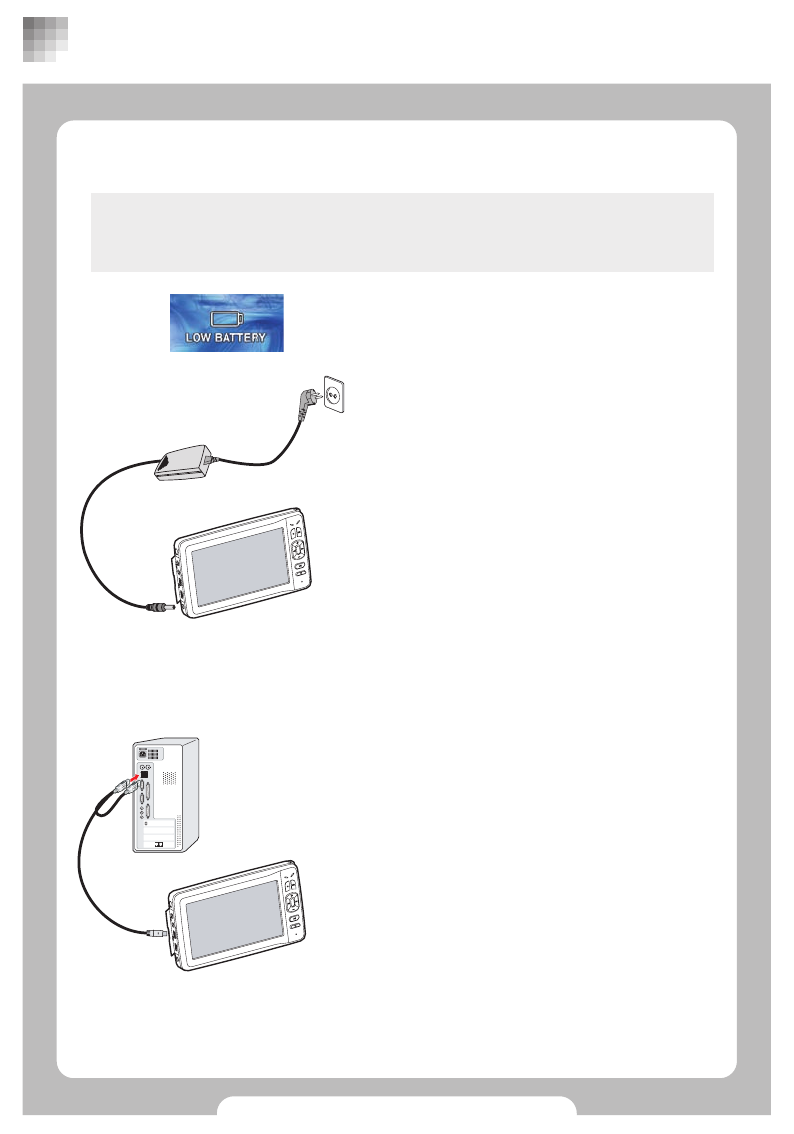
■Charging Battery
Charge the battery or use adapter when Battery is low (Low battery icon
will be shown in the screen)
Charging with USB
•For charging, connect USB cable between
product and PC.
•Charging with USB may take longer than
Adapter. Red lamp is on during charging
battery.
•Turn the power off during charging battery
when you use PC link function.
•Set function does not work during USB
connected but works when connected to PC.
•Make sure to connect USB cable firmly to
both PC and PMP for smooth data transfer.
Connecting adapter will automatically charge
battery.
•Discharge battery completely once a month
and recharge it for long life.
•Charging time after complete discharging
Adaptor : About 5 hrs
USB : About 6 hrs
•Charging lamp
Red : in charging
colorless: charging completed
BEFORE USE

7
■ Safe use of Battery
Battery contains 3.7v 4100mAh Lithium Polymer. Read below carefully for safe use of
product and longer battery life.
•Dropping from height may cause failure, overheating and explosion.
•Do not separate battery from the product.
•Keeping product near heat generating objects may cause overheating and explosion.
•Using non-recommended battery may cause overheating, explosion and failure.
•Keeping the product sealed hot place such as interior of car getting direct sunlight
may cause deformation of product and explosion. Keep it between 0℃ ~ +40℃.
•When your skin gets contaminated with liquid from broken battery, wash your skin
sufficiently with running water for 1~2 minutes.
•Avoid impact or shock by sharp object. It may cause explosion.
•Excessive use during charging may interrupt charging and may cause explosion by
overheating.
•Battery is a consumable with limited life.
•Visit authorized service centre and use authorized battery.
•Do not use battery for other purposes. It may cause unexpected incident.
BEFORE USE
8
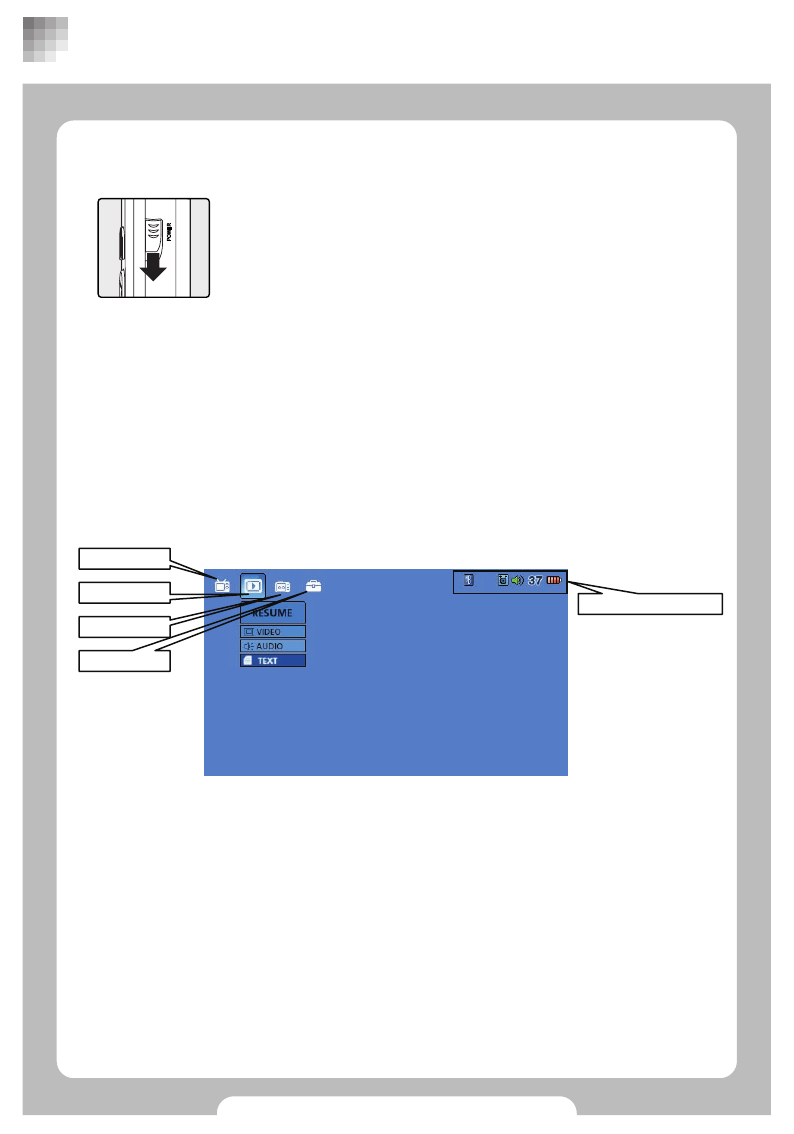
■ Turning On/Off
Slide down power button to start the main screen.
■Main screen
Turning off
•Slide down power button to turn it off.
•PLAY Edit or play in the file browser.
•RESUME Continuous play of VIDEO, AUDIO and TEXT files.
•REC Record with A/V, LINE, VOICE mode.
•SETUP Change product configuration and register with Blue tooth deviceor
upgrade Firmware.
•STATUS ICON Battery status/adapter connection, Volume(0~40), Mute,
speaker/earphone/blue tooth output, hold.
Use arrow button to show sub menus.
BASIC FUNCTIONS
STATUS ICON
PLAY
RESUME
REC
SETUP

9
■ Compatible files
Incompatible files can be converted via Transcoder to be played with our
product. Enjoy animations or movies with Transcoder technology. (Please
refer to page 34)
•Animation / movies
- recorded files with our products.
- File Format : AVI, ASF, WMV, MPG, MP4, M1V, M2V, MPV
- Video Codec : Divx 3.11/4/5, XviD, MPEG4, WMV9 MP@LL, H.264, MPEG2
•Music
- MP3, WMA, OGG, WAV
•Other file formats can also be played with our Transcoder technology.
BASIC FUNCTIONS
Installation program
Installation program is pre-installed in this product when its purchase. Connect USB
cable to copy the program into your PC.
zViewable File formats without Transcoder.
zNotes
zCopy Rights
•Movies, music or DVD files protected by copy rights should not be downloaded,
copied, nor converted with Transcoder.
•After purchasing our product, we recommend you to install the program into your PC.
•Divx or Xvid files may not be played without appropriate codec. Change file format
accordingly with Transcoder and play.
•Include subtitle when using Transcoder for minimum errors.
•Contents of software, music video, animation and movies with copy rights are
protected by law.
•It is user’s responsibility to use this product for illegal copy of any contents with
copyright protected by law.
10
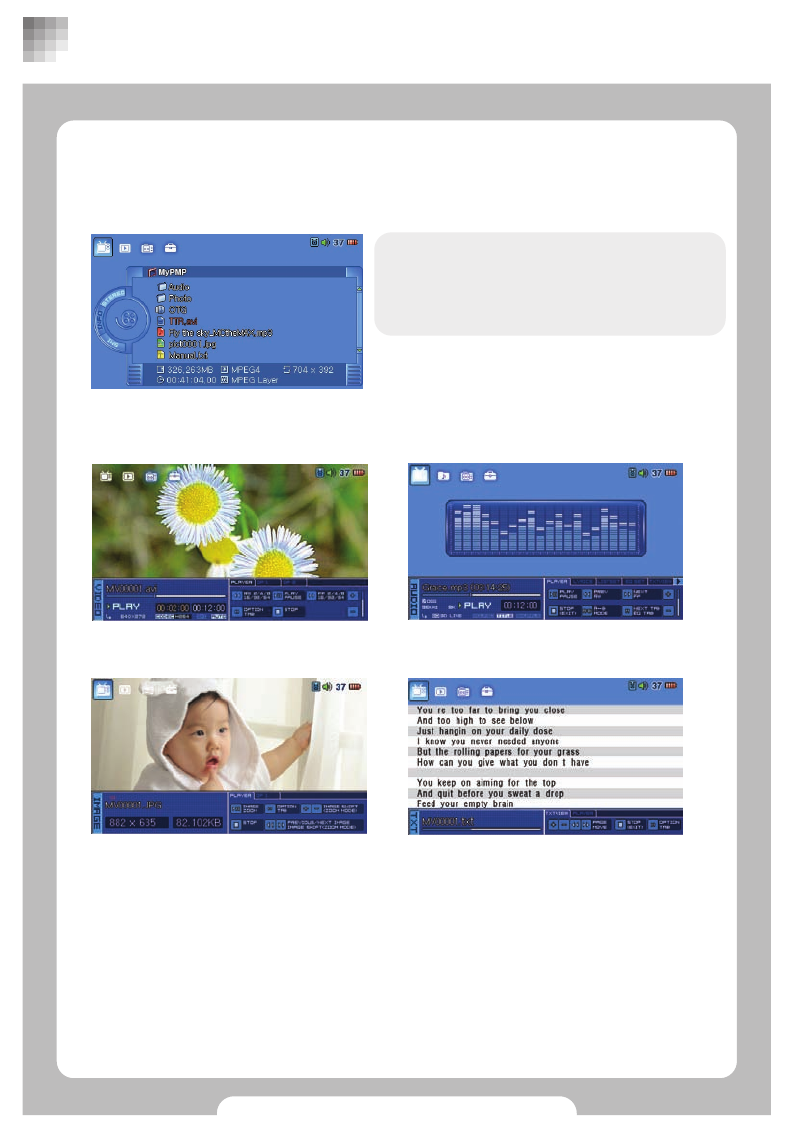
■ PLAY Menu
Open browser window with play menu. Choose files to play and press play button.
•Select file and press [▶II] to play.
•It plays same files repeatedly within the
folder where the first files were selected.
Audio player (Refer to page 15)
BASIC FUNCTIONS
Movie player (Refer to page 13)
Image player (Refer to page 18) Text player (Refer to page 19)
11
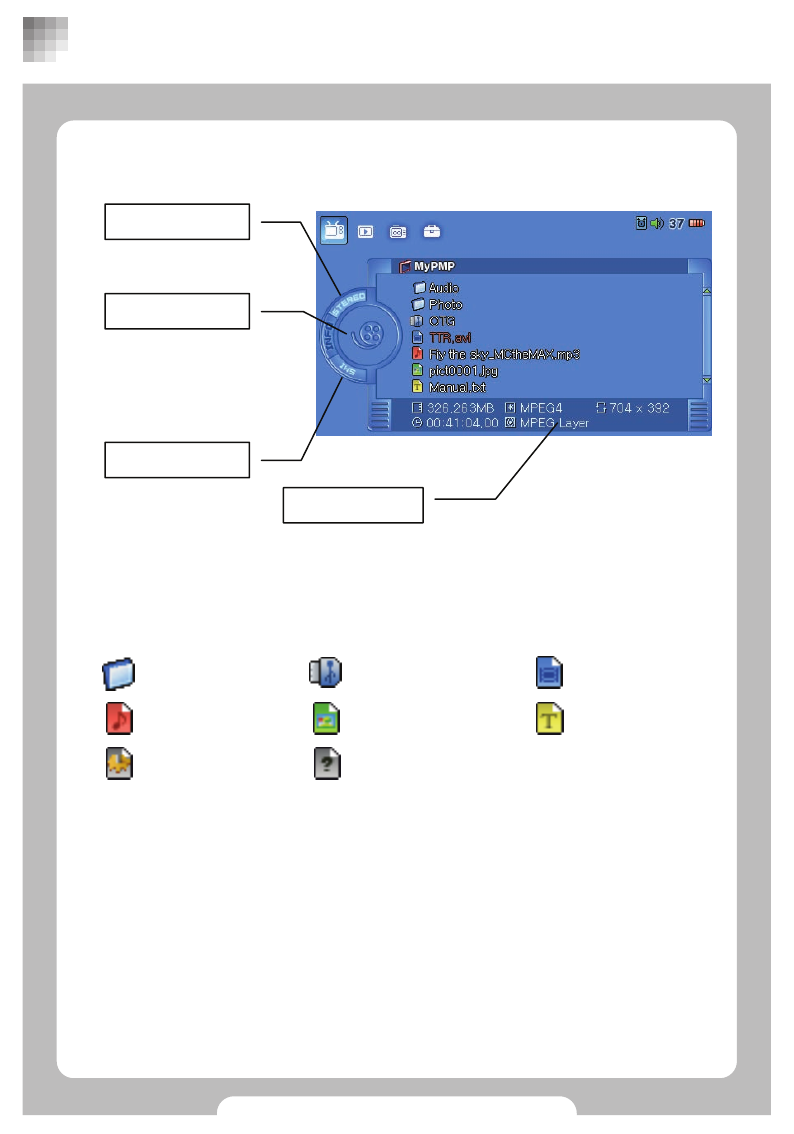
■ Setting Browser Screen
BASIC FUNCTIONS
Legend for File Icons
Stereo sign
Stereo sign for selected
files
Preview/File type
Preview (or File type
icon) for selected video
or image file.
LDB/SMI Sign
Shows subtitle and
Lyrics for selected file.
LDB : Lyrics
SMI : Subtitle
File information
Displays file information.
File size/Resolution/Video Codec/Running time/Audio Codec
Video File
Audio file
Folder OTG link folder
Image file
System file
Text file
Non-playable file

12
■ Browser POP UP Menu
Select files in browser and press [M], then a
pop up will turn up for setting up play lists, file
copy/past/delete and file sorting. Press [II]
after selecting wanted menu.
Press[■] to close pop up after finishing setup.
BASIC FUNCTIONS
Add to Audio list
A pop up will turn up after selecting audio file and pressing [M button]. Select files and
select “Add to Audio list”to add audio files to play lists.
Play Audio list
‘Play Audio list‘plays files selected by previous user. To view play lists, press [M] in
audio play screen and select “List set”again.
Copy
Copy files or folders.
Paste
Pastes copied files or folders.
Delete
Delete files or folders.
Sort by name
Sort files by its name.
Sort by extension
Sort files by its extension.
Sort by type
Sort files by its type.
Preview
Turn on/off preview of movie or image in the browser.
Set Wallpaper
Set wallpaper you want.
Select image files (jpg,bmp,tiff.gif) and press [M], then select “Set Wallpaper”in the pop
up window and press [▶II].
Use 480x272 pixels for image size which is optimized resolution for PMP.
13
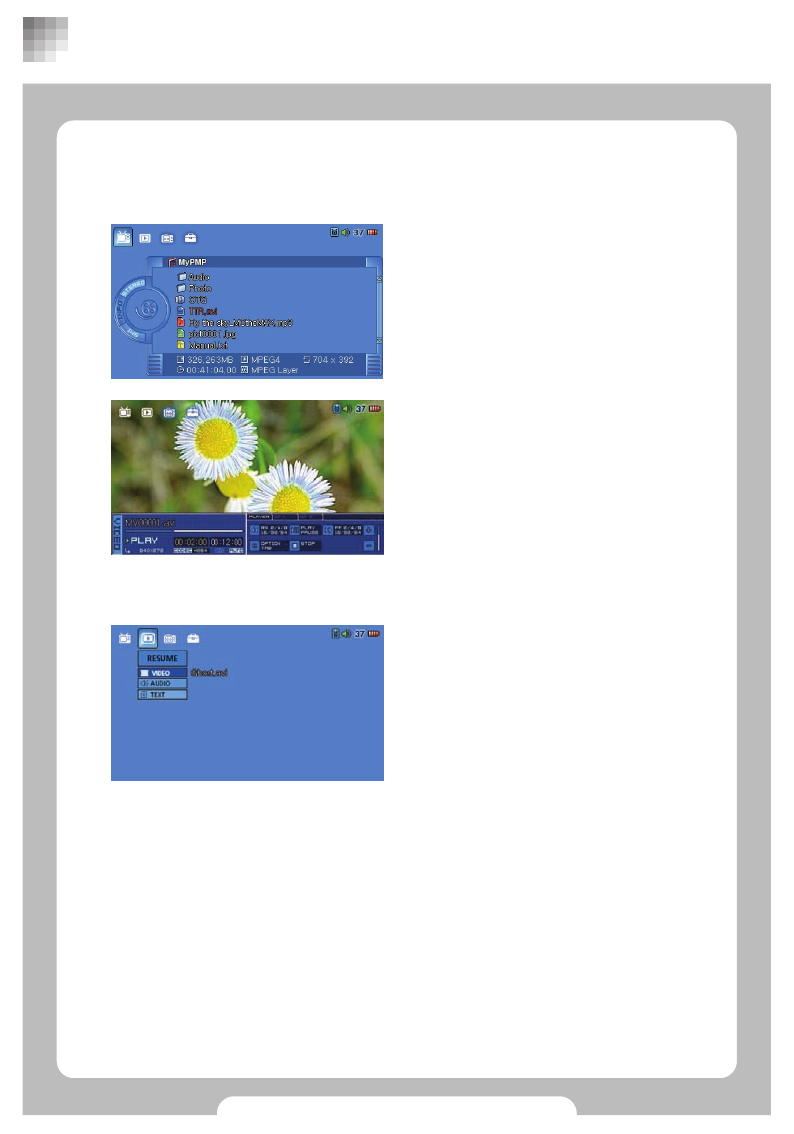
■ Playing Video files
zPlaying Video files with browser
Select PLAY in the main menu and use [arrow
key] to choose files to play, then use [▶II] or
[▶▶].
Movies will be played in movie player screen.
zViewing movies in RESUME Menu
Select ‘VIDEO’under ‘RESUME’Menu and the
most recently played file will be displayed.
Press [▶II] will play from the last played
position.
BASIC FUNCTIONS
Check below when no sub menus are available under ‘Resume’menu.
•After shipment from factory or no files were previously played.
•System/Syetem ini files were deleted.
•System default is set in ‘Set up’menu.
•Files to be played are deleted.
•File name has been changed.
•Abnormal power-off or reset.
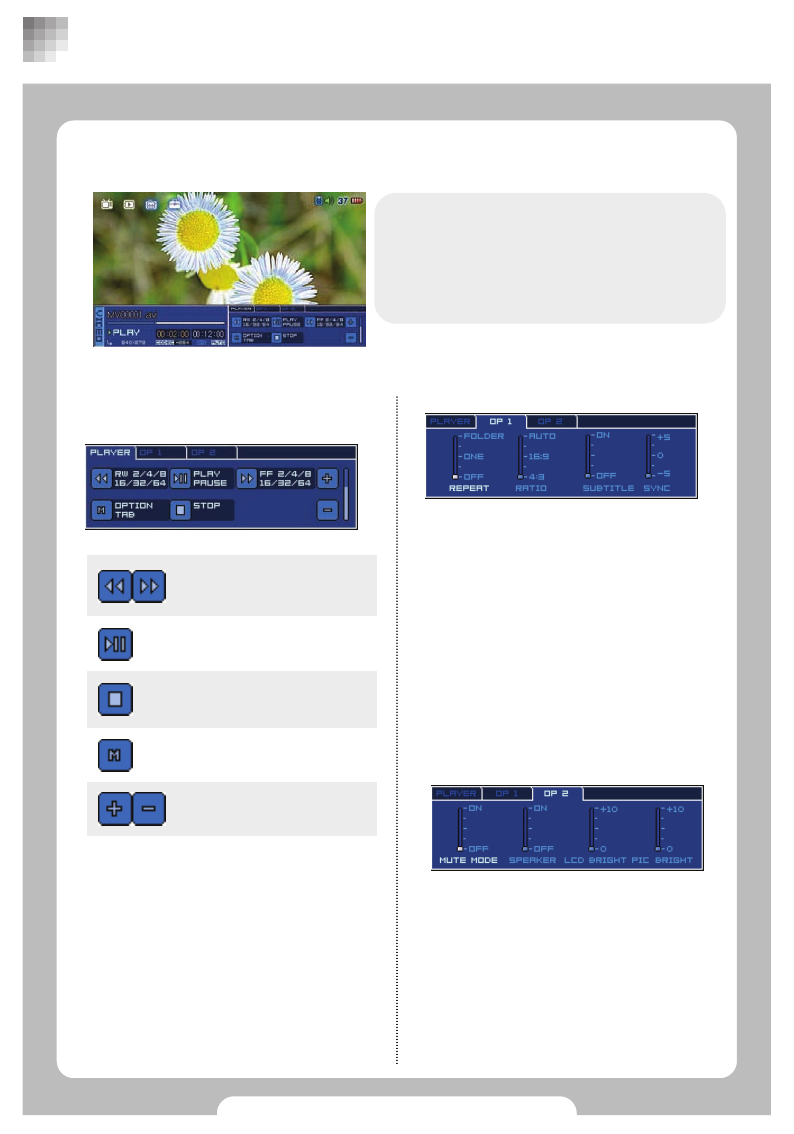
14
■ Setting options for playing movies
Press [M] during playing movie to change
settings in the option.
Press [◀◀/▶▶] to move between menus
and use [+/-] to change settings. Press [■]
to finish.
PLAYER
Operations to play movies.
BASIC FUNCTIONS
OP 1
•REPEAT
FOLDER : Repeat all
ONE : Repeat current file only
OFF : No Repetition
•RATIO
Change screen ratio
•SUBTITLE
Sub-title on
•SYNC
Sub-title synchronization
•MUTE MODE
Turn the sound off
•SPEAKER
Turning on/off internal speaker
•LCD BRIGHT
LCD brightness tuning
•PIC BRIGHT
Screen brightness tuning
OP 2
Volume
Stop
Move to option menu
Play/Pause
Rewind backward/forward up
to x2>x4>x8>x16>x32>x64>x128
or vice versa
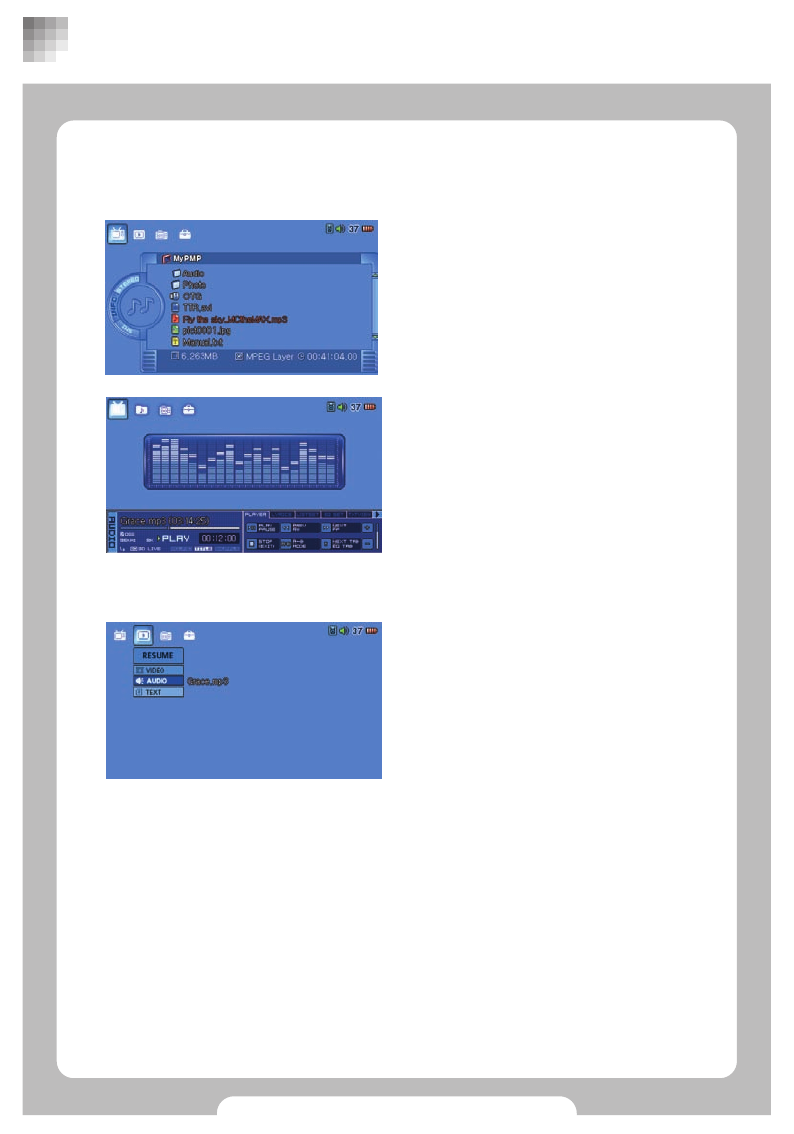
15
■ Playing music files
zPlaying music files with browser
Select ‘PLAY’in the main menu and choose
files to play, then press [▶II].
Press [◀◀/▶▶] to change menus and use
[+/-] to change settings. Press [■] to finish.
Press [M] to edit play lists. (Refer to page 13)
Audio files will be played in audio play mode.
zPlaying audio files in RESUME menu
Selecting ‘Audio’under ‘RESUME’menu will
display the file one after last flayed file. Press
[▶II] to play.
BASIC FUNCTIONS
Check below when no sub menus are available under ‘Resume’menu.
•After shipment from factory or no files were previously played.
•System or System ini files were deleted.
•System default is set in Set up menu.
•Files to be played are deleted.
•File name’s been changed.
•Abnormal power-off or reset.
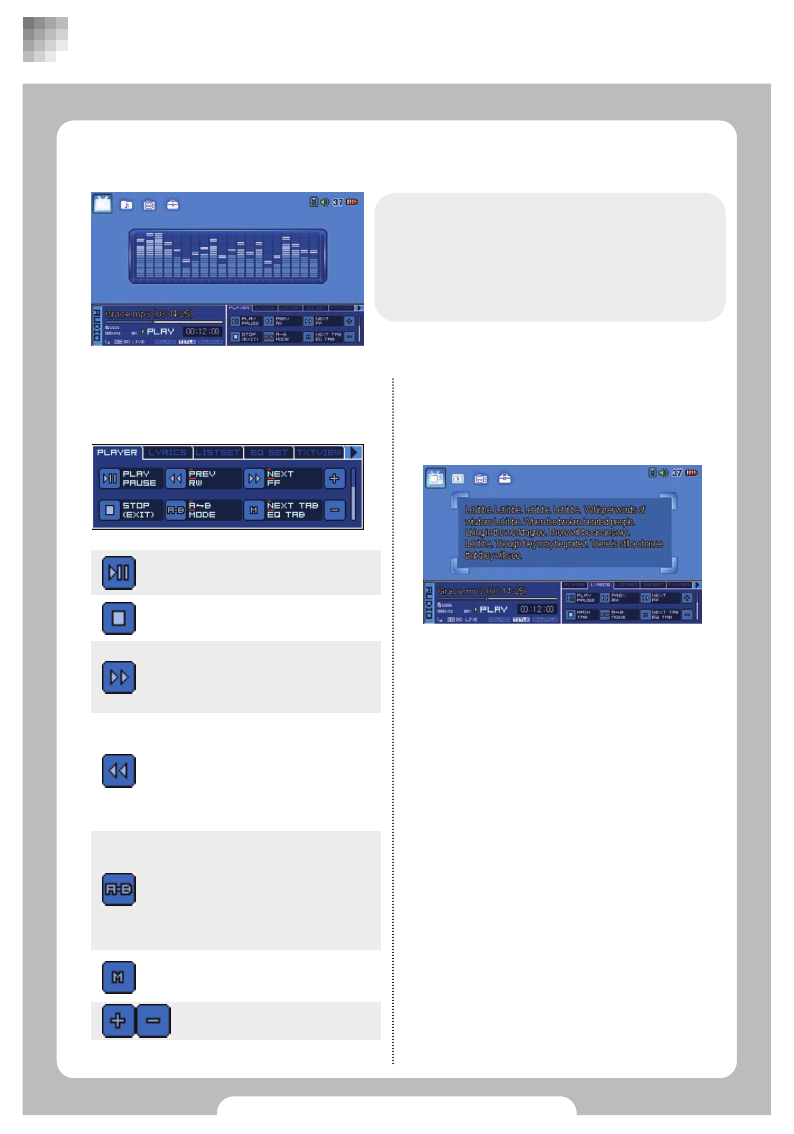
16
■ Setting options for playing audio files
Press [M] during playing audio files to change
setting in the right.
Press [◀◀/▶▶]to move between menus and
use [+/-] to change settings. Press [■] to
finish.
PLAYER
Operations to play audio files.
BASIC FUNCTIONS
LYRICS
A preview window for viewing Lyrics will
appear only for audio files with sub title.
Press : Play next music
Press and hold : rewind
Repeat
Press : setting the length of
session to be repeated.
Press and hold : toggling
repeat mode (Off→One→All)
Volume
Press : Move to the beginning
of file after 10 seconds’play
Move to the previous file
back to 10 second’s play
Press and hold : rewind
Move to menu
Stop
Play/Pause
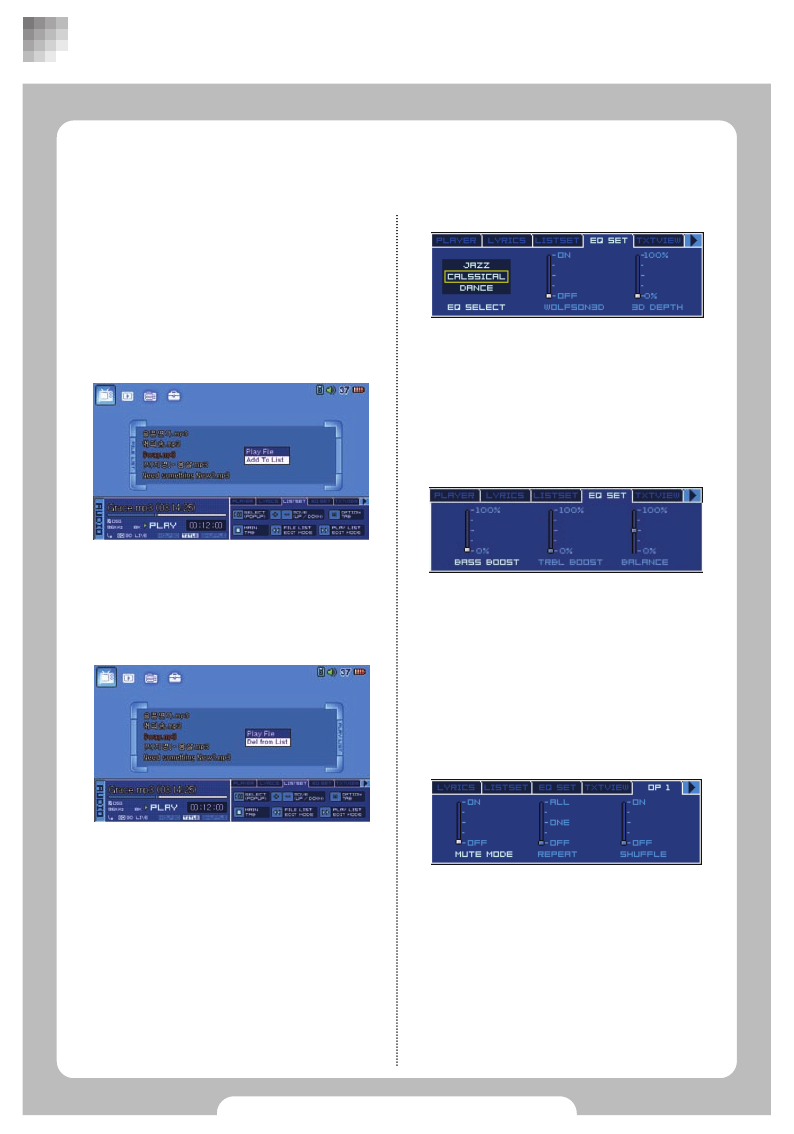
17
•EQ SELECT
Setting EQ mode
•WOLFSON3D
Setting WOLFSON3D
•3D DEPTH
Setting 3D DEPTH
BASIC FUNCTIONS
LIST SET
Press [M] and select “LISTSET”to see
file list. Press [+/-] to choose audio
files and press [M] or [▶II] to bring pop
up window.
File list pop up
Play File : Pplay current file
Add To List : Move to selected file list.
EQ SET
•BASS BOOST
Tuning for low frequency sound
•TRBL BOOST
Tuning for high frequency sound
•BALANCE
Tuning speaker output
•MUTEMODE
Turning off sound
•REPEAT
ALL : Repeat all
ONE : Repeat current file only
OFF : Canceling Repeat mode
•SHUFFLE
Random play
OP 1
Switch-over between file list and play list
Press [◀◀/▶▶] to switchover
Play list pop up
Play File : Play current file
Del from List : Delete file
18
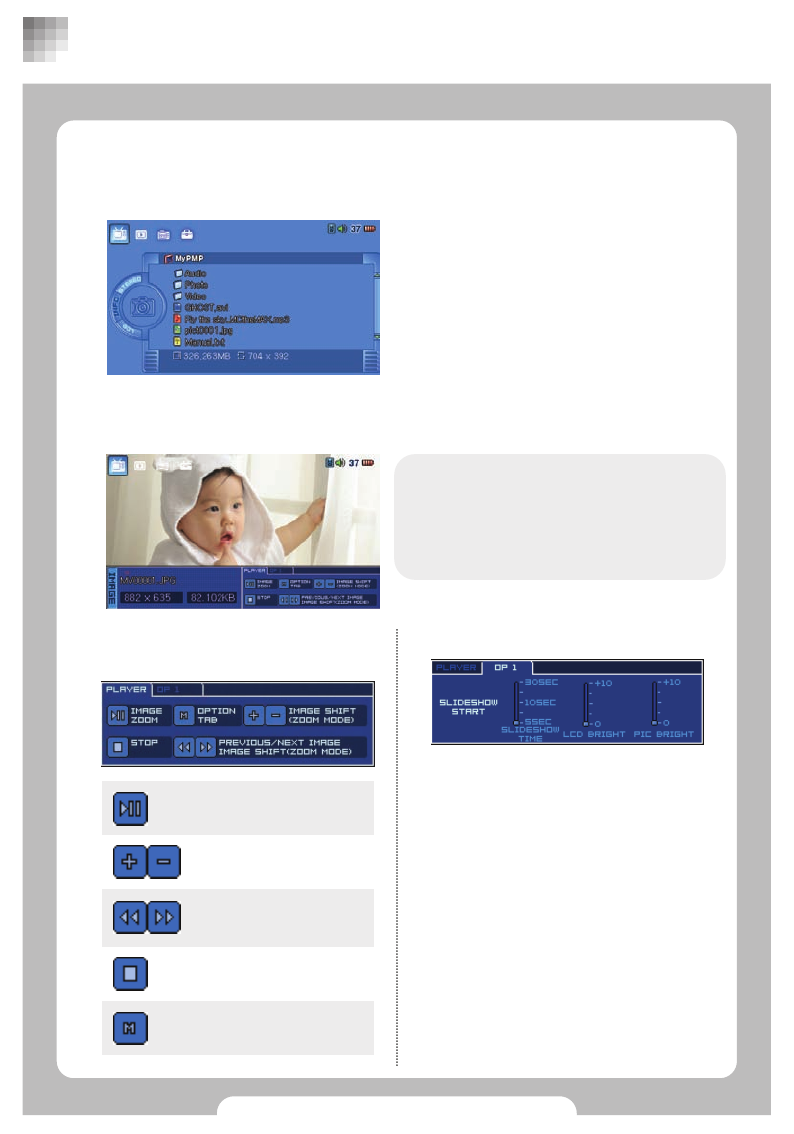
■Viewing Image
zViewing Image in PLAY menu with browser
Select ‘PLAY’in the main menu and choose
the image file to play and press [▶II].
Image player will appear and images will be
played.
BASIC FUNCTIONS
■ Setting options for playing images
Press [M] during playing images to change
settings in the option window.
Press [◀◀/▶▶] to move between menus
and [+/-] to change settings. Press [■] to
finish.
PLAYER
Operations for playing image.
OP 1
•SLIDESHOW START
Displays images from current image
•SLIDESHOW TIME
Setting slideshow frame rate
•LCD BRIGHT
LCD brightness tuning
•PIC BRIGHT
Display brightness tuning
Move to option menu
Go to Previous/Next
image
Pan in zoon mode
Stop
Releasing zoom mode
Pan in zoom mode
Zoom in 200%
19
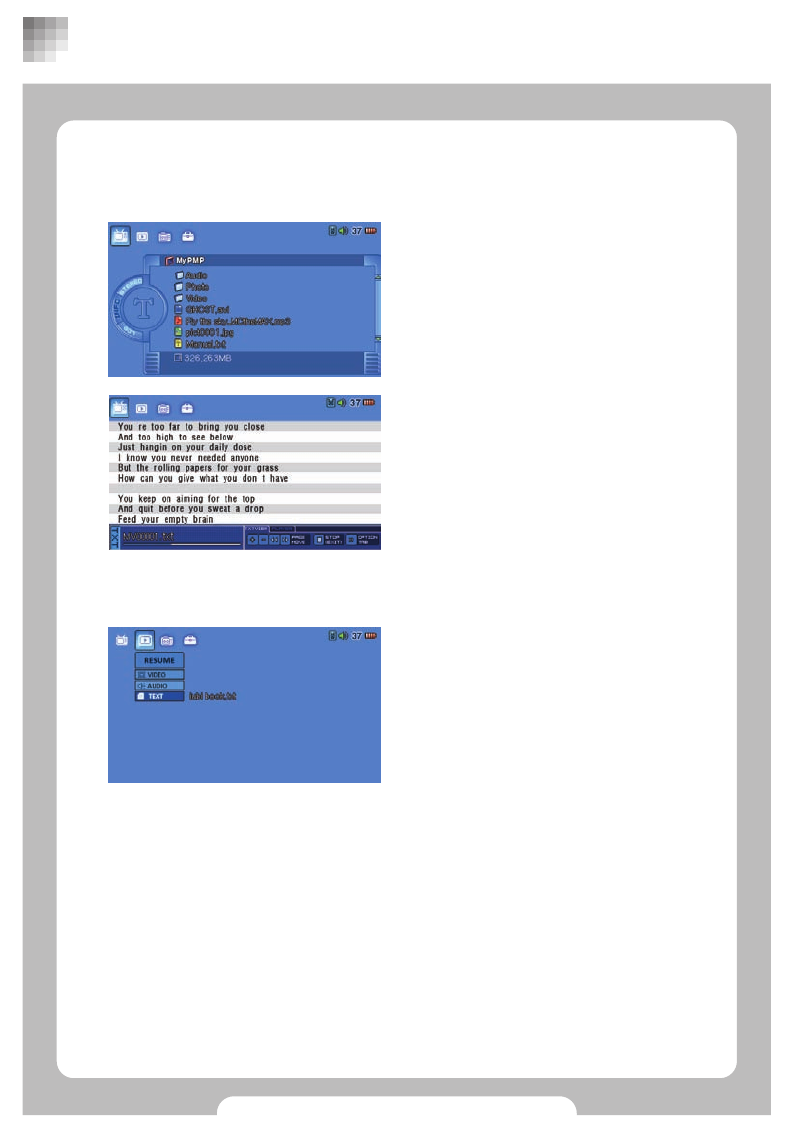
■Viewing Texts
Select ‘PLAY’in the main menu and choose
text file to play and press [▶II].
Compatible files have ‘.txt’extension.
Text will be viewed after preview.
Selecting ‘Text’under RESUME menu will
show the file viewed last time. Press [▶II] to
resume from previously played position.
BASIC FUNCTIONS
zViewing Text in PLAY menu with browser
zViewing Text in RESUME menu
Check below when no sub menus are available under ‘Resume’menu.
•After shipment from factory or no files were previously played.
•System or System ini files were deleted.
•System default is set in Set up menu.
•Files to be played are deleted.
•File name’s been changed.
•Abnormal power-off or reset.

20
■ Connecting to external devices for recording
When using this product for recording.
■ Sending output to external devices
•This product can be connected to external display devices such as TV to send images
out or record.
•Quality and resolution of this product depends on TV resolution and may not be
supported.
BASIC FUNCTIONS
Locate to LCD.
Locate to TV.
Yellow : image
Red : voice (right)
White : voice (left)
Yellow : image
Red : voice (right)
White : voice (left)
21
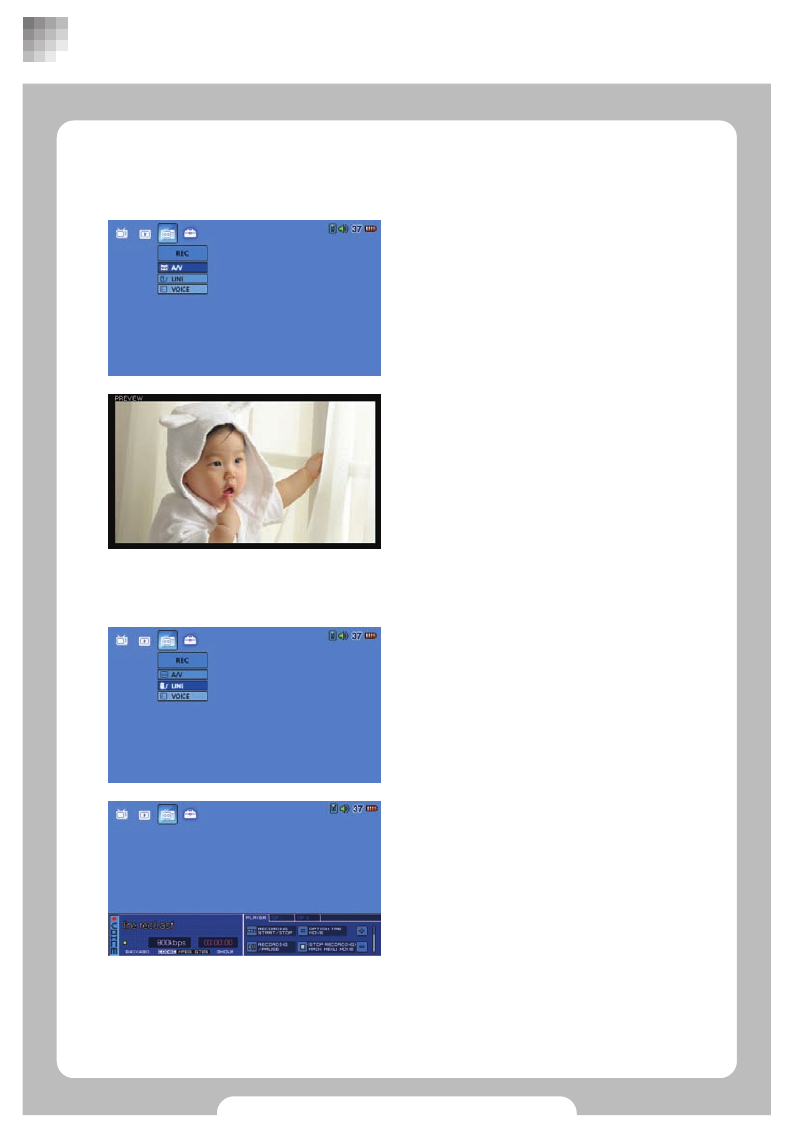
■ Recording
zRecording (Audio/Video)
Connect this product to external devices and
select ‘A/V’under ‘REC’menu.
Press [▶II] after preview to start recording.
Press [■] to save “av rec0.asf”file into PMP
hard disk.
[Line] Recording - Connect this product to
external device and select ‘LINE’under ‘REC’
menu.
[VOICE] Recording - No Connection is
required.
Select ‘LINE(VOICE)’under the ‘REC’menu.
After ‘Recording player screen’shows up,
press [▶II] to record voice through ‘AV IN’
(using internal microphone).
Press [■] to save “line(voice) rec0.asf”file
into PMP hard disk.
zLINE/VOICE Recording
BASIC FUNCTIONS

22
■ Setting options for Recording
Press [M] during recording to change setting
in the option window right side.
Press [◀◀/▶▶] to move between menus
and press [+/-] to change settings. Press [■]
to finish.
PLAYER
Operations for Audio/Video Recording.
BASIC FUNCTIONS
Volume
Stop/Back to main menu
Move to option menu
Start/Pause Recording
Start/Stop Recording
OP 1
•REC TIMEOUT
Setting recording time
•REC QUALITY
Recording quality tuning
OP 2
•MUTE MODE
Turning off sound
•SPEAKER
Turning off internal speaker
•LCD BRIGHT
LCD brightness tuning
•PIC BRIGHT
Display brightness tuning
23
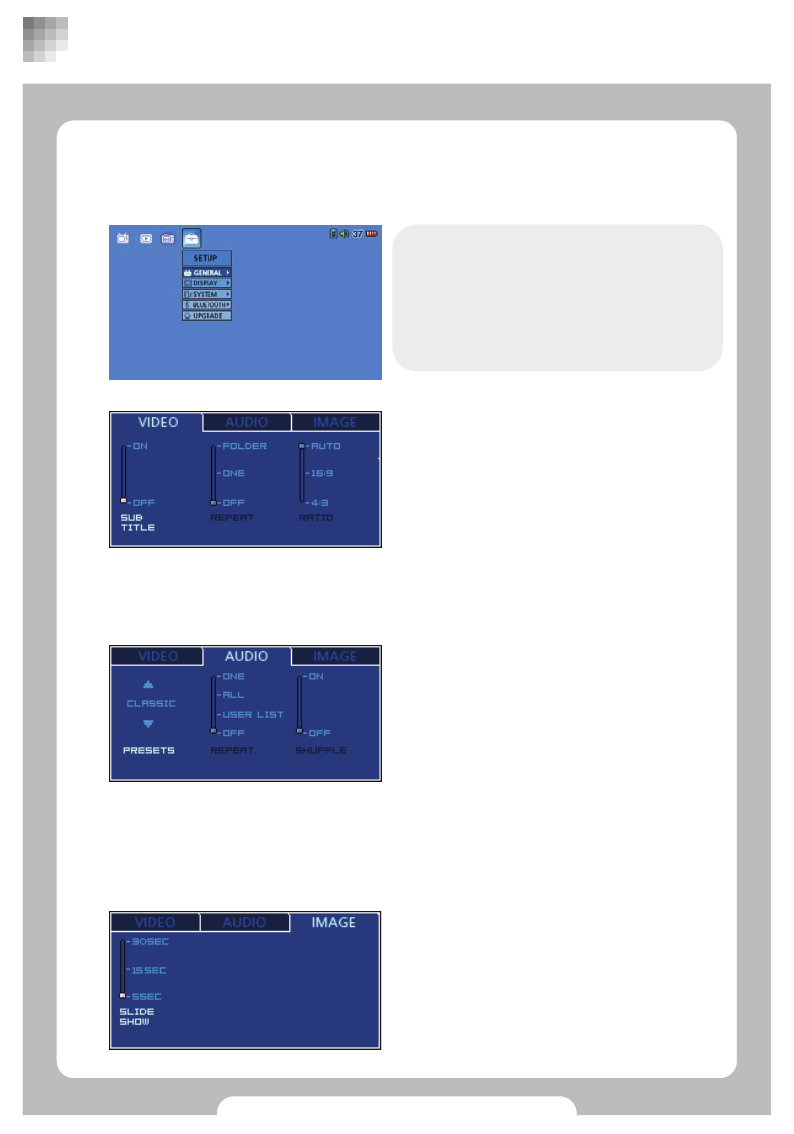
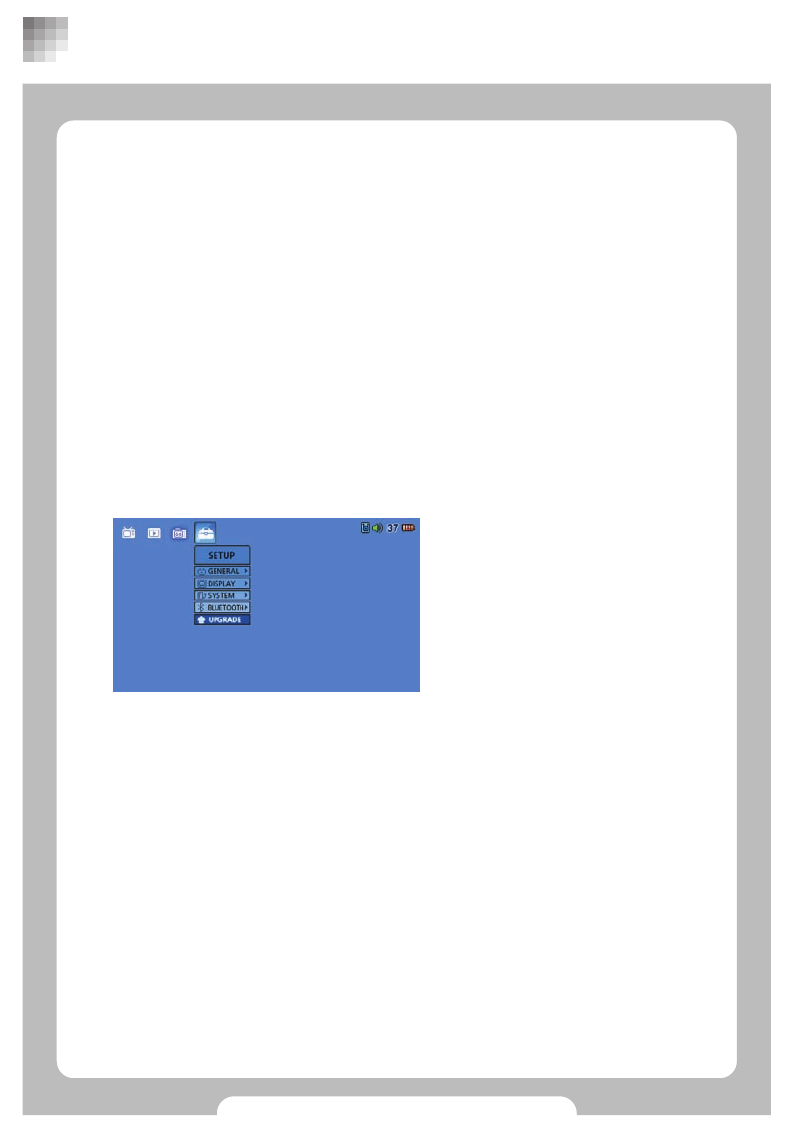
■SET UP
zGENERAL
Select ‘GENERAL’under ‘Setup’menu and
press [▶II]. Then press [M] in the ‘Setting’
window to change menu.
Press [◀◀/▶▶] to move between menus
and use [+/-] to change settings. Press
[■] to finish.
VIDEO
•SUBTITLE
Turning on sub title
•REPEAT
FOLDER : Repeat all
ONE : Repeat current file only
OFF : No repetition
•RATIO
Setting Display Ratio
AUDIO
•PRESETS
Setting EQ mode
•REPEAT
ONE : Repeat current file only
ALL : No repetition
USER LIST : Repeat the fist in the current
folder
OFF : No repetition
•SHUFFLE
Random play
BASIC FUNCTIONS
IMAGE
•SLIDE SHOW
Setting slide show frame rate.
24
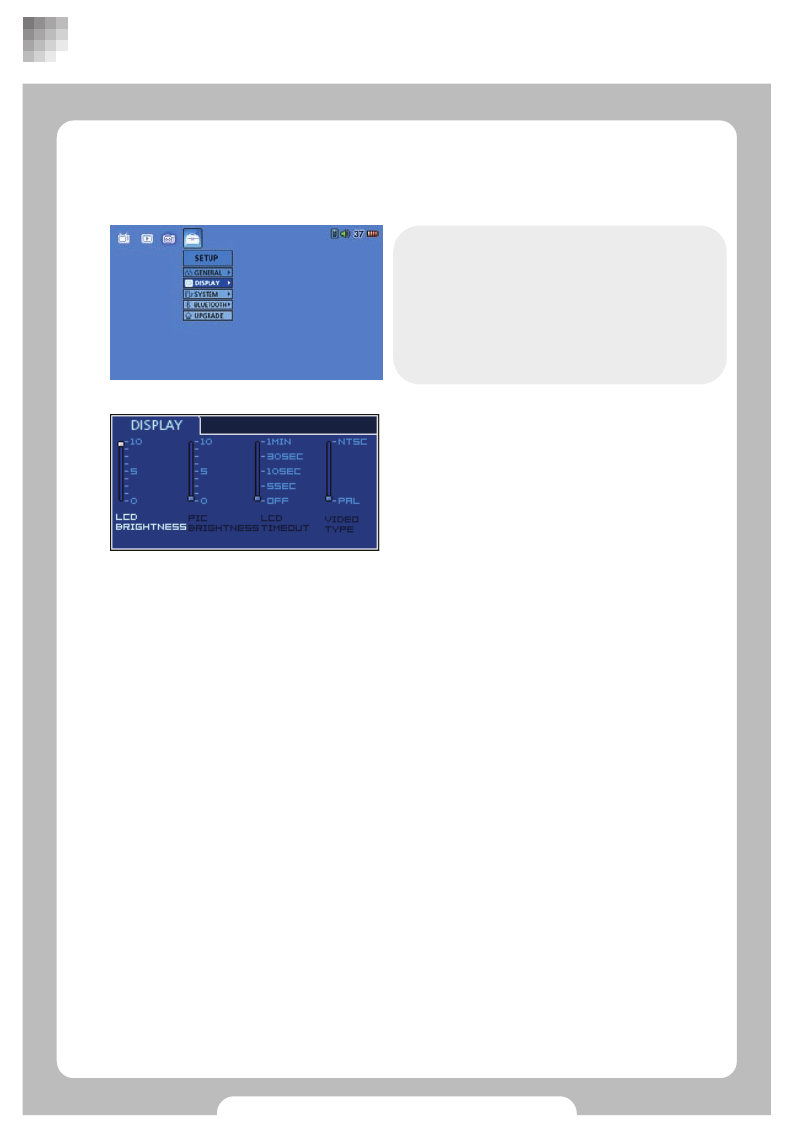
■SET UP
zDISPLAY
Select ‘DISPLAY’under ‘SETUP’menu and
press [▶II]. Then press [M] in the setting
option window to change menus.
Press [◀◀/▶▶] to move between menus
and use [+/-] to change settings.
Press [■] to finish.
•LCD BRIGHTNESS
LCD brightness tuning
•PIC BRIGHTNESS
Screen brightness tuning
•LCD TIMEOUT
LCD backlight timeout tuning
•VIDEO TYPE
Setting output type
BASIC FUNCTIONS
25
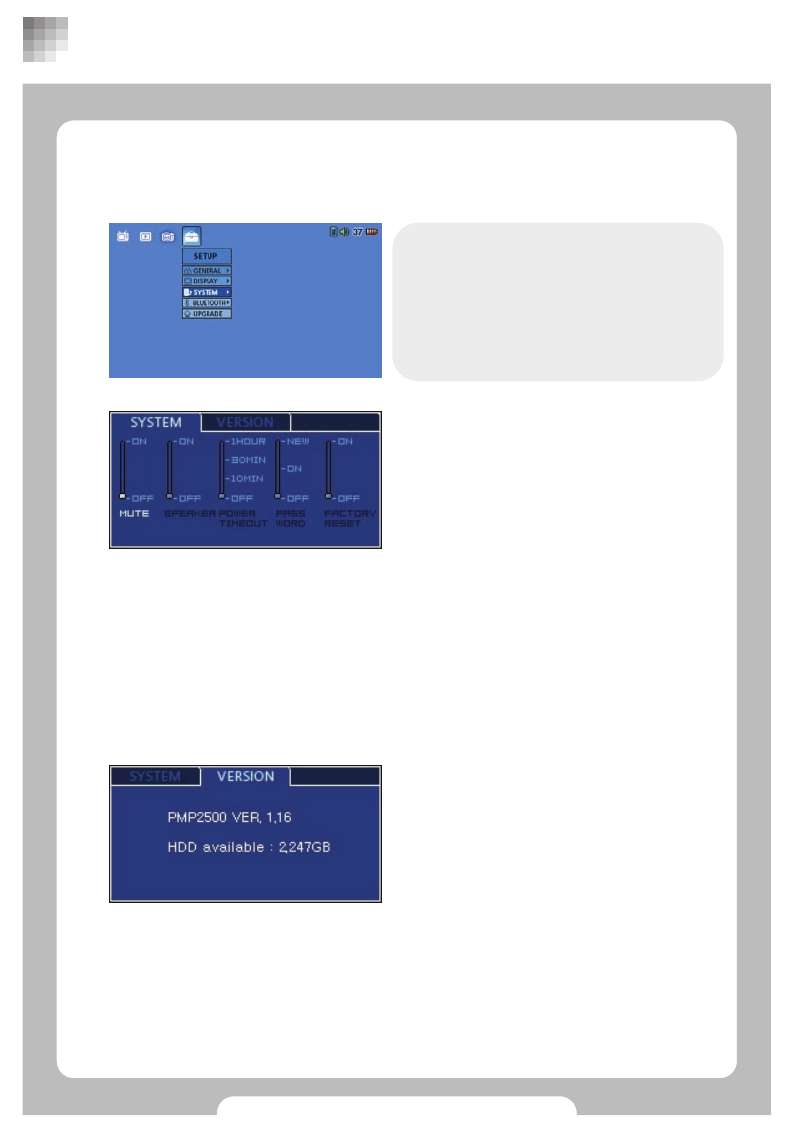
■SET UP
zSYSTEM
Select ‘SYSTEM’under ‘SETUP’menu and
press [▶II]. Then press [M] in the setting
option window to change menu.
Press [◀◀/▶▶] to move between menus
and use [+/-] to change settings.
Press [■] to finish.
SYSTEM
•MUTE
Turning off sound
•SPEAKER
Turning off internal speaker
•POWER TIMEOUT
Setting System Power timeout
•PASSWORD
Set up or change password
NEW : Set up a new password
ON : Password function ON
OFF : Password function off
•FACTORY RESET
Setting back to Factory Default setting
VERSION
Check current firmware version.
BASIC FUNCTIONS
26
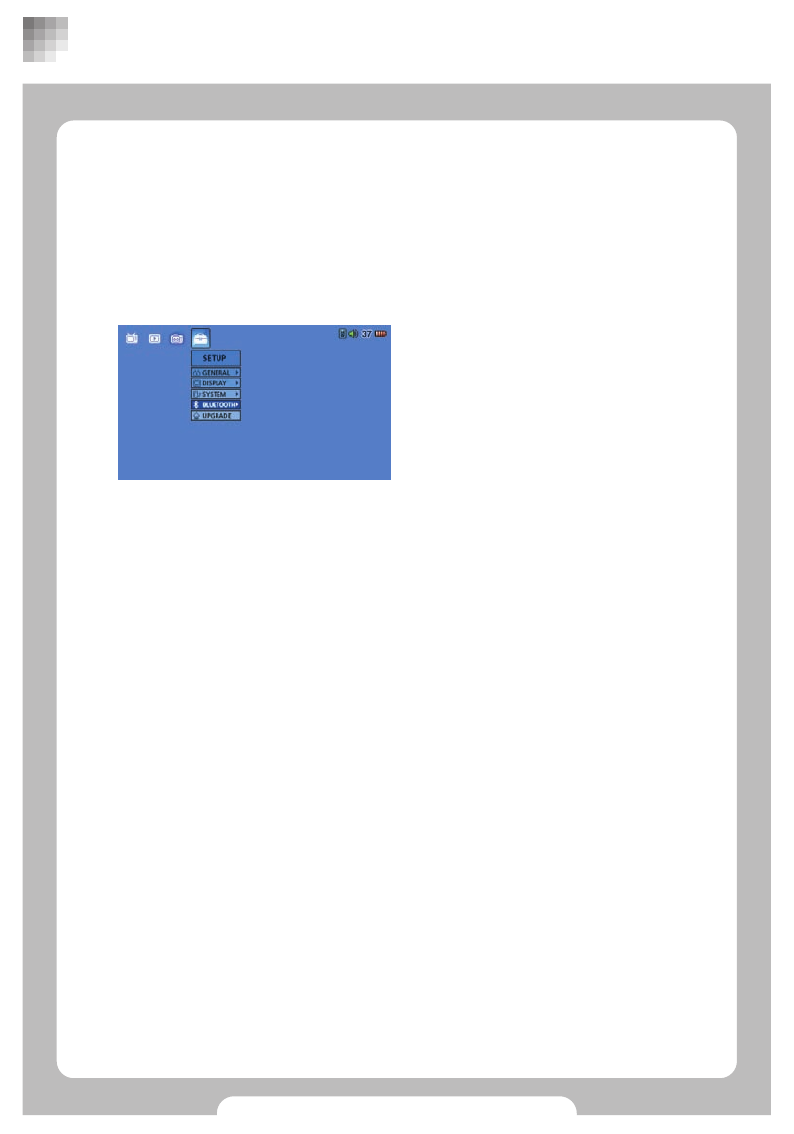
■SET UP
zBLUETOOTH
Choose ‘BULETOOTH’in the SETUP menu
and press ‘play’to bring ‘AUTO/OFF/NEW
CONNECTION’menu.
Connect Bluetooth headset device to this product.
The maximum effective distance between headset and this product is 10m.
The quality will be sensitive to any interruptive objects such as wall or doors
BASIC FUNCTIONS
Connecting Bluetooth device
1. AUTO
Configure to connect to bluetooth device automatically with power on.
It will automatically try to connect to most recently connected device. (Up to 7
devices are memorized and any one of these will be connected automatically) If
there is no information about recent connection or any defect on device or no
devices to be connected, ‘Disconnect status icon’will appear. If the connection is
successful, ‘Connect status icon’will be shown. This may take dozens of seconds
but setting operation will be performed normally.
2. OFF
If you want to turn off automatic connection and prefer new connection every time,
refer to No‘3.’below (This will terminate current connection)
3. NEW CONNECTION
Search devices available around and to choose list. (Turn off and restart if it’s
connected.)
27
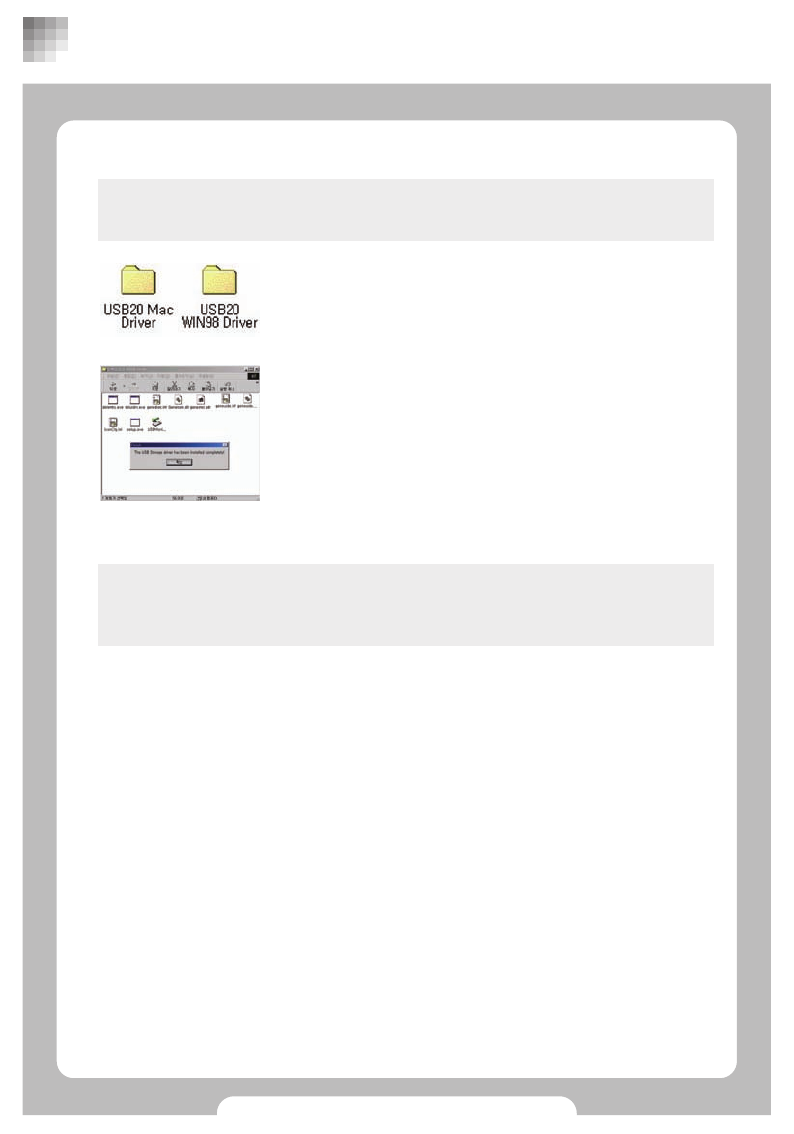
■ Installing USB Driver
USB driver will need to be installed manually if the operating system is
WINDOW 98 or below .
Open install program and choose ‘USB20 WIN 98
Driver’from the CD.
We advise you to choose suitable driver that is
compatible to OS after selecting ‘USB20 WIN 98 Driver’
for Mac users.
2
Run ‘SET UP’.
Connect USB cable after installation.
3
ADDITIONAL FEATURES
Download ‘USB20 WIN 98 Driver’from customer
service www.merlin-me.com.
1
For Window 98 OS users, download driver from our website as PMP will not be
connected to your PC without appropriate driver installation though drivers are pre-
saved PMP hard disk.
28
■ Upgrading Firmware
Download from our homepage to upgrade your system.
1. Connect this product to PC with USB cable.
2. Visit our website www.merlin-me.com
3. Select customer Center > Download > Necessary software.
4. Choose Firmware upgrade icon.
5. Download Upgrade file.
6. For safety purposes, back up files from the ‘Upgrade’folder in PMP hard disk to PC
and delete files from PMP.
7. De-compress downloaded file and copy into ‘Upgrade’folder within PMP hard disk.
8. Turn off and restart.
9. Select ‘Upgrade’in the SETUP menu and choose “YES”to upgrade.
ADDITIONAL FEATURES
29
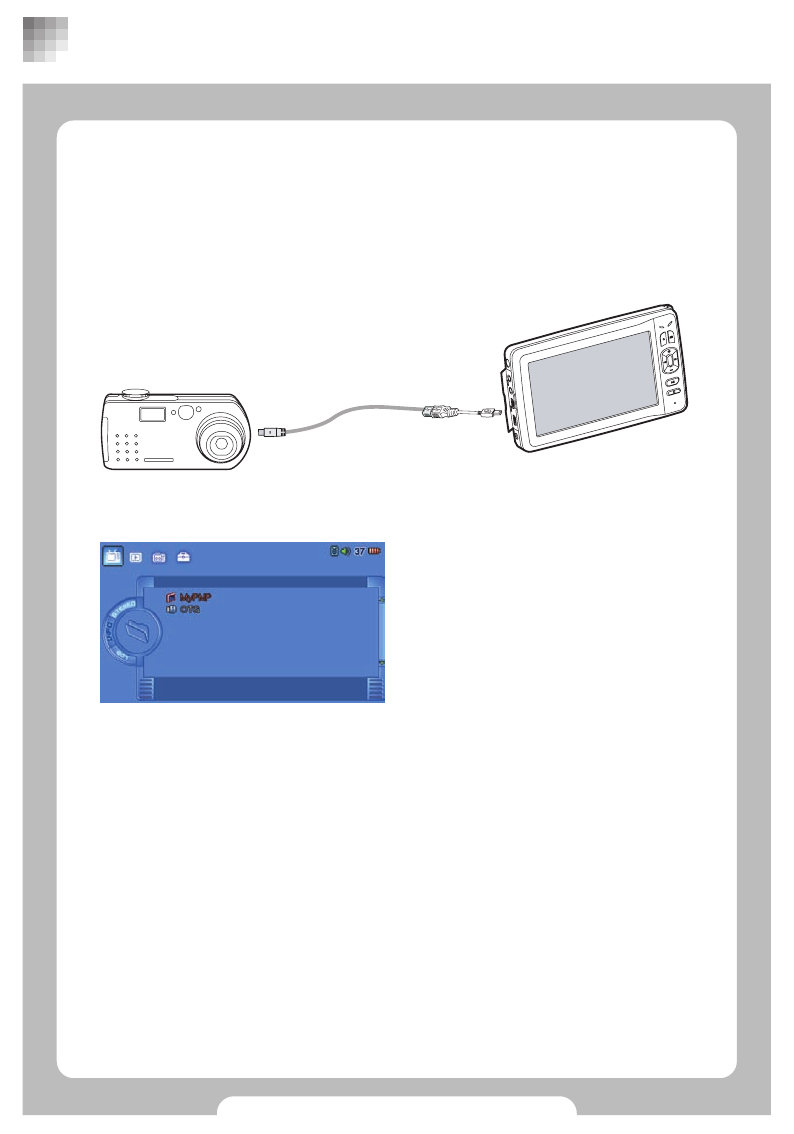
■USB Hosting
You can transfer data to external devices by connecting USB cable.
-Camera, USB storage, External Hard disk
Connect to external devices by using USB host cable.
OTG connection Icon will appear in the main screen.
When OTG icon appears in browser, press
[M] to move/copy/delete file or folder in the
pop up menu.
Always make it sure to turn on external devices when you make connection to external
devices by using USB host cable.
ADDITIONAL FEATURES
30
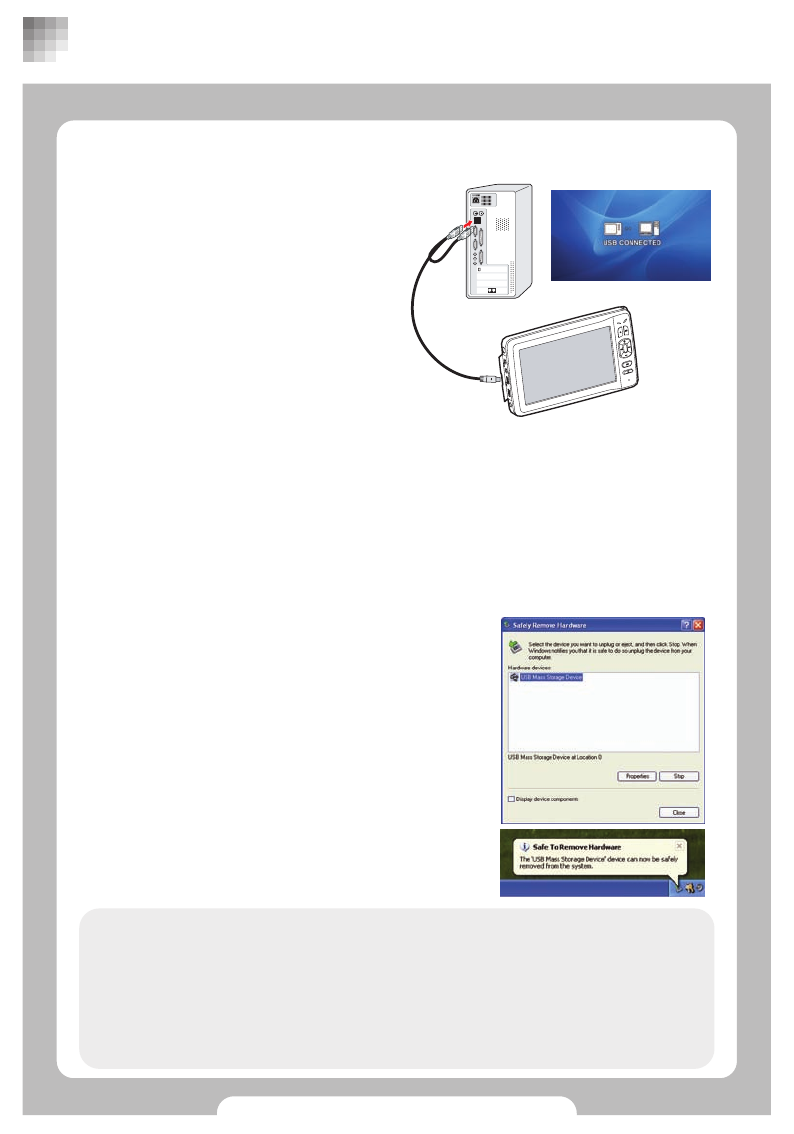
■ Connecting Player to PC
■ Disconnecting PC
•Do not turn off when USB cable is
connected. This may cause malfunction
or failure.
•When using USB hub, PC may get
unstable for interface reason and Data
may be corrupted.
•Using extended USB cable may cause
damages on data.
•This product is compatible both to
USB2.0 and USB1.1.
Run ‘Safely remove hardware’to disconnect USB cable to protect your system.
● When using Windows 98 or below
1. Double-click [My computer] in the Desktop screen.
2. Right click [Removable disk].
3. Click [Eject] in the menu and check [Removable Disk] icon disappears. If it still
remains, wait for a moment and try again.
4. Disconnect USB cable from PC.
● Windows 2000/ME/XP or Above
1. Double click [Safely Remove Hardware] from
the status bar.
2. A dialogue window for [Safely Remove
Hardware] will appear.
3. Click stop (S) button.
4. Completion message will appear in the bottom
of screen.
1. Menus and messages may be different according to operating system and personal settings.
2. If the product does not function correctly after removing USB cable, use [RESET] button in the
lower part of the product as there may be problems with data trasferring.
3. When upgrading Firmware, or disconnecting USB cable during data transferring, or if there was
interruption during file downloading, the product may not work properly even after restarting.
Complete downloading and remove any hardware safely to disconnect USB cable. If the product
still does not work try upgrade again.
ADDITIONAL FEATURES
31
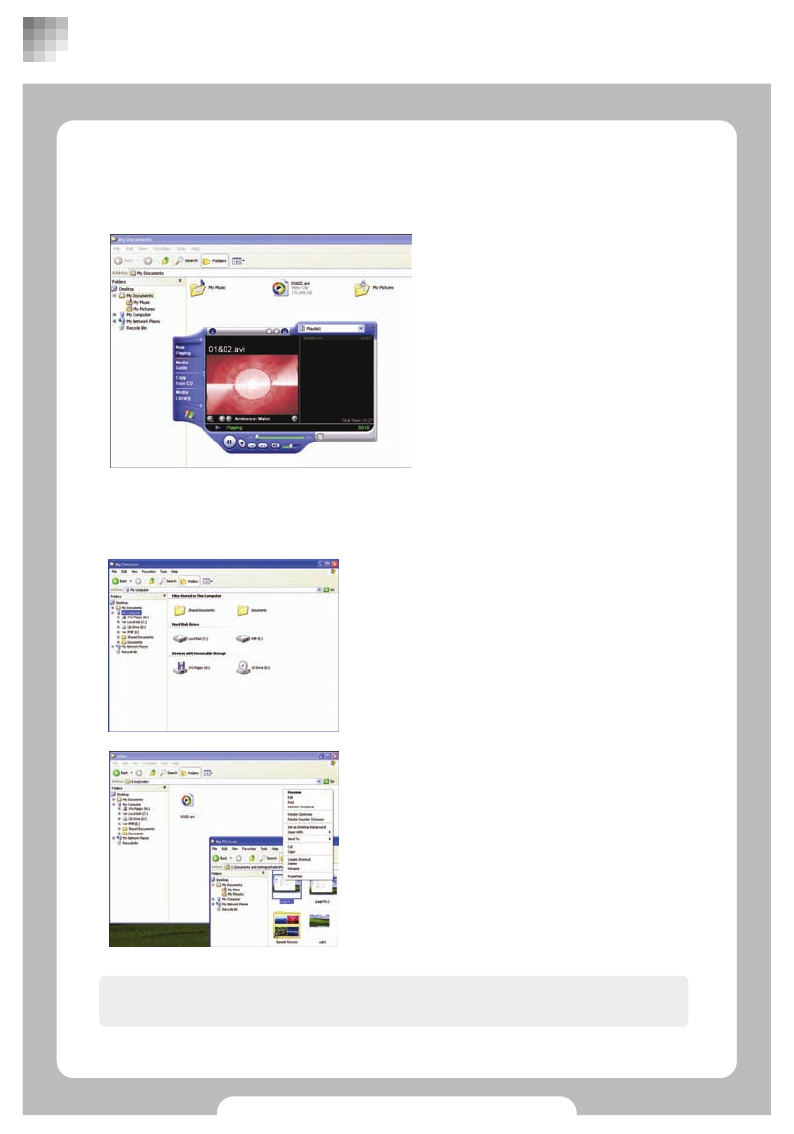
■Copy/Move/Delete
After connecting PC and the product with USB
cable, make sure that PMP(*:) is properly
connected into PC.
Deleting System folder may bring the settings back to factory default.
Saved movie, music and image files can be copied, moved, and deleted from your PC.
Open the folder where movies and music files
located and check the files.
After selecting files drag and drop them into
proper folder or use appropriate command to copy
or move the files.
Delete selected files.
■PlayingPMP file with PC
Connecting to PC with USB CABLE will enable you to enjoy movies and music files
saved in the product. MPEG-4, Dvix, Xvid codec must be installed within PC.
ADDITIONAL FEATURES

32
■ Using as portable mass storage
■ Managing Hard Disk
When using Windows XP
Select the driver of this product and right click →‘Property’→‘Tools’→‘Disk Defragmenter’
When using Windows 98
‘Start’→‘Program’→‘Accessories’→‘System tools’
As hard disk installed internally, run ‘Disk defragmenter’regularly when it performs very
slow or memory runs out. Follow instructions below.
This product can be used as portable mass storage.
Please be careful about below when using this product as back-up device or using as
portable mass storage by connecting PC.
•Installed hard disk drive is sensitive to impact and any impact on the product may
cause data loss or damage to the hard disk. Do not use this product for long-term
data storage.
•Make sure it is powered on when using long time by connecting to PC. Use fully
charged battery or power adapter. Short of battery during data transferring will cause
problems.
•Run “Safely Remove Hardware”menu when disconnecting USB cable from PC and
make sure the connection during the data transferring.
•It is user’s responsibility to lose data or downloaded files, therefore always back up
files into PC.
ADDITIONAL FEATURES

33
■ Before using Transcoder
Functions of Transcoder
•File converter
•DVD Player
•DVD Converter
•QuickTime(MOV/QT/MP4) Converter
•Advanced DVD Converter
•RealVideo Converter
Files that can be converted
•Movies : Unsupported file types need to be converted.
•Setting out Transcoder options : No option settings required as files will be converted
automatically on importing.
•Check if the files corrupted when errors occur or change image size by using [Image
Resizing] button in the left lower part.
•When performing first after program installation, connecting this product to PC will
disable security code, which will enable you to use afterwards.
Recommended system requirement
Pentium3 1G or above | Memory 256MB or above | Microsoft DirectX supported VGA |
Soundcard
OS
Microsoft Windows 98 | Microsoft Windows ME | Windows 2000 | Windows XP
Required system
TRANSCODER
34
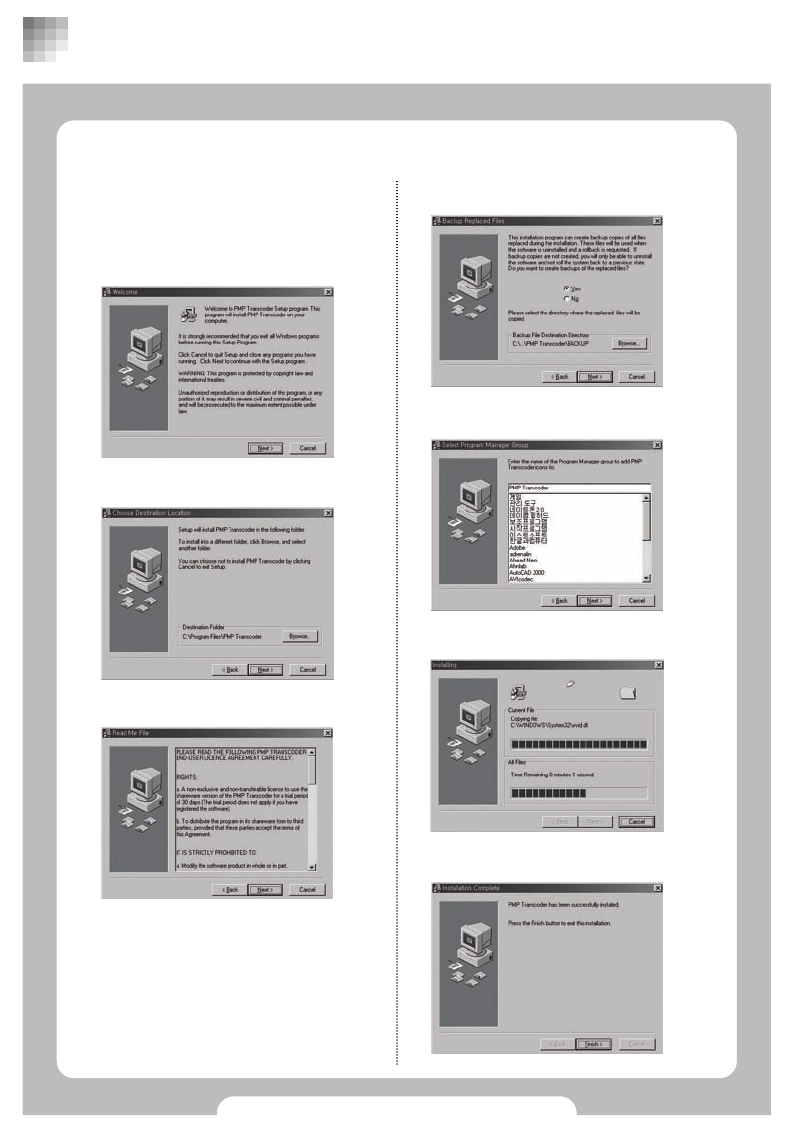
■ Installing Transcoder
1. Double click
“iubi_transcoder_setup.exe”within
“PMP_UTIL”folder.
2. Select ”NEXT”.
3. Select ”NEXT”.
4. Select ”NEXT”.
5. Select “YES”, then “NEXT”
6. Select ”NEXT”.
7.Then installation will begin.
8. Select ”NEXT”and press ‘Finish”.
TRANSCODER

35
■ Using Transcoder
Press [Start] in the lower left part then go
to [Program(P)] → [PMP Transcoder] →
[PMP Transcoder] , or double click PMP
Transcoder icon in background.
Transcoder window
1. File lists window : Displays currently
opened files.
2. Status bar : Show status for currently
running command.
3. Playing time and estimated file
converting time : displays Playing time
or estimated time for file converting.
4. Play and converting status sign :
Displays play or file converting status.
5. Assigning file size : Use when
converted file needs to be divided into
sections.
6. Setting audio file synchronization :
Use to match sound to the original
audio file.
Menu bar
•Opening files to be converted will set out
options automatically.
•Image Resizing : Decide file size (Limit
the resolution under 640x480 when the
original size is 640x480 or over)
•Destination : Locate converted file.
•Frame Rate : Setting out the frame rate.
•Audio Format : Setting audio file
sampling frequency and bit-rate.
Defaults are 192kBit/s, 44.100Hz, stereo.
•Video Format : Video option setting
window (Automatic setup)
Icons
1. Open
2. Close
3. Play
4. Stop
5. converting selected files
6. Set starting point of a section file
converting
7. Set ending point of a section file converting
8. Convert all of the current file
9. Run section converting
TRANSCODER
345
6
1
2
1 2 3 4 5 6 7 8 9
36
■ Using Transcoder
Menu
File
•Open VCD/MPEG/AVI/WMV/ASF/VOB
files :
Open the file to be converted
•Close current File:Close current file
•Add movie Files to List : Add movie Files
to List
•Remove checked Files from List :
Remove checked Files from List
•Clear File List :
Clear current file list
•Exit : Exit Transcoder
View
•Show/Hide LogInfo : Show/Hide Log Info
•Show Mixer : Show audio option setting
window
•Toggle Window/Full screen Mode :
Full screen mode (Toggle with ‘esc’)
Control
•Play : Start file converting
•Stop : Stop file converting
•Check All Files :
Select all files from the file list
•Uncheck All Files :
Unselect all file from the file list
•Set Begin Position For Converting :
Set beginning point of section file
converting
•Set End Position For Converting :
Set end point of section file converting
•Set whole File For Converting :
Convert whole file
•Convert All checked Files :
Convert all checked files
•Convert Current File from Begin Position
To End Position :
Convert selected sections of current file
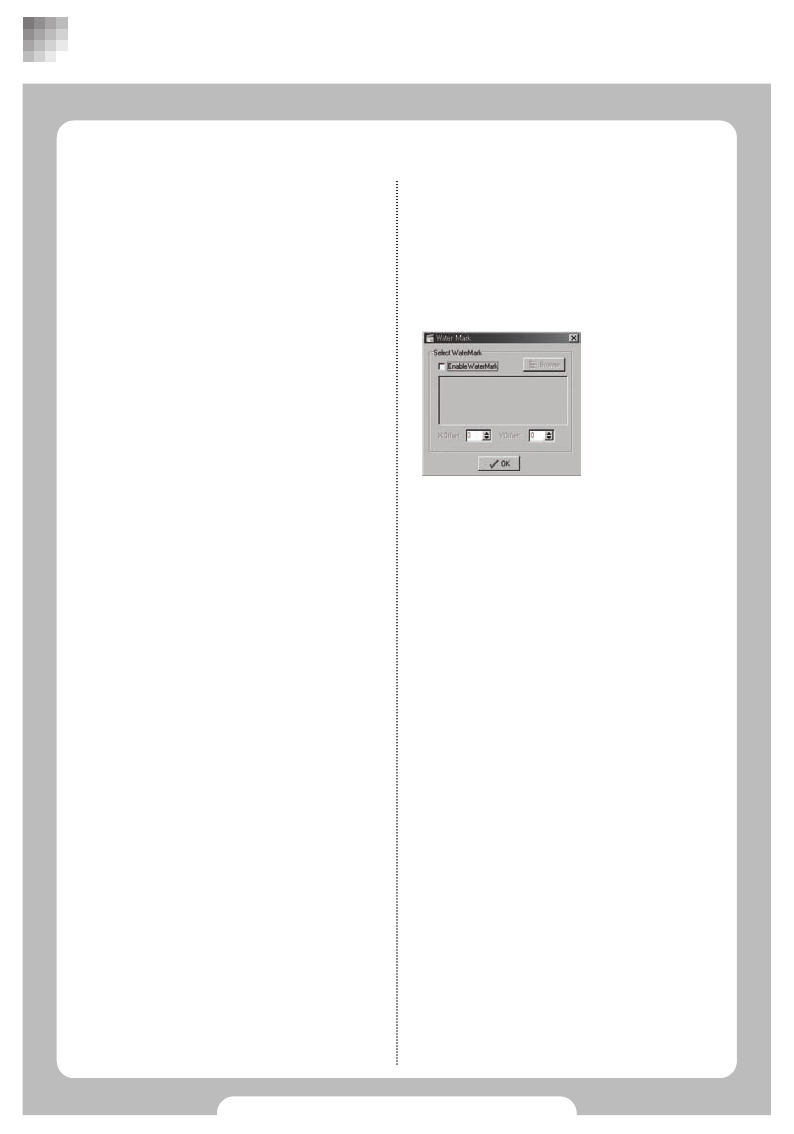
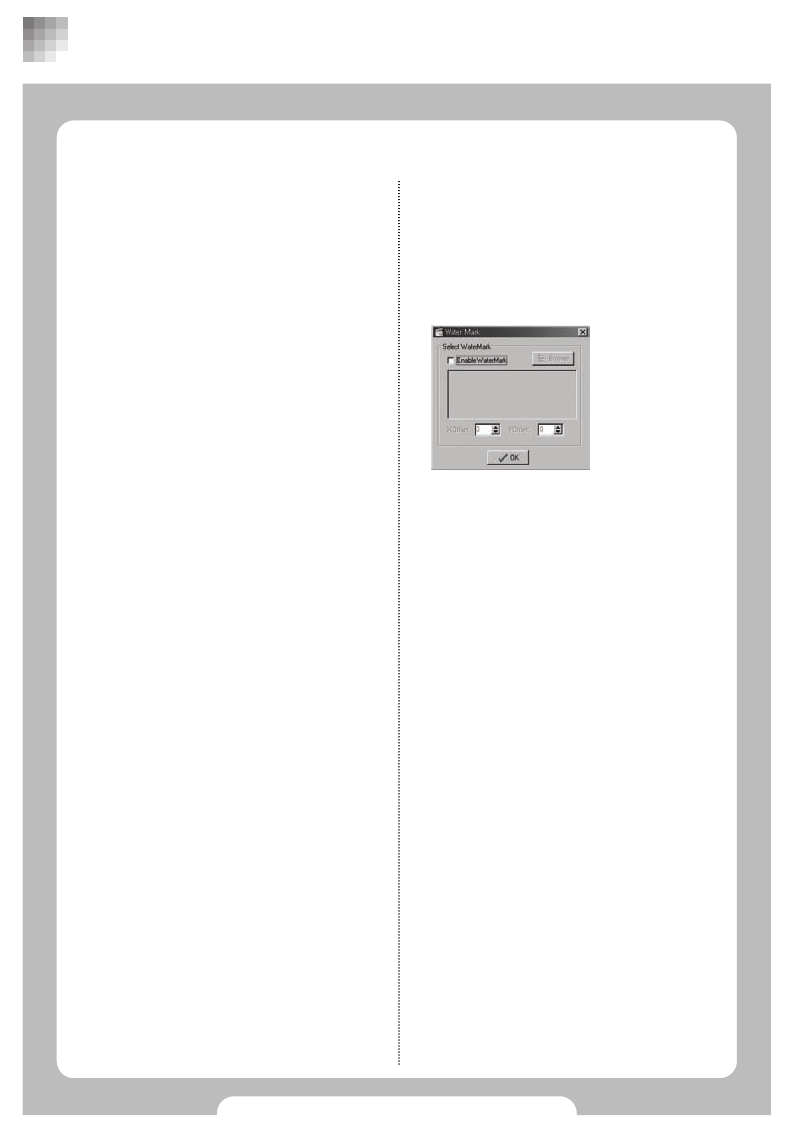
Option
•Setup Watermark :
User preferred icons or letters can be
inserted into converted file. ‘bmp’is the
only compatible file format.
•Enable Audio : Enables audio files
Help
•Help : Help
•About PMP Transcoder :
Displays program version and
information
•Download QuickTime Player :
Shows link to the website where
QuickTime Player can be downloaded.
•Download Real Player :
Shows link to the website where Real
Player can be downloaded
•Download Other Codecs :
Shows link to the website where Codec
can be downloaded
Choose files with
Browser button
TRANSCODER
37
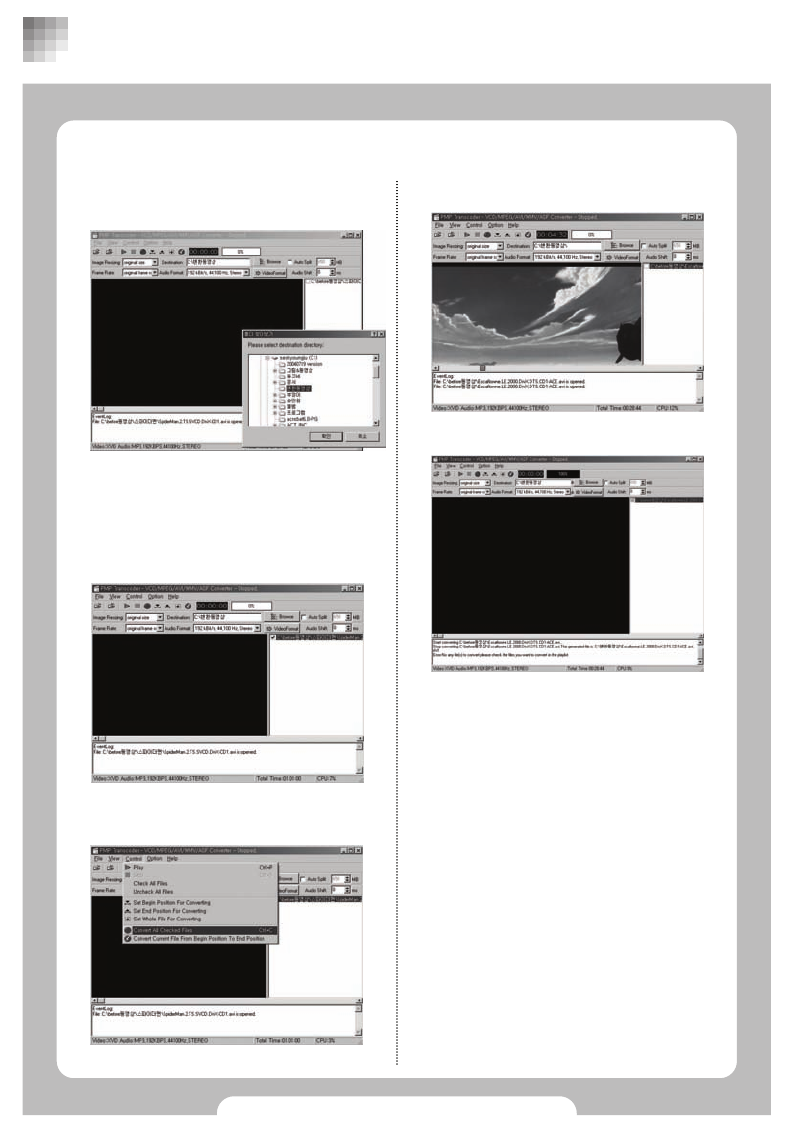
■ Converting whole file
1. Set folder location by using browser,
where converted files are to be saved.
2. Select File → Open
VCD/MPEG/AVI/WMV/ASF/VOB File
Select files to be converted.
3. File name will appear in the right.
Check files to be converted.
4. Choose ‘Control’→‘Convert All Checked
File’to start converting process.
5. File converting status will be shown as %.
6. File converting completed.
TRANSCODER

38
■ Converting part of file
1. Set folder location with browser to save
converted files.
2. Select ‘File’→‘Open’
VCD/MPEG/AVI/WMV/ASF/VOB File to
convert.
3. File names will appear in the right.
Check files to be converted.
4. Move the button on the status bar in the
bottom to the starting point of converting.
5. Select ‘Control’→‘Set Begin Position
For Converting’menu in the pop up to
set starting position of sectional file
converting.
6. Same as setting starting position, move
the button on the status bar to end
position and select ‘Control’→‘Set End
Position For Converting’in the pop up
menu to set the end position of file
converting.
7. Select ‘Control’→‘Convert current file
from the beginning position To end
position’in the pop up menu.
TRANSCODER
39
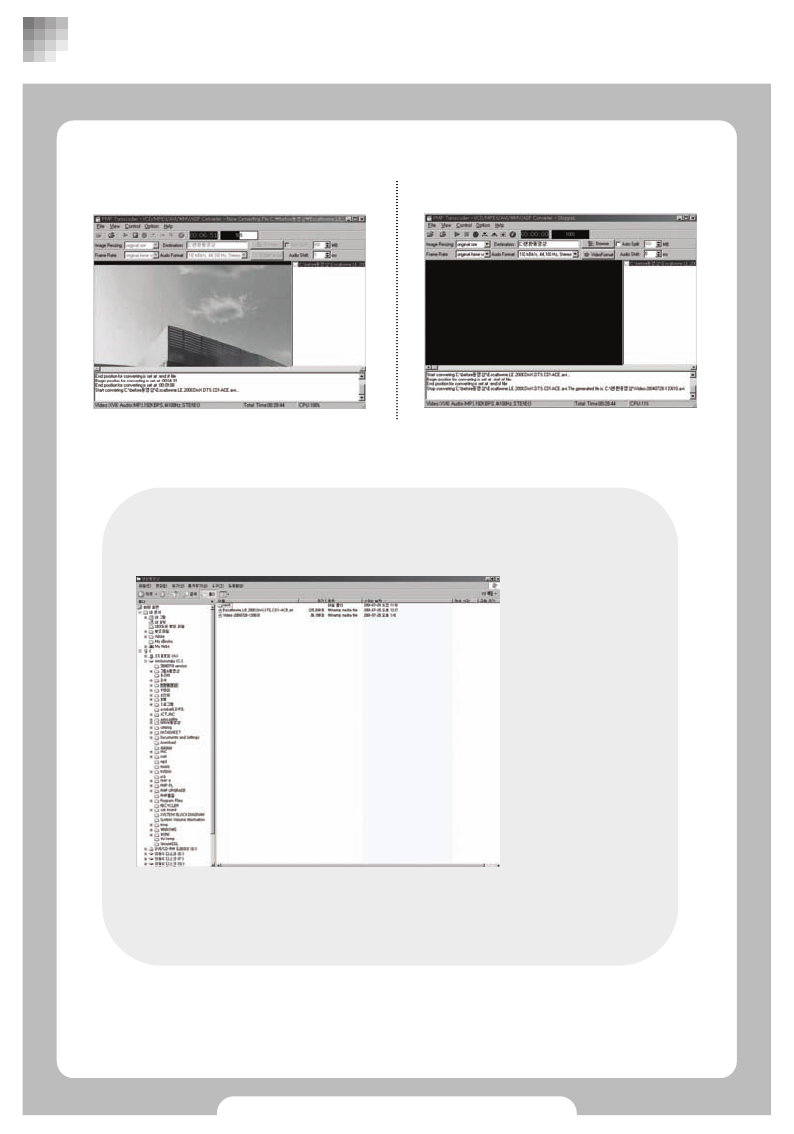
8. Sectional file converting will start. 9. File converting completed.
Review converted movie file.
Converted file name is identical to the original file name.
In case of duplicate file name, ‘video-yy/mm/dd’will be added.
When it’s non convertible or there are error messages please check if the
original file is not corrupted and try different resolution by using “Image
Resizing”in the left upper part of the screen.
TRANSCODER
40
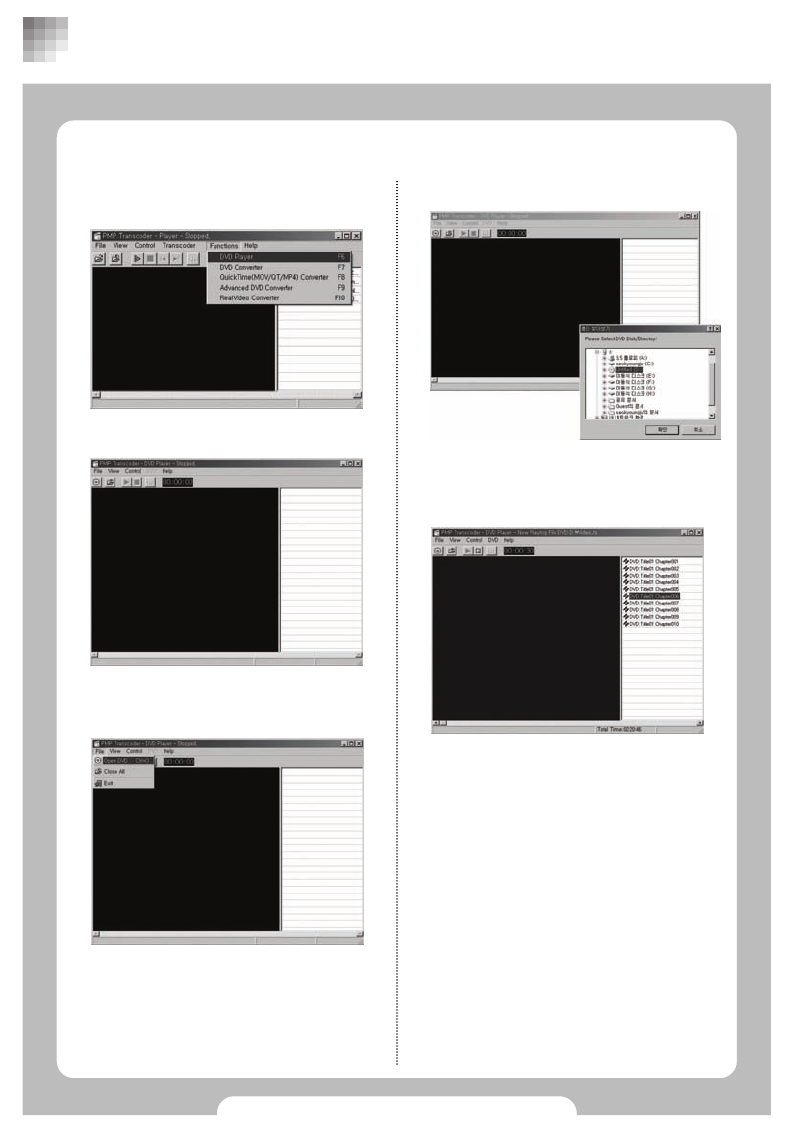
■ DVD PLAYER –Playing DVD
1. Select ‘Functions’→‘DVD Player’in the
menu.
2. You will see screen below.
3. Select ‘File’→‘Open DVD’from the
menu.
4. Choose ‘DVD’and play.
5. Double click ‘Chapter list’to play in the
right.
Stop or play by using ‘Control’menu.
TRANSCODER
41
■ Using DVD Converter
Convert DVD to PMP compatible file format.
‘Advanced DVD Converter’features more
improved functions than ‘DVD Converter’.
Menu
File
•Open DVD/DVD directory :
Open files to be converted
•Open Info File : Open Info file
•Open VOB File : Open VOB file
•Close All : Close DVD file
•Exit : Exit DVD Converter program
View
-Show/Hide LogInfo :
Show/Hide Log Info
- Show Mixer : Show audio option setting
window
Control
•Stop : Stop converting
•Convert All Checked Chapters :
Convert all checked chapters
•Check All Chapters : Check all chapters
•Uncheck All Chapters :
Uncheck all chapters
•Set Begin Position For Current title :
Set begin position of new section for
current title
•Set End Position For Current title :
Set end position of current section
•Set Whole Title For Converting :
Convert whole contents of current title.
•Convert Current Title :
Convert selected sections of current title
DVD
•Select Audio : Select audio file
•Select Sub picture : Select sub title type
•Enable Deinterlace(PAL,slower) :
Enable Deinterlace(PAL,slower)
•Enable preview : Enable preview
Option
•Setup Watermark :
User preferred icons or letters can be
inserted into converted file, wehre
‘bmp’is the only available file format.
•Enable Audio : Set audio file active
Select file to be
inserted with Browser
button
TRANSCODER
Help
•Help : Help
•About PMP Transcoder :
Displays program version and information
•Download QuickTime Player :
Shows link to the website where
QuickTime Player can be downloaded.
•Download Real Player :
Shows link to the website where Real
Player can be downloaded
•Download Other Codecs :
Shows link to the website where Codec
can be downloaded
42
■ Converting DVD files
Use same way as DVD Converter
There are more additional features.
Option
•Enable Full Speed Mode
(The subpicture maybe distorted) :
Converting speed depends on user’s
PC specification.
•Convert Selected Chapter(s) to One
File : Convert selected chapters only.
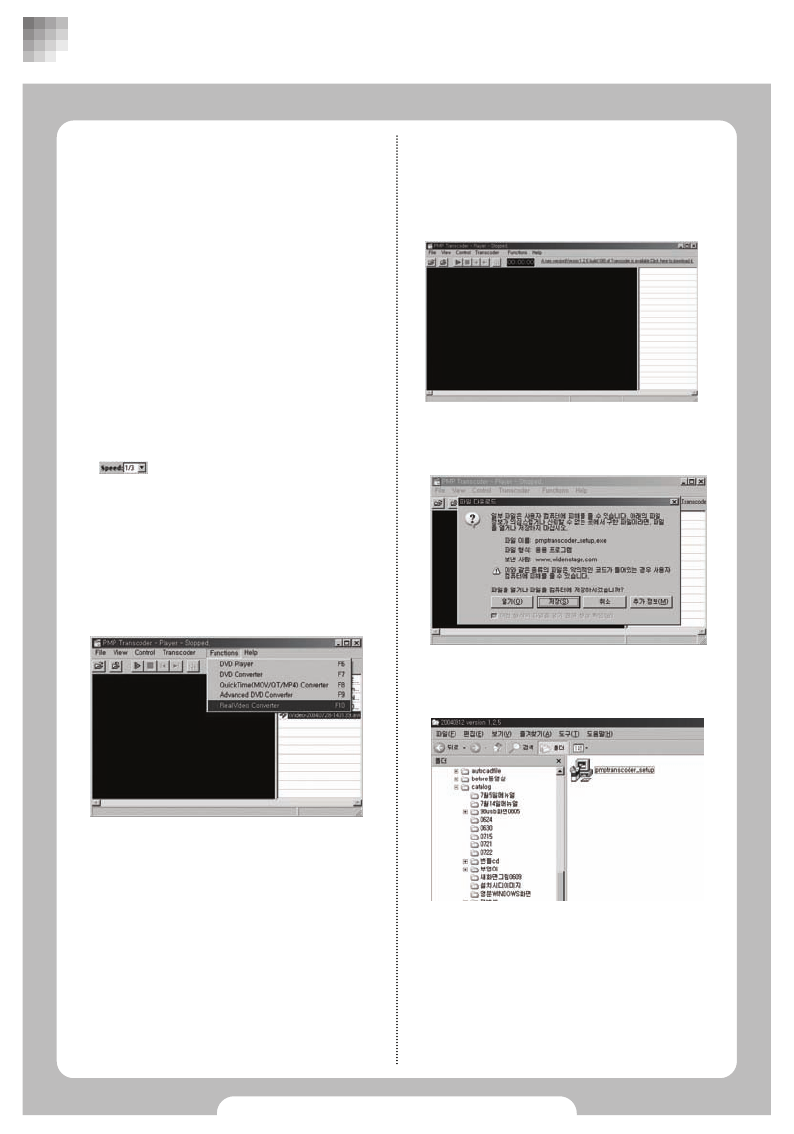
Upgrading Transcoder
Added Icons
Converting speed setup.
Converting
Refer to DVD Converter instruction.
RealVideo Converter
Convert Real Video files.
•Select ‘Functions’→‘RealVideo
Converter’menu.
•Directions for usage is same as
Transcoder.
1. During running Transcoder, program to be
upgraded will appear in the right upper
side with updated version Information.
2. Click the highlighted and save the
program.
3. Run the upgrade program to complete
upgrade.
TRANSCODER
43
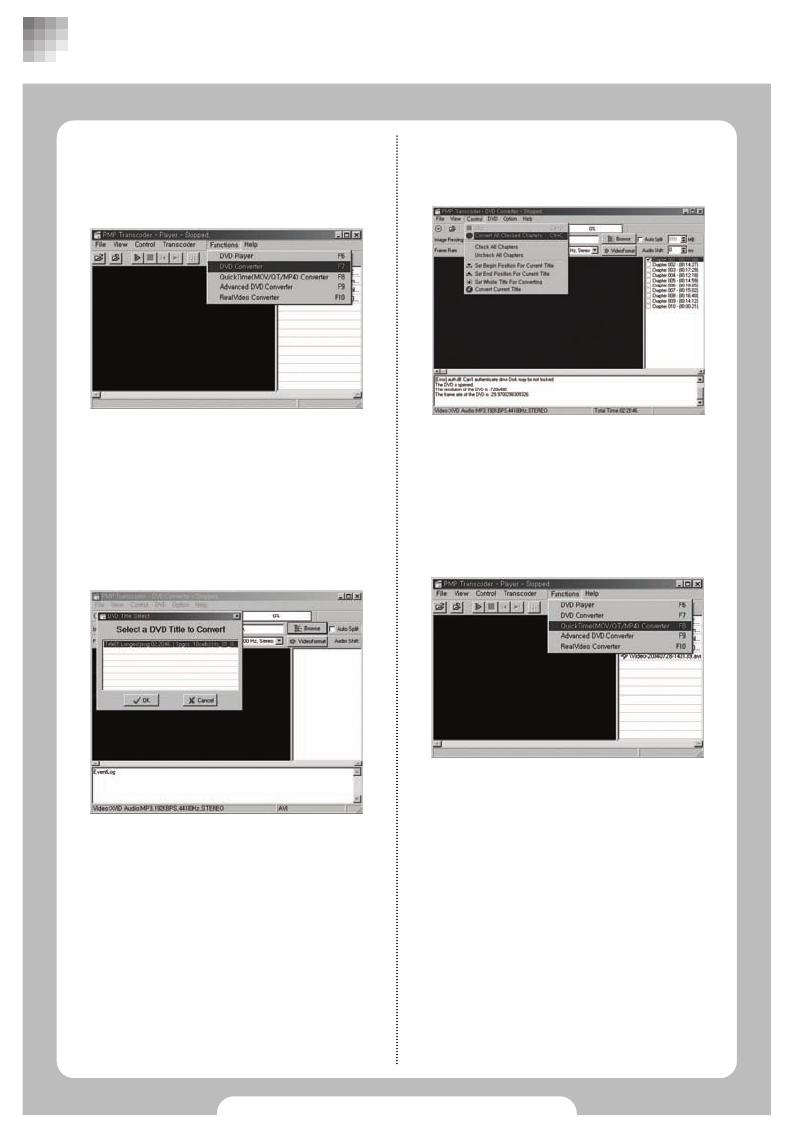
■ Advanced DVD Converter
1. Select ‘Functions’→‘DVD Converter’
menu.
2. Set location of folder with browser, where
converted files to be saved.
3. Select ‘File’→‘Open DVD/DVD Directory’
in the menu bar, then ‘DVD title select’
window will appear. Choose DVD file.
4. Press ‘OK’after choosing title.
5. Check ‘Chapter list’in the right and
select ‘Control’→‘Convert All Checked
Chapters’to start converting.
Convert QuickTime files with ‘mov, qt,
mp4’extention.
■ QuickTime(MOV/QT/3GP/MP4)
Converter
Select ‘Functions’
→’QuickTime(MOV/QT/MP4) Converter’
menu.
Then follow ‘Transcoder manual’
afterwards.
TRANSCODER
44
■Troubleshooting
•Check whether the battery is exhausted.
The player cannot
be turned on.
•The player may get warm when it is in use for a long time.
The player is warm
when it is in use.
•Make sure the machine is fully charged before using.
•The play time may get shorten with the frequent use of the keys.
•Check whether the battery is used off.
The play time is
shorter than the
time written in the
manual.
•Check for the connection of an AC adaptor.
•Check whether the player is fully charged or not
Charging does not
work.
•Check whether the Headset is fully charged or not.
The Bluetooth
Headset does not
work.
•Check whether the battery is exhausted.
•Check the HOLD key is turned on.
•Check for the level of volume.
•Check for the connection of the earphone.
•Check the MENU key is turned on.
The key does not
work.
SolutionProblem
•Check the hard disk for bad sectors and run the Disk Defragmenter or
the Disk Cleanup program.
•Check whether the original file is normal.
•Check the system and run the Disk Defragmenter and Cleanup
programs regularly.
•Format the hard disk before using.
The key does not
work while
recoding/voice
recoding, or the file
size is different from
the original.
•The player may stop working when keys are pressed improperly while
the player is working or when the file on playing is a damaged one.
To solve the problem, press the RESET button on the bottom of the
machine and delete the damaged file.
•A file may not be properly transcoded. If this happens, try to
transcode the file again according to the direction in the manual, and
play it.
•Check the MENU key is turned on.
The play stops while
working and won’t
start again.
TROUBLESHOOTING
45
■Troubleshooting
•Do not force to unplug the USB cable after downloading the upgrade
file. Download an upgrade file again and try to upgrade the player
again.
The player does not
work after
upgrading.
•Check whether the PAUSE or MUTE keys are turned on.
•Check for the connection of the earphone.
There is noise or no
sound when playing.
•Check the POWER OFF key is turned on.
The playback
screen is not
displayed normally
when seeing the list.
SolutionProblem
•Check whether the earphone is connected. If the earphone is
connected, it is normal that there is no sound in the speaker.
There is no sound in
the speaker.
•Check whether the file was transcoded properly.
•Play the transcoded file on the computer. It may not have been
properly transcoded even though the computer can play the file.
Delete the file and transcode it again.
A file cannot play
after transcoding.
•The computer with the Windows 98 or below needs to install a
separate USB driver.
•Make sure the USB driver is properly installed.
•Make sure the computer is rebooted after the driver is installed.
The machine does
not recognize USB
devices.
•Check whether LCD Brightness of the SETUP menu is sep up for 01.
The LCD screen is
dark.
•Check for the connection of the RCA cable.
•Check the TV channel is selected for EXTERNAL INPUT.
The TV OUTPUT
does not work.
•Check whether the AV cable was properly connected with the right
terminal when recoding.
•Check whether recoding was done on the PREVIEW screen.
The playback
screen is not
displayed normally
after recoding.
TROUBLESHOOTING

46
USB Full Speed (Max. 12Mbps)USB Host
USB 2.0 High Speed (Max. 480Mbps)USB DeviceUSB Interface
1.8inch 60G, FAT32 File systemHard DiskCapacity
DC 5.0V, 3AAC Adapter
Takes 5hours to fully chargedBattery Charging
Time
Built-in Rechargeable Lithium Polymer Battery
4100mAh
Built-in BatteryPower
+2dBmTransmitter Power
-80dBmReceiver Sensitivity
A2DP(Audio Streaming), AVRCP(Remote control)Profile
Class2Class
V1.2 CompliantBluetoothBluetooth
MonoBuilt-in Microphone
StereoBuilt-in Speaker
90dB (with 16 Ohm)SNR
16 Ohm earphones : 32mW + 32mWMax Output
20Hz ~ 20KHzFrequency Range
StereoChannelAudio
NTSC / PAL (Composite Video Input/Output 75ohm
1.0Vpp)
Video Format
4.3 inch, 480x272 Resolution, Digital TFT LCDDisplay Video
260g WeightSpecifications
131.8x78.5x19.8mmSize General
Product Specifications
SPECIFICATIONS
47
recommend 2.0High SpeedUSB Port
128Mbyte or MoreRAM
Windows 98SE, ME, 2000(with service pack v3), XPOS
233Mhz or HigherCPU
PC
External DMB TunerOption
1000 Files per Folder
Playable
media files
G.726Audio Codec
ASFFile Format
Line-in, Mic
Recording
G.726Audio Codec
MPEG4 (640x480 30fps)Video Codec
ASFFile Format
AV
Recording
TXTFile Format Text Viewer
JPG, BMP, TIFF, GIFFile FormatPhoto
Sound SpectrumVisualization
Wolfson 3D enhancement supportSound Effect
User Selectable EQ (Base, Treble Boost)
Preset (Normal, Rock, Pop, Jazz, Classical, Dance, Heavy,
Disco, Soft, Live, Hall)
EQ
LDB, LyricsLyrics
ID3 V1, V2.2, V2.3ID3 Tag
8Kbps ~ 1.4Mbps (Up to OGG Q10)
Audio
Resolution
MPEG 1/2/2.5 Layer 3, WMA(ASF), Ogg Vorbis, G.726(ASF)Audio Codec
MP3, WMA(ASF),OGGFile Format
Audio
Player
SMI FormatSubtitle
AC3 Downmix, MP3, WMA, L-PCM, AAC-LC Audio Resolution
Max. 48KHz, 448 kbps
Audio Codec
Divx, XviD (Max. 800x576, 30fps)
Video
Resolution
Divx 3.11/4/5, XviD, MPEG4, WMV9 MP@LL, H.264, MPEG2Video
AVI, ASF, WMV, MPG, MP4, M1V, M2V, MPVFile Format
Video
Player
Software Specifications
SPECIFICATIONS