ELITEGROUP COMPUTER SYSTEMS G553IBXX Notebook PC with 802.11b WLAN User Manual G553 user namual update
Elitegroup Computer Systems Co., Ltd Notebook PC with 802.11b WLAN G553 user namual update
Contents
- 1. Users Manual Part 1 Revision 2
- 2. Users Manual Part 2 Revision 2
Users Manual Part 1 Revision 2


![UUssiinngg tthhee NNootteebbooookk CCoommppuutteerr Adjusting the LCD Screen Display The LCD screen display can be adjusted by the following key combinations. KEYS FUNCTIONS [Fn] + [F7] Decreases the brightness level. [Fn] + [F8] Increases the brightness level. [Fn] + [F10] Use this key combination to expand your video screen or reset to its original size. This function will be disabled when the system is in](https://usermanual.wiki/ELITEGROUP-COMPUTER-SYSTEMS/G553IBXX.Users-Manual-Part-1-Revision-2/User-Guide-466177-Page-41.png)
![40 Overlay mode (playing video). [Fn] + [F12] This key combination toggles the display between the LCD, CRT, simultaneous LCD/CRT, and TV only. This function will be disabled when the system is in Overlay (playing video) or Extended Desktop mode. LCD Care LCD screens are delicate devices that need careful handling. Please pay attention to the following precautions: • When you are not using the computer, keep the LCD screen closed to protect it from dust. • If you need to clean your LCD screen, use a soft tissue to gently wipe the LCD surface. • Do not put your fingers or sharp objects directly on the surface and never spray cleaner directly onto the display. • Do not press on, or store any objects on the cover when it is closed. Doing so may cause the LCD to break. EExxtteerrnnaall CCRRTT DDiissppllaayy You can hook up an external monitor through the 15-pin CRT connector. Configurations are available: • LCD only • CRT only • Simultaneous display of the LCD screen and CRT monitor • TV only You can switch between these display configurations by pressing the key combination [Fn] + [F12].](https://usermanual.wiki/ELITEGROUP-COMPUTER-SYSTEMS/G553IBXX.Users-Manual-Part-1-Revision-2/User-Guide-466177-Page-42.png)
![41 A Tour of the Notebook’s Keyboard The Notebook’s keyboard uses a standard QWERTY layout with the addition of special function keys and an embedded numeric keypad for number intensive data entry. Your keyboard supports Windows by incorporating the two Windows specific keys. With the two Windows keys you will be able to access and take advantage of many of the timesaving features of Windows software. The function keys (F1-F12) on the top row of the keyboard, serve different purposes and carry out different tasks depending on the application you are running. The cursor (arrow) keys (which are all located in the lower right corner of your keyboard) and the [PgUp], [PgDn], [Home] and [End] keys (which are located along the right edge of the keyboard) allow you to move the active cursor of the computer to various locations on the screen or within the document. The embedded numeric keypad consists of 15 keys that make number intensive input more convenient. Like the [Num Lock] key, these keys are labeled in blue on the keycaps. Numeric assignments are located at the upper right of each key. When the numeric keypad is engaged, the NumLock icon will appear in the System Window. The keypad is activated by pressing the [Fn] + [NumLk] key. If an external keyboard is connected, pressing the NumLock key on either the Notebook or external keyboard will enable/disable NumLock of both keyboards in unison. To disable the Notebook numeric keypad while keeping the keypad on an external keyboard activated, use the [Fn] + [NumLk] hot key on the Notebook keyboard.](https://usermanual.wiki/ELITEGROUP-COMPUTER-SYSTEMS/G553IBXX.Users-Manual-Part-1-Revision-2/User-Guide-466177-Page-43.png)
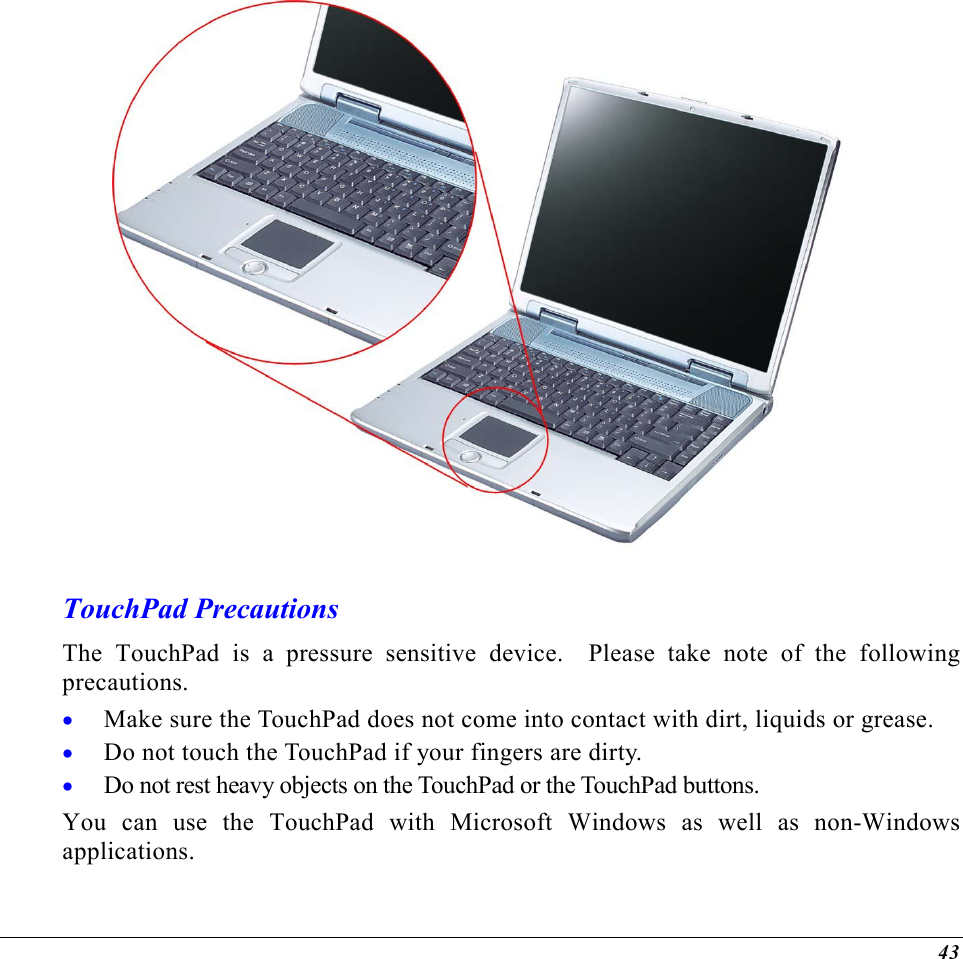
![42 The Notebook’s Hot Key Controls KEYS FUNCTION(S) Power Button Press this button once to power on or enter the suspend/resume mode. Press this button for more than 4 seconds to power off the system. Internet Button Open Internet WWW Home short-cut key Email Button Open Email Reader short-cut key [Fn] + [F1] This key combination turns on/off the battery beeping sound [Fn] + [F2] This key combination turns on/off the volume. [Fn] + [F3] Decreases the speaker volume. [Fn] + [F4] Increases the speaker volume. [Fn] + [F7] Decreases the brightness level. [Fn] + [F8] Increases the brightness level. [Fn] + [F10] Use this key combination to expand your video screen or reset to its original size. This function will be disabled when the system is in Overlay mode (playing video). [Fn] + [F12] This key combination toggles the display between the LCD, CRT, simultaneous LCD/CRT, and TV only. This function will be disabled when the system is in Overlay (playing video) or Extended Desktop mode. The TouchPad The touchpad is a rectangular electronic panel located just below your keyboard. You can use the static-sensitive panel of the touchpad and slit it to move the cursor. You can use the buttons below the touchpad as left and right mouse buttons.](https://usermanual.wiki/ELITEGROUP-COMPUTER-SYSTEMS/G553IBXX.Users-Manual-Part-1-Revision-2/User-Guide-466177-Page-44.png)

![51 Small Battery for the Real Time Clock There is a small built-in battery pack that supplies power to the system in order to maintain certain system information while the power is off. If the Notebook is left without a power source for long period of time, this battery will be exhausted and system information will be lost. Danger of explosion if battery is incorrectly replaced. Replace only with the same or equivalent type recommended by the manufacturer. Dispose of used batteries according to the manufacturer's instructions. Never remove the battery pack while the power is on as this may result in data loss when the system loses power. Resetting the System After installing a software application package, you may be prompted to reset the system to load the changed operating environment. To reset the system, or “reboot,” press the [Ctrl] + [Alt] + [Delete] keys simultaneously. This is known as “warm boot.” This key combination acts as “software” reset switch when you encounter hardware or software problems, which lock up the Notebook. If this key combination does not shut down the Notebook, you can reset the Notebook by using the Notebook’s power button. Should the Notebook lock up for some reason, pressing this button powers the Notebook off. Adjusting the Brightness To adjust the brightness on the LCD screen, press and hold down the [Fn] key in the lower left hand corner of the keyboard and press the [F7] key to reduce the brightness or [F8] to increase the brightness.](https://usermanual.wiki/ELITEGROUP-COMPUTER-SYSTEMS/G553IBXX.Users-Manual-Part-1-Revision-2/User-Guide-466177-Page-53.png)

![54 Audio The Multimedia Sound System The Notebook’s built-in audio capabilities allow you to take advantage of a wide range of education and entertainment multimedia software. The Notebook is equipped with internal stereo speakers, a microphone, and input audio ports for external audio units. An external microphone can be connected to the microphone jack. External speakers or headphones can be connected to the Notebook’s audio-out jack. External audio devices can be connected to the Line in jack. All audio features are software controlled. The Notebook’s multimedia sound system includes the following features: • Supports Windows Sound System compatibility • Full Duplex operation • Dynamic filtering reduces noise and distortion rate • 16-bit digitized audio playback • A built-in microphone for convenient recording • Built-in stereo speakers • Digitized audio recording through the Notebook’s built-in microphone or any external source Audio Volume Control The Notebook is equipped with hot-key volume controls: Pressing the [Fn] + [F3] hot-key combination decreases the audio output volume, press the [Fn] + [F4] hot-key combination increases the audio output volume.](https://usermanual.wiki/ELITEGROUP-COMPUTER-SYSTEMS/G553IBXX.Users-Manual-Part-1-Revision-2/User-Guide-466177-Page-56.png)