ELITEGROUP COMPUTER SYSTEMS H70QBGXB Tablet PC with 11bg WLAN and Bluetooth User Manual H70 e v2
Elitegroup Computer Systems Co., Ltd Tablet PC with 11bg WLAN and Bluetooth H70 e v2
UserManual.wiki
>
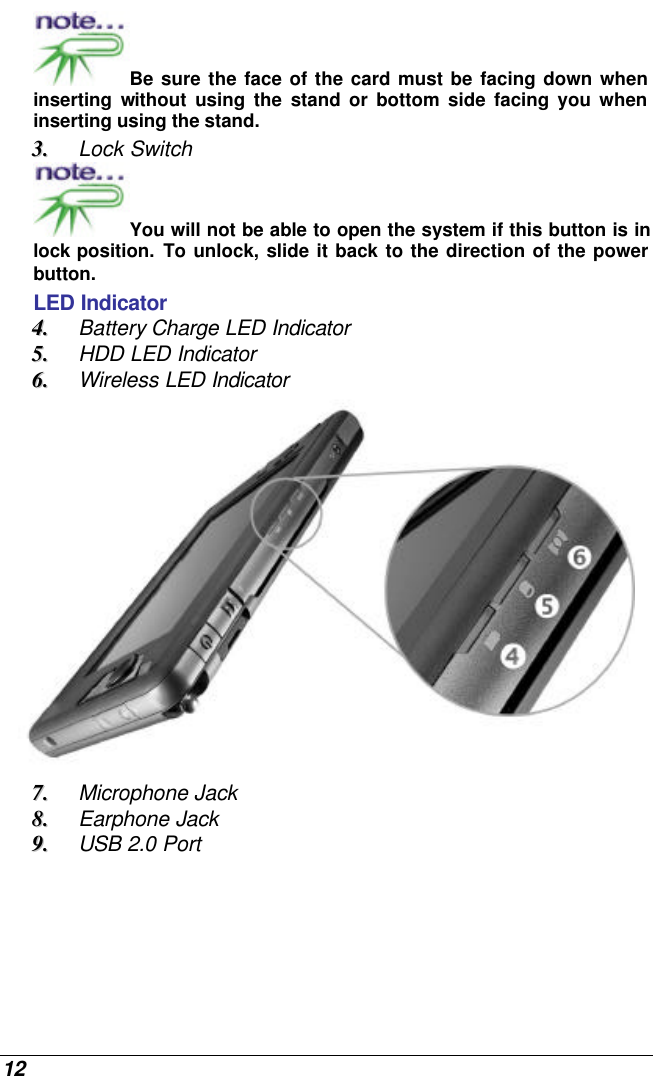
ELITEGROUP COMPUTER SYSTEMS
>
H70QBGXB User Manual
Manual
Navigation menu
Upload a User Manual
Namespaces
Wiki Guide
HTML
PDF
Info
Views
User Manual
Discussion / Help
Navigation


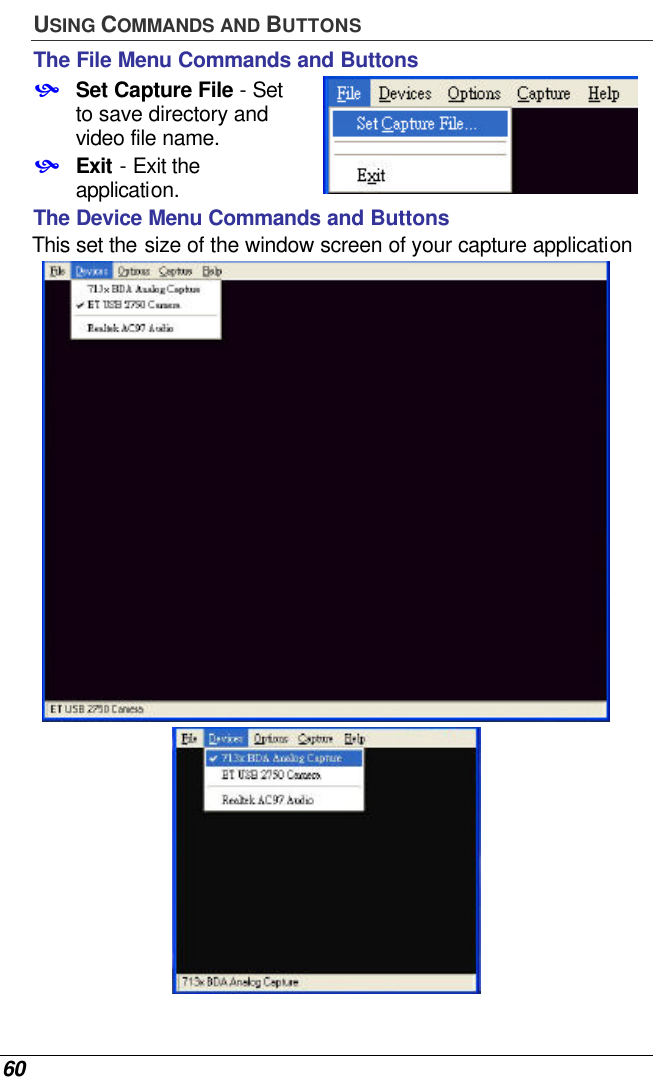
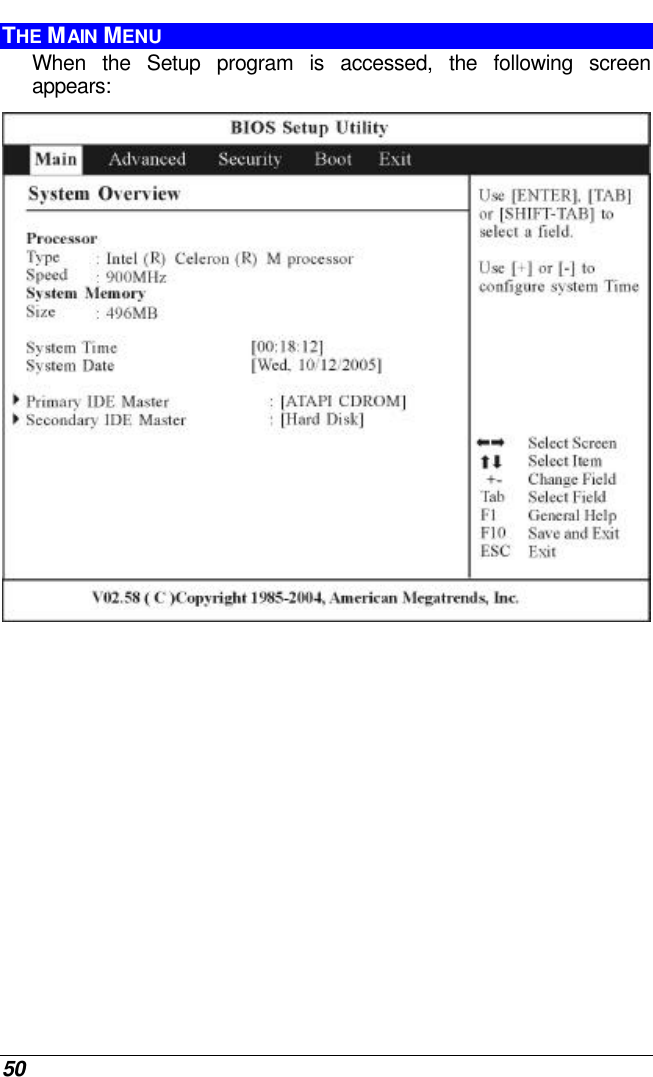
![26 1. Turn on the computer, when the text appears, press [Del] or the [Delete] key until the system enters the BIOS Setup screen, you may now make the necessary changes. 2. Press the è arrow key until it reaches the “Exit” menu screen. Again press the ê arrow key and select the “Battery Calibration” item. Press the [Enter] key and disconnect the AC adapter then press the [Y] key until you hear continuous battery low-low warning beeping sounds. The system will be fully discharge and shutdown completely. 3. Connect the AC adapter and let the battery fully recharge. The “Battery Charge LED” of the computer will light indicating it is in charging status. 4. When the battery charge LED turns off will indicate the system is fully charged. 5. Repeat step 1 to 4 once again. 6. The battery is now fully calibrated. RESETTING THE SYSTEM After installing a software application package, you may be prompted to reset the system to load the changed operating environment. To reset the system, or “reboot,” press the [Ctrl]+[Alt]+[Delete] button. This is known as “warm boot.” This key combination acts as “software” reset switch when you encounter hardware or software problems, which lock up the computer. ADJUSTING THE BRIGHTNESS To adjust the brightness on the LCD screen, use the brightness adjustment button located at the right sides of the system. Press on the + knob to increase and – knob to decrease the brightness of your LCD display.](https://usermanual.wiki/ELITEGROUP-COMPUTER-SYSTEMS/H70QBGXB/User-Guide-634160-Page-36.png)


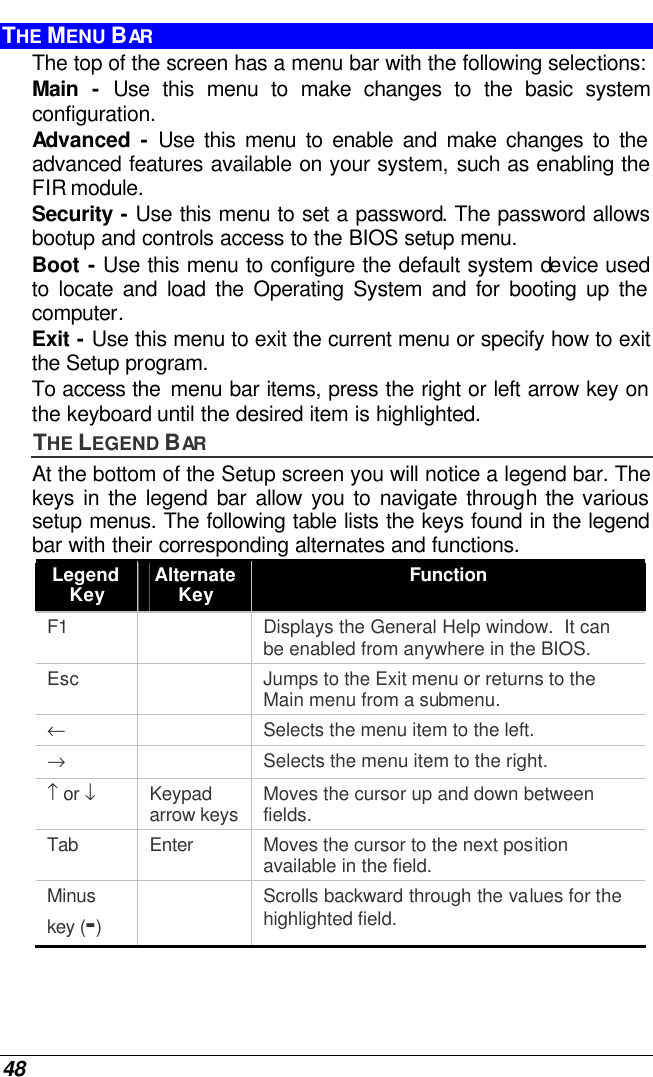
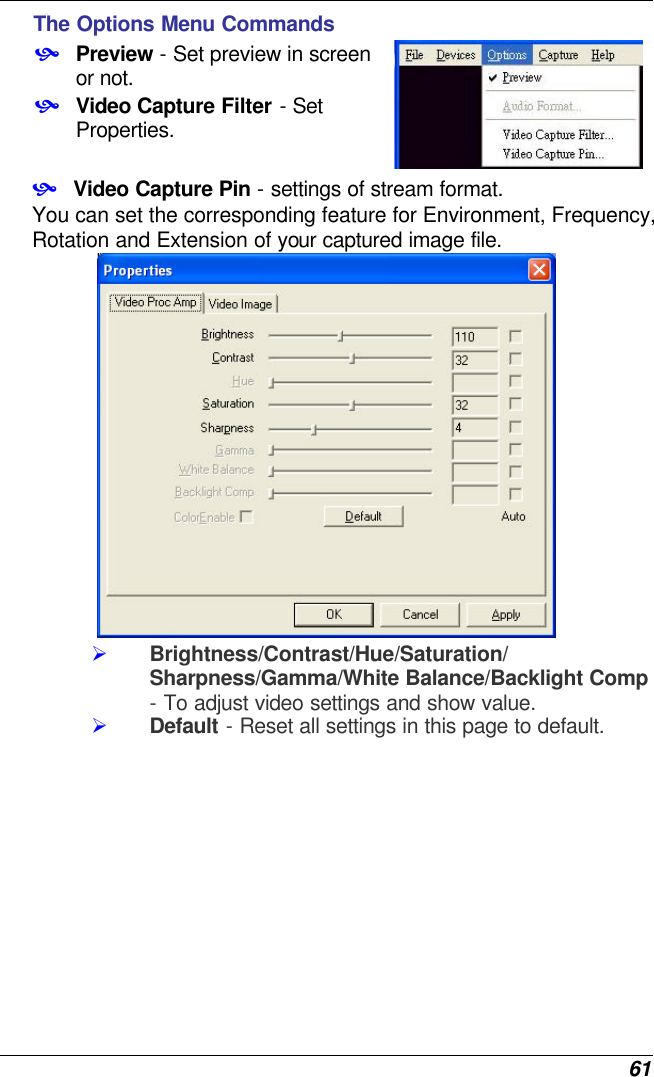
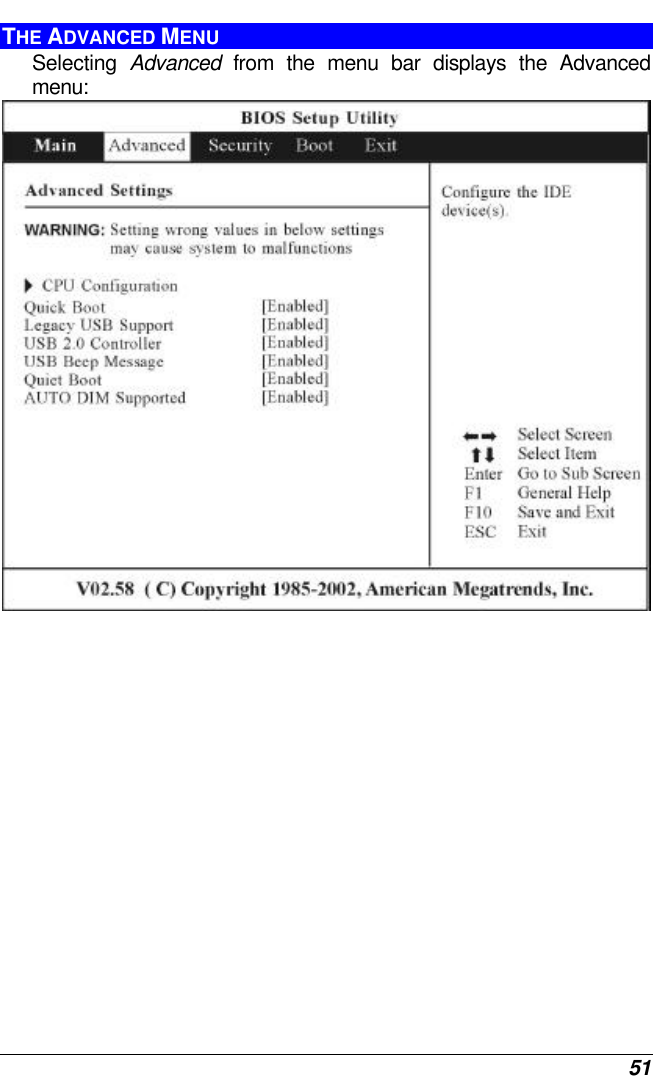
![49 Legend Key Alternate Key Function Plus key (+) Scrolls forward through the values for the highlighted field. Home PgUp Moves the cursor to the field at the top of the window. End PgDn Moves the cursor to the field at the bottom of the window. F9 Sets the parameters for the current menu to their default values. F10 Save and Exit. Enter Will select a sub menu or show a range of options for a field. LAUNCHING SUBMENUS Note that a right pointer symbol u appears to the left of certain fields. This pointer indicates that a submenu can be launched from this field. A submenu contains additional options for a field parameter. To call up a submenu, simply move the cursor to highlight the field and press the [Enter] key. Use the [Esc] key to return to the Main menu. GENERAL HELP In addition to the Item Specific Help window, the BIOS Setup program also provides a General Help screen can be called up from any menu by simply pressing [F1]. Use the [PgUp] and [PgDn] keys or the up and down arrow keys (↑↓) to scroll through the entire help document. Press the Home key to display the first page, press End to go to the last page. To exit the help window, press the [Enter] or the [Esc] key. Save Changes and Exit the Setup Program Refer to the Exit menu section of this chapter for detailed information on saving changes and exiting the setup program.](https://usermanual.wiki/ELITEGROUP-COMPUTER-SYSTEMS/H70QBGXB/User-Guide-634160-Page-59.png)

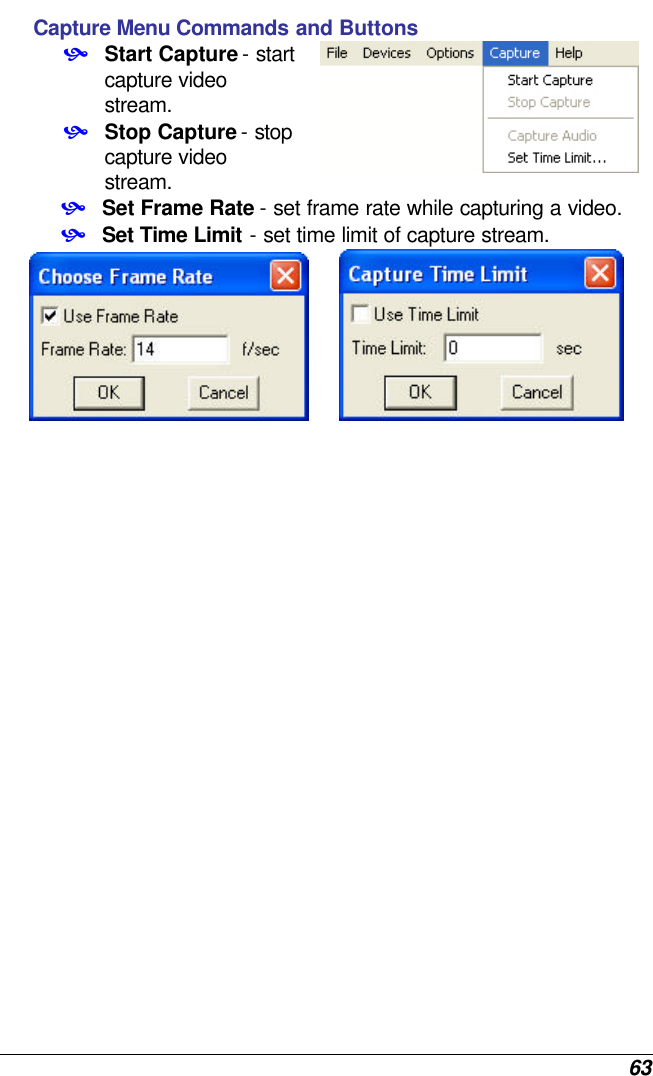
![59 Video Conferencing (Option) This application offers video conferencing capabilities to work and communicate in real-time with one or more participants through streaming video, from any location. You can click on the icon on the Windows screen display to run the capture application. APPLICATION Use the hot key of [Fn] + [F6] to capture the image that appear on your application’s screen. You are allowed to capture the image for a number of times until you save it by selecting the “Set Capture File…” in the “File” menu.](https://usermanual.wiki/ELITEGROUP-COMPUTER-SYSTEMS/H70QBGXB/User-Guide-634160-Page-69.png)