Elster Solutions HHI03 PI900 Handheld Interrogator User Manual
Elster Solutions, LLC PI900 Handheld Interrogator Users Manual
UserManual.wiki
>
Elster Solutions
>
HHI03 User Manual
Users Manual
Navigation menu
Upload a User Manual
Namespaces
Wiki Guide
HTML
PDF
Info
Views
User Manual
Discussion / Help
Navigation

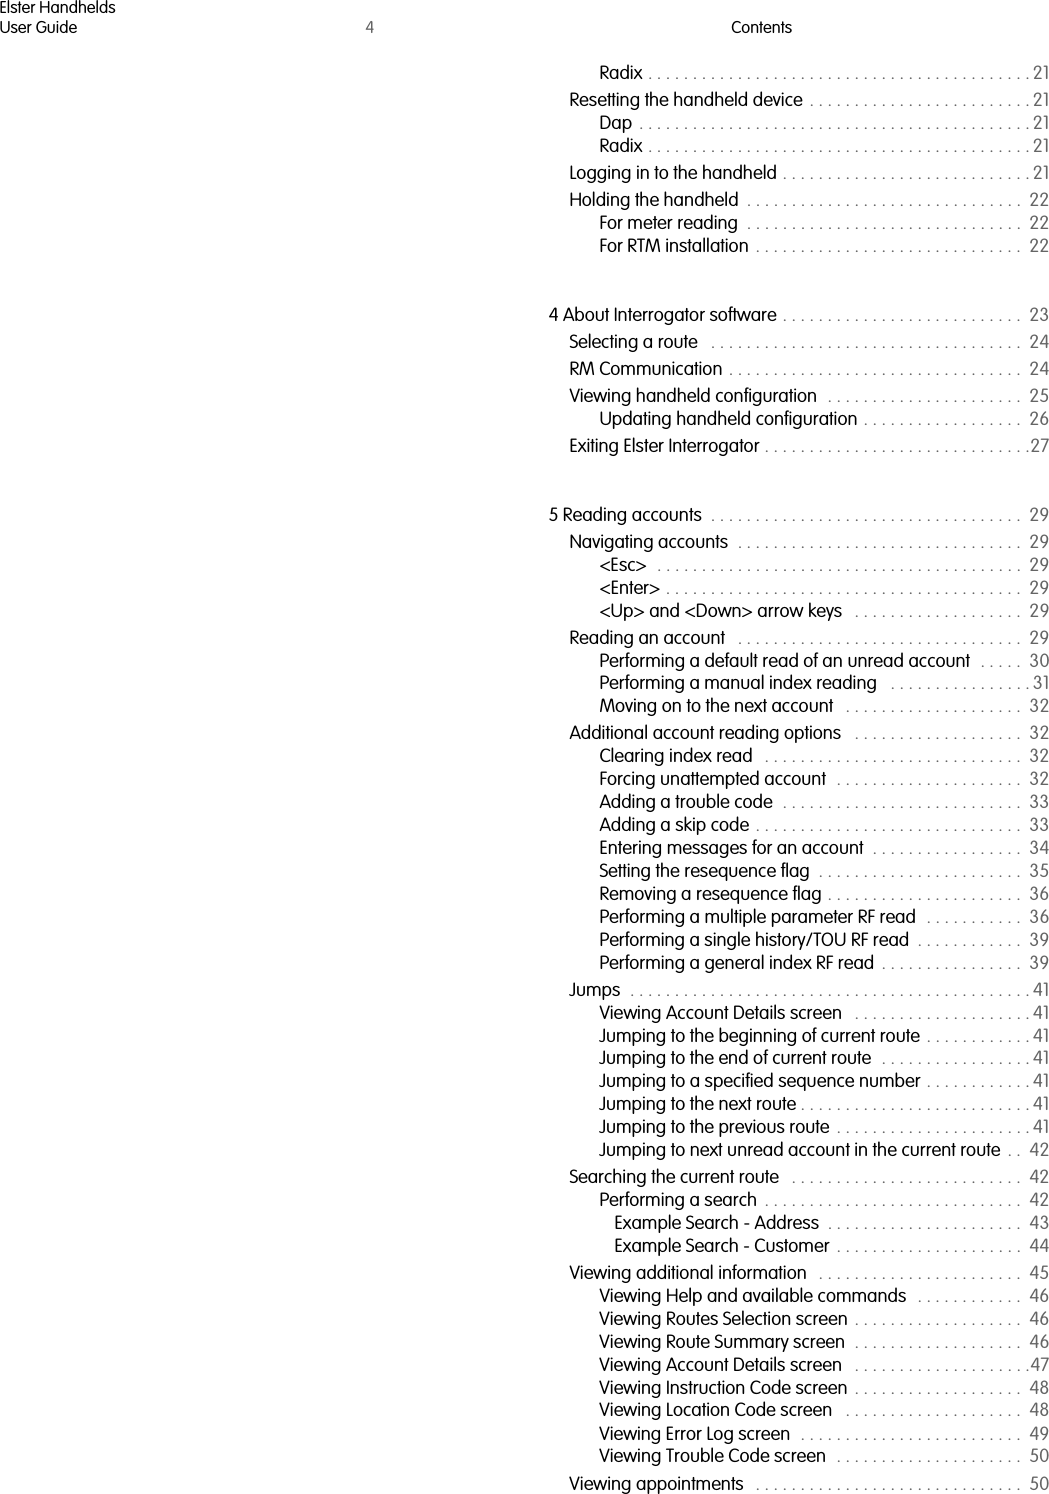


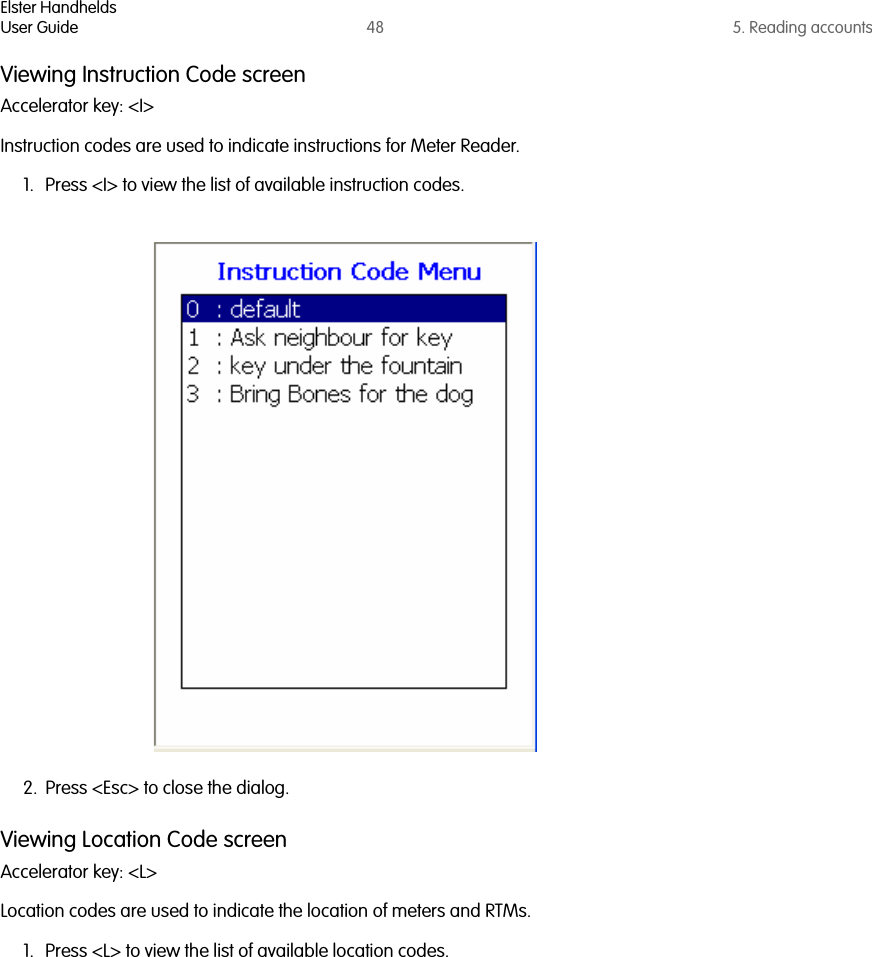
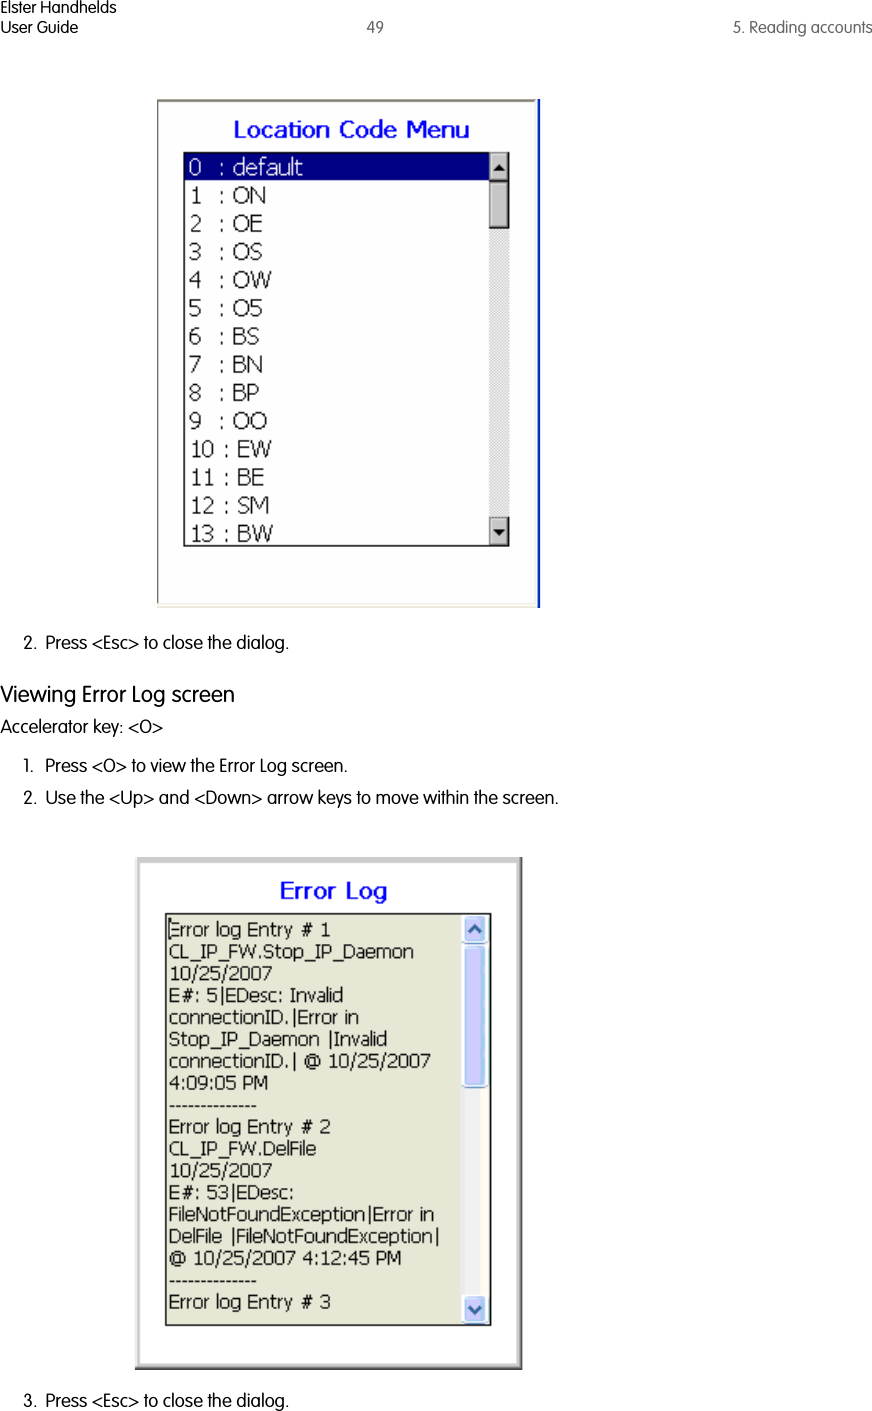
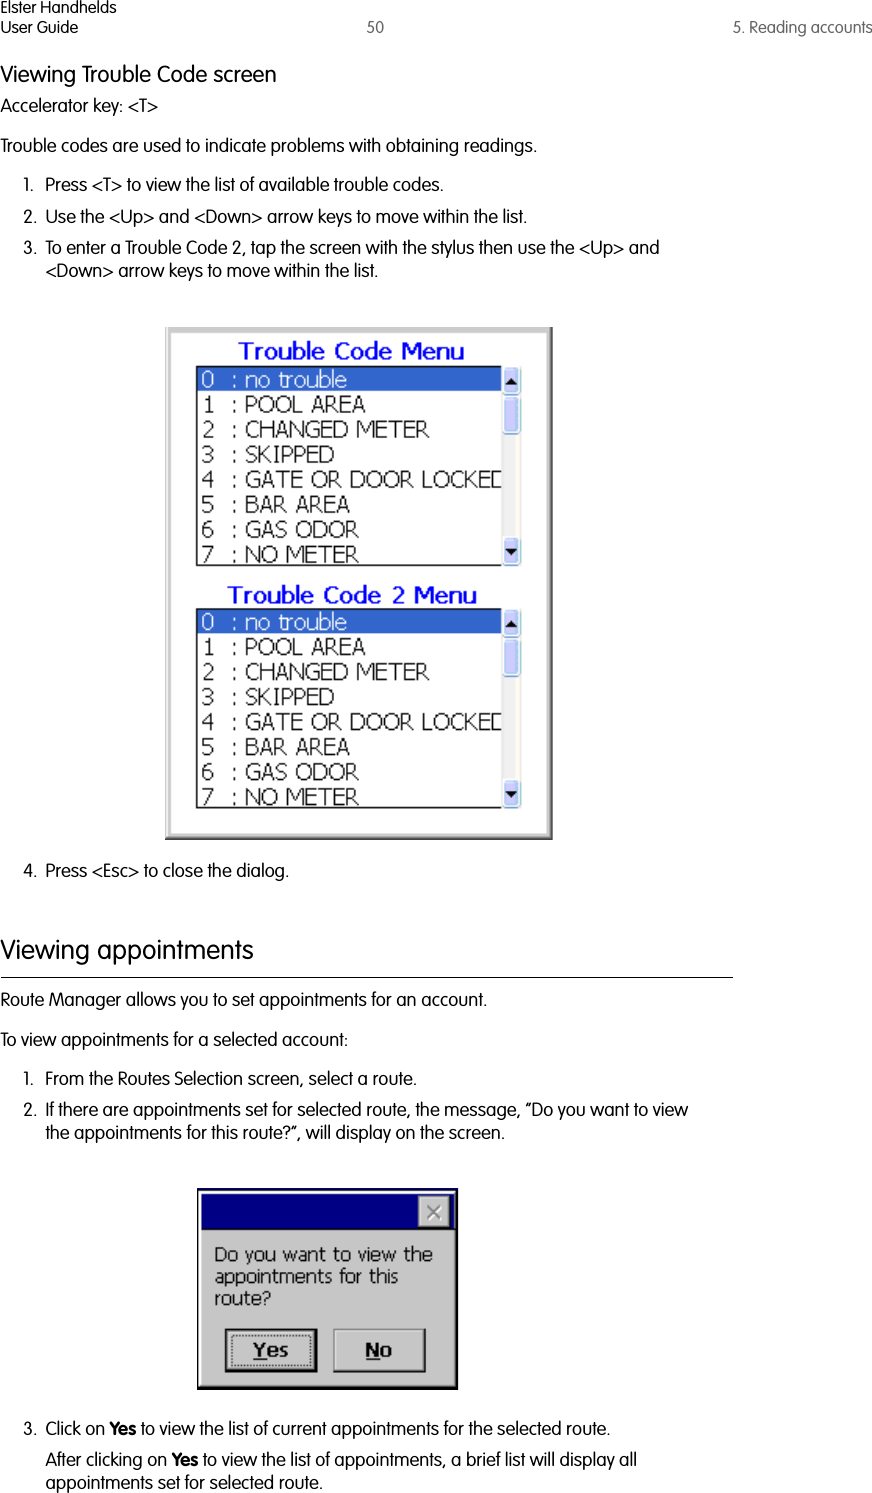
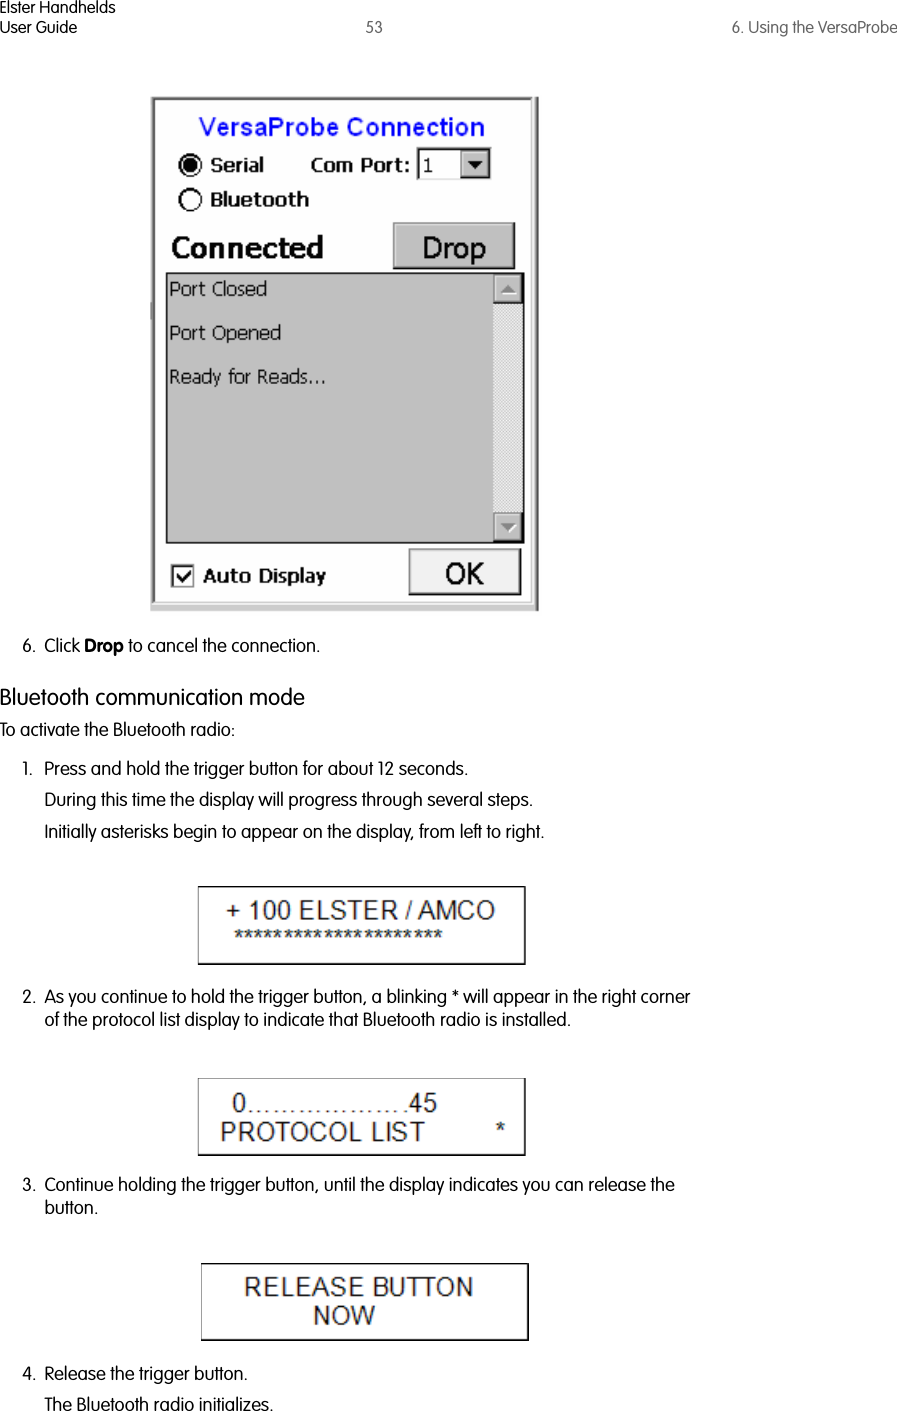
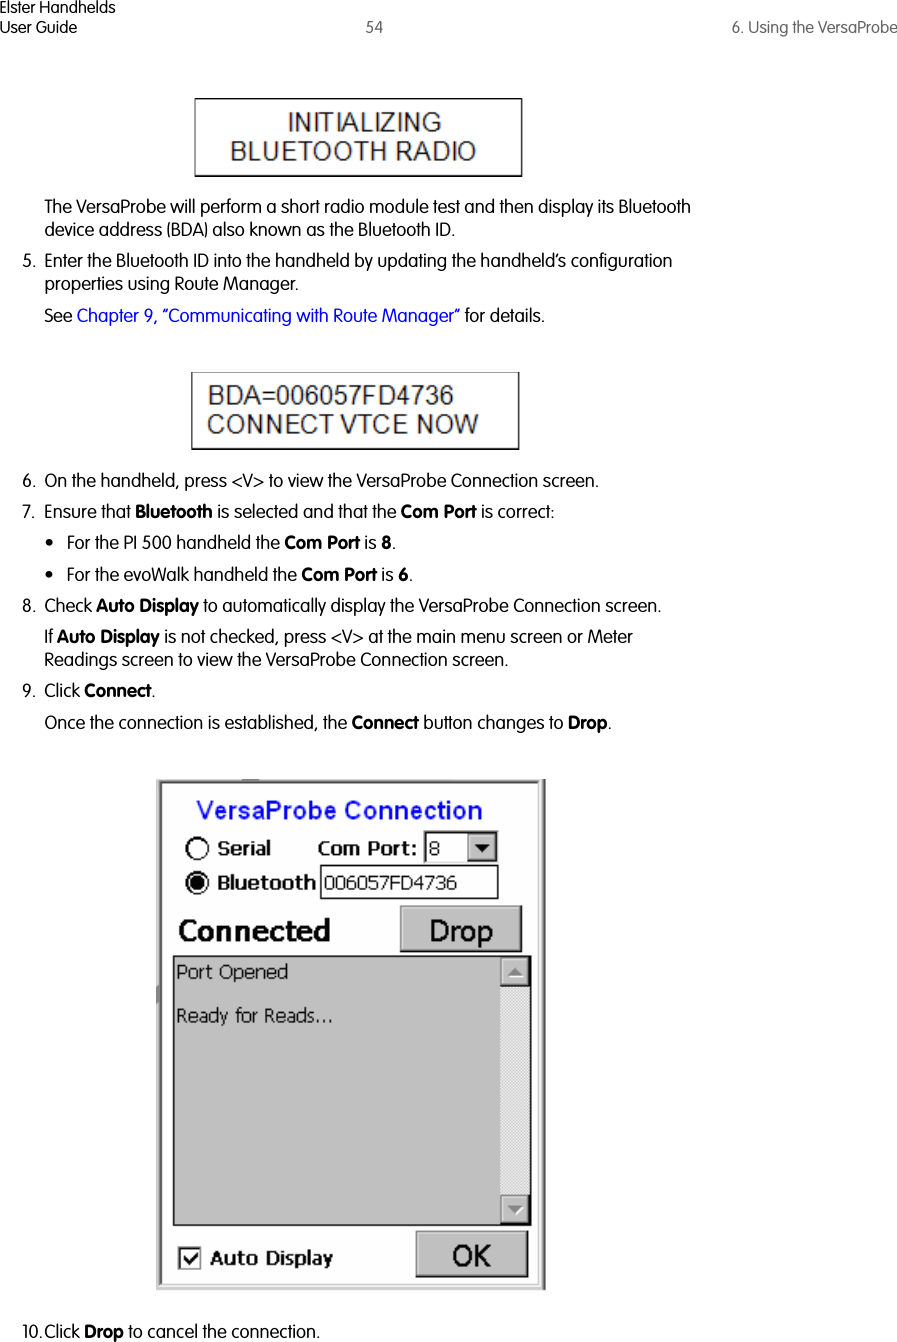
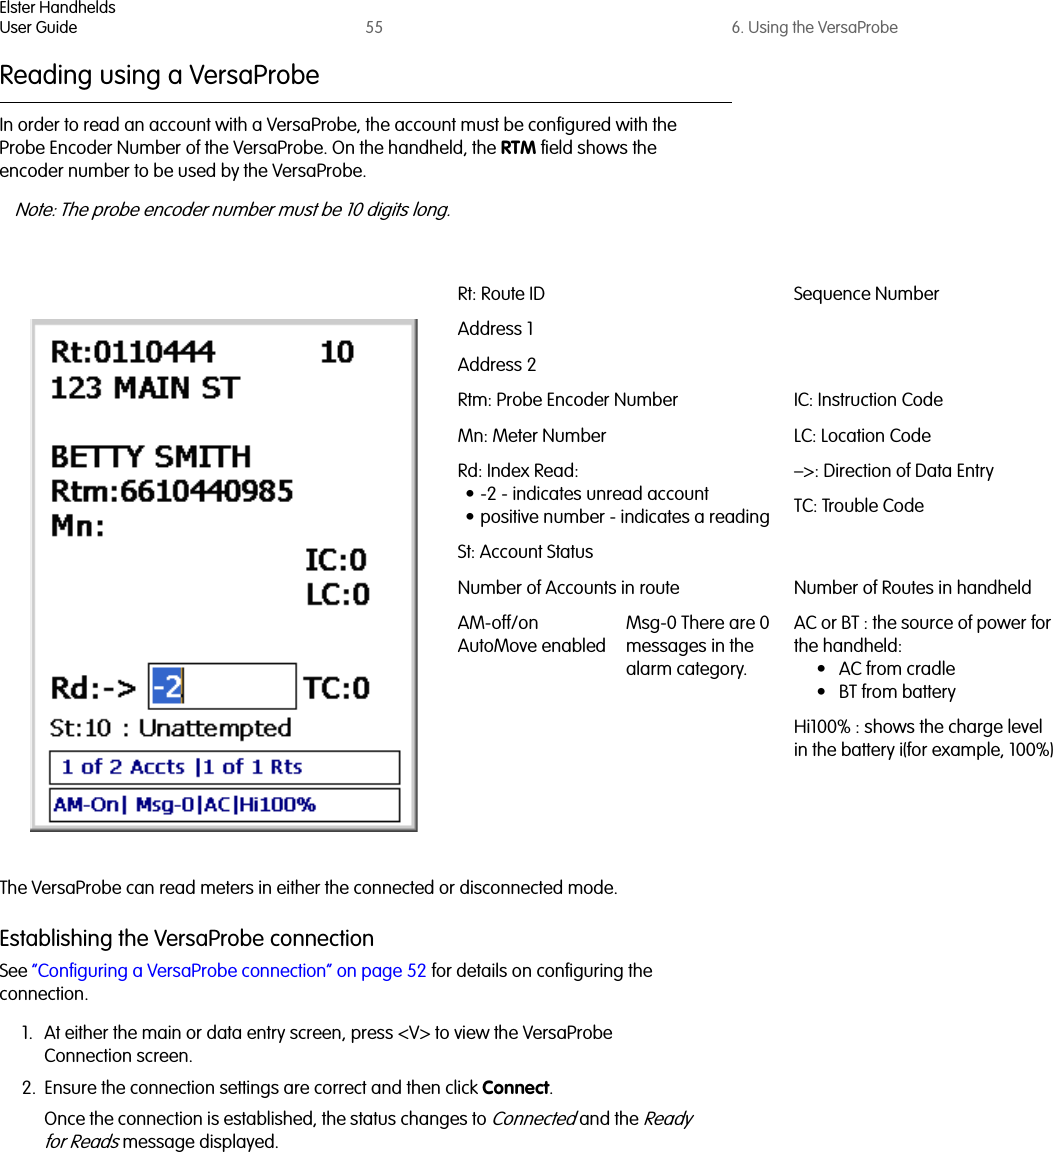
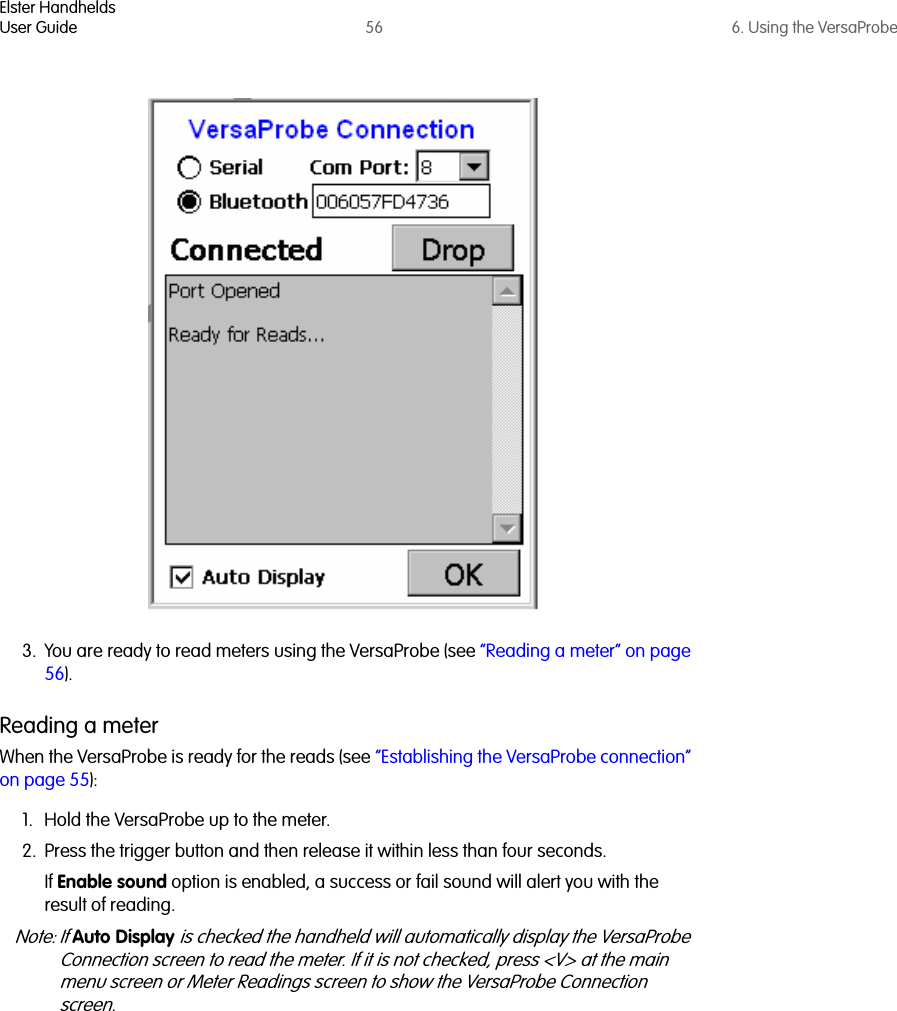
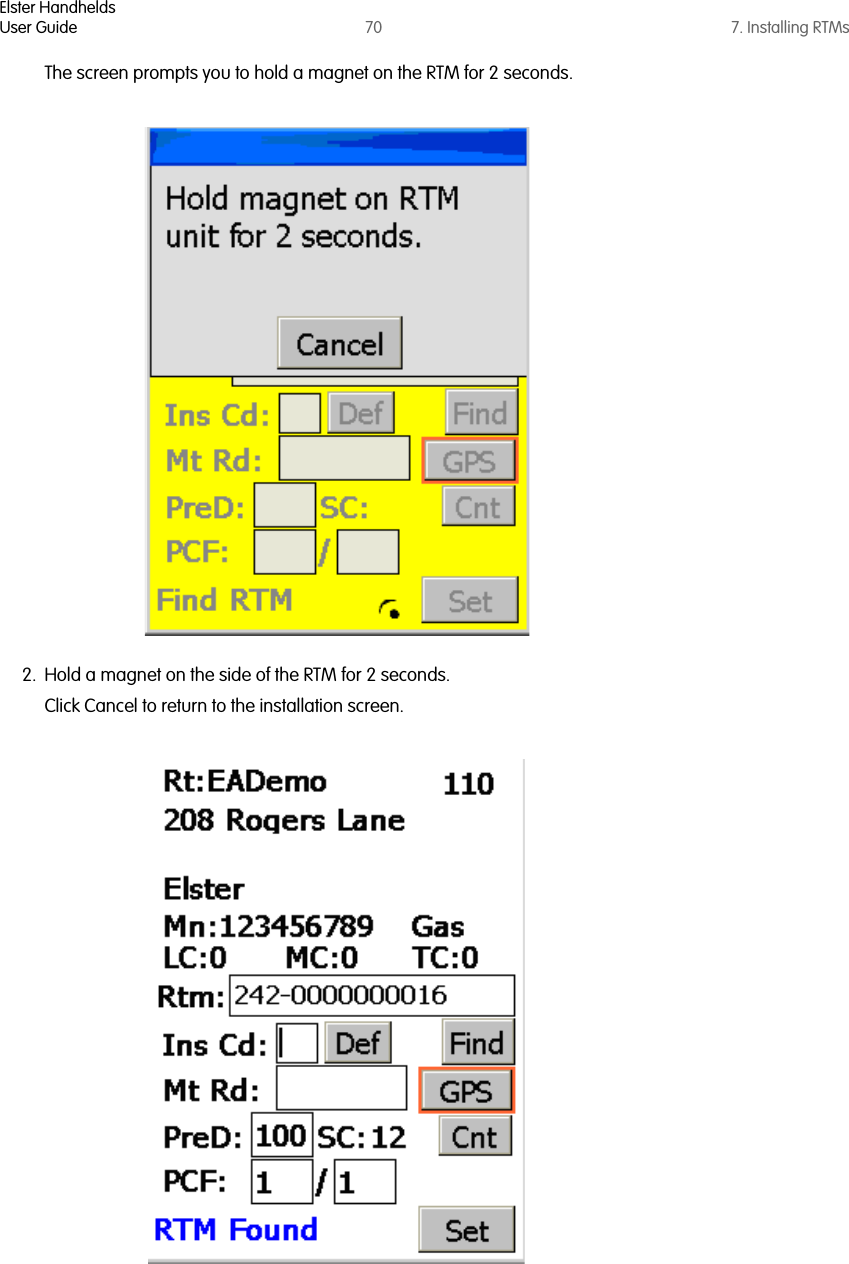
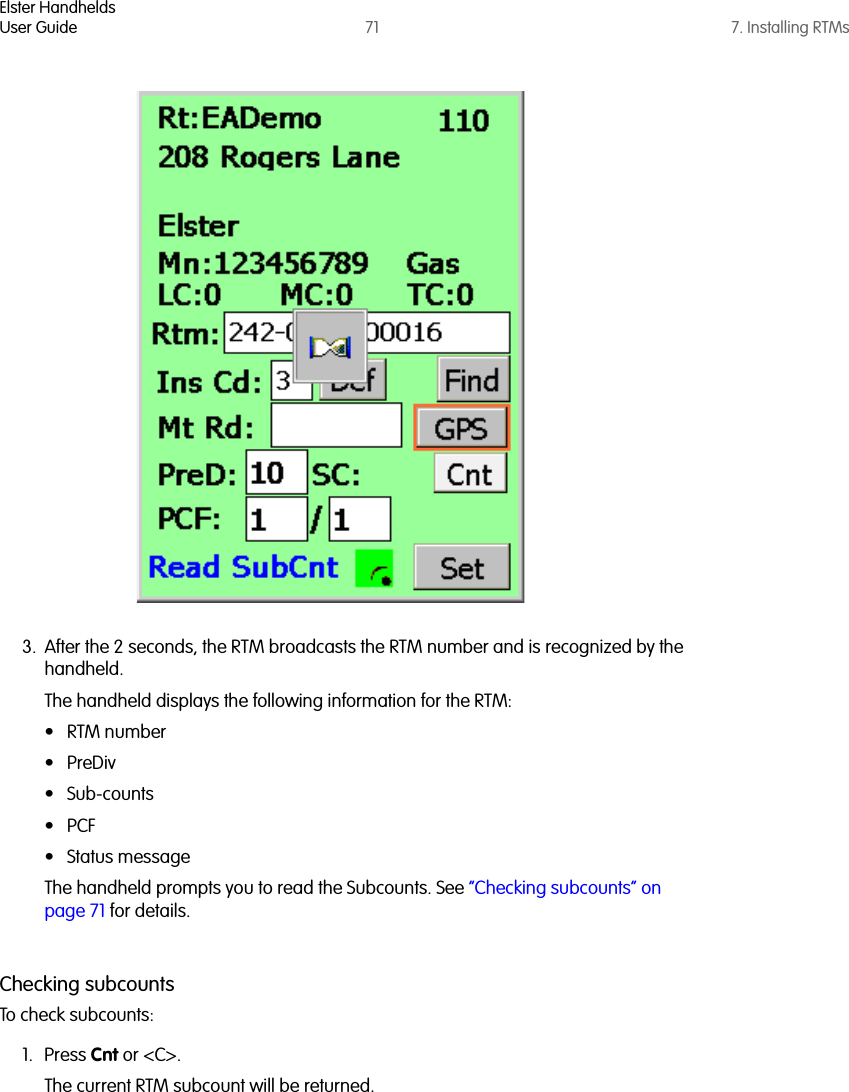
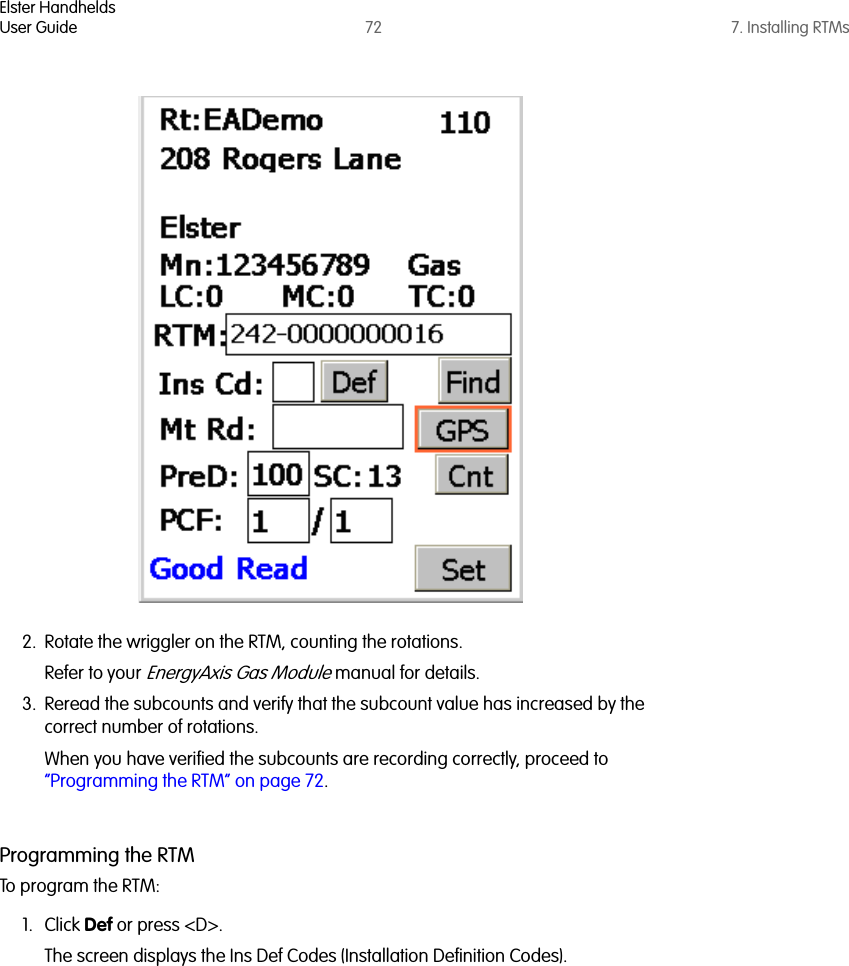
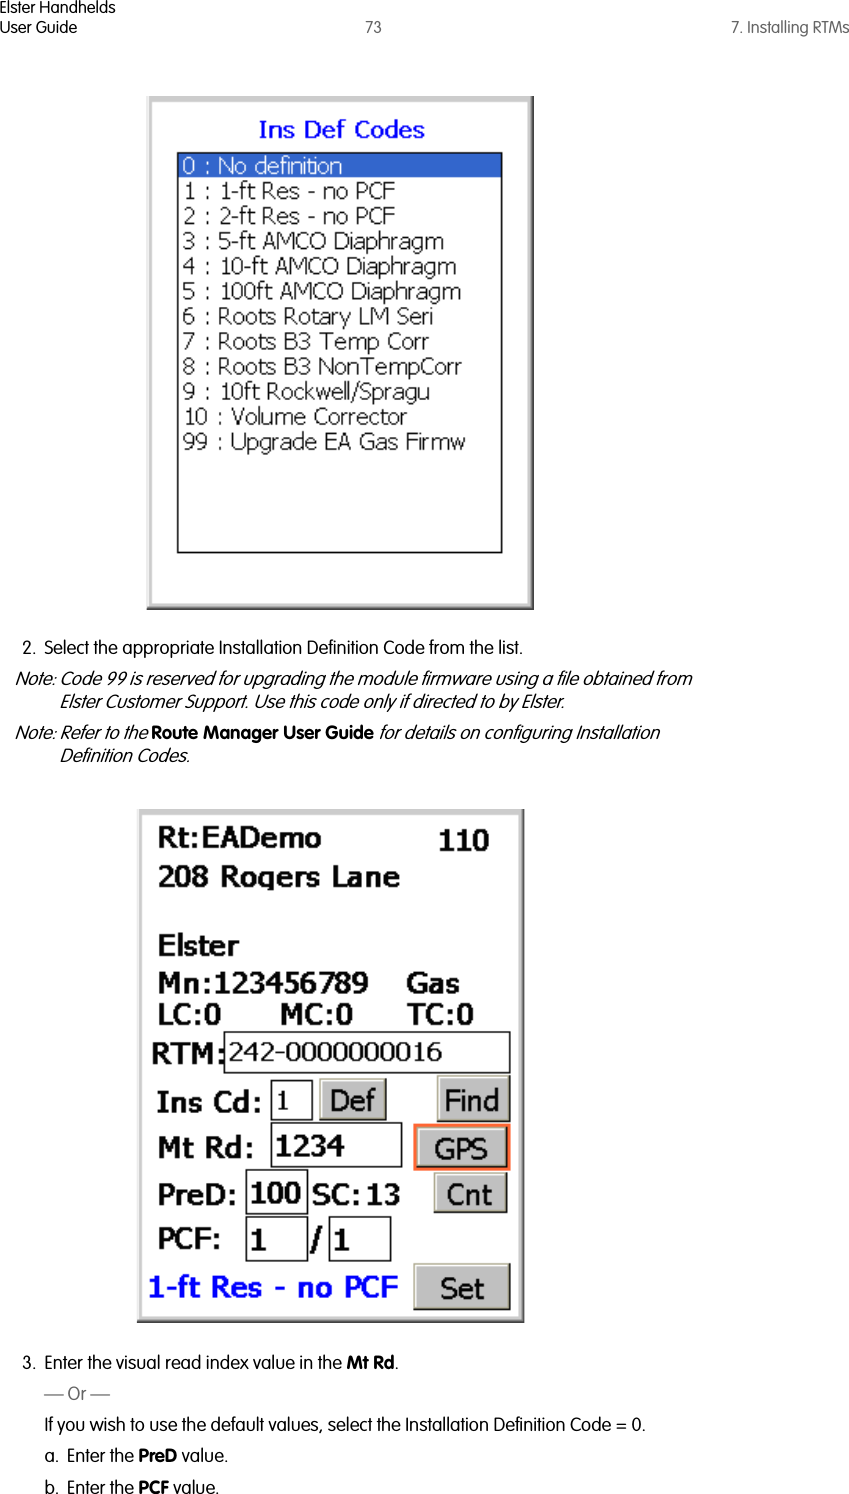
![Elster HandheldsUser Guide 26 4. About Interrogator softwareUpdating handheld configurationNote: The configuration settings should only be modified by the handheld administrator. 1. From the View Configuration screen you can press <F4> again to access the Update Configuration screen. The figure below shows the fields available for update. The table below details the information entered on the Configuration Update screen:Item DescriptionHH Name Enter a maximum of 10 characters for the handheld name. Note: The entered name must match the handheld name in Route Manager.Auto Move Select:•True - to automatically display the next account’s screen after a good read•False - to stay on the account screen after a readCon Type Set the connection type:•1 - for Ethernet communicationNote: Contact Elster Customer Support for other types of communications options.Tamper Try[PI 500 only]Enter a value of 0 to 10 to indicates how many attempts are made to clear a tamper status. Note: A higher number will increase battery usage and reducing the amount of time before the handheld needs to be recharged. To maximize battery life, Elster recommends setting this value to 0.Cradle Port number of the cradle. Note: Do not change unless directed by Elster Customer Support.IP Port number used for IP communications.Note: Do not change unless directed by Elster Customer Support.](https://usermanual.wiki/Elster-Solutions/HHI03/User-Guide-887779-Page-26.png)
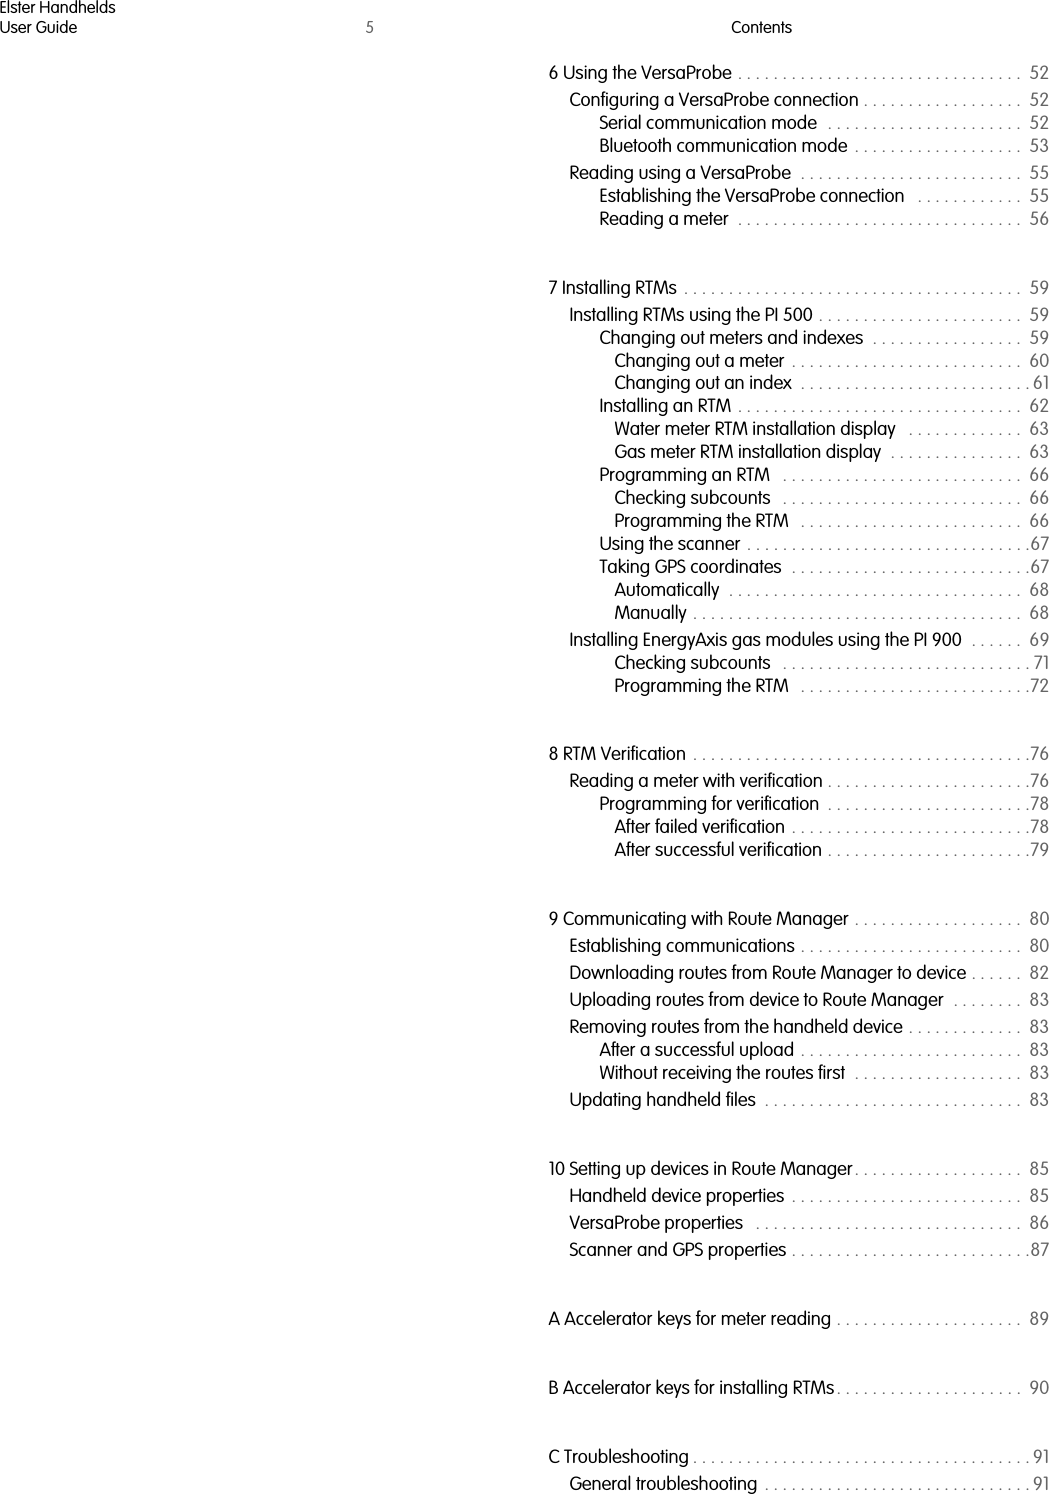
![Elster HandheldsUser Guide 27 4. About Interrogator softwareTo exit from the Update Configuration screen without making or saving changes, press <Esc>.2. After making changes, press Update to save your changes. A confirmation box will appear to verify that you really want to save your changes. 3. Tap the button Yes or No with the stylus.— Or —Press <Y> or <N> on the keyboard.Exiting Elster Interrogator1. While the main menu screen is open, press <Esc> to exit the software. A dialog displays asking you to confirm you wish to exit. Ftp Port number used to FTP file transfers.Note: Do not change unless directed by Elster Customer Support.Extend Battery Life[PI 500 only]If checked, the RF communications port will be closed after each read to maximize battery life.If unchecked, the communications port remains open between reads allowing faster reads.Capture GPS on Read[PI 500 and evoWalk]If checked and the account GPS coordinates are 0, the meter reader will be asked if they want to capture the RTM GPS coordinates. See “Taking GPS coordinates” on page 67 for details.Item Description](https://usermanual.wiki/Elster-Solutions/HHI03/User-Guide-887779-Page-27.png)