Energate FZ100 Foundation Smart Thermostat and Home Energy Gateway User Manual
Energate Inc. Foundation Smart Thermostat and Home Energy Gateway
UserManual.wiki
>
Energate
>
FZ100 User Manual
user manual
Navigation menu
Upload a User Manual
Namespaces
Wiki Guide
HTML
PDF
Info
Views
User Manual
Discussion / Help
Navigation


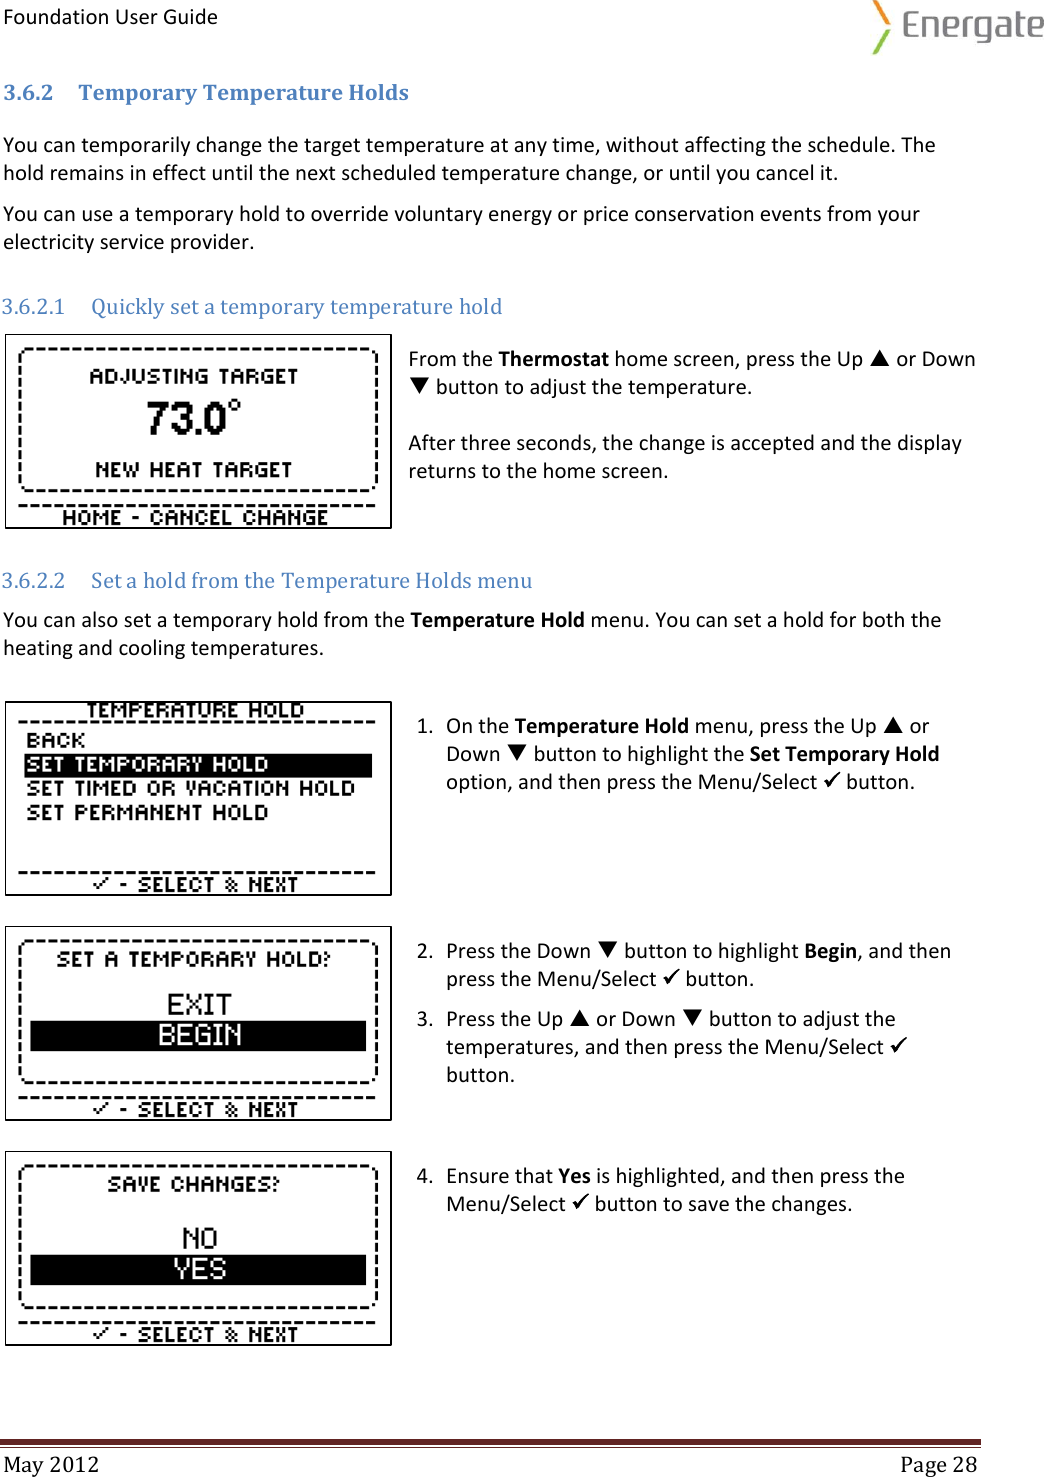
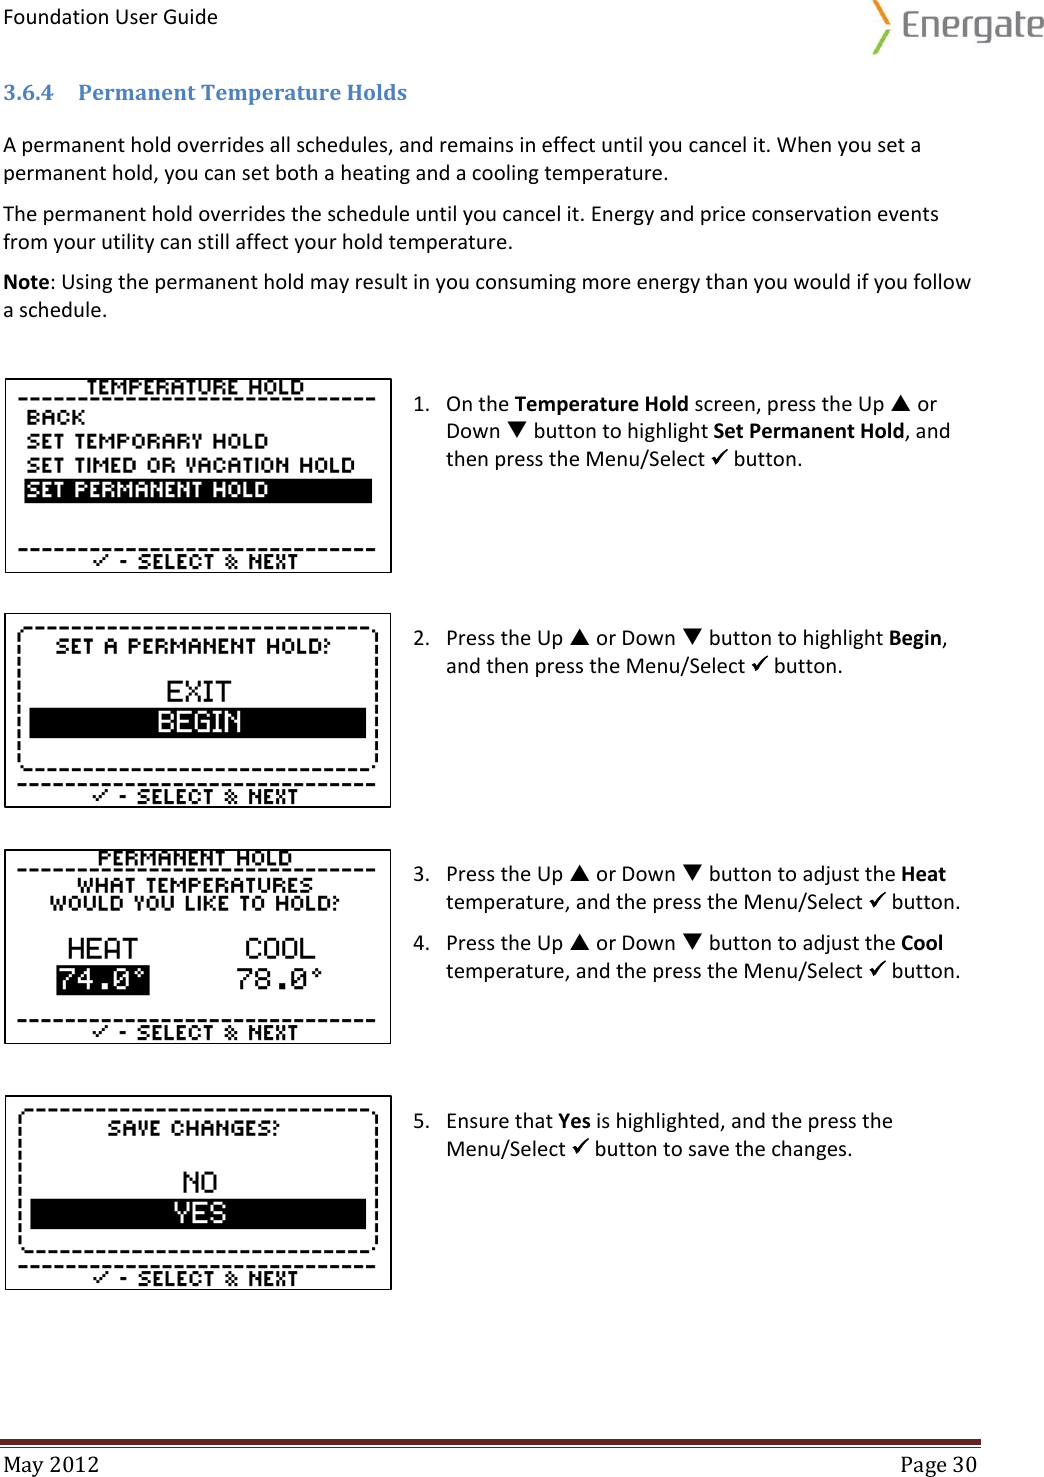
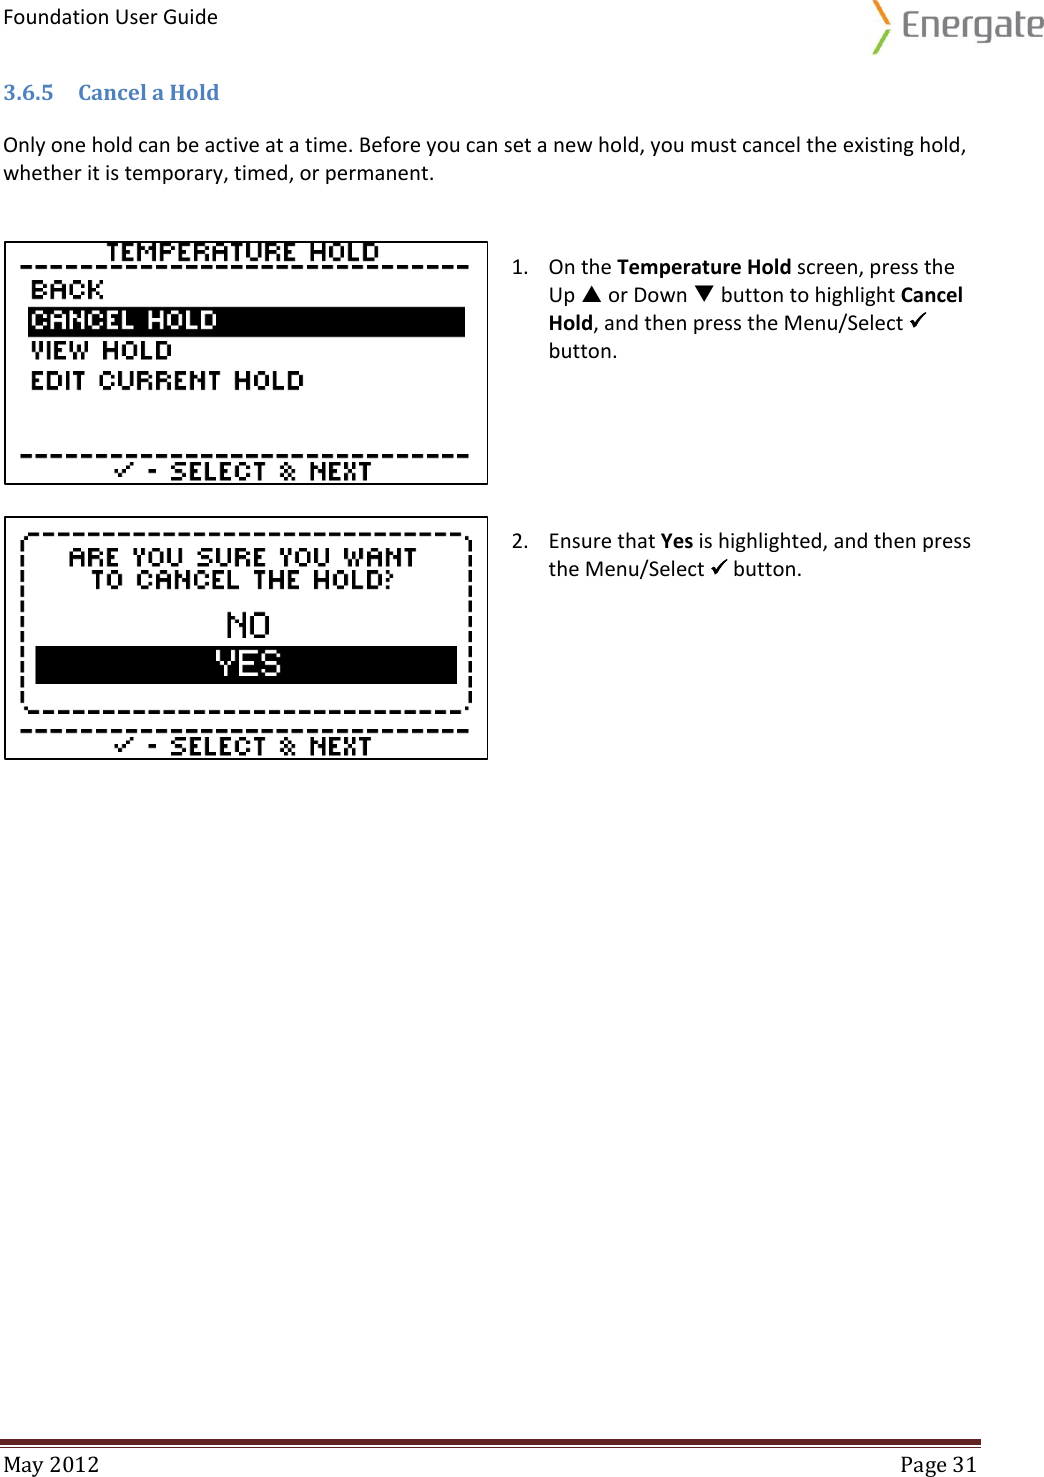
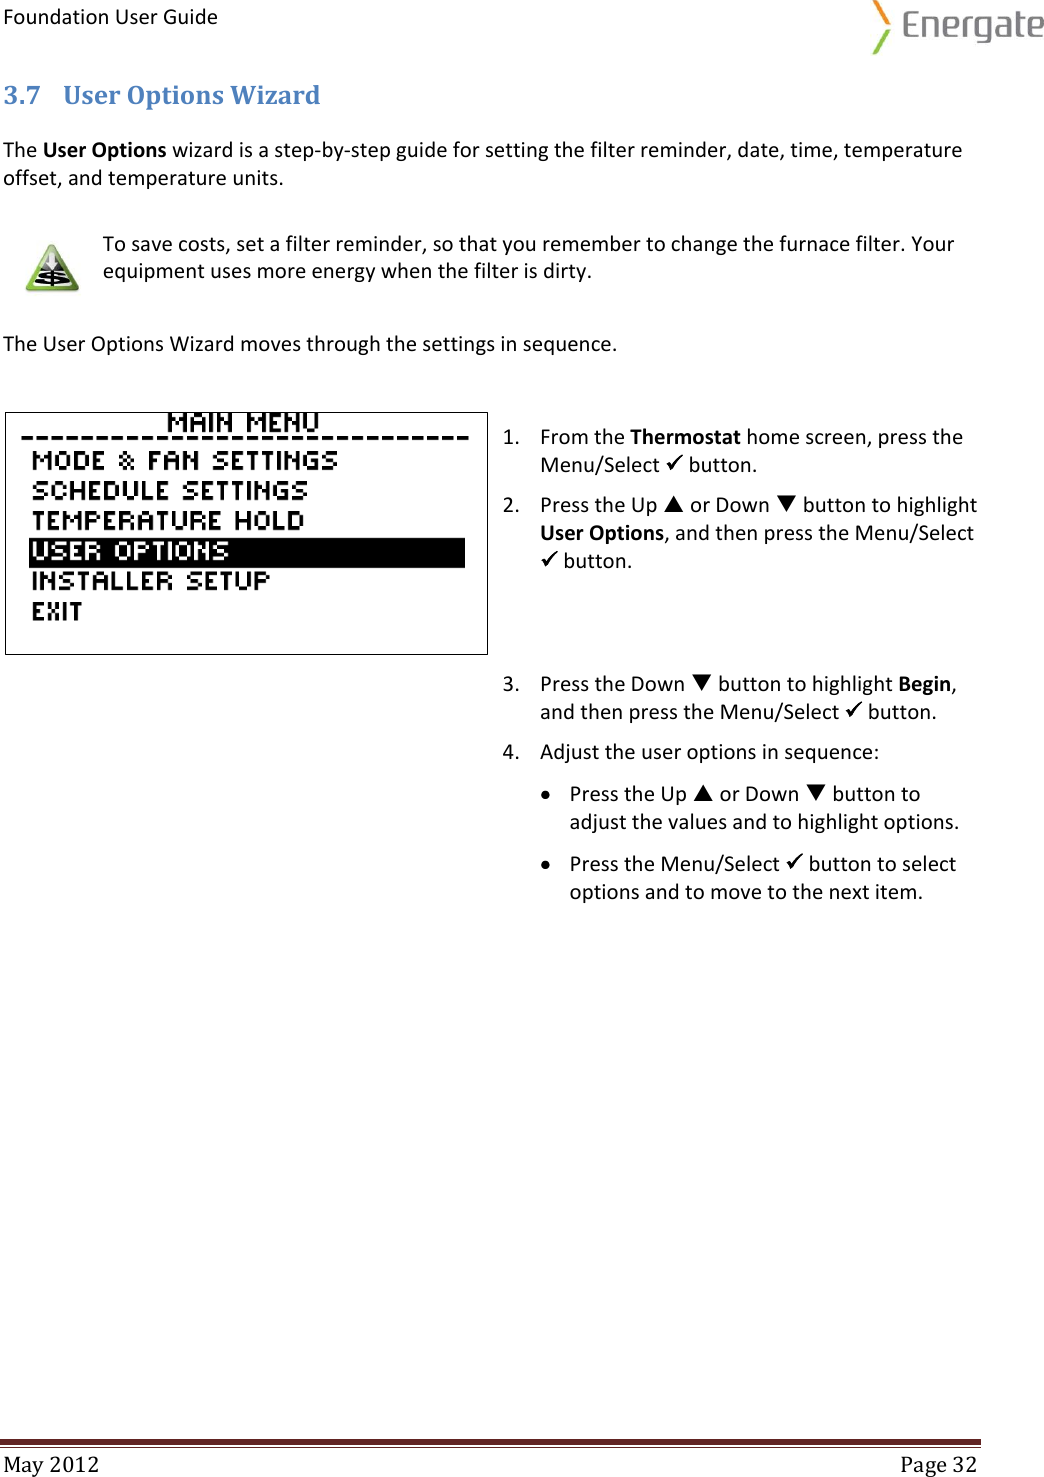
![Foundation User Guide May 2012 Page 15 3.1.4 Scrolling Messages The following table shows the scrolling messages that appear at the bottom of the home screen: Message Description Following Schedule Displayed when the thermostat scheduled setpoint is the active setpoint. No Hold active [Heating/Cooling] to [target]When hold active Hold at [target] Displayed when there is a hold in progress, or when the system is running the equipment. Anticipating for [next setpoint] ° Displayed when the equipment is anticipating a scheduled setpoint change. [Second / Third] stage on Displayed when more than one stage is on. Aux. Heat On Displayed when the emergency heat stage is engaged. Rate: [current price][*] Displayed when pricing information is available. The current price is displayed in either cents or dollars, depending on the current price. A star indicates that you manually entered the price and rate information in Foundation, and that it does not come from the meter. Limiting [heat/cool] To [active setpoint] Displayed when a conservation event is in progress. Limiting [heat/cool] To [active setpoint] Displayed when a utility event is in progress. Limiting Usage To [event duty cycle]% Displayed when a utility event is in progress, and the duty cycle is the limiting factor or is the only field that is specified in the event (no temperatures are specified). Please Change Filter Displayed when the filter reminder alarm is triggered. Configuration Error Displayed when there is a memory problem in the thermostat. Short Circuit Detected Displayed when a short circuit is detected on the output stages. Low Battery Displayed when the battery level is low. Filter Fault Detected Displayed when the filter hardware fault is detected. Heat Pump Fault Displayed when the heat pump hardware fault is detected. Brown Out Fault Displayed when there is a brown out. Communication Error Displayed when there is a problem communicating with the ZigBee module, or communicating over the ZigBee network.](https://usermanual.wiki/Energate/FZ100/User-Guide-1744921-Page-15.png)


![Foundation User Guide May 2012 Page 65 6.1.8.2 Thermostat Reset The Thermostat Reset restores the thermostat to the default manufacturer settings. For example, you might reset the thermostat when you change your HVAC equipment, or move the thermostat to a new home. Avoid resetting the thermostat unless necessary. The following table shows the defaults for the Thermostat mode: Section Setting Default Value Mode & Fan Settings Equipment Mode HEAT Fan Mode AUTO Schedule Settings Schedule Setpoint Name Time Heat Setpoint Cool Setpoint Monday-Friday WAKE 6:00am 70°F (21.11°C) 78°F (25.56°C) LEAVE 8:00am 62°F (16.67°C) 85°F (29.44°C) RETURN 6:00pm 70°F (21.11°C) 78°F (25.56°C) SLEEP 10:00pm 62°F (16.67°C) 82°F (27.78°C) Saturday-Sunday WAKE 8:00am 70°F (21.11°C) 78°F (25.56°C) SLEEP 11:00pm 62°F (16.67°C) 82°F (27.78°C) User Options Filter Reminder 0 months Time 12:00am Date January 1 2000 Temperature Offset 0.0°F Temperature Units Fahrenheit (°F) Time Units 12 Hour Installer Setup Installer Password [INST] User Password [1234] disabled Setpoint Range HEAT Max 91.0°F (33.89°C) Min 54.0°F (12.22°C) COOL Max 93.0°F (32.78°C) Min 56.0°F (13.33°C) Equipment Setup Equipment Type Conventional # of Cool stages 1 # of Heat stages 1 Minimum On/Off time 3 minutes Fan on in Heat YES Control Hysteresis 2°F (1°C) Anticipation Time 60 minutes Maximum Recovery Time 90 minutes](https://usermanual.wiki/Energate/FZ100/User-Guide-1744921-Page-65.png)