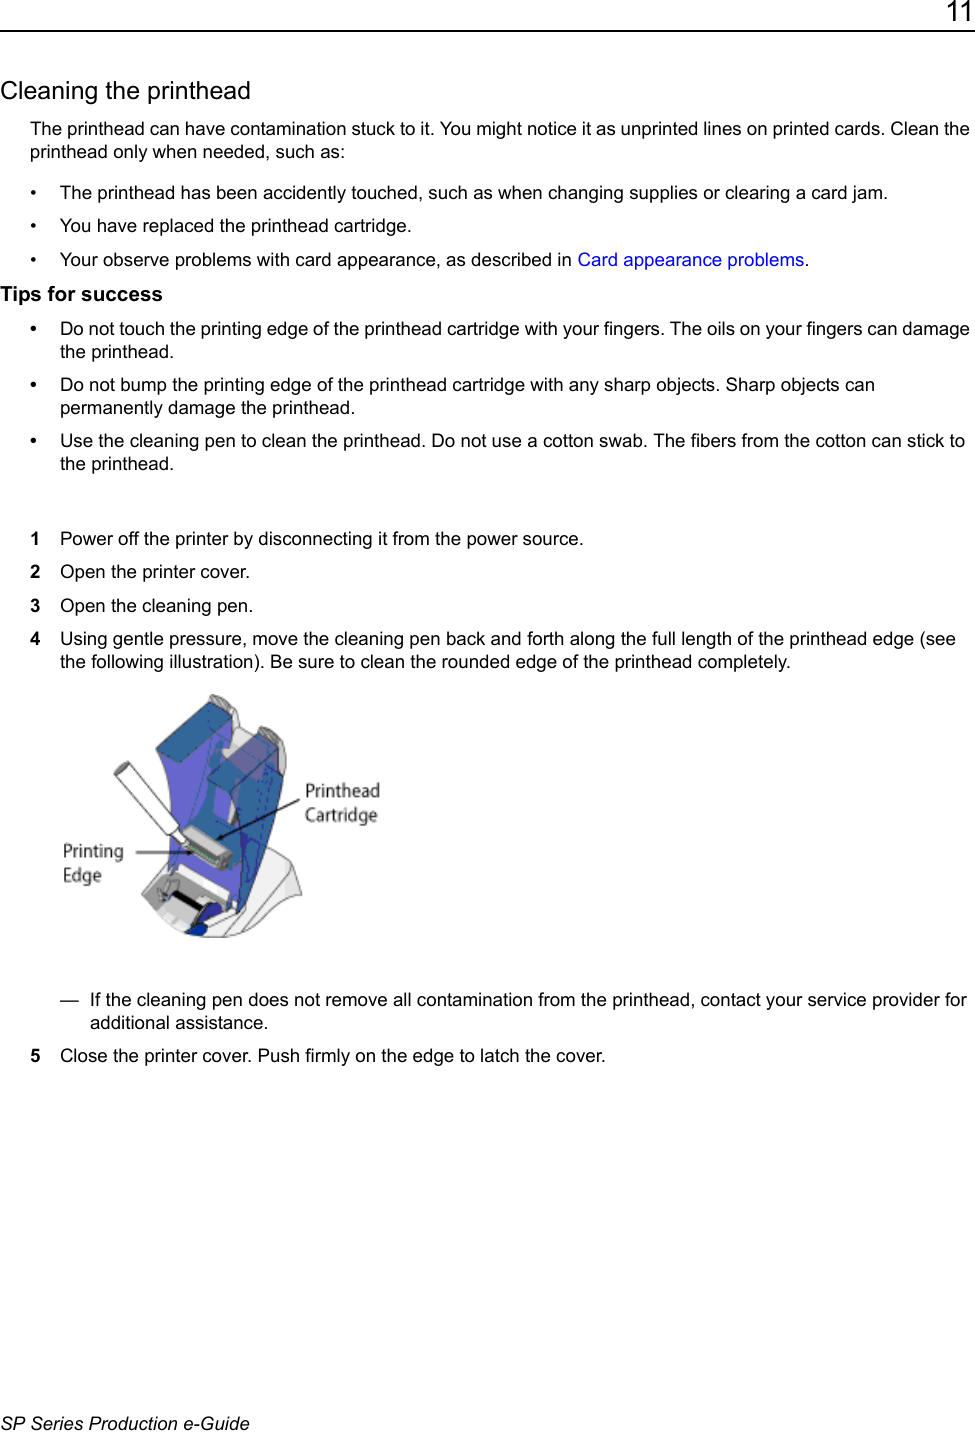
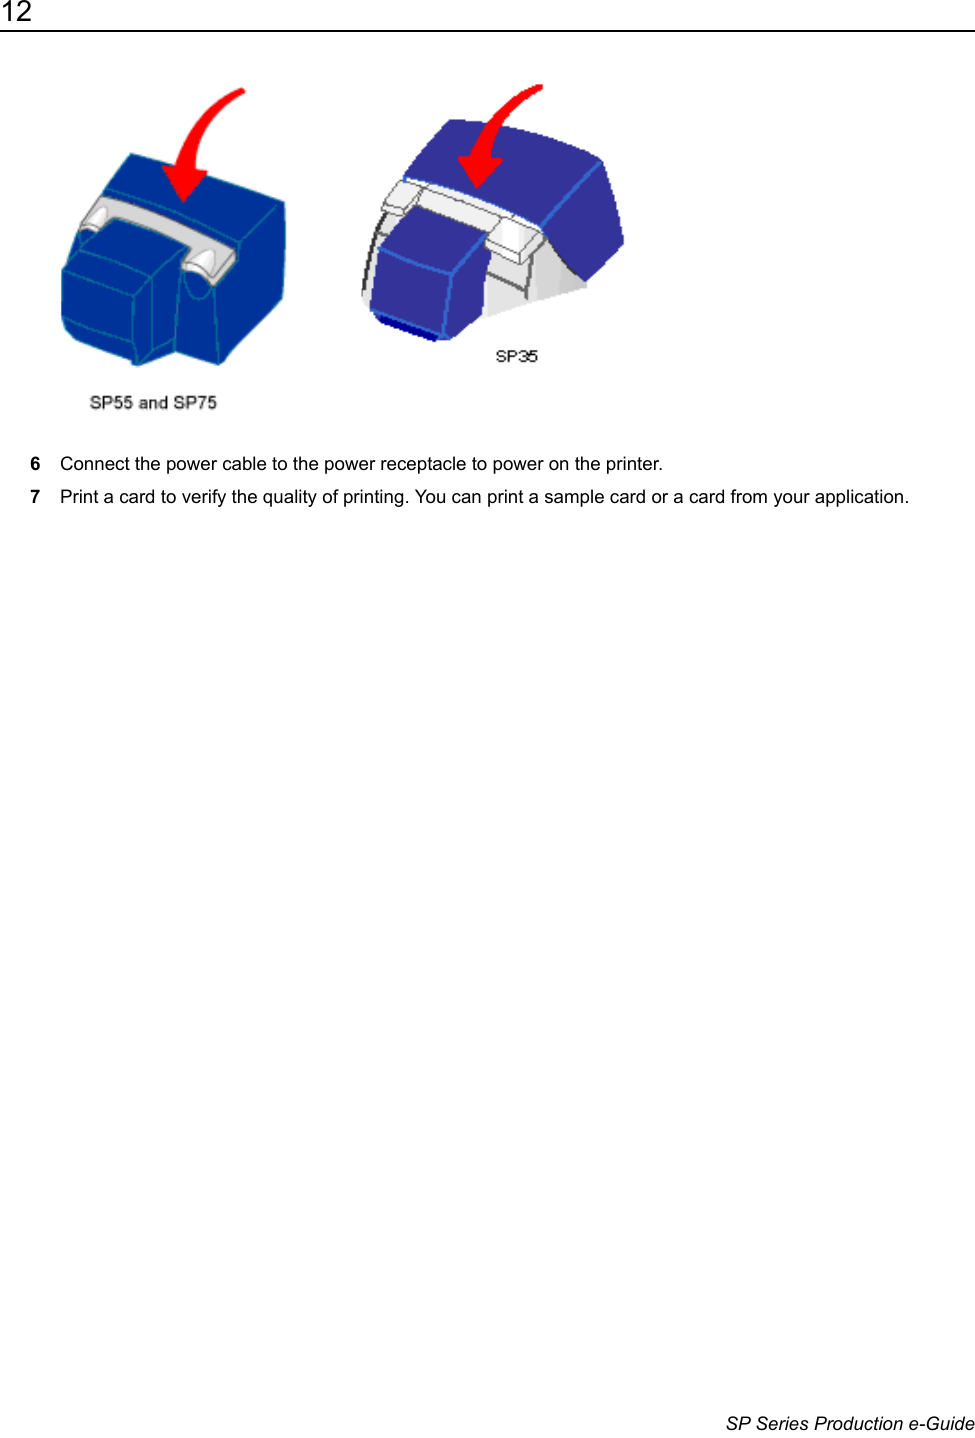
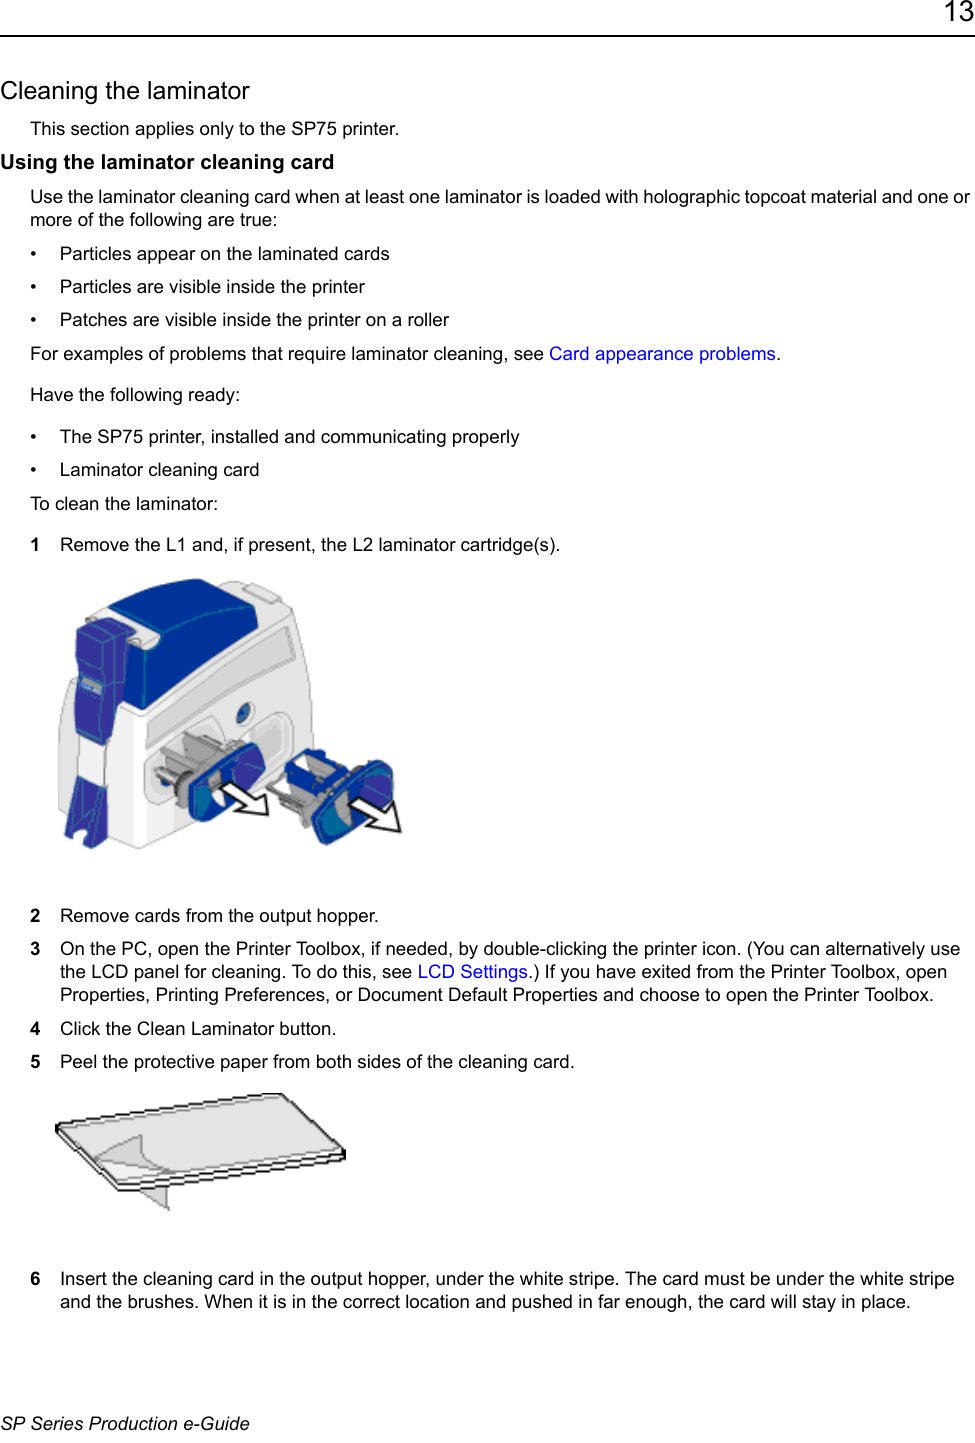
Entrust Q10075 Low Power Transmitter SP75 Card Printer with 13.56 User Manual SP Series Install e guide
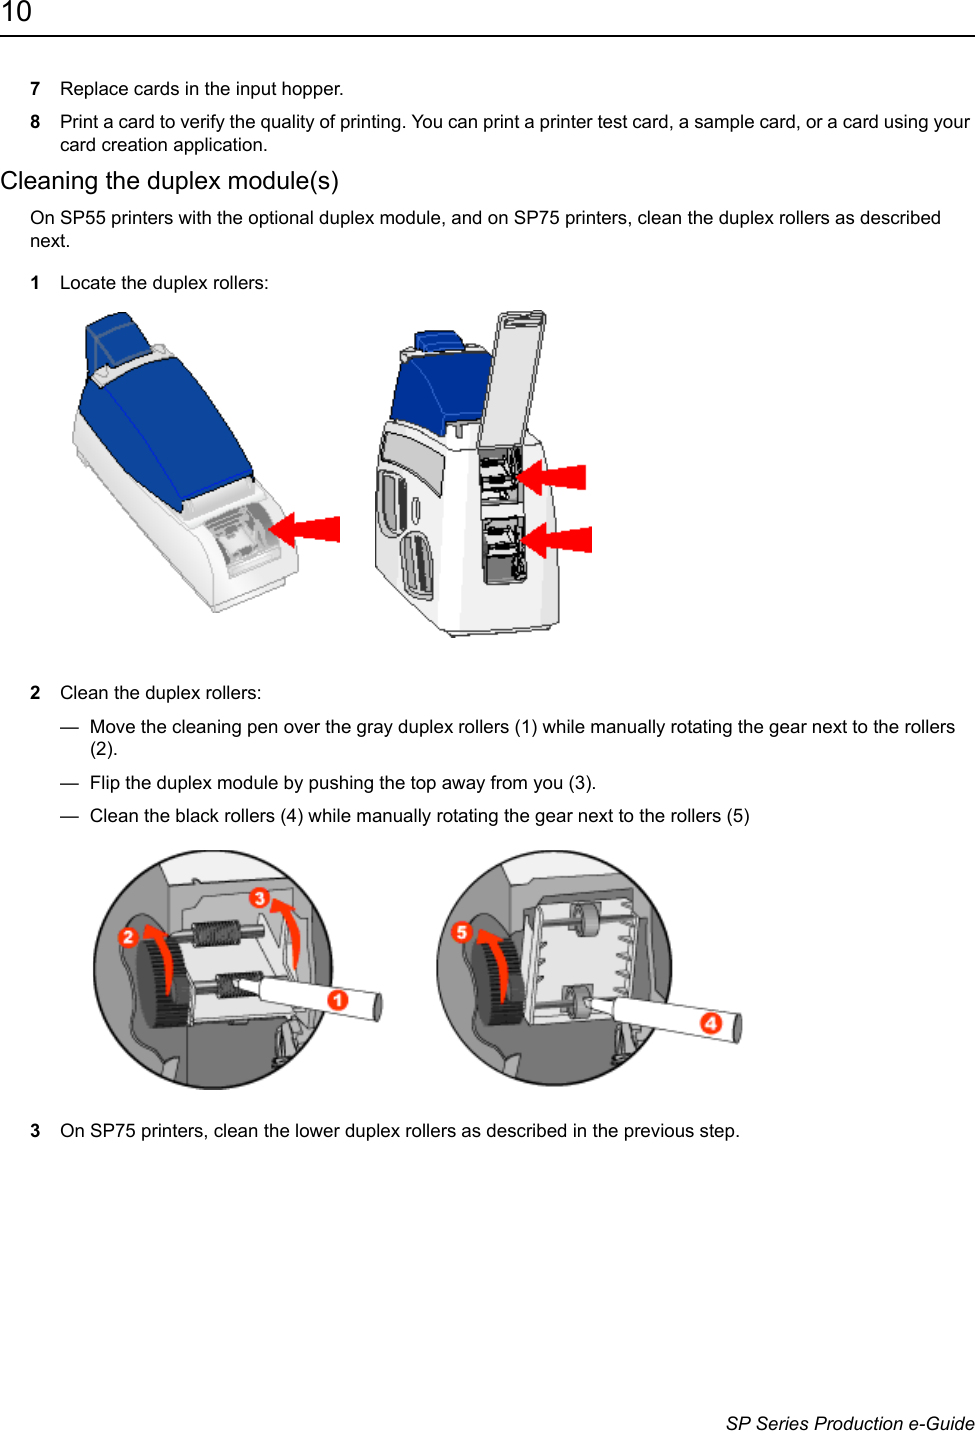
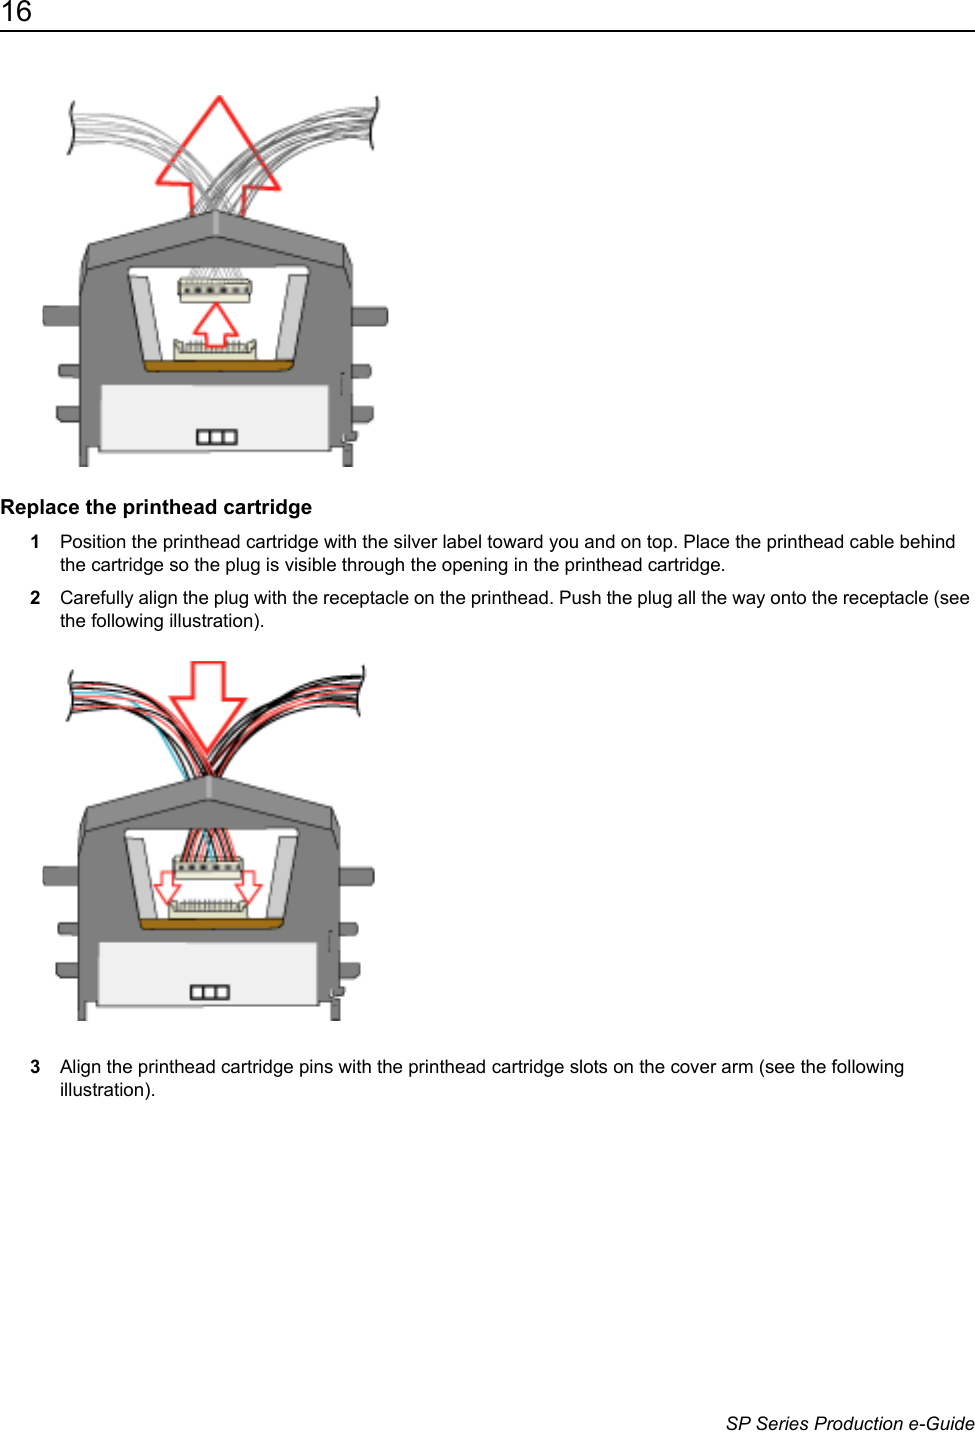
Entrust Datacard Corporation Low Power Transmitter SP75 Card Printer with 13.56 SP Series Install e guide
Entrust >
Contents
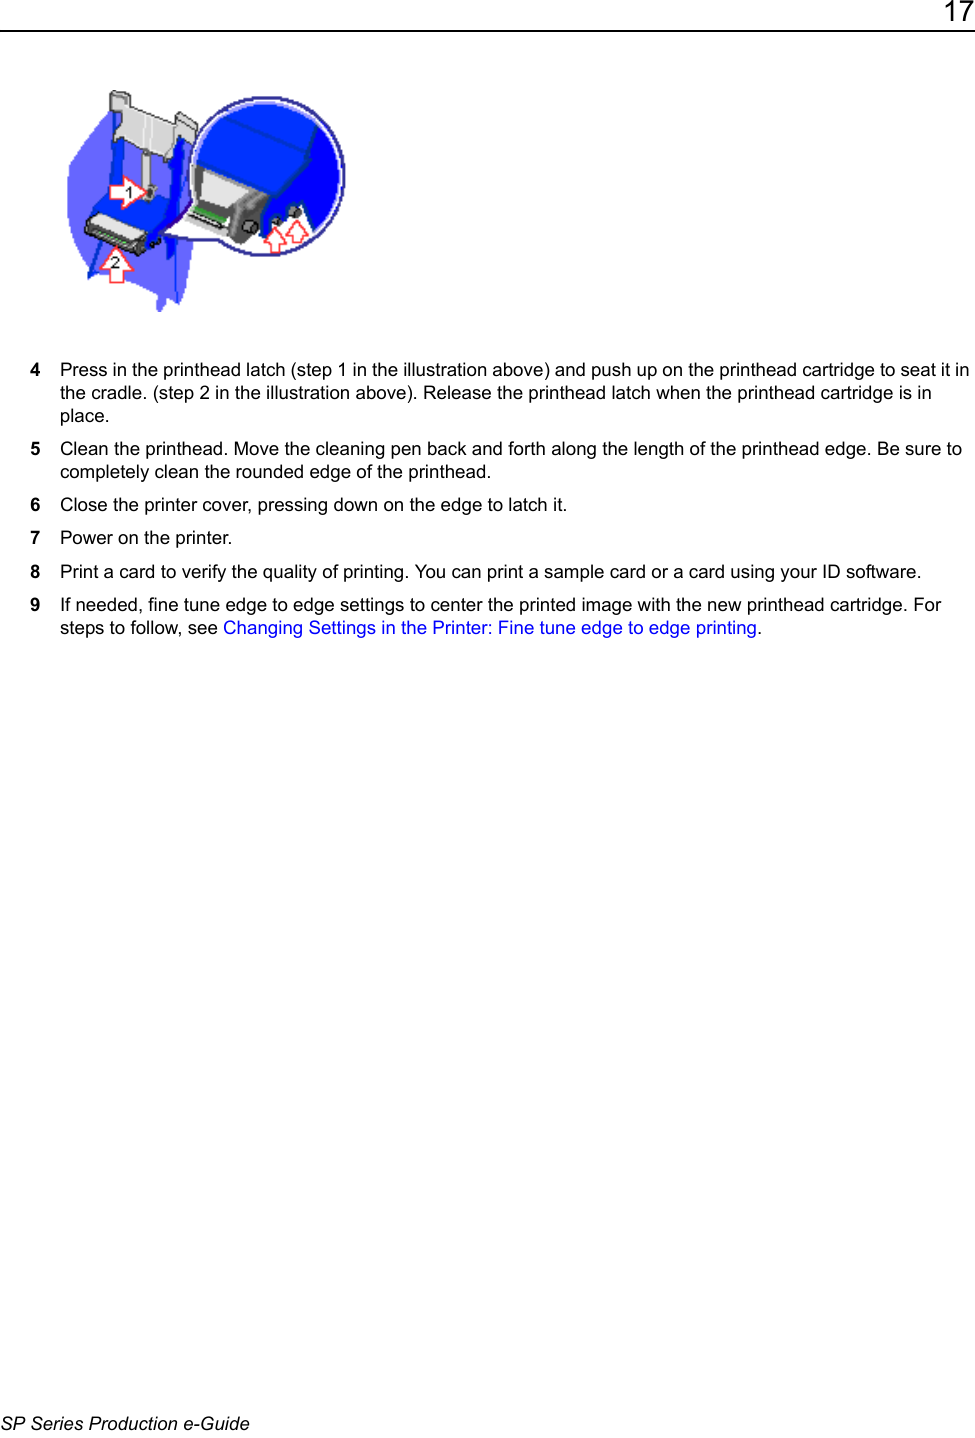
user


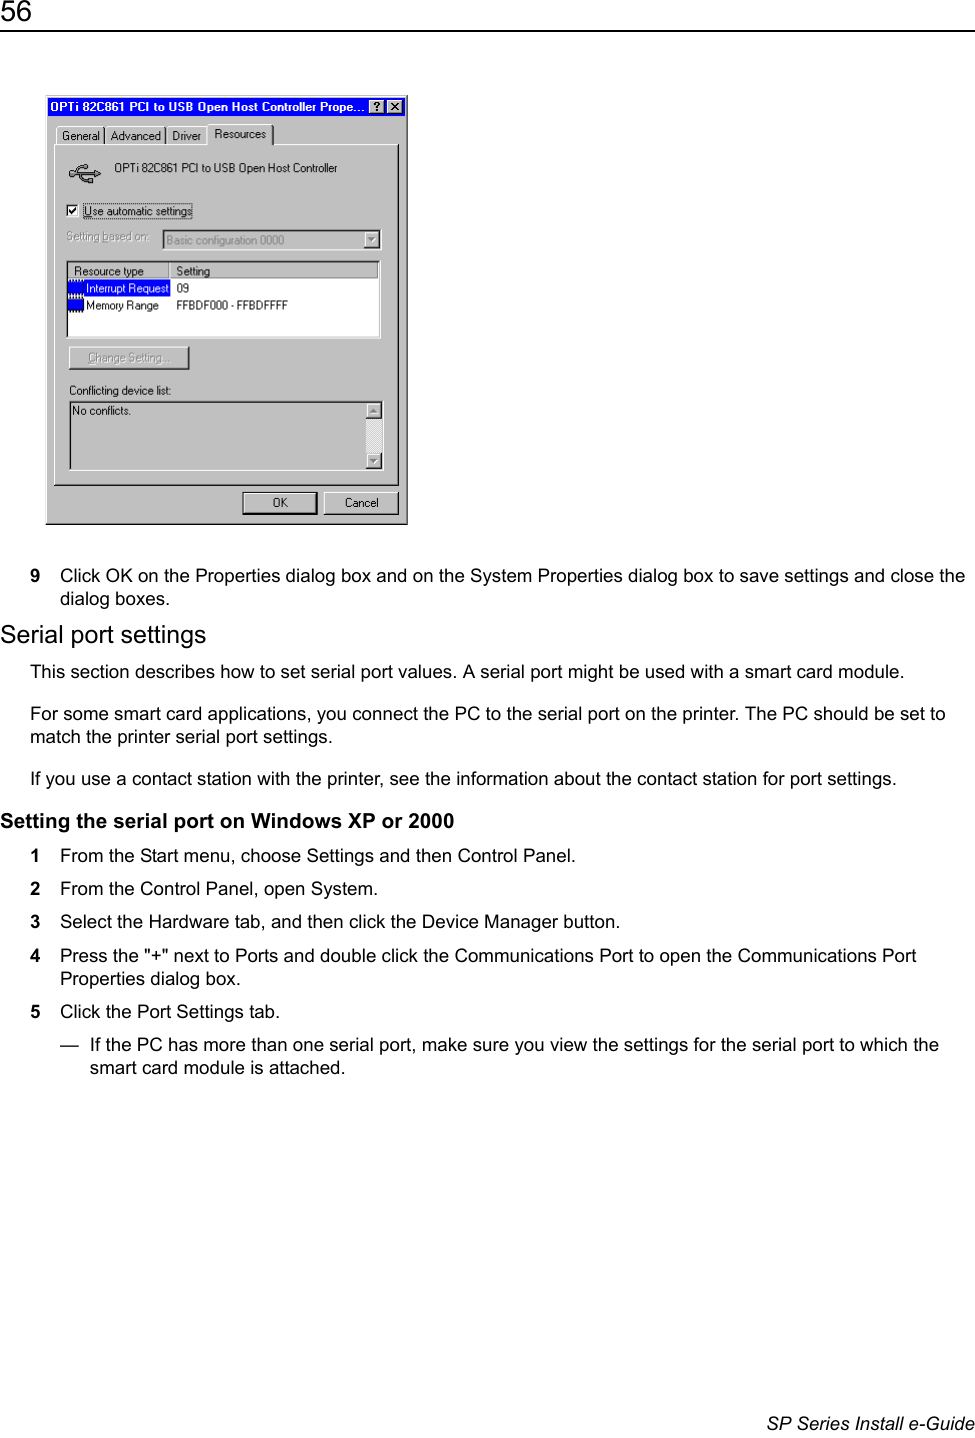
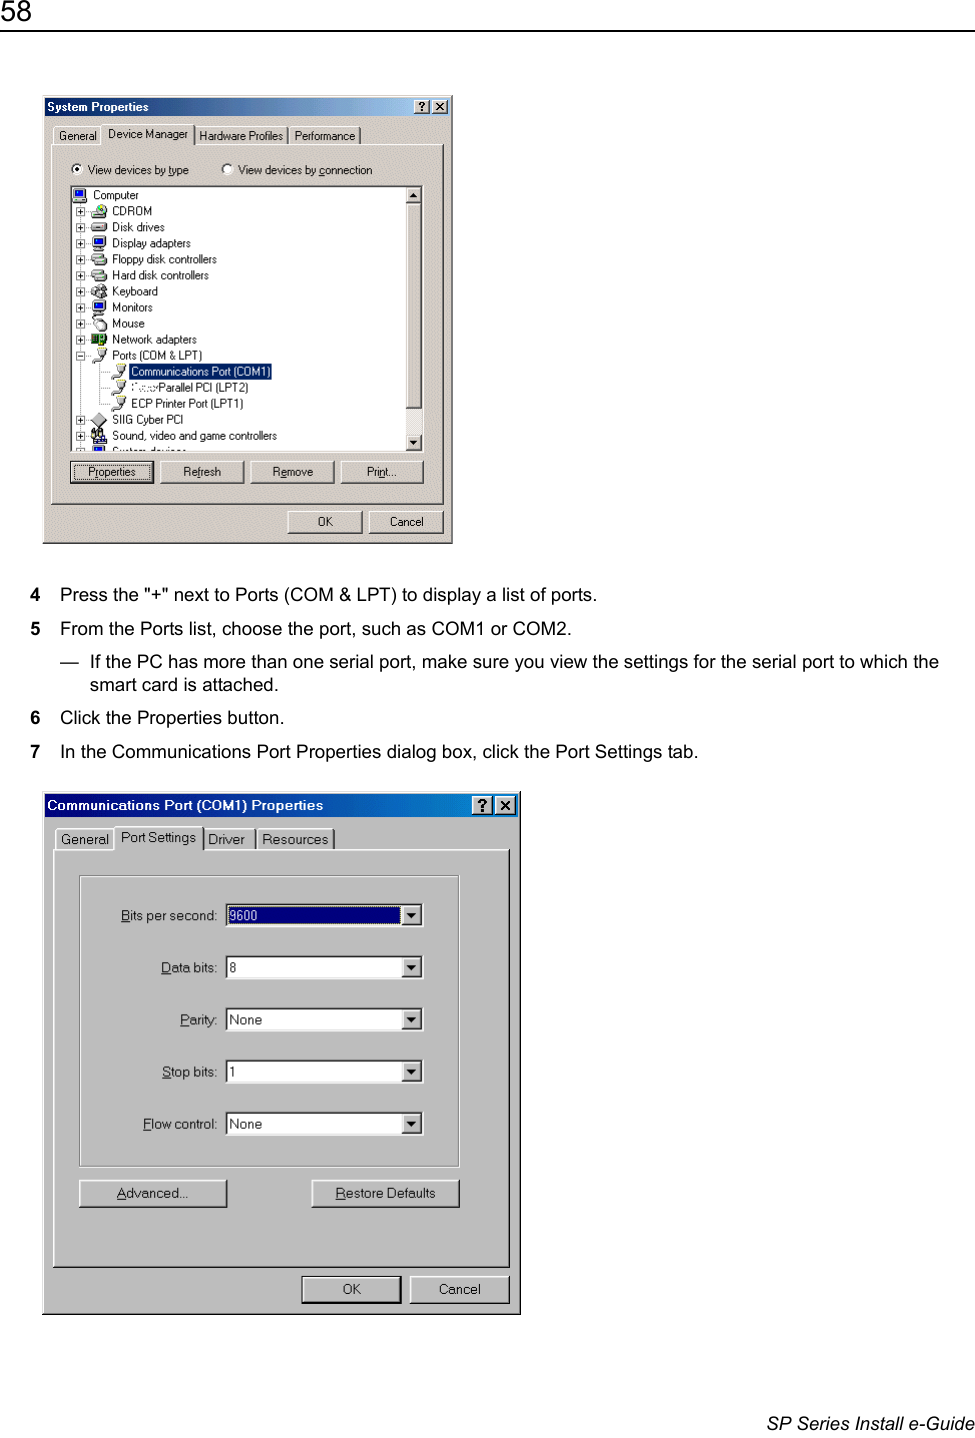
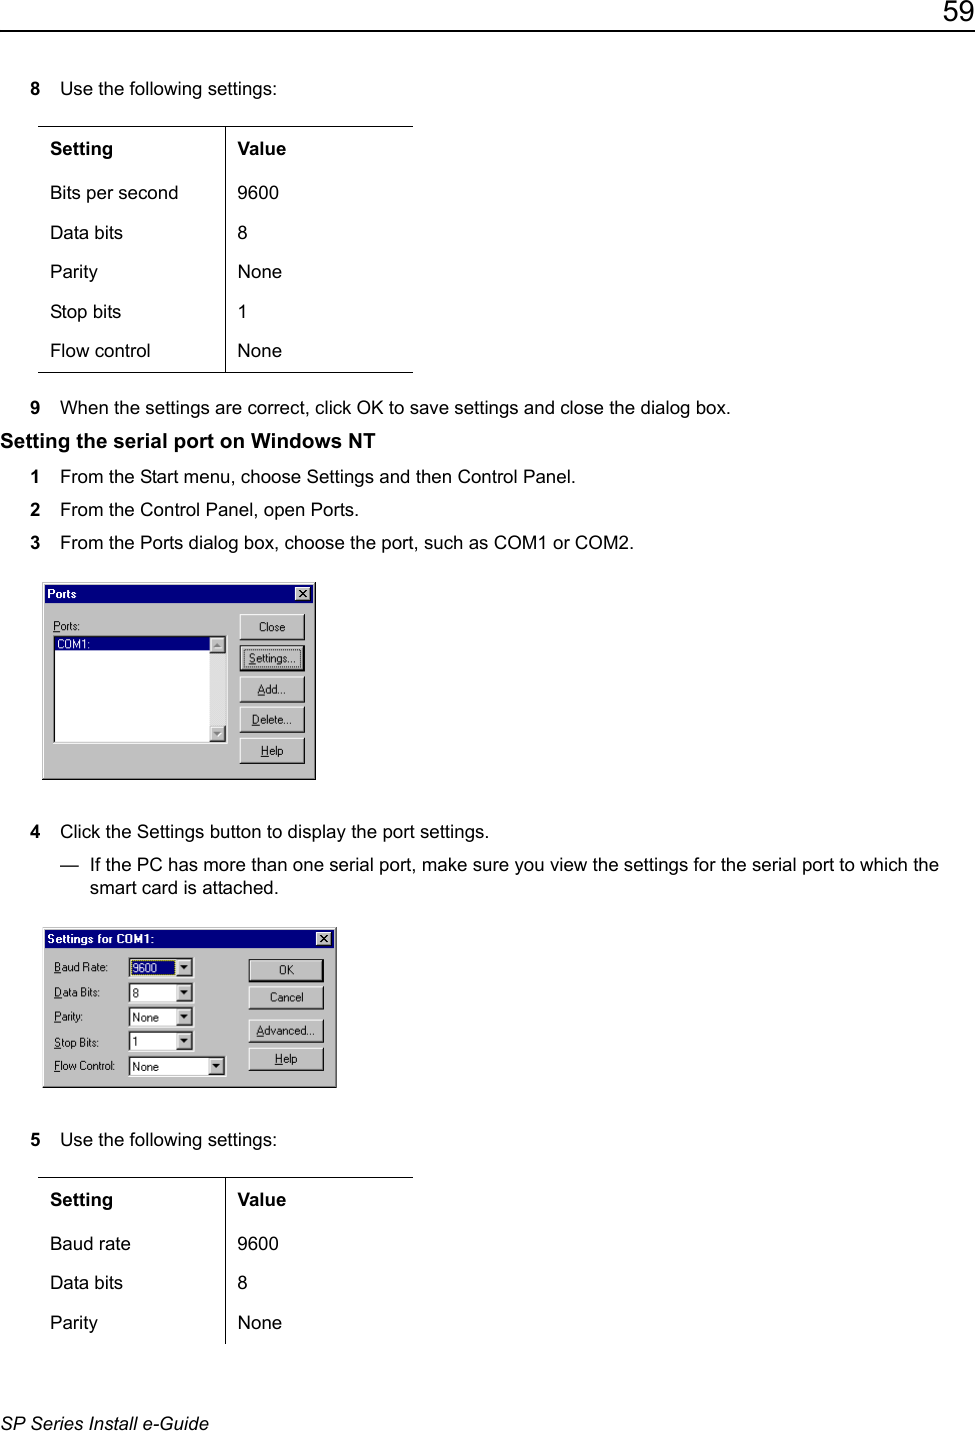


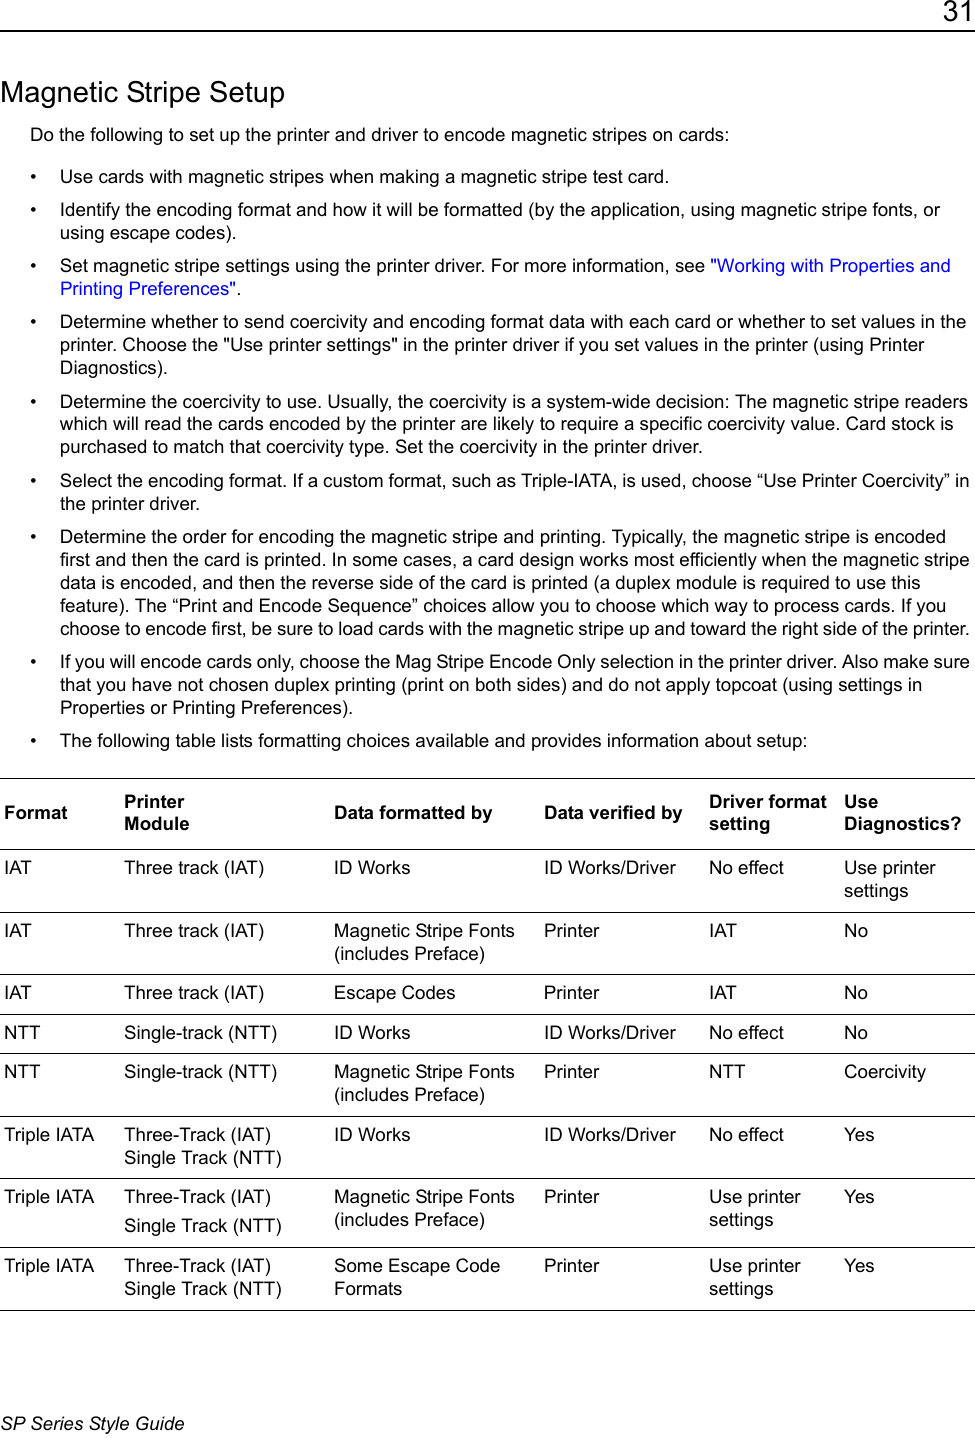
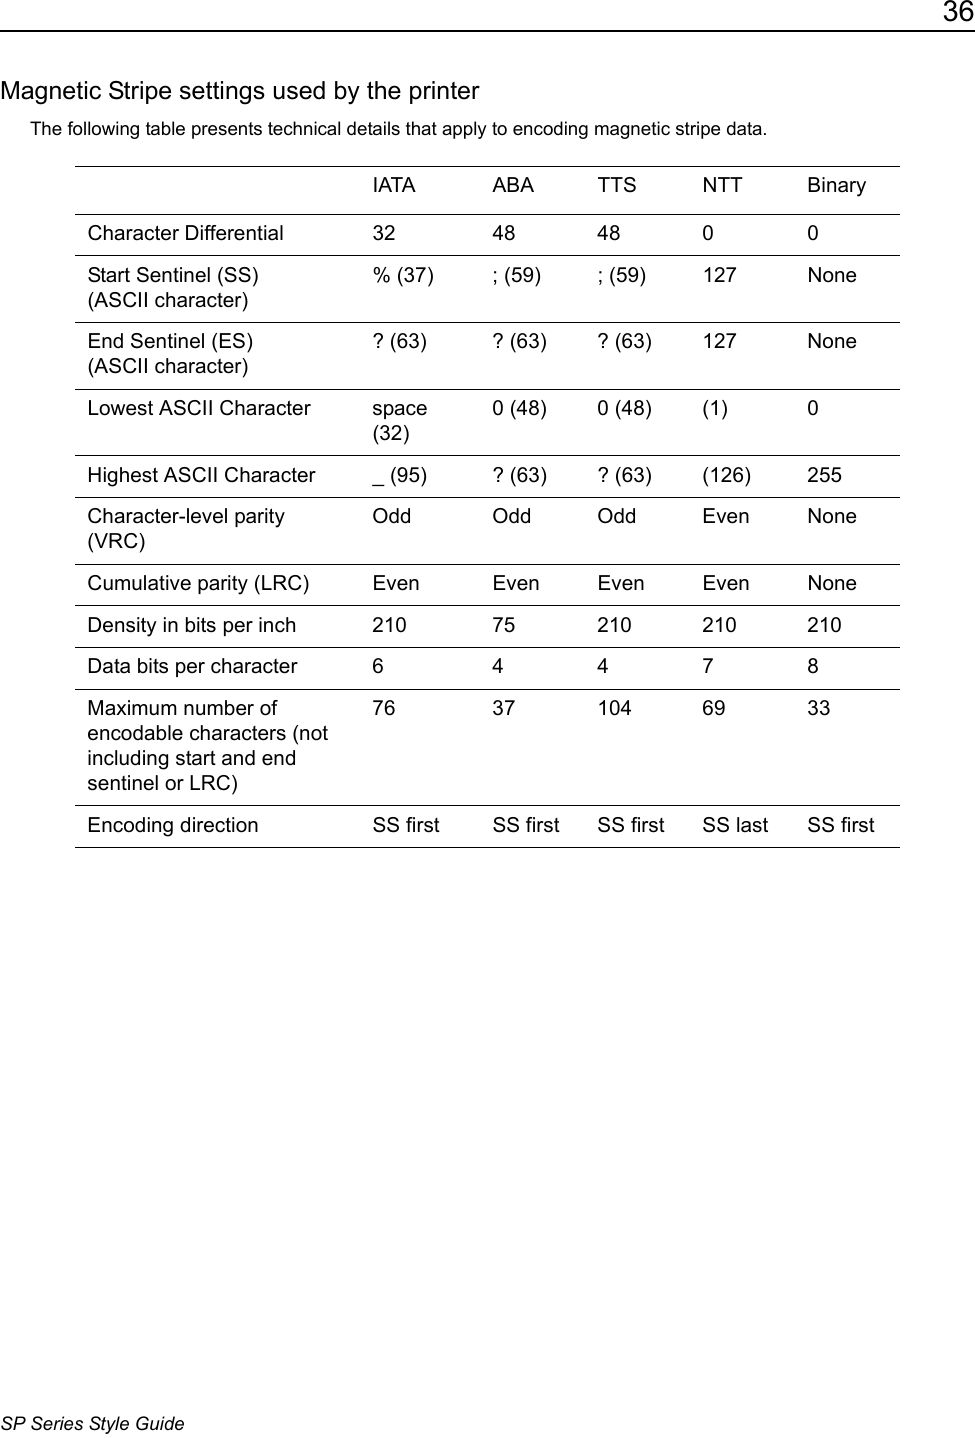
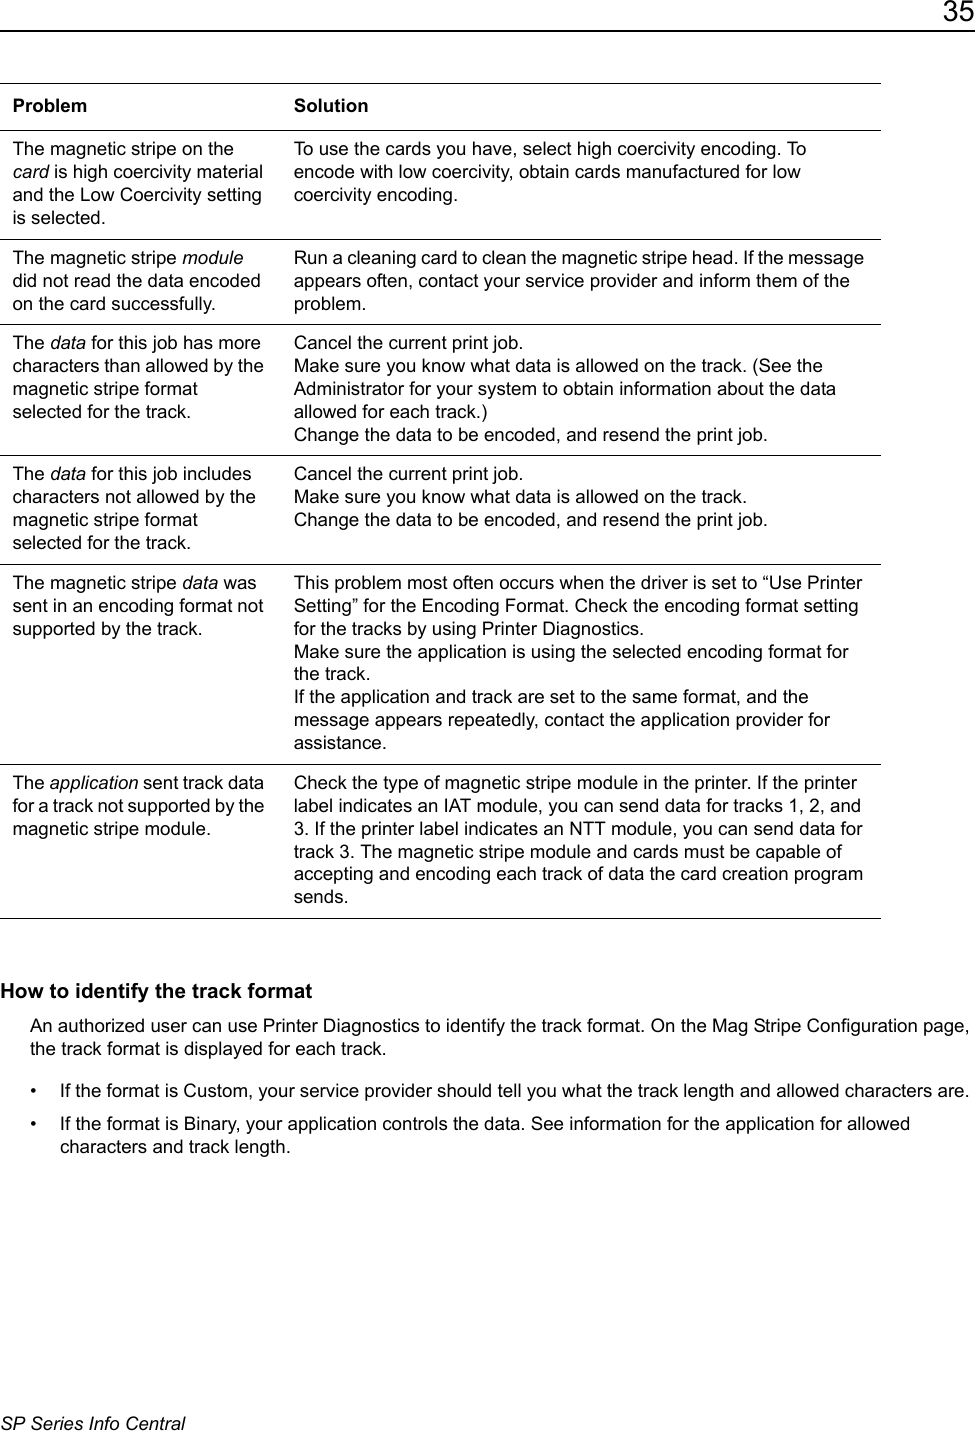
![34SP Series Style Guide• Magnetic stripe data will be converted to uppercase (capital) letters if necessary.• If you include not-allowed characters within the magnetic stripe data, the printer will beep and a message will be displayed on the PC.• The driver does not check the data you send. (The printer checks the data.) This is the same behavior as magnetic stripe fonts.On Windows 98, 98 SE, and Me, data formatted with escape codes cannot be located in rotated fields.a) Only the default start sentinel, a semicolon (;), is permitted.For information about the characters allowed for each track format, see the following section. For more information about requirements for using escapes, see the documentation for the original printer. IATA, ABA, and TTS character setsThe IAT encoding format selection for the SP35 printer encodes IATA data on track 1, ABA data on track 2, and TTS data on track 3. This meets the requirements of the ISO standard.IATA (International Air Transport Association)The maximum field length for IATA format is 76 characters. IATA allows spaces, upper case alphabetic characters, numeric characters, and the following special characters:! # $ % ' ( ) * + , - . / ; : < @ > = ^ ] \ [ " & _ABA (American Bankers Association) The maximum field length for ABA format is 37 characters. ABA allows numeric characters and the following special characters:: ; < = >Printer ManufacturerEncoding Format Syntax ExampleEltron IAT (ISO) ~<track#><data> ~1ENCODING WITH ESCAPES~21234567890~31234567890Atlantek IAT (ISO) ~<track#>=<data> ~1=ENCODING WITH ESCAPES~2=1234567890~3=1234567890Fargo IAT (ISO) ~<track#>(Start Sentinel><Data> <End Sentinel>~1%ENCODING WITH ESCAPES?~2;1234567890?~3;1234567890?Datacard HiFX IAT (ISO) ~<track#>(Start Sentinel><Data> <End Sentinel>~1%ENCODING WITH ESCAPES?~2;1234567890?a ~3;1234567890?a Victor Data Systems IAT (ISO) ~<track#>(Start Sentinel><Data> <End Sentinel>~1%ENCODING WITH ESCAPES?~2;1234567890? a~3;1234567890? a](https://usermanual.wiki/Entrust/Q10075.user/User-Guide-525287-Page-104.png)
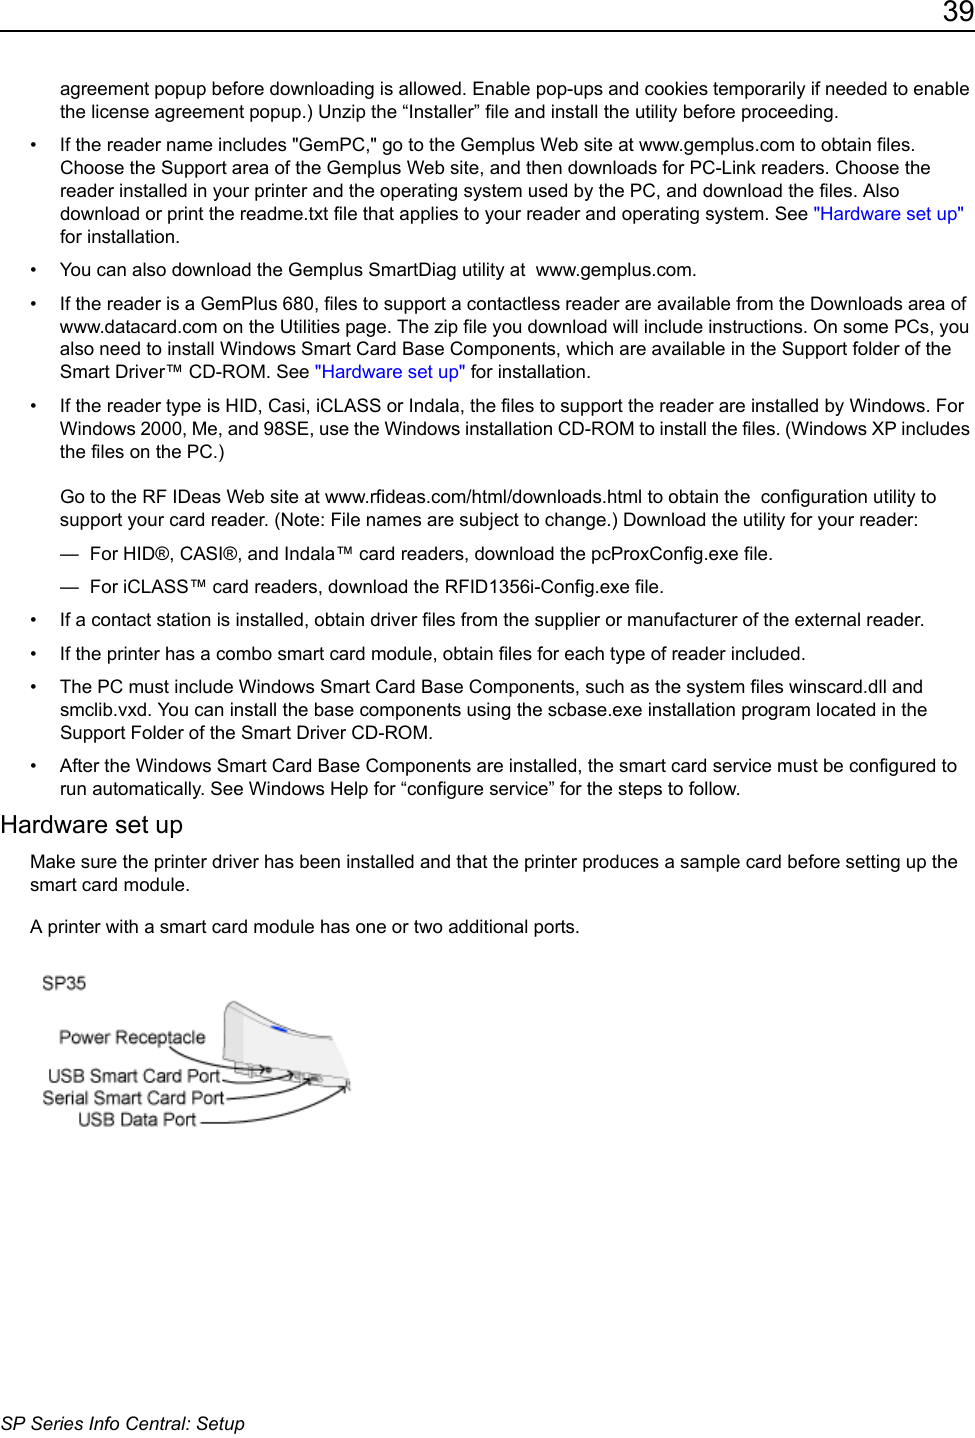
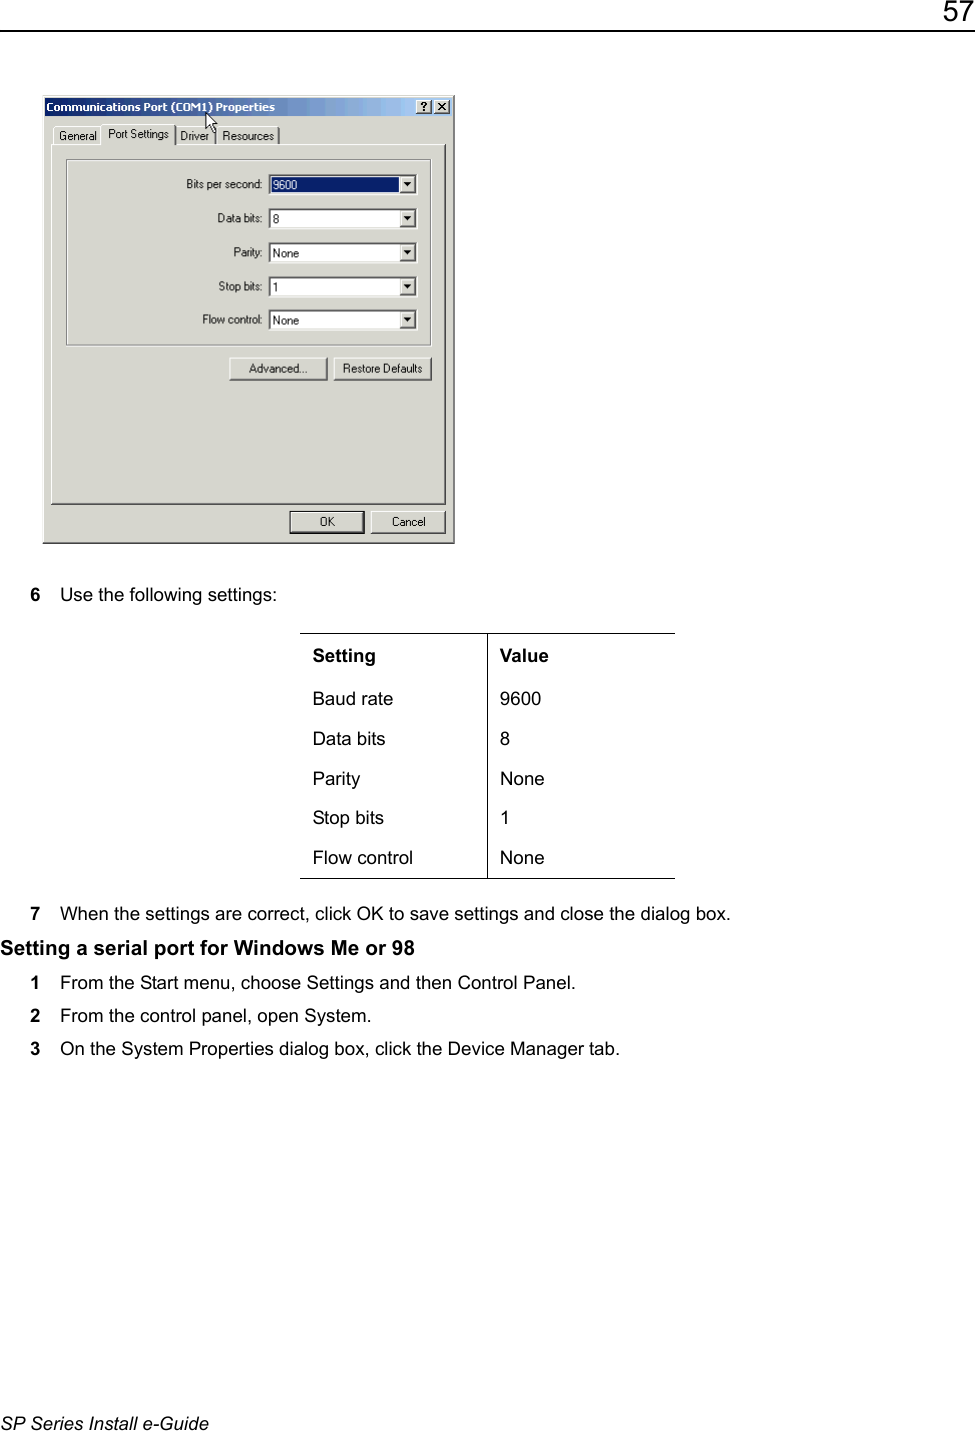
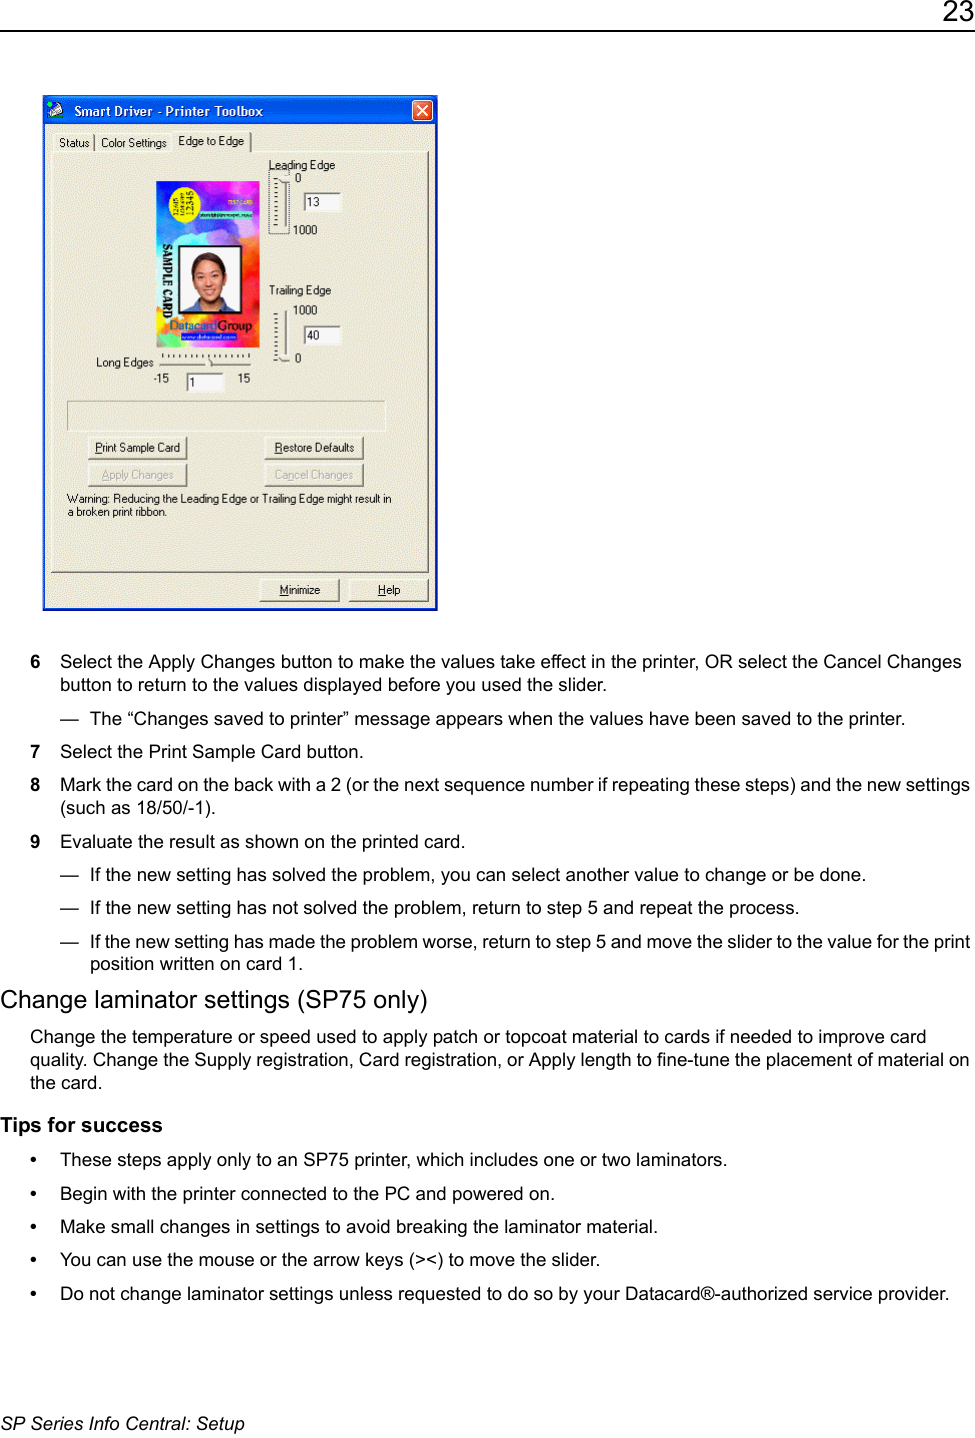
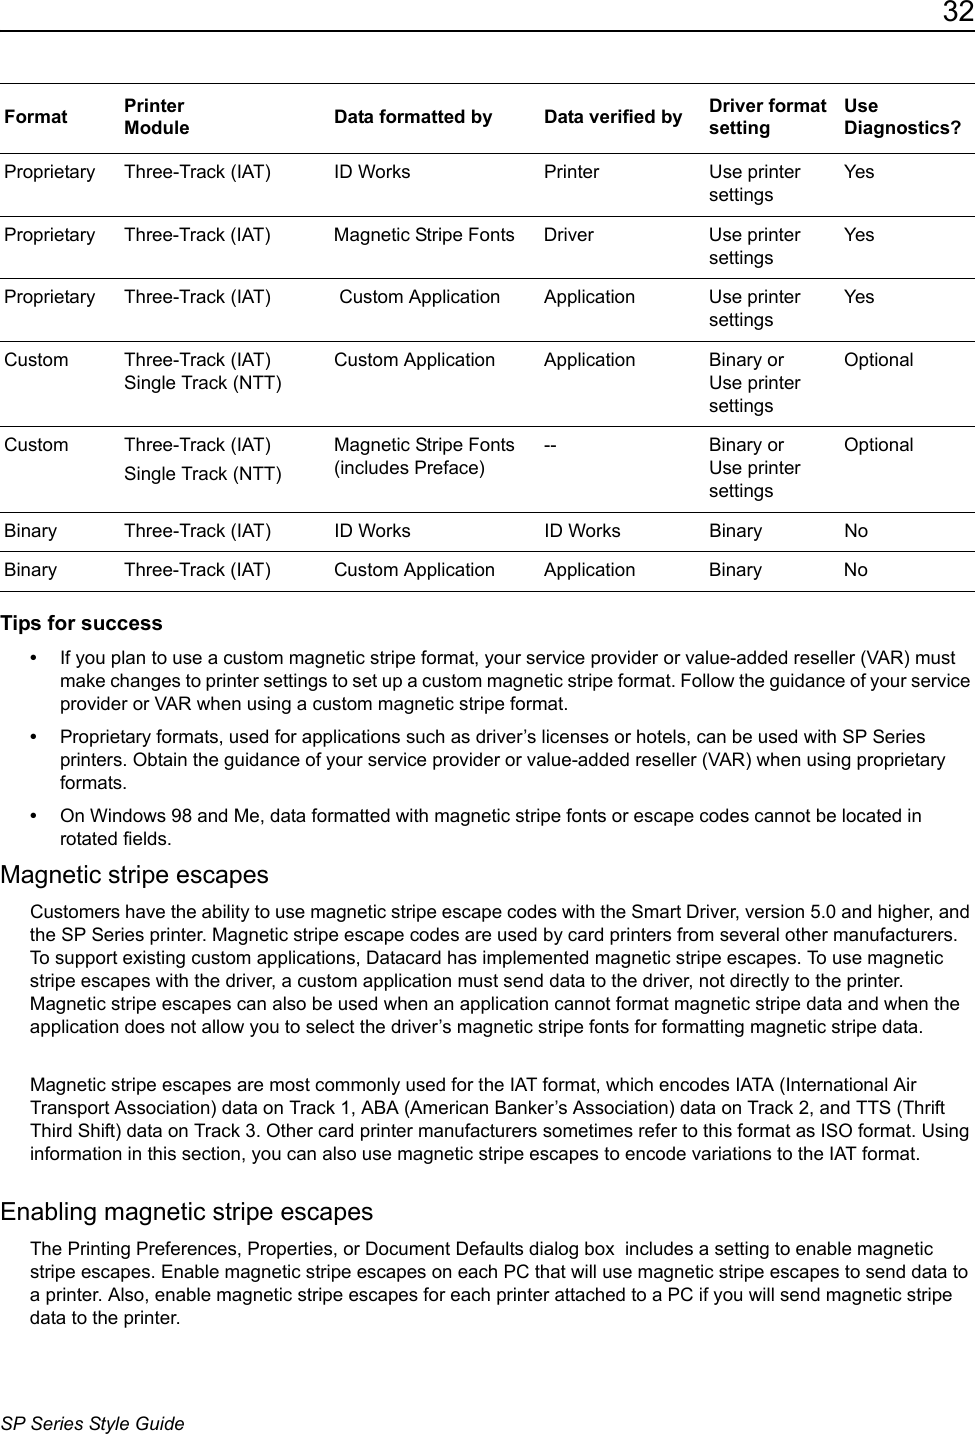
![35SP Series Style GuideTTS (Thrift Third Standard) The maximum field length for TTS format is 104 characters. TTS allows numeric characters and the following special characters: : ; < = >NTT character setThe maximum field length for NTT (Nippon Telephone & Telegraph) format is 69 characters. NTT allows spaces, numeric characters, upper case alphabetic characters, lower case alphabetic characters, and special characters. From a PC running a Japanese edition of a supported Windows operating system, NTT also supports 55 Katakana characters. The special characters include: ! " # $ % & ' ( ) * + , - . / : ; < = > ? @ [ ] ^ _ ` { | } ~and the following Japanese-language special characters: (a Japanese edition of a supported Windows operating system is required.)The 55 Katakana characters include the following 45 Katakana characters:and the following 10 Katakana characters: Each time you start using Japanese-language characters, or stop using them, the driver adds a hidden character. Each hidden character reduces by one the number of characters you can encode.](https://usermanual.wiki/Entrust/Q10075.user/User-Guide-525287-Page-105.png)