Entrust Q20020 RFID Printer User Manual
Entrust Datacard Corporation RFID Printer
UserManual.wiki
>
Entrust
>
Q20020 User Manual
User Manual
Navigation menu
Upload a User Manual
Namespaces
Wiki Guide
HTML
PDF
Info
Views
User Manual
Discussion / Help
Navigation
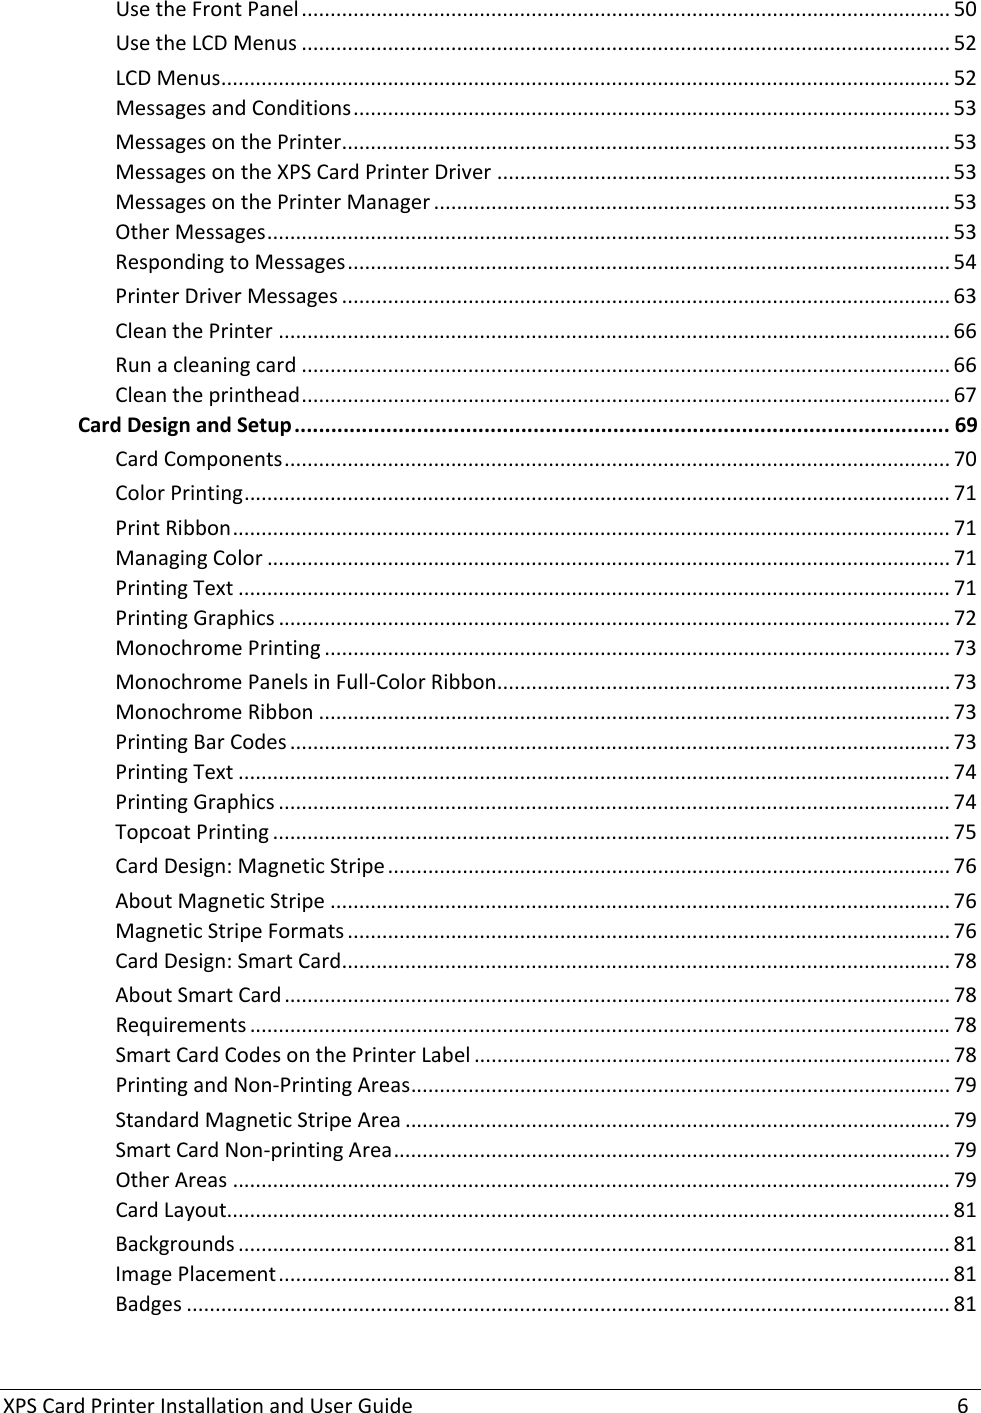
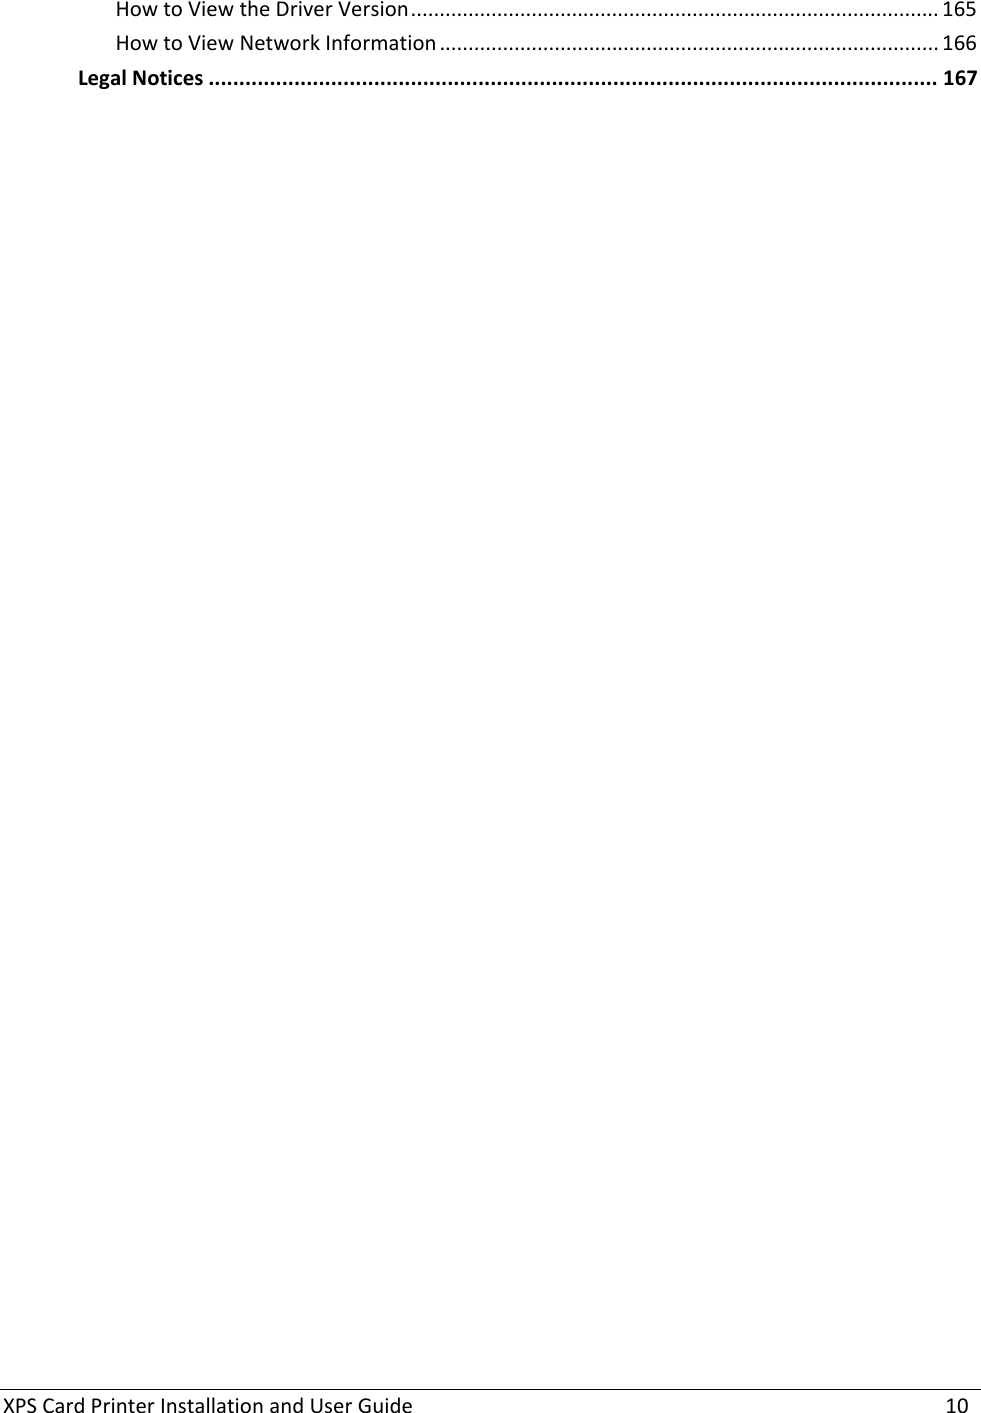
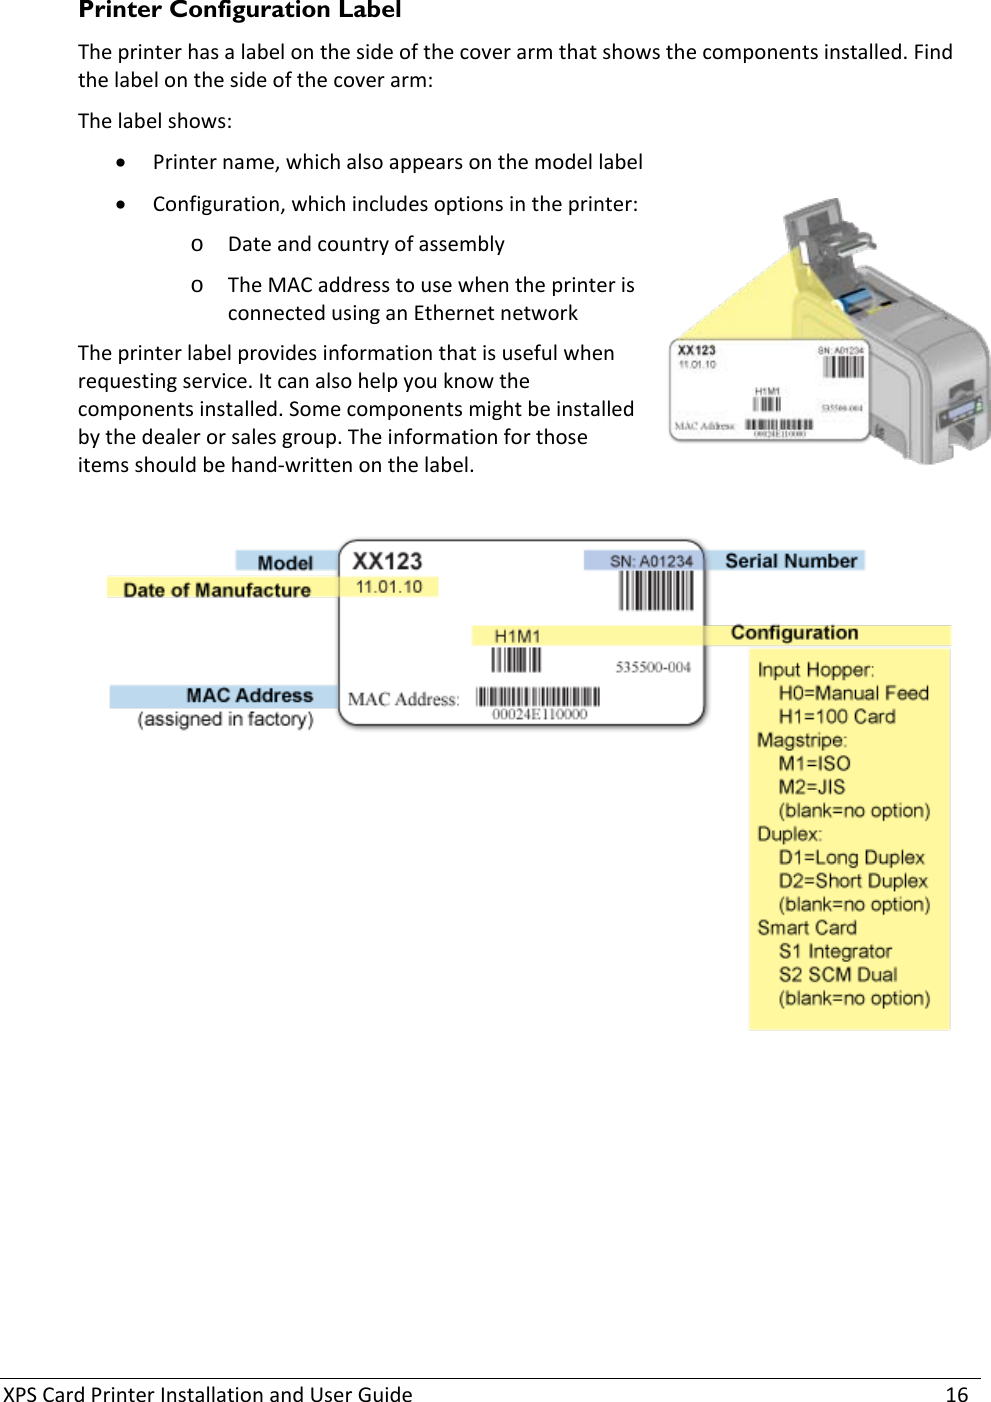

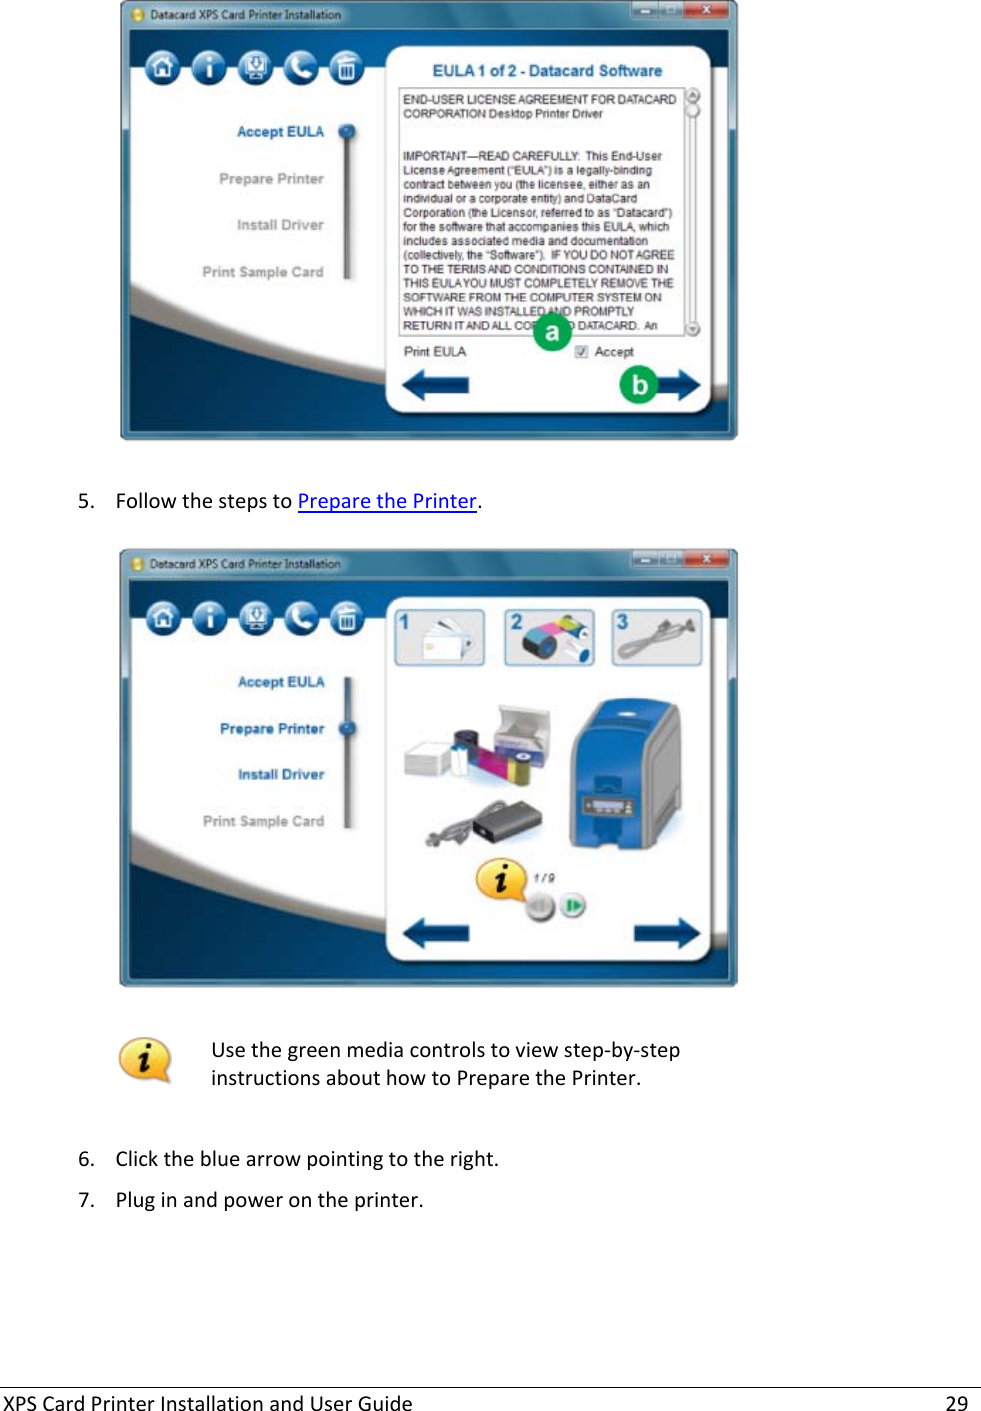
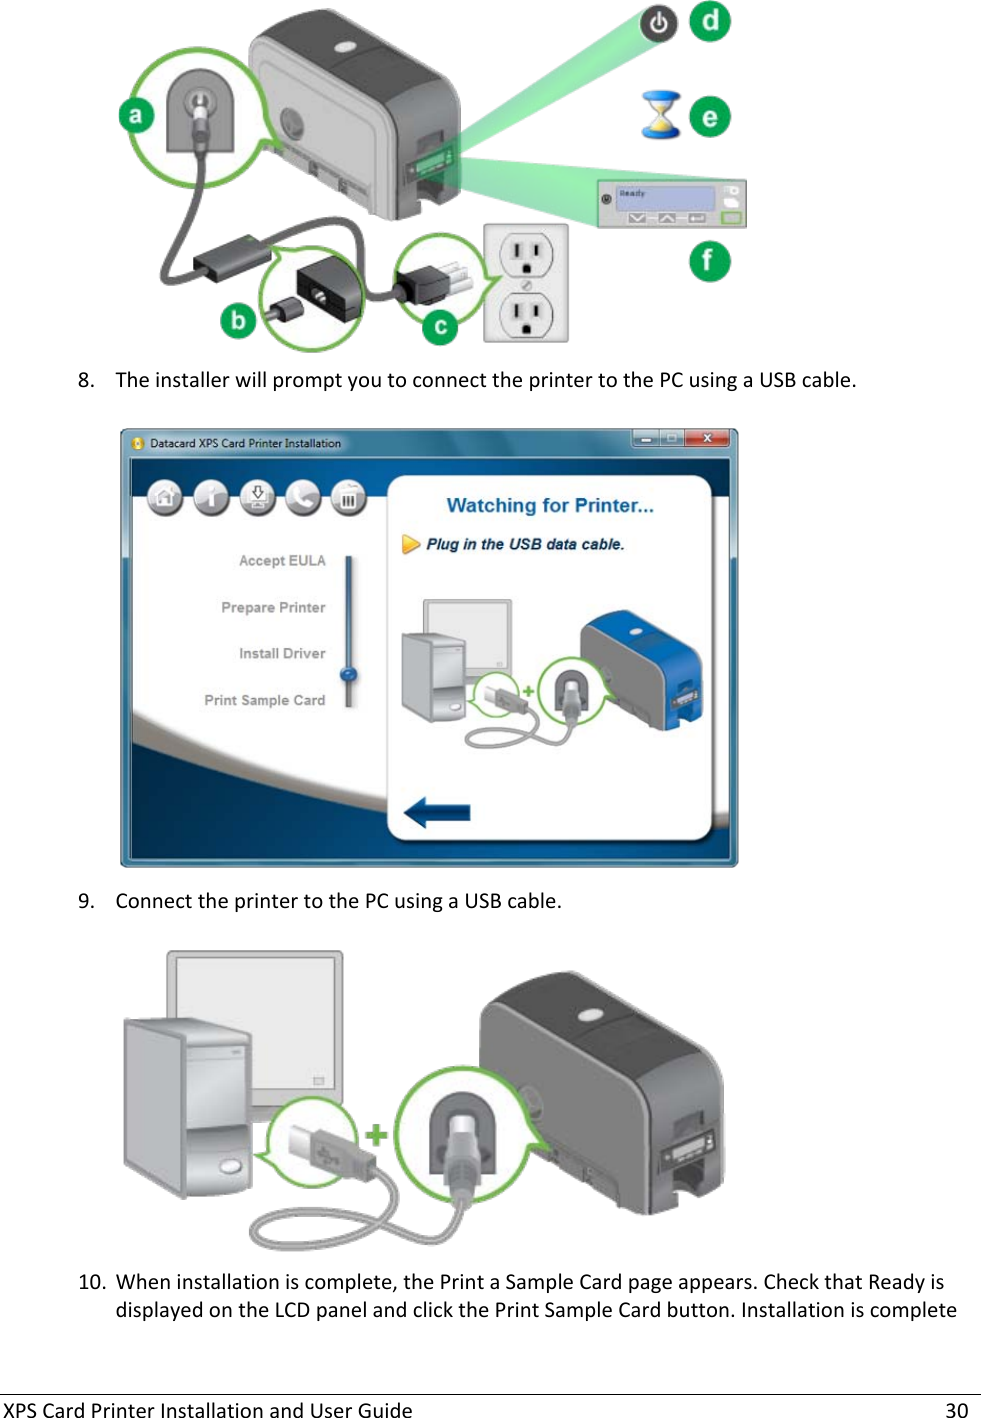
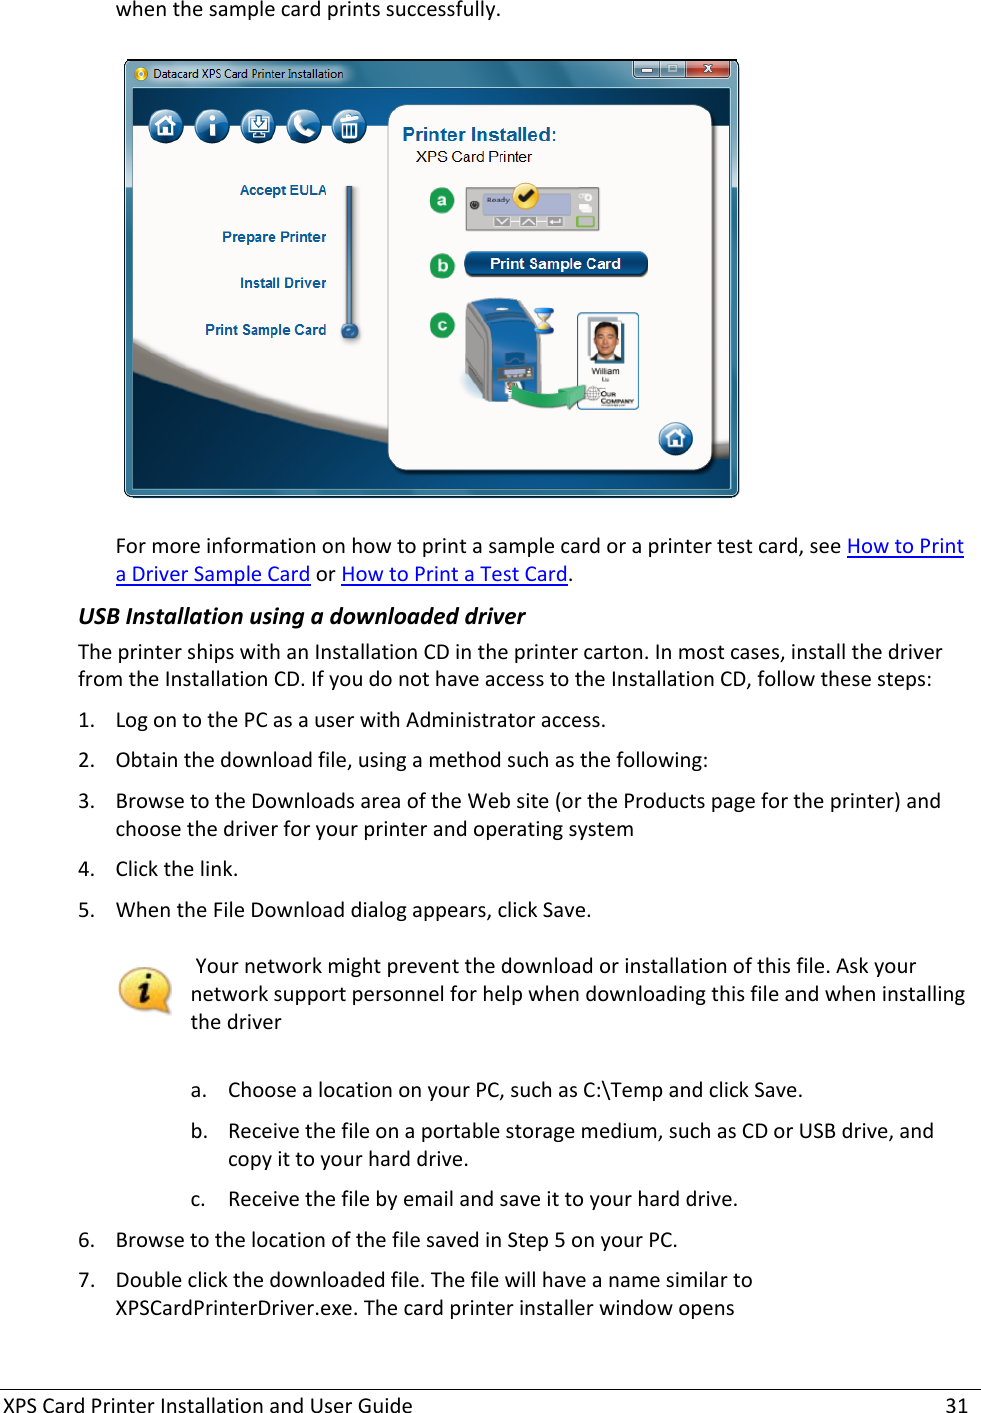
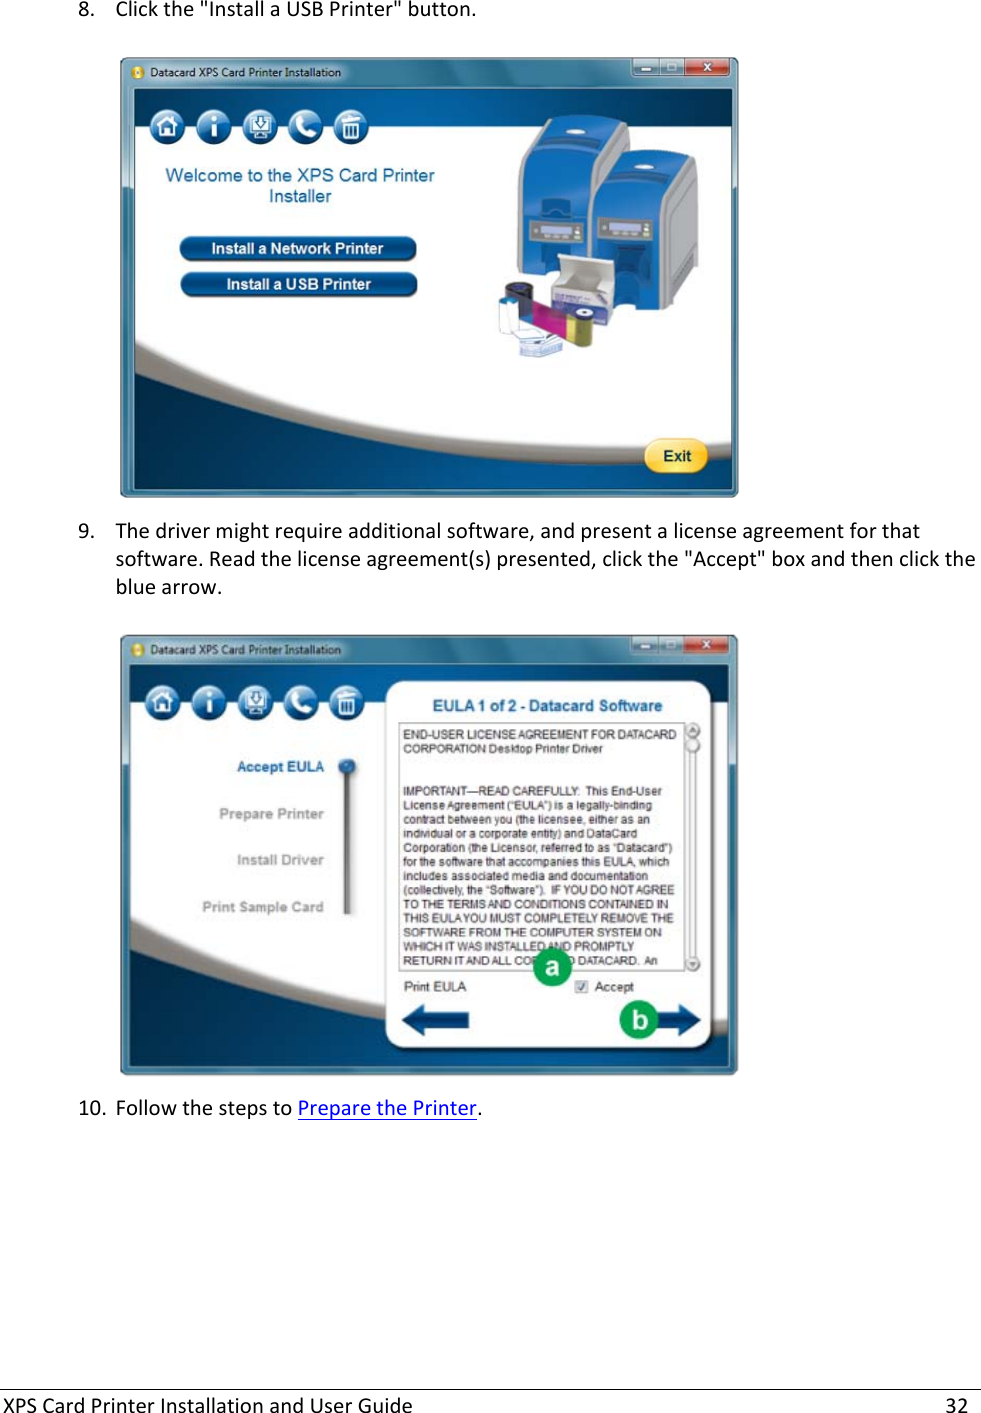
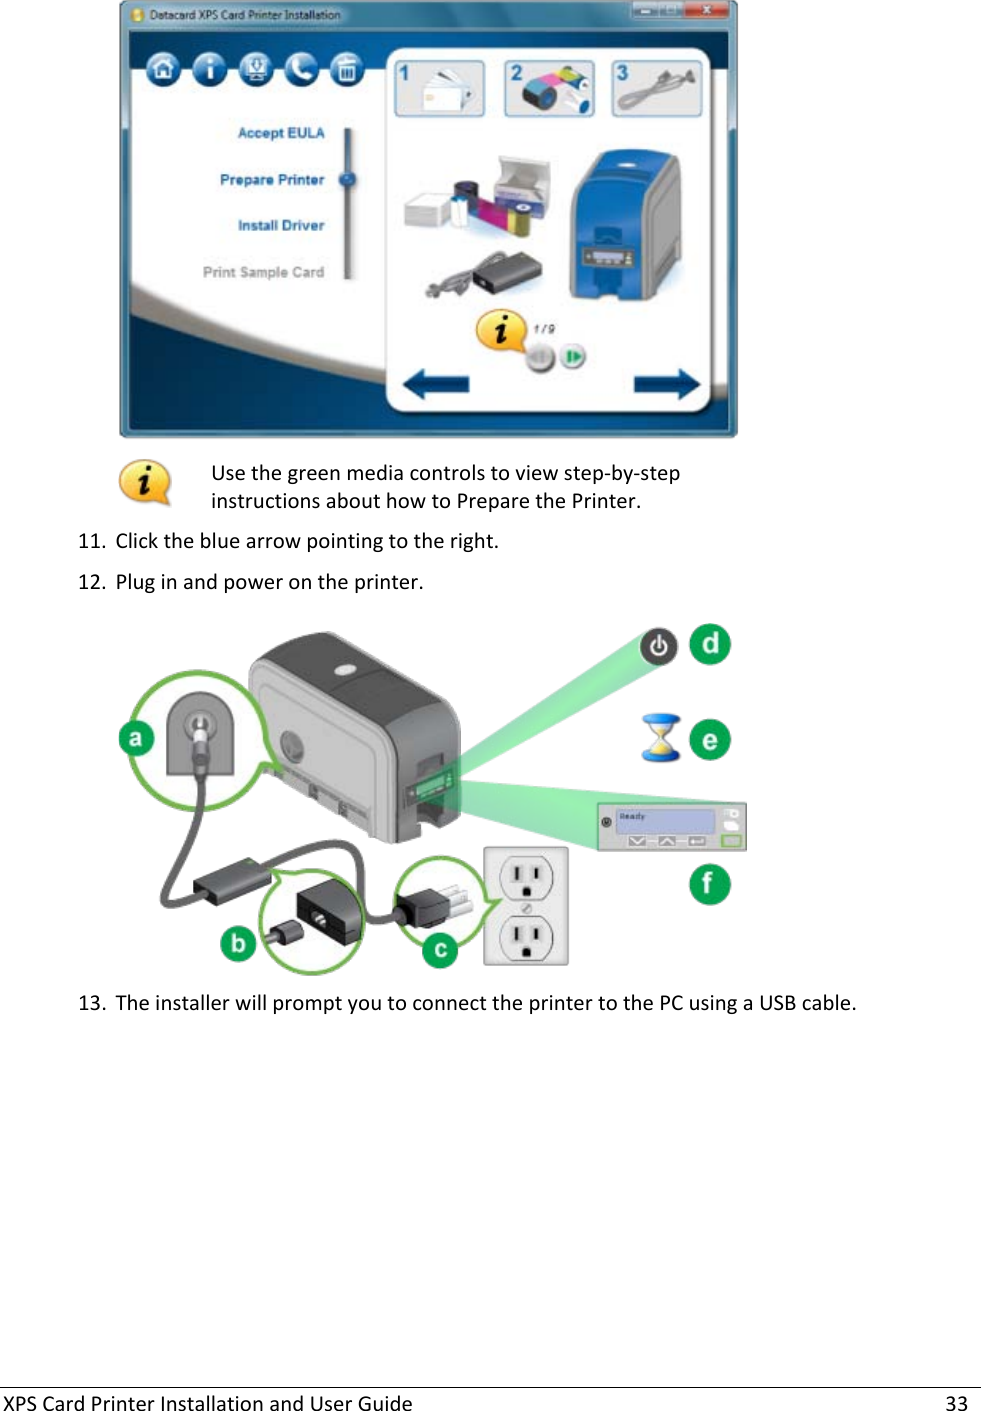
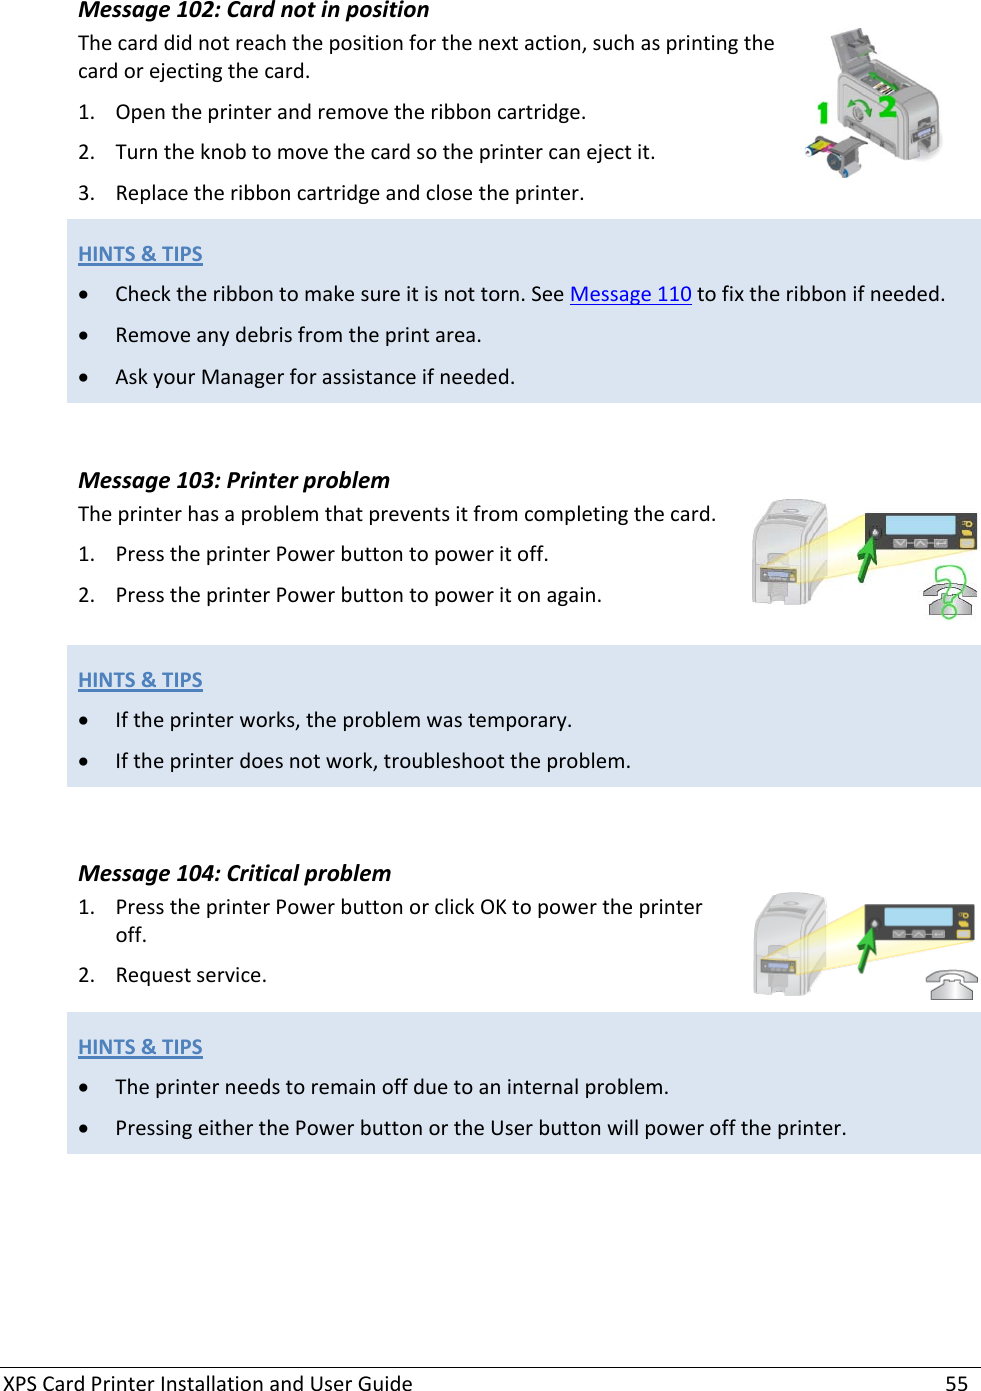


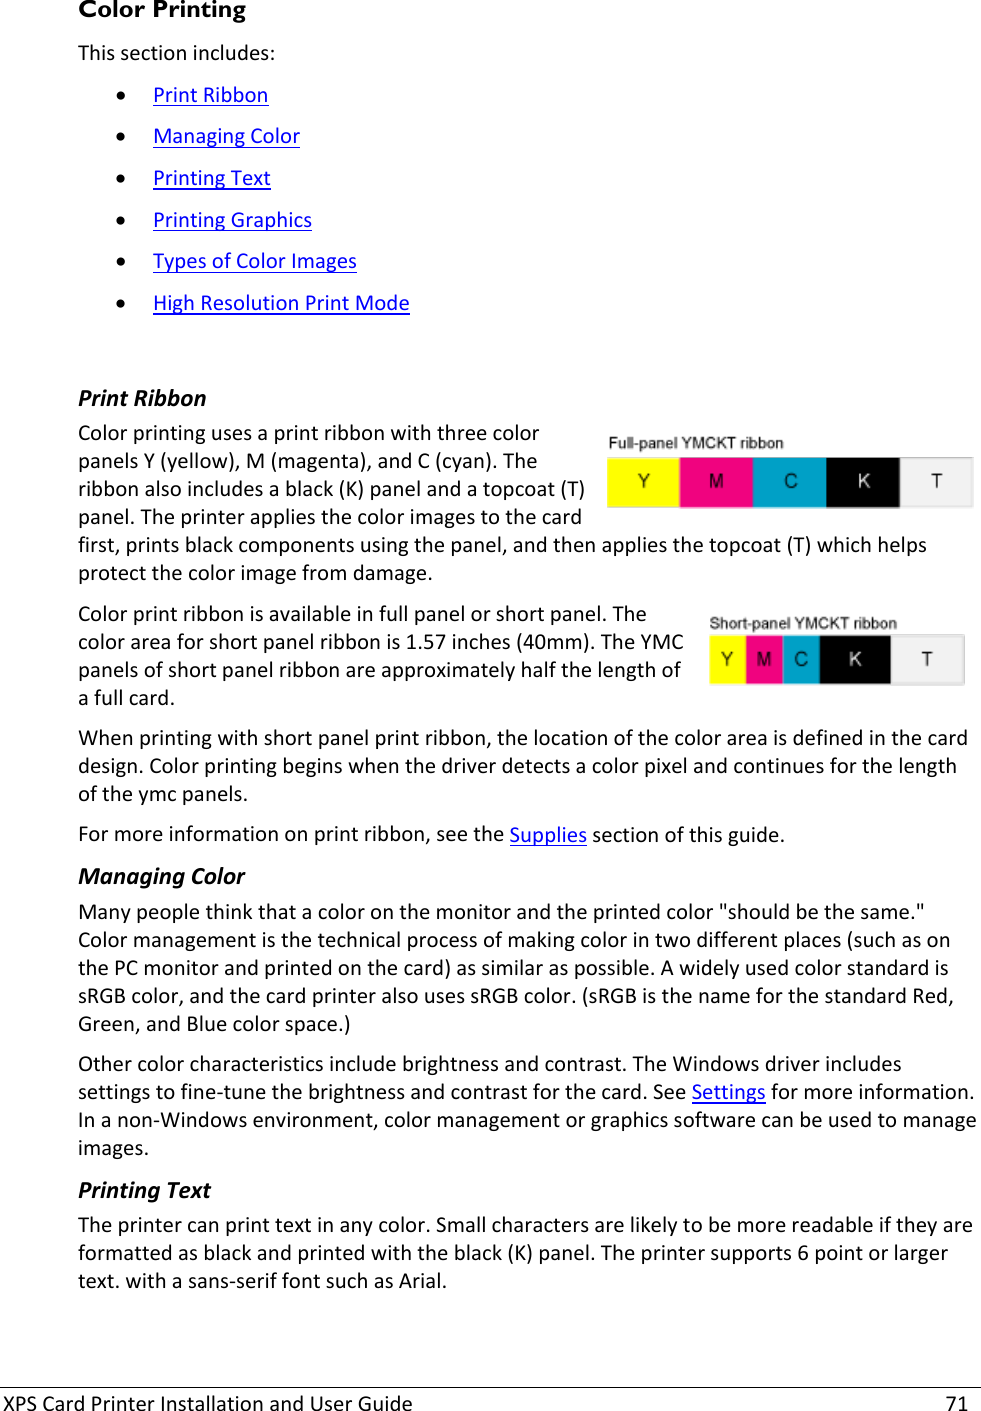

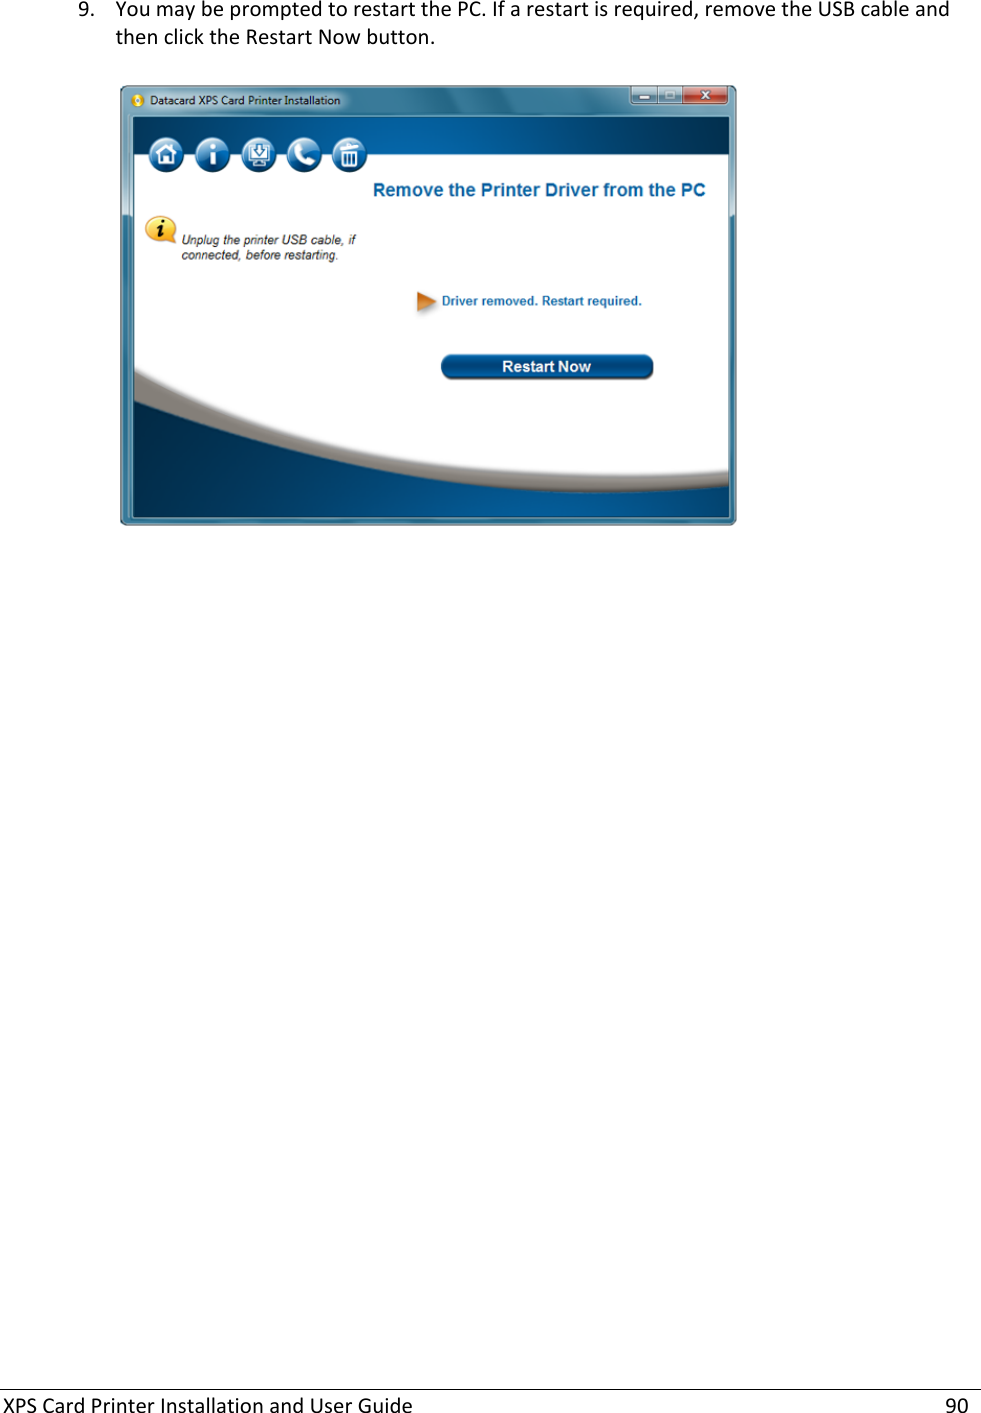
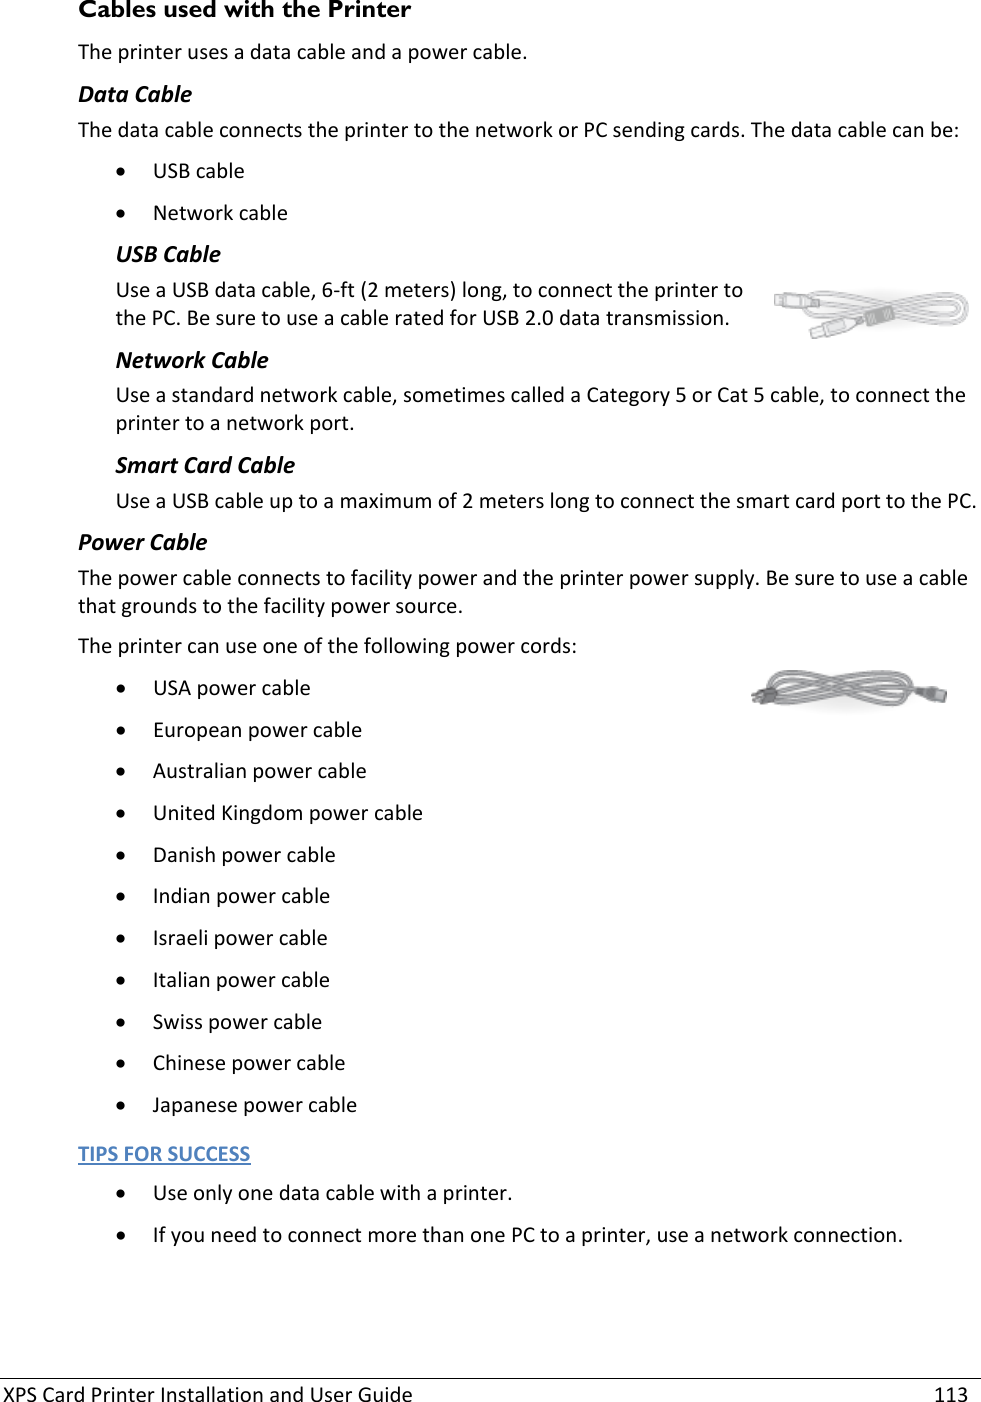
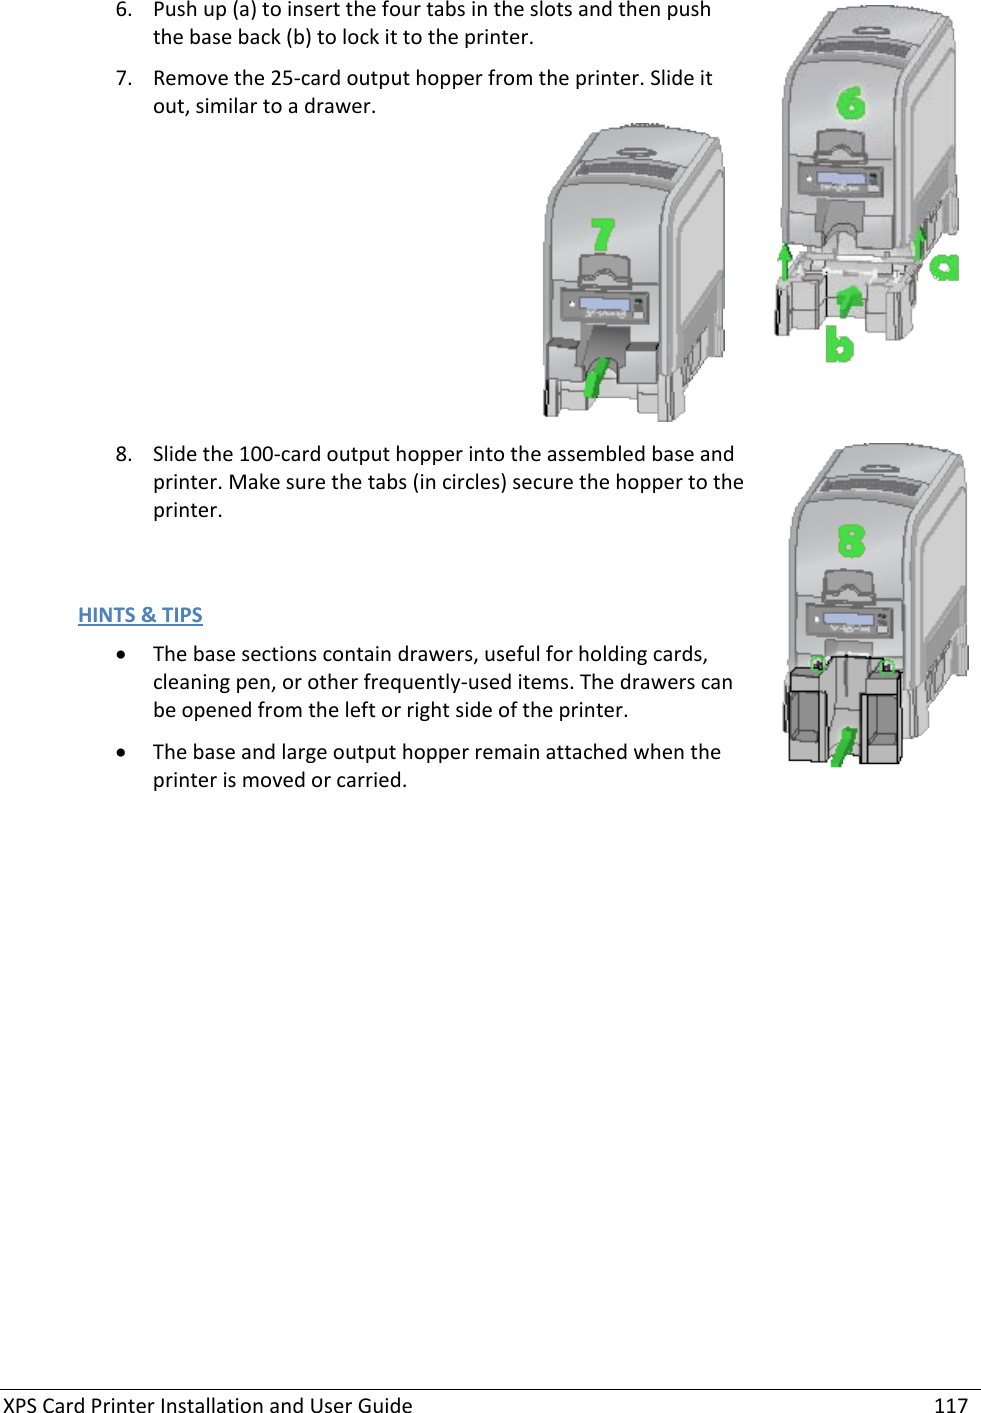
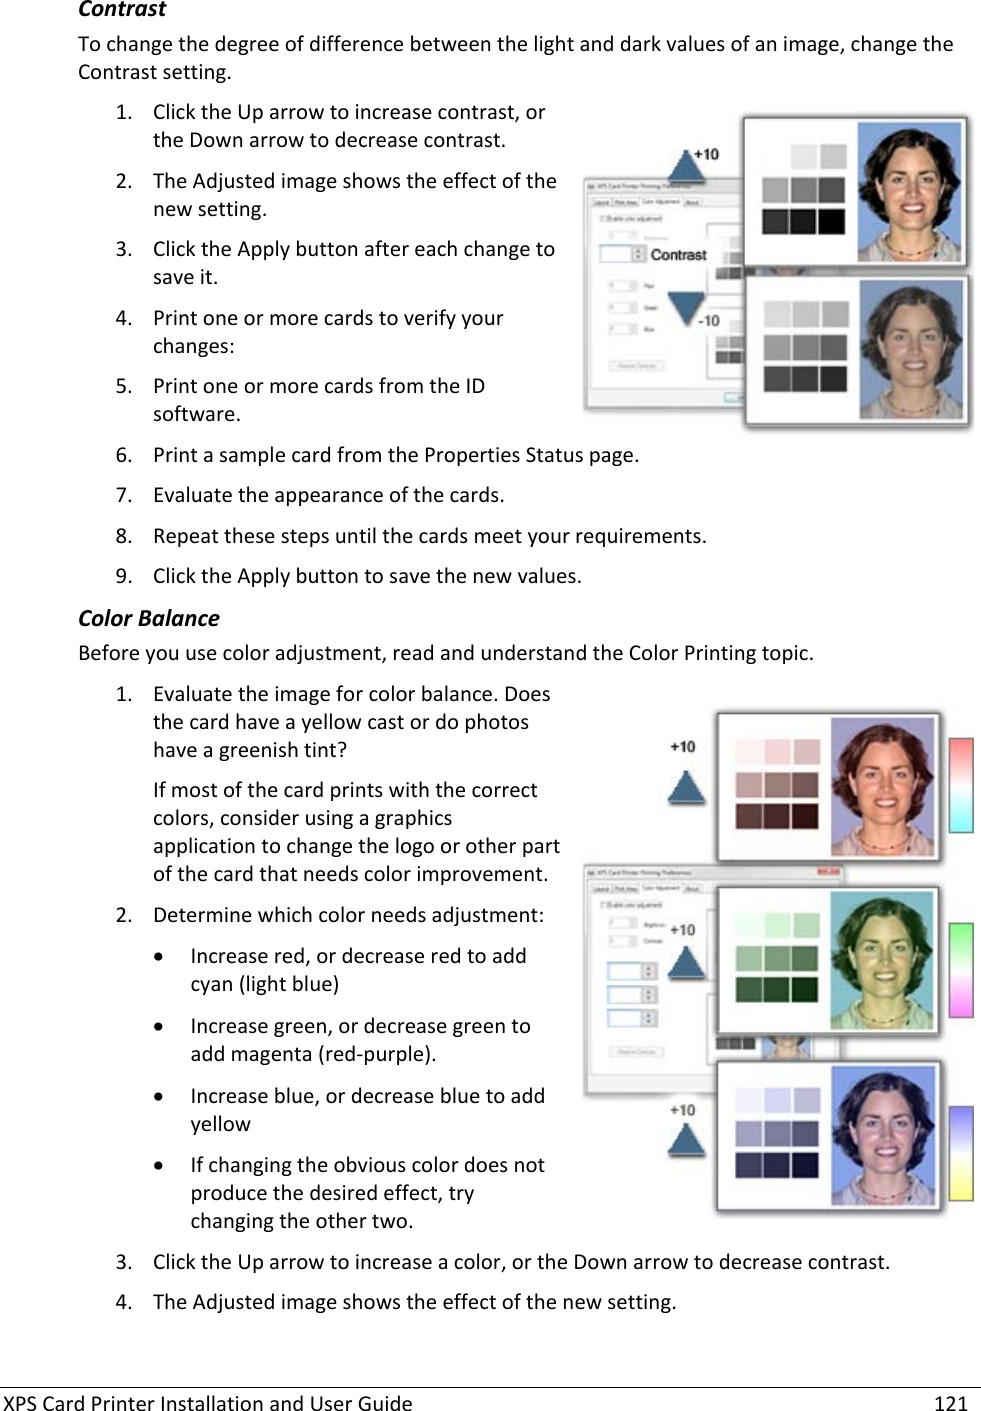
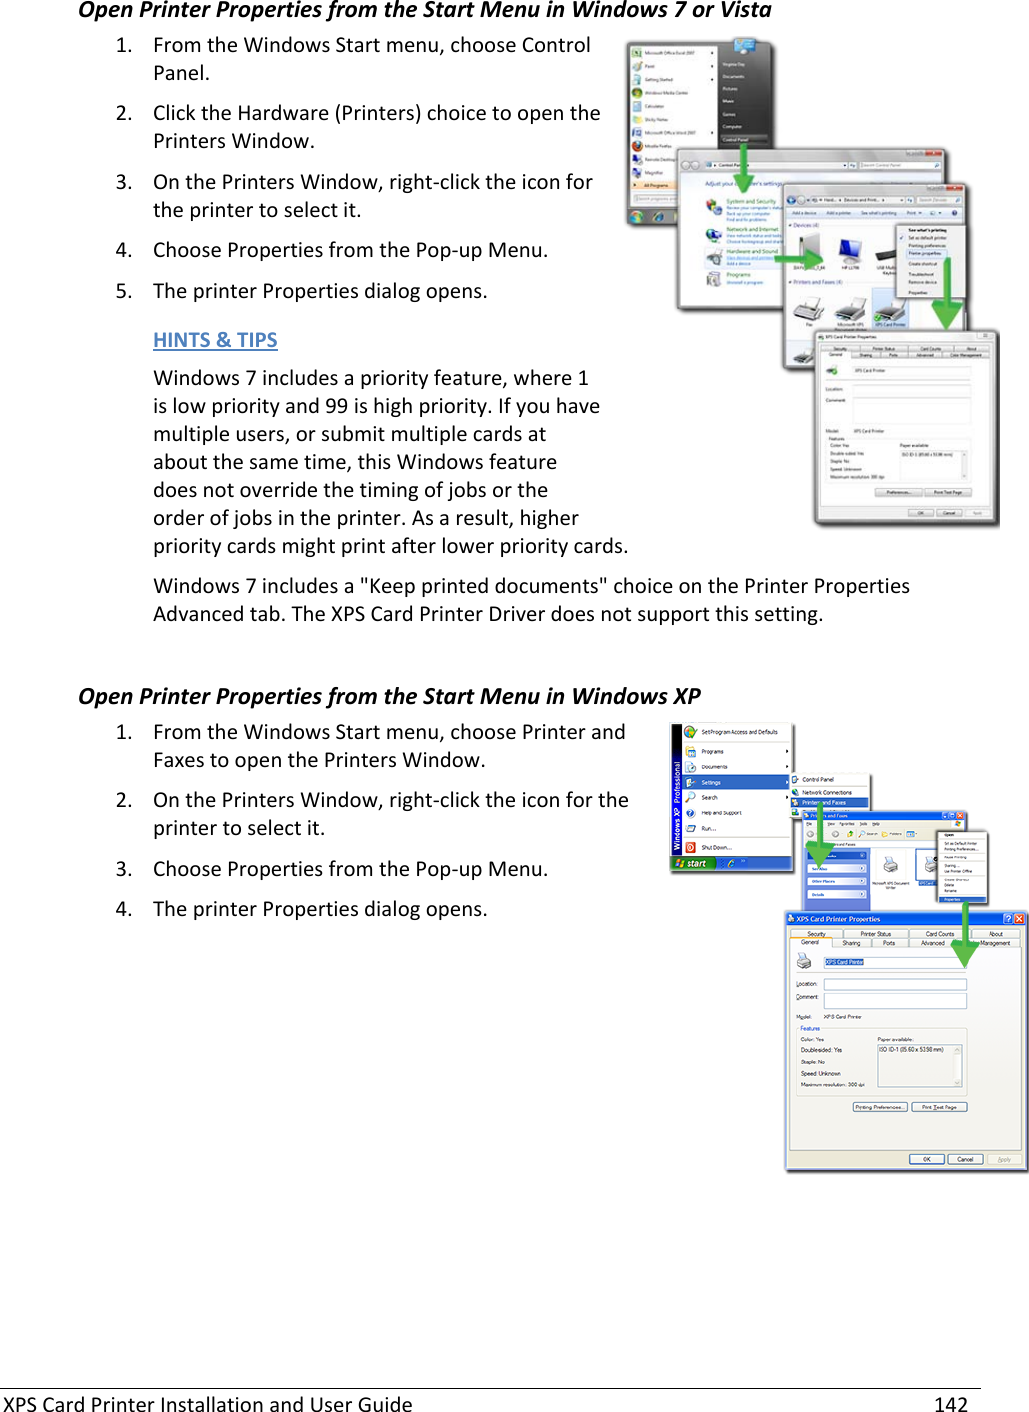
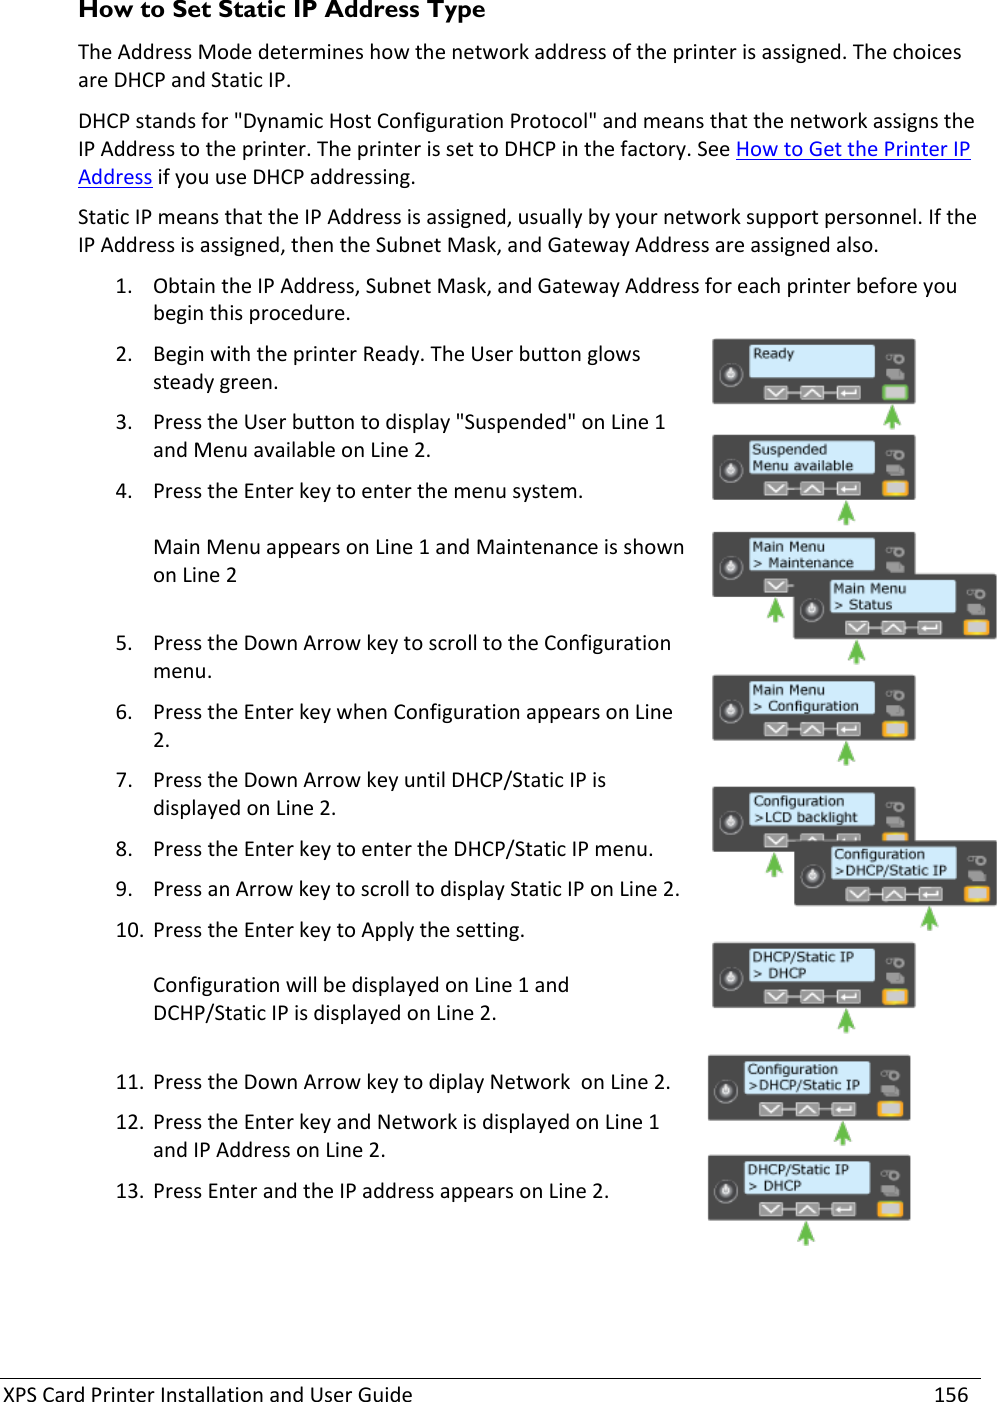
![XPS Card Printer Installation and User Guide 76 Card Design: Magnetic Stripe This section describes: • About Magnetic Stripe • Magnetic Stripe Formats • Magnetic Stripe Escapes • Magnetic Stripe Fonts About Magnetic Stripe Magnetic stripe is an option available in the printer. See the Printer Status page of Printer Properties for the printer to see if your printer has a magnetic stripe option. The cards you use must also have a magnetic stripe. The magnetic stripe is a brown or black stripe close to one long edge of the card. See the package containing new cards for details about the magnetic stripe. The magnetic stripe option is set up to define the coercivity, number of tracks, and data format. The coercivity and data format are set in the printer. The installer sets these values and they remain the same for all cards printed using the same design. See How to Set the Magnetic Stripe Coercivity if you need to change the coercivity. The data format determines how many characters can be encoded on a track. It also determines which characters can be encoded. Click here to see the characters available with the default ISO three-track format. Click here to see the characters available with the JIS single-track format. Your cards can use the default format for each track, or can use a different combination of tracks and data formats. Magnetic Stripe Formats Three-Track Option The default data formats for a three-track magnetic stripe option are: • Track 1 — IATA • Track 2 — ABA • Track 3 — TTS This combination is often abbreviated IAT. This format is called ISO format. IATA (International Air Transport Association) The maximum number of characters for IATA format is 76 characters. These characters can include spaces, upper case alphabetic characters, numeric characters, and the following special characters: ! # $ % ' ( ) * + , - . / ; : < @ > = ^ ] \ [ " & _](https://usermanual.wiki/Entrust/Q20020/User-Guide-1424676-Page-76.png)
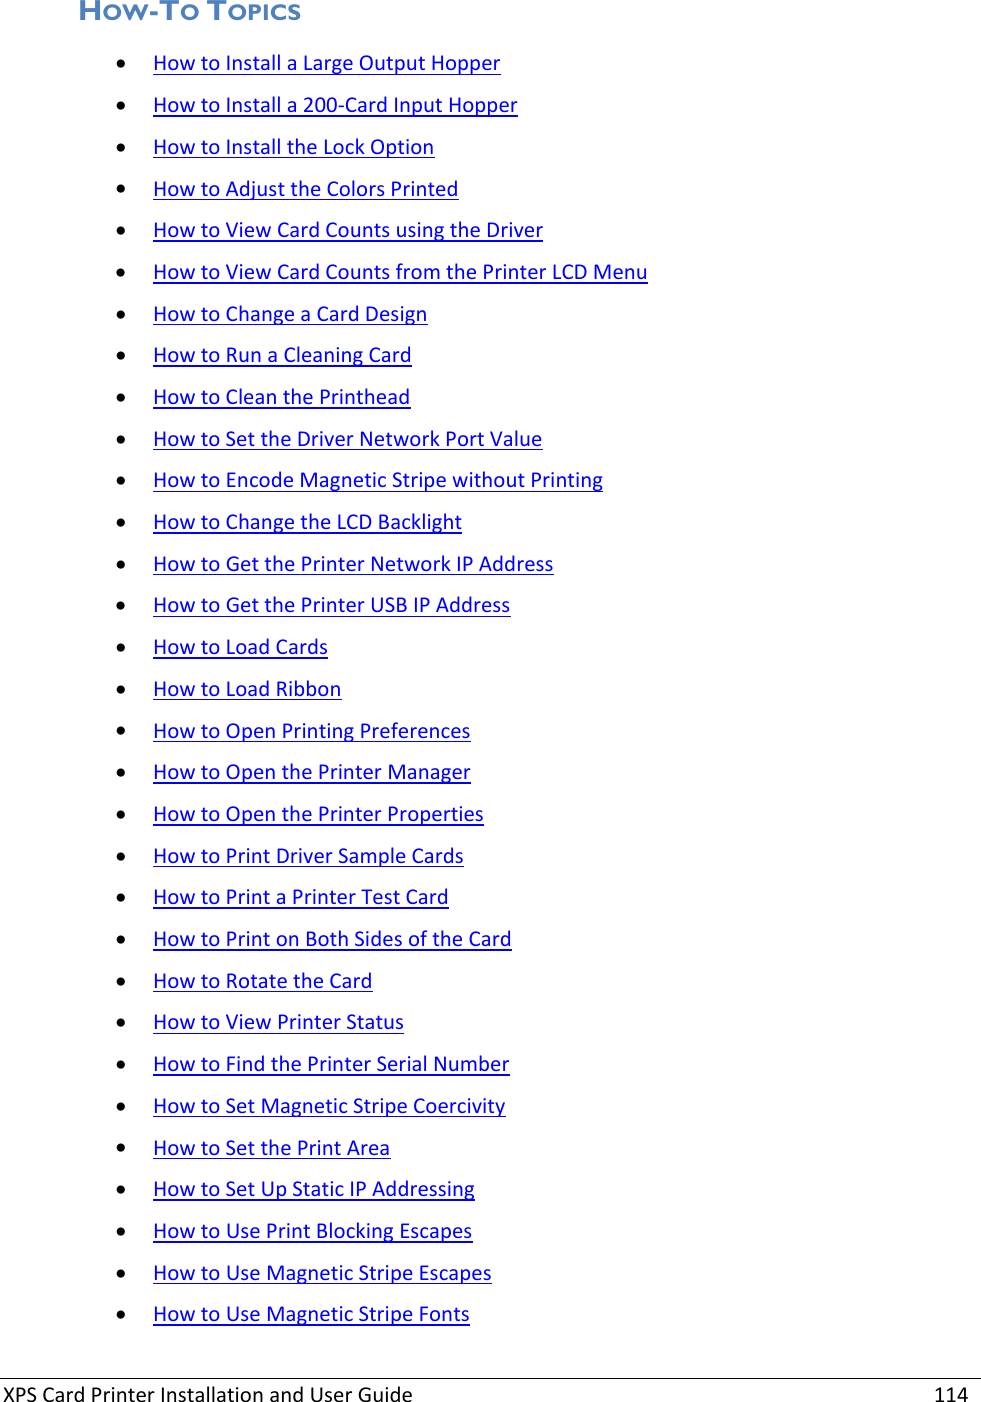
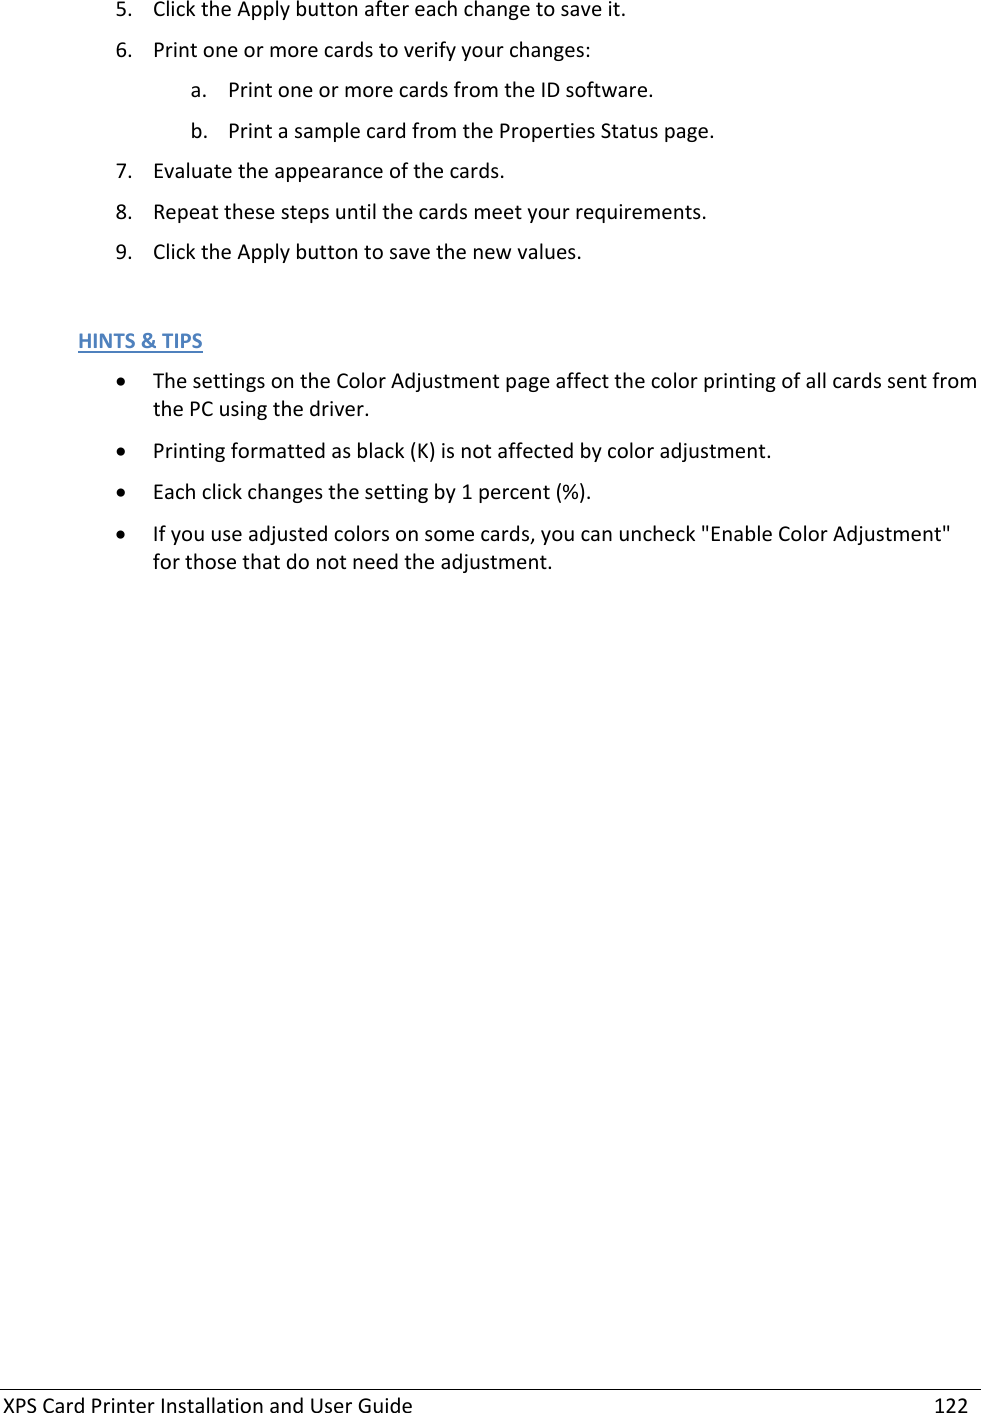
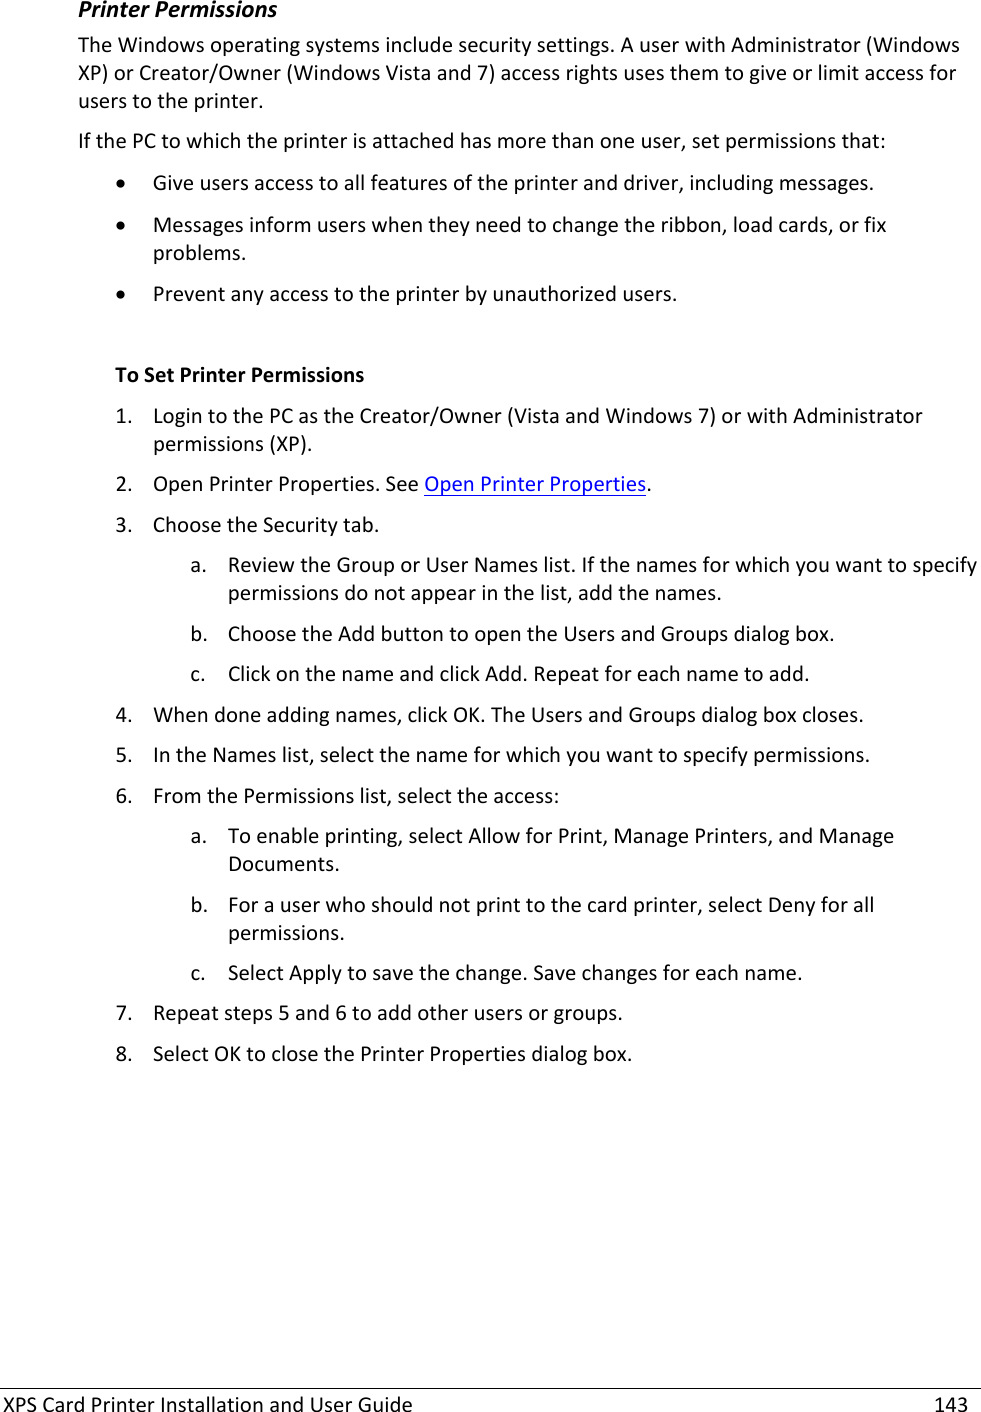
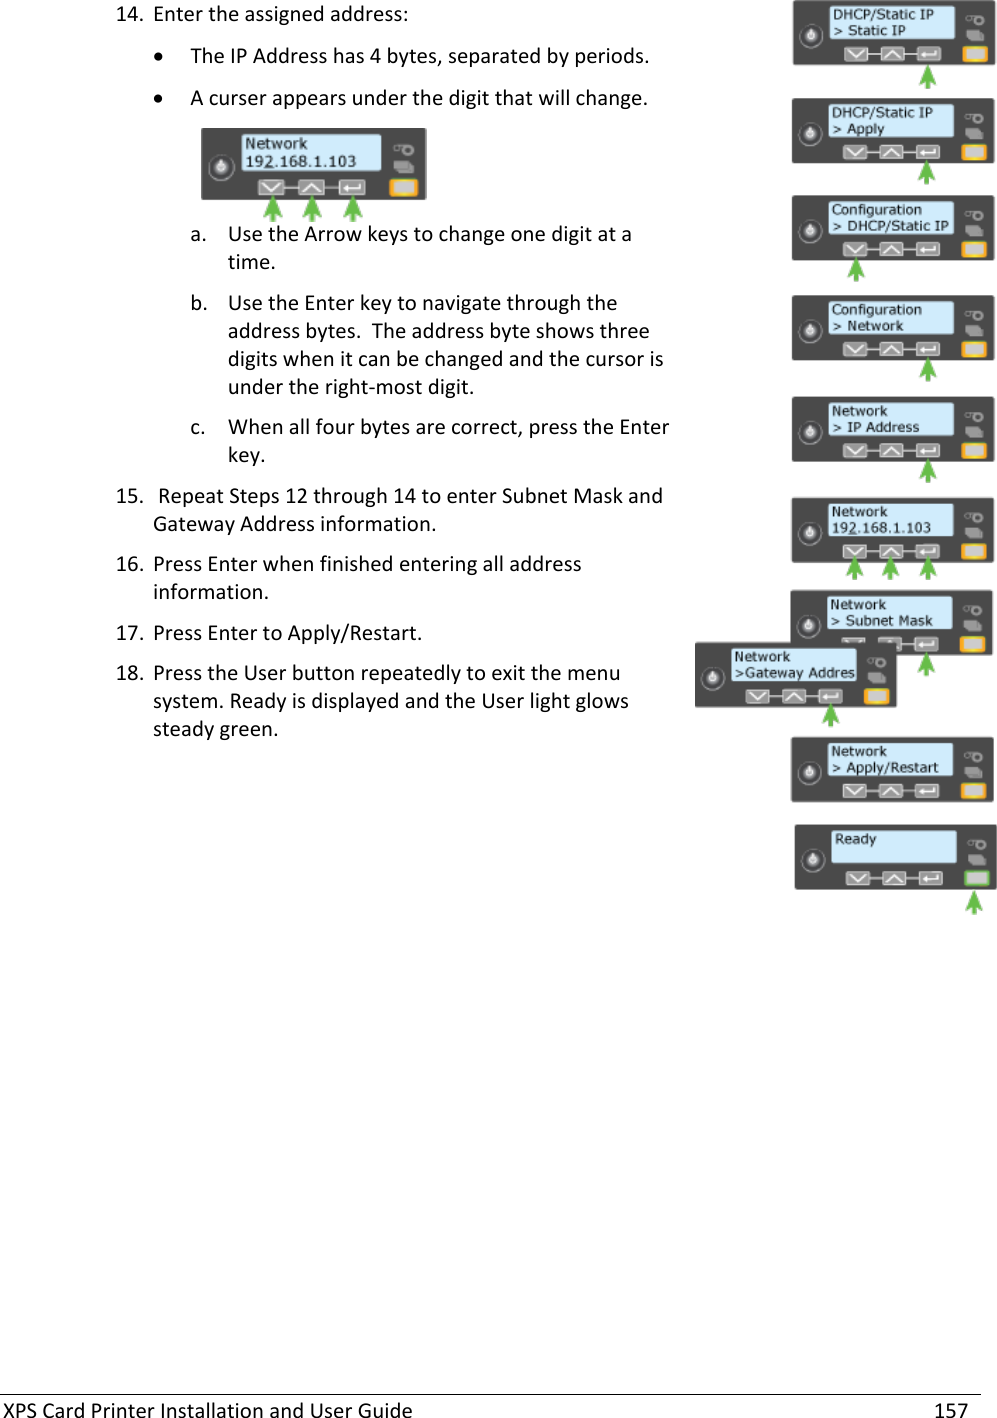
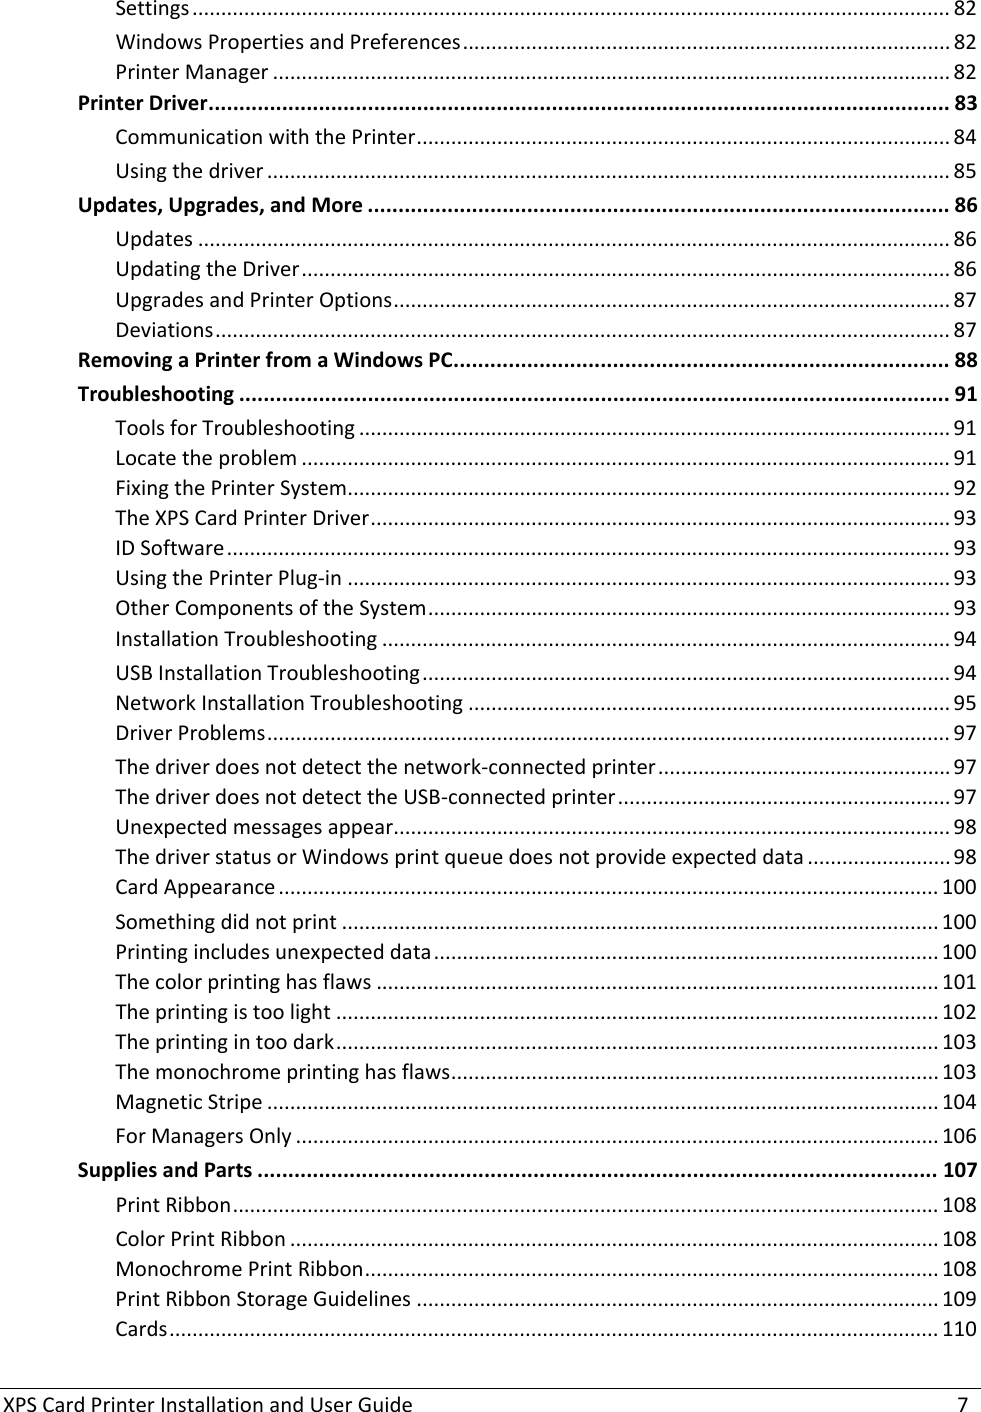
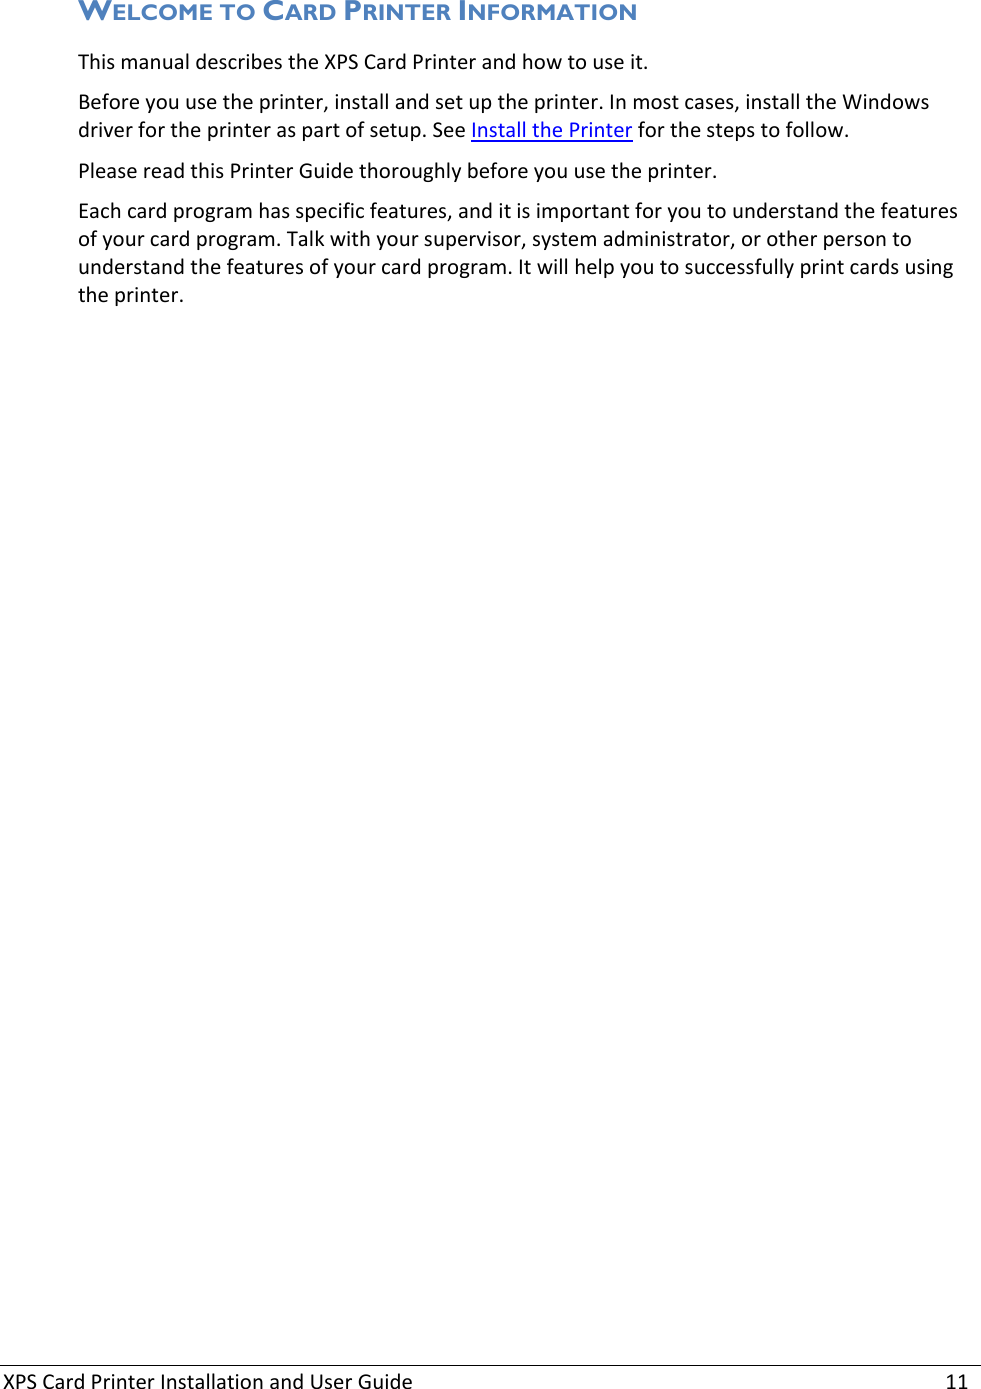
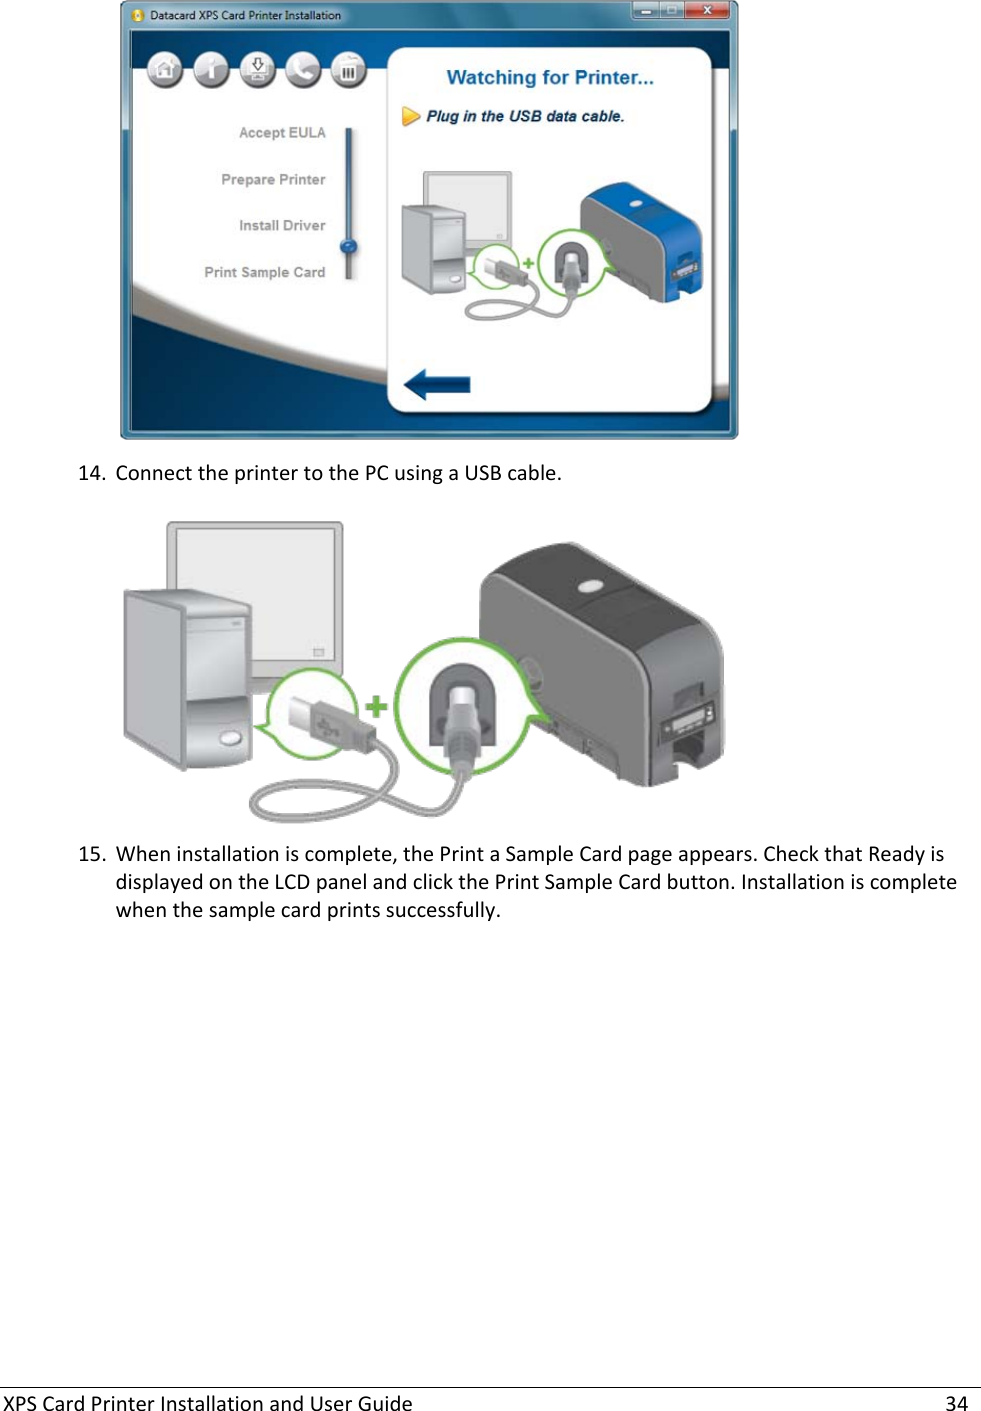
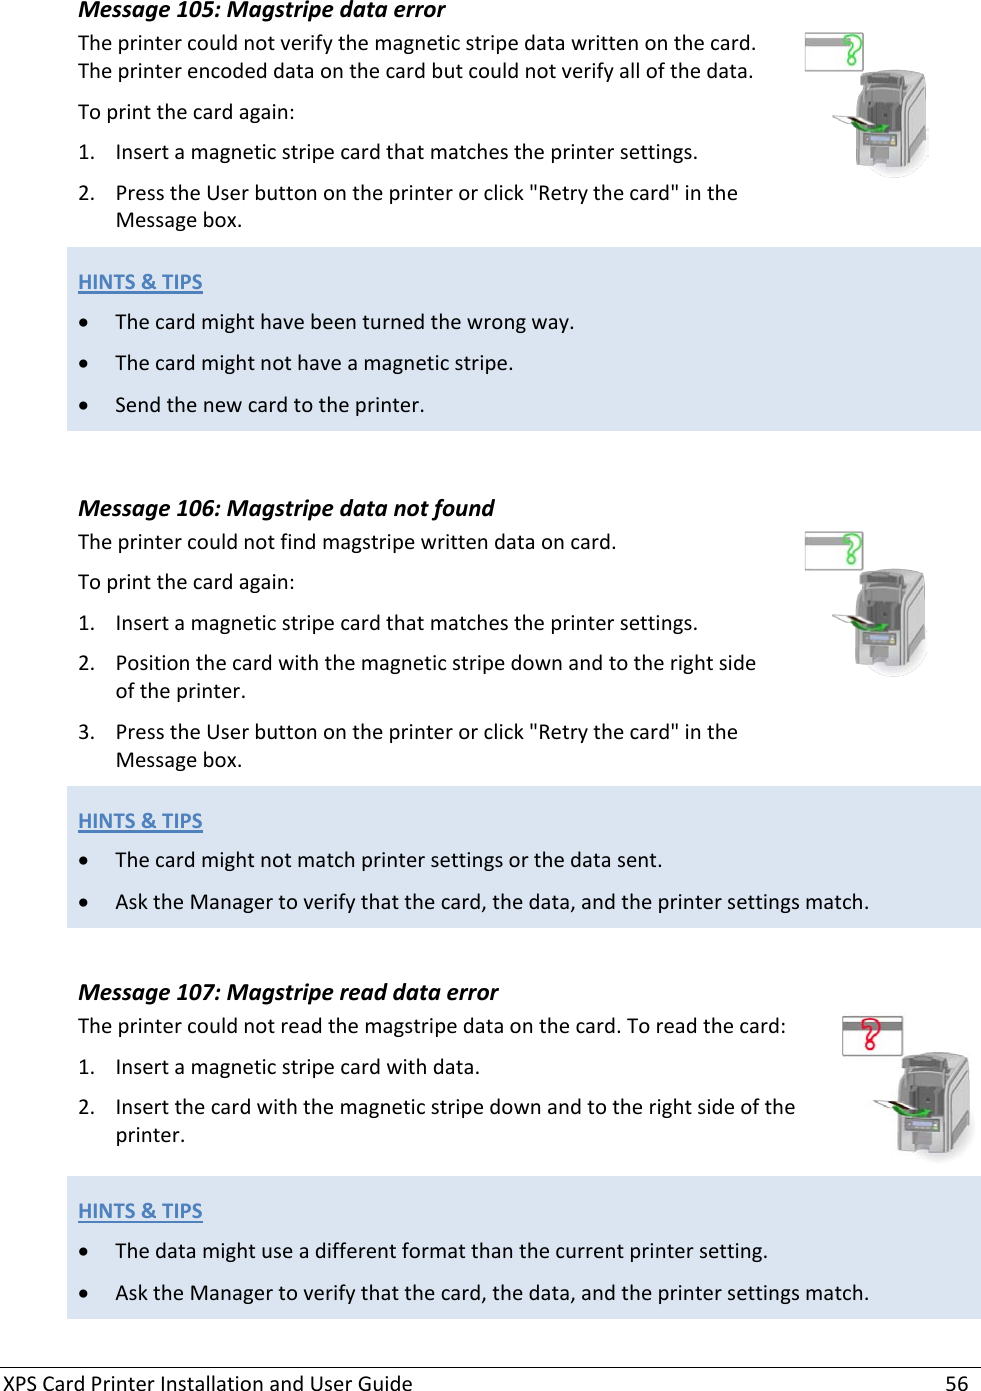
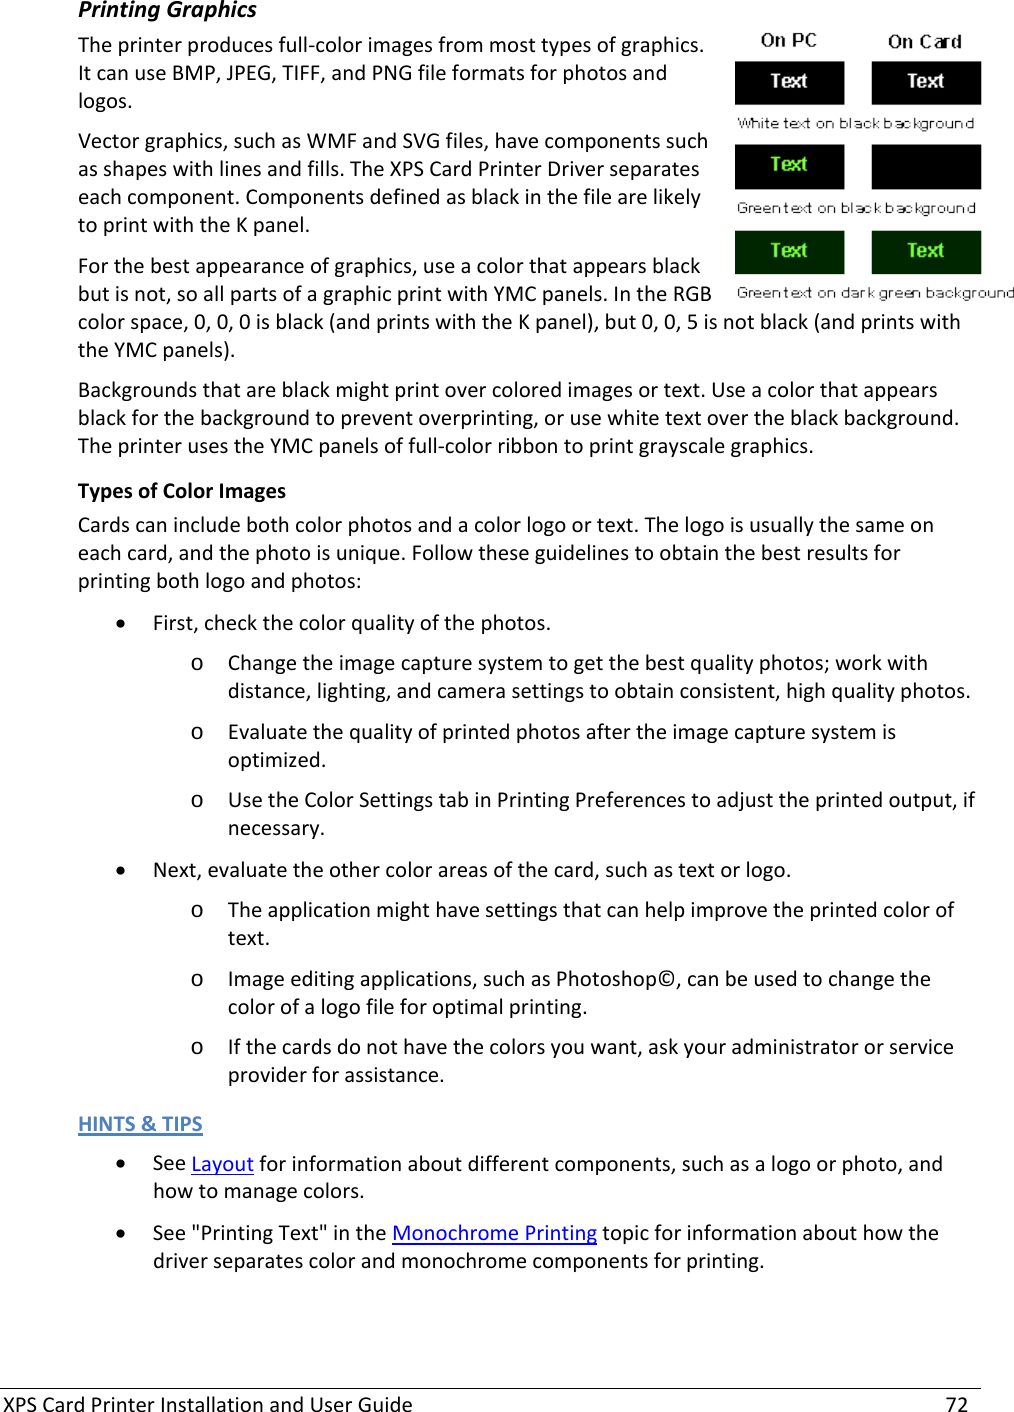
![XPS Card Printer Installation and User Guide 77 ABA (American Bankers Association) The maximum number of characters for ABA format is 37 characters. Numeric characters and the following special characters are allowed: : ; < = > TTS (Thrift Third Standard) The maximum number of characters for TTS format is 104 characters. Numeric characters and the following special characters are allowed: : ; < = > Single-Track Option The default data encoding format for a single-track magnetic stripe module is the JIS Type II format. JIS (Japanese Industrial Standard) The maximum number of characters for the JIS format is 69 characters. These characters can include spaces, numeric characters, upper case alphabetic characters, lower case alphabetic characters, and the following special characters: ! " # $ % & ' ( ) * + , - . / : ; < = > ? @ [ ] ^ _ ~ { | } ~ From a PC running a Japanese edition of a supported Windows operating system Japanese-language characters are also supported. They include the following special characters: 45 Katakana characters: and the following 10 Katakana characters: Each time you start using Japanese-language characters, or stop using them, a hidden character is added. Each hidden character reduces the number of characters you can encode by one character.](https://usermanual.wiki/Entrust/Q20020/User-Guide-1424676-Page-77.png)