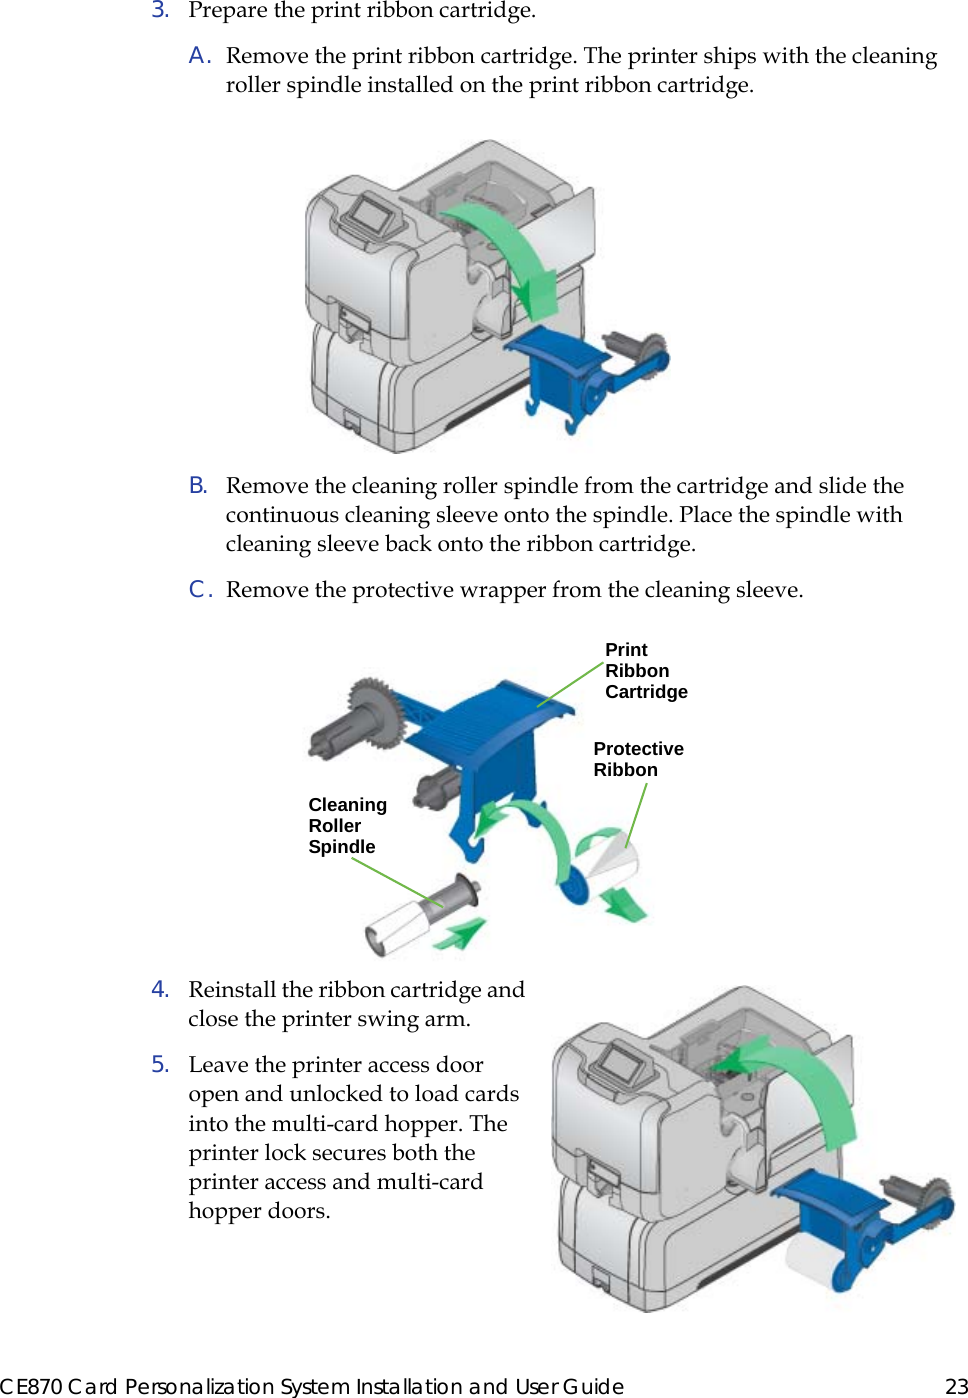
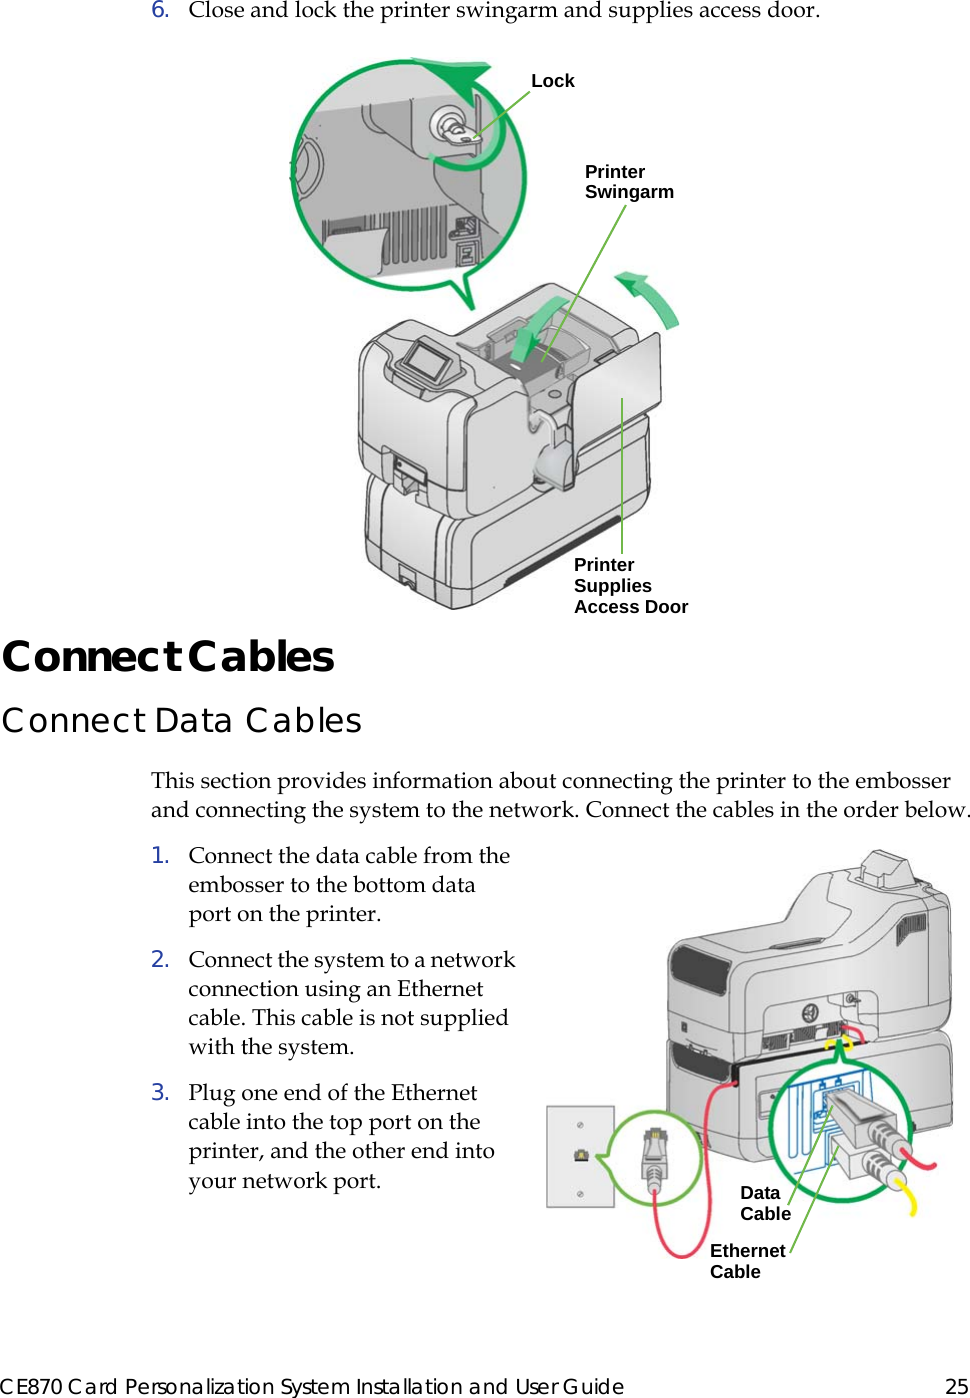
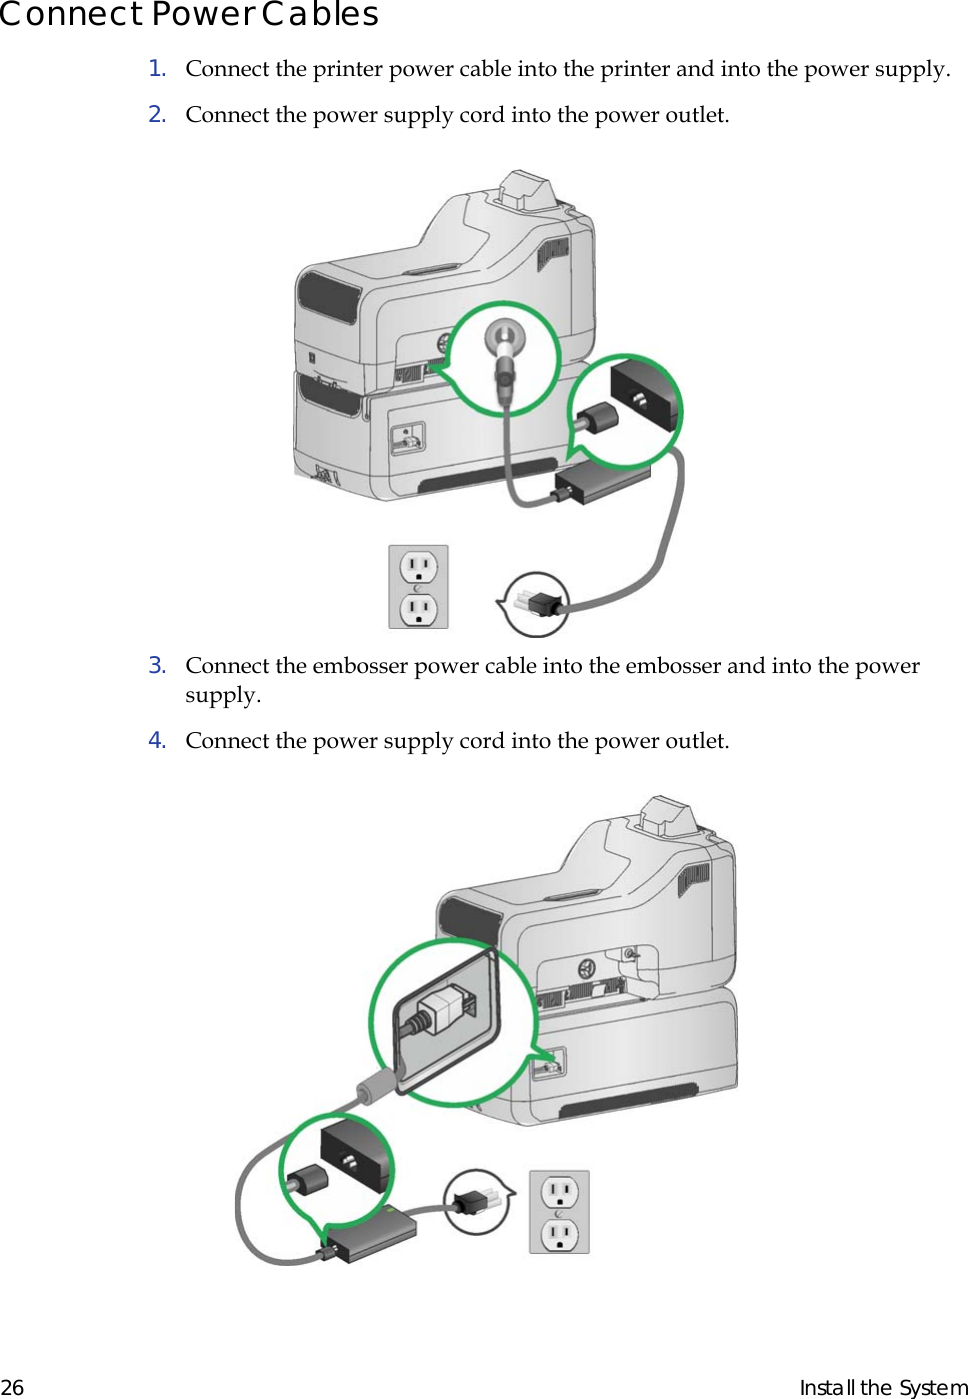
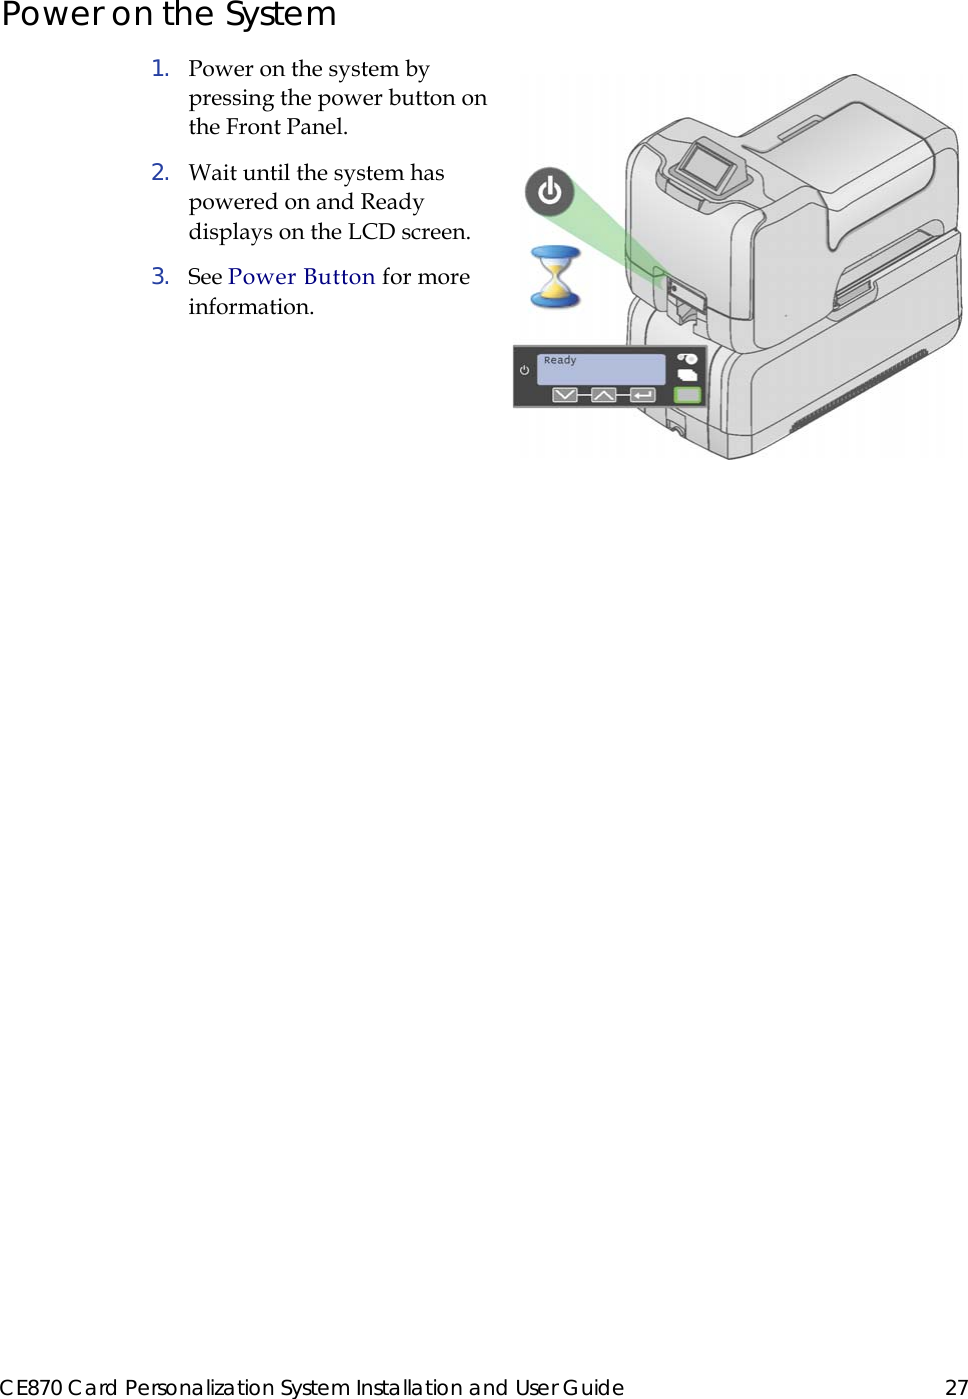
Entrust Q30030 Card Personalisation System User Manual
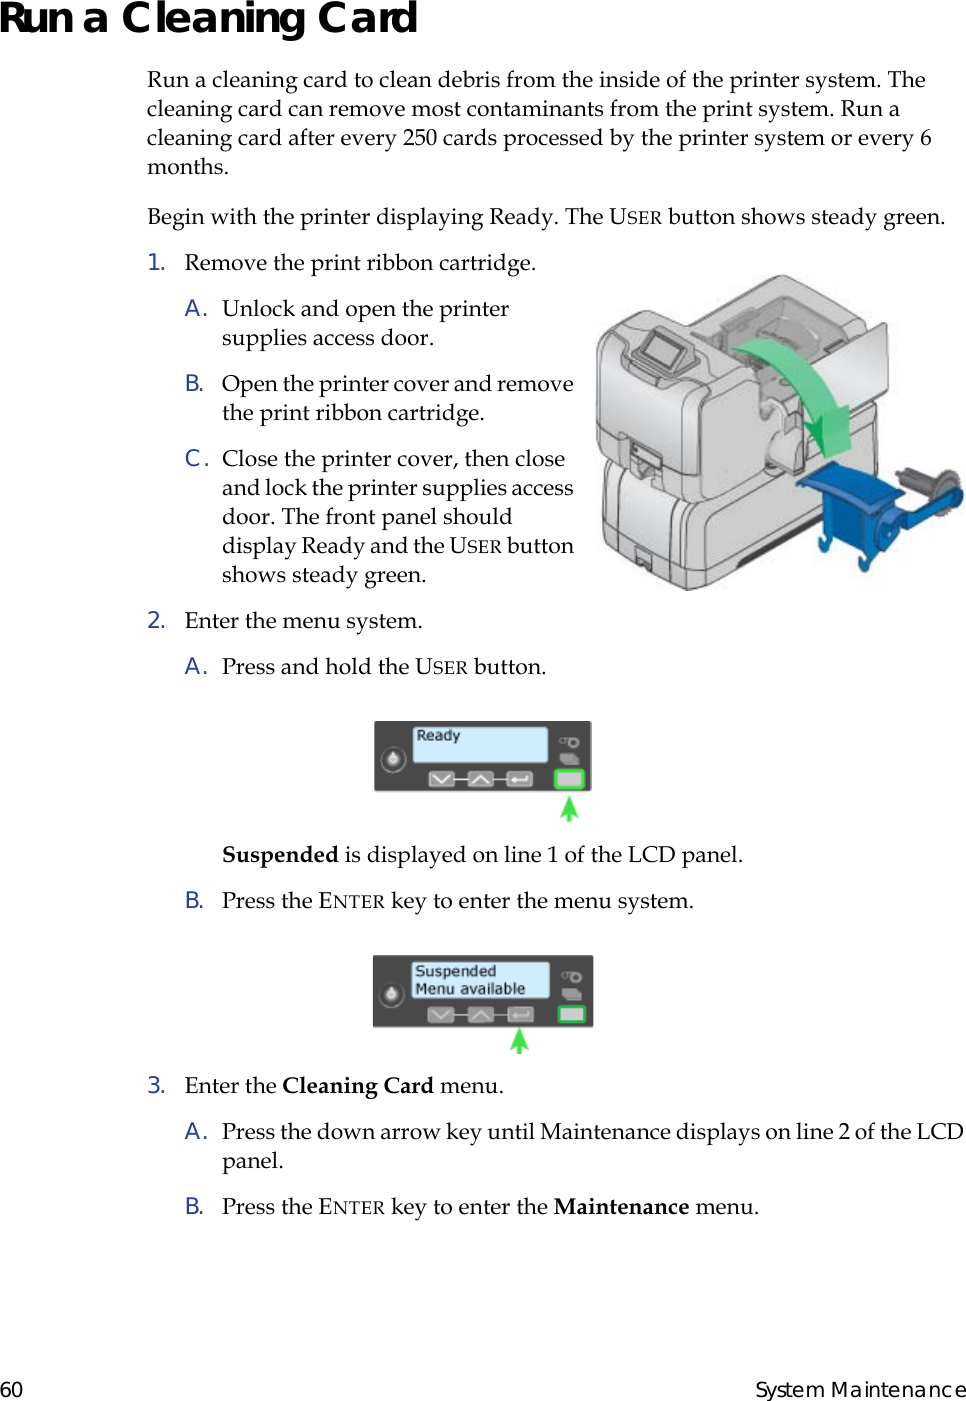
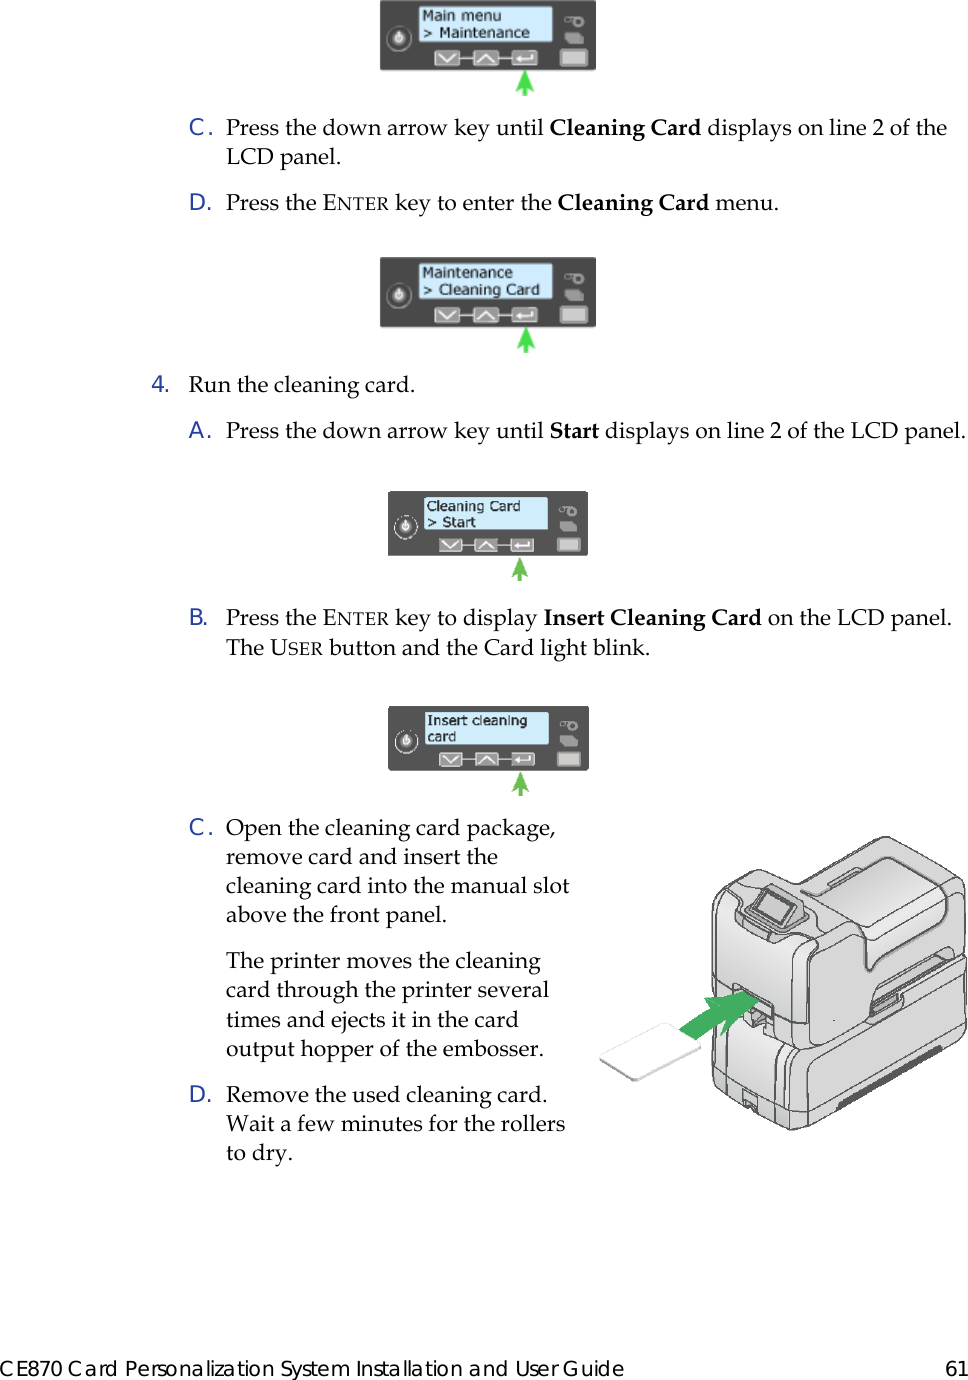
Entrust Datacard Corporation Card Personalisation System Users Manual
UserManual.wiki
>
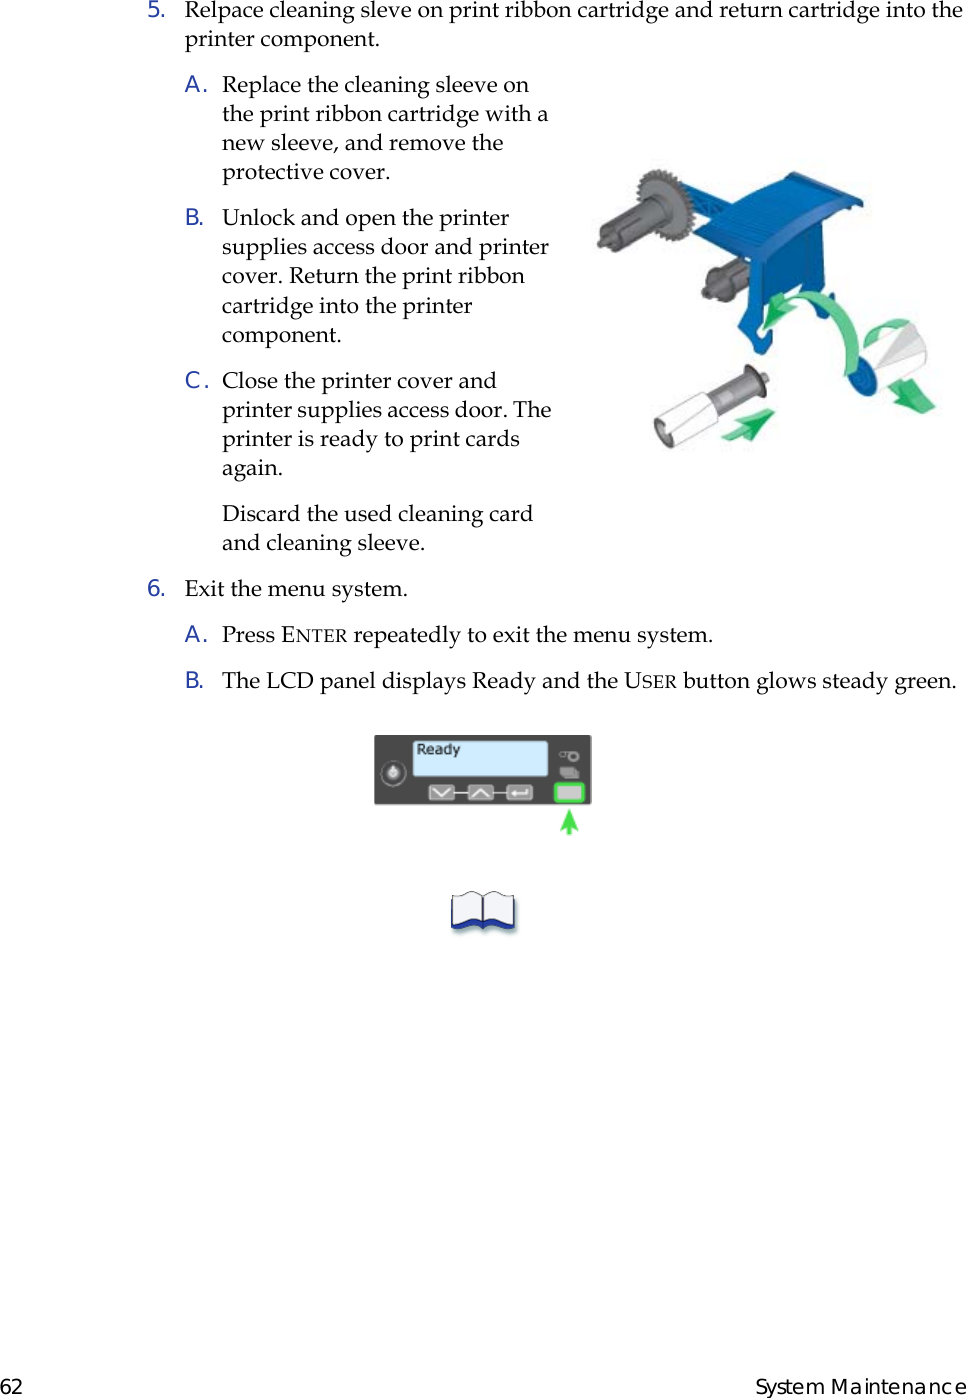
Entrust
>
Q30030 User Manual
User Manual
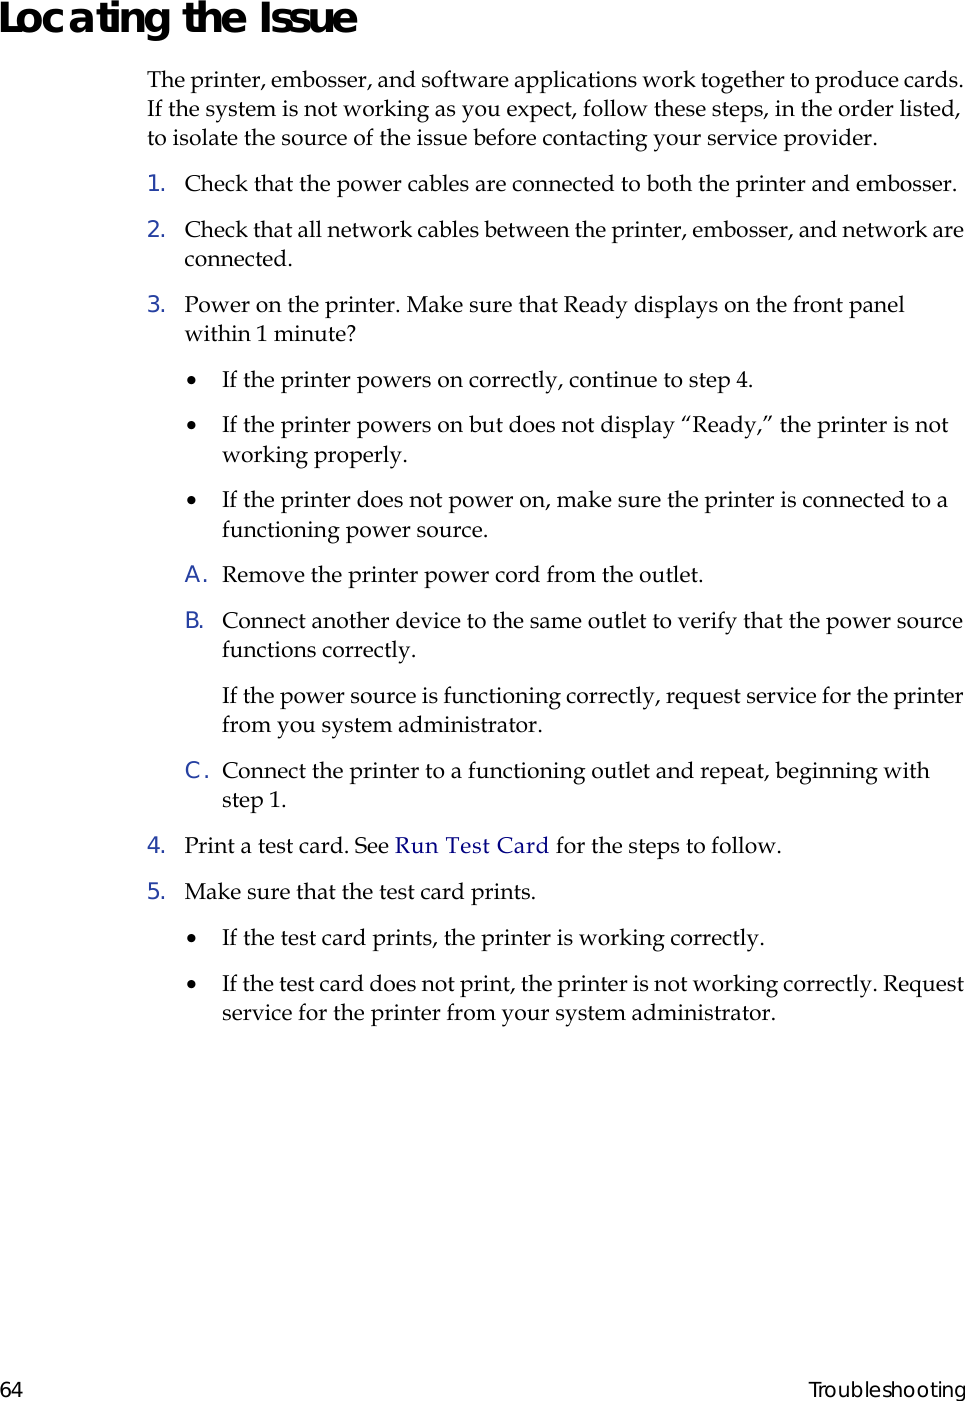
Navigation menu
Upload a User Manual
Namespaces
Wiki Guide
HTML
PDF
Info
Views
User Manual
Discussion / Help
Navigation


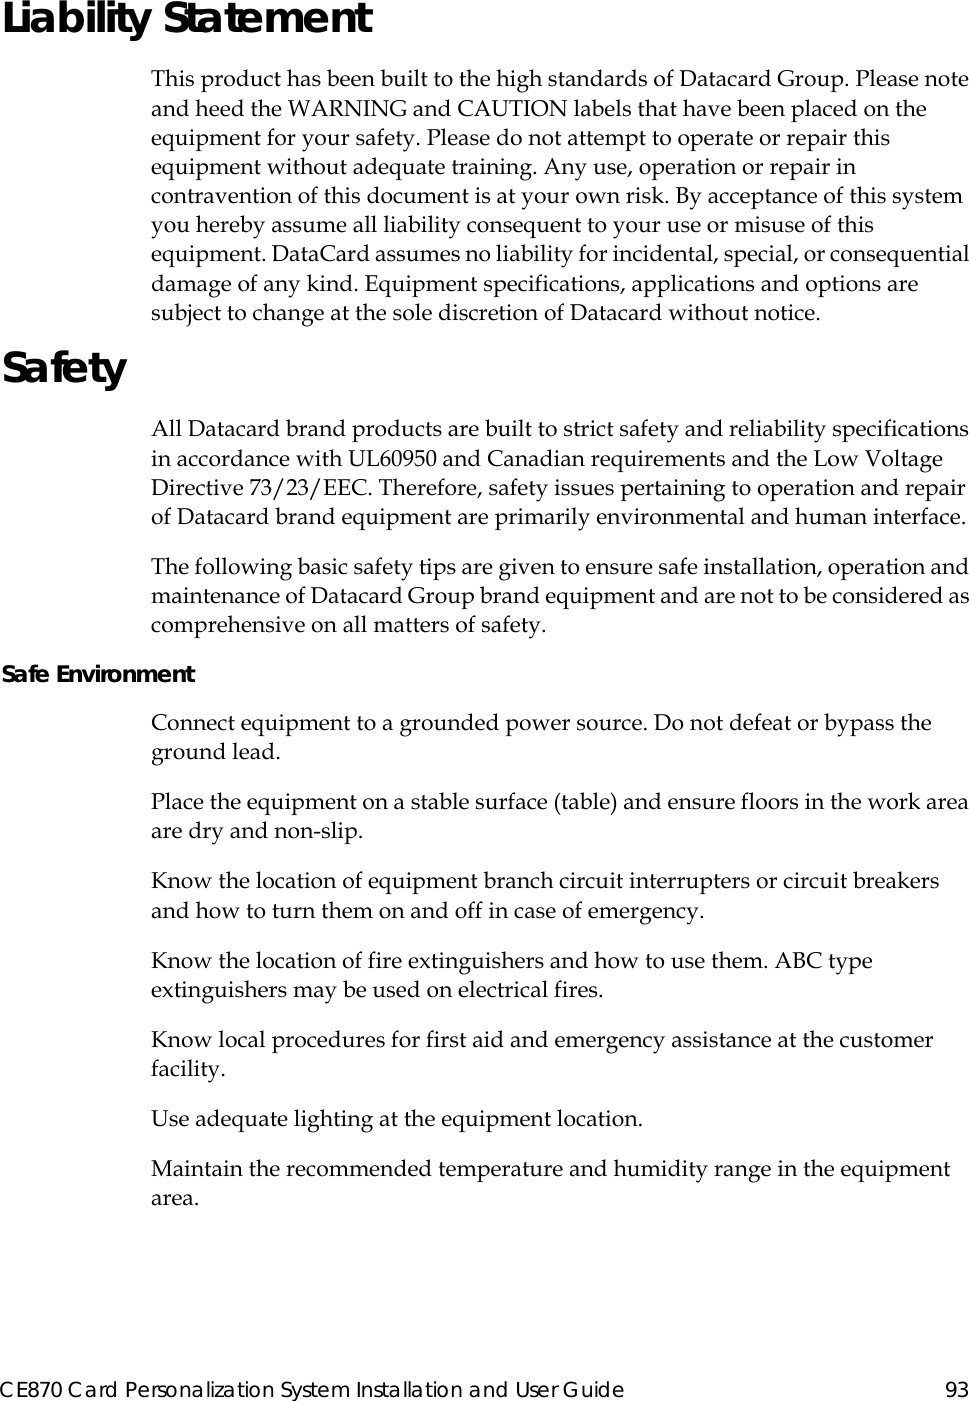
![54 Card DesignThe module format (ISO or JIS) defines the type and format of the information to encode. The standard ISO format is a three-track option and the JIS format is a single-track option. The ISO standard includes default data settings that determine how many characters can be encoded on each track. It also determines which characters can be encoded. Your cards can use the default format for each track, or can use a different combination of tracks and data formats.The JIS module also includes default data settings.The printer component may require additional settings to match the coercivity of the card. The system administrator sets these values and they remain the same for all cards processed using the same design. The defaults are set to standard ISO format and high-coercivity. There are five high-coercivity cards included with the system. Use these cards to set up and test the magnetic stripe feature. See Set Magnetic Stripe Coercivity from the LCD Menu if you need to change the coercivity.The type of magnetic stripe cards you use must match the type of module installed. Purchase magnetic stripe cards to match the type of module installed. See the card included in the package for details and specifications of the magnetic stripe.Magnetic Stripe FormatsThree-Track OptionThe default data formats for a three-track magnetic stripe option are:• Track 1 — IATA • Track 2 — ABA • Track 3 — TTS This combination is often abbreviated IAT. This format is also called ISO format.IATA (International Air Transport Association)The maximum number of characters for IATA format date is 76 characters. These characters can include spaces, upper case alphabetic characters, numeric characters, and the following special characters:! # $ % ' ( ) * + , - . / ; : < @ > = ^ ] \ [ " & _](https://usermanual.wiki/Entrust/Q30030/User-Guide-1590464-Page-62.png)
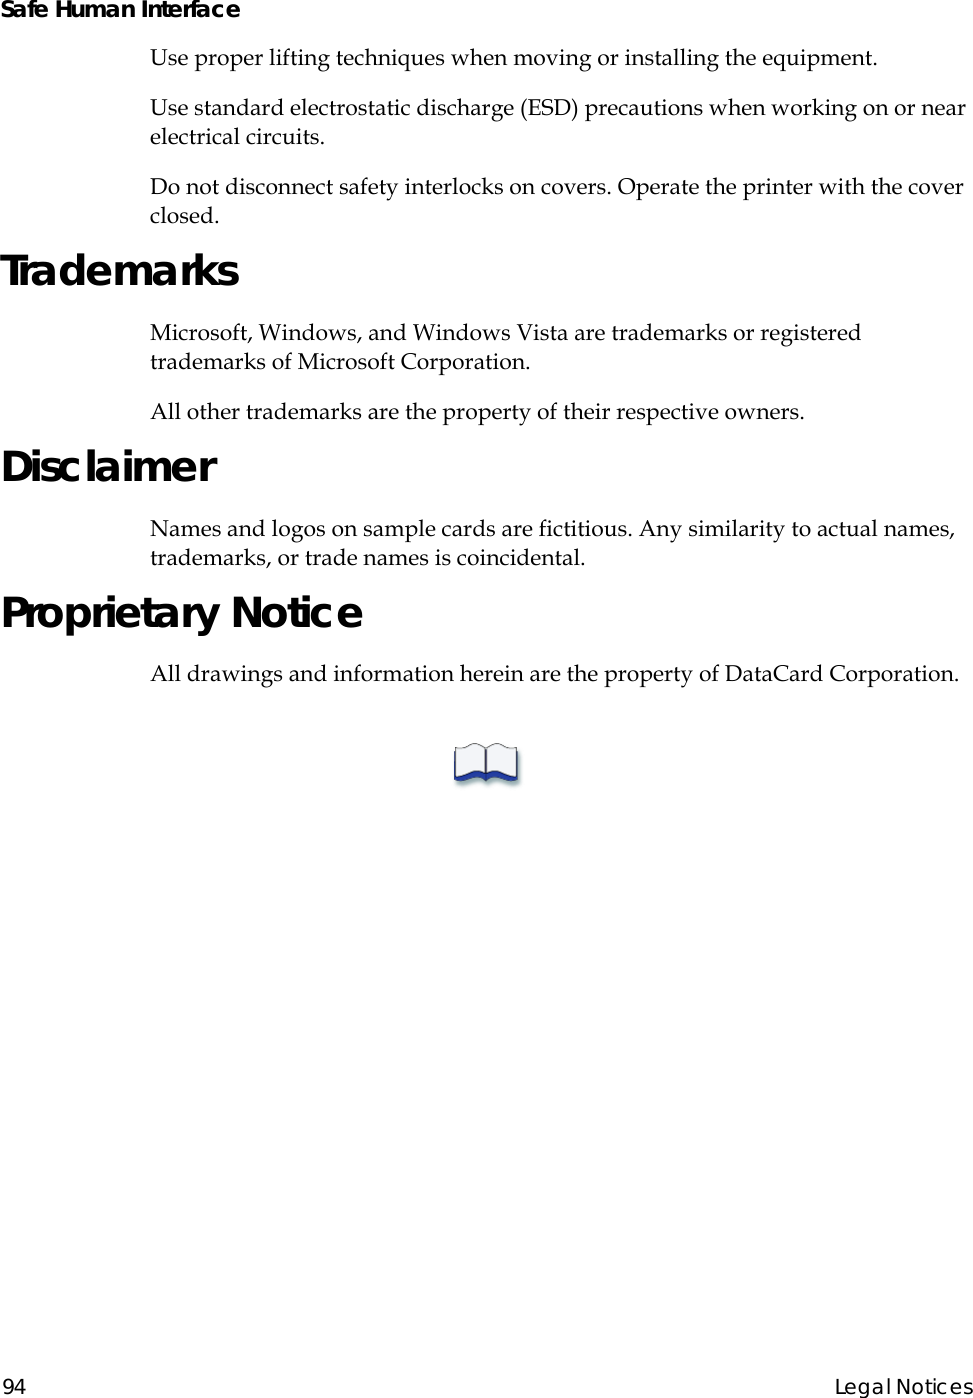
![CE870 Card Personalization System Installation and User Guide 55 ABA (American Bankers Association) The maximum number of characters for ABA format is 37 characters. Numeric characters and the following special characters are allowed:: ; < = >TTS (Thrift Third Standard) The maximum number of characters for TTS format is 104 characters. Numeric characters and the following special characters are allowed: : ; < = >Single-Track JIS OptionThe default data encoding format for a single-track magnetic stripe module is the JIS (Japanese Industrial Standard) Type II format.The maximum number of characters for the JIS format is 69 characters. These characters can include spaces, numeric characters, upper case alphabetic characters, lower case alphabetic characters, and the following special characters:! " # $ % & ' ( ) * + , - . / : ; < = > ? @ [ ] ^ _ ~ { | } ~From a PC running a Japanese edition of a supported operating system Japanese-language characters are also supported. They include the following special characters: 45 Katakana characters:](https://usermanual.wiki/Entrust/Q30030/User-Guide-1590464-Page-63.png)