Enuresis Solutions DBFLR03 DryBuddyFLEX Transceiver User Manual
Enuresis Solutions, LLC DryBuddyFLEX Transceiver
User manual
DryBuddyFLEX 3 Transceiver
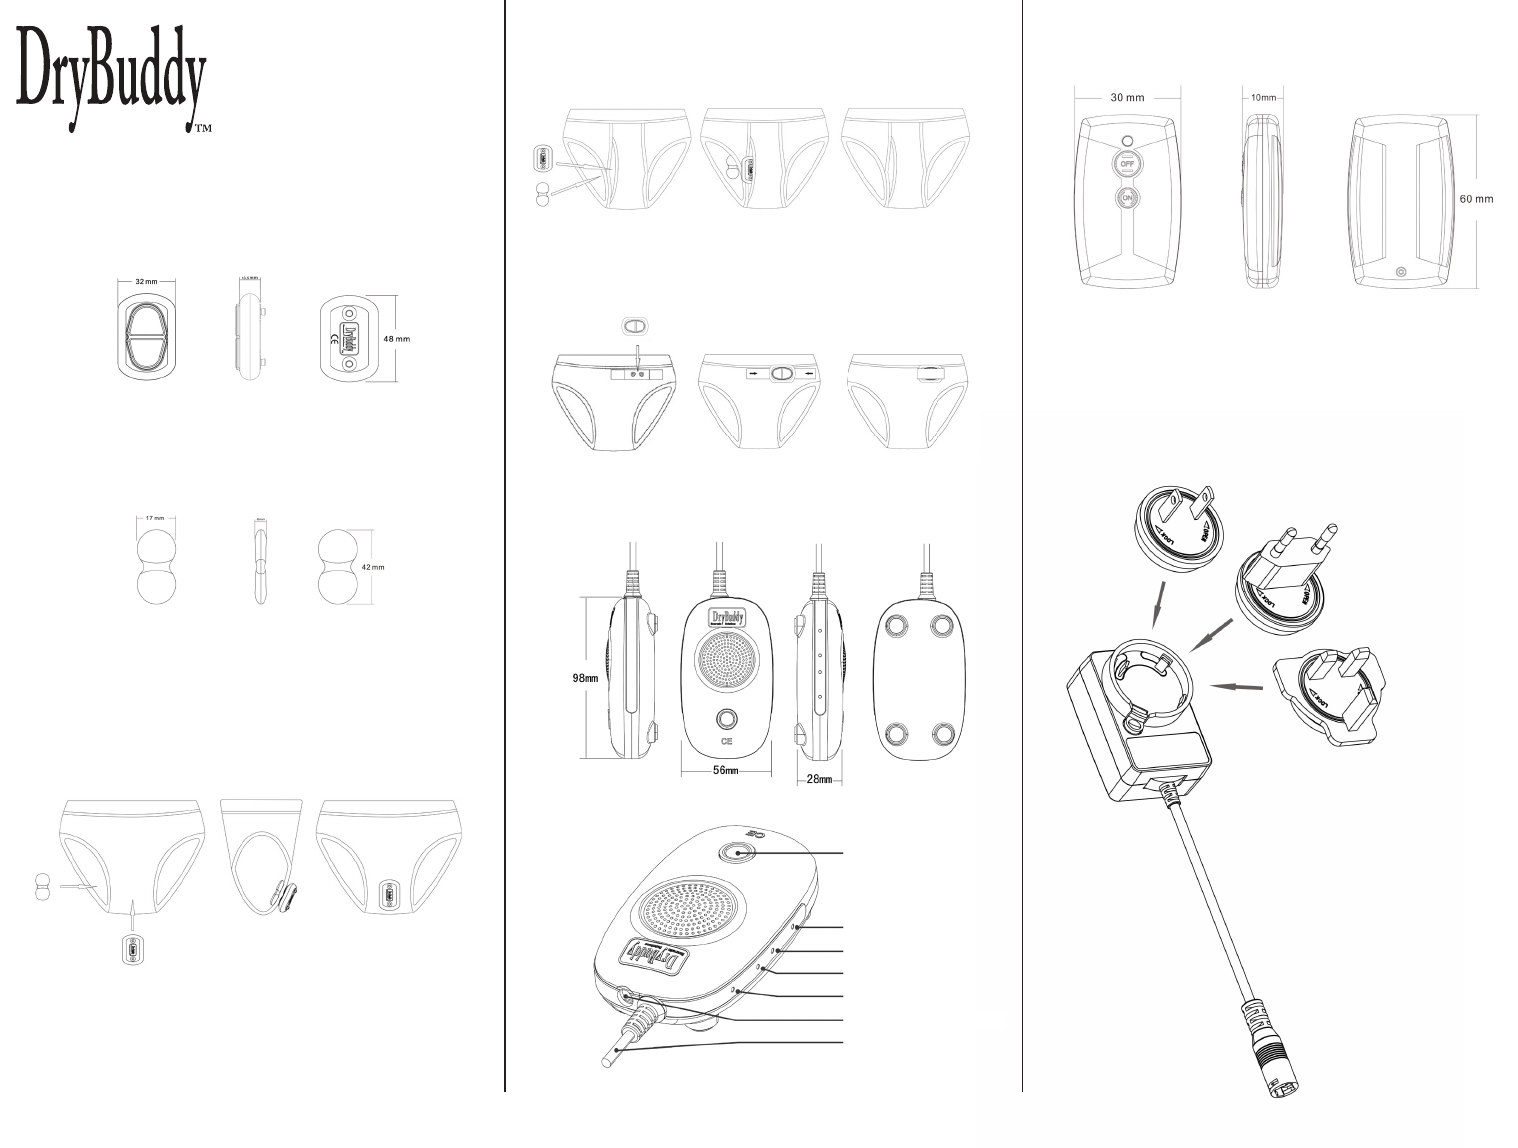
Figure 4a
Figure 4b Main Power Button
Synch
Sound
VOL+
VOL-
DryBuddyFLEX 3 Remote
3-Way Power Supply with Plugs
Figure 5
Figure 6a
U.S. (North America)
EU (European Union)
UK (United Kingdom)
weight: 17 gr
DryBuddyFLEX 3 Sensor & Cap
DryBuddyFLEX 3 Sensor and Cap attached to
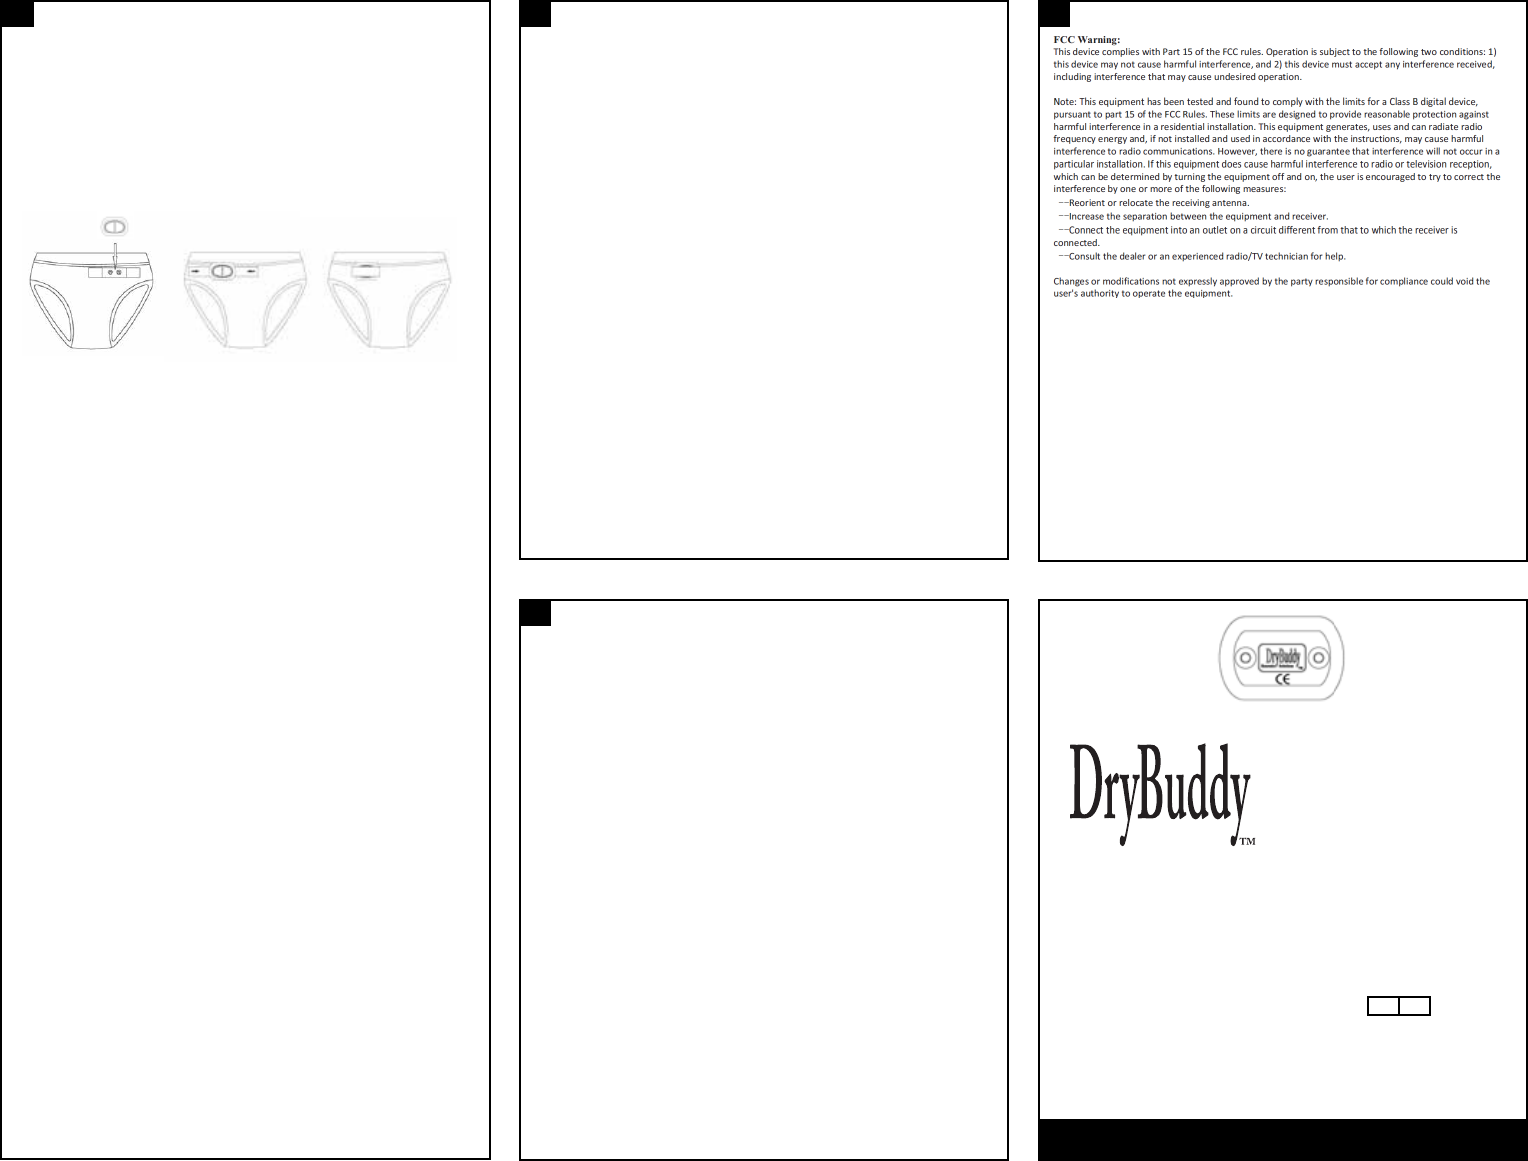
Unisex Briefs
DryBuddyFLEX 3 Sensor and Cap attached to
Unisex Briefs
DryBuddyFLEX 3 Sensor and Cap attached to
Wired Briefs
Figure 1a: Sensor
Figure 2a
Figure 2b
Figure 3
Figure 1b: Cap
Magnets side.
Used with “Cap”
to clamp briefs.
Snaps side. Used with
DryBuddy Wetness
Sensing Briefs.
weight: 22 gr
weight: 8 gr
FLEX 3
FLEX 3
DC Output to Bed Shaker
DC Input from Power Supply
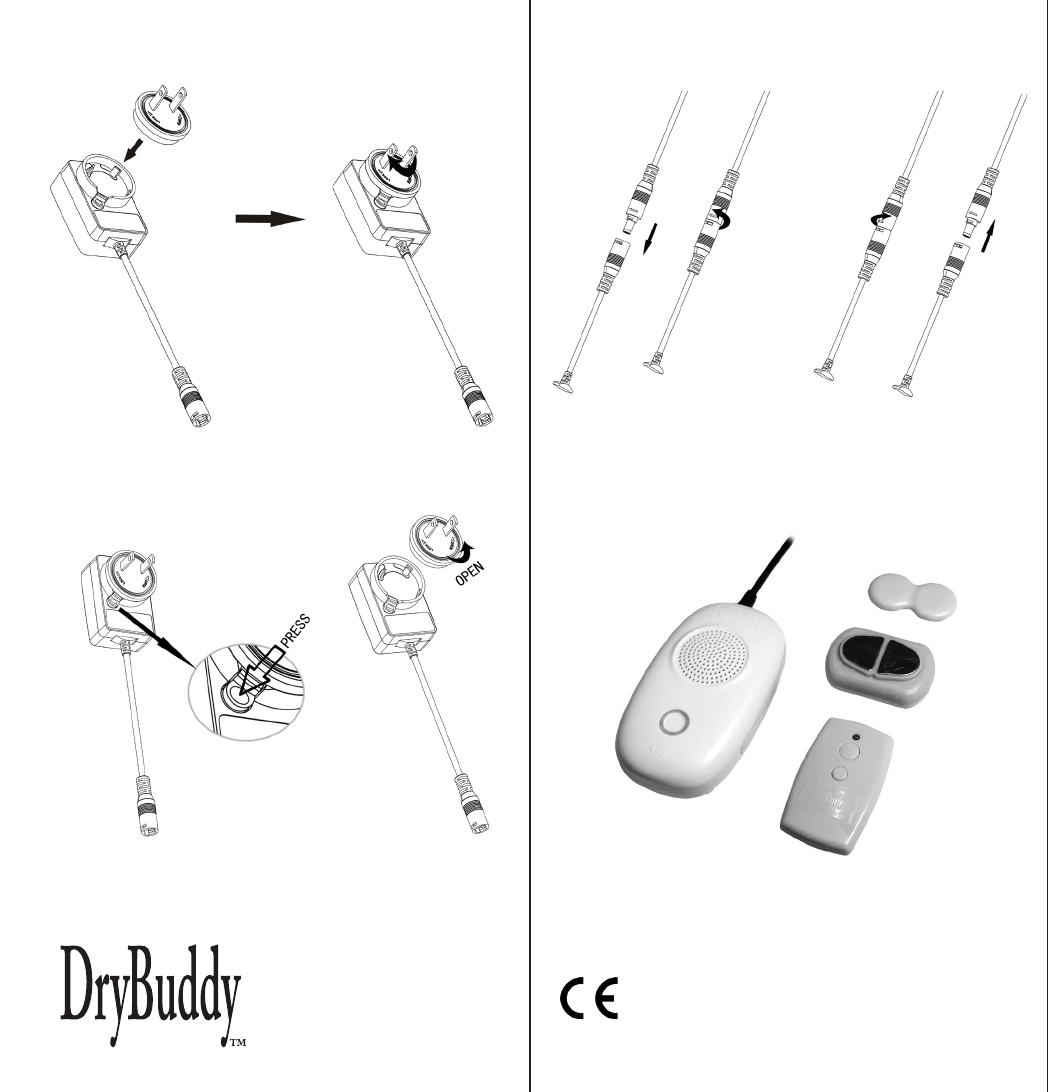
3-Way Power Supply with Plugs (Con’t) 3-Way Power Supply with Plugs (Con’t)
Figure 6b: Attaching a plug
Figure 6c: Detaching a Plug
Figure 6d: Connecting the Power Cable to the
Connecting the
Power Cable
Disconnecting
the Power Cable
FLEX 3
FLEX 3
The DryBuddyFLEX 3 is designed in USA. Assembled in China.
©2017 by Enuresis Solutions, LLC
• The DryBuddy alarm is intended for use as a bed-wetting
and enuresis alarm by children of age ve and older, or as
recommended by a medical authority. It can be used by
older patients as a urine sensor and wetness alarm and as
an incontinence alarm.
• The DryBuddy system is a medical device and should be
treated as such. Do not use roughly or damage.
• Do not use as a potty training aid for babies, toddlers and
young children.
• Make certain that no parts of the DryBuddy or sensor are
put in the mouth for any reason as this could cause choking
or other harm.
• Observe all sanitary precautions to keep the sensor clean
and the alarm parts clean and dry.
• Do not use the sensor for more than one user without
thorough cleaning.
• Do not strike the magnetic sensor or cap on hard surfaces
or make them hot as this can reduce magnetism.
• The DryBuddy system is designed to sense urine or salty
water. It is less eective in sensing plain water.
Caution when Using the DryBuddy1 System
Important Safety Instructions for Transceiver
Read these instructions carefully. Keep these instructions for later reference.
All cautions and warnings should be followed.
The rating of the equipment is input & output: The socket-outlet shall be installed near the
equipment and shall be easily accessible.
The equipment shall be used at maximum 40°C ambient temperature.
Do not open the equipment to reduce the risk of electrical shock. For safety reasons it is
only allowed to be opened by qualied service personnel.
Protect equipment from humidity.
Equipment has to be protected from objects falling through or liquids dripping through the
openings. This could cause a re or eletrical shock.
Disconnect equipment from power supply before cleaning. Do not use any liquid or
aerosol cleaner. Use only moistured cloth.
If the equipment is not used for long time, disconnect the equipment from power supply
to avoid being damaged by voltage peaks or lightning strike.
If one of the following situations arise, equipment has to be checked by qualied service
personnel
• Plug is damaged.
• Liquid has penetrated into the equipment.
• Equipment has been exposed to humidity.
• Equipment has obvious sign of breakage.
• Equipment does not work well or you cannot get it working according to user’s manual.
The equipment shall not be exposed to dripping or splashing and no object lled with
liquids, such as vases, shall be placed on the equipment.
For indoor use only.
Polarity of DC output Jack: Center is anode.
The appliance is designed to supply information technology equipment and similar
electrical appliances.
This product must not be disposed together with the domestic waste. This product has
to be disposed at an authorized place for recycling of electrical and electronic appliances.
By collecting and recycling waste, you help save natural resources, and make sure the
product is disposed in an environmental friendly and healthy way.
FCC Warning
DryBuddyFlex 3 System
The grantee is not responsible for any changes or modications not
expressly approved by the party responsible for compliance. Such
modications could void the user’s authority to operate the equipment.
This equipment has been tested to comply with the limits for a Class
B digital device, pursuant to Part 15 of the FCC Rules. These limits are
designed to provide reasonable portection against harmful interference
in a residential installation.
This device complies with Part 15 of the FCC Rules. Operation is
subject to the following two conditions: (1) This device may not cause
harmful interference, and (2) this device must accept any interference
received, including interference that may cause undesired operation.

The DryBuddyFLEX 3 system consists of:
• A Sensor, which consists of a magnetic sensor with
a built-in wireless transmitter, and its magnetic “cap.”
When used with standard cotton briefs, the material of
the briefs is clamped between the magnets of the sensor
and the cap. (See Fig. 1)
• A Transceiver, which receives the wireless signals from
the Sensor and Remote and alerts. It also re-transmits
to other transceivers (if used) so that all transceivers
behave alike. A power supply is included. (See Fig. 4A
and 4B)
• A Remote, which wirelessly sends signals to the
Transceiver to control its behavior. (See Fig. 5)
The DryBuddyFLEX 3 Briefs system consists of the
DryBuddyFLEX 3 system described above plus two (2)
DryBuddy wetness sensing briefs of the ordered size.
All DryBuddyFLEX 3 parts and wetness sensing briefs can
be obtained from DryBuddy.
DryBuddyFLEX 3 Quick-Use Instructions A3A1 A2
The DryBuddyFLEX 3 is the third generation of the
DryBuddyFLEX bedwetting, enuresis and incontinence
detection and alarm system, and provides improvements
and enhancements over previous versions. It is a very
feature-rich true wireless system, where no wires of any kind
are attached to or worn by the user. It has been designed to
provide unmatched convenience, ease-of-use and exibility
to the user and caregiver, and oers many useful features
and options to allow it to be customized for the user.
Where can the DryBuddyFLEX 3 be used?
The DryBuddyFLEX 3 can be used at home or any place
where there is an AC (alternating current) electric power
supply and receptacle. It comes with a special power
adaptor that allows ready use with standard electric plug
sockets in the U.S. (North America), U.K. (United Kingdom)
and EU (European Union). A 110 – 240 V AC 50/60 Hz
electric power source must be used. For nations with a
dierent plug design, a plug adaptor may be needed.
The DryBuddyFLEX 3 oers one-button user simplicity. It
also allows customization of its many features so that it best
matches the needs of the user and the caregiver. After the
DryBuddyFLEX system has been set as required, the user only
needs to use the Power button on the Transceiver to operate
the system in its Manual Power (MP) mode. The Remote oers
further convenience for the user and the caregiver.
The DryBuddyFLEX 3 or DryBuddyFLEX 3 Briefs system
comes ready-to-use. The included Sensor, Remote and
Transceiver have been synchronized with one-another
at the factory. The feature-rich DryBuddyFLEX 3 can be
used simply by following the following instructions. To use
additional features please refer to the additional instructions
at www.DryBuddy.com:
www.DryBuddy.com → Our Products → DryBuddyFLEX
→ DryBuddyFLEX 3 Instructions
Setting up the DryBuddyFLEX 3
Place the Transceiver on a bed-side table or other
convenient location.
Attach the plug at the end of the power cord from the
power supply to the socket at the end of the short
cord of the Transceiver. (See Fig. 6A – 6D)
Plug the Power Supply into a live electric wall socket.
Press the Power button on the top of the Transceiver.
The Power button will show a Yellow light. The
system is now in its SLEEP state.
Press the Power button on the Transceiver once. A
Green light will show under the button. The system is
now in its READY state, ready to receive a signal from
the Sensor.
Attach the Sensor to the patient’s briefs or special
wetness sensing briefs. The wetness sensing briefs
should have been gently washed and dried before
use. (See Fig. 2A and 2B, or Fig 3A and 3B)
The alarm has been pre-set to Audio (Trumpet
Fanfare) at maximum volume.
When the alarm sounds, it can be switched OFF
manually by pressing the Power button on the
Transceiver, or remotely by pressing the OFF button
on the Remote. A Yellow light will show under the
Power switch. Make certain that the child or patient
is awake and gets out of bed before turning the alarm
OFF.
Remove the sensor and other items that may be
soiled, wash and dry them, and re-attach them to the
patient.
To reset the system so that it will be triggered by
wetness, press the Power button manually or press
the ON button on the Remote. The Power switch
will show a Green light indicating that the system is
in its READY state. The system is again ready to be
triggered by the Sensor when it detects wetness.
If the DryBuddyFLEX system is not being used, you
can turn the system completely OFF by disconnecting
the power supply cable from the Transceiver.
Note: The DryBuddyFLEX 3 is designed to be perspiration
resistant. It requires a rapid increase in urine at the sensor
(coming in a “rush”). Position the Sensor on the briefs so that
urine is likely to fall directly on the Sensor. The Sensor may
not respond adequately to plain water or a creep in wetness
soaking through the briefs. Salt water should be used for any
testing.
Note: The feature-rich DryBuddyFLEX 2 is the most
sophisticated bedwetting alarm available today. Please
contact DryBuddy with any questions, comments or issues at:
Tel: 912-352-8854 or email: Service@DryBuddy.com
To set the Transceiver’s sound and volume, use a
straightened metal paper clip, toothpick or similar narrow
and blunt device to push the buttons on the side of the
Transceiver. (See Fig. 4B) The Transceiver must be in its
SLEEP state (Yellow light) to activate these buttons.
Sound: Each time the Sound switch is pressed, it is
switched to the next sound in the order:
Trumpet fanfare → Berlin police siren → Silence (no sound)
The Silence setting can be used if the audio alarm is to be silent.
Volume: There are ve (5) volume levels. Each time the + or
– button is pressed, the volume will increase or decrease by
one level. This new level will be heard if the sound is set to
an audio setting.
Attaching the Wireless Magnetic Sensor
1.
2.
3.
4.
5.
6.
7.
8.
9.
10.
11.
DryBuddyFLEX 3 Introduction
DryBuddyFLEX 3 System Contents
DryBuddyFLEX 3 Quick-Use Instructions (Con’t)
Attaching the wireless Magnetic Sensor to standard cotton
briefs:
1. The Sensor is attached on the outside of the briefs
at the point of urination. Position the Sensor carefully on
the briefs. The alarm will only alert when the material of the
briefs between the two magnets is wet.
2. The stainless steel magnets point towards the body.
3. The magnetic Cap is placed on the inside of the
briefs and directly opposite the magnets so that the
briefs are clamped between the Sensor and the Cap.
4. With male briefs having a pouch, the Sensor should
be placed inside the pouch with the magnets pointing
towards the body.
or
The DryBuddyFLEX 3 is designed in USA. Assembled in China.
©2017 by Enuresis Solutions, LLC
Enuresis Solutions, LLC
51 W. Fairmont Avenue, Suite 2
Savannah, GA 31406 USA
912-352-8854
service@drybuddy.com
Advena Ltd.
Tower Business Centre, 2nd Flr.,
Tower Street, Swatar, BKR 4013 Malta
EC REP
• The DryBuddy alarm is intended for use as a bed-wetting
and enuresis alarm by children of age ve and older, or as
recommended by a medical authority. It can be used by
older patients as a urine sensor and wetness alarm and as
an incontinence alarm.
• The DryBuddy system is a medical device and should be
treated as such. Do not use roughly or damage.
• Do not use as a potty training aid for babies, toddlers and
young children.
• Make certain that no parts of the DryBuddy or sensor are
put in the mouth for any reason as this could cause choking
or other harm.
• Observe all sanitary precautions to keep the sensor clean
and the alarm parts clean and dry.
• Do not use the sensor for more than one user without
thorough cleaning.
• Do not strike the magnetic sensor or cap on hard surfaces
or make them hot as this can reduce magnetism.
• The DryBuddy system is designed to sense urine or salty
water. It is less eective in sensing plain water.
A7
Good Things Happen with DryBuddy�
Raising the Standards for Mobility,
Privacy, Performance and Value.
A4 A5
A6
DryBuddy1 Quick-Use Instructions (Con’t)
Caution when Using the DryBuddy1 System
Attaching the wireless Sensor to optional DryBuddy
Wetness Sensing briefs:
1. The patient (child) wears the briefs.
2. The Sensor’s male snaps are inserted into the female
snaps at the waist of the briefs and rmly attached.
3. The Velcro is rmly strapped around the Sensor to
help keep it in place.
Introduction & Quick-Use Instructions
Synchronizing allows the Sensor, Transceiver and Remote to
recognize each other and work together. A DryBuddyFLEX 3
system must be synchronized. A new system, consisting of
a Sensor, Transceiver and Remote packed in a box, comes
with the three devises synchronized at the factory and can
be used without further synchronizing. Synchronizing is
required whenever
• A NEW Transceiver, Sensor or Remote is to be used, or
• Synchronization has been lost for any reason.
Note: A new DryBuddyFLEX 3 system, consisting of
a boxed Sensor, Transceiver and Remote, has been
synchronized at the factory and is ready to use.
To synchronize:
Attach the Transceiver to its power supply, and conrm
that the Transceiver is in its SLEEP state (Yellow light).
Press the Synch button on the side of the Transceiver.
The light under the Power button on the Transceiver will
become ashing BLUE. While the light is BLUE (one
minute), the Sensor and Remote must be synchronized.
Trigger the Sensor. This can be done by dipping both
sensor magnets in a cup of salt water, or by pressing a
clean and non-oily key or knife against both magnets. A
beep will be heard.
Press the OFF button on the Remote. Two beeps will be
heard and the ashing BLUE light will turn GREEN.
The system is now synchronized.
If the DryBuddyFLEX is perceived to not work or has
stopped working, please synchronize it rst as it may
have lost its synchronization. Without synchronizing, the
DryBuddyFLEX 3 system will not work.
The DryBuddyFLEX 3 has many useful features which can
be individually set and controlled by the user. Descriptions
and Instructions can be found on www.DryBuddy.com under
Our Products → DryBuddyFLEX → DryBuddyFLEX 3
Instructions
Please refer to the DryBuddyFLEX FAQ section in
www.DryBuddy.com for additional information, advice and
many answered questions:
www.DryBuddy.com → FAQ → DryBuddyFLEX
Note: The feature-rich DryBuddyFLEX 3 is the most
sophisticated bedwetting alarm available today. Please
contact DryBuddy at 912-352-8854 with any questions,
comments or issues.
1.
2.
3.
4.
Synchronizing the DryBuddyFLEX 3 System is
necessary.
Other DryBuddyFLEX 3 Features, Controls and
Operations
FLEX 3
FLEX 3
This device complies with Part 15 of the FCC rules. Operation is subject to the following two conditions: 1)
this device may not cause harmful interference, and 2) this device must accept any interference received,
including interference that may cause undesired operation.
Note: This equipment has been tested and found to comply with the limits for a Class B digital device,
pursuant to part 15 of the FCC Rules. These limits are designed to provide reasonable protection against
harmful interference in a residential installation. This equipment generates, uses and can radiate radio
frequency energy and, if not installed and used in accordance with the instructions, may cause harmful
interference to radio communications. However, there is no guarantee that interference will not occur in a
particular installation. If this equipment does cause harmful interference to radio or television reception,
which can be determined by turning the equipment off and on, the user is encouraged to try to correct the
interference by one or more of the following measures:
Reorient or relocate the receiving antenna.
Increase the separation between the equipment and receiver.
Connect the equipment into an outlet on a circuit different from that to which the receiver is
connected.
Consult the dealer or an experienced radio/TV technician for help.
Changes or modifications not expressly approved by the party responsible for compliance could void the
user's authority to operate the equipment.