Epic Data MPT9600RFID SHOP FLOOR KIOSK WITH RFID User Manual USERS MANUAL
Epic Data Inc SHOP FLOOR KIOSK WITH RFID USERS MANUAL
USERS MANUAL

Document Number: 991-101-055 Rev June 7, 2008
Caution
Read the following warnings to avoid potentially hazardous
situations. If you have any additional questions about the
maintenance of your equipment, please contact Epic Data.
Lithium Battery
This unit contains a non-rechargeable lithium battery. Replace
only with the same or equivalent lithium battery type
recommended by the manufacturer. There is a danger of
explosion when using incorrect batteries. Dispose used
batteries according to the manufacturer’s instructions.
Transformer
For use only with the included power supply or certified
equivalent Class 2 power supply:
Rated input: 100-240VAC, 1.1A, 50-60Hz
Rated output: 24VDC, 1.67A (40 Watts)
Ensure that the AC power source is not shared with high
current or inductive loads.
Emissions
Note: This equipment has been tested and found to comply
with the limits for a Class A digital device, pursuant to part 15
of the FCC Rules. These limits are designed to provide
reasonable protection against harmful interference when the
equipment is operated in a commercial environment. This
equipment generates, uses, and can radiate radio frequency
energy and, if not installed and used in accordance with the
instruction manual, may cause harmful interference to radio
communications. Operation of this equipment in a residential
area can cause harmful interference requiring correction at the
user’s own expense.
Changes or modifications not expressly approved by the
manufacturer could void the user's authority to operate the
equipment.
The MPT Components
At a minimum, you must have the following items:
MPT device
power supply
USB keyboard and mouse
For maximum reliability, use CAT 5 Ethernet cables less than 100
meters for 100 megabit operation. Other types of wiring may
cause slower connection speeds and/or communication loss.
Power Up
After the MPT is installed, insert power supply plug into MPT
before connecting the transformer into an AC outlet. The MPT
proceeds through its startup cycle. When the startup cycle
completes, a user application should start.
If application does not start when power is connected, press
reset button located on the bottom right hand corner at the
back of the unit.
In the unlikely event that the application does not start, please
contact the Epic Data Service Center.
About the Connections
VGA: External VGA display
PS/2 Keyboard and Mouse ports
for backward compatibility
USB: USB 2.0 Ports
10/100 NET: 10/100 BaseT Ethernet
Digital I/O: Attach relays and sense
lines to the MPT. Output capable of
sinking 5V or 12V at 1 amp. The input
handles 5V DC.
SERIAL: EIA-232 Serial port
BARCODE WAND: Barcode wand or
laser scanner port
14-30VDC: Power input
AUDIO OUT: – Audio output
AUDIO MIC: Microphone input
Document Number: 991-101-055 Rev June 7, 2008
Mounting the
MPT 9600
The MPT has an industry standard 75
mm VESA mounting pattern on the back
of the terminal. This allows the MPT to
be mounted in a variety of ways:
mounted to a wall or desk, using the
optional Epic mounting bracket
mounted to a workstation, using the optional workstation
platform
The mounting accessories you received were specified at the
time of ordering of the MPT.
Before mounting the MPT, connect the transformer, the input
and output devices, and the network cable to the appropriate
ports.
Caution! The MPT device weighs 7 pounds. Prepare the
mounting hardware in accordance with the instructions
supplied with the type of mounting hardware selected to
securely support the load.
To stationary mount the MPT 9600:
1. Fasten the Epic mounting bracket to a ¾” thick particle
board or stronger material, using #12 – ¾” wood screws.
If using a workstation platform, install as appropriate.
2. Verify that the adapter is attached to the back of the MPT.
This adapter has four “L” shaped slots.
3. Align the large part of the “L” with the mounting tabs on
the mounting bracket or workstation platform.
4. Push the MPT onto the bracket until the tabs touch the
bottom of the “L” slots, then slide the MPT to the right until
it stops. Let the unit drop into place.
5. Lock the MPT in place by sliding the retaining bracket down
onto the top of the terminal and tightening the locking
screw.
MPT 9600 Series
Installation Guide
This document describes how to install the Multi-Purpose
Terminal (MPT) 9600 device. Before you begin, be sure the
appropriate mounting station, cabling, and power are already
in place, as specified by Epic Data.
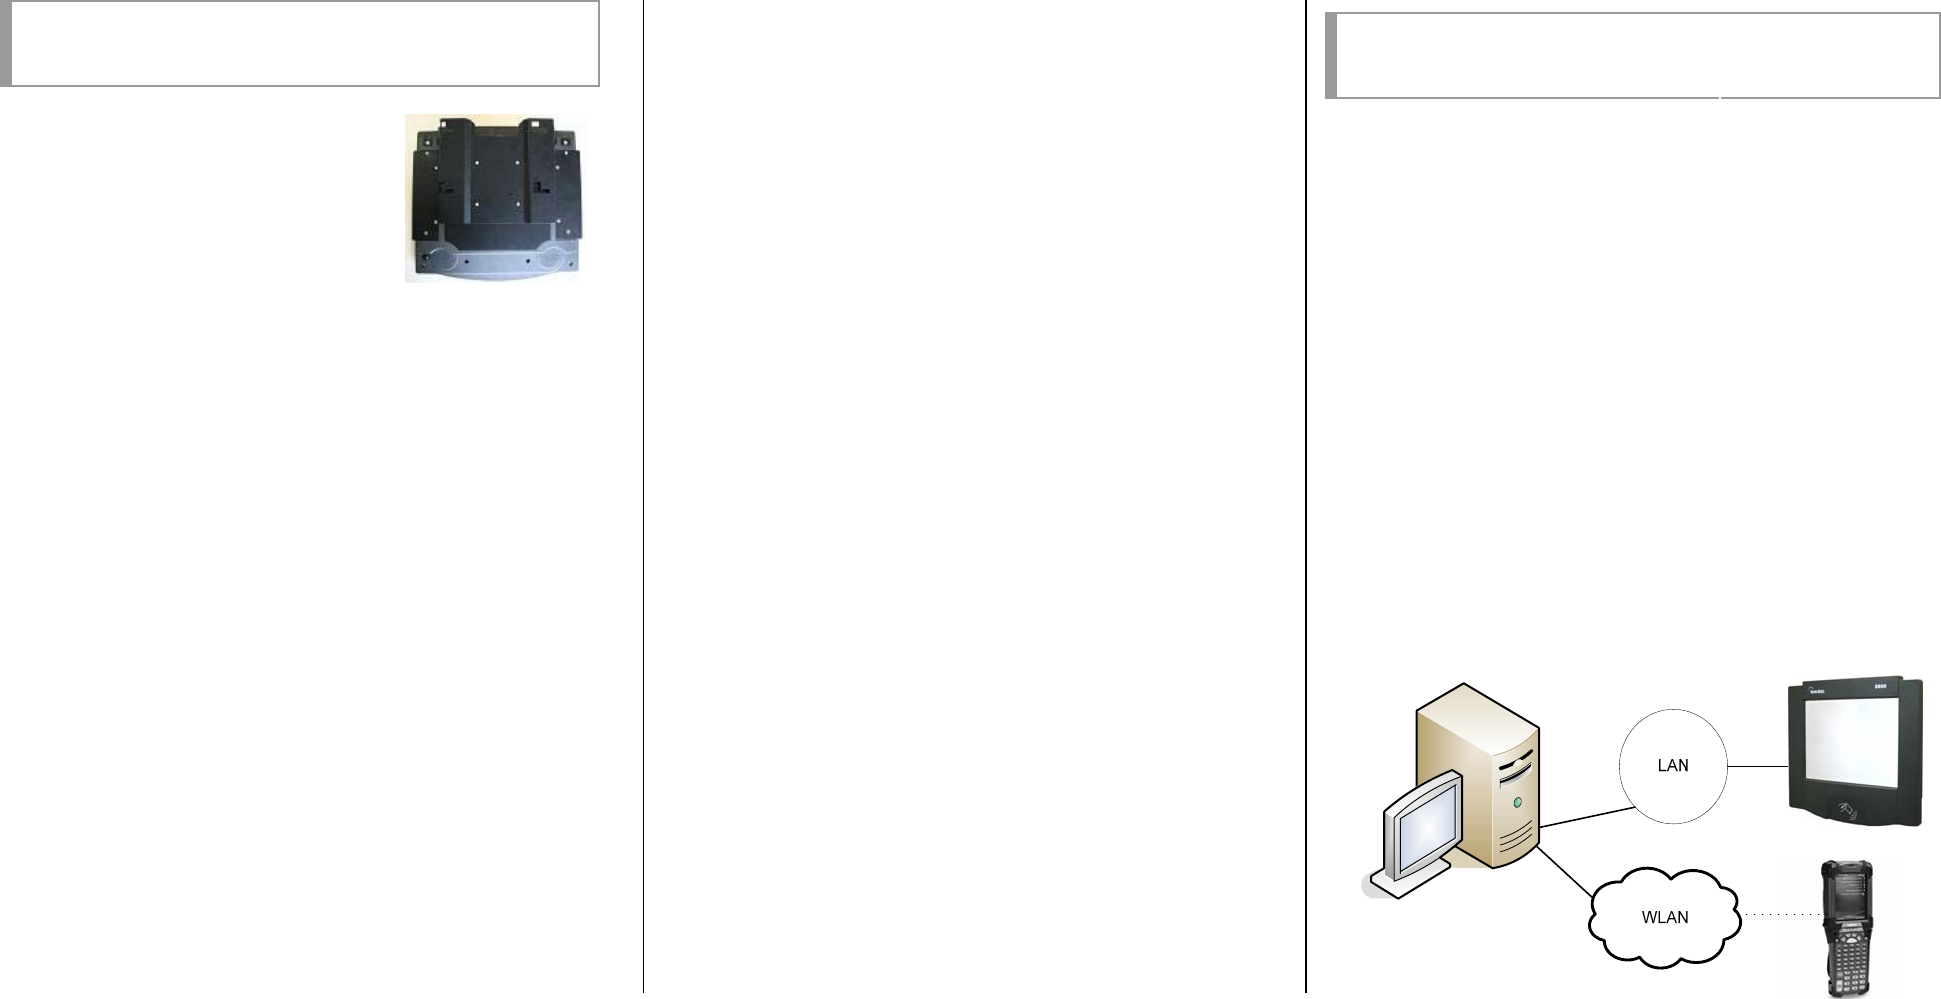
The MPT 9600 device is a shop floor kiosk used for collecting
data. It has many optional peripherals, including barcode
reader, SVGA monitor, USB devices, EIA232 devices, USB
keyboard and mouse, and digital I/O.
The MPT 9600 device is typically networked to an MXE™ Data
Collection Server or P3 Collaborative Manufacturing Execution
system, via a 10/100BaseT Ethernet connection.
Caution! Use only your fingers to touch the screen. Do not use
the barcode wand or any hard pointed object, as this will damage
the screen.