Equitrac 970940 RFID Reader User Manual SafeCom Controller Administrator s Manual
Equitrac Corporation RFID Reader SafeCom Controller Administrator s Manual
UserManual.wiki
>
Equitrac
>
970940 User Manual
User Manual
Navigation menu
Upload a User Manual
Namespaces
Wiki Guide
HTML
PDF
Info
Views
User Manual
Discussion / Help
Navigation

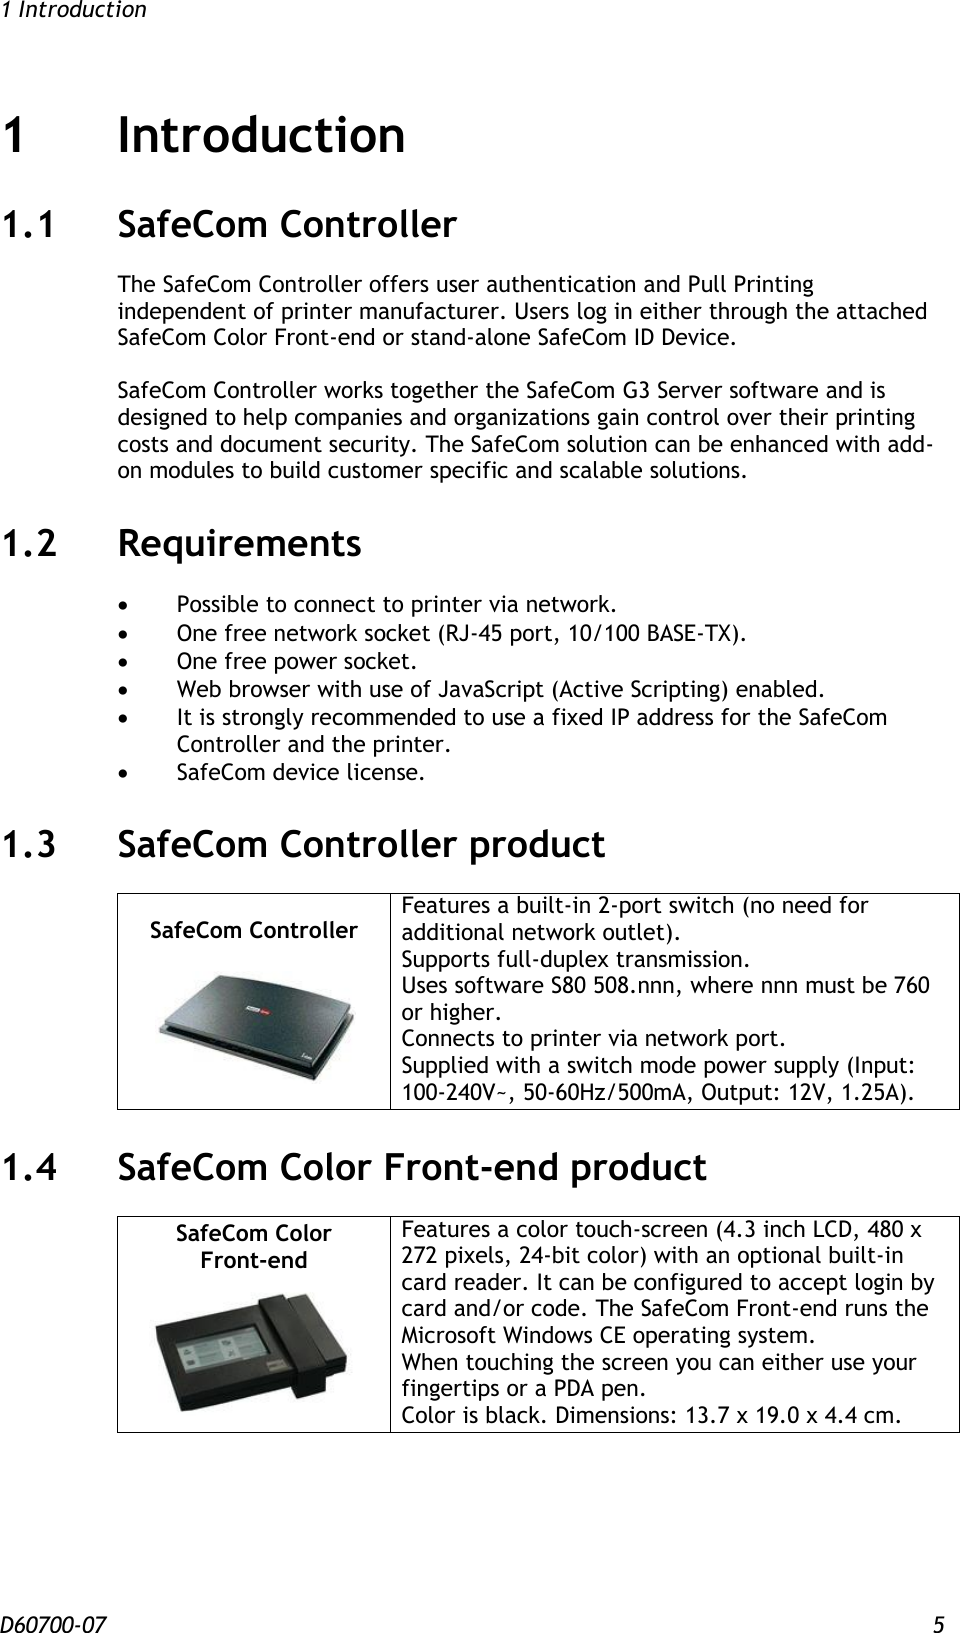
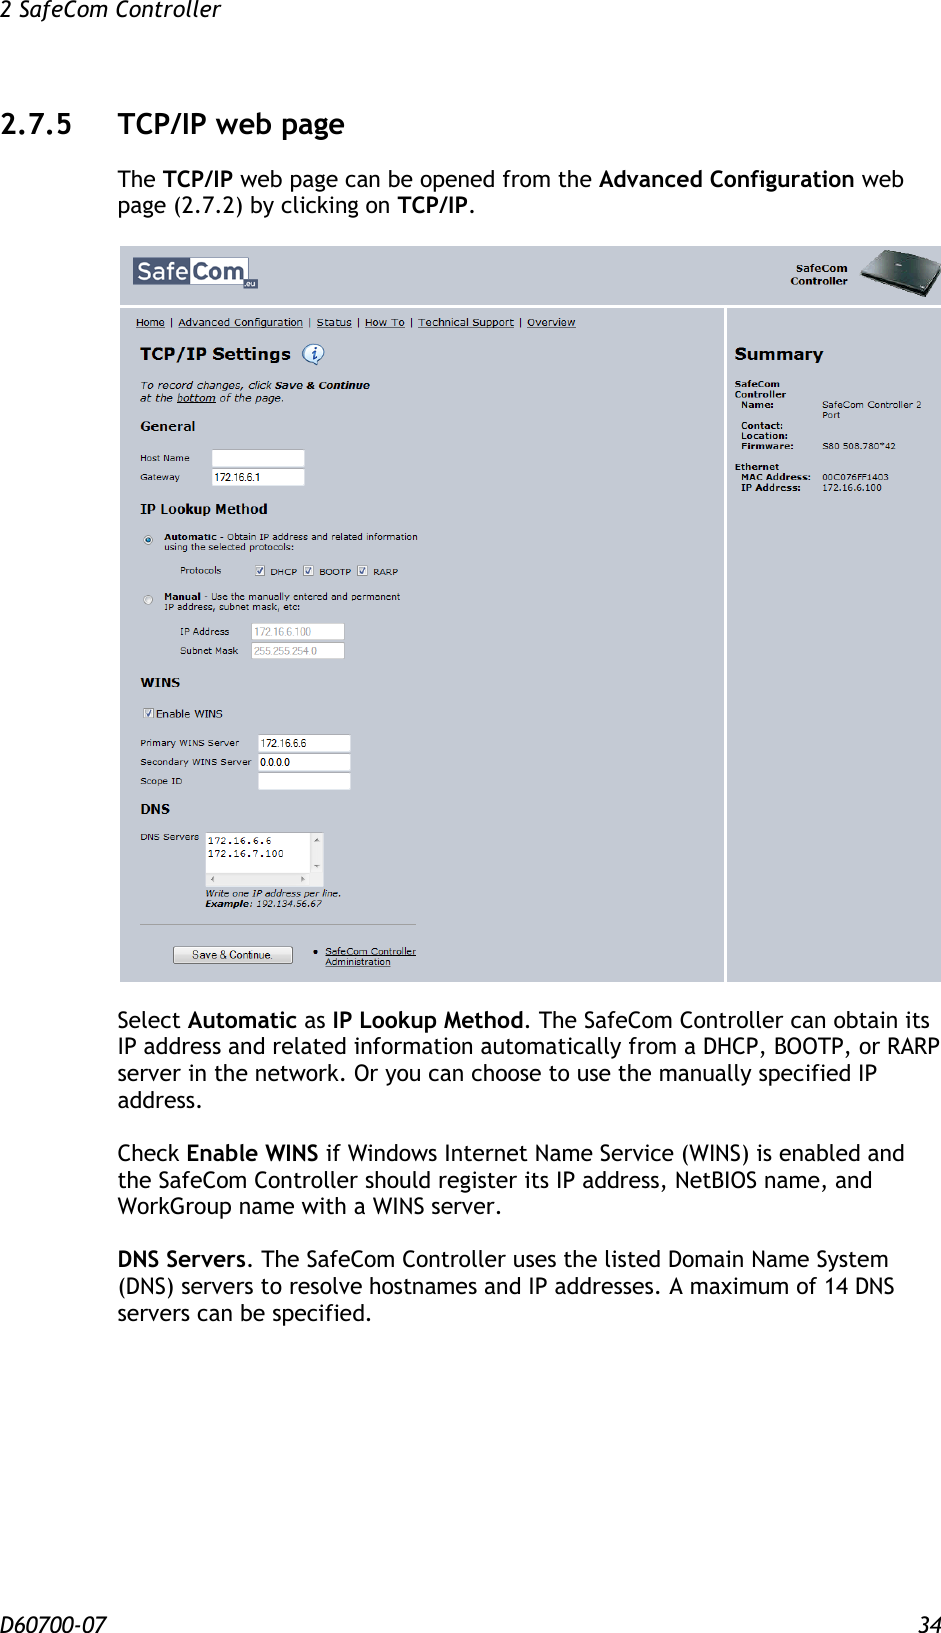
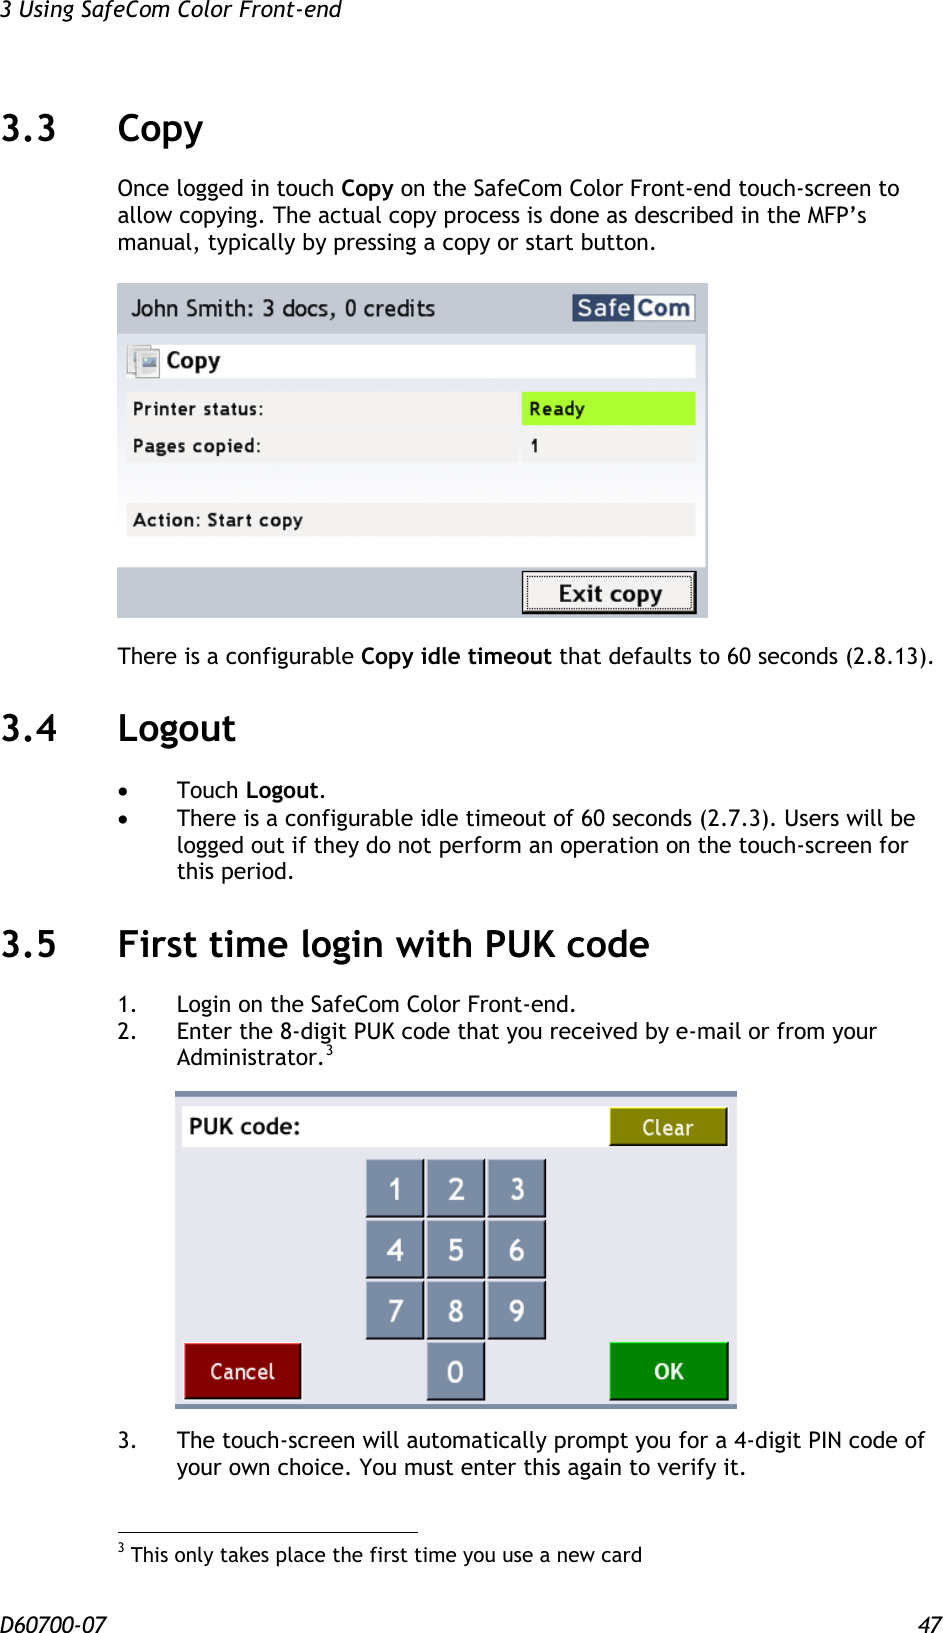
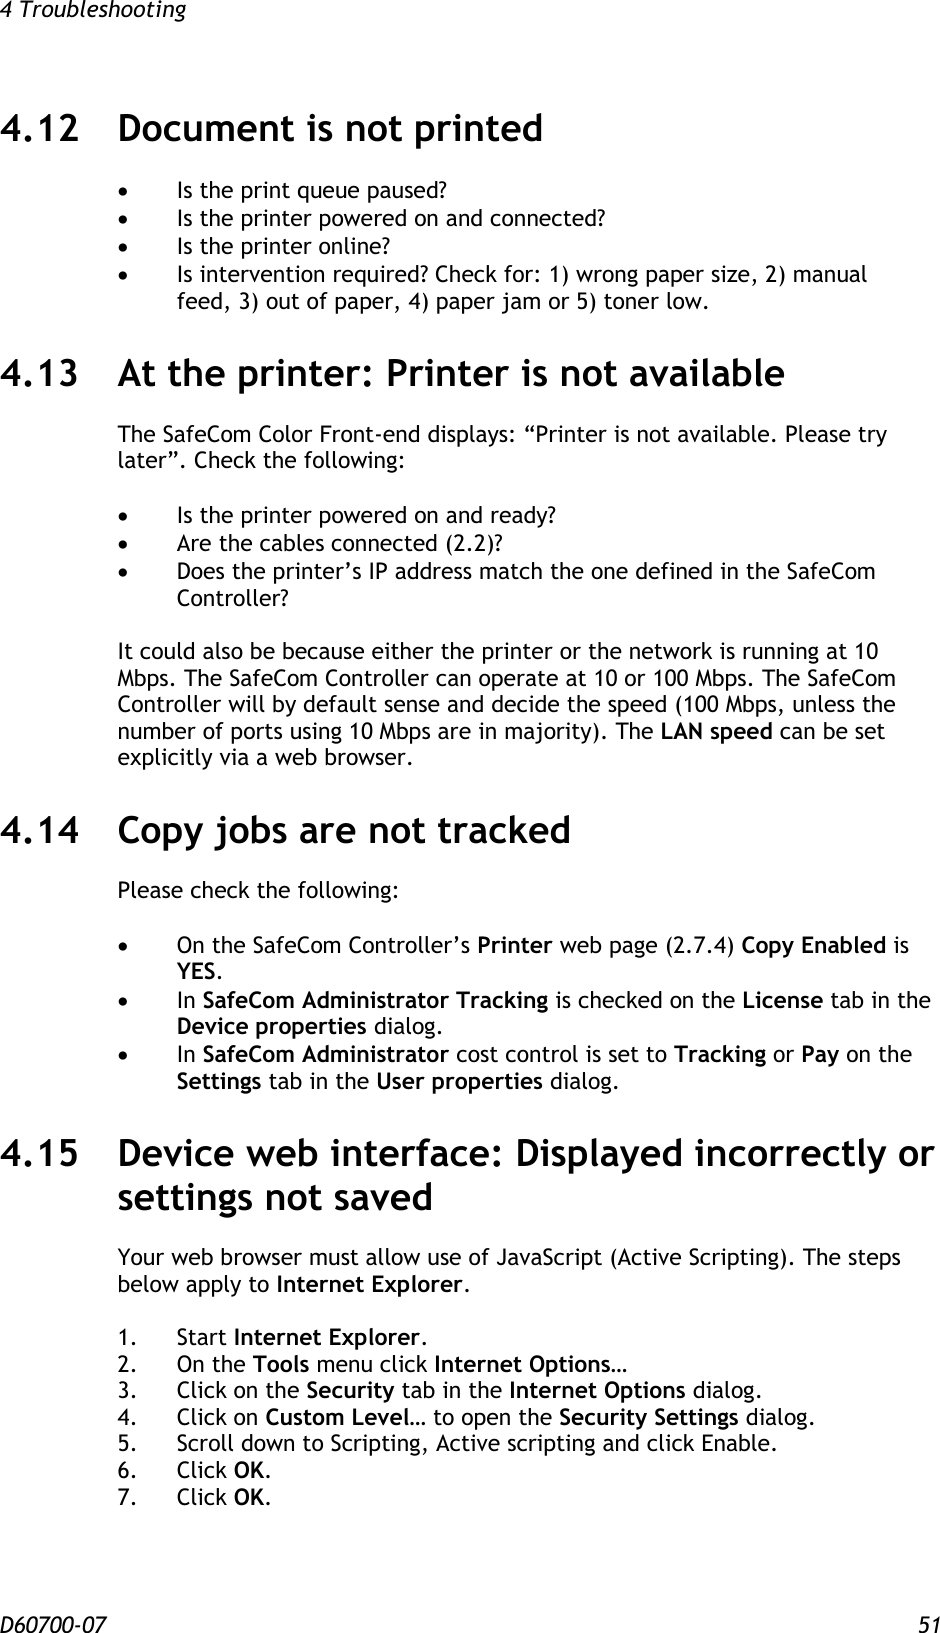
![1 Introduction D60700-07 6 1.5 SafeCom ID Devices Table 1 SafeCom Controller supported SafeCom ID Devices Identification Method Card Reader USB p/n Card Reader Serial p/n Color Front-end Serial p/n Windows authentication / User code 672040 SafeCom AWID Reader 696020 696010 696040 SafeCom Barcode Reader 694020 694010 SafeCom Casi-Rusco Reader 652420 652010 652040 SafeCom Cotag Reader 678020 67804x SafeCom Deister Reader 65504x SafeCom EM Reader [E] SafeCom EM Reader [R] 674120 674420 674110 674140 SafeCom Felica Reader 697420 697410 697440 SafeCom HID Reader 35 bit [E] SafeCom HID Reader 35 bit [R] 673120 673420 673110 673140 SafeCom HID Reader 37 bit 671120 671110 671140 SafeCom iCLASS Reader [E] SafeCom iCLASS Reader [R] 654120 654420 654110 654140 SafeCom Indala Reader 26 bit 670420 670010 670040 SafeCom Indala Reader 29 bit 651020 651010 651040 SafeCom IoProx 658420 658010 658040 SafeCom Legic Reader [E] SafeCom Legic Reader [R] 679120 679420 679110 679140 SafeCom Magnetic Card Reader (Tr 1) 959010 959040 SafeCom Magnetic Card Reader (Tr 2) 954010 691040 SafeCom Magnetic Card Reader (Tr 3) 657010 657040 SafeCom Magnetic Card Reader DD (Tr 1) 692010 SafeCom Magnetic Card Reader DD (Tr 2) 691020 SafeCom Magnetic Card Reader DD (Tr 3) 692020 SafeCom Mifare Reader [E] SafeCom Mifare Reader [R] 970120 970420 970110 970140 SafeCom Nedap Reader 653020 978990 653040 SafeCom NexWatch Reader 698420 698010 698040 Table 1 shows the supported identification methods. The ID device is either fitted or supplied with a 1.8 - 2.0 m cable. Additional information about the ID devices is available in SafeCom G3 Administrator’s ManualD60603.](https://usermanual.wiki/Equitrac/970940/User-Guide-2519406-Page-7.png)
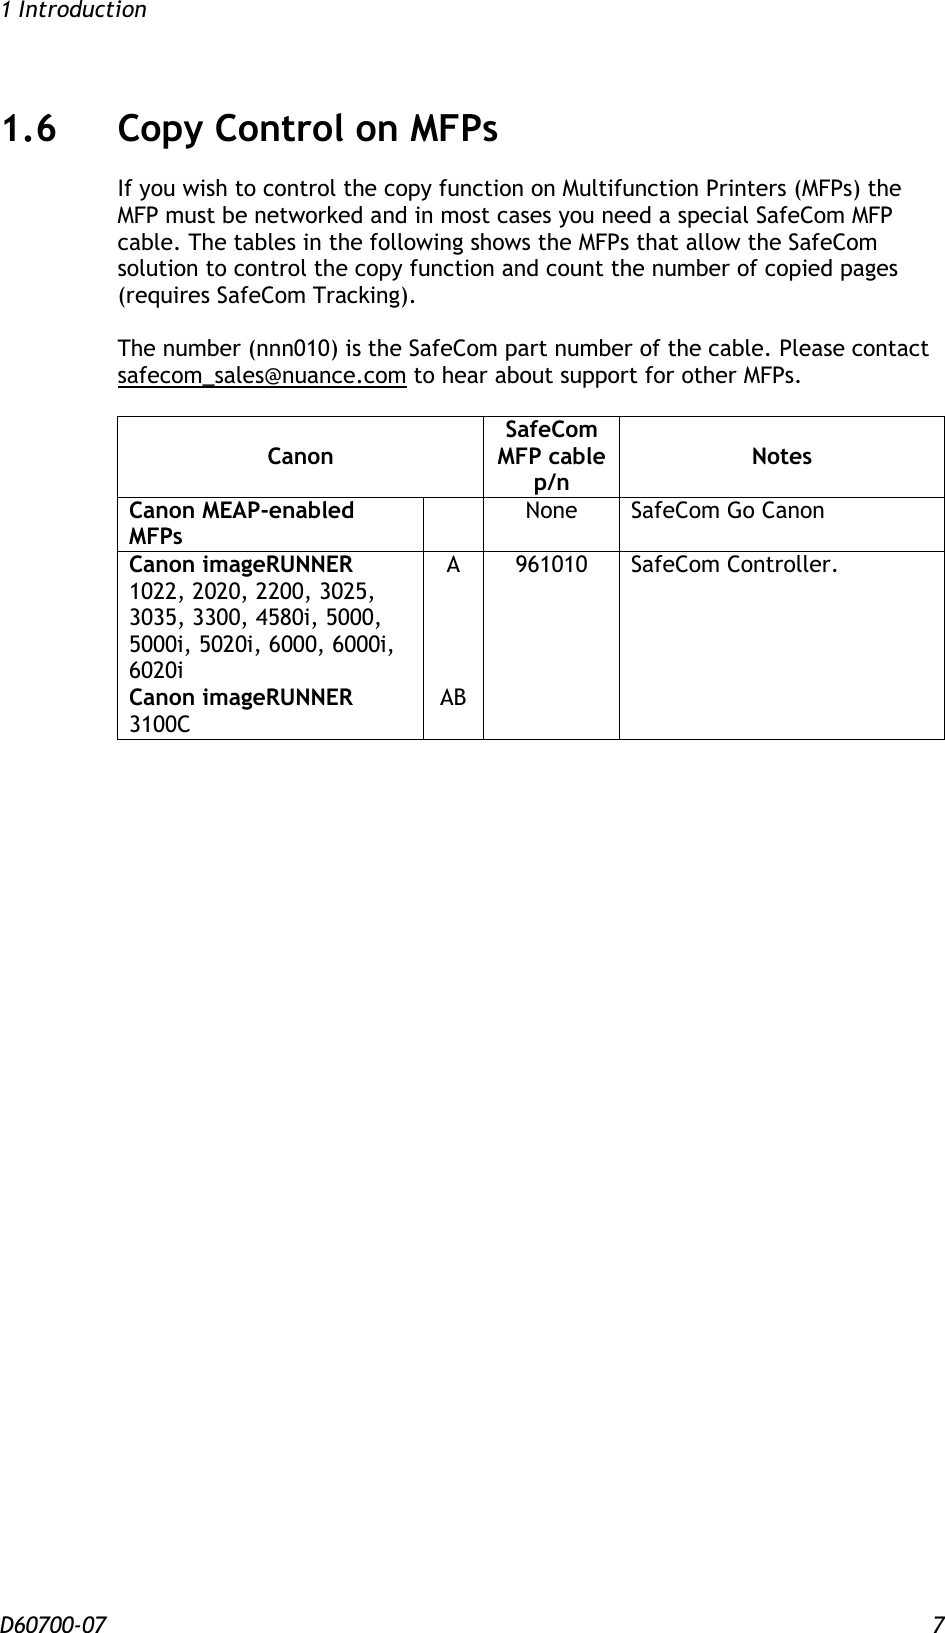

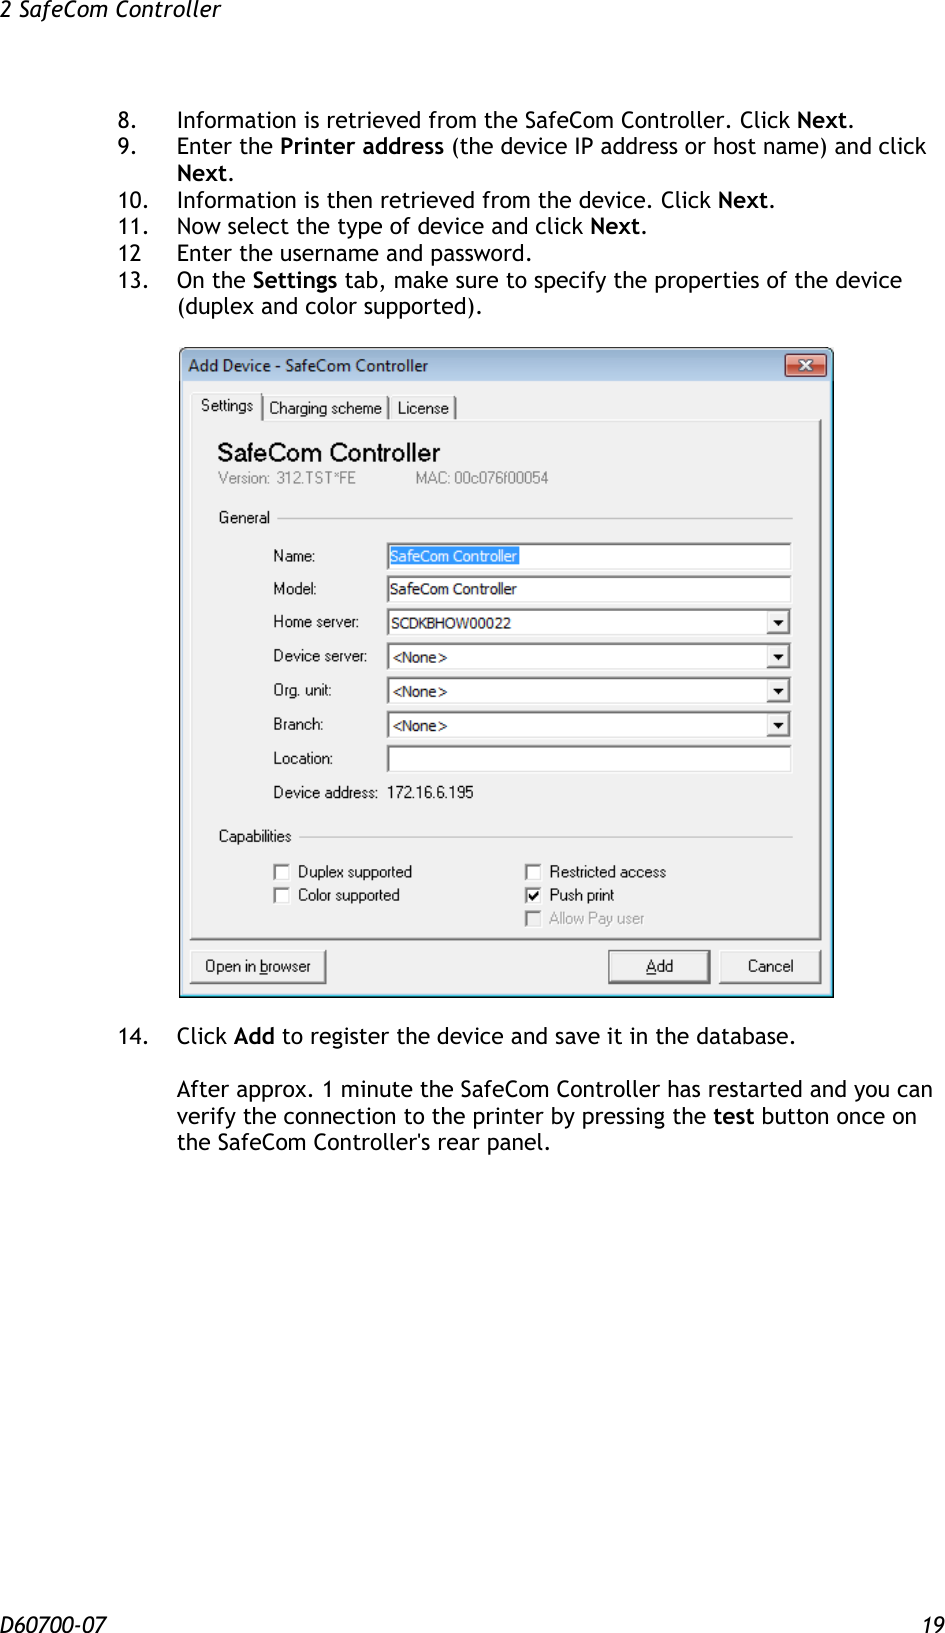
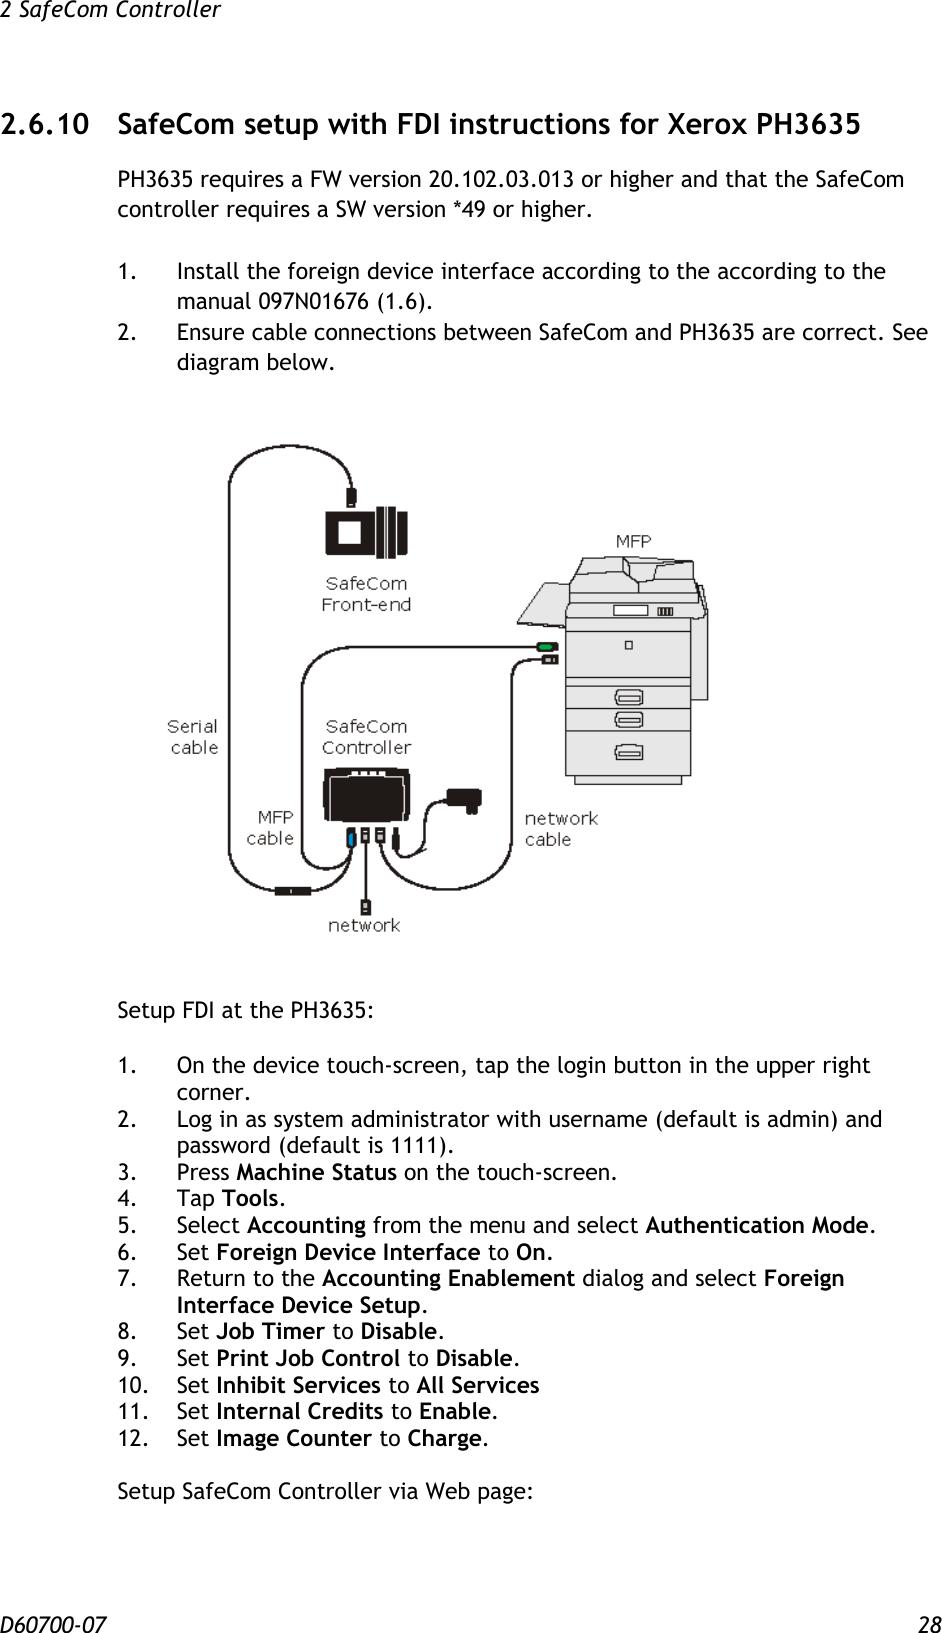
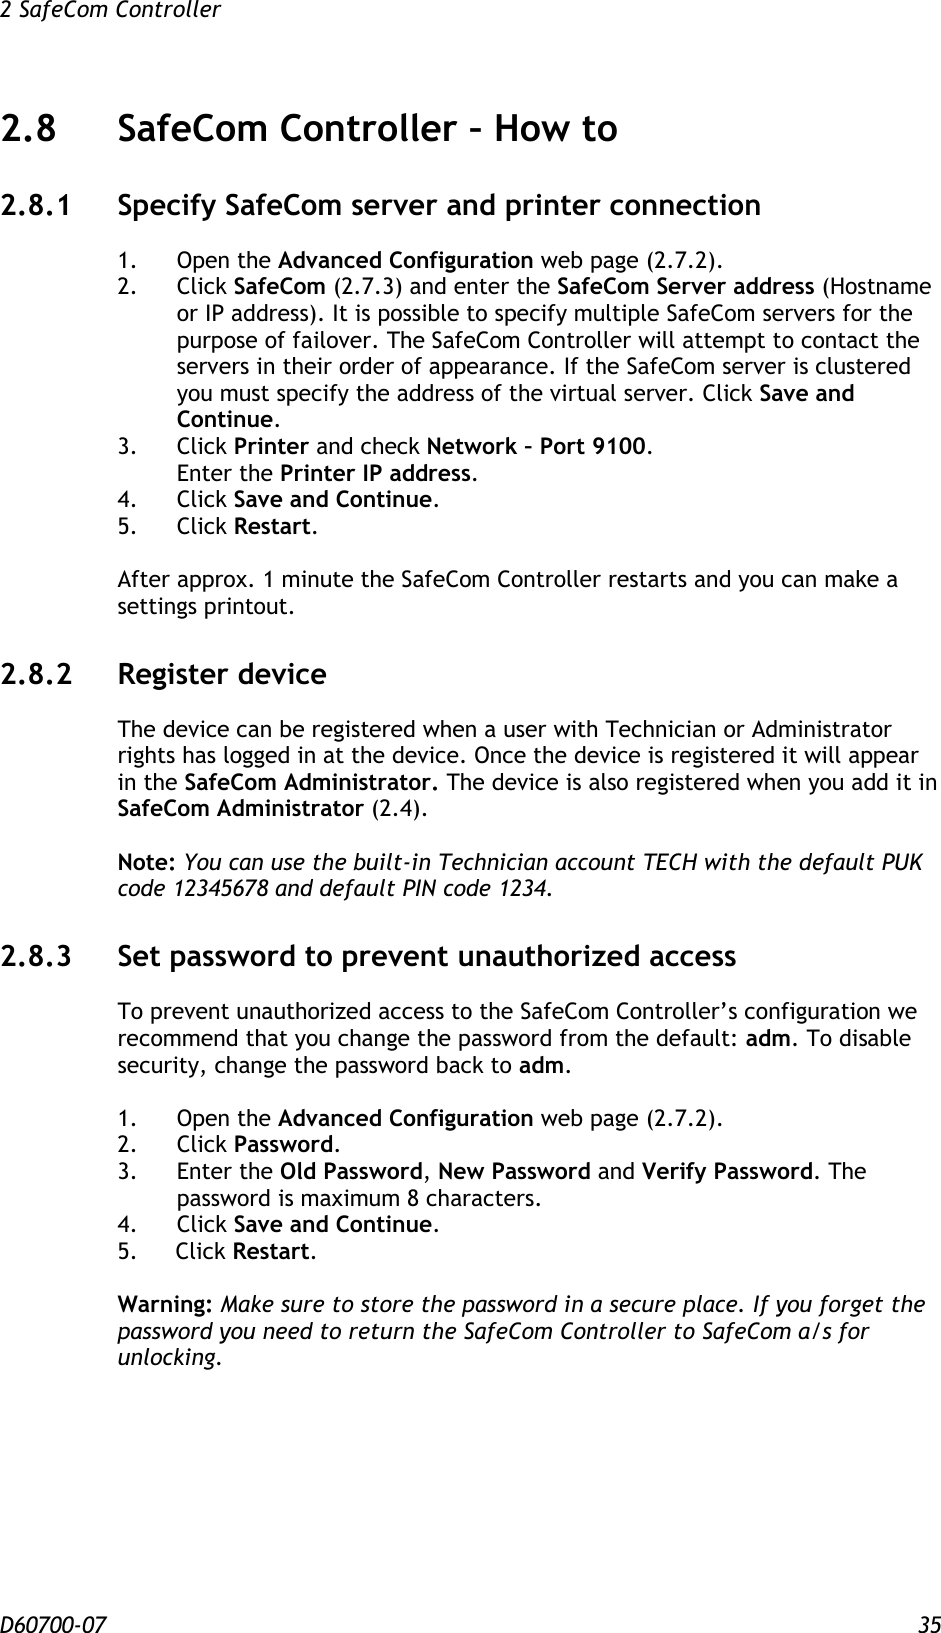
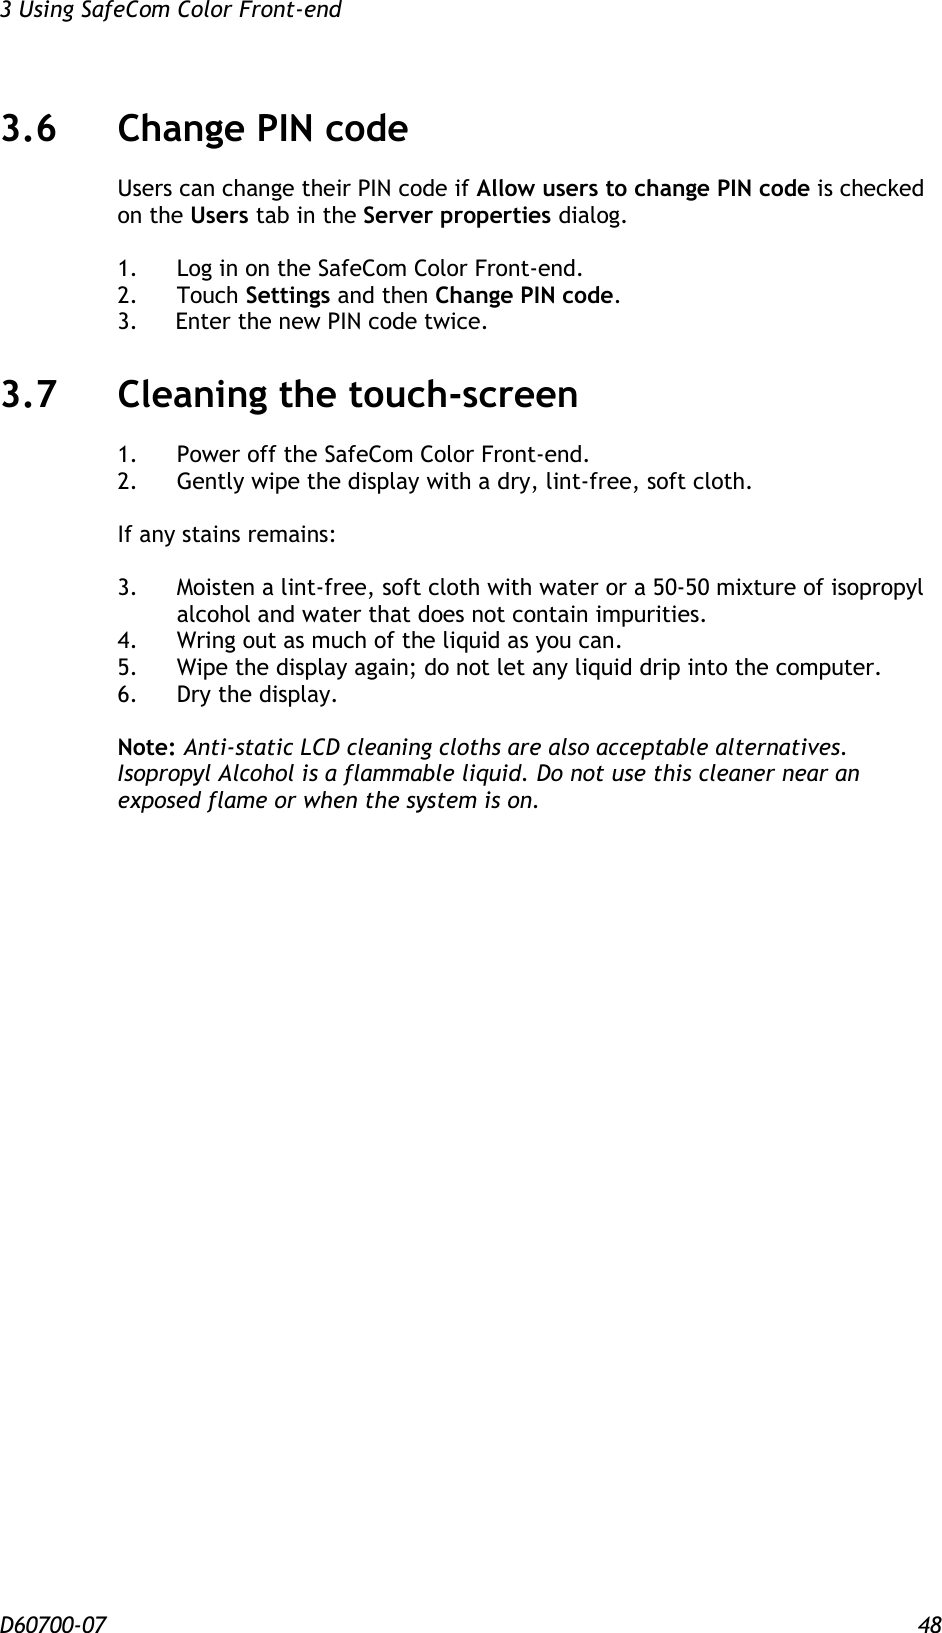
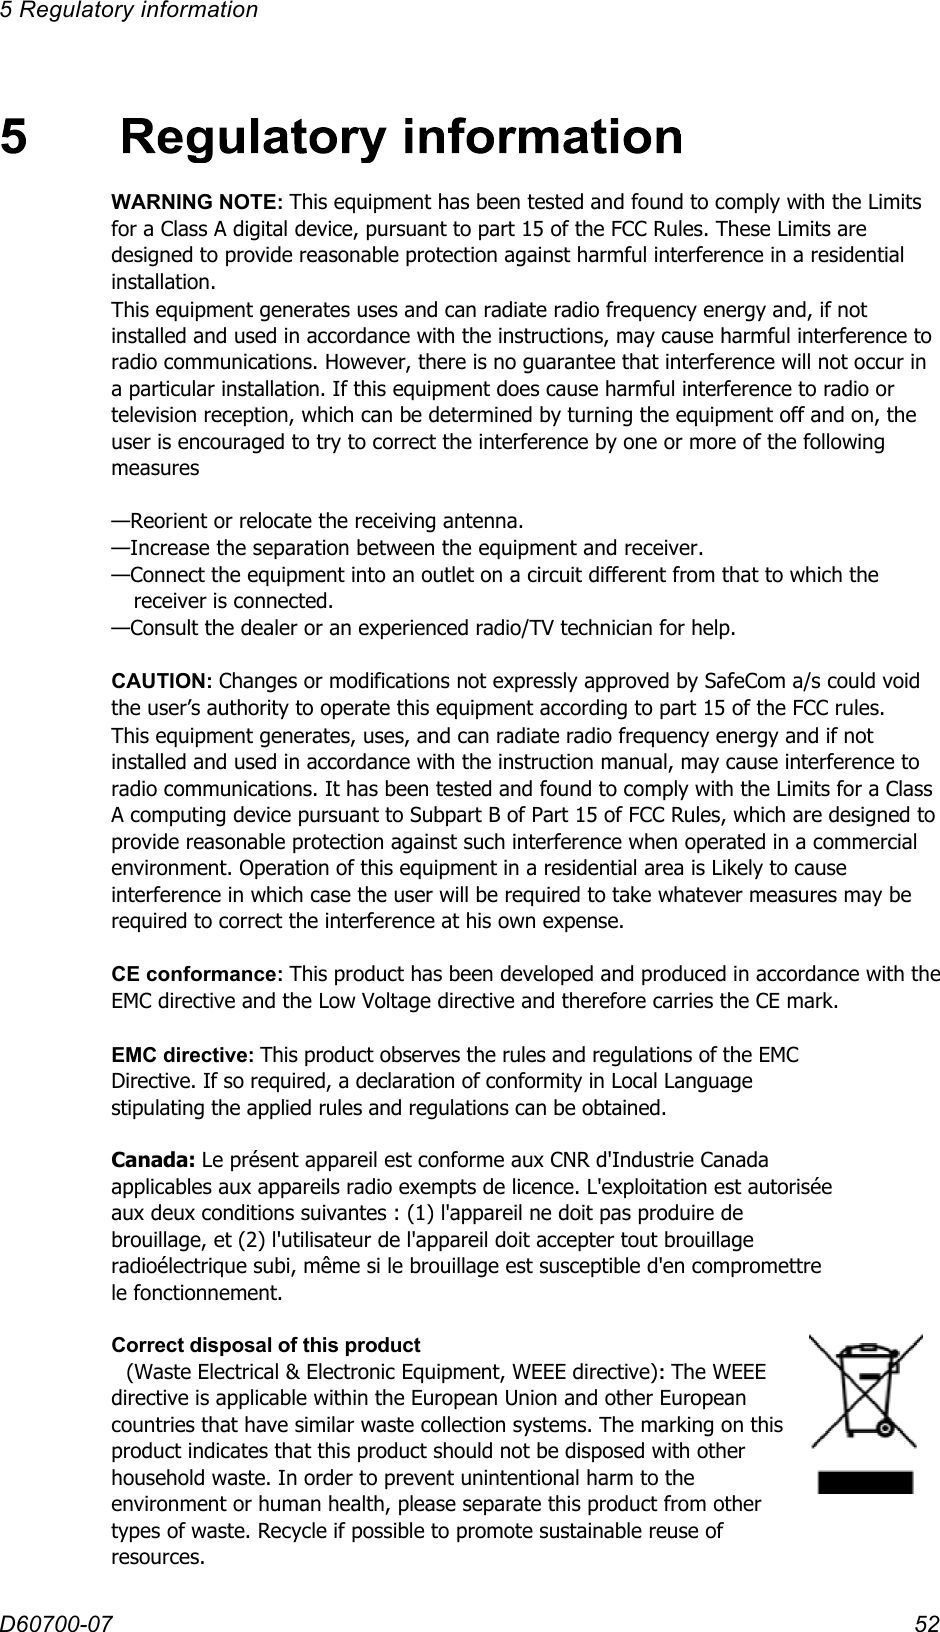
![2 SafeCom Controller D60700-07 33 High Speed Print Enabled should be YES if print data is to be sent directly (and unencrypted) to the printer from the SafeCom server rather than through the SafeCom Controller. The pace of high speed print is then comparable to that of printing the document directly to the printer. SafeCom G2 version S82 070.380*07 or higher can hold off Push printed documents while a user is logged in at the device. The directly printed document needs to be submitted via a SafeCom Push Port that is is referencing the same tracking device. Documents that are submitted via a standard TCP/IP port cannot be held off. There is the risk that the user standing at the device printing and copying may experience that other users' direct prints are printed between their own jobs. Post tracking affects the following tracking data types for Pull print jobs: Tracking pages (TrackingPageCount) is adjusted to reflect the actual number of pull printed pages. If a 100 page document is cancelled after 10 pages the job is only tracked (and priced) as 10 pages. Color pages (TrackingColorPageCount) is adjusted to reflect the actual number of pull printed pages with color. Price 1 (JobPrice) and Price 2 (JobPrice2) are adjusted as well to reflect the adjustment of Tracking pages and Color pages. Post tracking is supported on SafeCom Controller with Canon devices (CPCA Protocol v.1. and v.2.), Ricoh devices and Xerox devices. Driver Names. During Pull Printing, SafeCom compares the driver name embedded in the print job with its list of driver names. If there is no match, the document appears with a question mark [?] in the document list. This way the user is warned that fidelity is low and the document may print incorrectly.](https://usermanual.wiki/Equitrac/970940/User-Guide-2519406-Page-34.png)