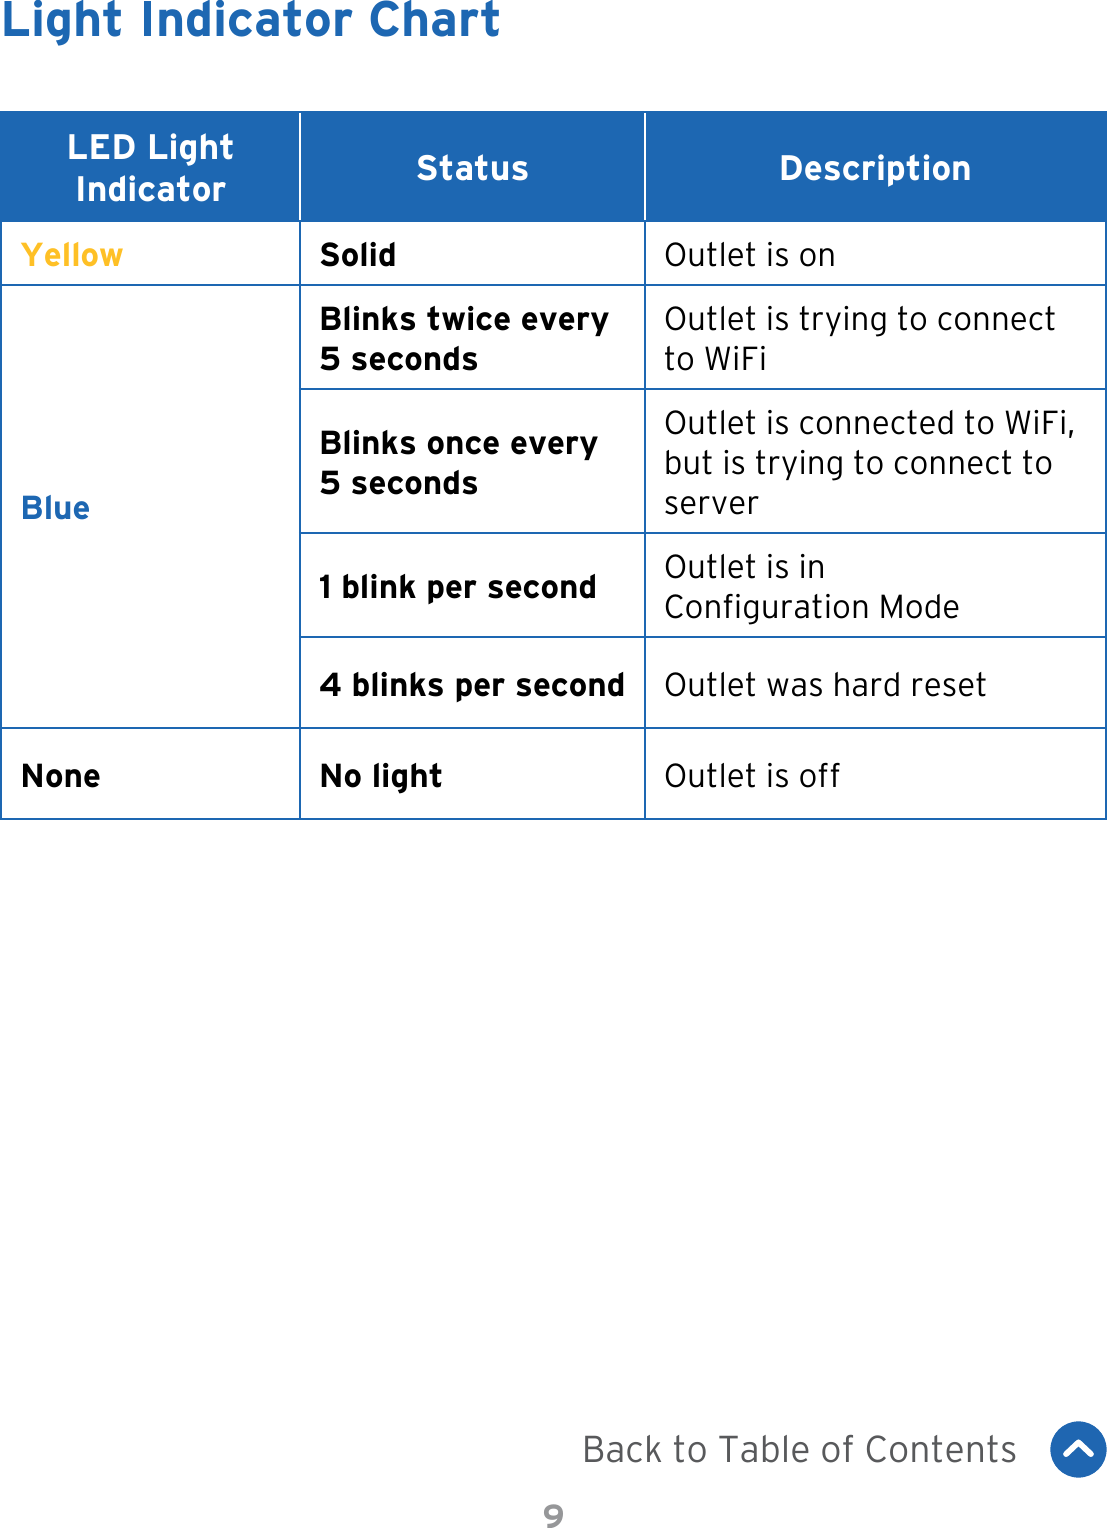
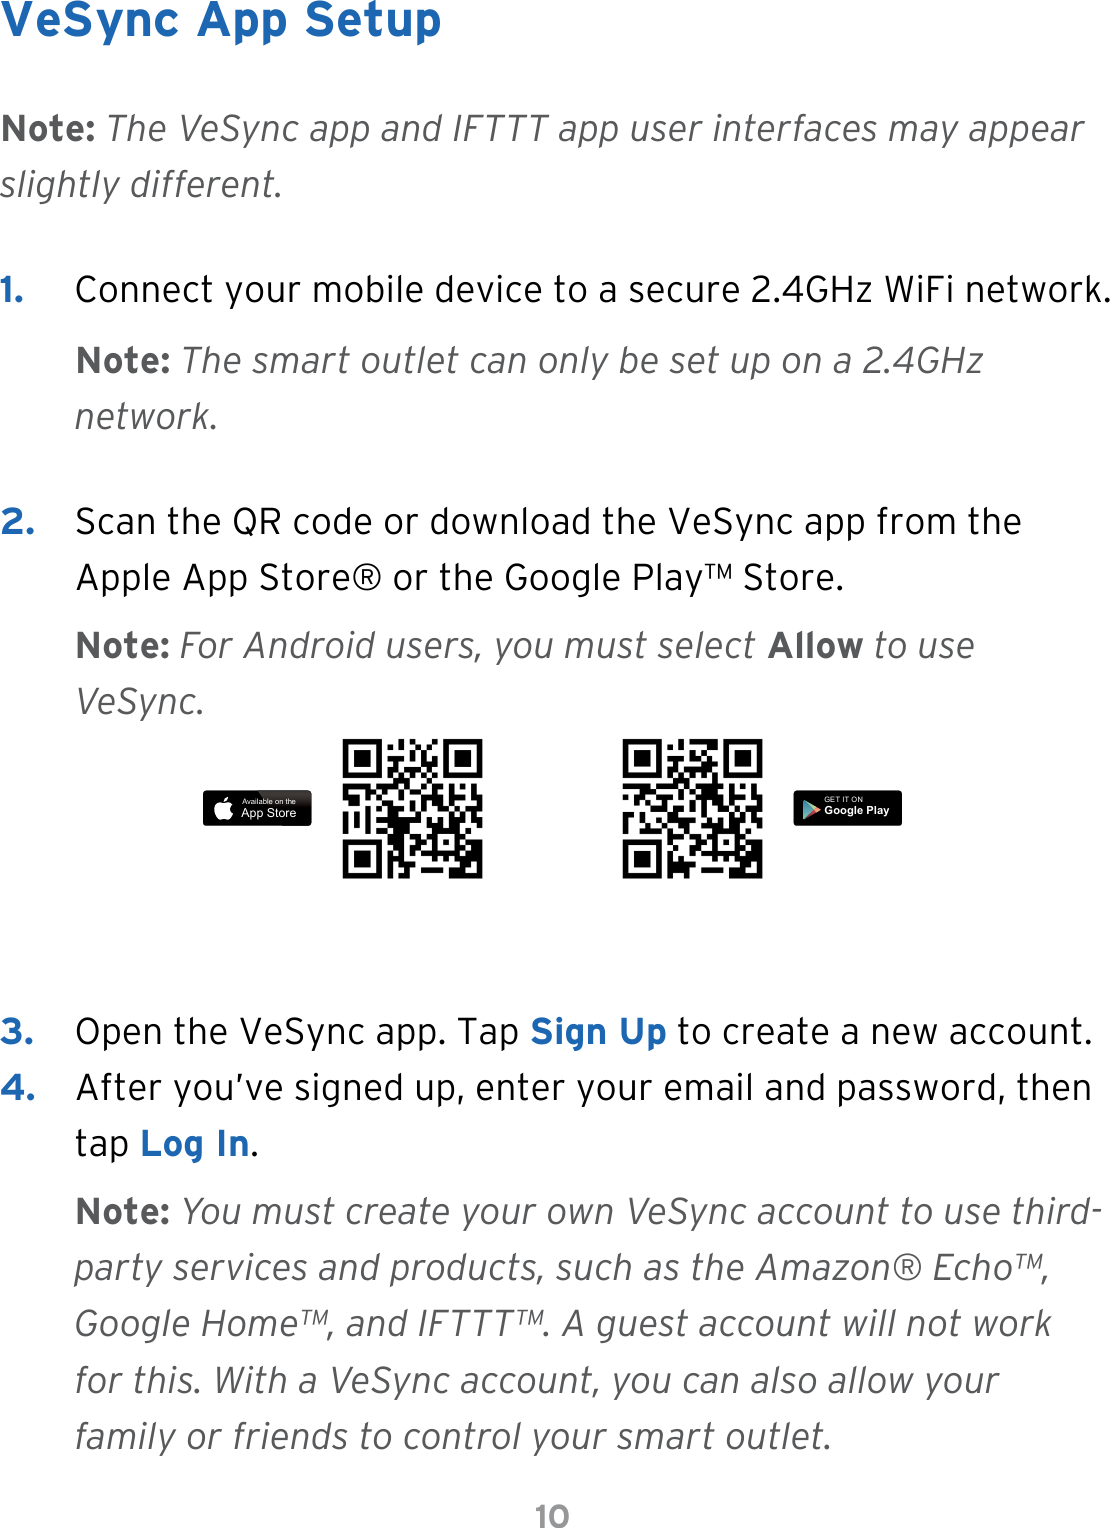
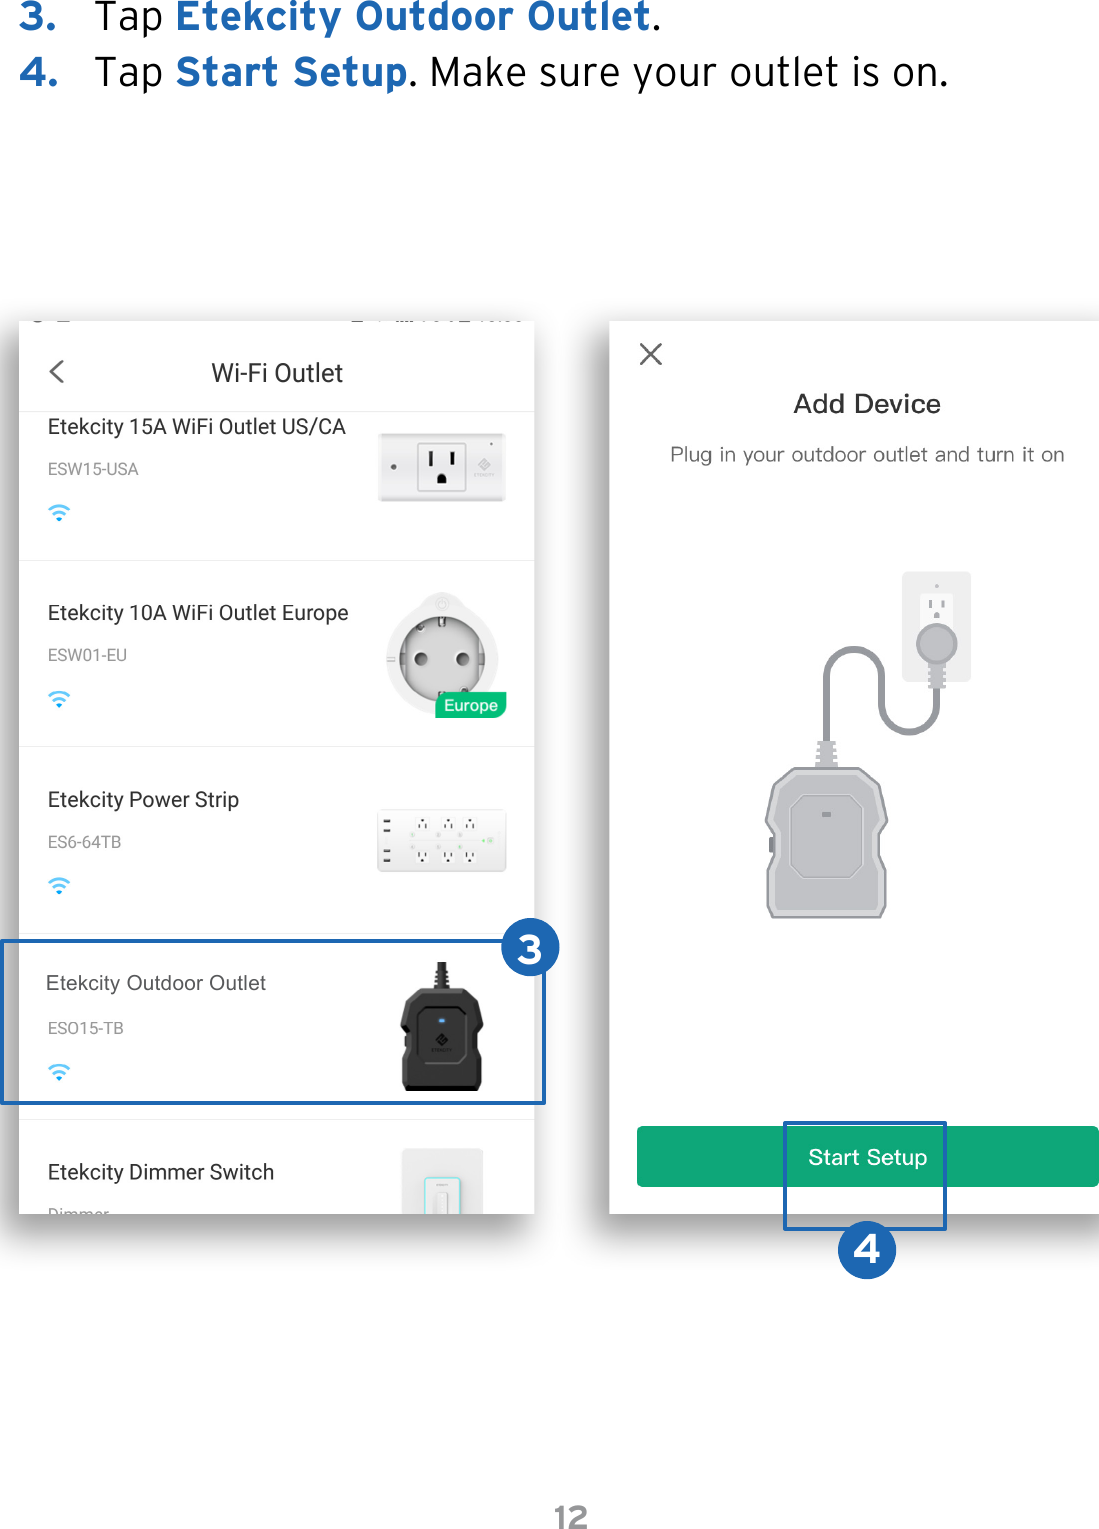
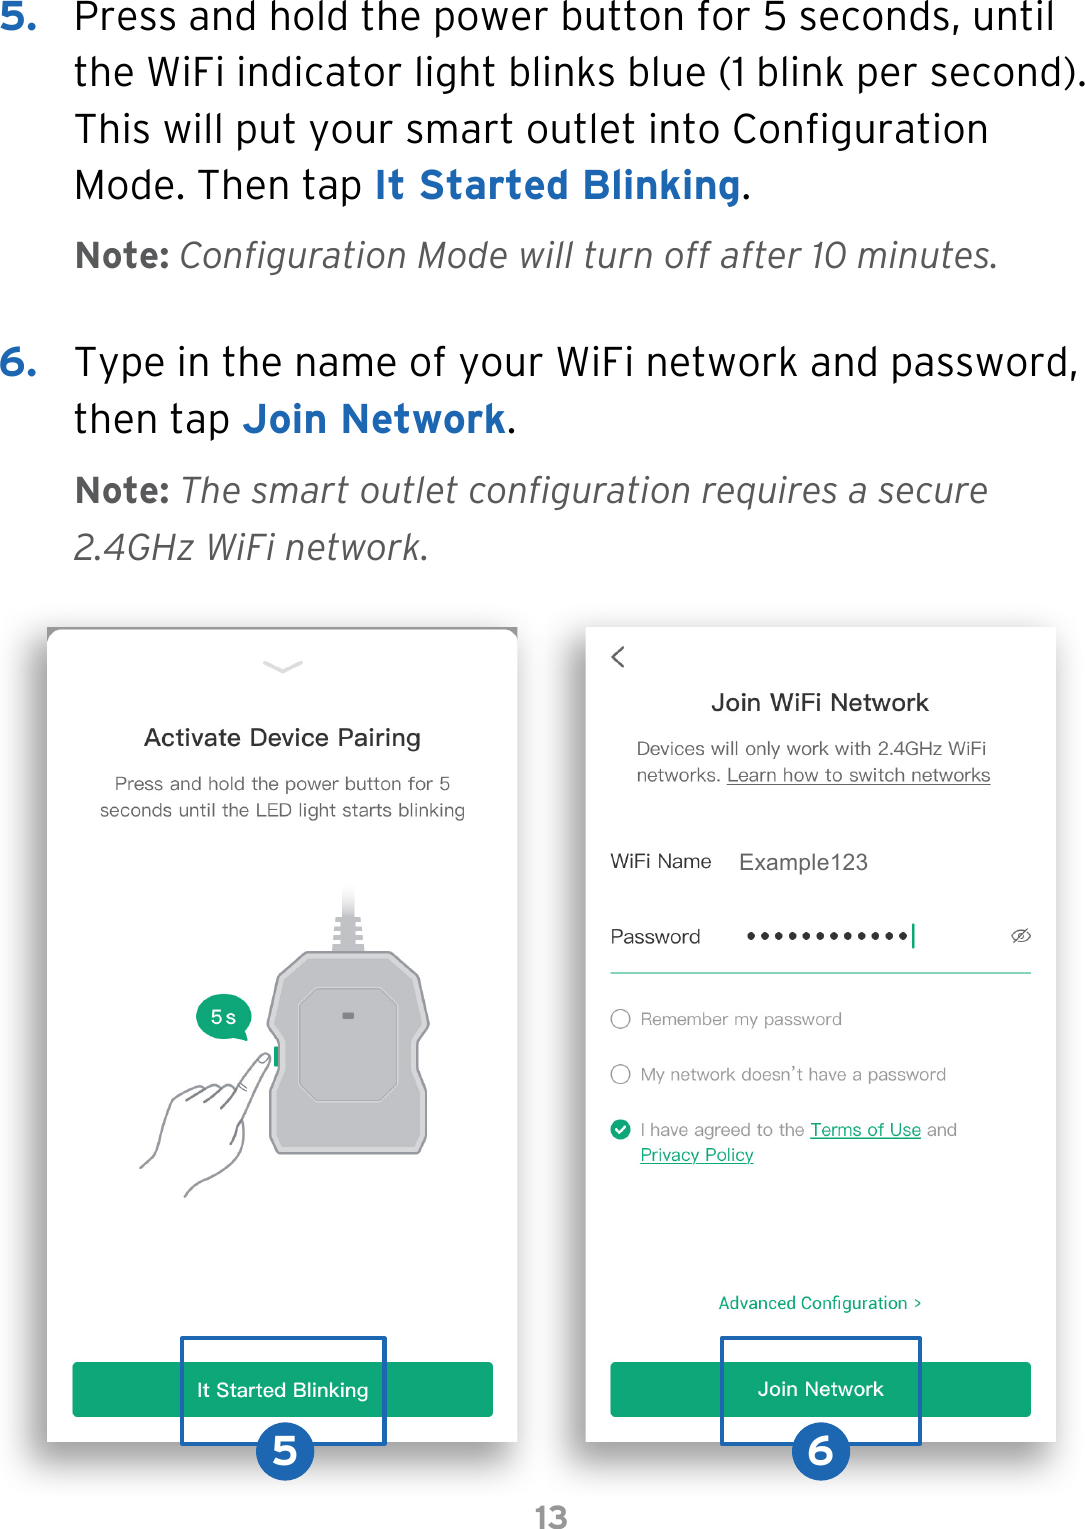
Etekcity ESO15-TB Etekcity Smart Outdoor Wi-Fi Outlet(15A) User Manual 15 ESO15 TB UserMan
Etekcity Corporation Etekcity Smart Outdoor Wi-Fi Outlet(15A) 15 ESO15 TB UserMan
UserManual.wiki
>
Etekcity
>
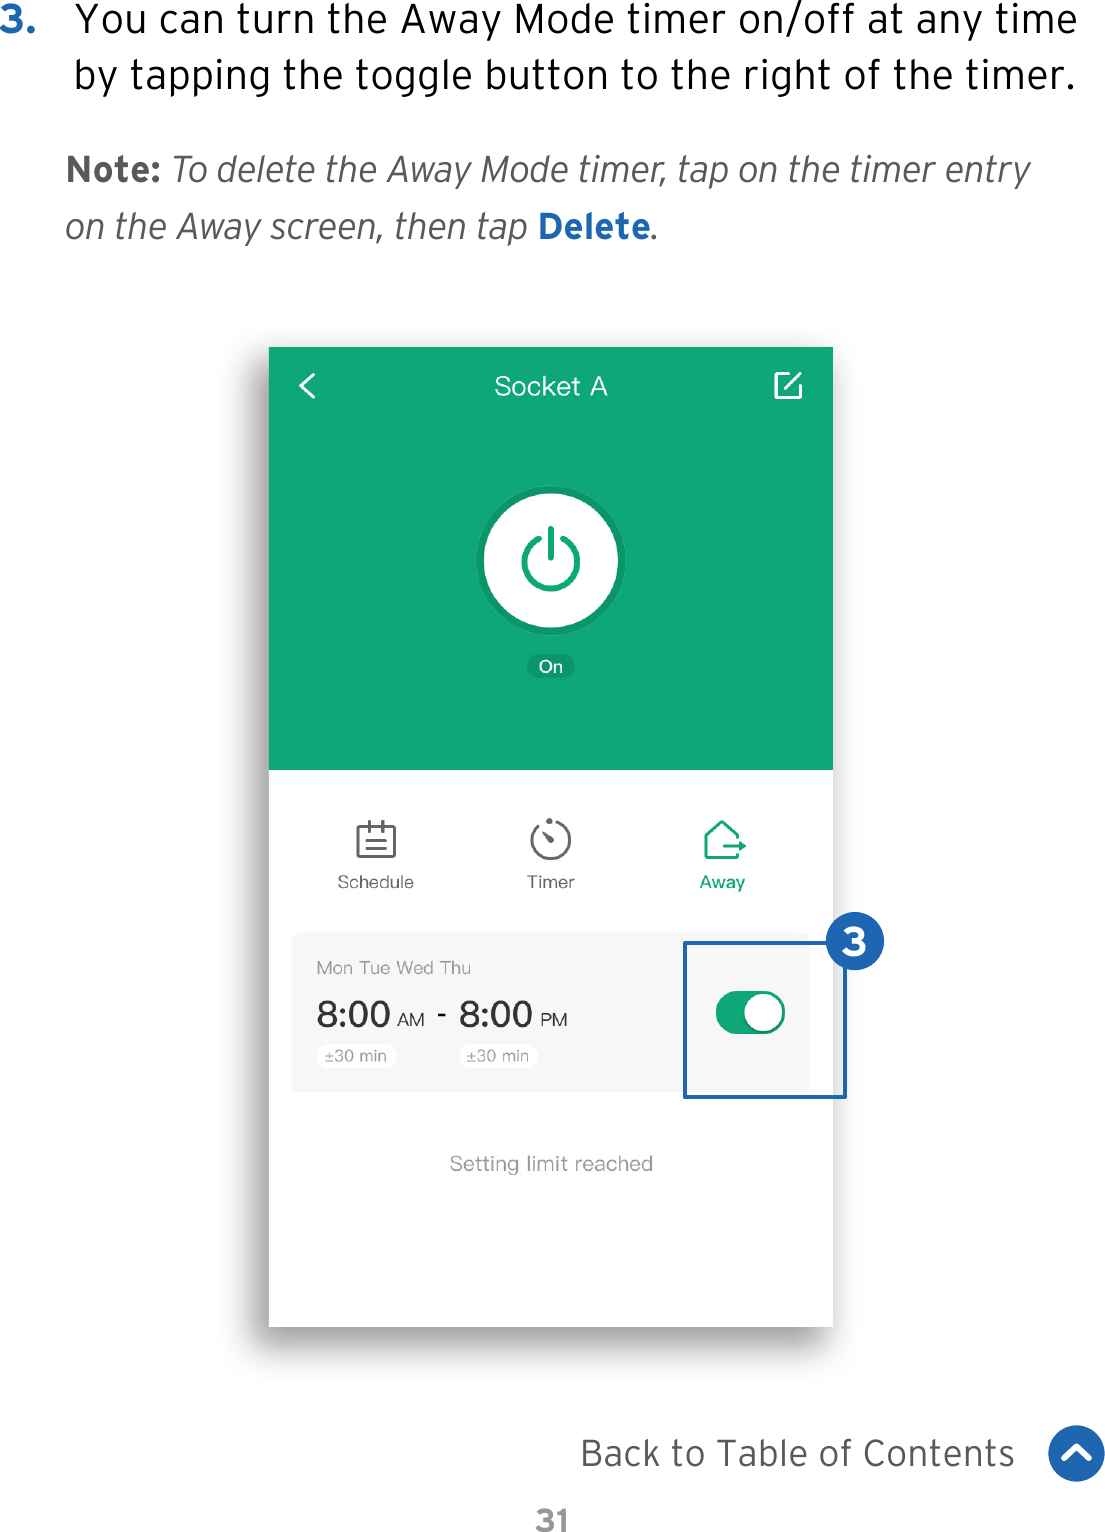
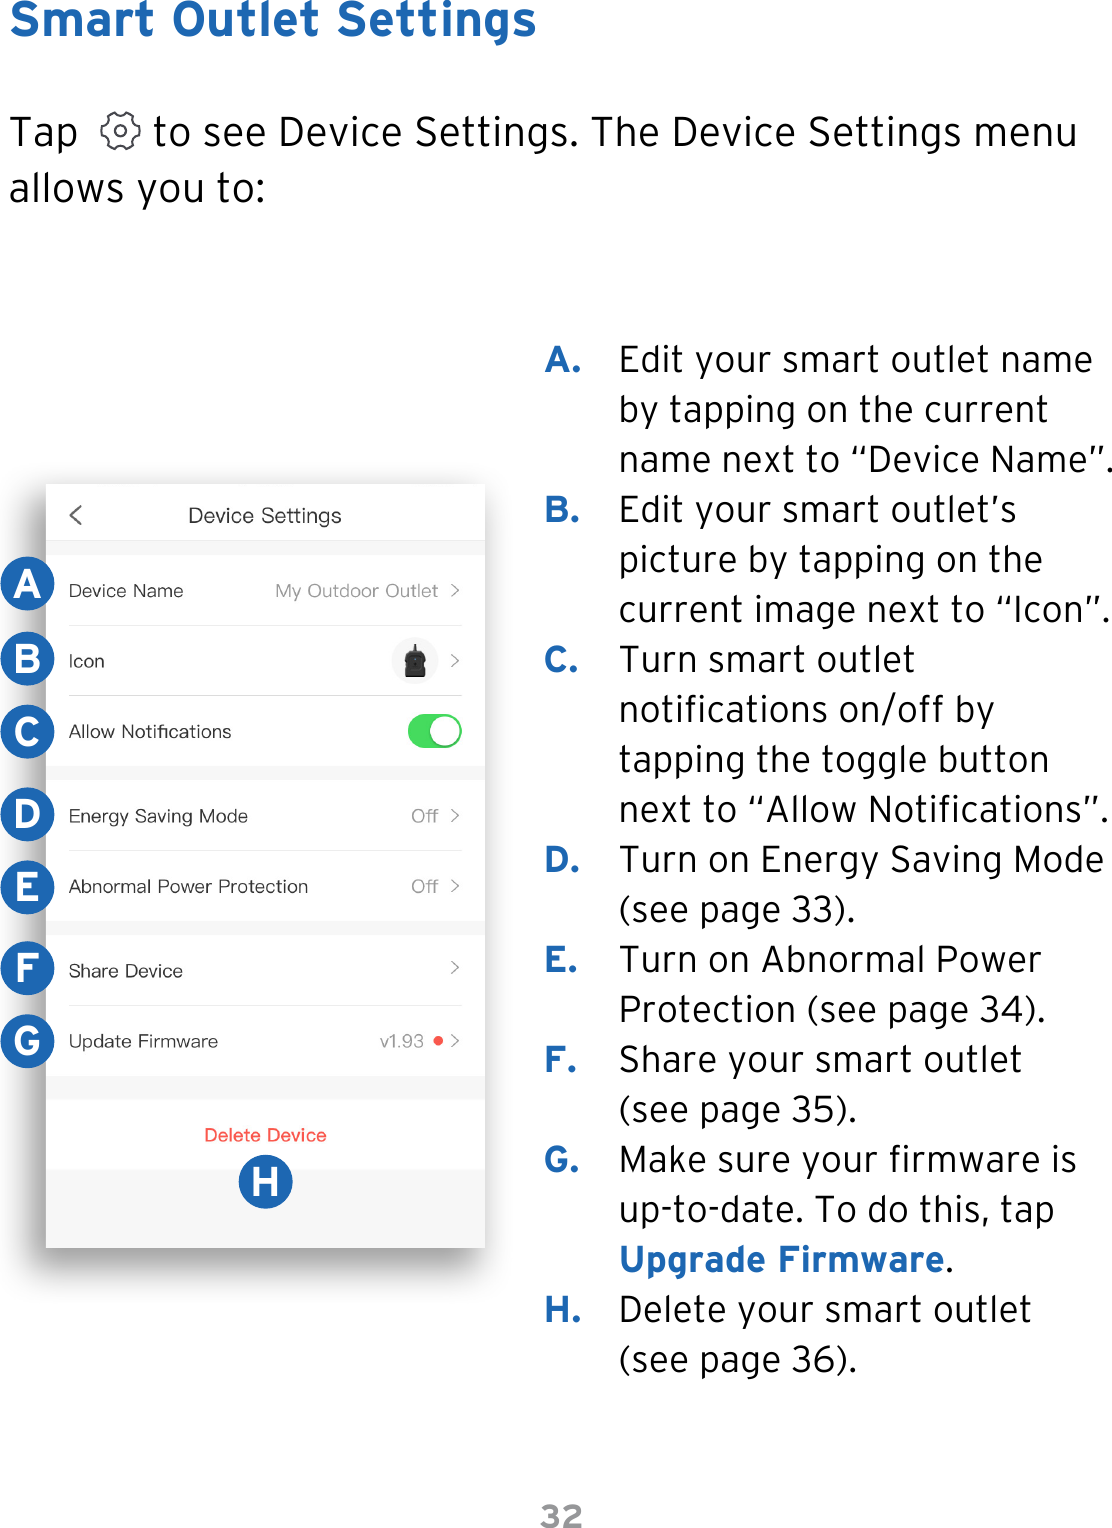
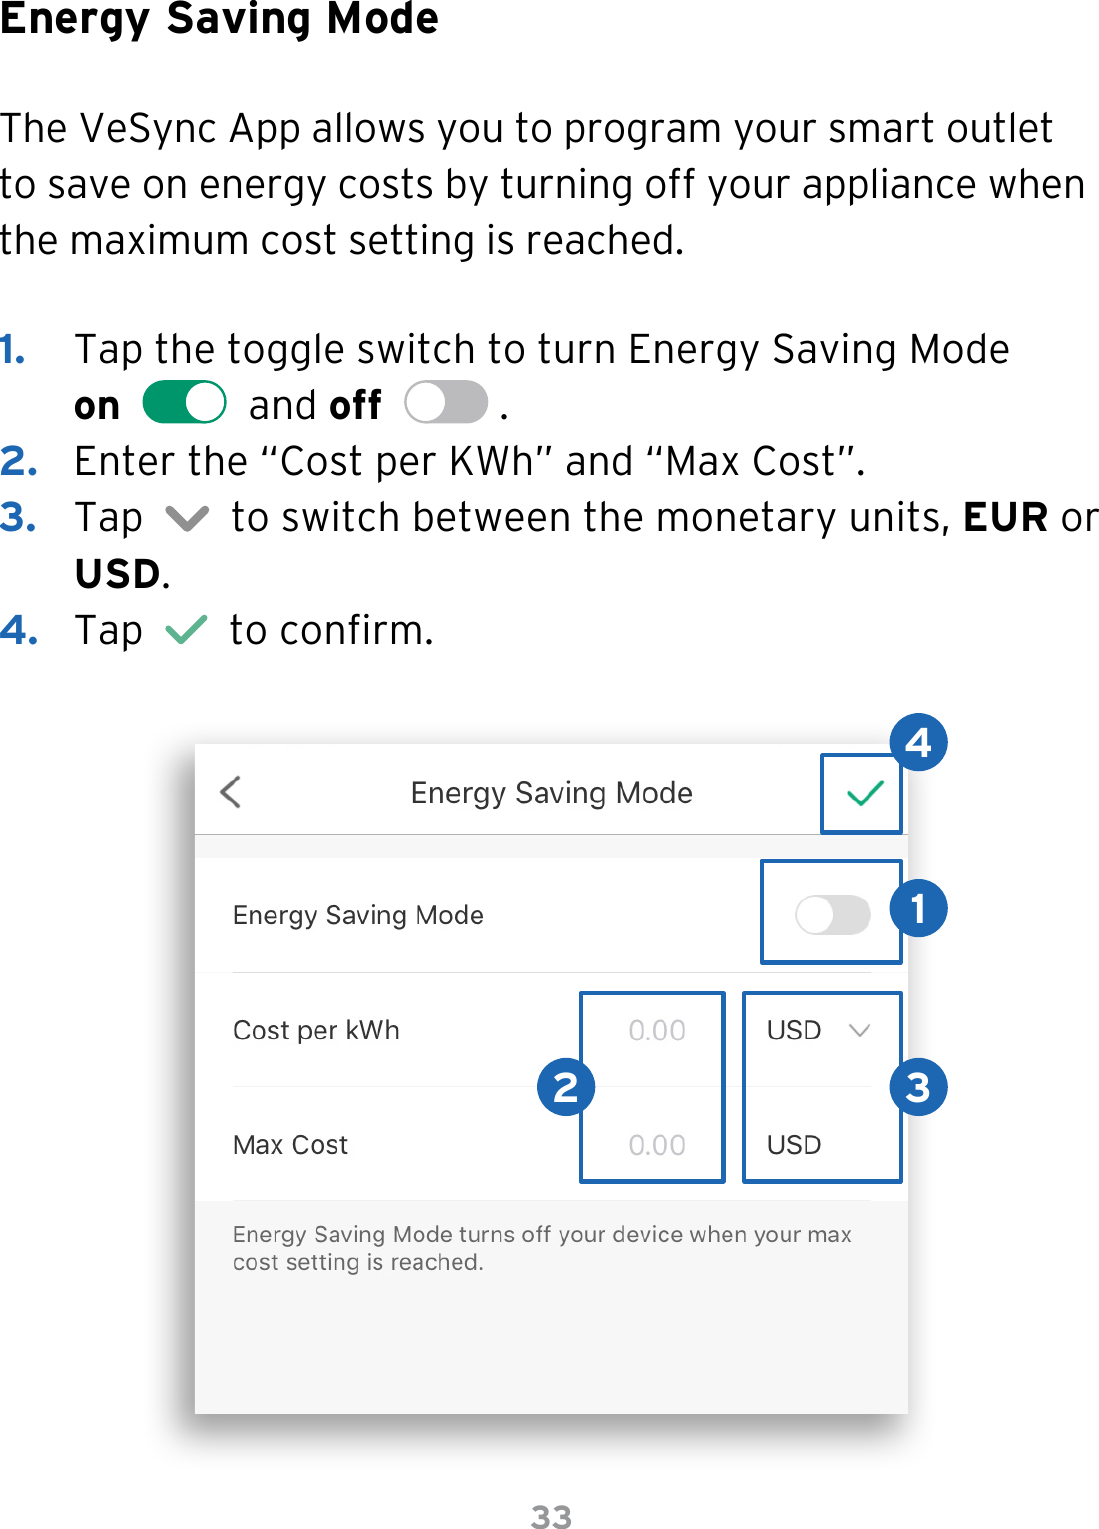
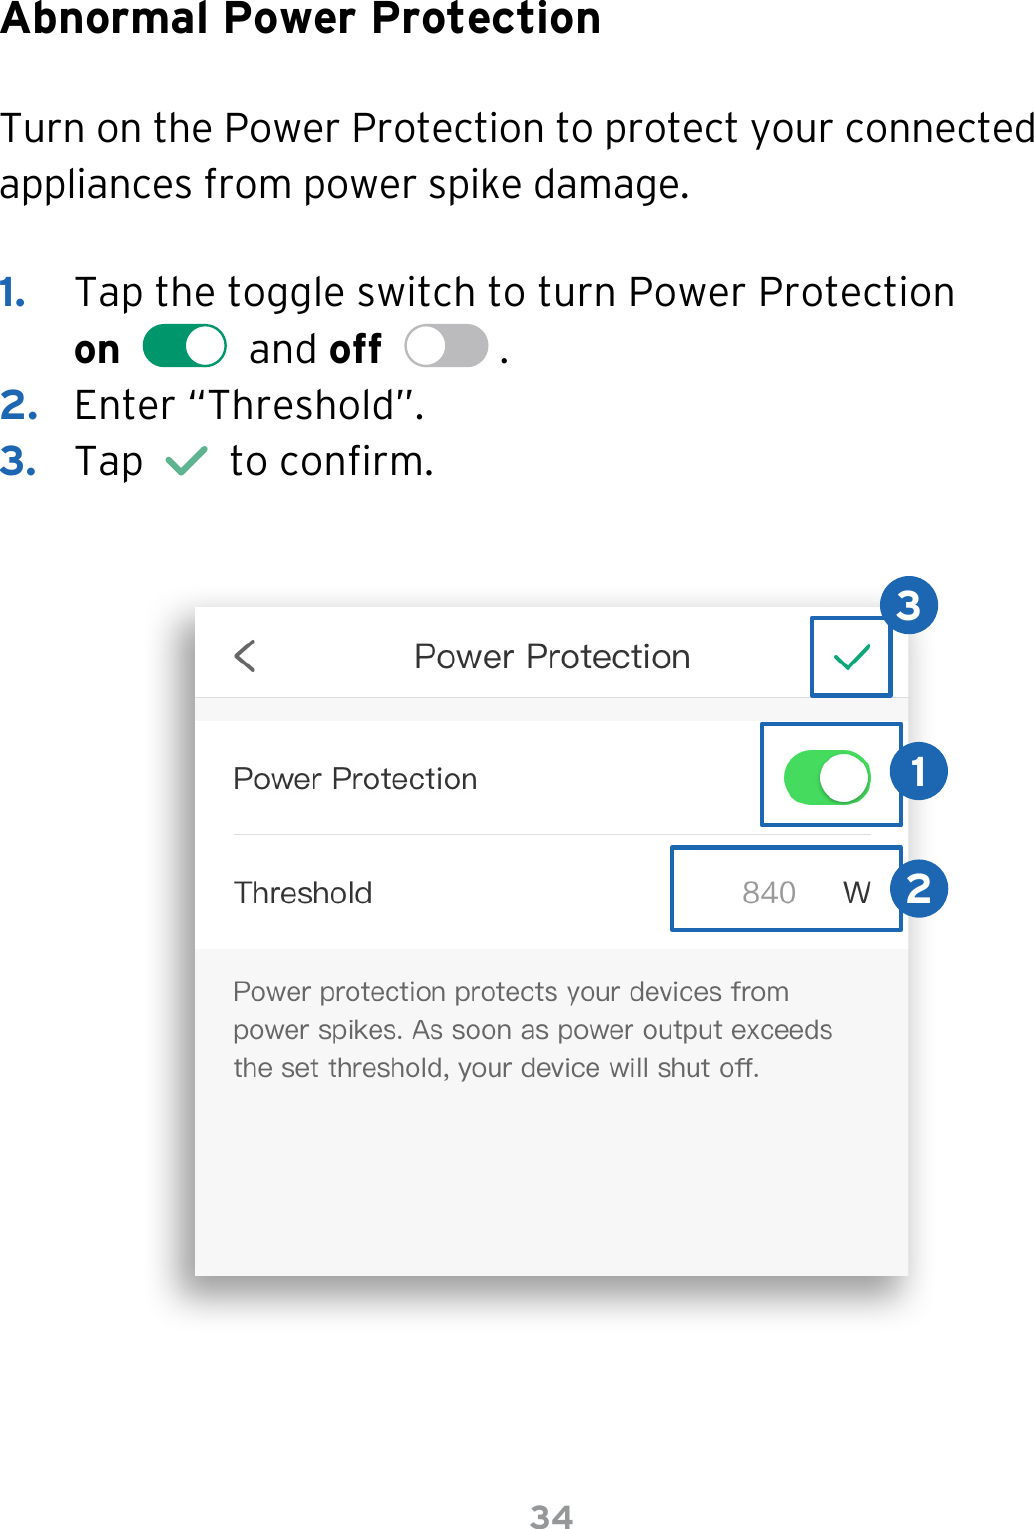
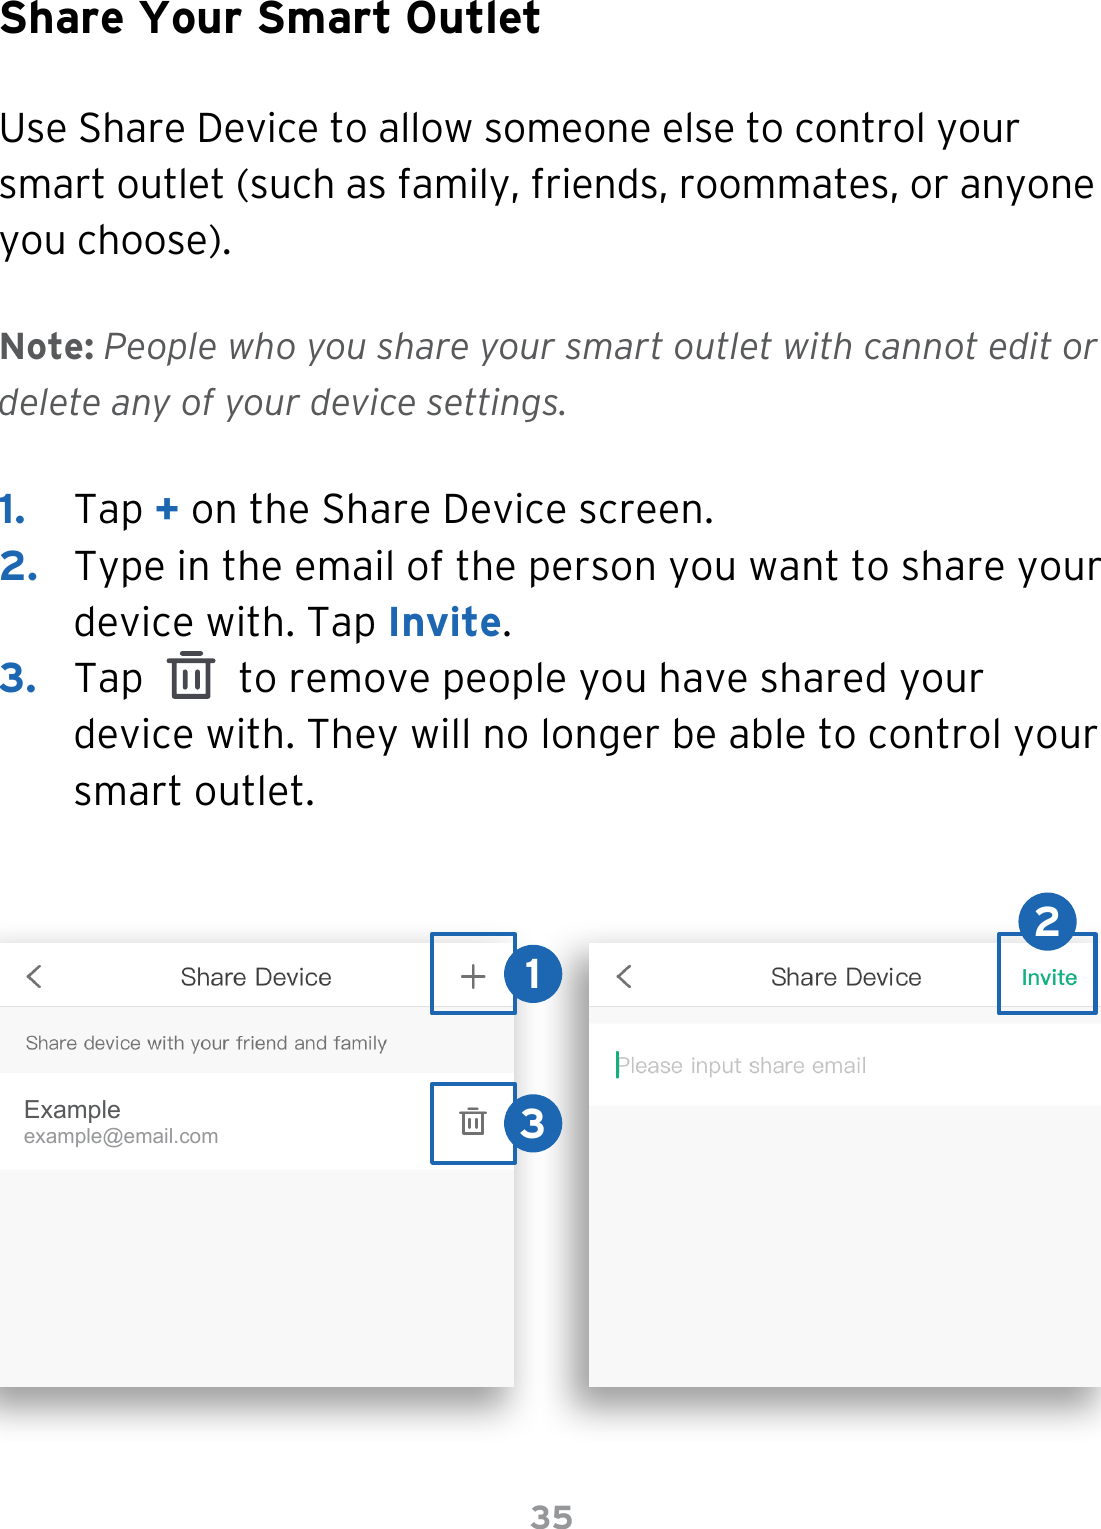
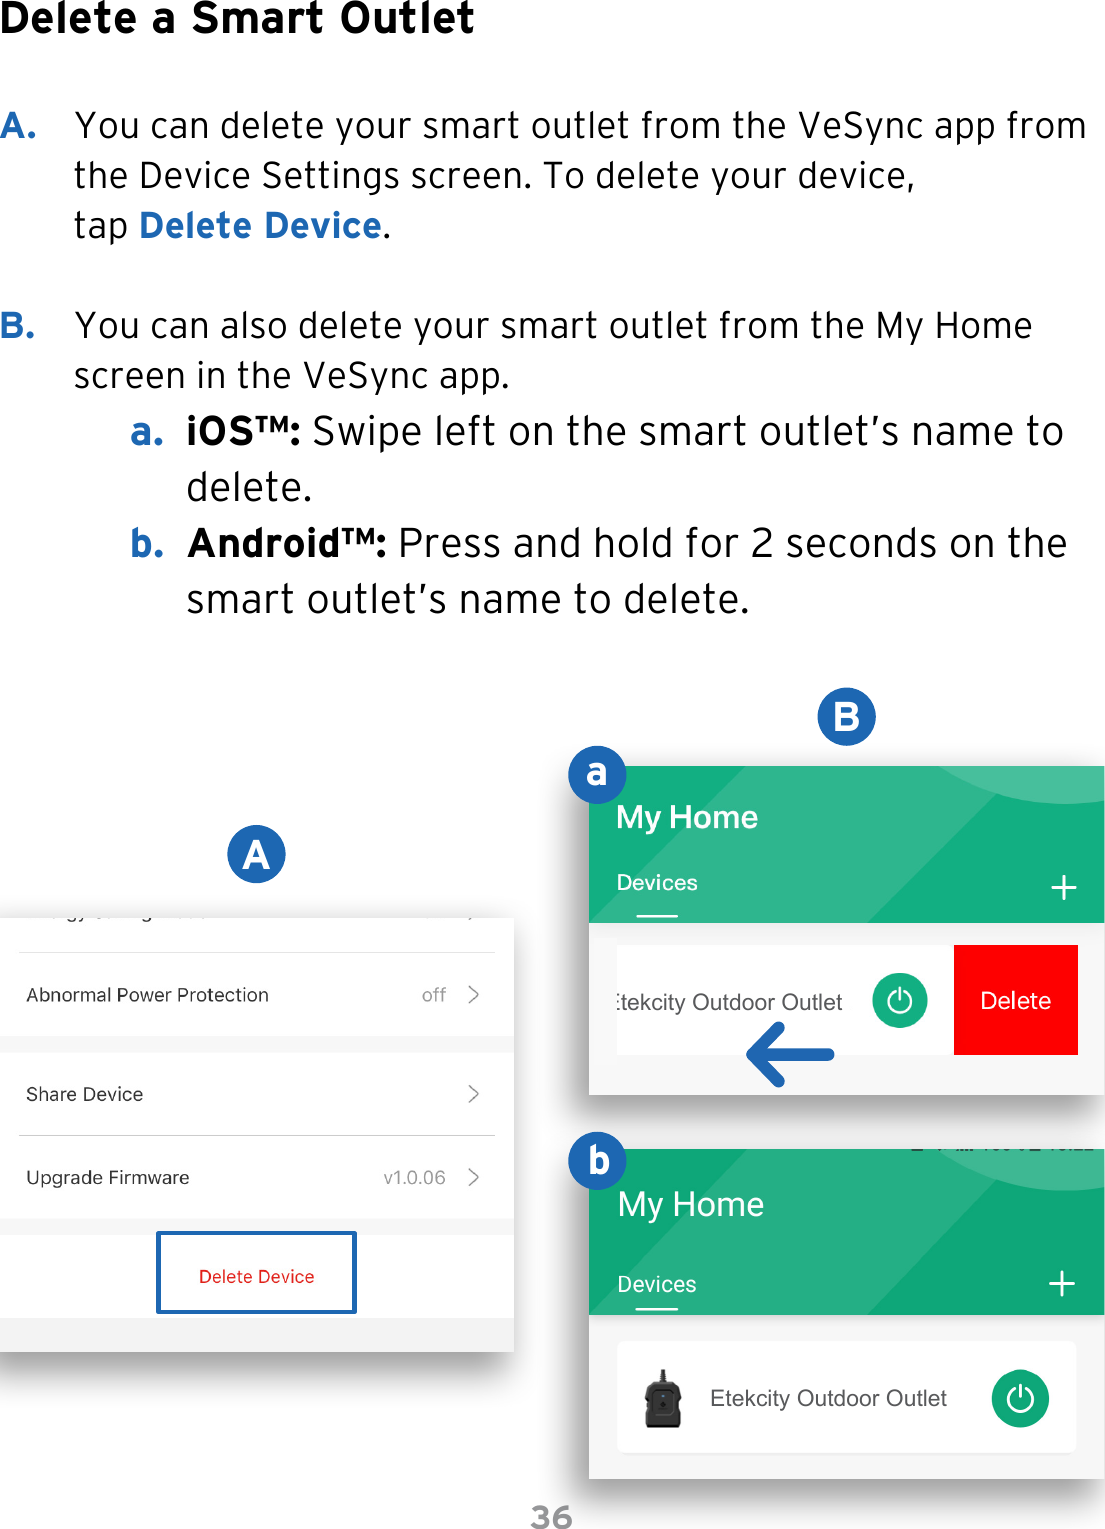
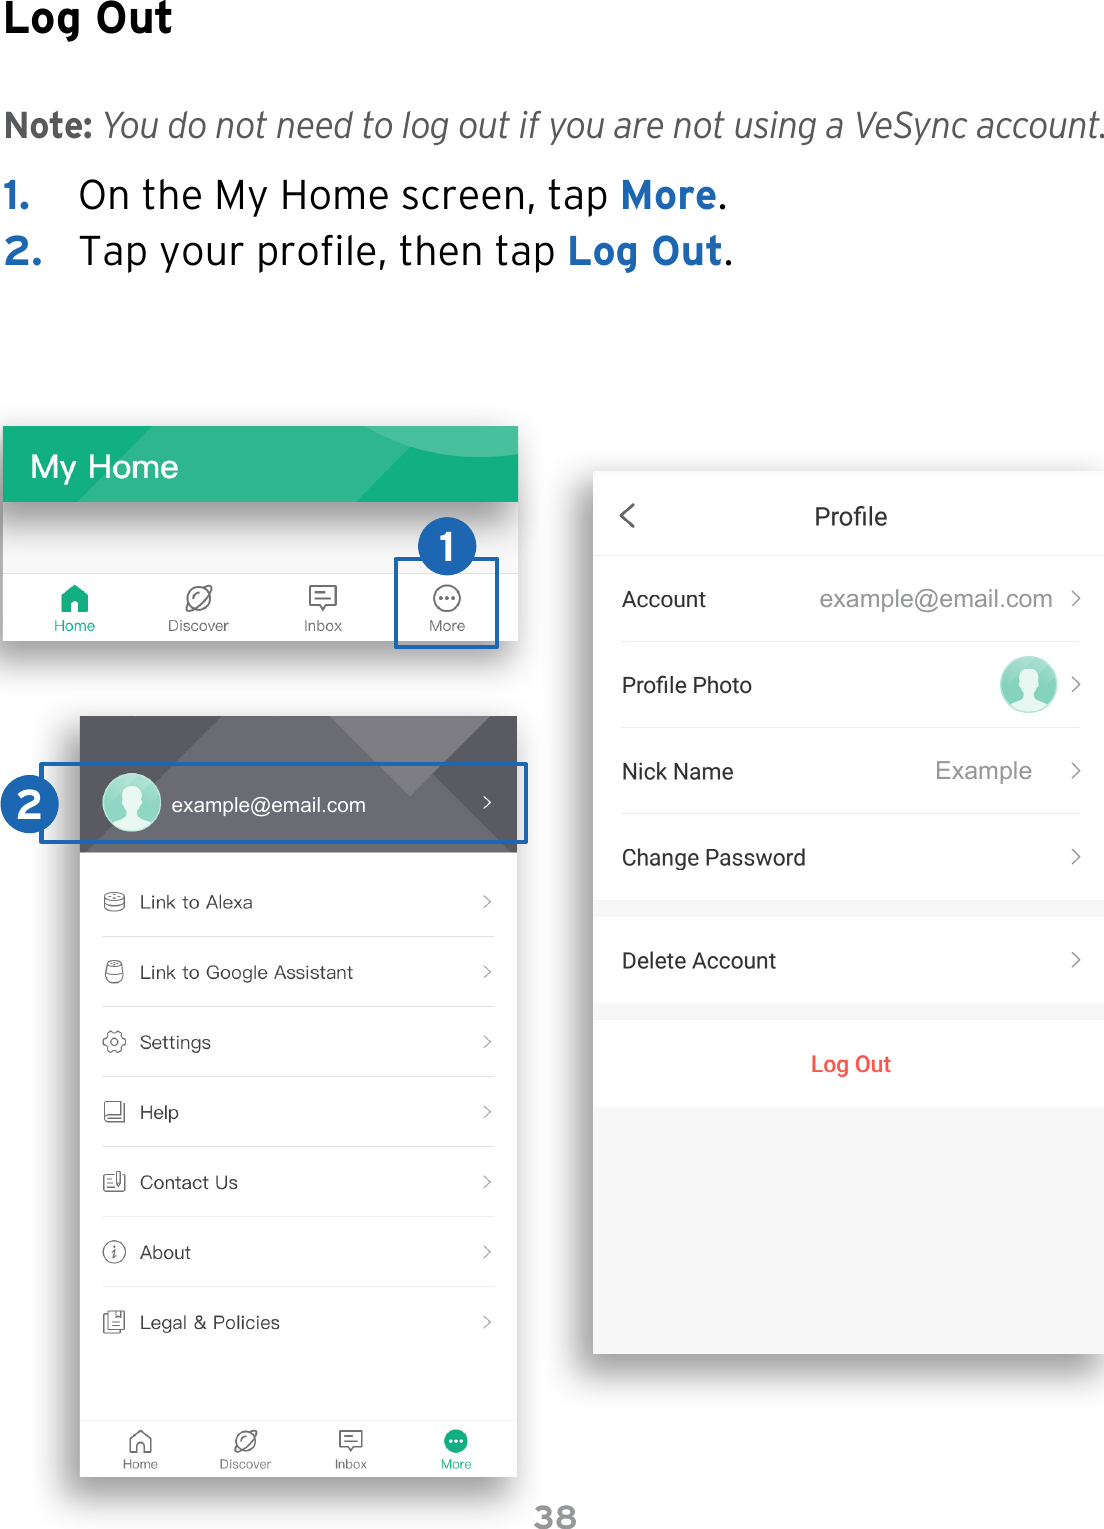
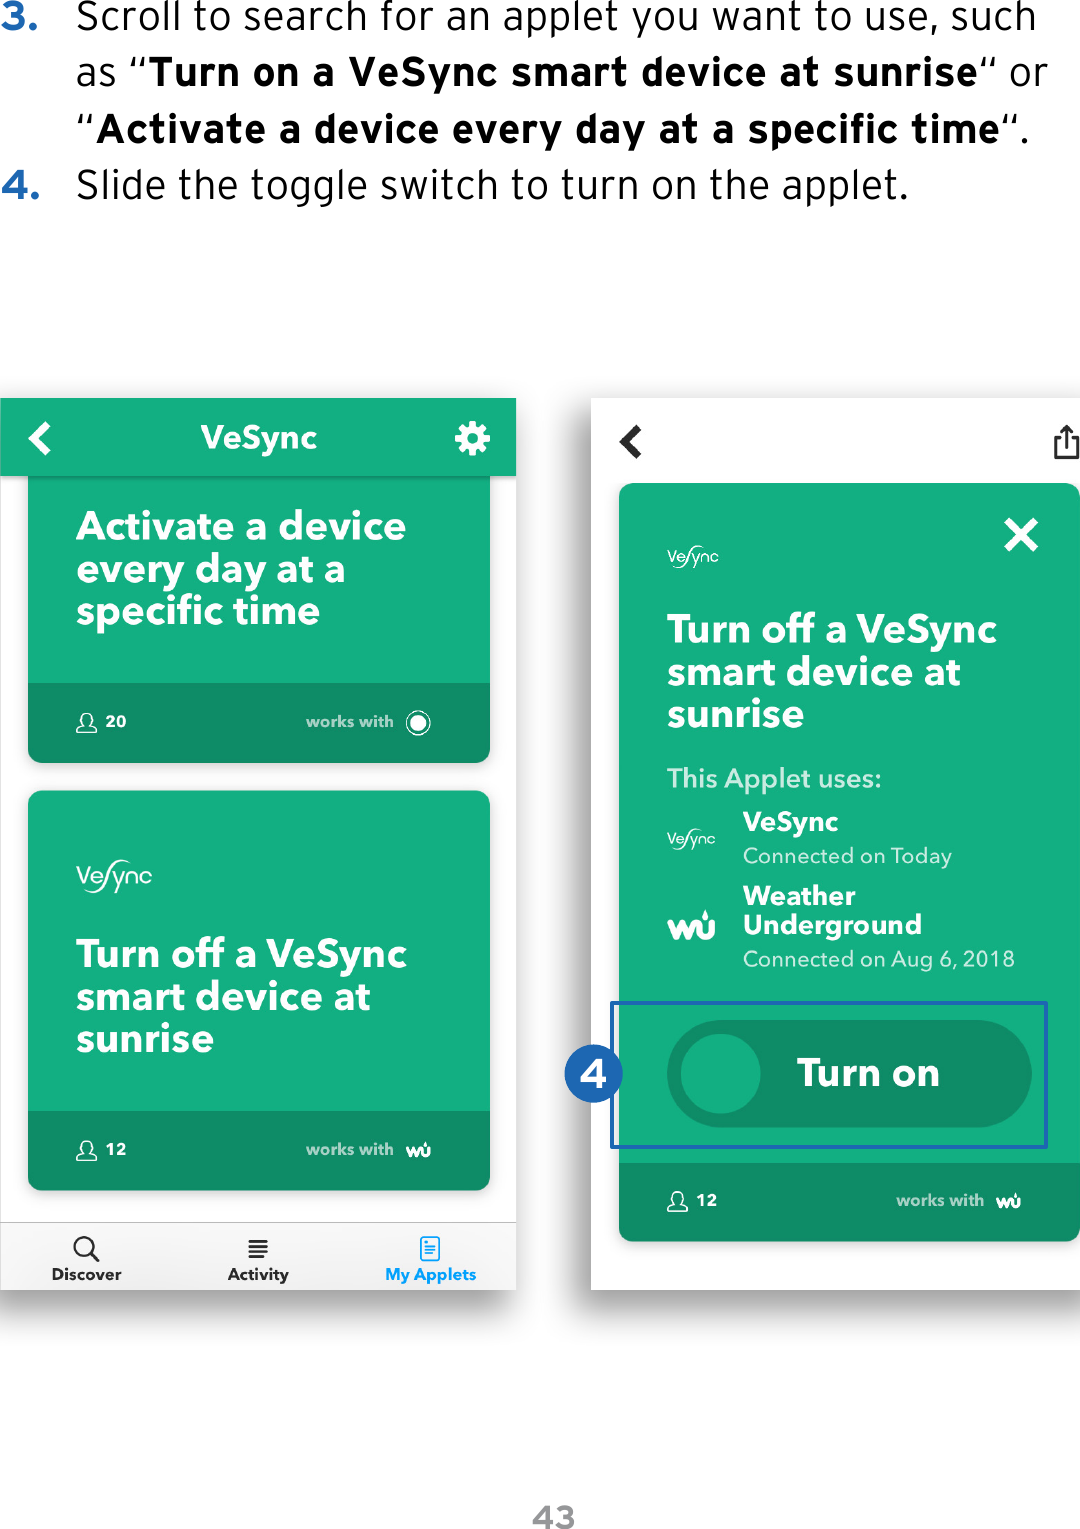
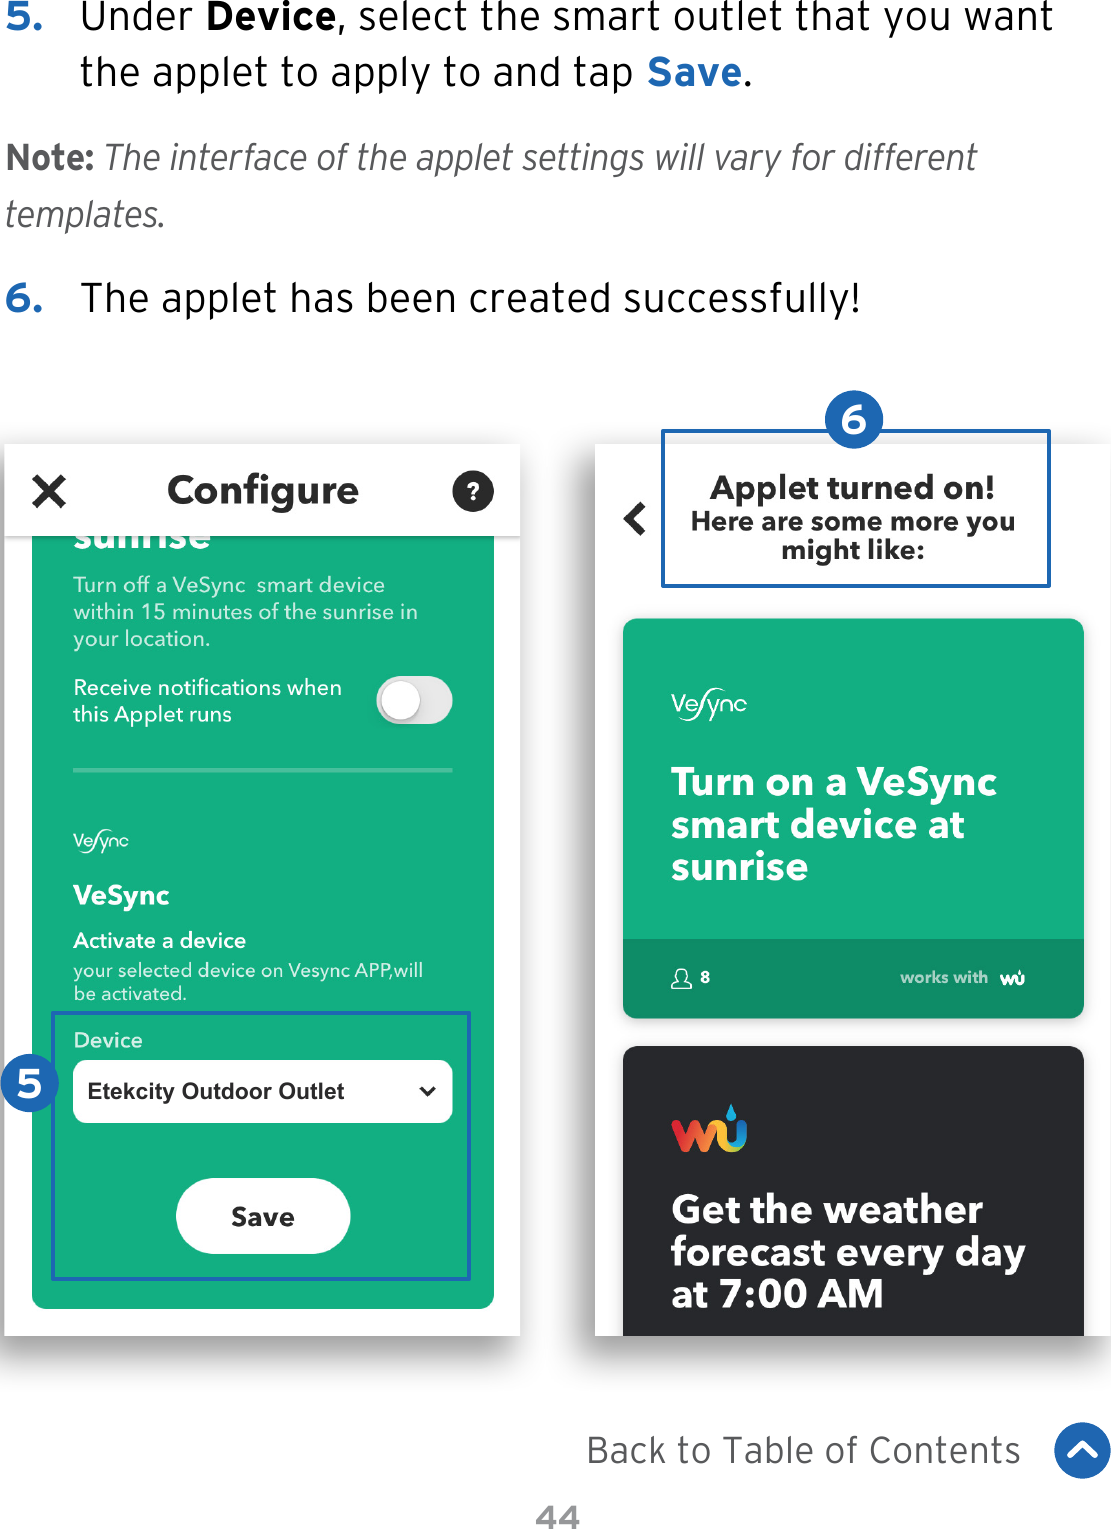
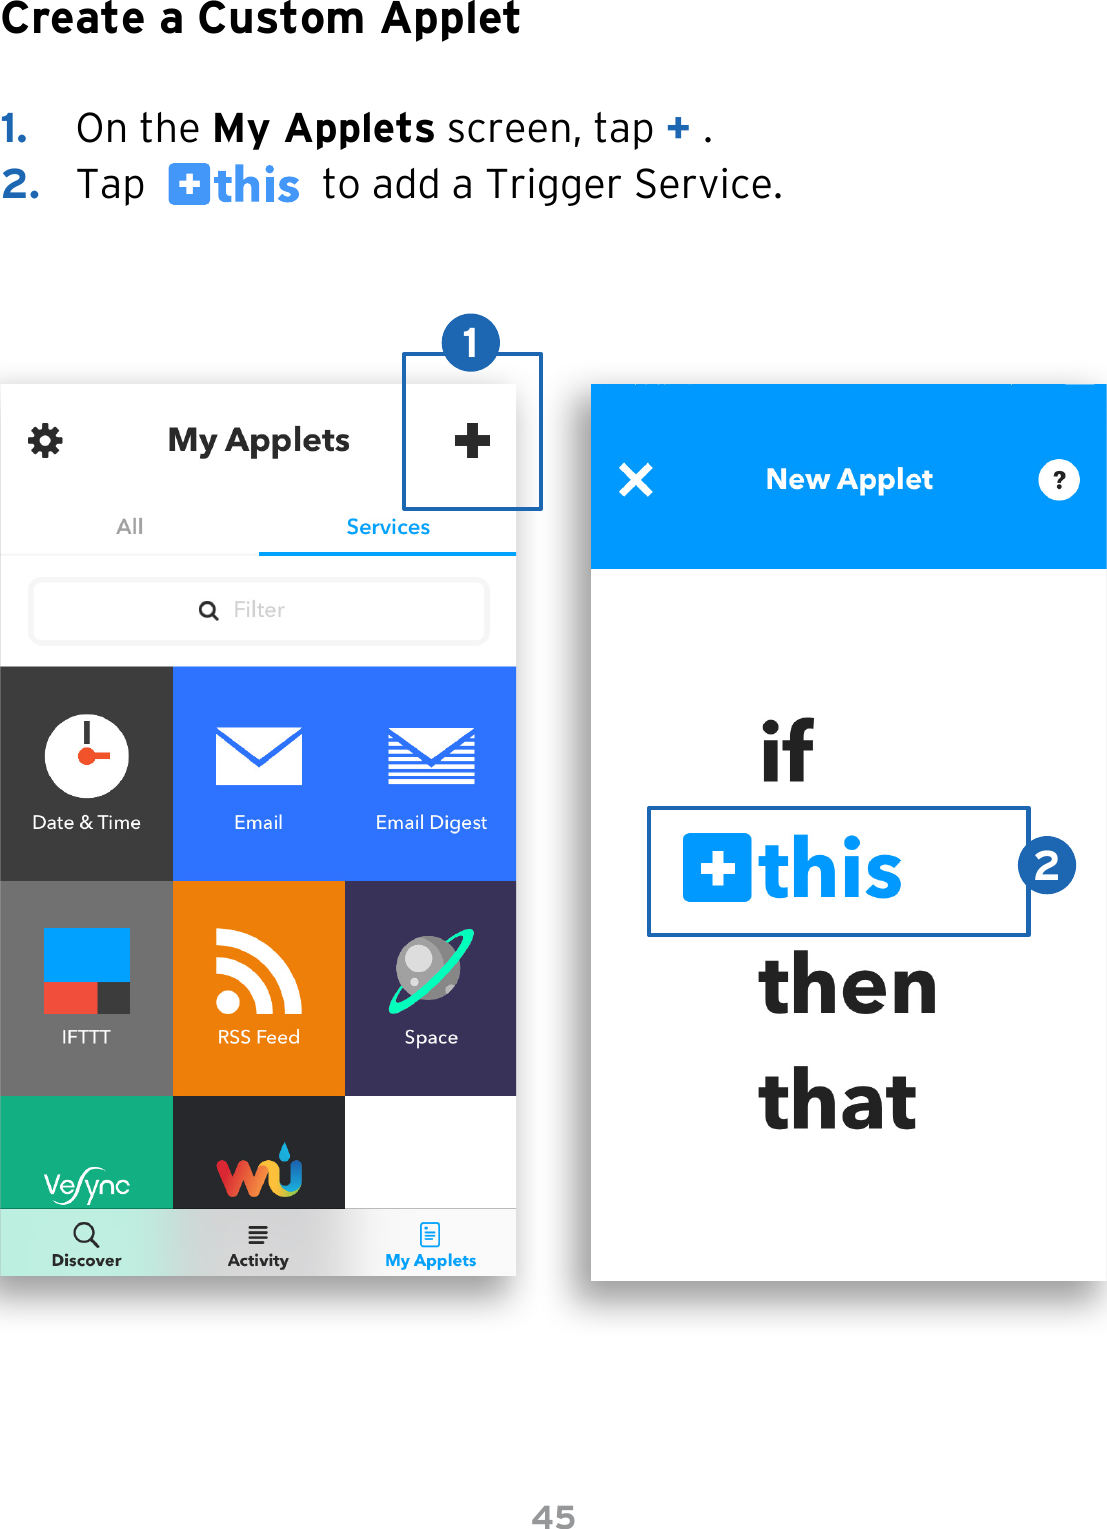
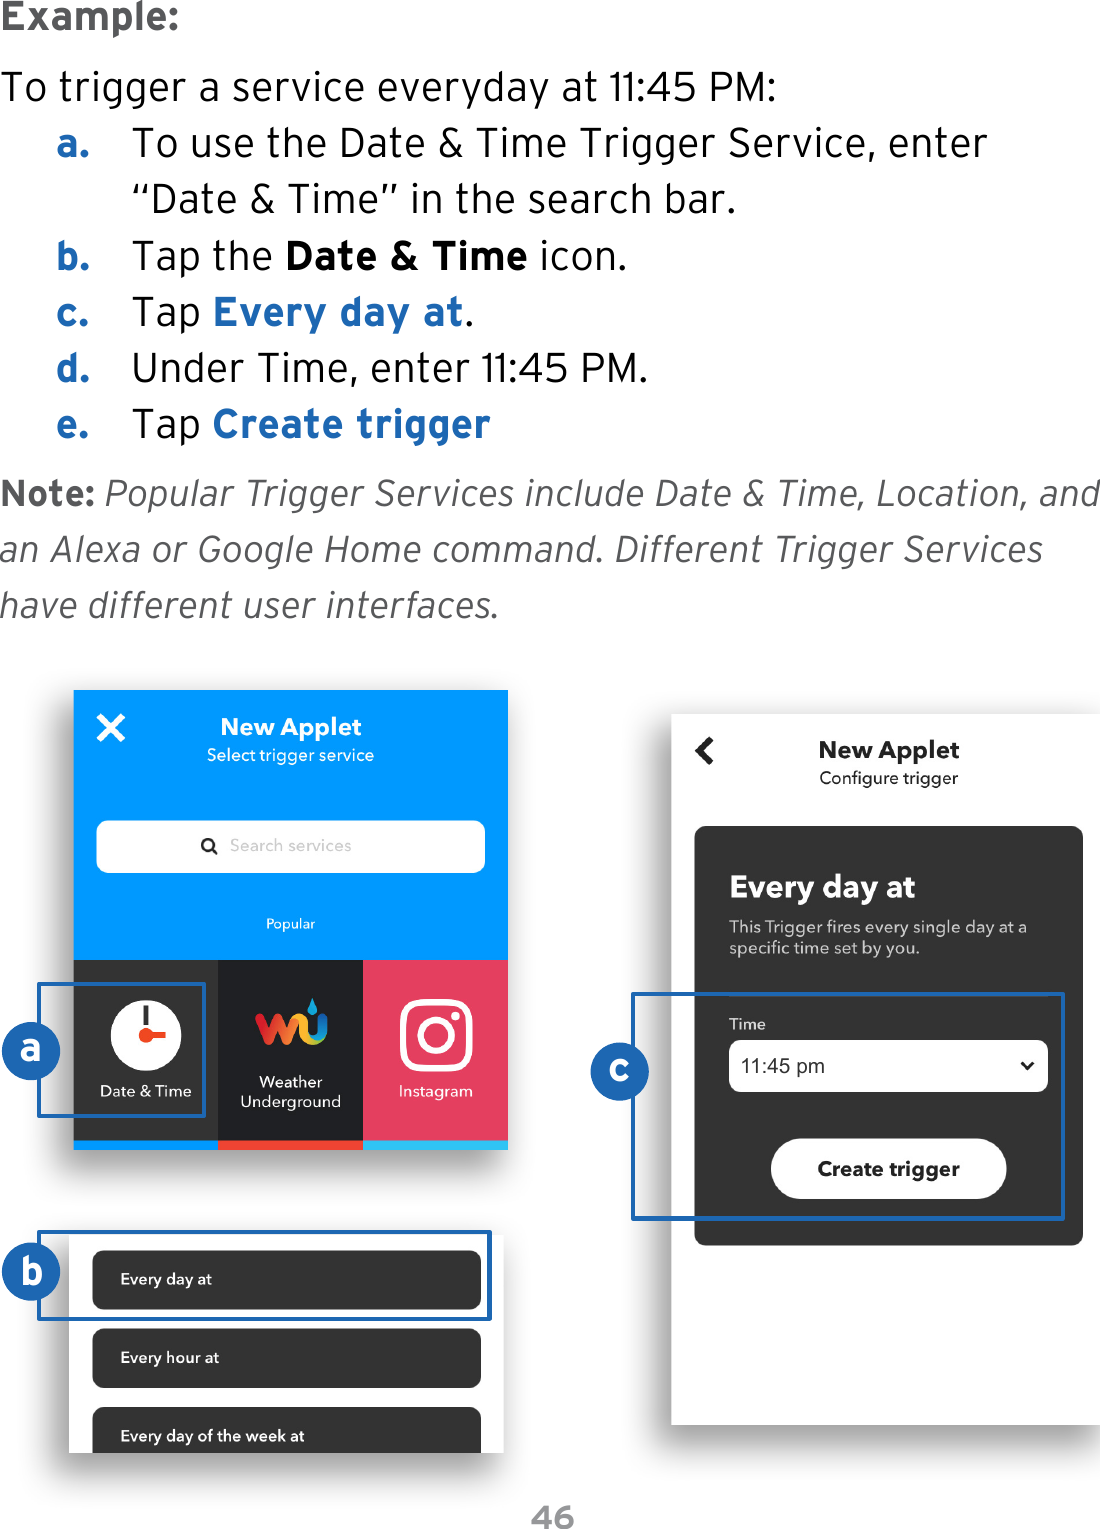
ESO15 TB User Manual
15_ESO15-TB UserMan
Navigation menu
Upload a User Manual
Namespaces
Wiki Guide
HTML
PDF
Info
Views
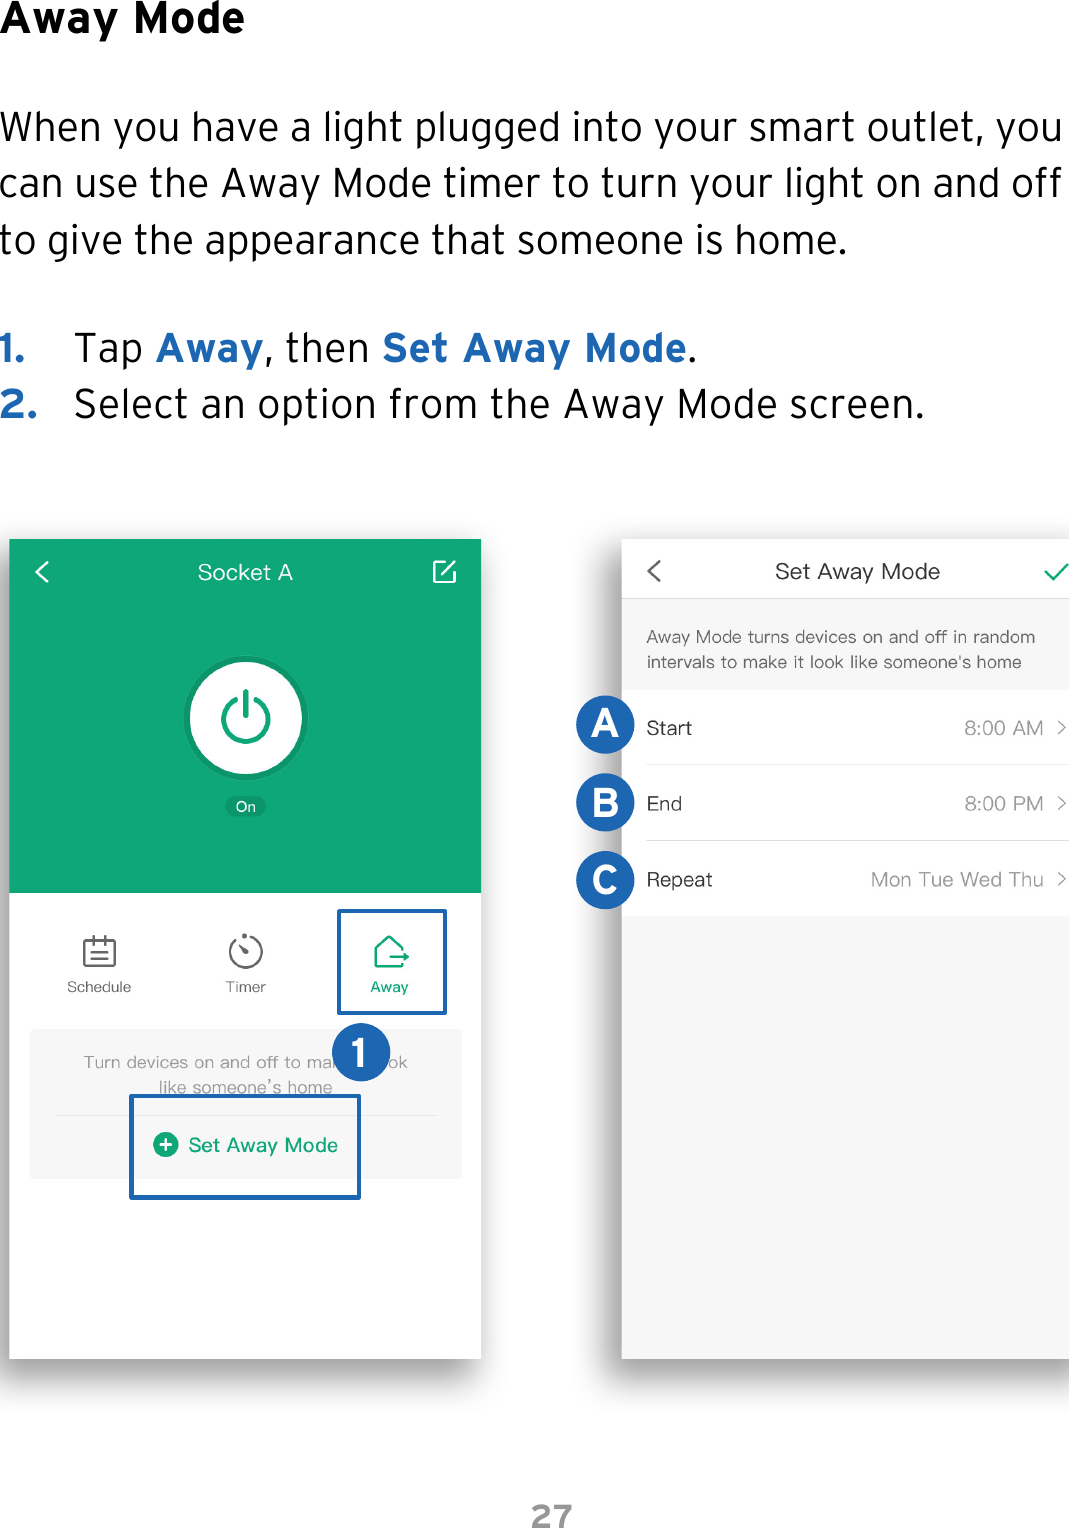
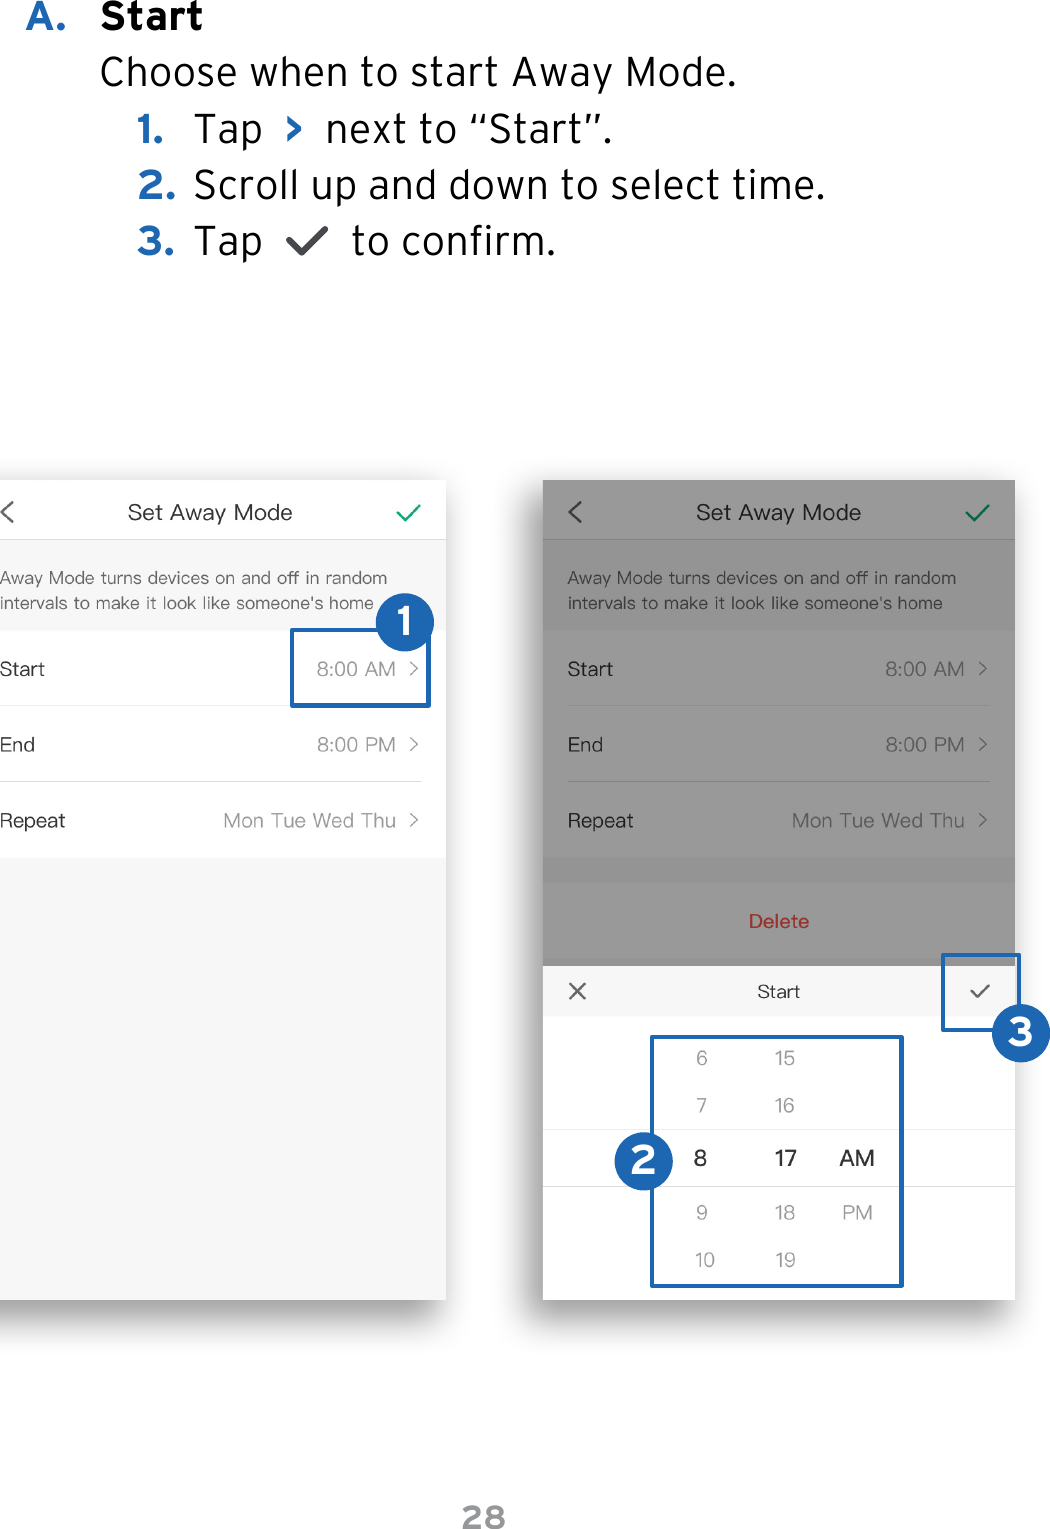
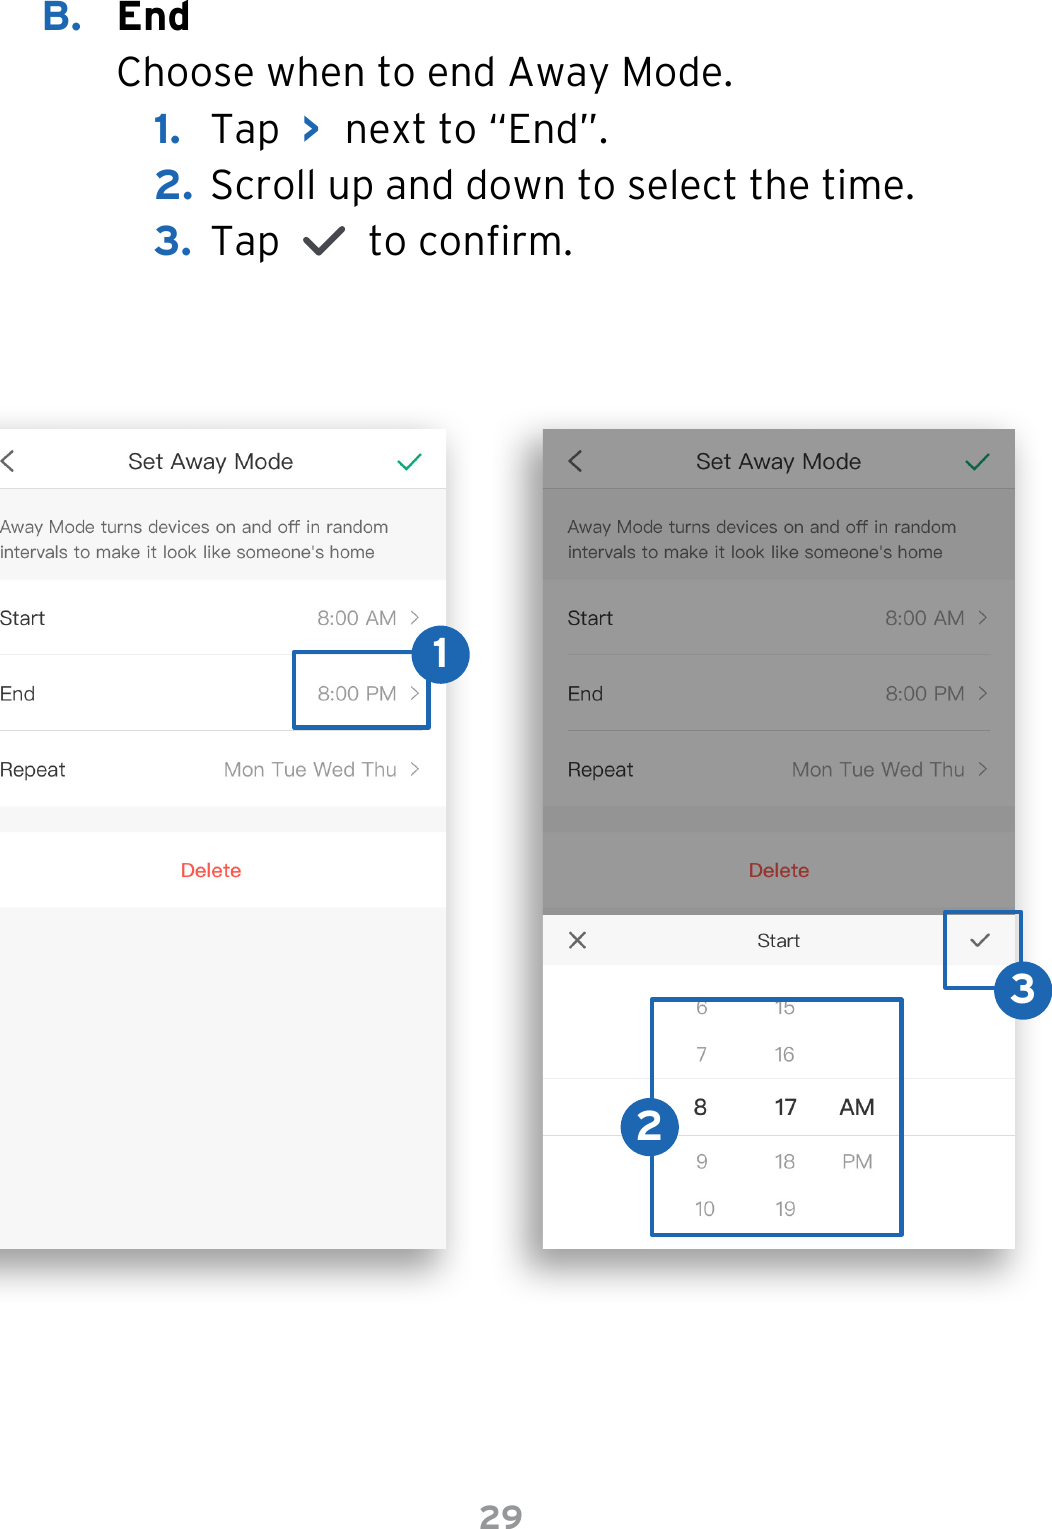
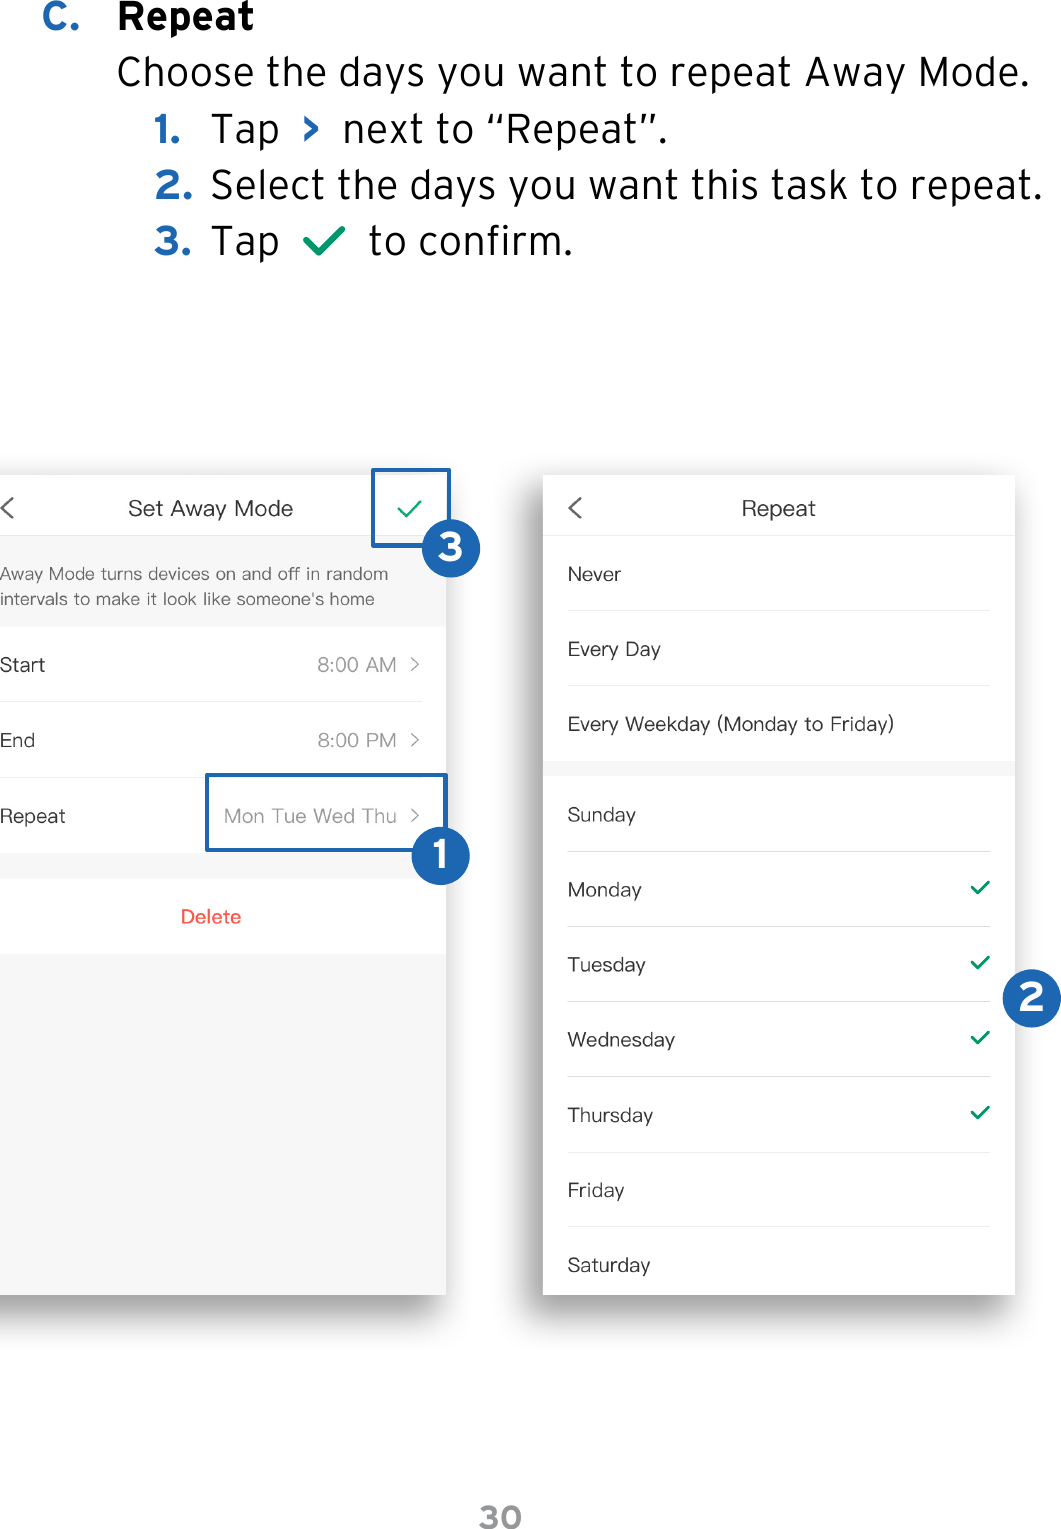
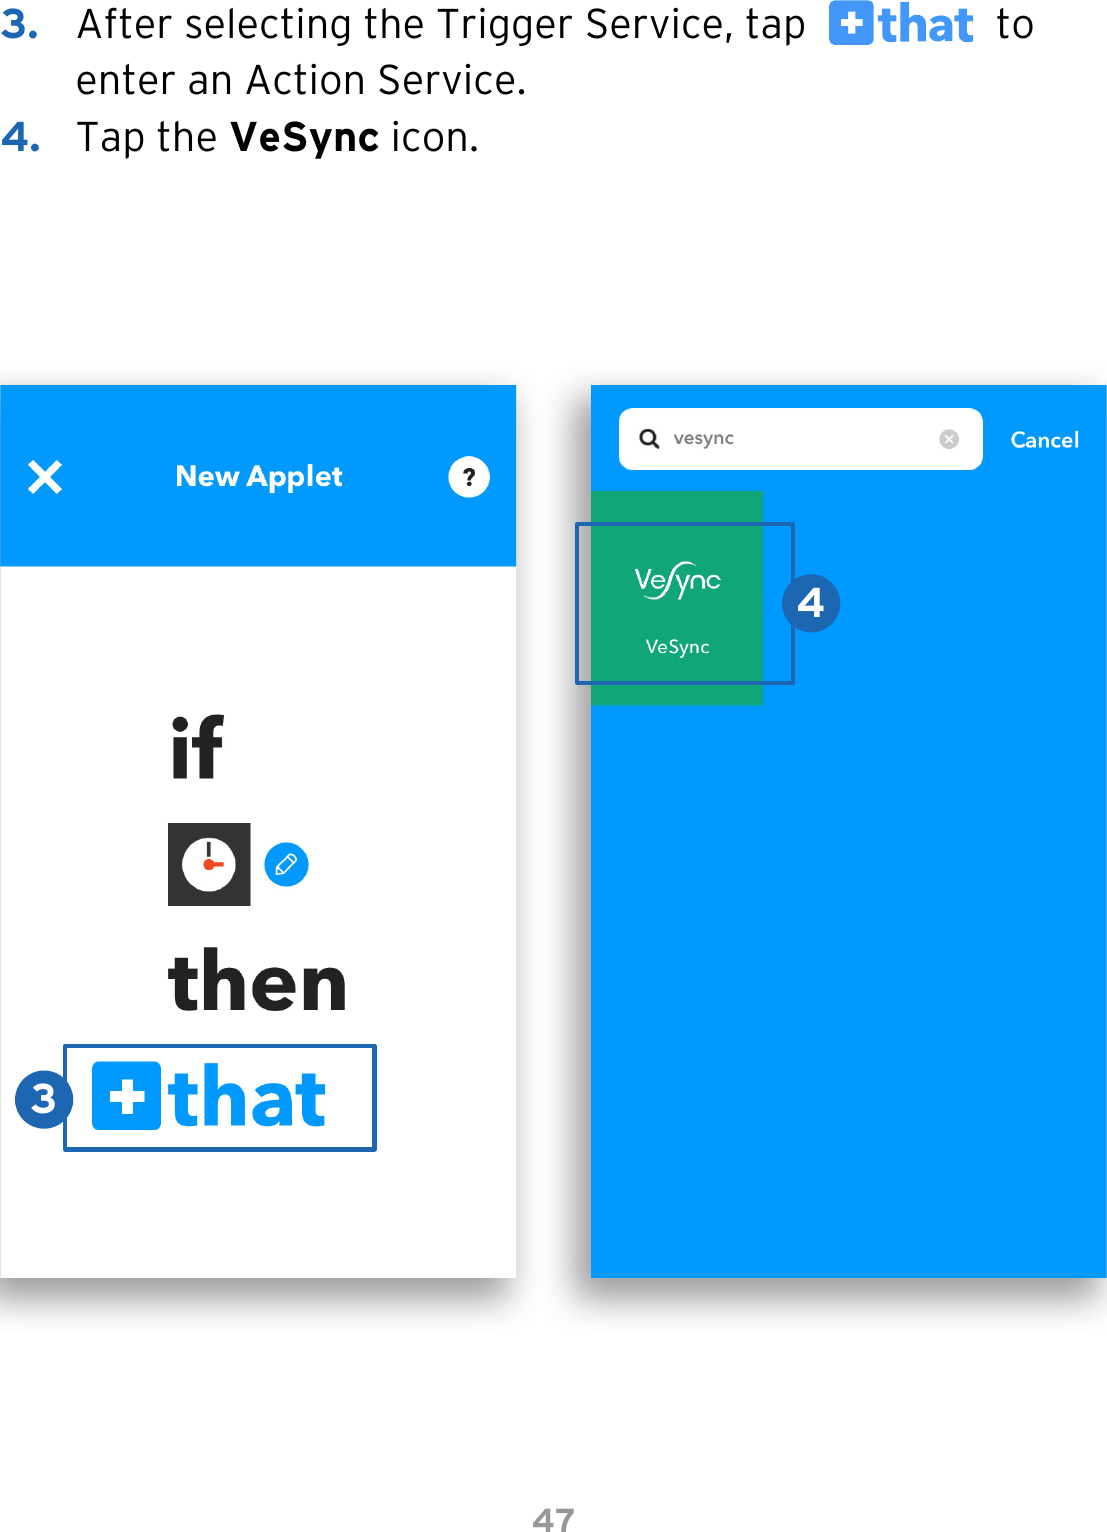
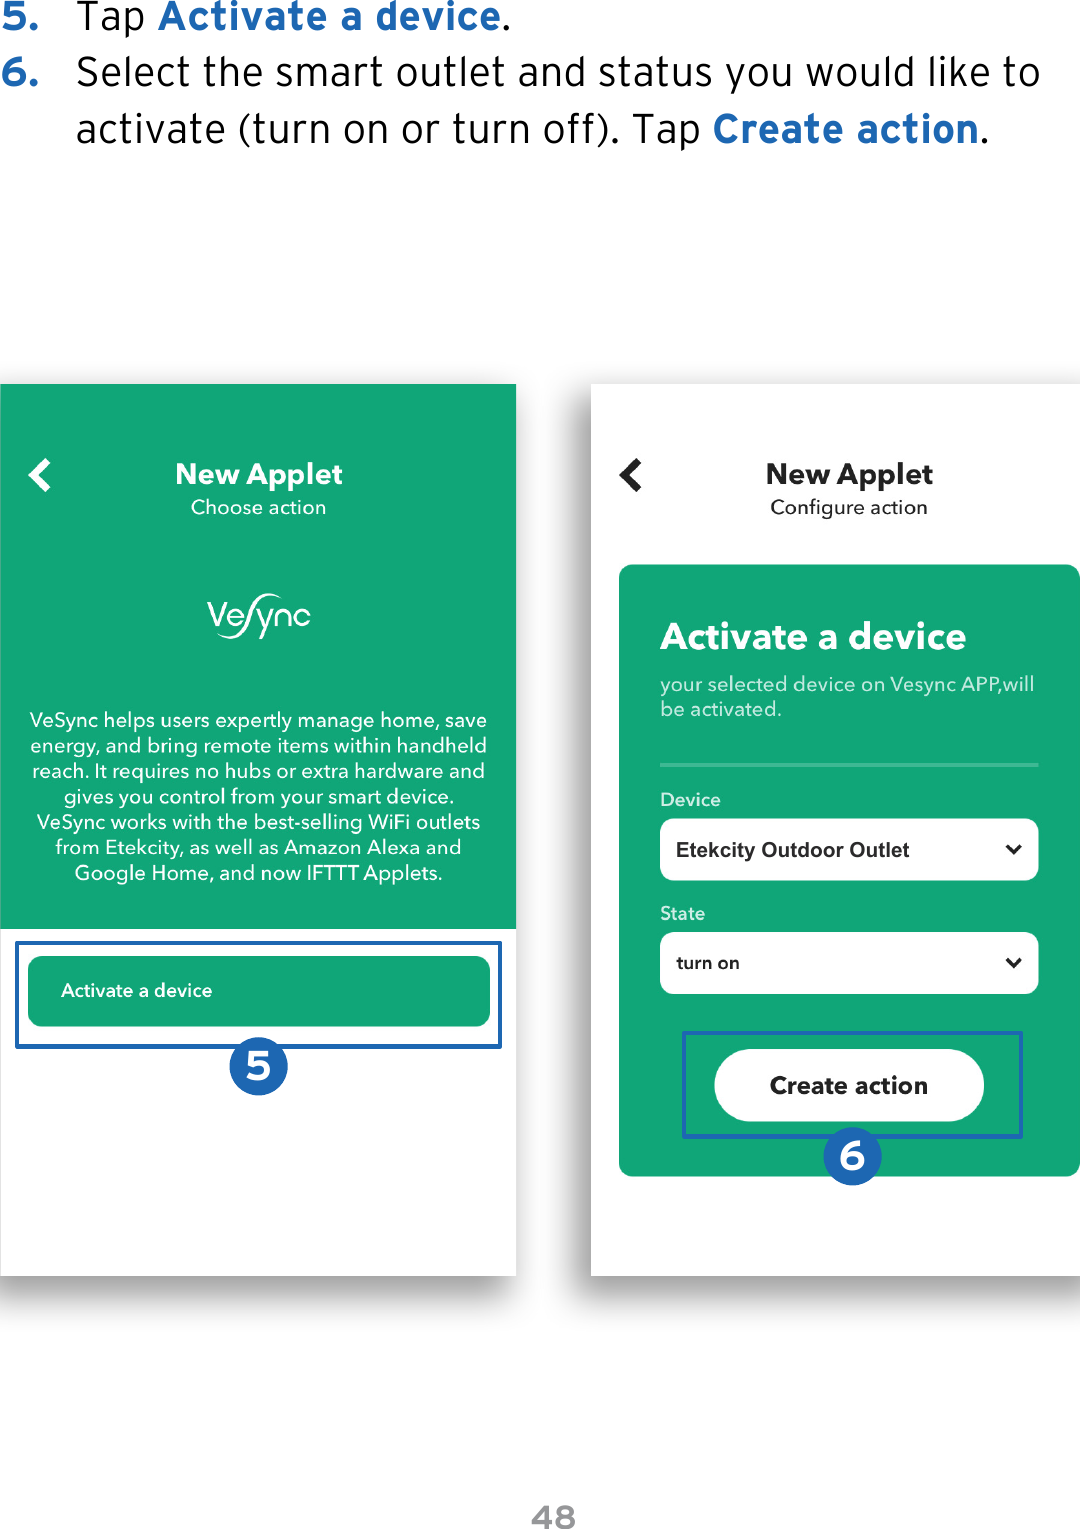
User Manual
Discussion / Help
Navigation