EverFocus Electronics EVS200AW-W 2CH Video Encoder User Manual EVS200A manual draft
EverFocus Electronics Corp. 2CH Video Encoder EVS200A manual draft
UserManual.wiki
>
EverFocus Electronics
>
EVS200AW W User Manual
User Manual
Navigation menu
Upload a User Manual
Namespaces
Wiki Guide
HTML
PDF
Info
Views
User Manual
Discussion / Help
Navigation
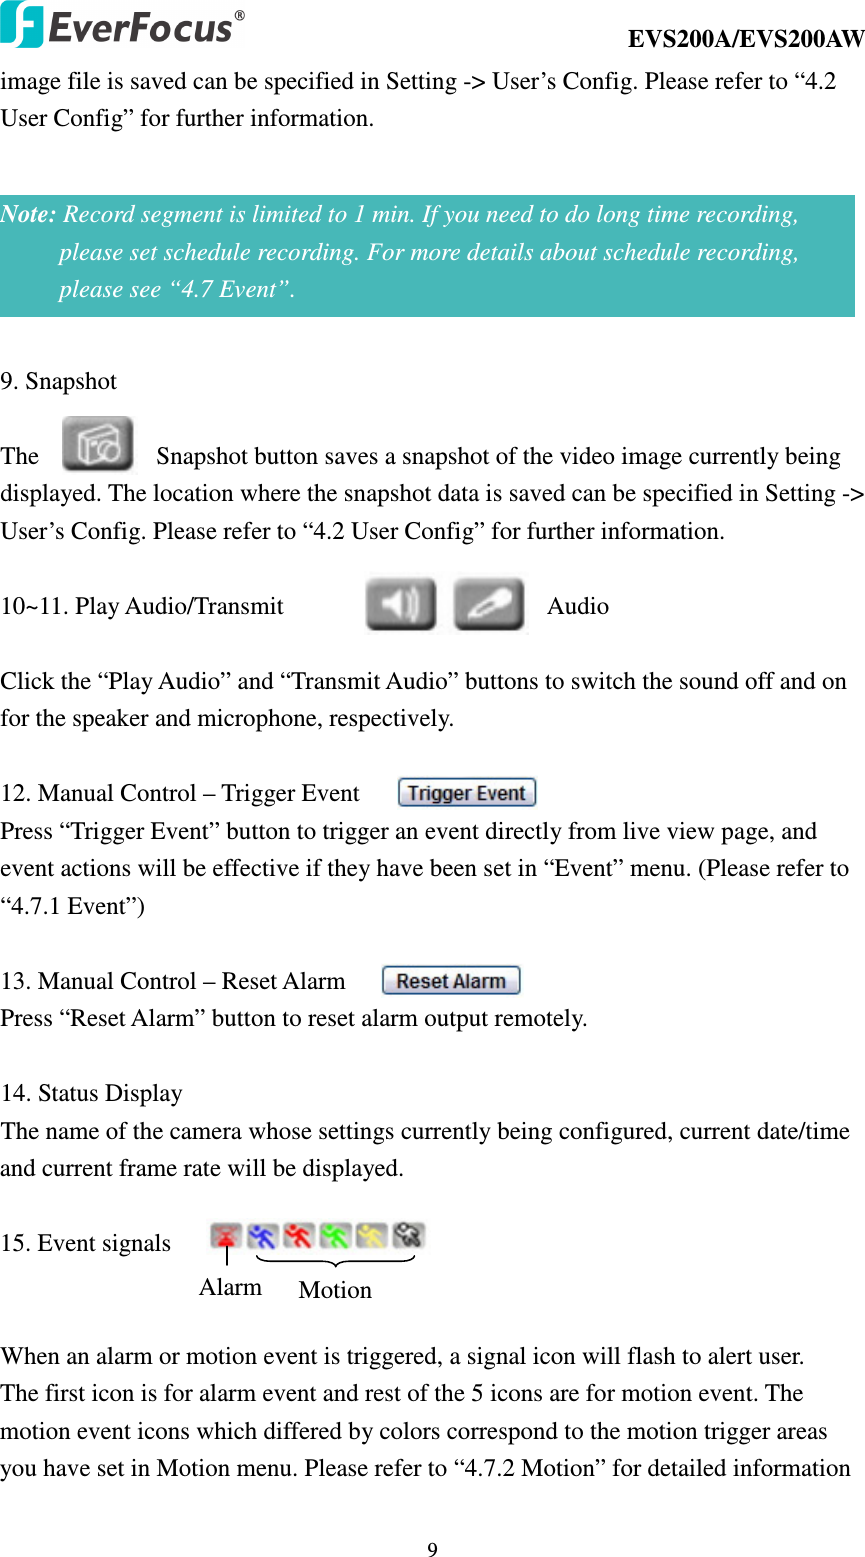
![EVS200A/EVS200AW 7 Ultra-compact size for space-saving applications 3. ACCESSING THE CAMERA MENU Step 1.Start an Internet Explorer browser. Step 2. Enter the IP address or host name of the camera in the Location/Address field of your Internet Explorer browser. (Please refer to EVS200A/EVS200AW Installation Guide for how to find the IP address) Step 3. Input “Username” and “Password”. Default Username is “user1” and default password is “11111111”. Step 4. Click “Login” button. Step 5. You might be required to download Active X, which is required to view camera video. Please click "Yes". Step 6. Congratulation!! You should be able to see the live image now. LivePlaybackSettingVideo StreamCH1 Stream1Manual ControlTrigger EventDigital ZoomView Size704 x 480Reset AlarmEVS [2009/3/5] FPS: 30/30Exit7 9 12 13 11 1 2 3 4 5 6 14 15 8 10](https://usermanual.wiki/EverFocus-Electronics/EVS200AW-W/User-Guide-1176020-Page-7.png)
![EVS200A/EVS200AW 8 1. Press button to display the "Live" page. Double click on the image to show a full screen display, double click again or press ESC to return normal display. 2. Press Playback button to start playback. 3. Press button to enter Setting page. In Setting page, there are 8 sections: [System Info], [User Config], [Network], [Video], [Audio], [User], [Event] and [System]. Please refer to “4. SETTING” for further information. 4. Press button to close the network page. 5. Video Stream Select Video Stream from Stream 1 / Stream 2, Stream 3 and Stream 4. Please refer to “4.4.1 Multi Streaming” for further information. 6. View Size You can select View size to either reduce or enlarge the image to the appropriate view size. Select the view size for live images from: NTSC: 704*480/640*480/352*240/320*240/176*120 PAL: 704*576/640*480/352*288/320*240/176*144 7. Digital Zoom Press “+” or “-“ button to enlarge / reduce the displayed image. (max. is X10) 8. Record The record button is used to record the current video stream. The location where the](https://usermanual.wiki/EverFocus-Electronics/EVS200AW-W/User-Guide-1176020-Page-8.png)
![EVS200A/EVS200AW 10 about Motion setup. 4. SETTING Click this button to display the setup menu. 4.1 System Info System information and system log check of the setup menu can be performed on this page. The “System Info” page has 2 tabs: [Information] tab and the [Log] tab. 4.1.1 Information System Information: Firmware version, MAC address, Video Type, Model number. (unchangeable, for reference only)](https://usermanual.wiki/EverFocus-Electronics/EVS200AW-W/User-Guide-1176020-Page-10.png)

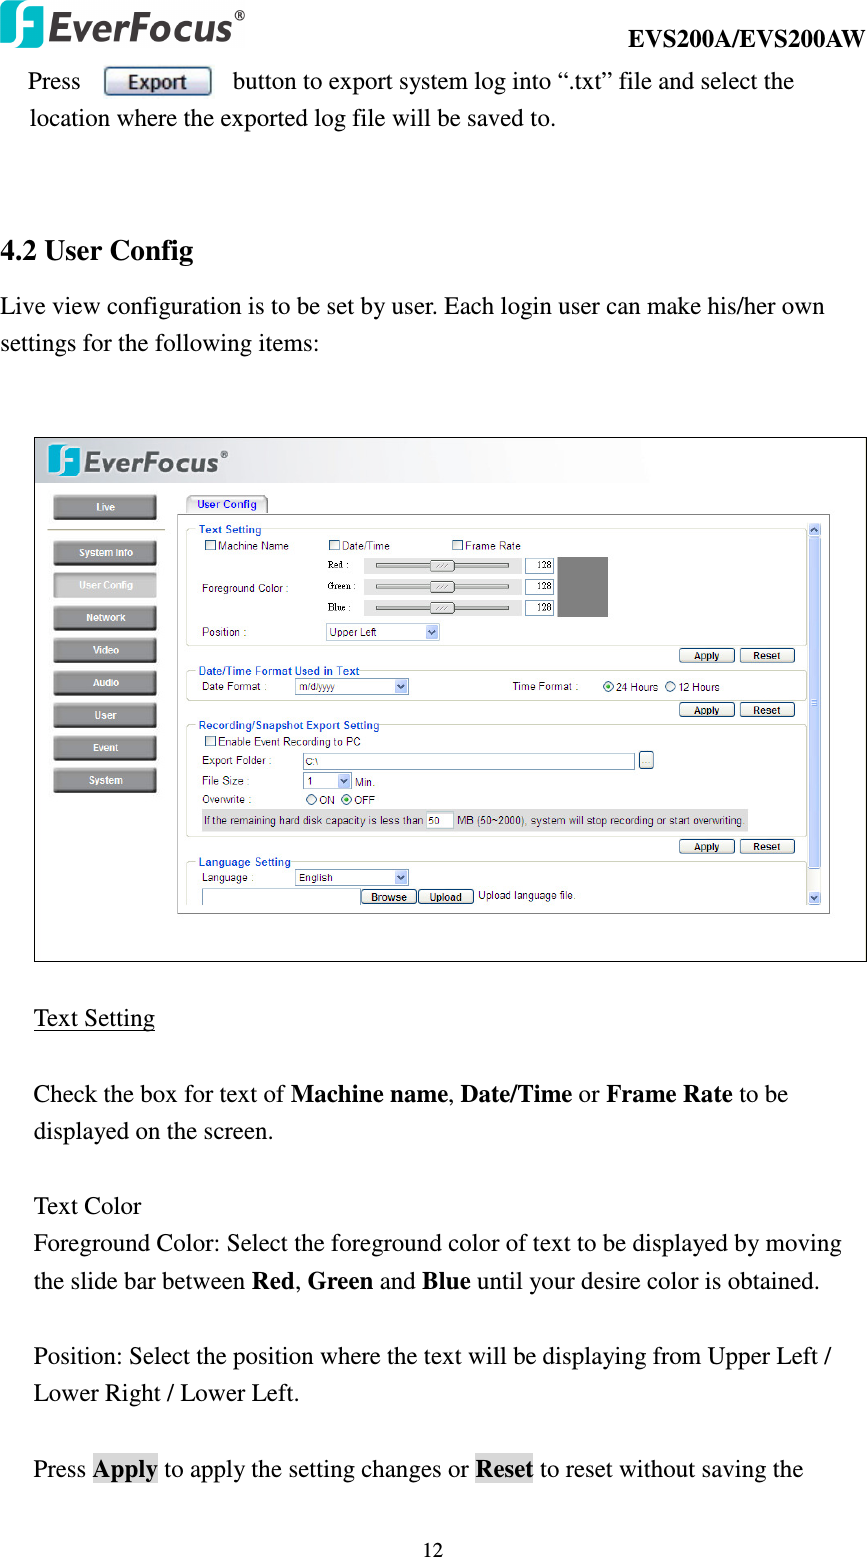
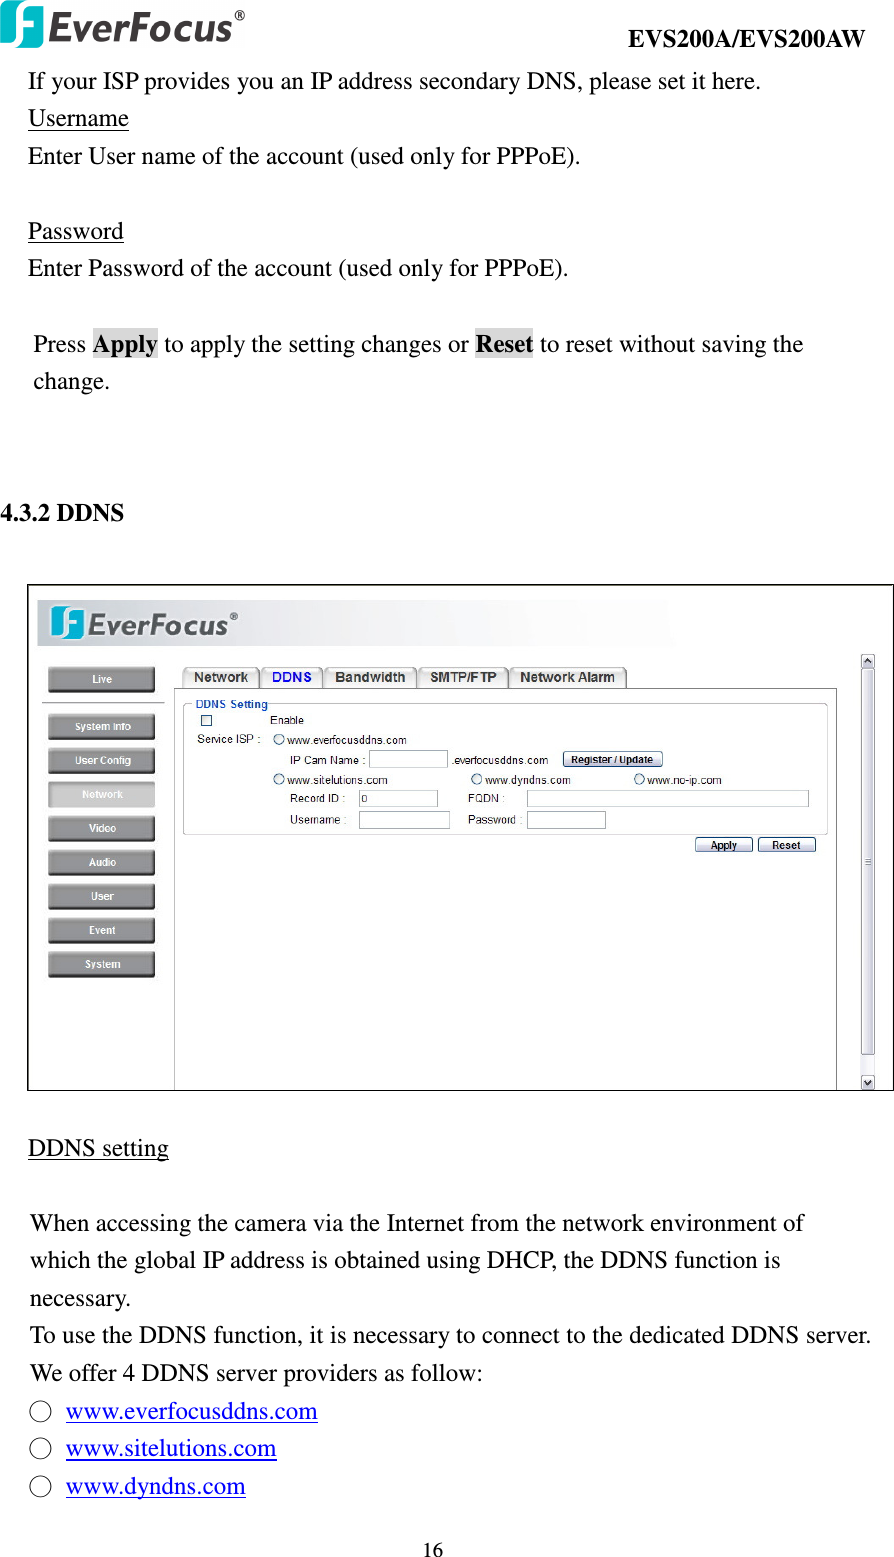
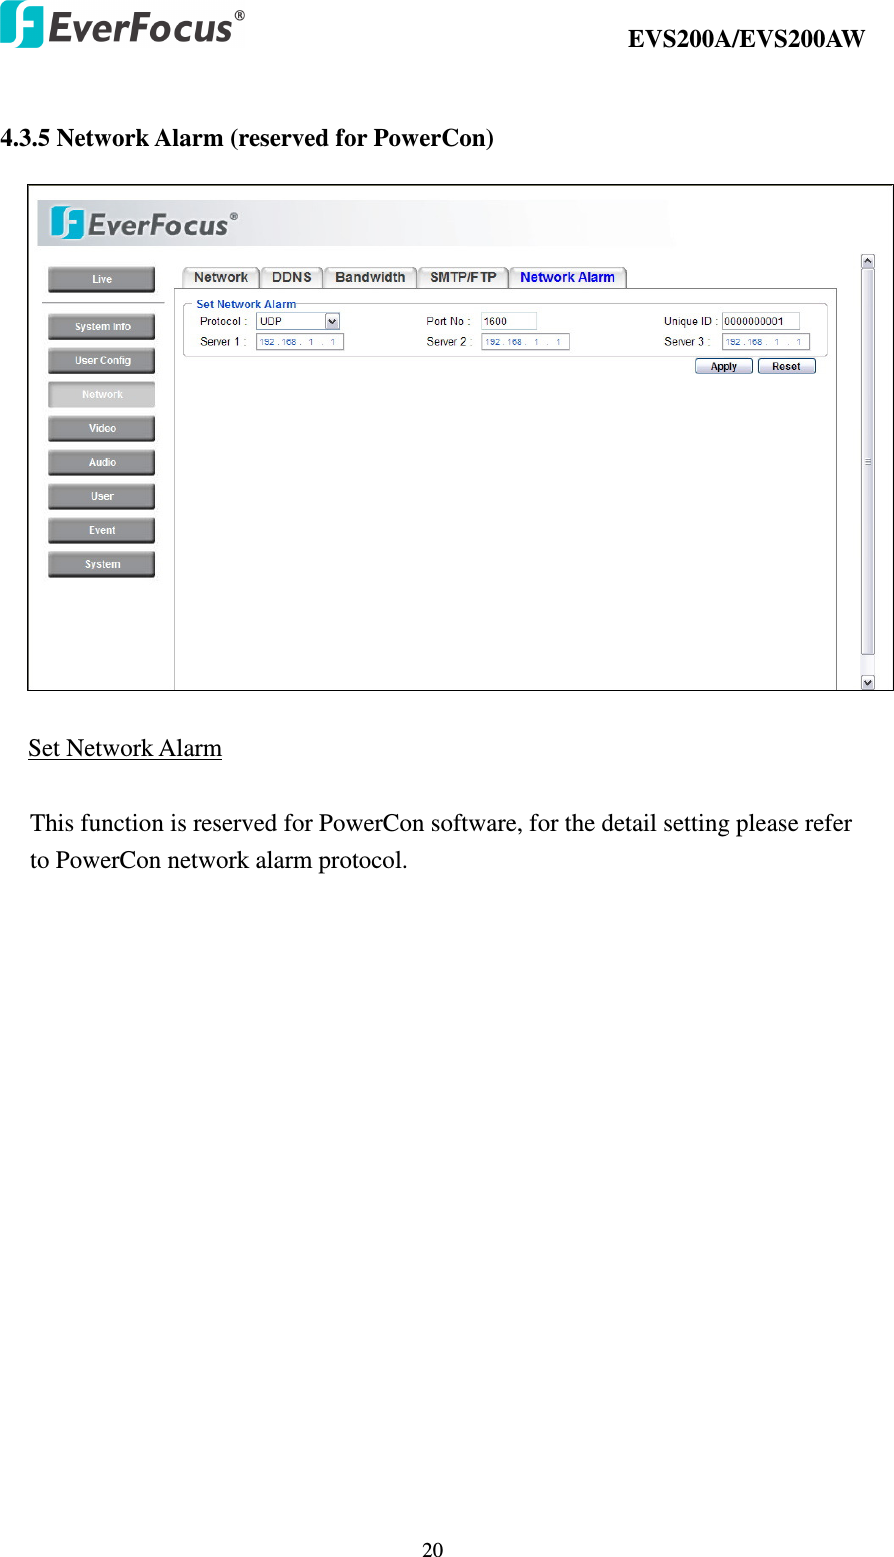
![EVS200A/EVS200AW 14 English. To add a new language which is not listed in the original configuration, press the Browse button to locate the new language file (.evb) and then click the Load button. Press Apply to apply the setting changes or Reset to reset without saving the change. 4.3 Network The network settings and the settings relating to Network, DDNS, Bandwidth, SMTP/FTP and Network Alarm can be configured on this page. The "Network setup" page has 5 tabs of the [Network] tab, the [DDNS] tab, the [SMTP/FTP] tab and the [Network Alarm] tab. 4.3.1 Network The following information is required to configure the network settings. Contact Note: Upload a new language file will reboot system automatically. Please reconnect IP camera after reboot.](https://usermanual.wiki/EverFocus-Electronics/EVS200AW-W/User-Guide-1176020-Page-14.png)
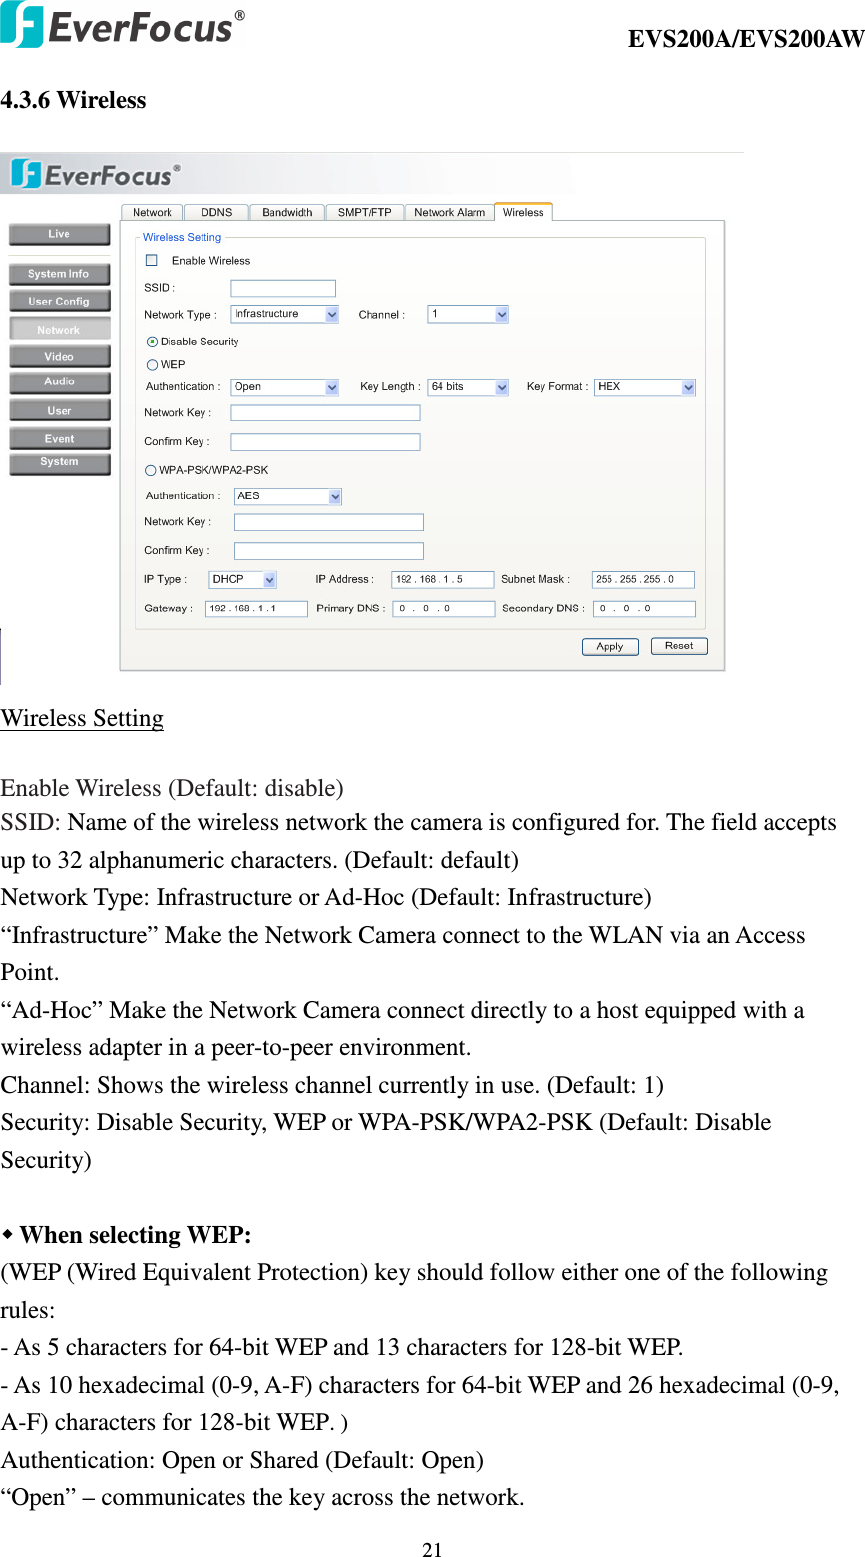
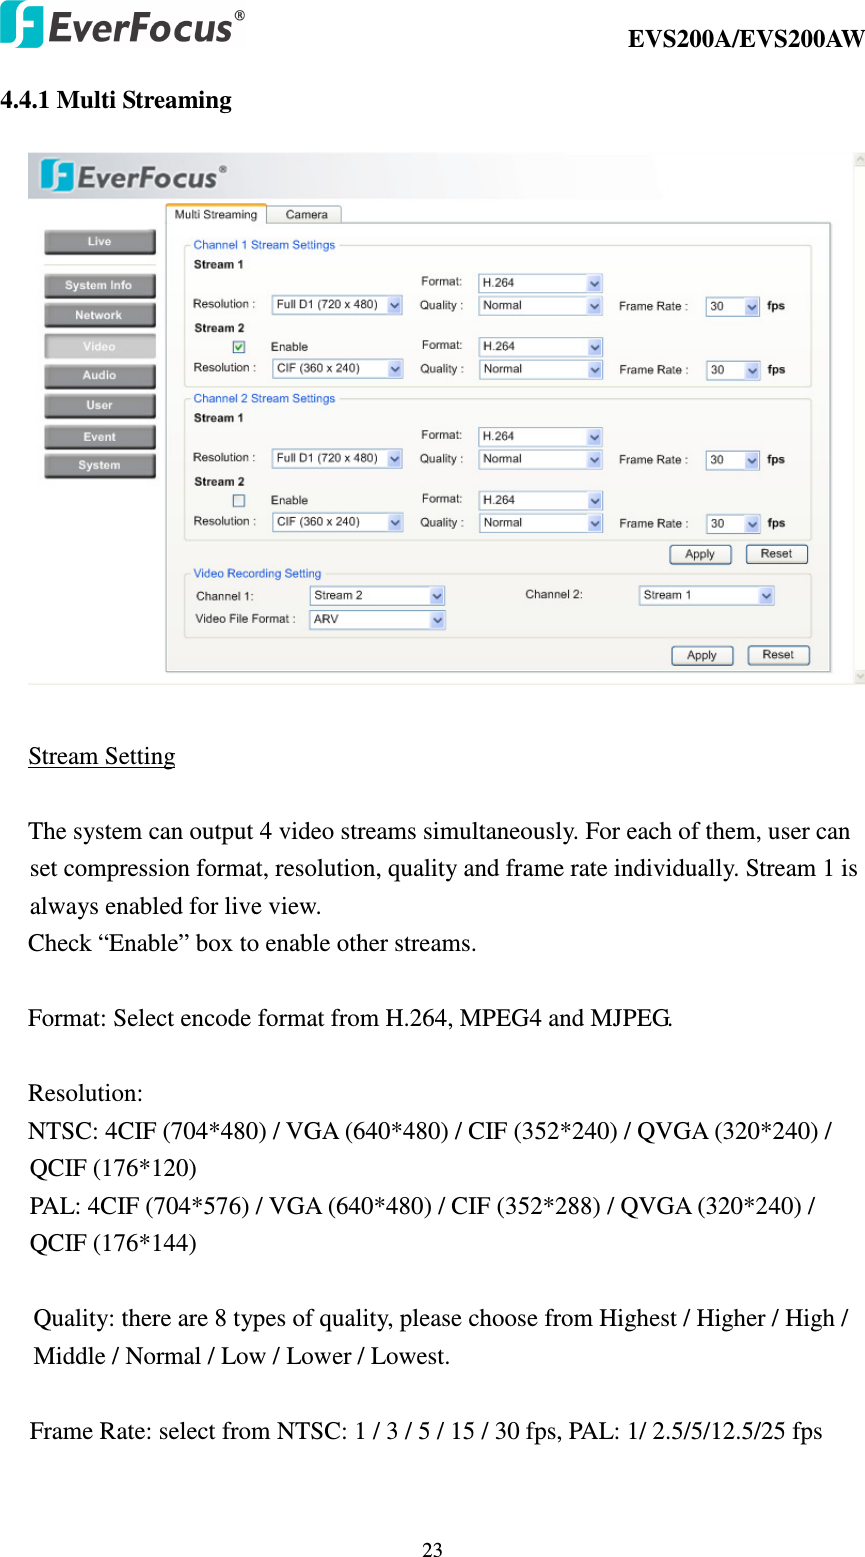
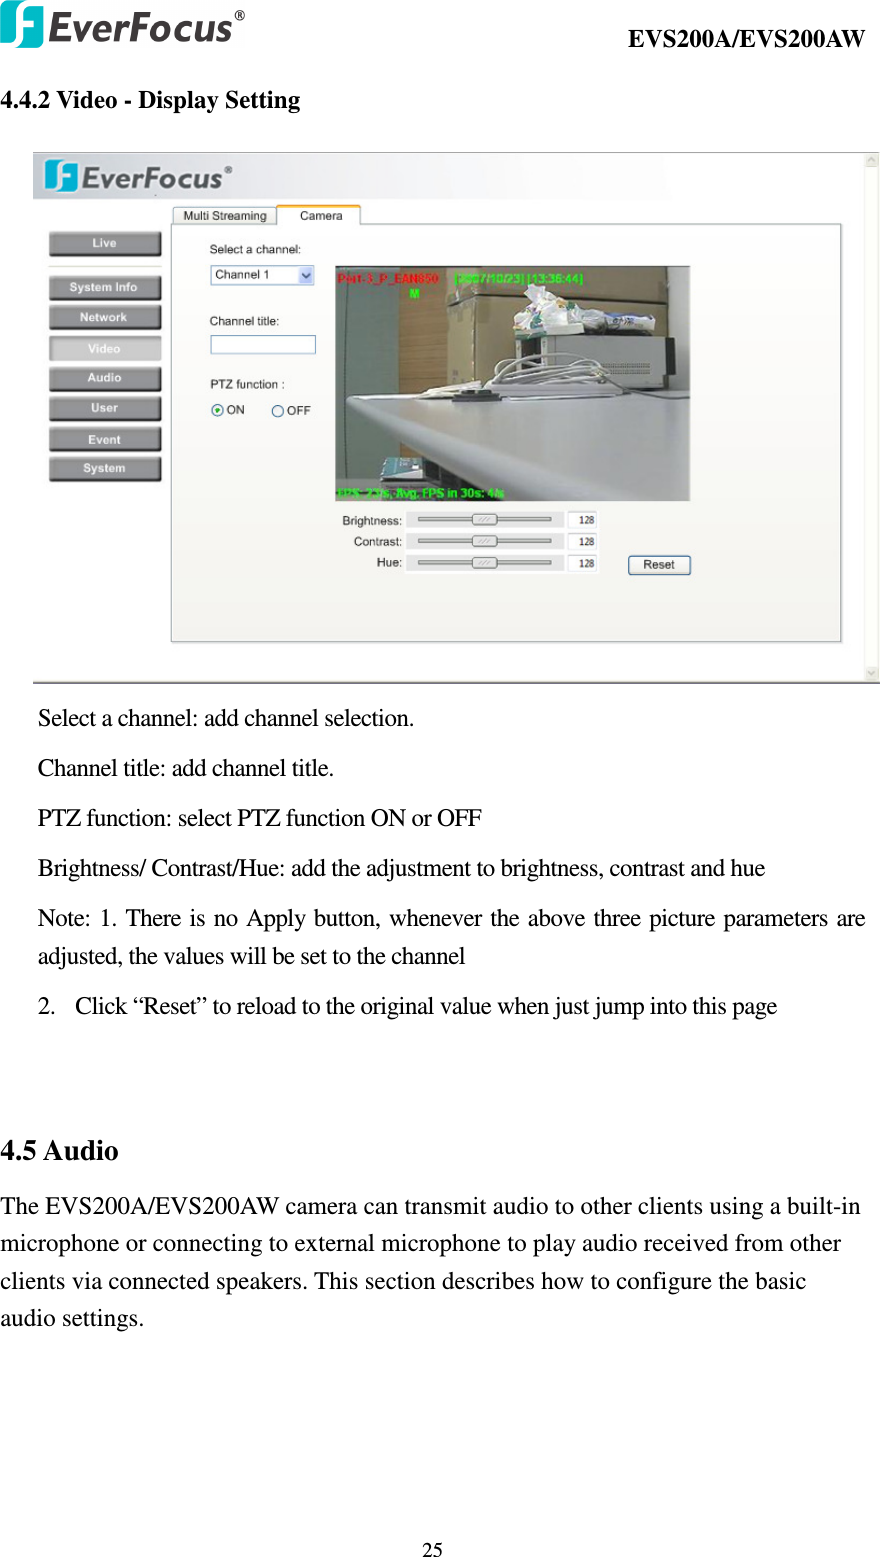
![EVS200A/EVS200AW 22 “Shared” – allows communication only with other devices with identical WEP settings. Key Length: 64 or 128 bits (Default: 64 bits) Key Format: HEX or ASCII (Default: HEX) Network Key: Entering a key in either hexadecimal or ASCII format. Confirm Key: double confirm network key. When selecting WPA-PSK/WPA2-PSK: WPA (Wi-Fi Protected Access) key should follow either one of the following rules: - As 64 hexadecimal (0-9, A-F) characters. - As 8 to 63 ASCII characters. Authentication: AES or TKIP (Default: AES) Network Key: Entering a key in either hexadecimal or ASCII format. Confirm Key: double confirm network key IP Type: DHCP, Static IP (Default: DHCP) IP Address, Subnet mask, Gateway, Primary DNS, Secondary DNS Press Apply to apply the setting changes or Reset to reset without saving the change. 4.4 Video The settings relating video such as streaming, camera OSD can be configured on this page. The "Video" page has 2 tabs: the [Multi-streaming] tab and the [Camera] tab.](https://usermanual.wiki/EverFocus-Electronics/EVS200AW-W/User-Guide-1176020-Page-22.png)
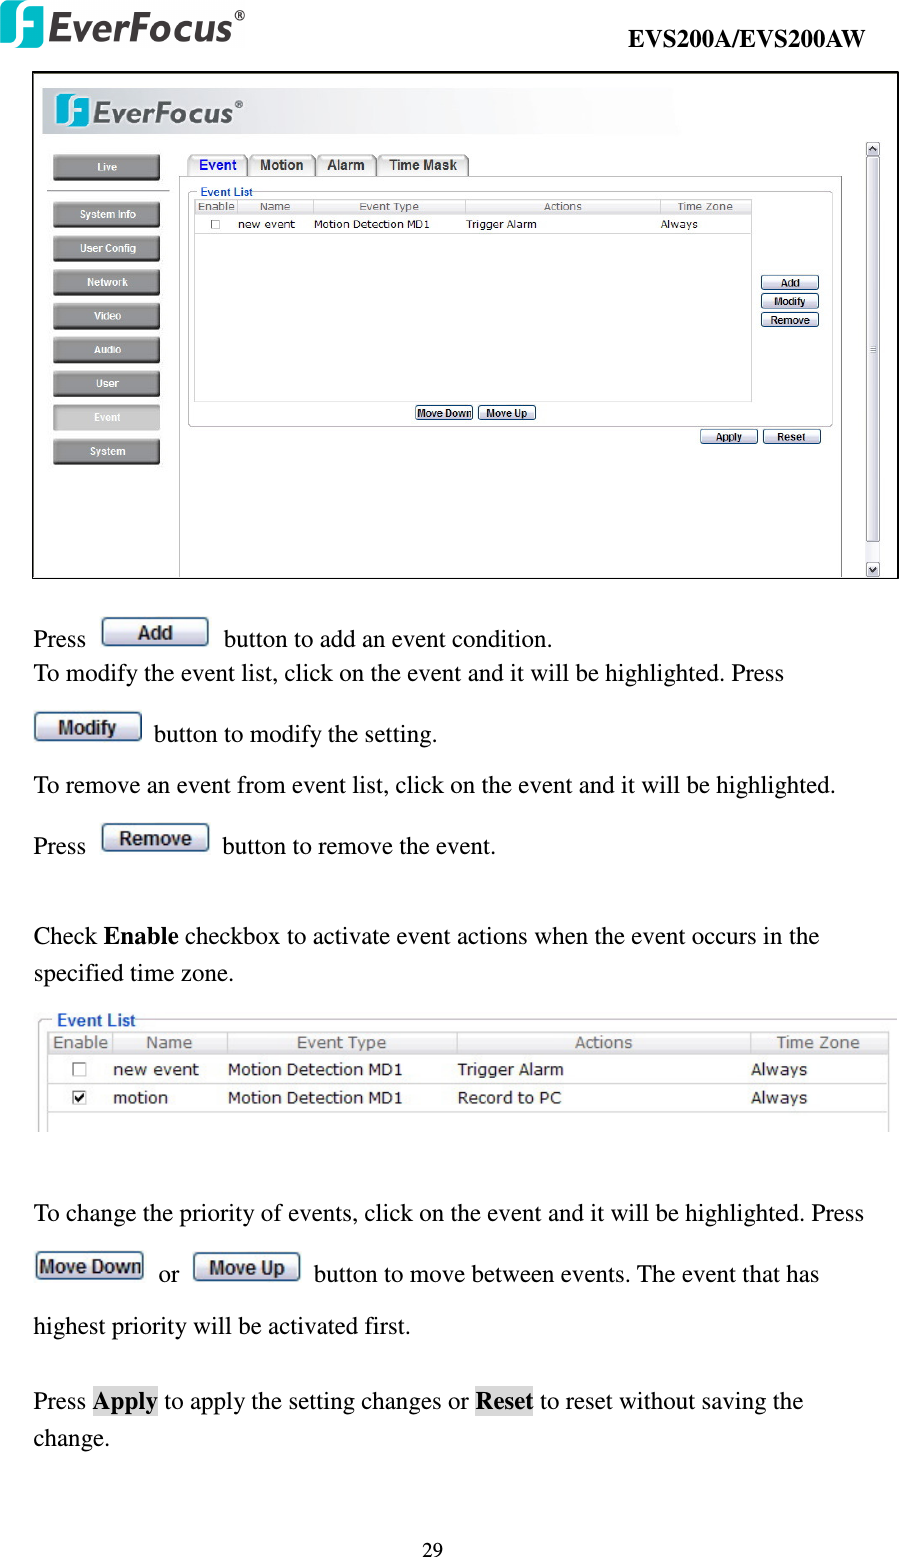
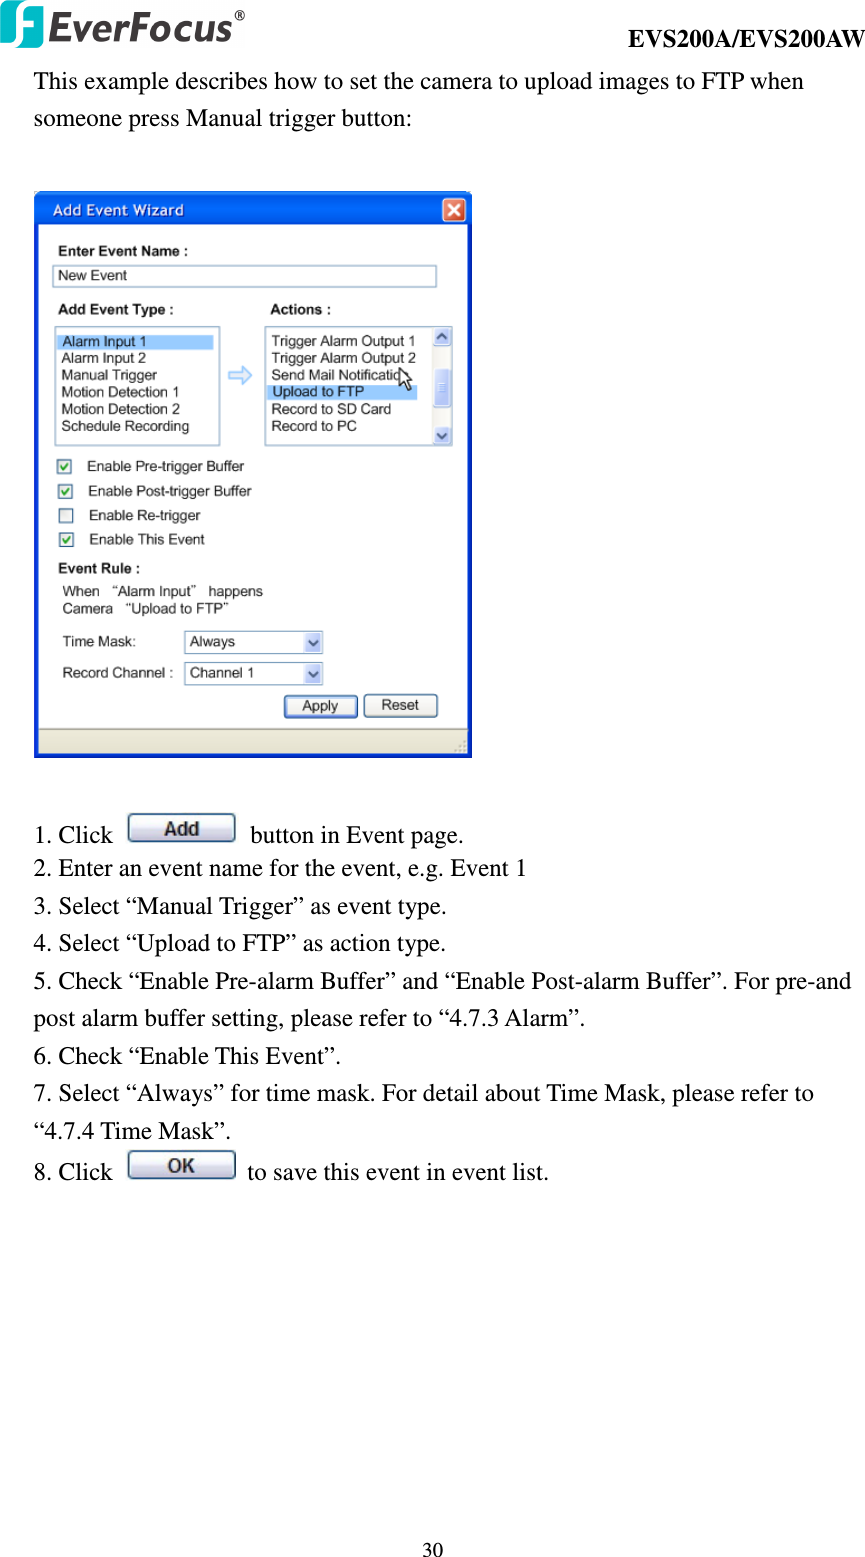
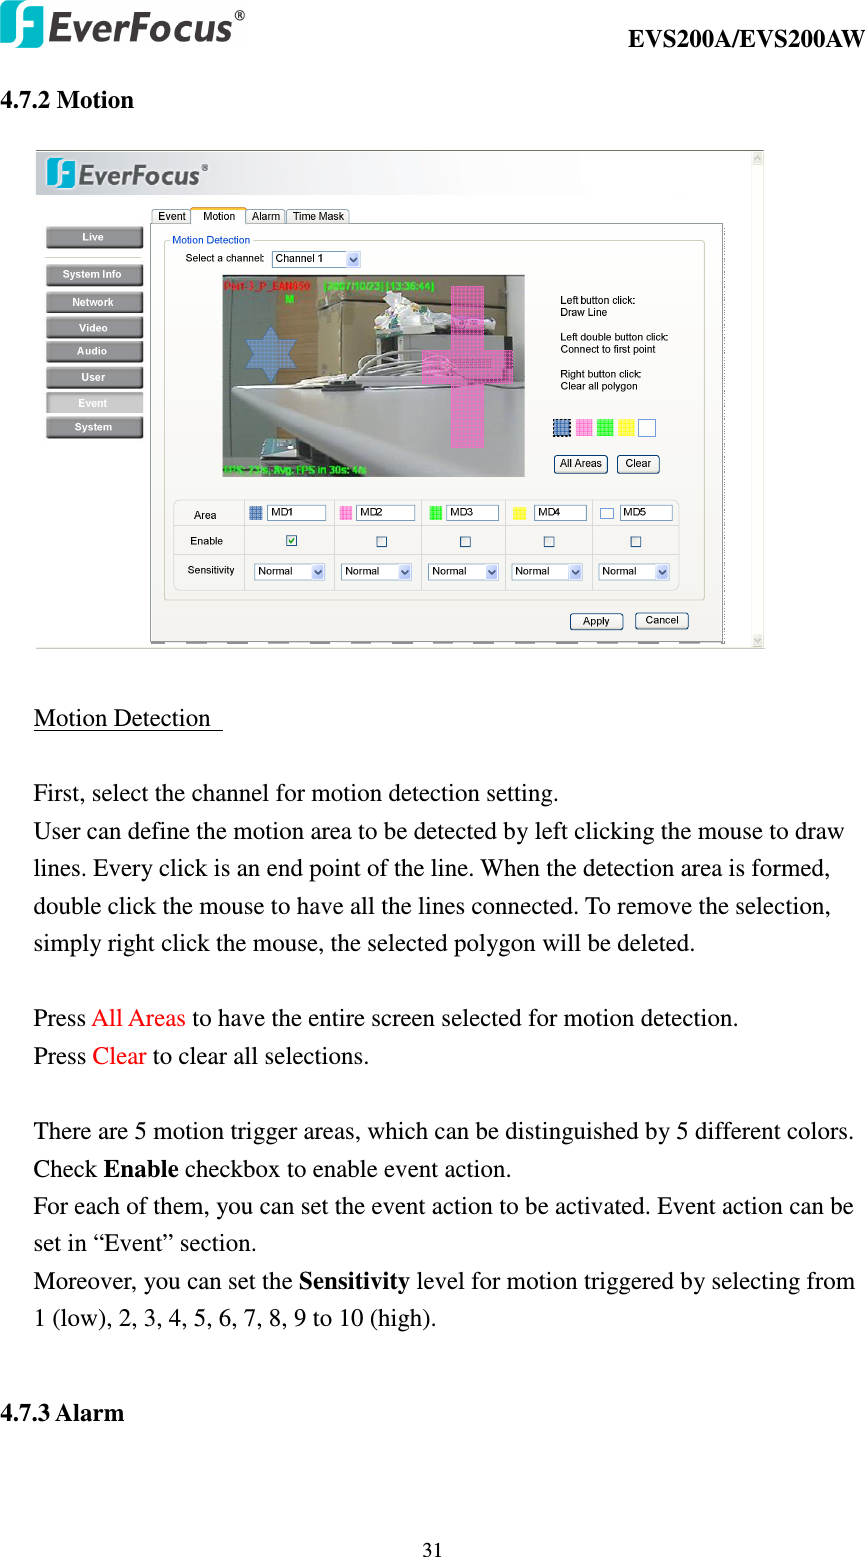
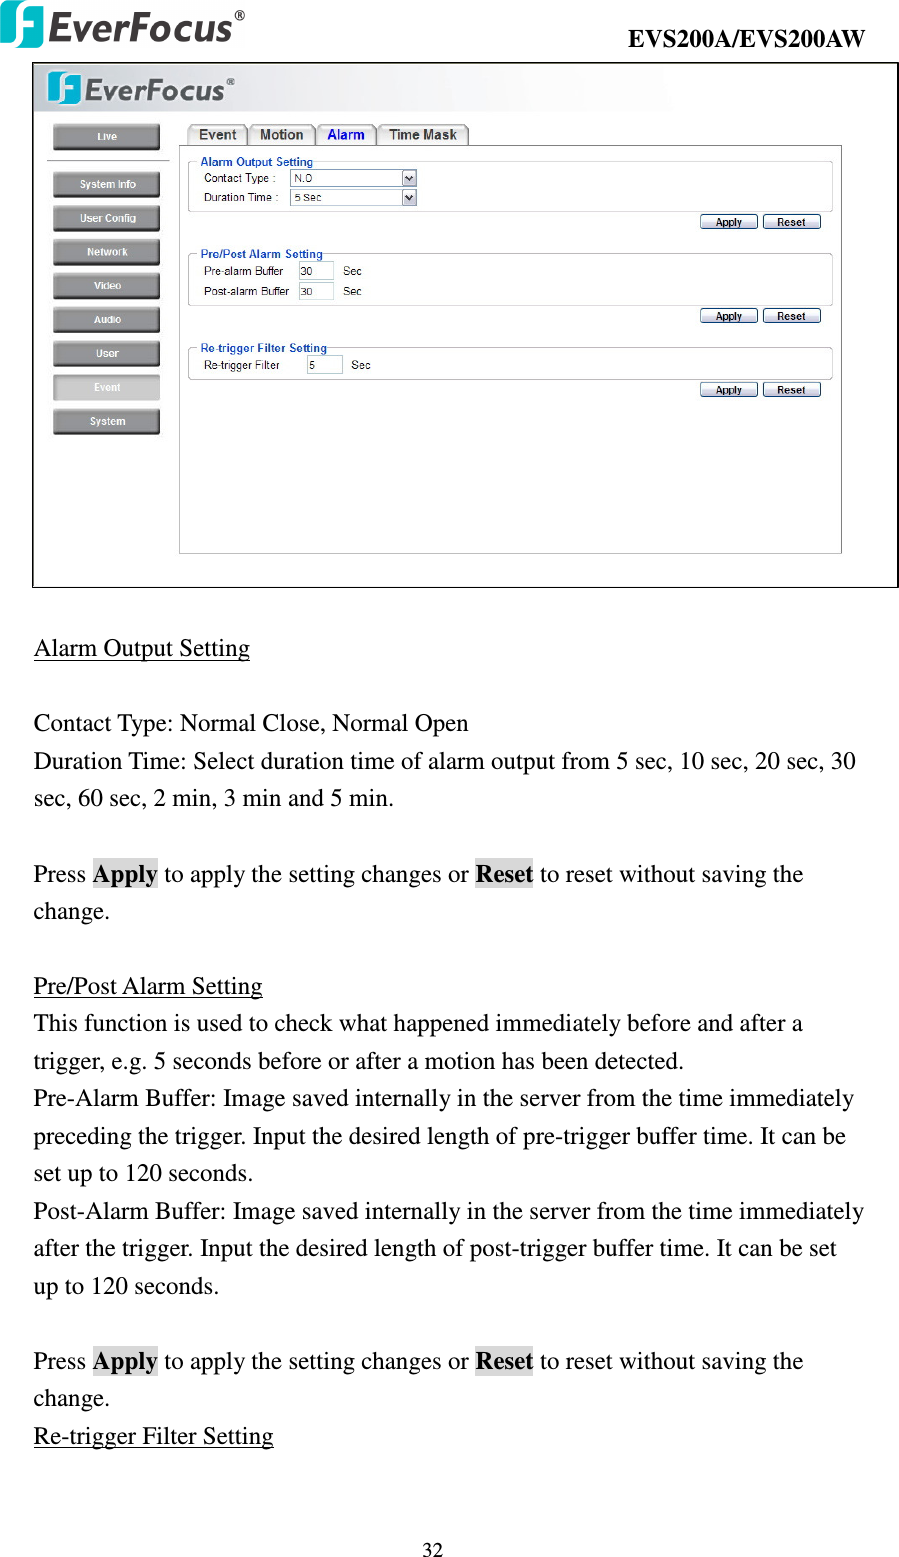
![EVS200A/EVS200AW 28 to be performed. The event type is the set of conditions that specifies how and when which actions will be performed. This table describes how to setup action types and event type. Event Type Action Type Alarm Input Manual Trigger Motion Detection Schedule Recording Pre/Post-Alarm Trigger Alarm x x x Send Mail notification x x x Upload to FTP** x x x x Record to SD Card x x x x x Record to PC* x x x x x Network Alarm x x x Re-trigger x x x 4.7.1 Event The settings relating to event occurrences such as settings for the event occurrence, motion, alarm and time mask can be configured on this page. The "Event " page has 4 tabs: [Event] tab, the [Motion] tab, the [Alarm] tab and the [Time Mask] tab. Note: 1. * Record to PC only works when PC and IP camera are connected. 2. **Either Upload to FTP or Record to Network Storage can be selected to record event video to remote site. 3. Up to 10 event types can be configured in the camera, and up to 3 of these can be configured to upload images.](https://usermanual.wiki/EverFocus-Electronics/EVS200AW-W/User-Guide-1176020-Page-28.png)
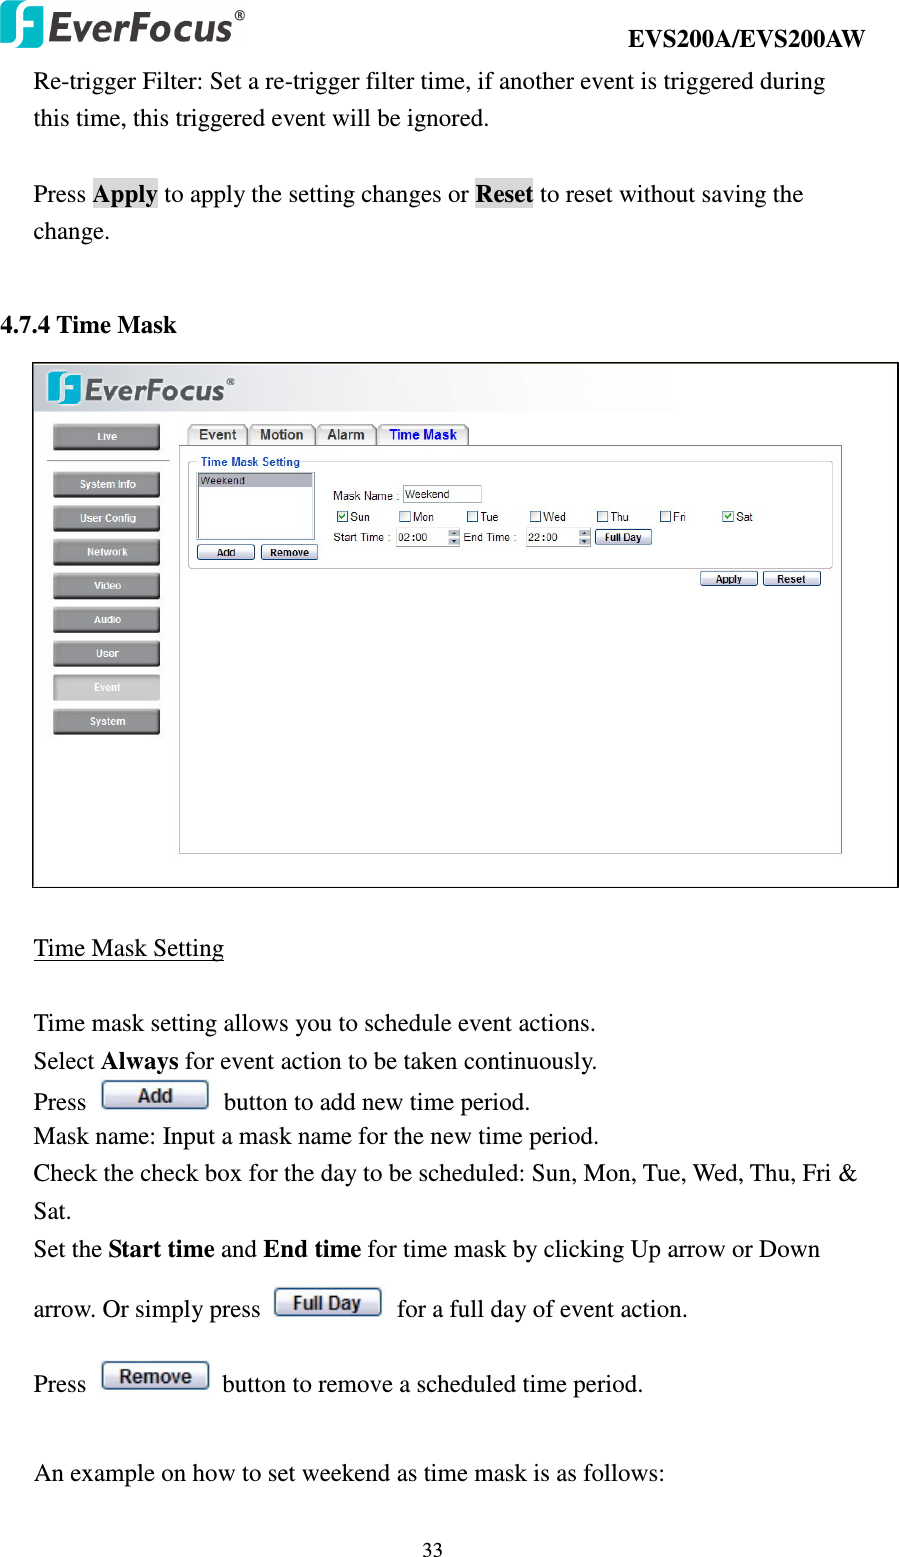
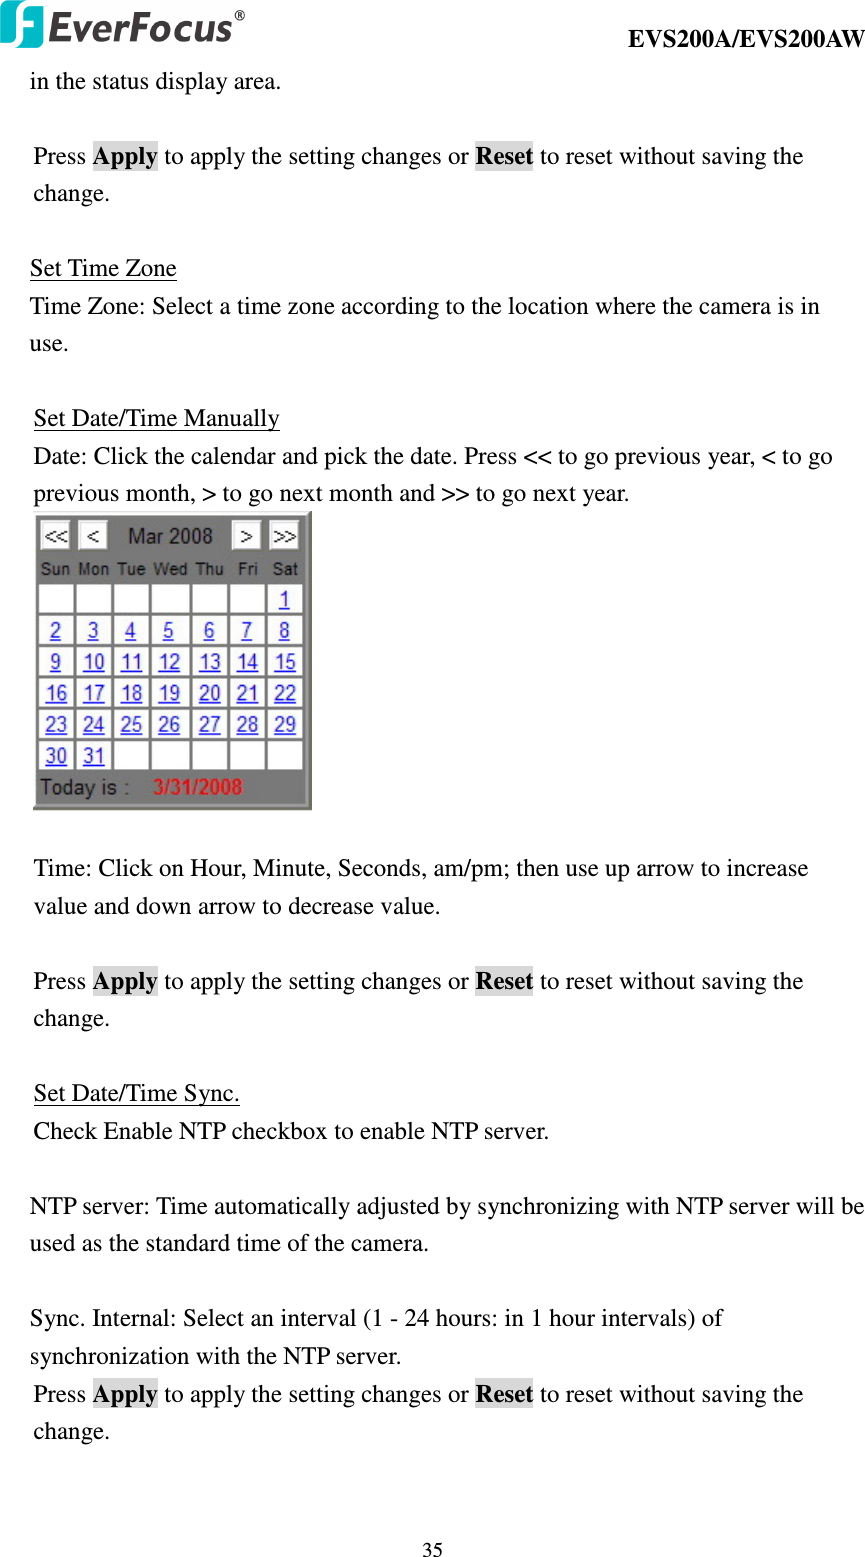
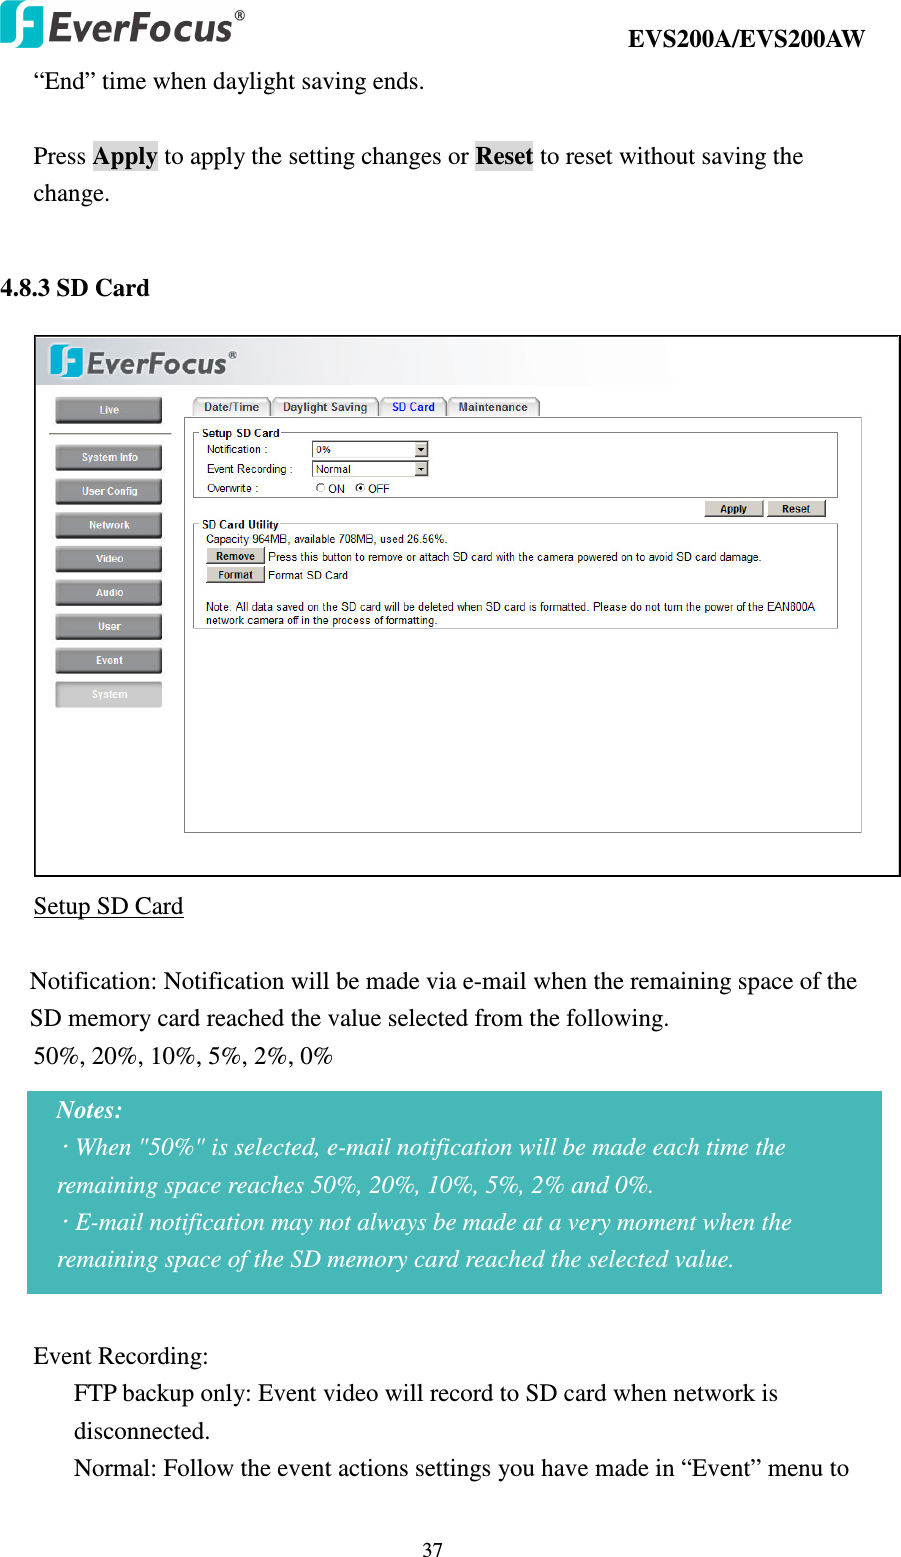
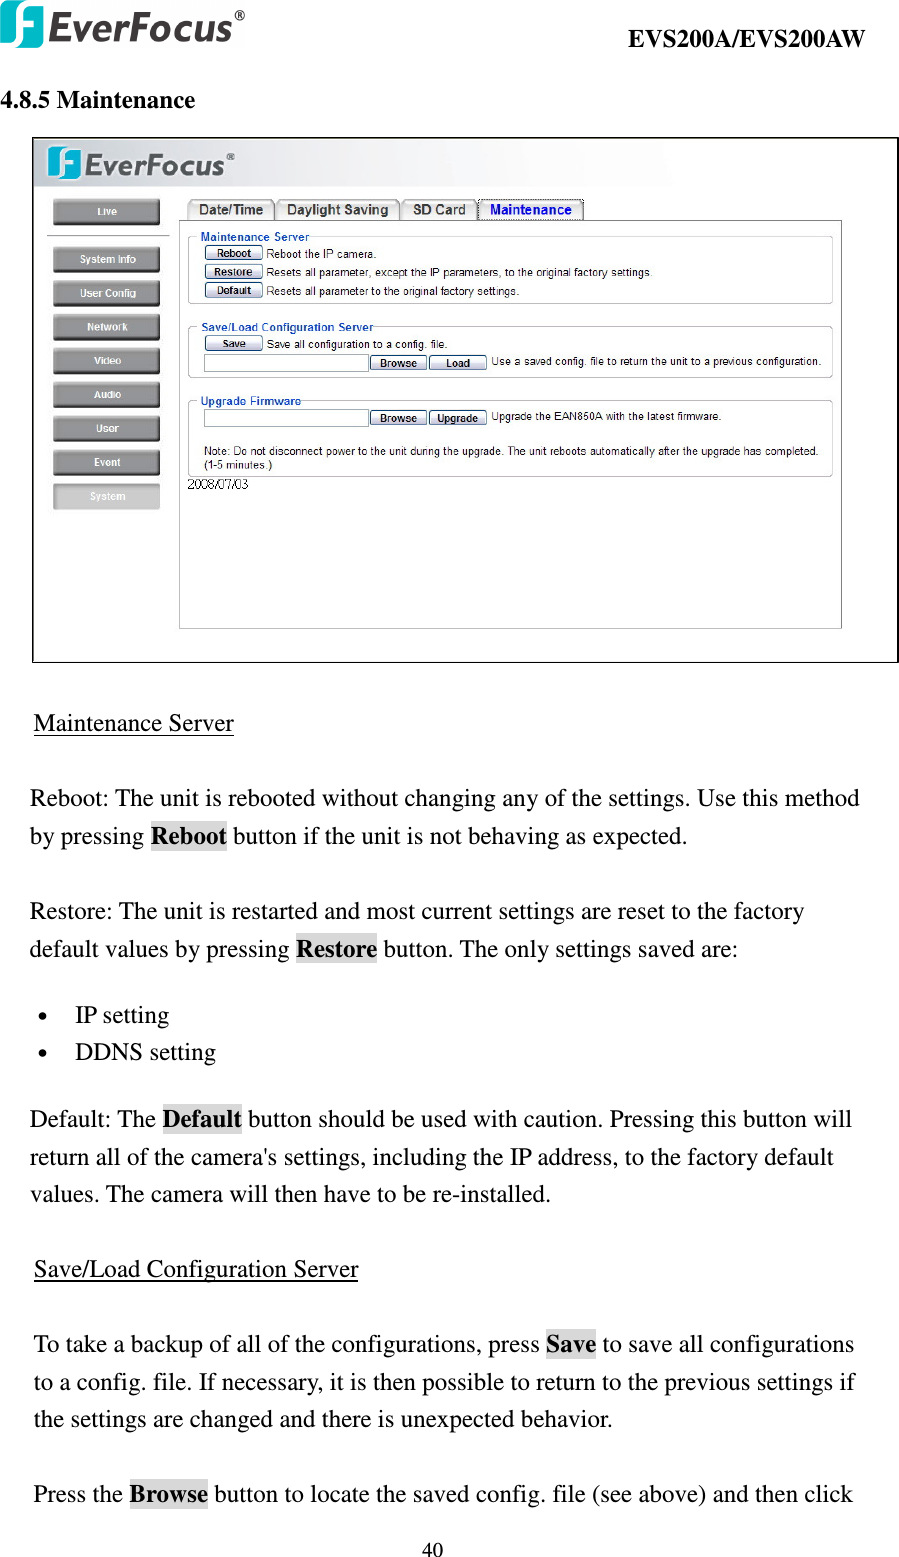
![EVS200A/EVS200AW 34 1. Click from time mask setting. 2. Enter Mask name, e.g. Weekend. 3. Check “Sun” & “Sat” boxes. 4. Select “Start time” and “End time” or “Full day”. Press Apply to apply the setting changes or Reset to reset without saving the change. 4.8 SYSTEM Date/Time, Daylight Saving, SD card and Maintenance settings can be performed on this page. The "System" page has 4 tabs of the [Date/Time] tab, the [Daylight Saving] tab, the [SD card] tab and the [Maintenance] tab. 4.8.1 Date/Time Machine Name Setting Machine Name: Enter the name of the camera. The entered name will be displayed](https://usermanual.wiki/EverFocus-Electronics/EVS200AW-W/User-Guide-1176020-Page-34.png)