FORYOU MULTIMEDIA ELECTRONICS S8S9 Pico Projector User Manual
FORYOU MULTIMEDIA ELECTRONICS CO., LTD Pico Projector
user manual
User manual
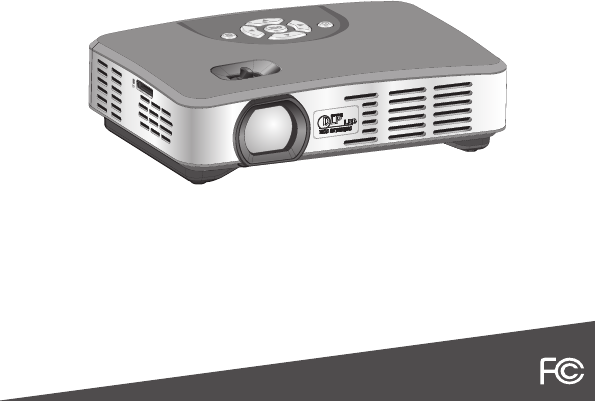
Smart Portable Projector

Contents
1 Product introduction .................................................................... 1
2 Specification 2
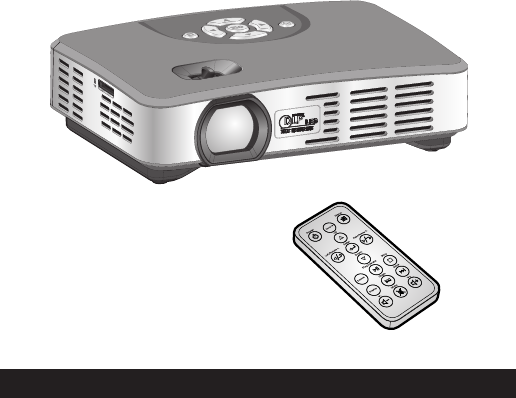
3 Package content 3
4 Pico projector, remote control appearance and parts name .............. 3
5 Using and connection .................................................................. 4
6 Buttons specification ................................................................... 5
7 Remote control function................................................................ 6
8 Desktop and status bar ................................................................ 7
9 System settings ........................................................................... 8
10 Network application .................................................................... 9
11 Multimedia function .................................................................... 9
12 OTG function ............................................................................ 10
13 Install/uninstall/run application .................................................... 10
14 E-mail ..................................................................................... 11
15 Input source ............................................................................ 11
16 Settings menu .......................................................................... 11
17 Battery installation of remote control ........................................... 12
18 Operation range of remote control .............................................. 12
19 Trouble shooting ...................................................................... 12
...............................................................................
.........................................................................
1 Product introduction
S8 is based on Android operating system. It is capable of installing and using of
application .With the built-in Wi-Fi module, it supports surfing the web, playing
games online and dowloading softwares. Users can use office software such as
WORD, EXCEL, POWERPOINT, PDF to read or edit files.
It is easy for carrying. Users can watch wonderful screen in anytime. It supports
reading audio, video (up to 1080p), pictures and text files stored in USB flash driver
and external memory storage devices. And it's compatible with laptops, digital
(video) cameras, game consoles (PS2/XBox/Wii), smartphones, DVD players, TV
set-top box and etc.
It's your big-screen mate for family entertainment as well as a presentation tool for
business meetings.
- 1 -
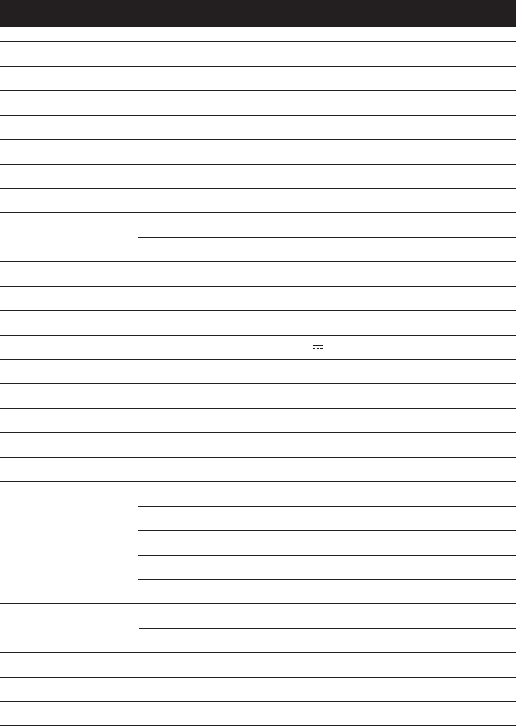
2 Specification
Brightness 400Lumens
WXGA(1280X800)
Projection Size
0.5M,19inches;1M,38inches;3M,115inches
Light Sources RGB LED, the life is over 30,000Hours
Project Distance 0.5-3M
Memory card capacity 32GB USB storage device/8G Built-in Flash
16: ( )10 4:3
Aspect Ratio
Uniformity ≥80%
NTSC >100% NTSC
Contrast Ratio 1000:1
Project Technology DLP
19-115inches (It can be adjusted according to the light and project distance)
Power consumption 35W
Power Supply
AC 100-240V~ 50Hz/60Hz;
Φ3.5mm
VGA; AV; HDMI; USB 2.0;TF card;OTG2.0
Input Interface
Headphone output
Speaker 3Wx1
DC 19V 3.42A;
Dimension 150 ×108mm×44mmmm
AC Adaptor, AC cable, VGA cable, Av cable, OTG cable, remote control, user manual
Standard Accessories
Weight 425g
Operating Temperature: 0 C~40 C;
Operating relative humidity: 35%~85% (without condensation)
Requirement Environment
Video: MPEG,MPG,AVI,MP4,XVID,DAT,RM,RMVB,DIVX,H.264
Support media data
formats
Picture: JPG/JPEG/BMP/PNG
Audio: MP3,WMA,WAV, AAC
Native Resolution
Support HD 720p, 1080p
Len F/#=2.1,f=12mm
Office: WORD/EXCEL/PPT/PDF(Need to install office software by user)
- 2 -
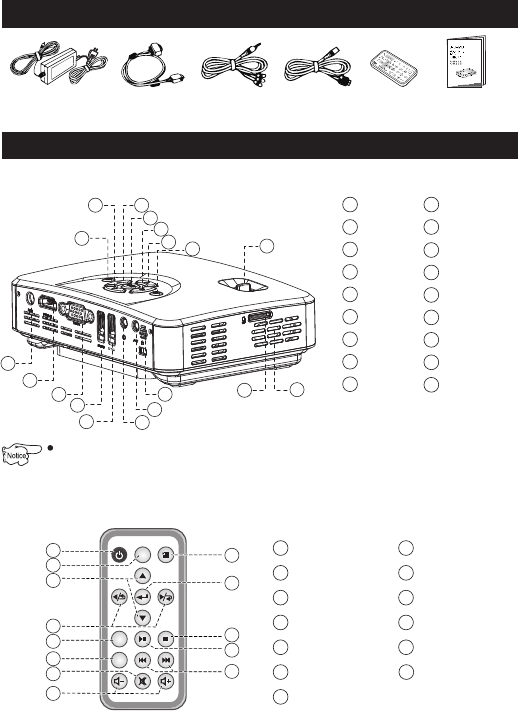
4 Pico projector appearance and parts name
4.1 Pico projector
3 Package content
AC Adaptor Remote control User manual
Power
1
Right
5
Left
3
Enter
4
Down
2
Focus
8
Up
6
Setup
7
Speaker
9
HDMI
16
DC in
17
TF card sslot
10
RC receptor
11
AV IN
12
Earphone
13
VGA
15
USB
14
Focus button: when the image is not clear, use this key and adjust image effect, make image
clearer.
4.2 Remote control
- 3 -
Volume-/+
8
Menu button
9
Stop button
11
Play/ Pause button
12
Skip button Up/Down
13
Enter button
10
Power off button
1
Source switch button
2
Up/Down button
3
Display button
6
Mute button
7
Right/Rotate-R
Source
Power Menu
Up
Left/Rotate-L Enter
Return
Down
Play/pause Stop
Skipb
V-
Display
Skipf
Mute V+
3
4
5
6
1
2
7
8
10
11
12
13
9
4Left/Right button
Return button
5
1
23
4
5
678
9
10
11
12
13
14
15
16
17
VGA cable
AV cable
OTG cable
OTG
18
18
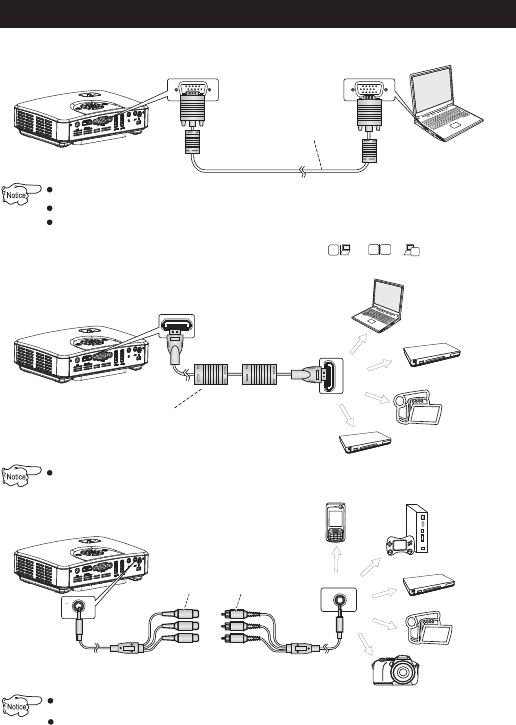
5 Using and connection
The machine can support the biggest resolution 1920x1080, PC displayer, the biggest refresh
frequencyis 75Hz. Here we suggest that the best is 1080x800,60Hz.
When connect PC, please press source switch key and choose PC-RGB, and then press Enter
key into PC-RGB mode.
Laptop images project by pico projector, please use operating key and change that, usually
we use Fn key+ F5 key (Mark small icons, for example: " ", " ", " " ) for you reference.
Mobilephone
AV cable
5.1 Use VGA cable
Connect equipment, please press Source switch key and choose HDMI, and then press Enter key
into HDMI mode.
5.2 Use HDMI cable
- 4 -
VGA cable
Laptop
HDMI cable
Digital Video
Camera
Set Top Box
DVD player
Laptop
5.3 Use AV cable
Yellow
White
Red
Play Game
console
Digital Video
Camera
Digital Video
Camera
When connect equipment, please press Source switch key and choose AV, and then press Enter
key into AV mode.
DVD player
special AV cable
for equipment
When connect mobilephone,AV mode only can use AV OUT or TV OUT if the mobilephone is able
to connect AV cable.
- 5 -
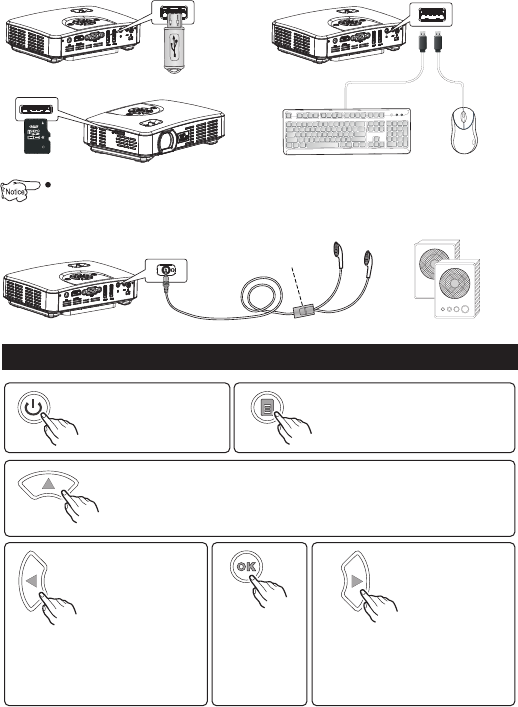
5.5 Connect earphone/speaker
User match that, not
included in standard
accessories
5.4 USB/TF memory card data projection
USB Flash Drive
Speaker
USB keyboard USB mouse
USB connect Mouse, keyboard and outer USB memory devices, please “set”->“note developer
option”->set operating mode to be host mode.
TF memory card
6 Remote control function
Power On/Off key Setup Key
◆ Set up menu.
◆
◆
Operate on/off function.
Short press to exit
Enter button
Sure the selected
items.;
Long press to
source menu
◆
◆
Left button(volume-,
fast rewind)
Up button (enlarge ,skip to previous files)
◆
◆
◆
◆
◆
When set up menu, operate upward function.
When play video, press and choose previous file.
When play audio, it owns fast rewind function.
When play images ,it will enlarge the files.
When play text files, it can scroll the files up.
Left button(volume+,
fast forward)
◆
◆
◆
◆
◆
When set up menu, operate rightward function.
When play audio, it owns fast forward function.
When play images, every time press that,
o
images will rotate 90 in clockwise way.
When play text, press and choose next file.
Long press and volume increase.
◆ When set up menu, operate leftward function.
◆ When play video, it owns fast rewind function.
◆ When play images, every time press that,
o
images will rotate 90 in anticlockwise way.
◆ When play text, press and choose previous
file.
◆ Long press and volume decrease.

- 6 -
Down button (reduces ,skip to next files)
◆
◆
◆
◆
◆
When set up menu, operate downward function.
When play video, press and choose next file.
When play audio, it owns fastforward function.
When play images ,it will reduces the files.
When play text files, it can scroll the files down.
7 Remote control function
Menu Key
◆ Setup menu.
Power Key
Power
Power off
button.
◆
Source
Source switch button
◆
◆
◆
◆
Connect PC-PC mode.
Connect AV cable-AV mode.
Use USB flash drive/TF memory
card-Multimedia mode.
Use HDMI cable-HDMI mode.
Up button
Up
When set up menu, the cursor move to the upper.
When play audio, it owns fast rewind function.
When play video, images files, it will enlarge images.
When play text files, it can scroll the files up.
◆
◆
◆
◆
Left/Rotate-L
Enter
Enter button
Sure the selected items
When play video, images,
functional menu come out,
and then make operation.
◆
◆
Left button
When set up menu, the cursor move
to left.
When play video, it owns fast rewind
function.
When play images, every time press
o
that, images will rotate 90 in
anticlockwise way.
◆
◆
◆
Right buttons
◆
◆
◆
◆
When set up menu, the cursor move
to right.
When play video, it owns fast forward
function.
When play images, every time press
o
that, images will rotate 90 in clockwise
way.
When play text files, it can play the
next files.
Right/Rotate-R
Down
Down button
◆
◆
◆
◆
When set up menu, the cursor down.
When play audio, it owns fast forward function.
When play video, images files, it will reduce images.
When play text files, it can scroll the files down.
Play/Pause
Return button Play/Pause button
◆ Play/Pause function
◆ Exit the current state
and back to the
previous page.
Stop
Return
Return Stop button
◆ Stop function
Skipb
Display button Skipb button
◆ Choose the
previous files
◆ Data display when
play video /images
information.
Skipf
Display
Skipf button
◆ Choose the
next files
- 7 -
Mute
Vol- button Mute button
ontrol mute◆ C
Volume decrease◆
V-
Vol+ button
olume increase◆ V
V+
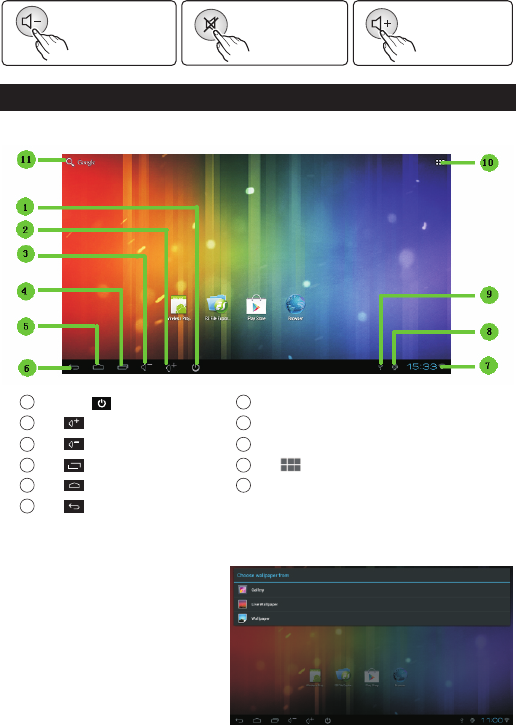
8 Desktop and Wallpaper
8.1 Desktop
Long press to power off
1
Click volume up
2
Click volume down
3
Click check history
4
Click return to desktop
5
Click back space
6
Click to check wifi, settings, usb function
7
Android setting icon
8
USB setting icon
9
Click enter into application interface
10
Click and search application or browse internet
11
8.2 Wallpaper
◆
◆
◆
Under Desktop UI, long
press mouse leftkey and set
a wallpaper.
By clicking wallpaper or live
wallpaper, user can choose
wallpaper from system.
By clicking Photo storage,
user can choose wallpaper
from memory devices.
- 8 -
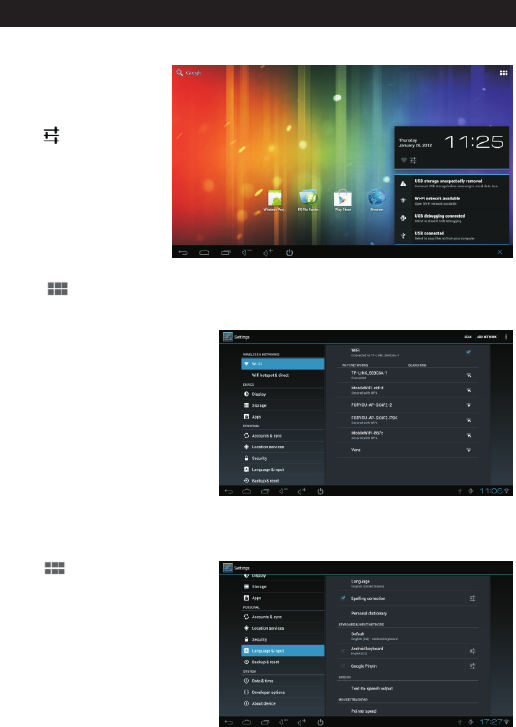
9.1 Setting
9 Setting System
◆ Click digital clock icon
which located in desktop
bottom right corner, and
then click from display
menu, > “setting”
get into setting interface.
◆ Click > Setting and get into setting interface.
Under setting menu, user can check below setting and status.
• WI-FI
• Display
• Setting/ Storage
• App
• Accounts&sync
• Location services
• Security
• Language&input
• Backup&reset
• Data&time
• Developer options
• About device
9.2 Setting input method
◆ language &
input, enter to set language and
input method. Click "default" on
the right to choose one of them.
Click >setting >
“Android keyboard” is pure English
input method.
- 9 -
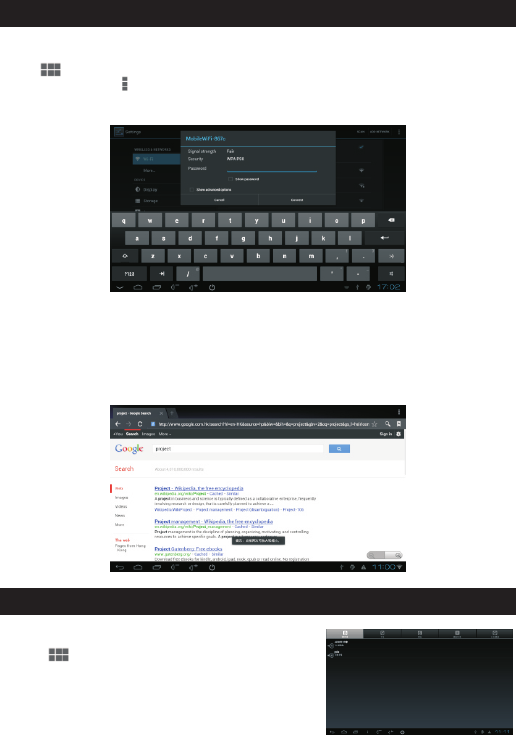
10.1 Connect WiFi
10 Network application
10.2 Browsing webpage
◆
◆
◆
◆
Click“brower”,input website in the address bar to browse;
It is convenient that you can click the webpage to drag it.;
When drag the webpage, a toolbar pops up below, click the icon to zoom in or zoom out
the webpage;
When edit or send e-mail through the browser, choose plain txt to edit the main body.
11 Multimedia function
11.1 Music play
◆ Click > “Music”to enter the music play page,
system will list all relevant files stored in the built-in
flash drive and USB storage device, you can play any
one.
◆
◆
◆
◆
Click “setting”->“wireless&networks”, click “Wi-Fi” to open wireless network;
Click “Wi-Fi setting” ->“network notification” to list all searched wireless router;
Click the wireless router, connect network according to guidance, if it is encrypted, input password;
Through the icon above to check connection status and signal strength.
- 10 -
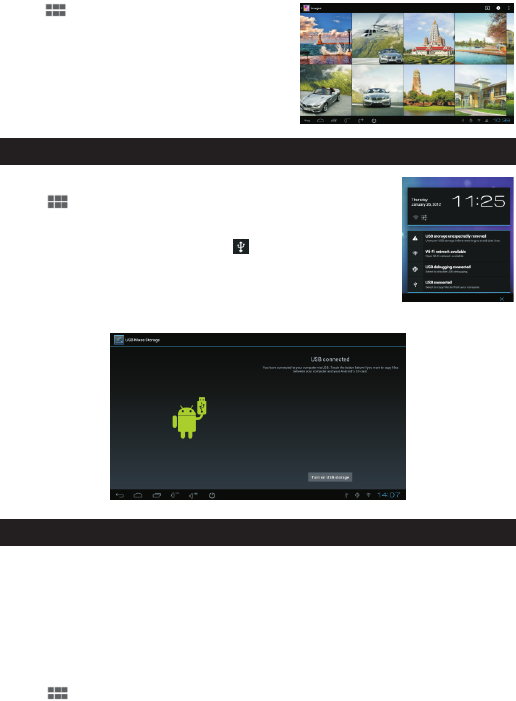
11.2 Photo and video
◆ Click >“Gallery” to enter the music play
page, system will list all relevant files stored in
the built-in flash drive and USB storage device,
you can play any sony.
12 OTG application
◆
◆
◆
Use USB cable, to connect the device and computer
Click > “Settings” > Developer options, select the
“USB debugging ” on the right, and set to “OTG Control”
to slave mode;
When it is connected, status bar show , click to pull down
the status, Select to copy files to/from your computer.
◆ Go into it and click “Turn on USB storage”, you can then operate after the device is detected.
13 Install, uninstall, run application
13.1 Download and Install application
◆
◆
◆
Click “Play Store”on the desktop and creat Google account according to the instruction,
you can then install the application on line.
Using the internal browse to install online.
Using third party software to download and install.
13.2 Uninstall application
Notice: Install non-Play Store software, Please select Settings > Security “Unknown sources”, or it can’t be installed.
◆
“
Click > “Settings”> Apps > “DOWNLOADED” find the app need to be uninstalled,
click Uninstall” the app will be removed.
◆ Find app needed, and click to run it.
◆
Installation completed, prompt “open” or “done”,
click “open” will run the app.
Click “app”,find app needed, and click to run it.
13.3 Run application
14 E-mail
◆ Click >“Email”and fill the Email account and password according to the instruction,
Noted to modify the port NO“518”to“25”,complete the setup;
◆ After successfully set up the email account, click >“Email”to enter the Email page,
click on the right to edit and send the email. Click on the right to refresh the
inbox and read the email.
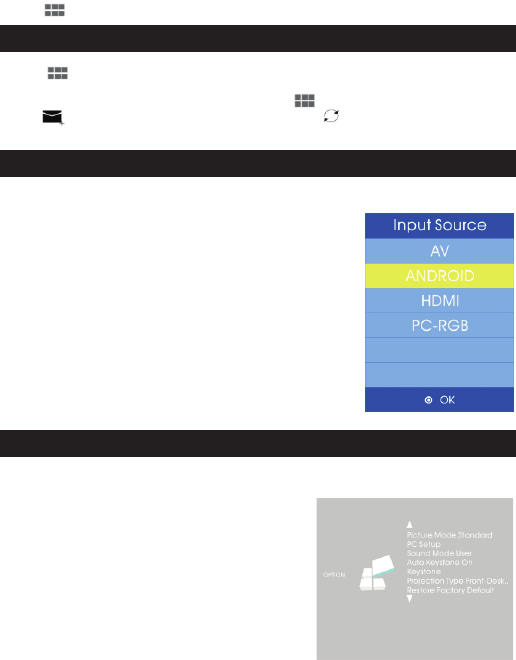
15 Input source
Press OK for a long time or using source button on the remote to enter the source selection
menu:
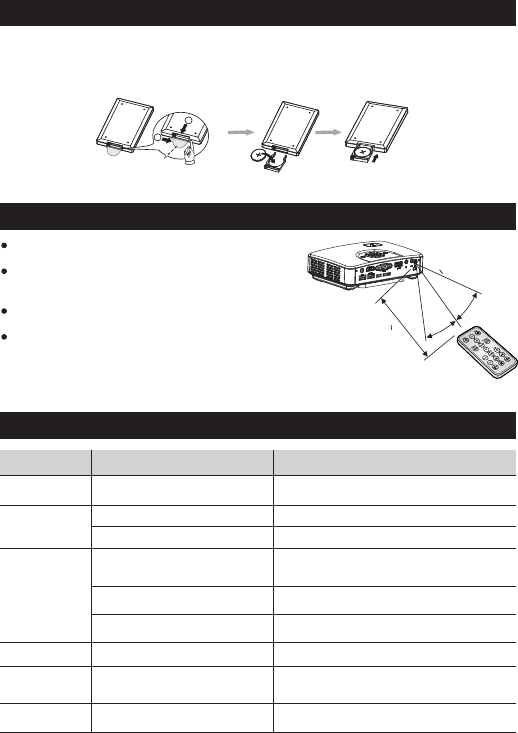
16 Setup Menu
1. Photo mode setup: To adjust the devices’ display
mode: standard mode, Dynamic Mode, User mode.
2. PC connection setup: using to setup right
resolution when connecting to laptop’s VGA input.
3. Sound mode setup: adjust sound mode: standard
mode, Music mode, Movie mode, Sports mode, User
mode.
4. keystone correction set up: ON/OFF keystone
correction.
5. Projection method setup: desk front projection,
desk rear projection, suspend front projection,
suspend rear projection.
6. default setup: recover to default setup or not.
- 11 -
1. AV: AV source input: Using the specific AV cable of the
device to connect to any device with AV output function,
such us STB, HD player, Smartphone or camera.
2. Android: the internal android system; enter the android
system can play Audio/video playback, web browseing,
email, and run other Android applications.
3. HDMI: HDMI source input: using the right HDMI cable to
connect device with HDMI output, such as laptop, DVD,
HD player, Smartphone etc.
4. PC-RGB: VGA source input, Using the included VGA
cable to connect device with VGA output, such as laptop,
HD player.
19 Trouble shooting
Pico projector
can't be turned on
Symptoms Reasons Solution
Images are
not clear
NO images
The whole
machine not work
Cannot open the
office files or videos
o
20
o
20
<8m
<3.5m
17 Battery installation of remote control
1>Remove battery box and
plastic isolation piece 3>Restore to original
2>Replace battery
Plastic isolation piece
2
1
- 12 -
The battery installed well before selling. But in order to prevent discharge, we use plastic
isolation piece separate battery and remote control. Before using please remove the
plastic isolation piece. Replace battery, please do that according to the below steps.
Notice: In the first part, press button toward arrow, press the second part button and then get it out.
Remote control points to pico projector accept
position. Operate that, please refer to the photos.
When press operation button and operate that, it
is still difficult to do that, please replace new
battery. Battery life is one year.
If you don't use remote control for a long time,
please remove battery.
The longest receive distance is 8M in maximum
horizontal, Oblique angle 20 the biggest receive
distance is 3.5M.
Notice: If remote control accept position suffer the sunlight directly, or located in frequency light
near and it is easy to make wrong operation, please change your position.
No power Ensure the AC power adapter is properly connected
The lens is not focused correctly
The screen is not aligned properly Adjust Pico projector position(0.5-3M,it is suitable)
Adjust the focus knob
Operate USB Flash Drive/smart
mobilephone micro-SD card, the
methods of operation are not correct
Please read specification the multimedia function part
and find the right connect way.
The input signal device is not connected
with the projector correctly
Check the connect interface again.
The input signal isn't selected correctly.By pico projector or remote control source button,
and then choose the right signal input source.
The system crashes Power off to restart
Cannot get online
Wi-Fi is not connected/no signal/weak
signal
Set Wi-Fi according to user manual/move to anywhere
has strong signal
Need install support application by user User can download apps from Android market
18 Operation range of remote control
FCC Statement:
This equipment has been tested and found to comply with the limits for
a Class B digital device, pursuant to Part 15 of the FCC Rules. These
limits are designed to provide reasonable protection against harmful
interference in a residential installation. This equipment generates uses
and can radiate radio frequency energy and, if not installed and used in
accordance with the instructions, may cause harmful interference to
radio communications. However, there is no guarantee that interference
will not occur in a particular installation. If this equipment does cause
harmful interference to radio or television reception, which can be
determined by turning the equipment off and on, the user is encouraged
to try to correct the interference by one or more of the following
measures:
-- Reorient or relocate the receiving antenna.
-- Increase the separation between the equipment and receiver.
-- Connect the equipment into an outlet on a circuit different from that to
which the receiver is connected.
-- Consult the dealer or an experienced radio/TV technician for help.
This device complies with part 15 of the FCC Rules. Operation is
subject to the following two conditions:
(1) This device may not cause harmful interference, and (2) this device
must accept any interference received, including interference that may
cause undesired operation.
Changes or modifications not expressly approved by the party
responsible for compliance could void the user's authority to operate the
equipment.
The antenna(s) used for this transmitter must be installed to provide a
separation distance of at least 20 cm from all persons and must not be
co-located or operating in conjunction with any other antenna or
transmitter.
Smart Portable Projector