FOXCONN 900901WBG Notebook User Manual Manual 1
FOXCONN INTERNATIONAL INC Notebook Manual 1
FOXCONN >
Contents
Manual 1

Netbook
User’s Manual
Trademark:
All trademarks are the property of their respective owners.
Version:
User’s Manual V1.1 for SZ 900 Netbook.
P/N: 3A221RD00-000-G
Symbol description:
Caution : refers to important information that can help you to use Netbook bet-
ter, and tells you how to avoid problems.
Warning : indicating a potential risk of hardware damage or physical injury
may exist.
WEEE:
The use of this symbol indicates that this product may not be treated as household
waste. By ensuring this product is disposed of correctly, you will help prevent potential
negative consequences for the environment and human health, which could other-
wise be caused by inappropriate waste handling of this product. For more detailed
information about recycling of this product, please contact your local city ofce, your
household waste disposal service or the shop where you purchased this product.
CAUTION
!
© All rights reserved.
All trade names are registered trademarks of respective manufacturers listed.
All images are for reference only, please refer to the physical Netbook for specic features.
W
A
R
N
I
N
G
!

The following safety precautions will increase the life of the netbook. Please
follow all precautions and instructions. Except as described in the manual,
refer all servicing to qualied personal.
■ Do not place on uneven or unstable work surfaces. Seek servicing if the
casing has been damaged.
■ Do not expose to dirty or dusty environment. And Do not operate during a
gas leak.
■ Do not leave the netbook on your lap or any part of the body to prevent
discomfort or injury from heat exposure.
■ Do not press or touch the display screen. Do not place together with small
items that may scratch or enter the netbook.
■ The netbook should only be used in environment with ambient temperature
between 0oC(32oF) and 40oC(104oF).
■ Do not place or drop objects on top.
■ Do not expose to or use near liquids、rains、moisture or strong magnetic
or electrical elds.
■ Do not carry or cover a netbook that is powered on with any materials that
will reduce air circulation such as a carrying bag.
■ Do not throw the netbook in municipal waste. Check local regulations for
disposal of electronic products.
■ Wipe the netbook using a clean cellulose sponge or chamois cloth damp-
ened with a solution of nonabrasive detergent and a few drops of warm
water and remove any extra moisture with a dry cloth.
CAUTION
!
Please carefully read the following information about battery :
■ Risk of explosion if battery is replaced by an incorrect type. Dispose of used
batteries according to the instructions.
■ Use only the power cord and batteries indicated in this manual. Do not
dispose of batteries in a re. They may explode. Check with local codes for
possible special disposal instructions.
CAUTION
!

TABLE OF CONTENTS
Chapter 1 Introduction to Your Netbook
External Appearance ................................................................................2
Setting Up Your Computer........................................................................6
Using the Touchpad ................................................................................10
Chapter 2 Using Your Netbook
Overview ................................................................................................12
Using Web Camera ................................................................................12
Chinese Input Method ............................................................................13
Special Function Keys ............................................................................13
Using WWAN .........................................................................................14
Using Wireless LAN ...............................................................................16
MMC/SD/MS Dummy Card ....................................................................17
Chapter 3 Install Windows XP in Netbook
Install a new Windows XP system ..........................................................19
Install drivers in new Windows XP .........................................................21
Appendix
Recovery of Linux system ......................................................................22

The Netbook is a compact and easy to use portable computer. It
is equipped with an intuitive graphical interface and full wireless
connectivity so you can use the Netbook and access the Internet
at any time and in any place.
This chapter includes the following information:
■ External Appearance
■ Setting Up Your Computer
■ Using the Touchpad
1
2
1-1 External Appearance
The Netbook is a compact and easy to use portable computer. It is equipped with an
intuitive graphical interface and full wireless connectivity so you can use the Netbook
and access the Internet at any time and in any place. Provided below is an introduction
to each product function.
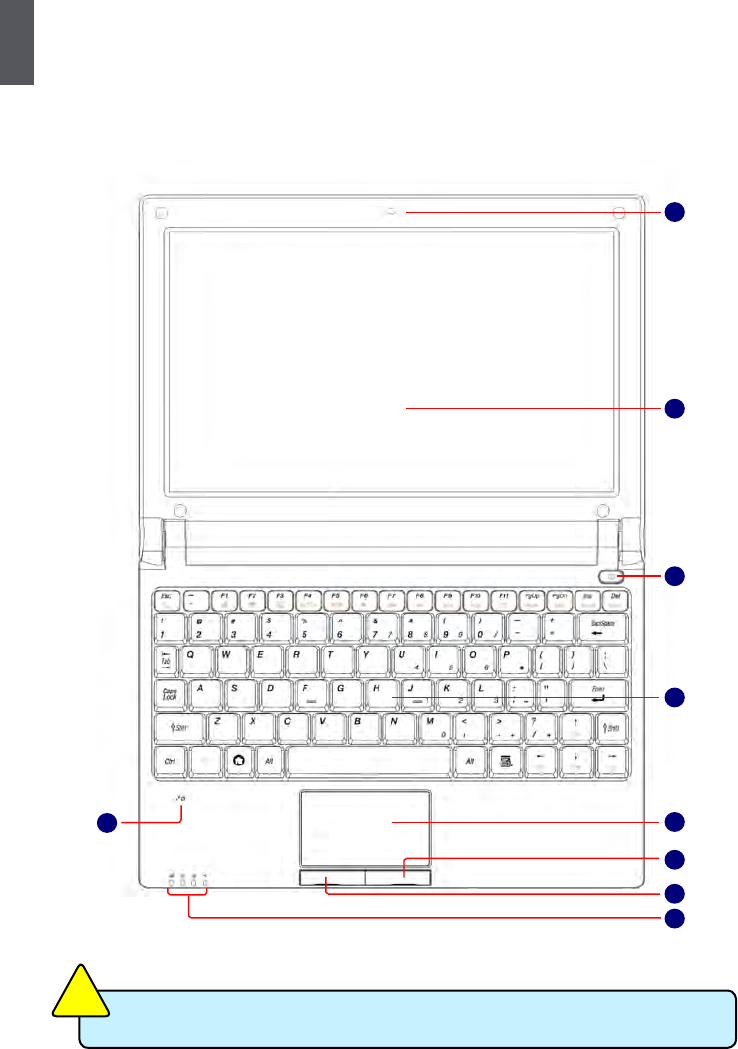
1. Top View
Your Netbook keyboard may vary depending on the country/region of purchase.
CAUTION
!
1
2
3
4
5
6
7
8
9
1
3
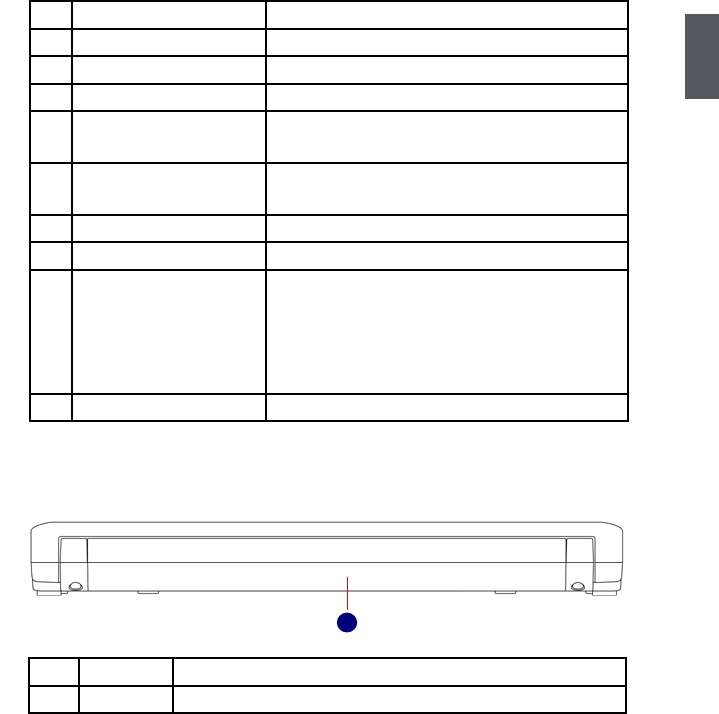
2. Rear View
No. Purpose Description
1 CCD Camera Records videos or take photos
2 Color LCD Display Netbook's screen
3 Power Button Button for turning the computer's power on/off
4 Keyboard Input device used for controlling the Netbook's
various functions
5 Touchpad Works the same way as a mouse and is used for
controlling the computer cursor
6 Right Touchpad Button Works the same way as the right mouse button
7 Left Touchpad Button Works the same way as the left mouse button
8 Computer Status Light From left to right:
Power icon
Num Lock icon
Caps Lock icon
Wireless Network icon
9 Microphone Netbook's built-in microphone
No. Purpose Description
1 Battery Replaceable battery that serves as Netbook's power supply
1
1
4
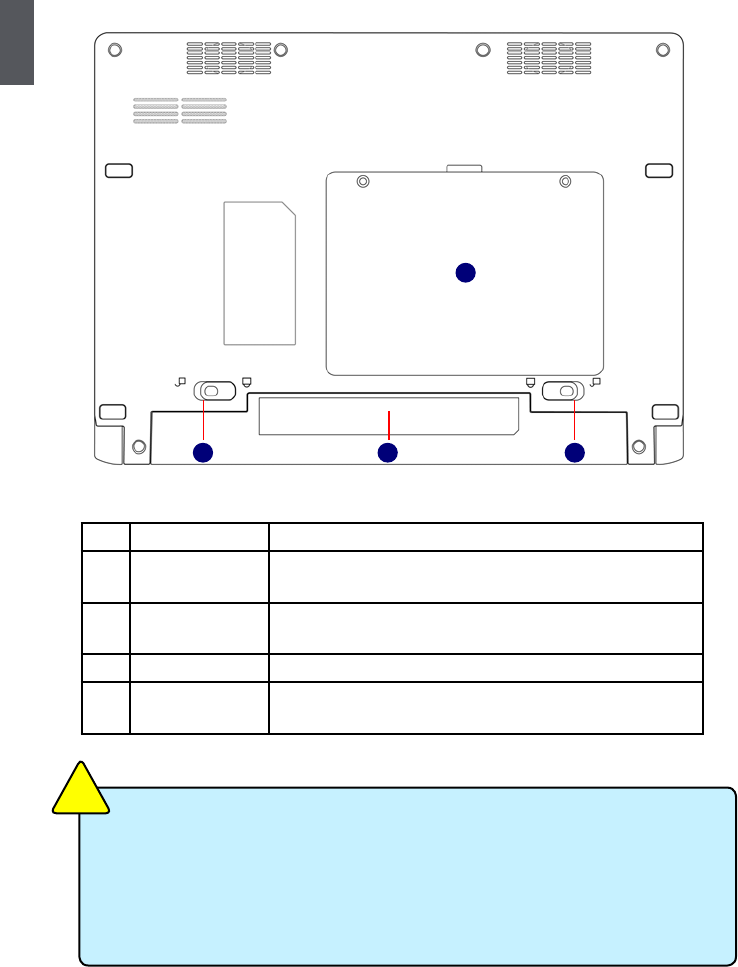
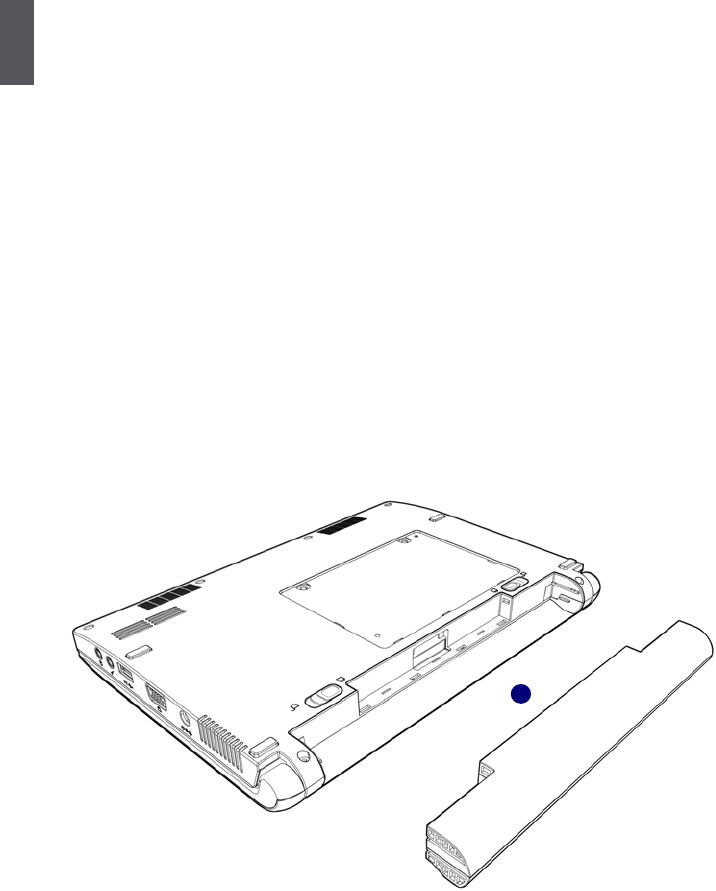
3. Bottom View
When the computer is running or charging, heat is produced inside the Netbook and
transferred to the back of the chassis by the heat dissipation system for cooling. The
transformer may also produce a lot of heat during normal use as well. The Netbook
and its transformer should therefore not be placed in the lap or on any other body part
for prolonged periods during use. Also avoid placing the Netbook on a soft surface
(e.g. sofa) as it might block the heat vents and interfere with cooling.
CAUTION
!
No. Purpose Description
1 Battery Lock Slide inwards to lock the battery in place. Slide outwards to
unlock battery.
2 Battery Replaceable battery. Serves as the Netbook's power
supply
3 Battery Latch Push outwards to release battery for removal
4 Hard Disk Cover The Hard Disk Cover protects the internal hardware. Open
to exchange device
23
4
1
1
5
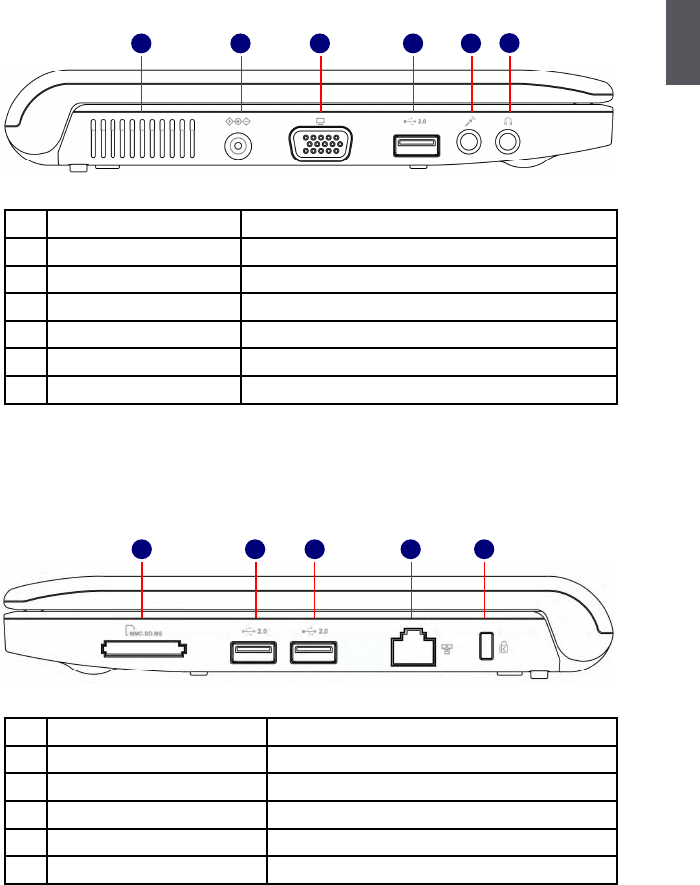
4. Left View
1 2 3 4 5 6
No. Purpose Description
1 Vent Netbook's cooling vent
2 Power Port Connects to the external power supply transformer
3 External Display Port Connects to an external display
4 USB Port Connects to USB 2.0 device
5 Microphone Connects to external microphone
6 Headphone Connects to external headphone
5. Right View
No. Purpose Description
1 Multi-Function Card Reader Supports MMC/SD/MS memory cards
2 USB Port Connects to USB 2.0 device
3 USB Port Connects to USB 2.0 device
4 Network Port Standard RJ-45 network port
5 Anti-Theft Lock Slot Connects to anti-theft lock
1 2 3 4 5
1
6
1-2 Setting Up Your Computer
1. Installing/Removing the Battery
Please install the battery before using the Netbook and connect the external power supply
transformer. The Netbook can be powered by the battery or the external transformer.
If you are in an ofce environment, we recommend using the external transformer as
much as possible. If you are away from the ofce and no power socket is available, use
the battery instead.
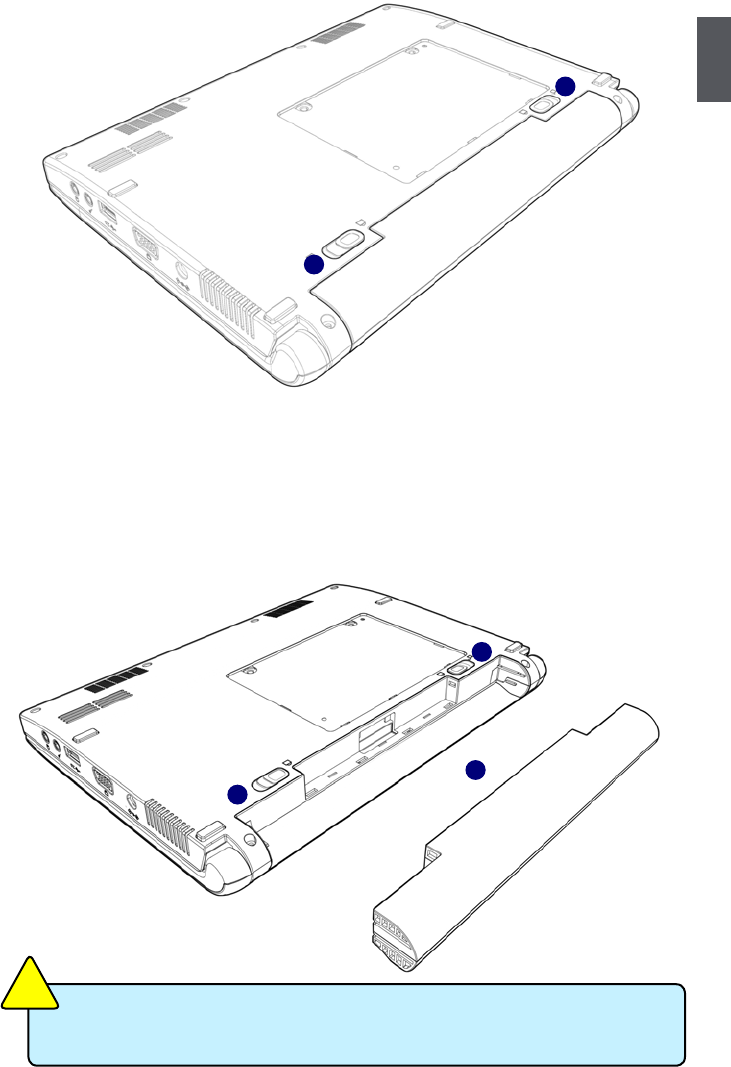
Installing the Battery
Step 1: Turn the Netbook over and have the back of the battery facing upwards as well.
Now push the end of the battery with the metal contacts into the Netbook's battery
slot evenly and slowly along the battery rails.
Step 2: Push the end of the Netbook battery with the metal contacts completely into the
battery slot. When there is a "click", this means the battery latch has engaged and
the battery is now secured to the Netbook.
Step 3: Push the Battery Lock inwards lightly to lock the battery in place.
1
1
7
2
3
1
2
3
Do not remove the battery while the Netbook is still running. This may damage the
data on the hard disk.
CAUTION
!
Removing the Battery
Step 1: Shut down the Netbook. Disconnect all cables and devices.
Step 2: Turn the Netbook over and unlock the battery by pushing the Battery Lock
outwards.
Step 3: Push the Battery Latch outwards and hold it in place with your nger. Now use
the other hand to pull the battery out.

1
8
2. Connecting the Power Supply
Step 1: Insert the round end of the power supply transformer into the charging port on
the left side of the Netbook.
Step 2: Insert the other end of the power supply transformer into a power socket.
The power connector for the power socket may vary depending on the local national
standards. The appropriate connector will be bundled with your Netbook. Please
always use the adapter when connecting the power supply. The connector shown
here may not match the type included in the box and is provided for reference
purposes only.
CAUTION
!
3. Startup
Step 1: Open the screen of your Netbook.
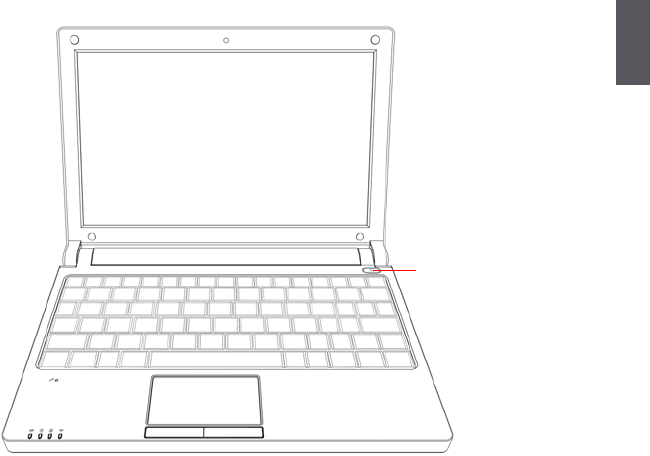
1
9
Step 2: Turn on the machine by pressing the Power Button.
Power Button
4. Emergency Shutdown
When the Netbook cannot be shut down through normal means, please press and hold
the Power Button until the Netbook powers off.
1
10
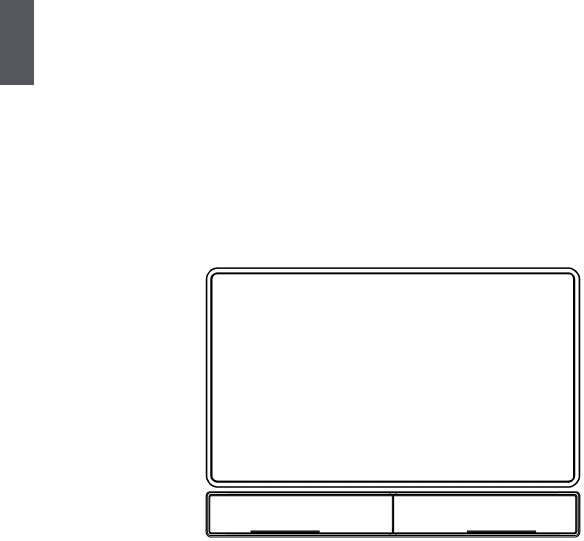
1-3 Using the Touchpad
1. Introduction to the Touchpad
The touchpad is like a computer mouse. It senses the pressure from the user's nger
and generates a voltage that is used to control the cursor's movements and issue
commands.
The touchpad senses nger movements. Simply move one nger across the touchpad
to control the movement of the cursor on screen. Below the touchpad is two buttons.
The left button is like the left mouse button and is used for selecting options or launching
programs on screen. The right button works the same way as the right mouse button.
2. Single Tap/ Single Click
To select a window function or press a button icon, move your nger across the touchpad
to move the cursor to the window or button to select. Now tap the touchpad with your
nger to perform the action. This action is equivalent to pressing the left mouse button.
You can also press the left touchpad button for the same effect.
3. Double Tap/ Double Click
To open a le or document, move your nger across the touchpad to move the cursor to
the le you wish to open. Now quickly tap the touchpad twice with your nger to perform
the action. This action is equivalent to pressing the left mouse button twice. You can also
press the left touchpad button twice for the same effect.
4. Drag
Move your nger across the touchpad to move the cursor to the object you wish to drag.
Now hold down the left touchpad button with one hand and move the cursor to the desired
location. Release the button and complete the drag operation. You can also double tap
the object you wish to drag and keep the nger on the touchpad after the second tap to
perform the drag operation with one hand.
Touchpad
Left Button Right Button