Fego Precision Co AT173 Awning Remote Control Transmitter User Manual AT173 function description
Fego Precision Industrial Co Ltd Awning Remote Control Transmitter AT173 function description
user manual
NUMBER FILE NAME AT173 function description
Department RND DATE 5/16/2008 PAGE 1/12 VERSION A/0
APPROVED CHECKED DESIGN
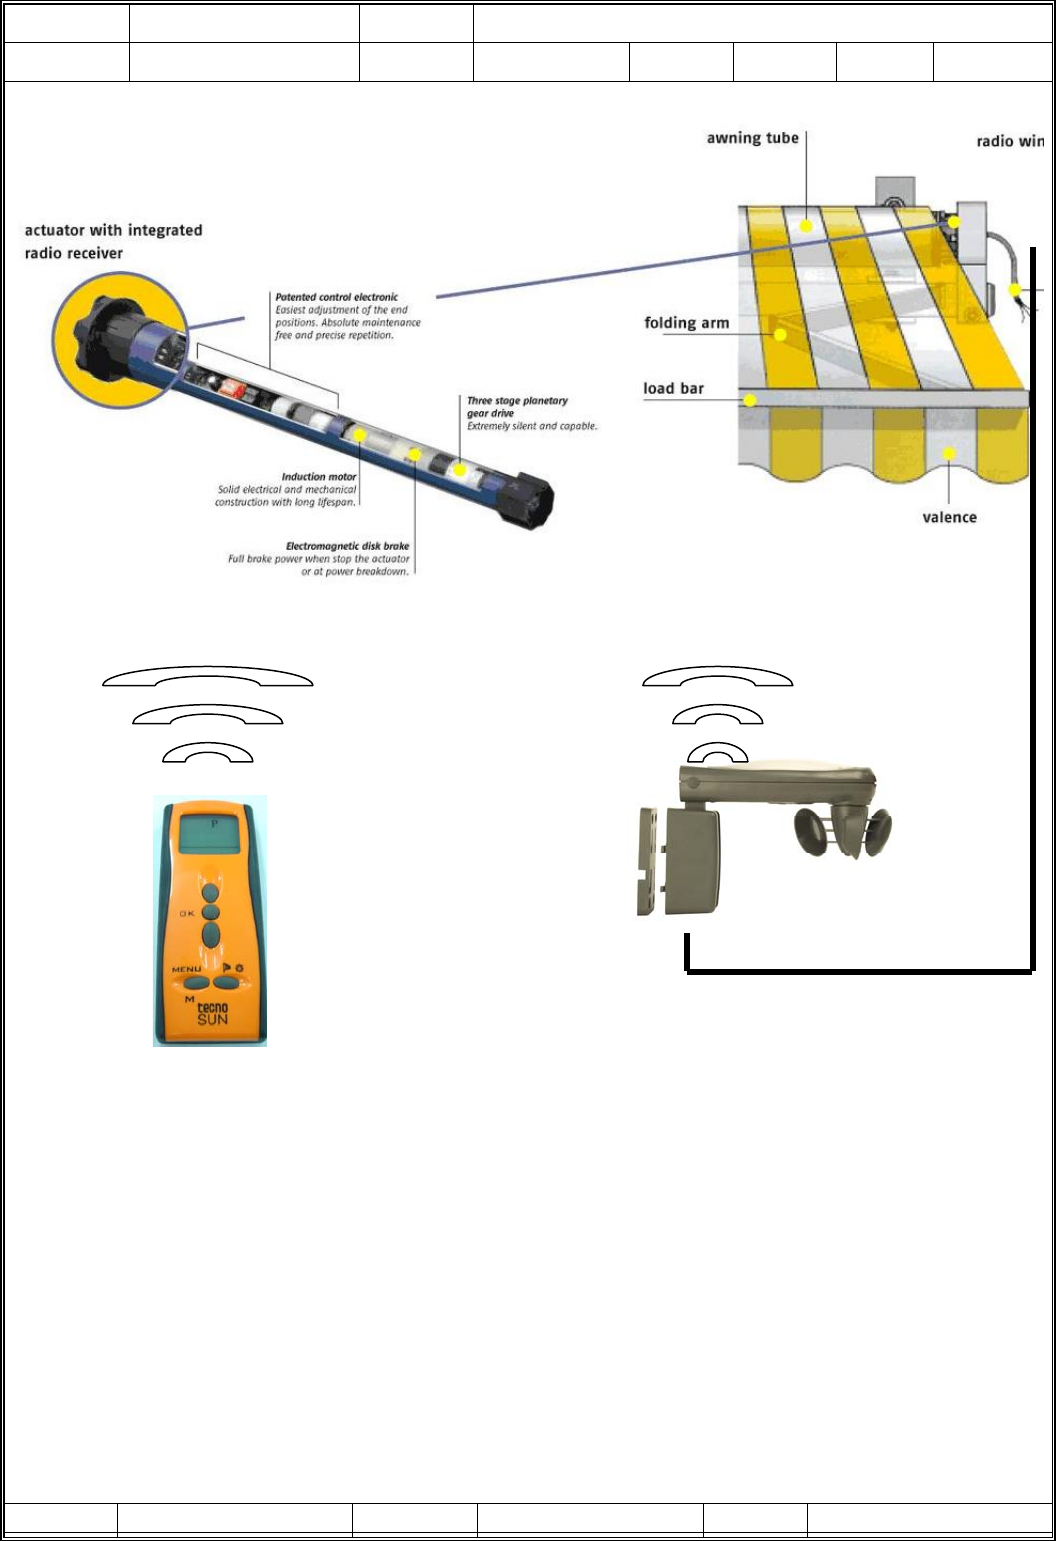
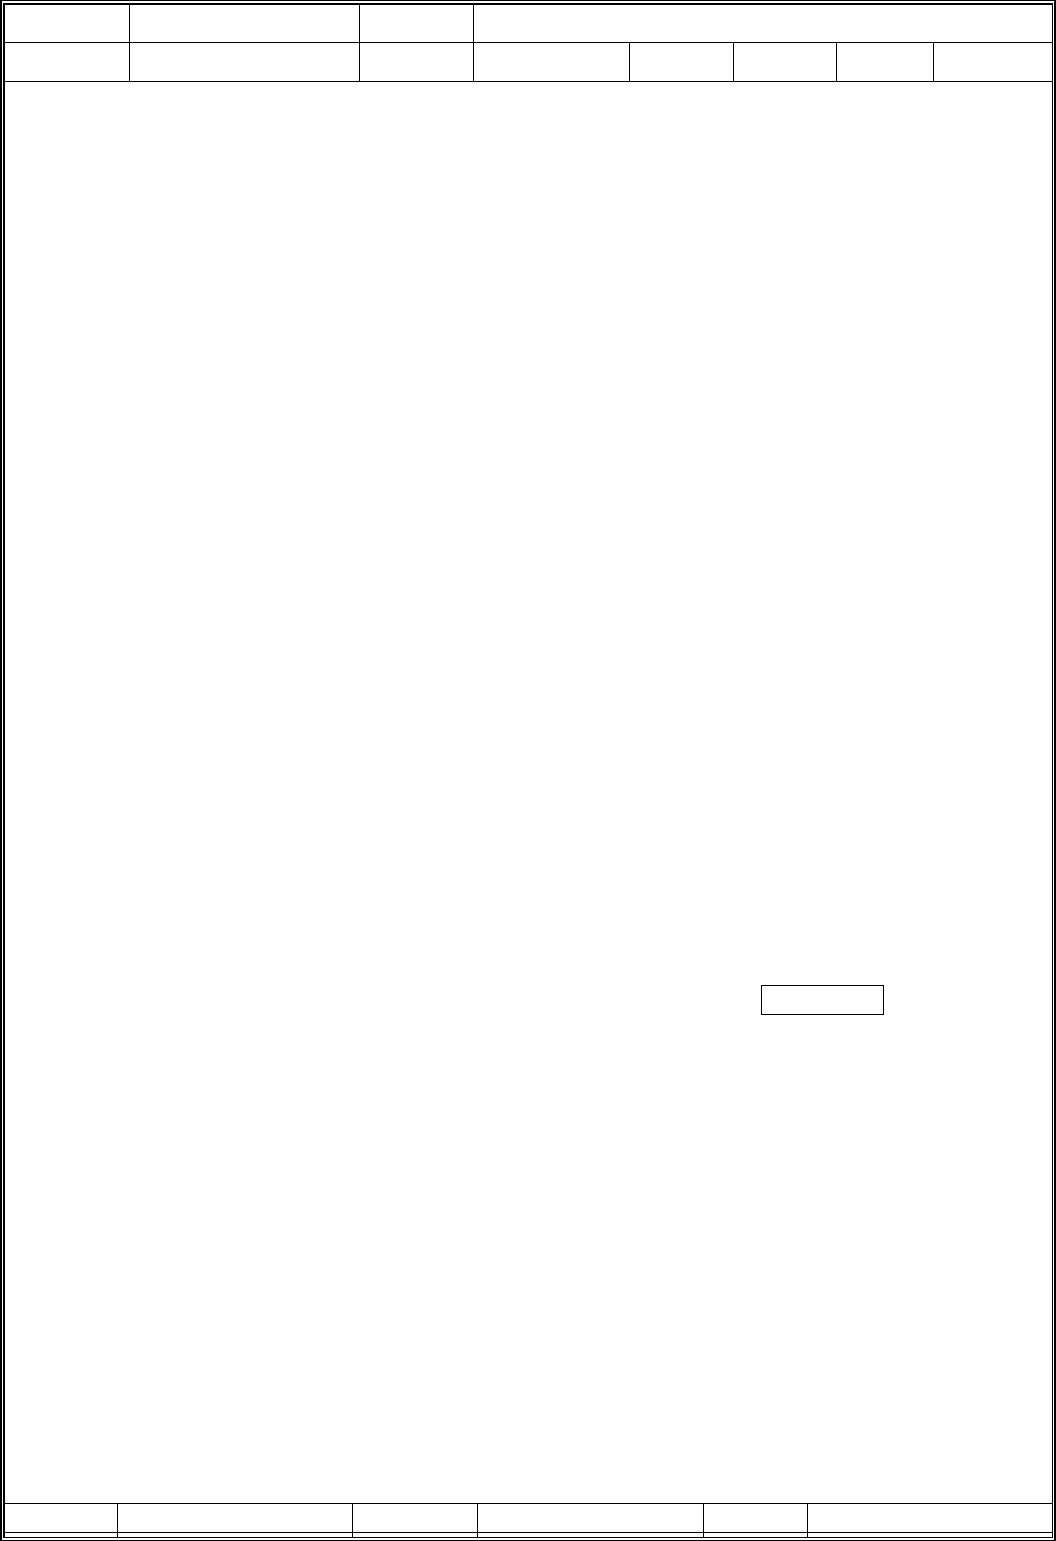
radio wind/sun sensor
remote contro
System Diagram
Electrical connection

NUMBER FILE NAME AT173 function description
Department RND DATE 5/16/2008 PAGE 2/12 VERSION A/0
APPROVED CHECKED DESIGN
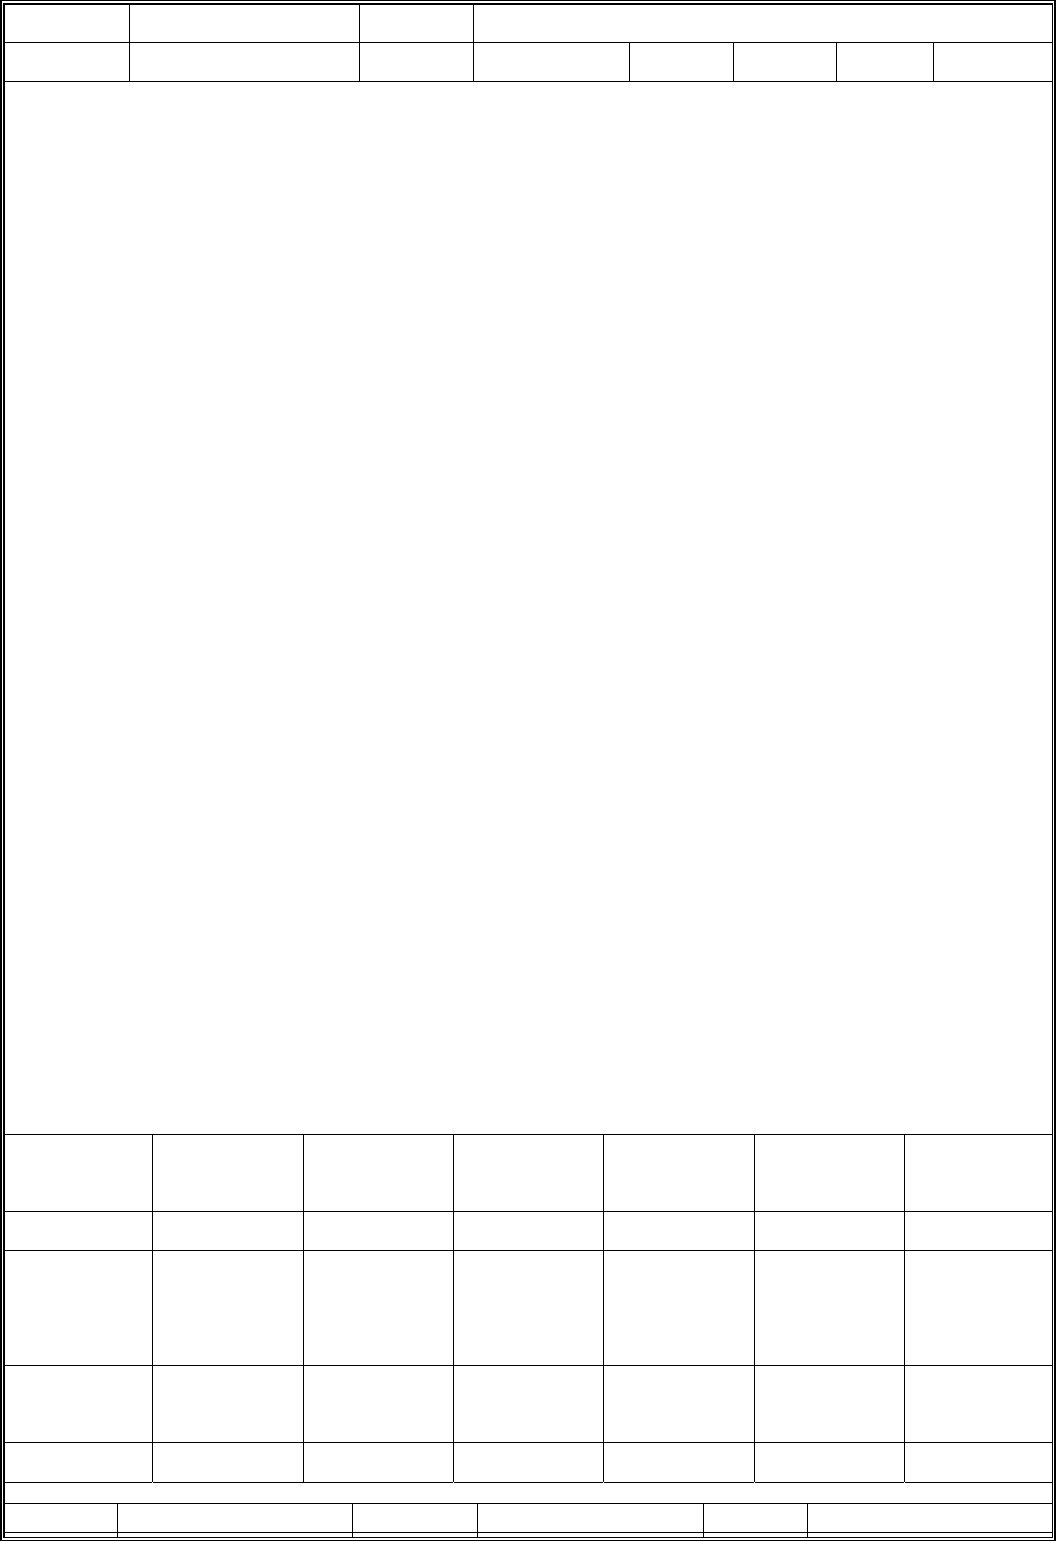
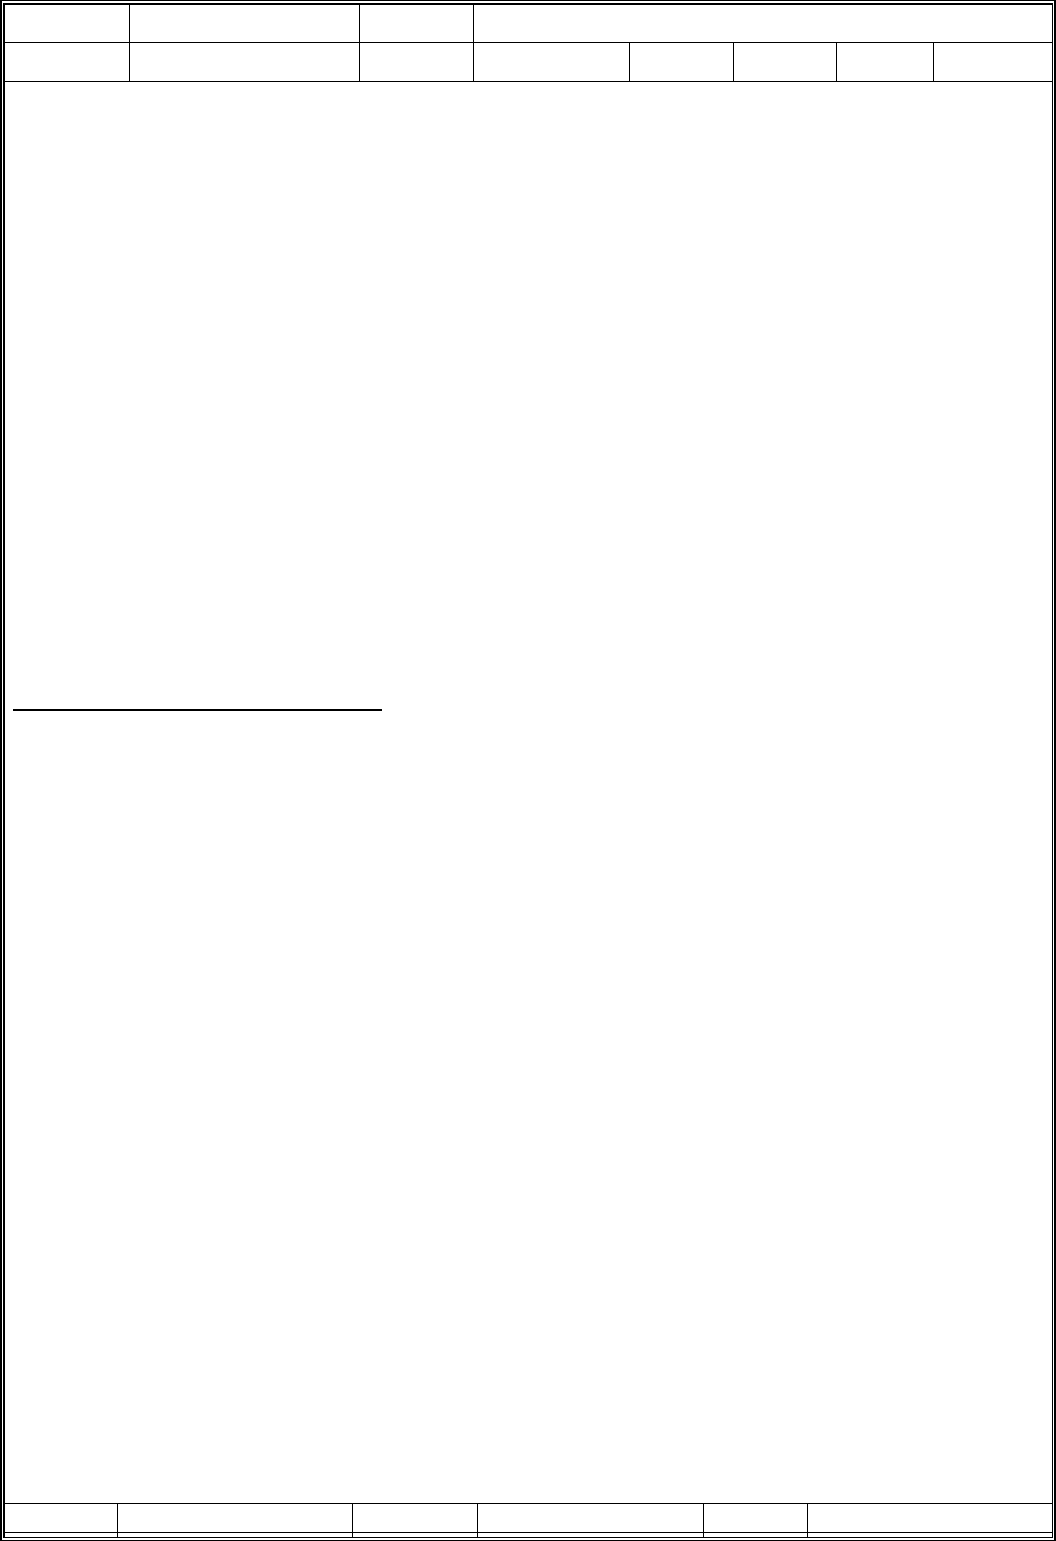
Product Appearance
Launch button
Stop key / button to onfirm
Contraction button
MENU button SENSOR button
NUMBER FILE NAME AT173 function description
Department RND DATE 5/16/2008 PAGE 3/12 VERSION A/0
APPROVED CHECKED DESIGN
1. FEATURES
¾ Radio Frequency range: 868.35MHZ
¾ The remote controller effective distance is above 25M
¾ Power: 3V lithium battery CR2032 X 2 PCS
¾ Low power consumption:
Less then 30μA during sleep mode
current of work < 10mA
¾ crash test:> 2M
¾ Operating ambient temperature: 0-50℃
2. Color style
At present, there are five styles, colors
BLACK C Black
RAL7022 grey
WHITE C white
877 C silver
1505 C orange
3. Brief function
z firing Zheyang Peng contraction / launch / stop movement
z WAY CHANGE FUNCTION
z start learning remote control motor function
z time show / set
z delete motor / sunlight, wind speed sensor by studying the remote control
function
Different models feature list
Multicanal
21 Sensor
Multicanal
21
3 Chanel
Sensor
3 Chanel Monocanal
con P
Monocanal
sin P
Motor channels 21 21 3 3 1 1
Group remote
control
functionality
YES YES YES YES NO NO
Torque to shed
function
YES YES YES YES YES NO

NUMBER FILE NAME AT173 function description
Department RND DATE 5/16/2008 PAGE 4/12 VERSION A/0
APPROVED CHECKED DESIGN
Multicanal
21 Sensor
Multicanal
21
3 Chanel
Sensor
3 Chanel Monocanal
con P
Monocanal
sin P
SUN
FUNCTION
YES NO YES NO NO NO
SUN
parameter
Setting
YES NO YES NO NO NO
WIND
parameter
Setting
YES NO YES NO NO NO
NUMBER FILE NAME AT173 function description
Department RND DATE 5/16/2008 PAGE 5/12 VERSION A/0
APPROVED CHECKED DESIGN
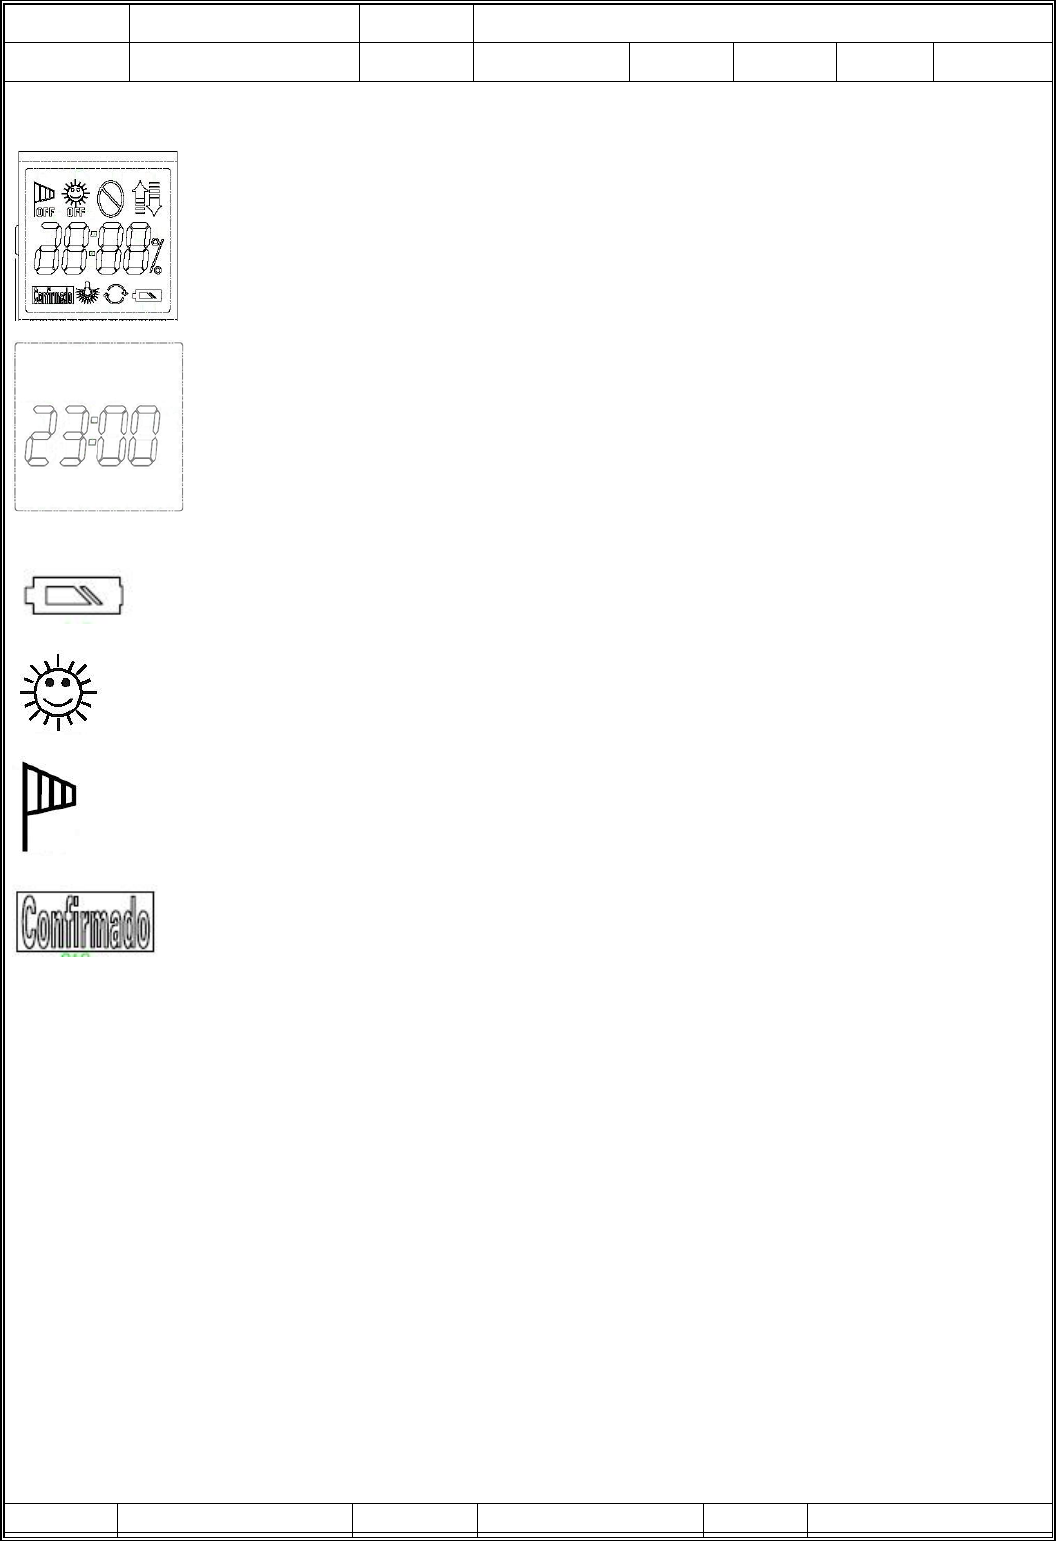
4. LCD Indicator:
Start-up screen
The main screen map of the figure for the time
Low Battery:When the battery voltage is lower than 5.2 V, show that this icon
SUN FUNCTION ENABLE
WIND FUNCTION ENABLE
Set to confirm
P
P
NUMBER FILE NAME AT173 function description
Department RND DATE 5/16/2008 PAGE 6/12 VERSION A/0
APPROVED CHECKED DESIGN
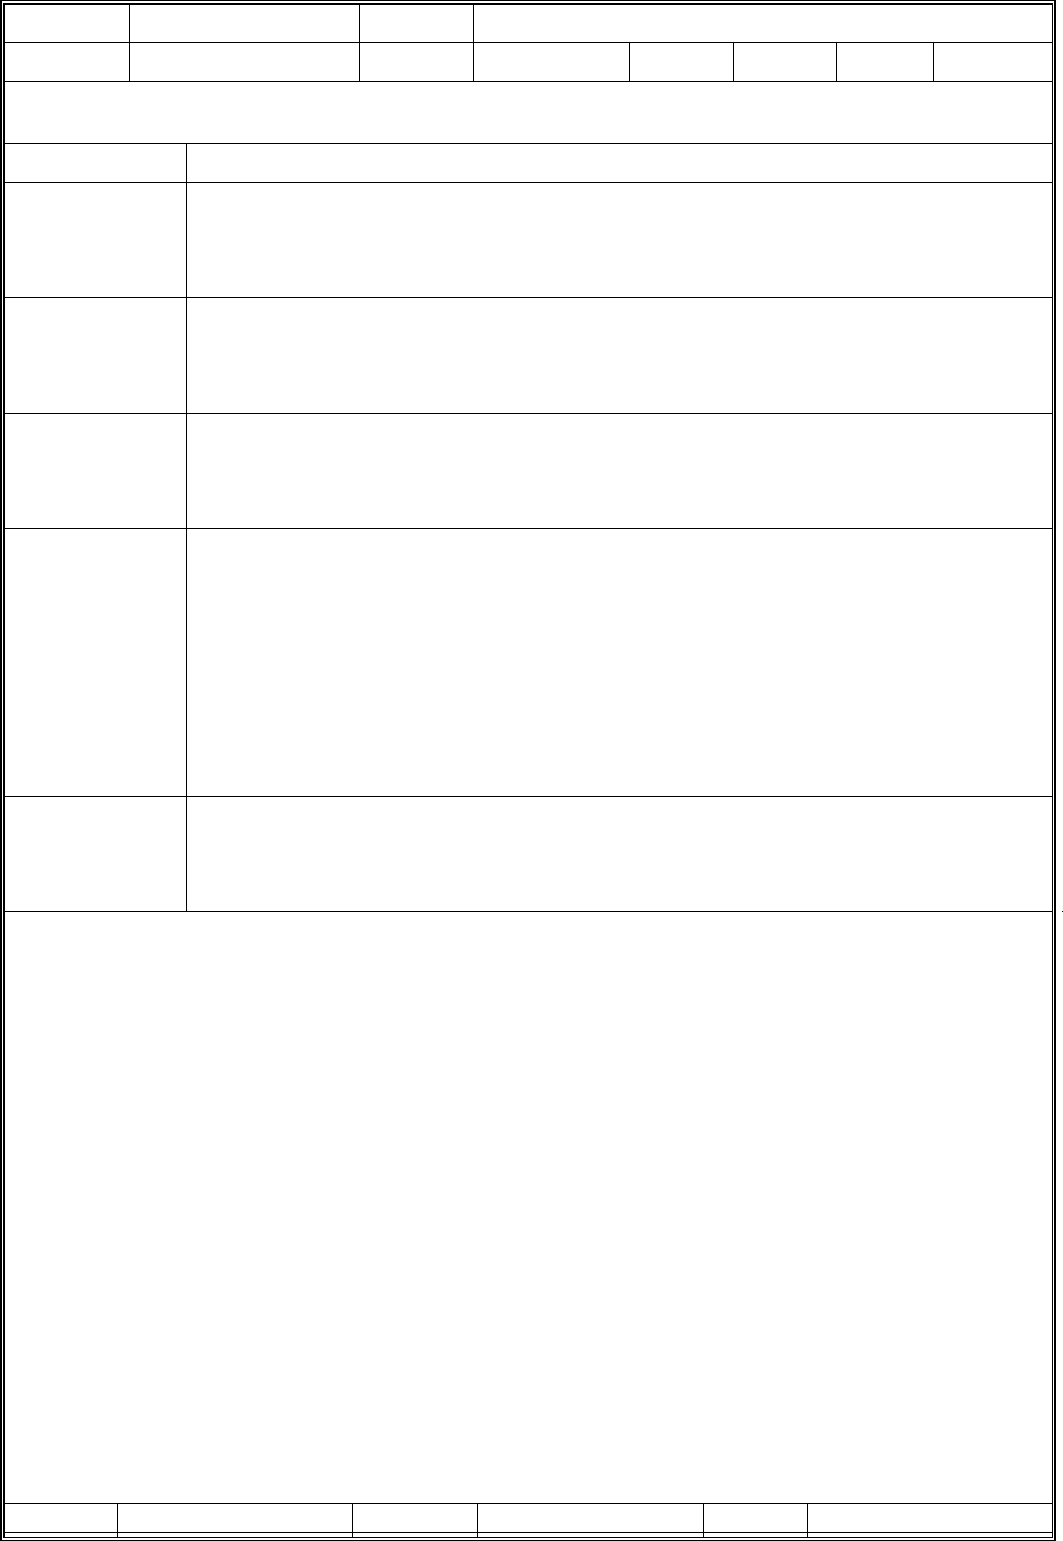
5. Button Description
Button Description
Launch button z work on the main screen, remote control for the awning in
t
roduced
to set itinerary point function
z Operation in the menu screen, for the decreasing value function
Contraction
button
z Work in the main screen, for the remote control to set awning contraction
point function trip
z operation in the menu screen, for the incremental value function
Stop key /
button to
confirm
z Work in the main screen, remote control for the awning stop motor function
z Operation in the menu screen, set for the confirmation function
MENU button Motor CHANNEL set pattern
¾ press the MENU key to decreasing motor CHANNEL
Preferences model works
¾ the main screen under the MENU button seven seconds into the
engineering function can be set pattern
¾ model of the project is set up press the MENU key to the end of
settings, to return to the screen
SENSOR
button
Sensor Function key
into the detection function on / off set
into the sunlight / wind action value set

NUMBER FILE NAME AT173 function description
Department RND DATE 5/16/2008 PAGE 7/12 VERSION A/0
APPROVED CHECKED DESIGN
6. Functional Description
z 6.1 Introduction awning to the set point
The main screen, press the launch button, awning will automatically launch has been set up to
the point of the trip
z 6.2 Contraction awning to set the trip point
The main screen, press the button contraction, awningg will automatically shrink to the
itinerary has been set points
z 6.3 Stop awning introduced / contraction action
Launched in awning / contraction moves, press the OK button to immediately stop awning
action
7. Settings Description
z 7.1 Motor code set
¾ the main screen, press the OK button
¾ LCD display screen 3 seconds motor CHANNEL
¾ press the MENU button at this time can be reduced motor CHANNEL
¾ press the SENSOR FUNCTION button at this time can increase motor CHANNEL
¾ motor CHANNEL model set by the scope of change
¾ Multicanal 21 Sensor / Multicanal 21: 1,2,3….21,CC1,CC2
¾ 3 Chanel Sensor/3 Chanel: 1,2,3,CC1,CC2
¾ Monocanal con P/ Monocanal sin P: 1
¾ set after the completion of waiting for 3 seconds SKIP main screen
In setting the motor in the process of code can also be launched using key / button remote
control motor launch contraction / shrink / stop
z 7.2 Remote learning
Motors and sensors learn the same way, to motor learning in this example to illustrate
¾ clicks on motor learning key seven seconds, the motor will beep beep beep sound and 3
before and after the first rotation, and then beep per second at motor out into the learning
mode
¾ will have to study the remote control, setting up motor number (set described in chapter
set motor #)
¾ on the main screen by pressing the remote control to learn the OK button, the motor will
beep beep beep sound and 3 before and after the first rotation, the study confirmed the
completion
8. Engineering model Description
¾ On the main screen, press the MENU button seven seconds, to be able to enter works
NUMBER FILE NAME AT173 function description
Department RND DATE 5/16/2008 PAGE 8/12 VERSION A/0
APPROVED CHECKED DESIGN
set pattern
¾ Set model of the project, can be set
9 CC(Group remote control)
9 SEn(change way)
9 Carr(GRADUATION OF THE CAREERS)
9 COPY(Copy remote Control)
9 bor(Delete remote control)
9 PrE(Torque to shed) 5 functions
¾ Into the project set mode,press launch button can select function item
z 8.1 CC function setting(Monocanal con P/ Monocanal sin P without this function)
CC function as a group control, as long as the learning remote control when activated CC
feature, available at the same time remote control of multiple motors, the two groups to
provide remote control group (CC1/CC2)
Configured
¾ on the main screen, press the MENU button seven seconds, to be able to enter works set
pattern
¾ press contraction button until lcd show CC
¾ press OK button, enter the setup screen
¾ press the contraction button contraction set CC1
¾ press the launch button choice of settings CC2
¾ choice after the completion of press OK button, enter the setup screen
¾ press the contraction button to select Open CC contraction function, LCD display ON
¾ press the launch button to select the closure CC function, LCD display OFF
¾ choice after the completion of press OK button, LCD display confirmado
¾ confirmado screen in three seconds if it continued to press the button without
automatically SKIP CC menu screen can be set to continue the implementation of functional
¾ set any time in the press menu button, will immediately return to the main
screen
z 8.2 Set change way
¾ into the project set mode, press the contraction button until lcd display SEn
¾ press OK button, enter the setup screen, LCD display S1
¾ press OK button, LCD display confirmado confirm settings, will motor is reversed once,
to confirm set
¾ confirmado screen in three seconds if it continued to press the button without
automatically SKIP CC menu screen can be set to continue the implementation of functional

NUMBER FILE NAME AT173 function description
Department RND DATE 5/16/2008 PAGE 9/12 VERSION A/0
APPROVED CHECKED DESIGN
¾ set any time in the press menu button, will immediately return to the main screen
z 8.3 GRADUATION OF THE CAREERS
The plane trip is to provide learning function, learning after the trip, as long as the main
screen or press the launch button contraction Zheyang Peng will automatically launch /
contraction to a specific point, and learning of the trip will not disappear because of power
It should be noted that special,
1. Itinerary learning at the first full study must be introduced and contraction trip, study and
again after the trip, not limited launch / contraction should study trip
2. Are carried out to the change way, For re-learning programme, we must launch and complete
study contraction trip, can not unilaterally change the itinerary or contraction launched
3. Itinerary learning set as follows
¾ into the project set mode, press the contraction button until lcd display Carr
¾ press OK button, enter the setup screen, LCD display beating Sub <-> BaJ
¾ press the button to enter the contraction contraction trip set LCD display Sub, press the
launch button to enter the launch itinerary set LCD display BaJ
After the trip into the setup screen (LCD display Sub or BaJ)
¾ short press contraction button the engine will move by impulses
¾ continue press contraction button the engine will move until key
REALIZED
¾ short press launch button the engine will move by impulse
¾ continue press contraction button the engine will move until key
REALIZED
¾ Finishes fitting the awning, to confirm it touches OK, you will hear a few Bips
z 8.4 copy remote control
¾ To activate this feature, there must be the hands of the first motor learning remote
control
¾ the following steps necessary for the implementation of the original remote control,
otherwise they will be no role
¾ into the project set mode, press the contraction button until lcd display copy
¾ press OK button to enter the setup screen, LCD display motor #
At this point motor will beep beep beep sound and 3 before and after the first rotation, and
then beep per second at motor out into the learning mode, if no action that motor
9 this remote control is not only the first time the motor learning remote control
9 this is only a remote control motor learning of the first remote control, but the
numbers are not set by the motor when the first study of the code

NUMBER FILE NAME AT173 function description
Department RND DATE 5/16/2008 PAGE 10/12 VERSION A/0
APPROVED CHECKED DESIGN
¾ prepared to another as long as the copy of the remote control, motor learning from the
former press OK button, this motor will beep beep beep sound and 3 before and after the
first rotation, the study confirmed the completion
The use of different motor code, learning with a motor way
¾ COPY function in the press OK button to enter the setting, LCD display motor #
¾ use MENU button and SENSOR Function key motor can choose a different number,
selected in the motor out of learning mode before the press OK button, LCD display screen
confirmado, this motor will beep beep beep sound and 3 before and after the first rotation,
the study confirmed the completion
¾ confirmado screen in three seconds if it continued to press the button
without automatically SKIP COPY menu screen can be set to continue the
implementation of functional
¾ set any time in the press menu button, will immediately return to the main
screen
z 8.5 Delete remote control
¾ To activate this feature, there must be the hands of the first motor learning remote
control
¾ the following steps necessary for the implementation of the original remote control,
otherwise they will be no role
¾ into the project set mode, press the contraction button until lcd display bor
¾ press OK button, enter the model set, LCD display ndo
¾ press the button contraction in addition to the option to delete the first
motor learning remote control, remote control functions of the remaining (LCD
display ndo)
¾ press the button contraction in addition to the option to delete the first motor learning
remote control, remote control functions of the remaining (LCD display ndo)
¾ To delete the selected types, press the button to confirm, LCD display confirmado
Choose to remove remote control motors, motor will be confirmed after the beep beep beep
sound and 3 before and after the first rotation, to confirm the deletion completed
Choose to remove sensor remote control, confirmed after the motor will beep and out before
and after the first rotation, the sensor will beep out to confirm the deletion completed
z 8.6 Torque to set up tent
¾ into the project set mode, press the contraction button until lcd display PrE
¾ ress OK button, enter the model set, LCD display ON or OFF (in accordance with prior

NUMBER FILE NAME AT173 function description
Department RND DATE 5/16/2008 PAGE 11/12 VERSION A/0
APPROVED CHECKED DESIGN
to setting may be)
¾ use of contraction key to select start awning torque to shed function (LCD display ON)
¾ introduced key to select the closure of torque to awning shelf features (LCD display
OFF)
¾ selected features, press the button to confirm, LCD display confirmado motor will beep
beep beep sound and 3 before and after the first rotation, set to confirm the completion
¾ confirmado screen in three seconds if it continued to press the button
without automatically SKIP COPY menu screen can be set to continue the
implementation of functional
¾ set any time in the press menu button, will immediately return to the main
draw
9. set time
¾ on the main screen and press the MENU button SENSOR Function key to be able to
enter set-up options
¾ press the option key set contraction, "hour"
¾ press the launch button choice of settings, "minute"
¾ selected features, press the button to confirm, using contraction and the introduction of
key button to select the desired numerical
¾ numerical selected, press the button to confirm, LCD display confirmado
¾ confirmado screen in three seconds if it continued to press the button without
automatically SKIP time settings menu screen can be set to continue the implementation of
functional
¾ set any time in the press menu button, will immediately return to the main
draw
10. Setting sun / wind parameters
z 10.1 Sunshine detection start on / off set
¾ on the main screen short by SENSOR Function key to be able to enter the sun detection
start on / off the set-up options, LCD display SET
¾ press OK button, enter the setup screen, LCD display ON or OFF
¾ press the option key contraction start sunshine detection, LCD display
¾ press the launch button to close the option of sunshine detection, LCD display OFF
¾ selected features, press the button to confirm, LCD display confirmado
¾ confirmado screen in three seconds if it continued to press the button
without automatically SKIP time settings menu screen can be set to continue the
implementation of functional
NUMBER FILE NAME AT173 function description
Department RND DATE 5/16/2008 PAGE 12/12 VERSION A/0
APPROVED CHECKED DESIGN
z 10.2 Sun / wind speed function parameters set
¾ on the main screen under the SENSOR Function key seven seconds to be able to enter
the sun / wind speed function parameters set menu, LCD display features icon and the sun
parameters
¾ on the main screen under the SENSOR Function key seven seconds to be able to enter
the sun / press the launch button keys or contraction may choose to switch the sun /
wind speed function parameters set menu, LCD display function of the sun or wind speed
function icon icon
¾ selected features, press the Enter into the parameters set the screen
¾ use of contraction bond and the introduction of key parameters set for
¾ setting parameters after the completion of press OK button, LCD display confirmado
¾ confirmado screen in three seconds if it continued to press the button
without automatically SKIP sun / wind speed function parameters set menu
screen can be set to continue the implementation of functional
FCC Compliance Statement:
This device complies with Port 15 of the FCC rules. Operation is subject to the
following two conditions: (1) This device may not cause harmful interference, and
(2) This device must accept any interference received, including interference that
may cause undesired operation.
that changes or modifications not expressly approved by the party responsible for
compliance could void the user's authority to operate the equipment.