First Computer MPC13A Notebook Computer with DSSS Data Transceiver User Manual PROPRIETARY NOTICE AND LIABILITY DISCLAIMER
First International Computer Inc Notebook Computer with DSSS Data Transceiver PROPRIETARY NOTICE AND LIABILITY DISCLAIMER
Contents
- 1. User Manual 1of 2
- 2. User Manual 2 of 2
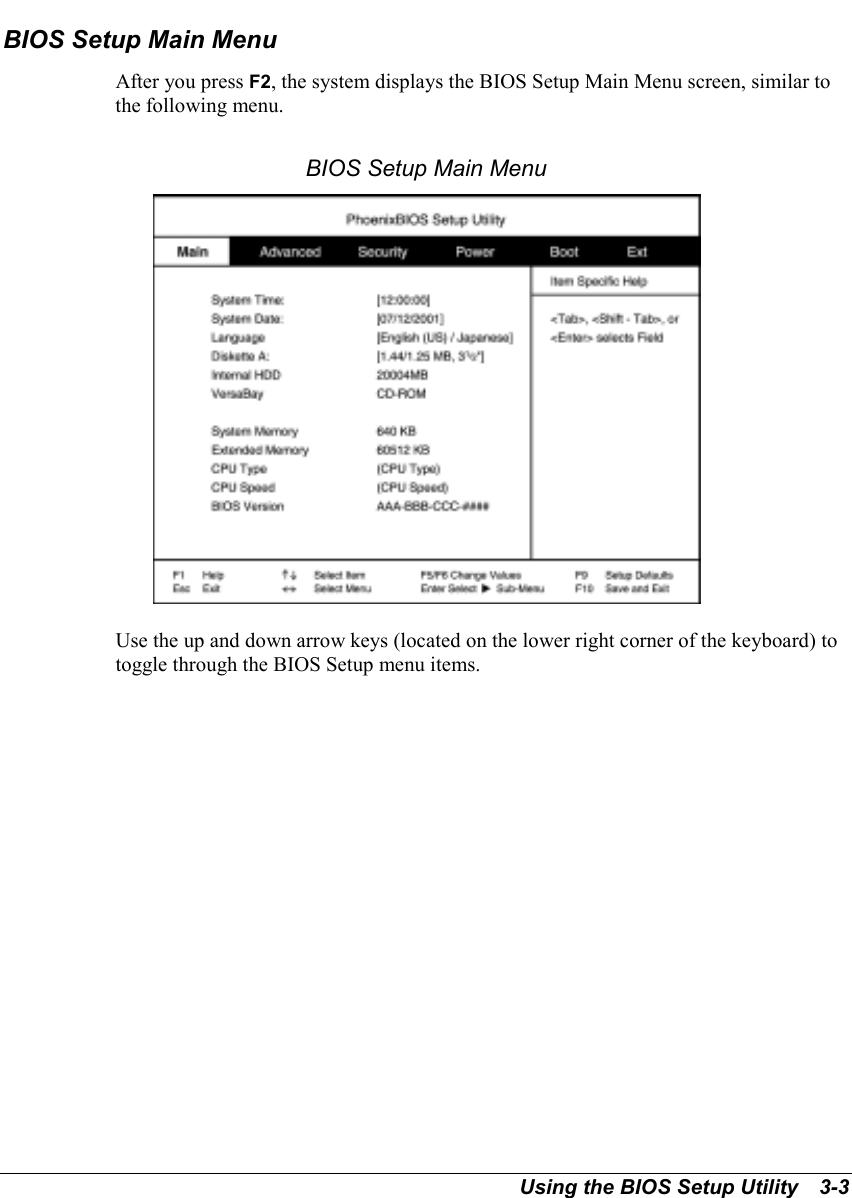
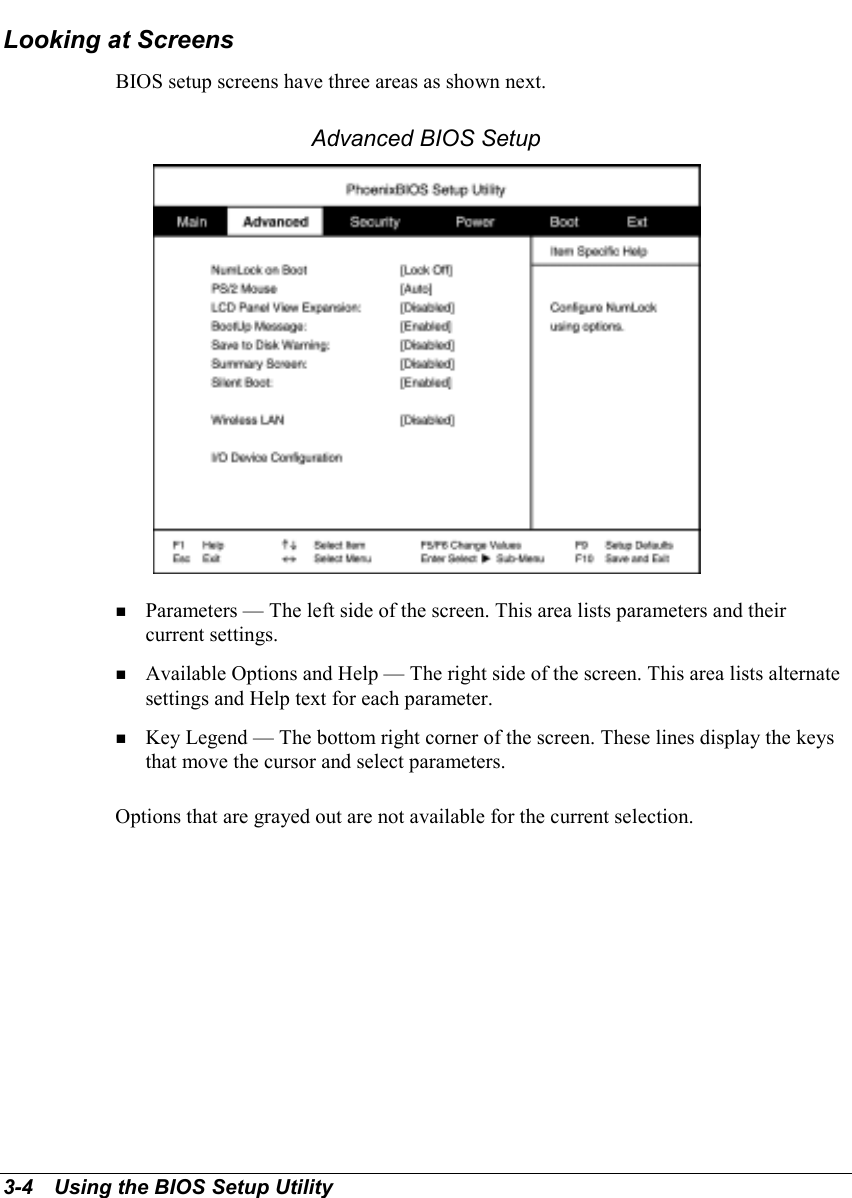
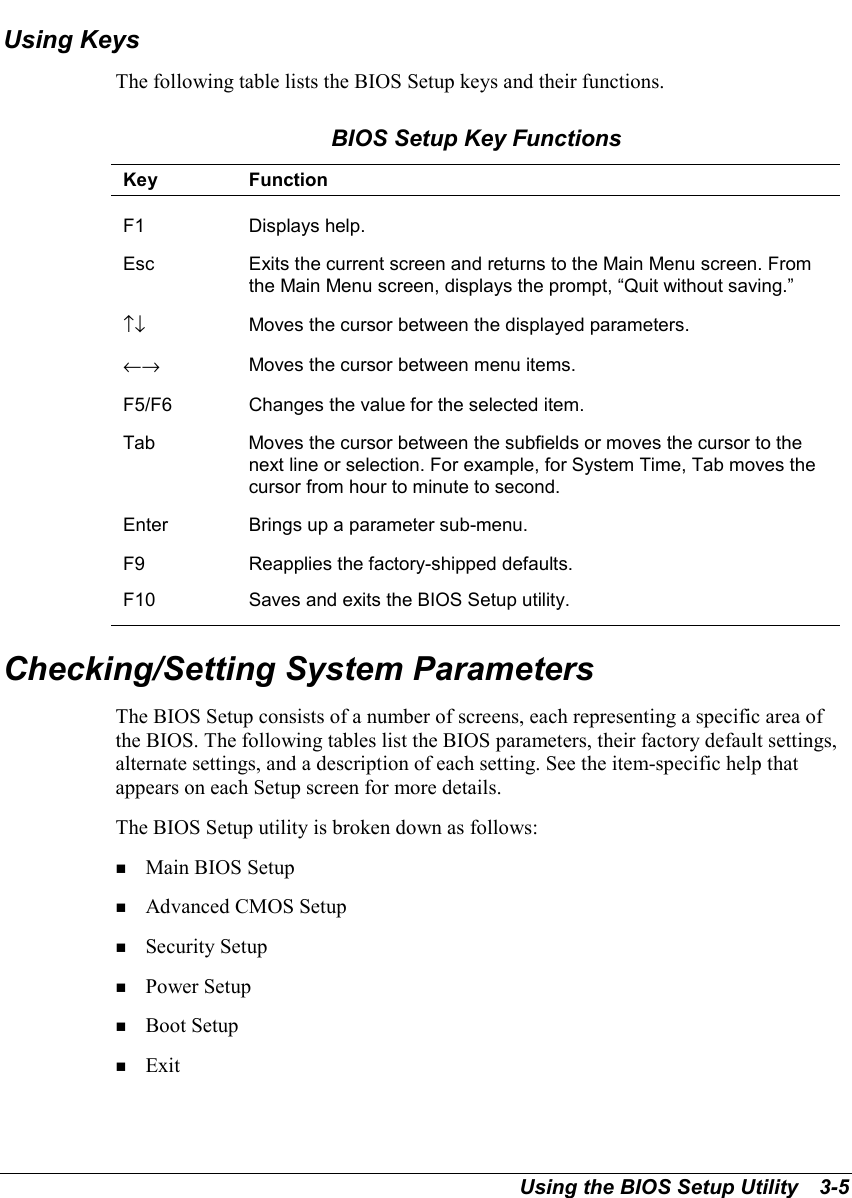
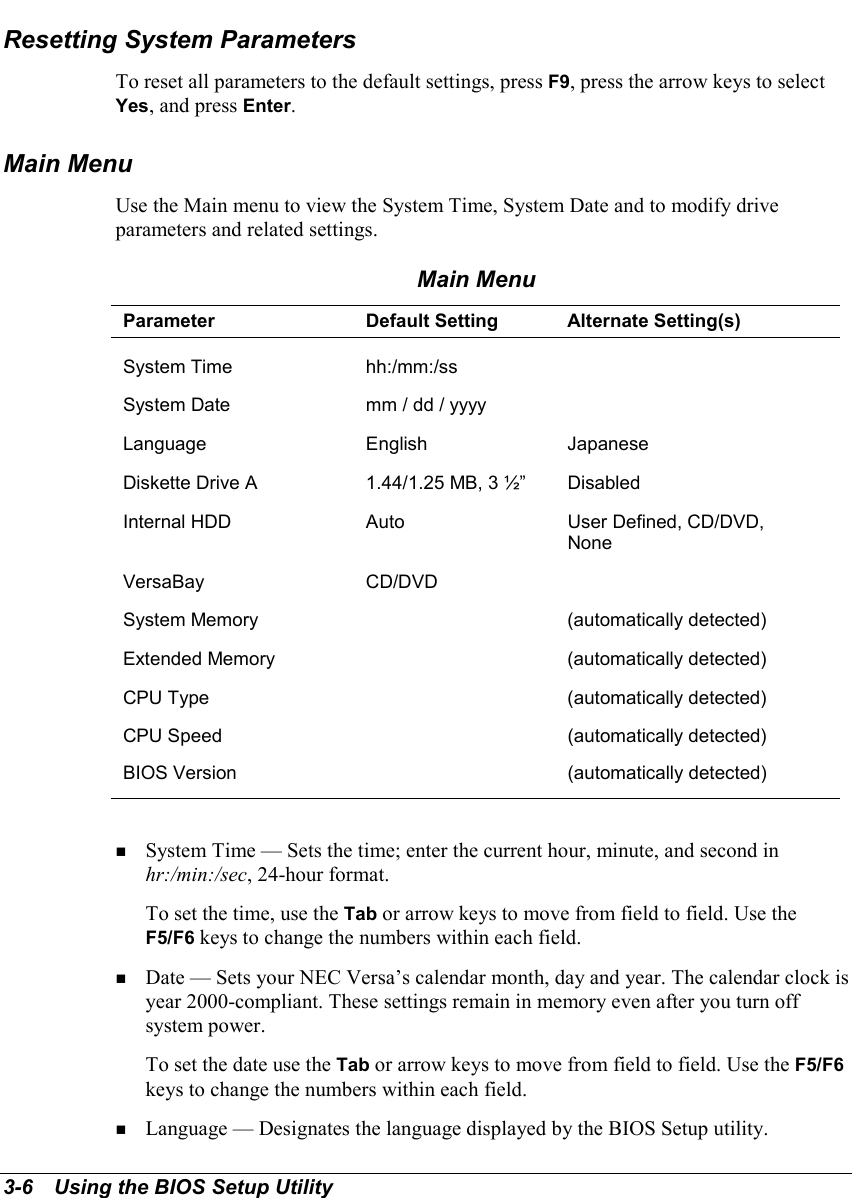
User Manual 1of 2
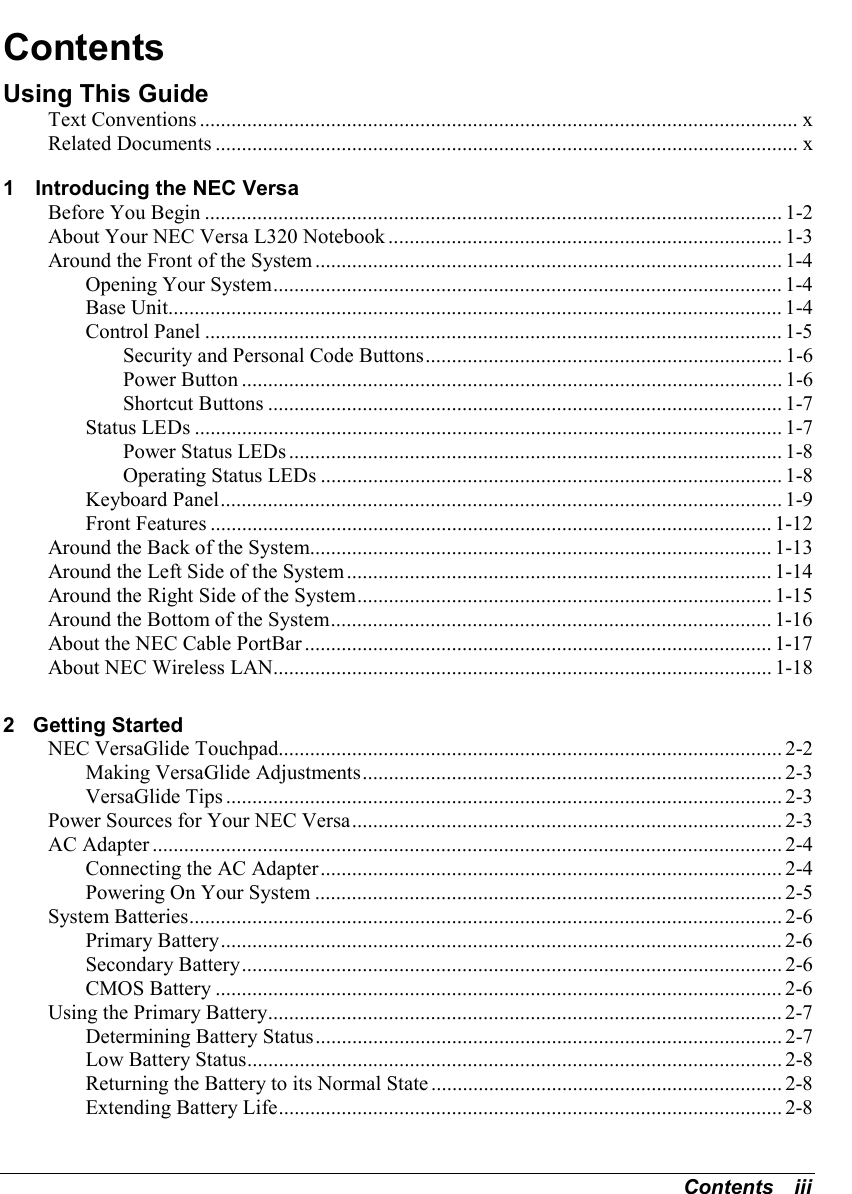
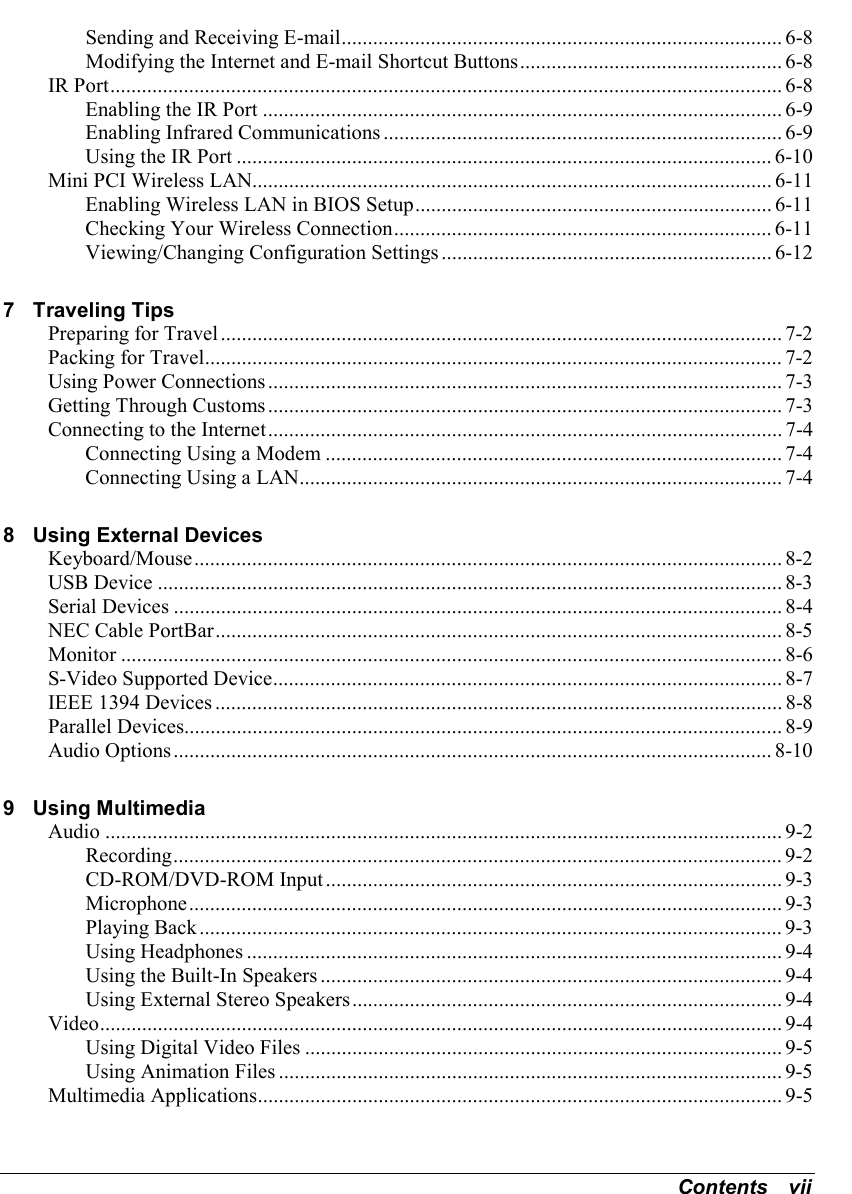
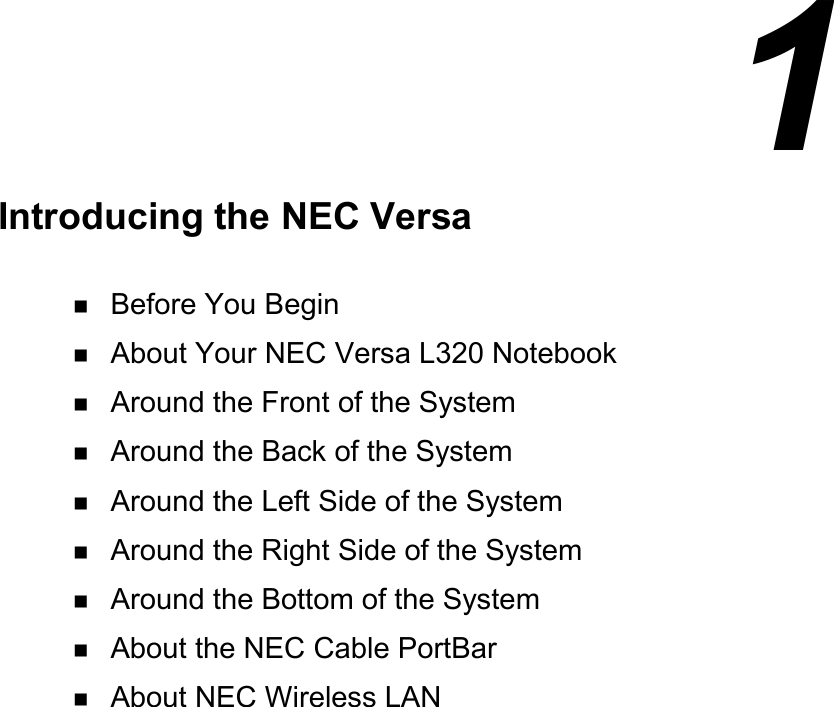


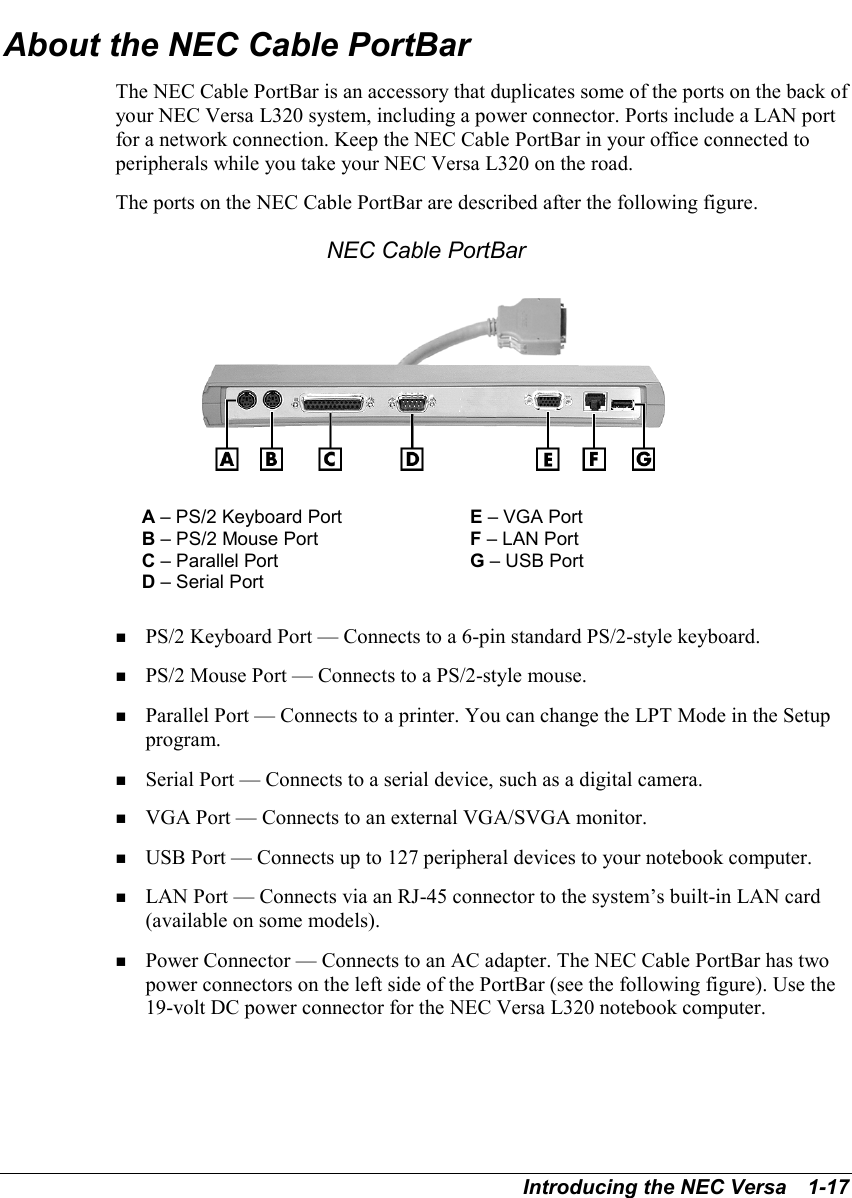

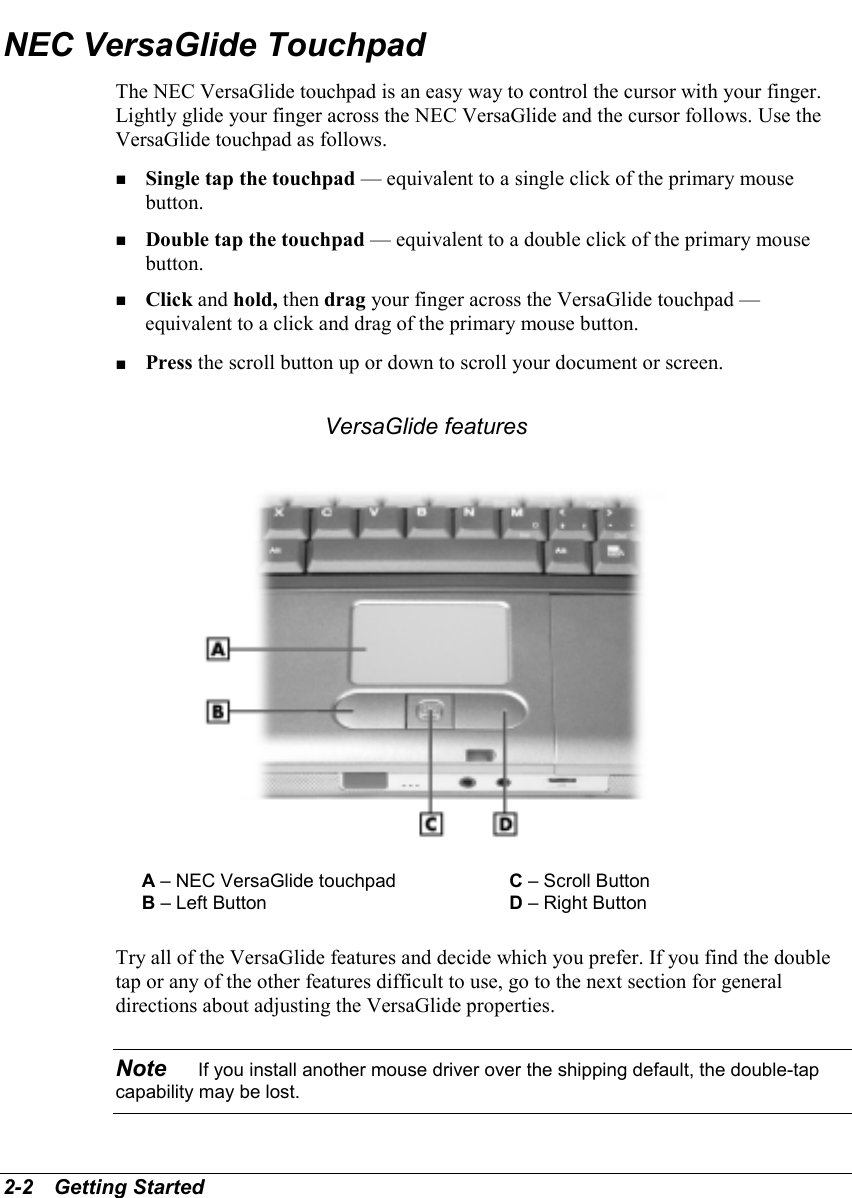

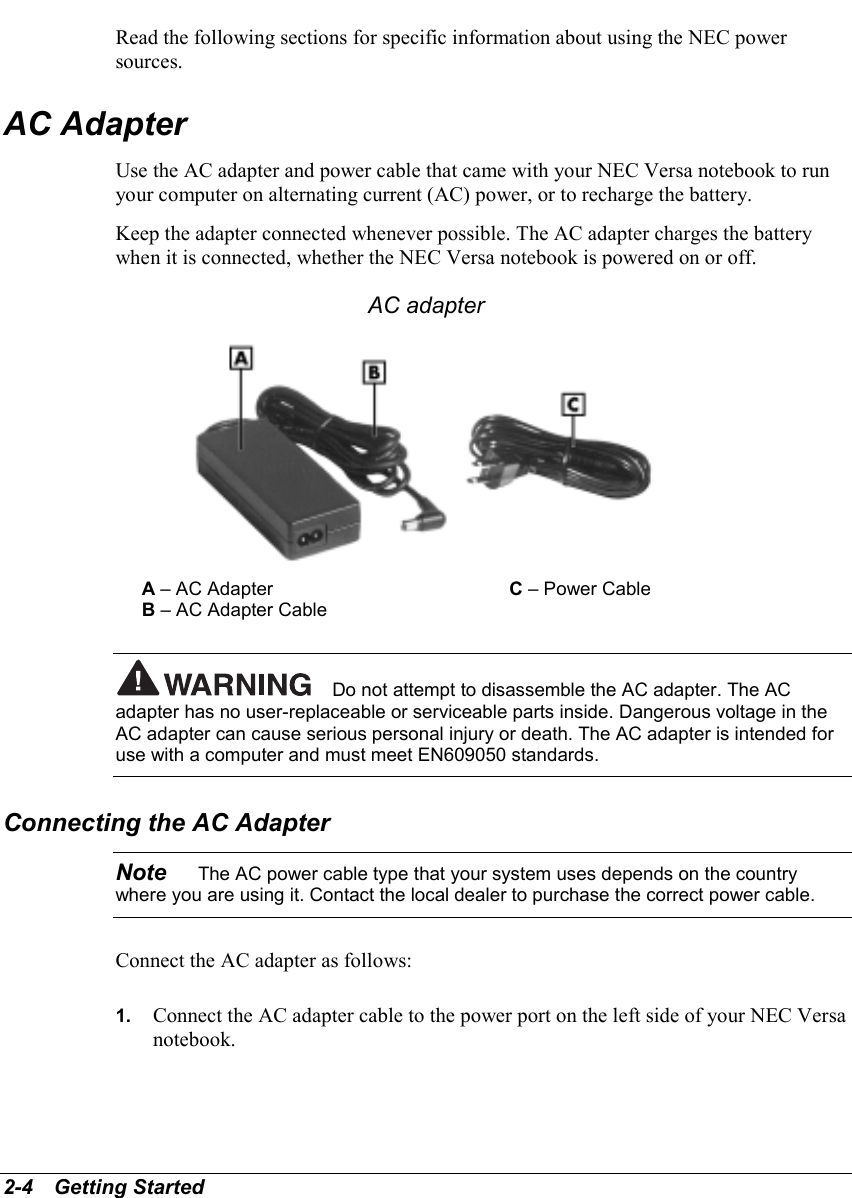
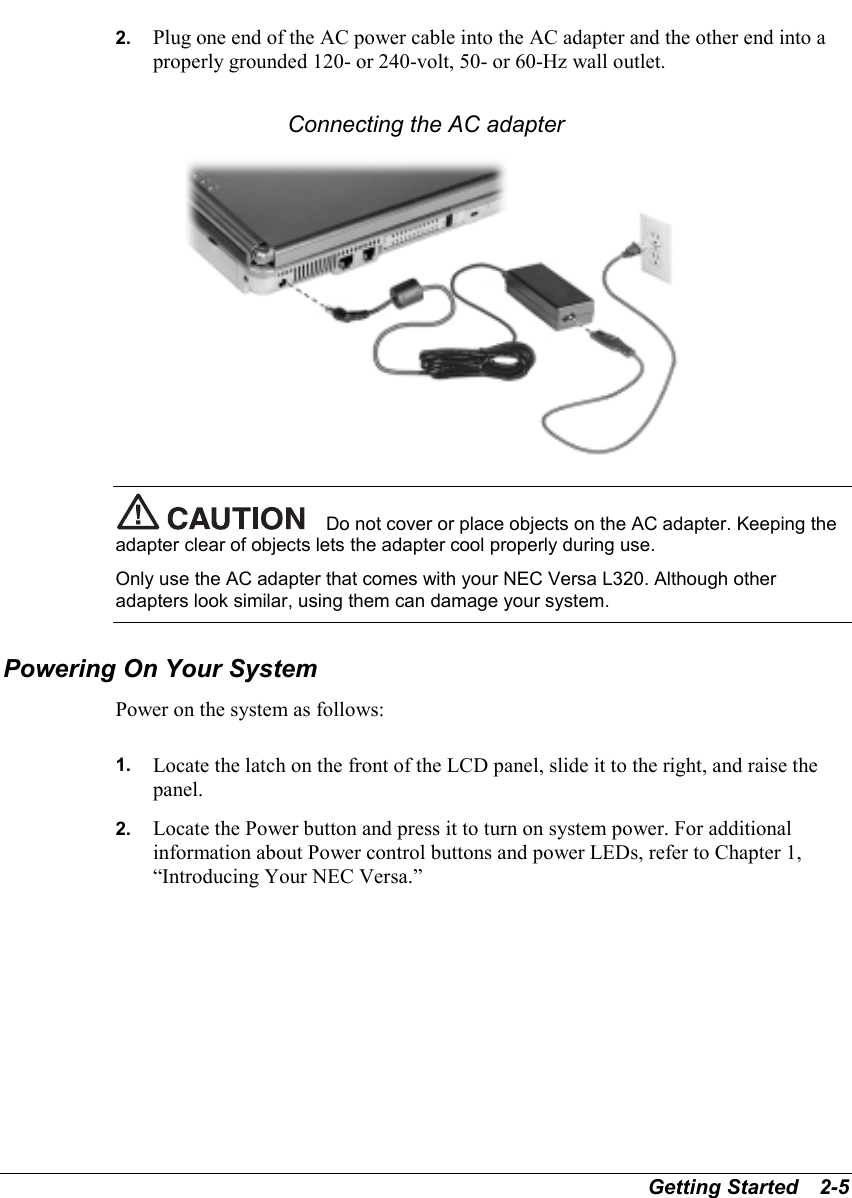
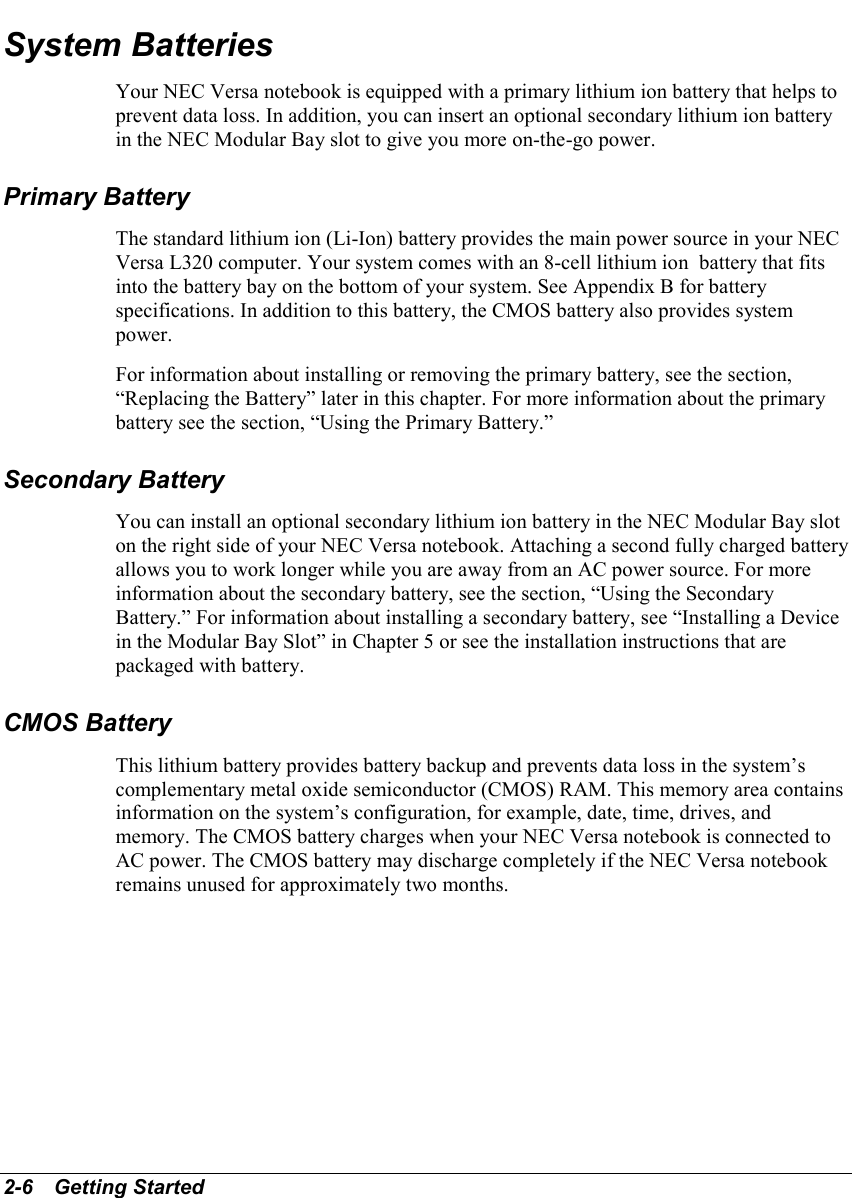

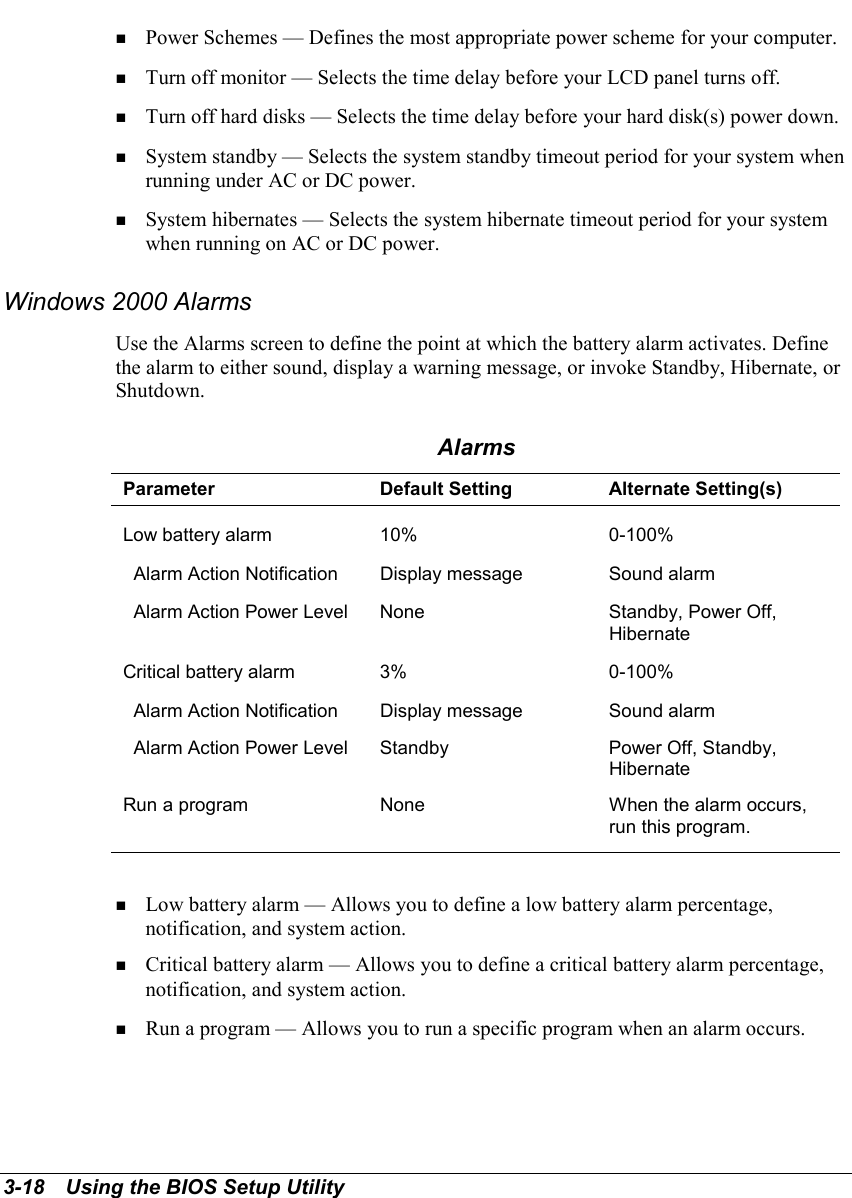
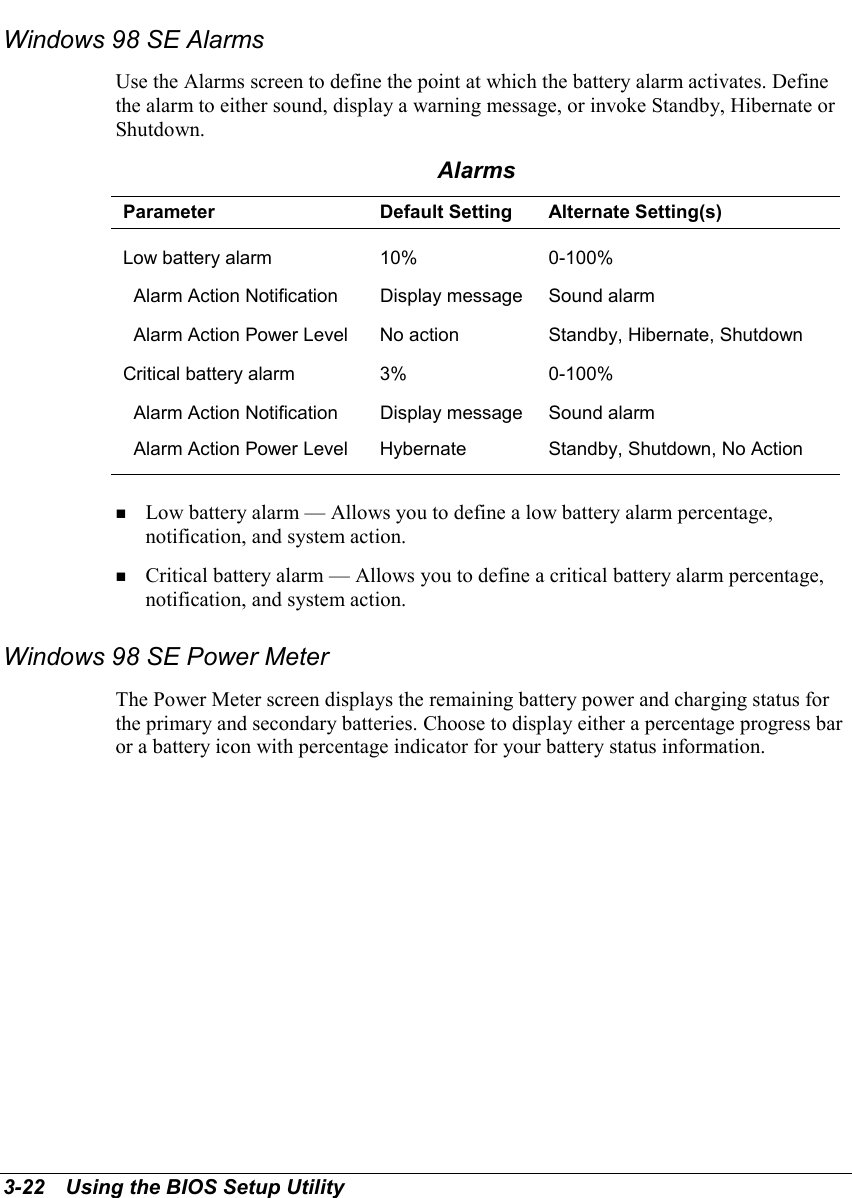
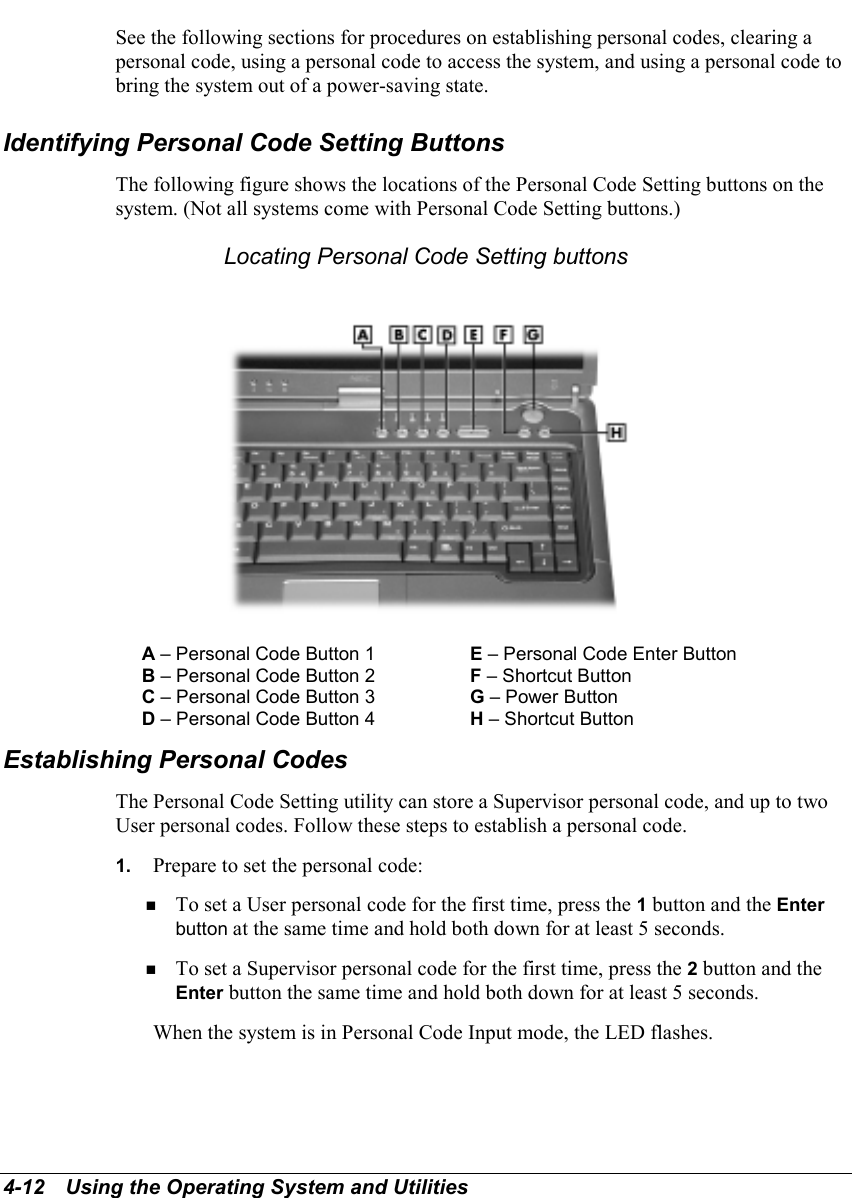
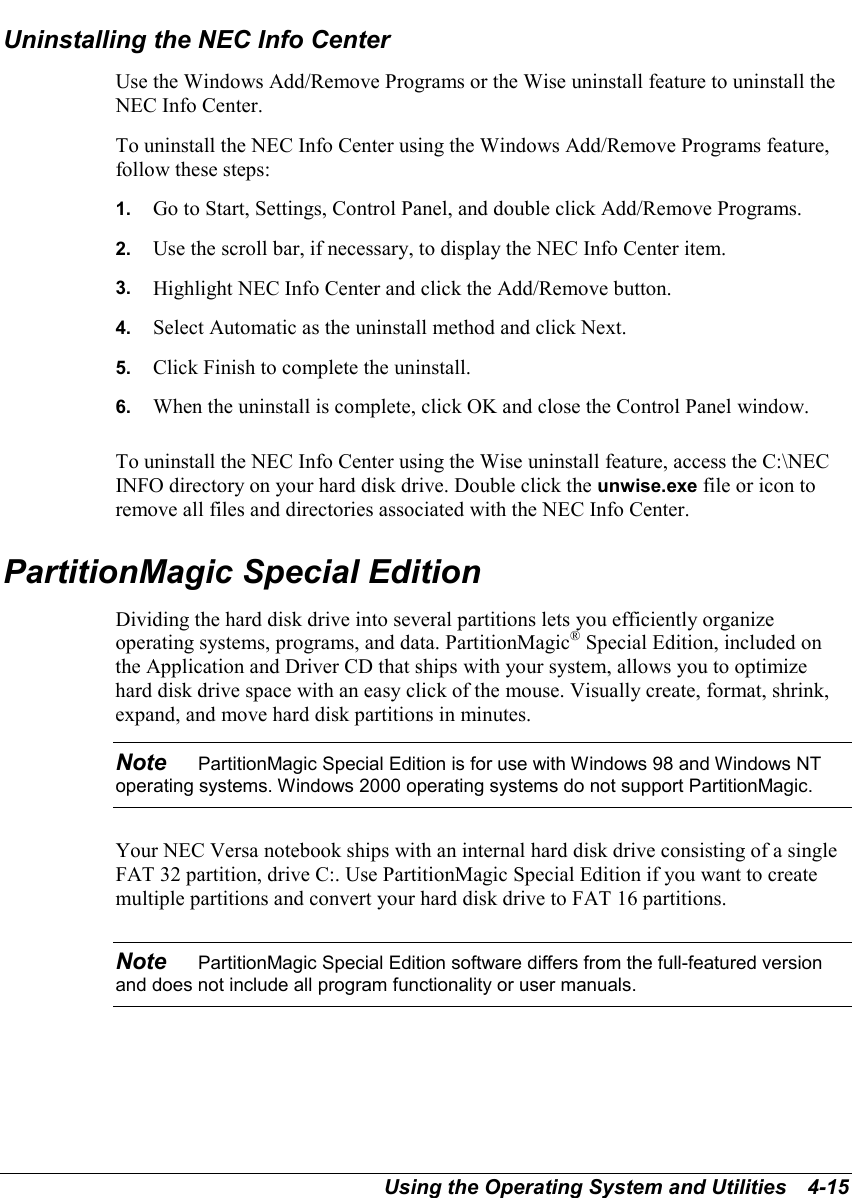
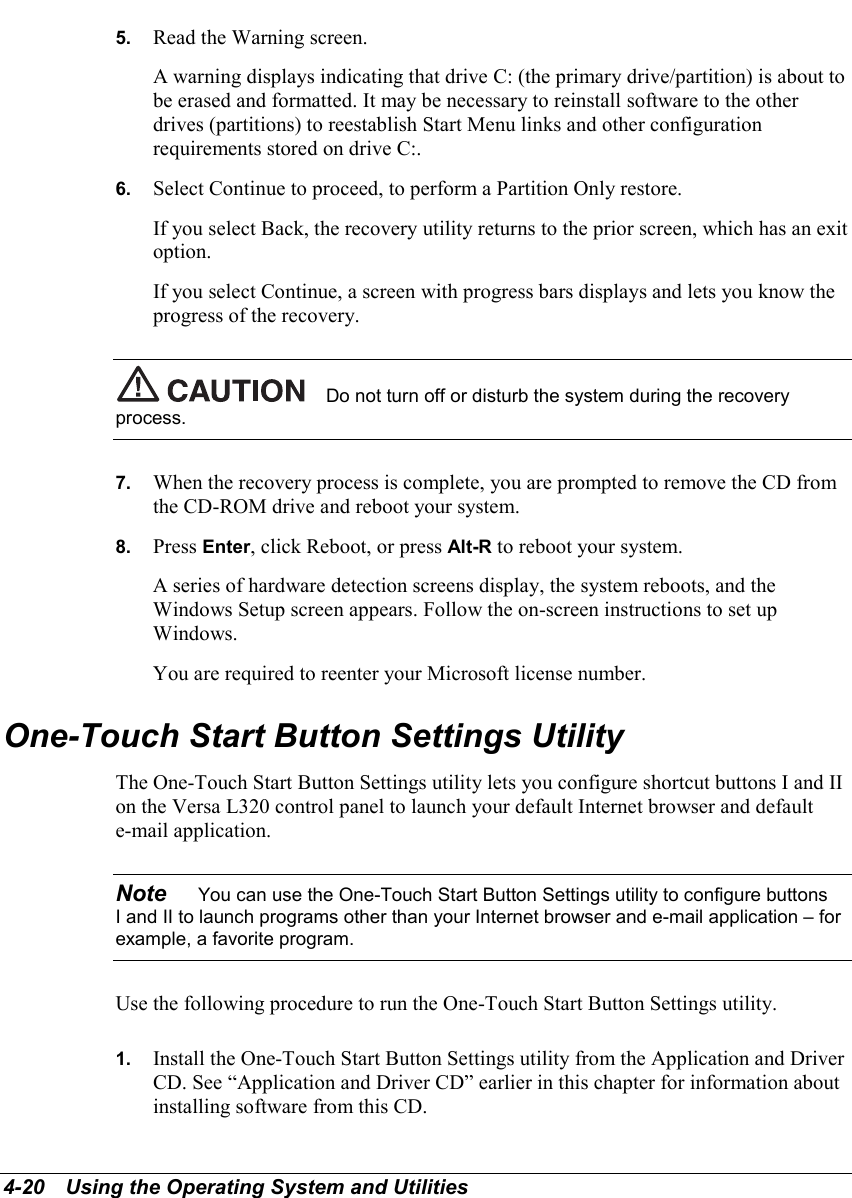
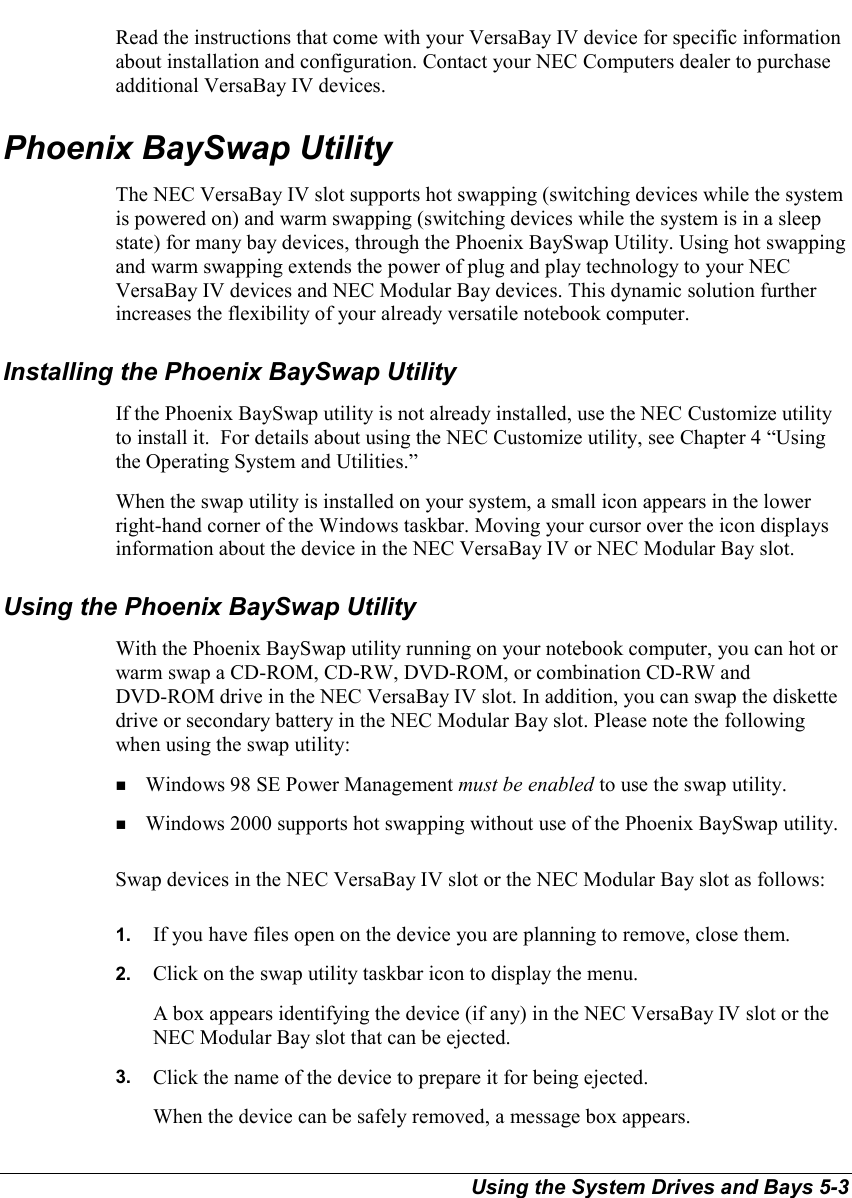
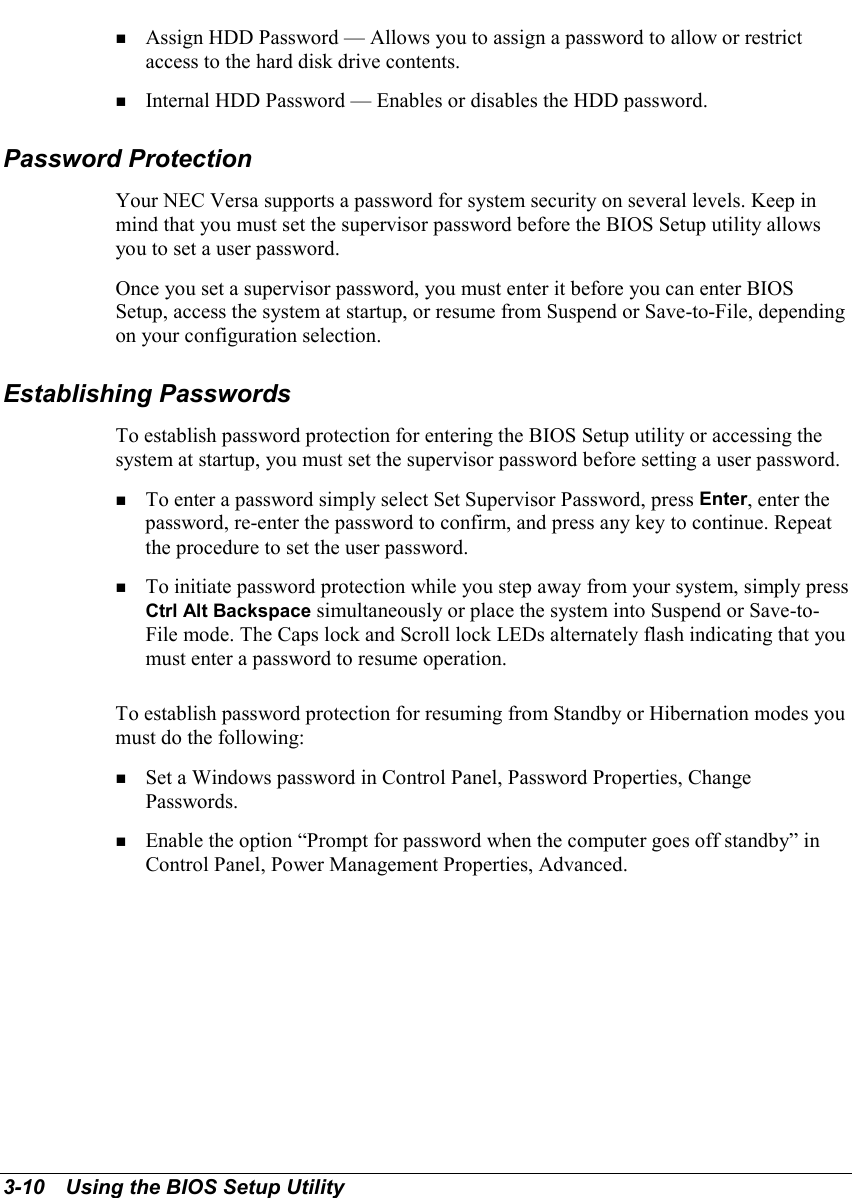
![Using the BIOS Setup Utility 3-7! Diskette Drive — Designates the drive type for your diskette drive.! Internal Drives — Assigns devices to the internal drives in your system.! VersaBay — Assigns the device to the VersaBay drive in your system.! System Memory / Extended Memory — Displays the amount of system memoryand extended memory currently installed in your system.! CPU Type, CPU Speed — Displays the type and speed of the installed processor.! BIOS version — Displays the version number of the current BIOS Setup utility.Advanced MenuUse the Advanced menu to set the following functions.Advanced MenuParameter Default Setting Alternate Setting(s)NumLock on Boot LockOff LockOnPS/2 Mouse Auto Both, DisabledLCD Panel View Expansion Enabled DisabledBootUp Message Enabled DisabledSave to Disk Warning Disabled EnabledSummary Screen Disabled EnabledSilent Boot Enabled Black, DisabledWireless Device Disabled EnabledI/O Device Configuration [Enter]! NumLock on Boot — Specifies whether NumLock is enabled when the systemboots.! PS/2 Mouse — Auto allows the PS/2 mouse to be active if it is detected. Bothallows the NEC VersaGlide touchpad and an external mouse to be active at thesame time. Disabled turns off the internal mouse and prevents an external mousefrom being active. (When set to Disabled, IRQ12 is freed up.)! LCD Panel View Expansion — Specifies whether the panel view is reduced/off orexpanded/on.](https://usermanual.wiki/First-Computer/MPC13A.User-Manual-1of-2/User-Guide-170804-Page-50.png)

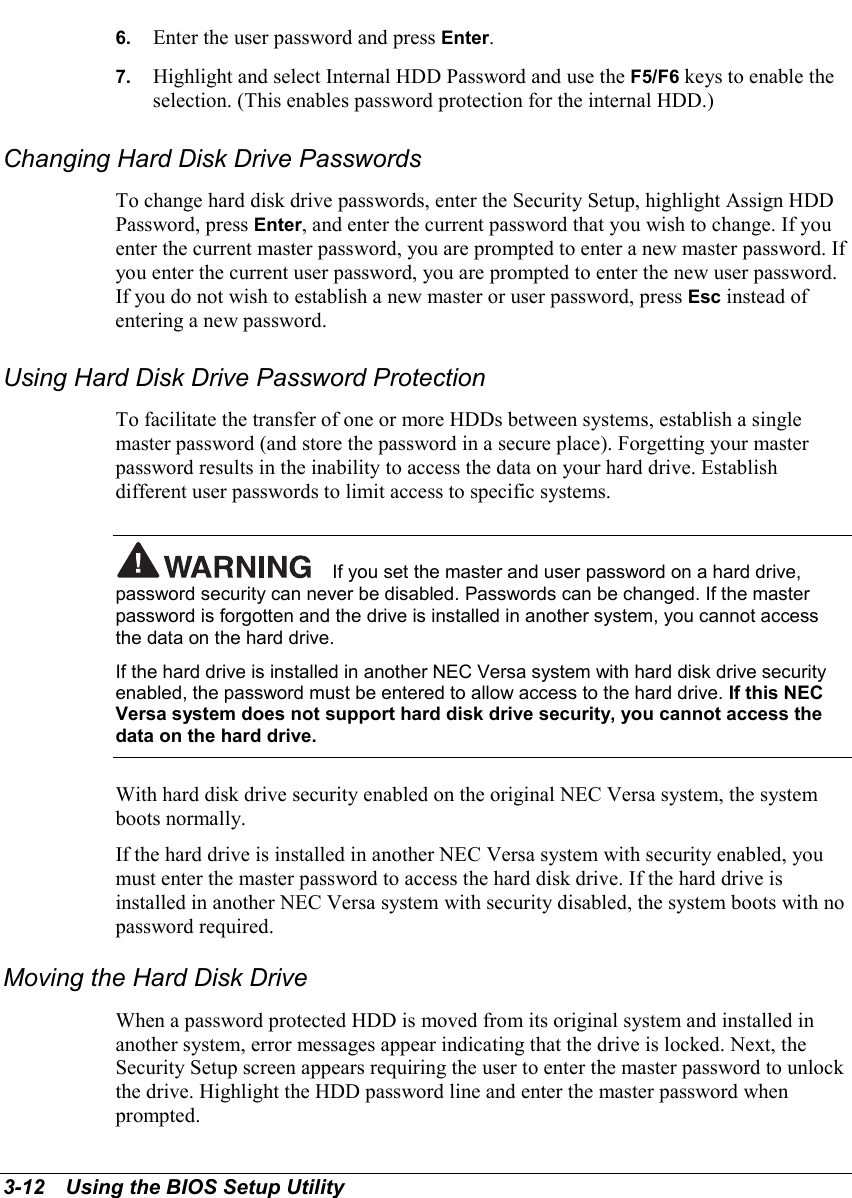
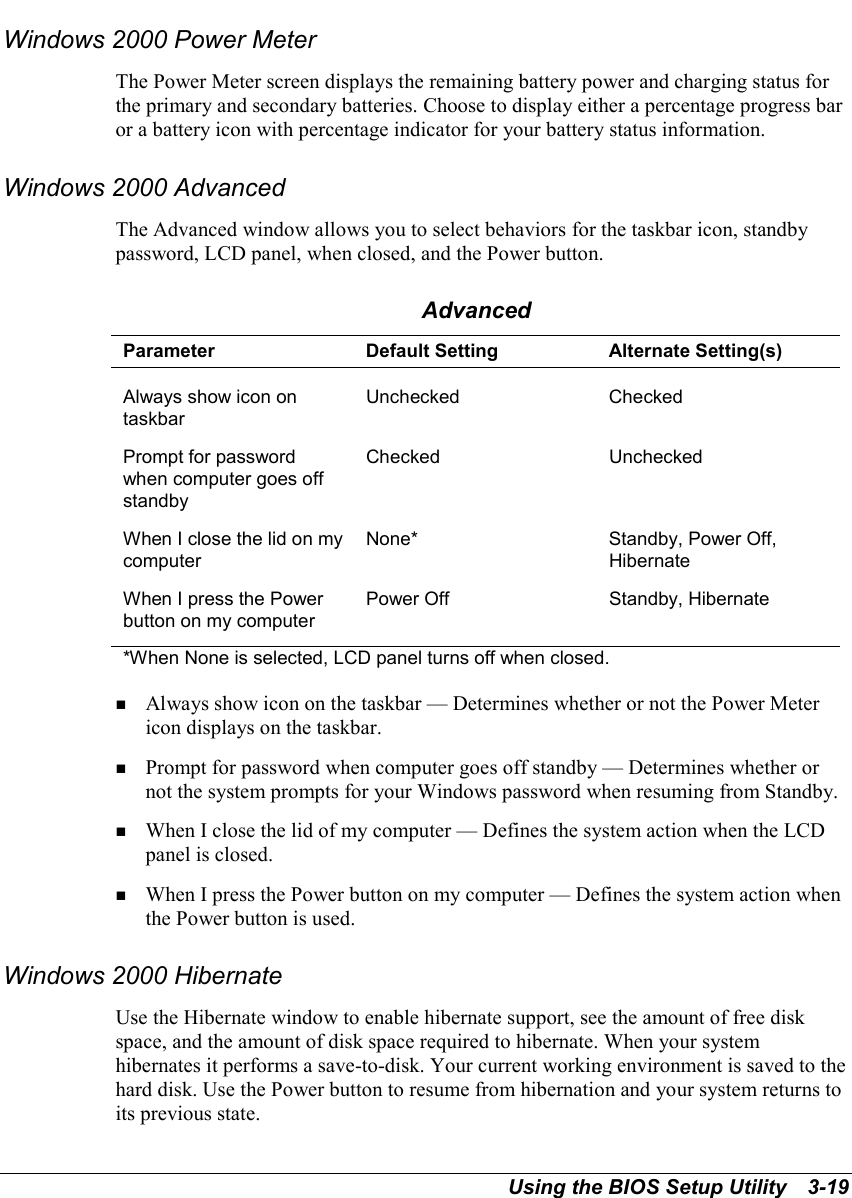
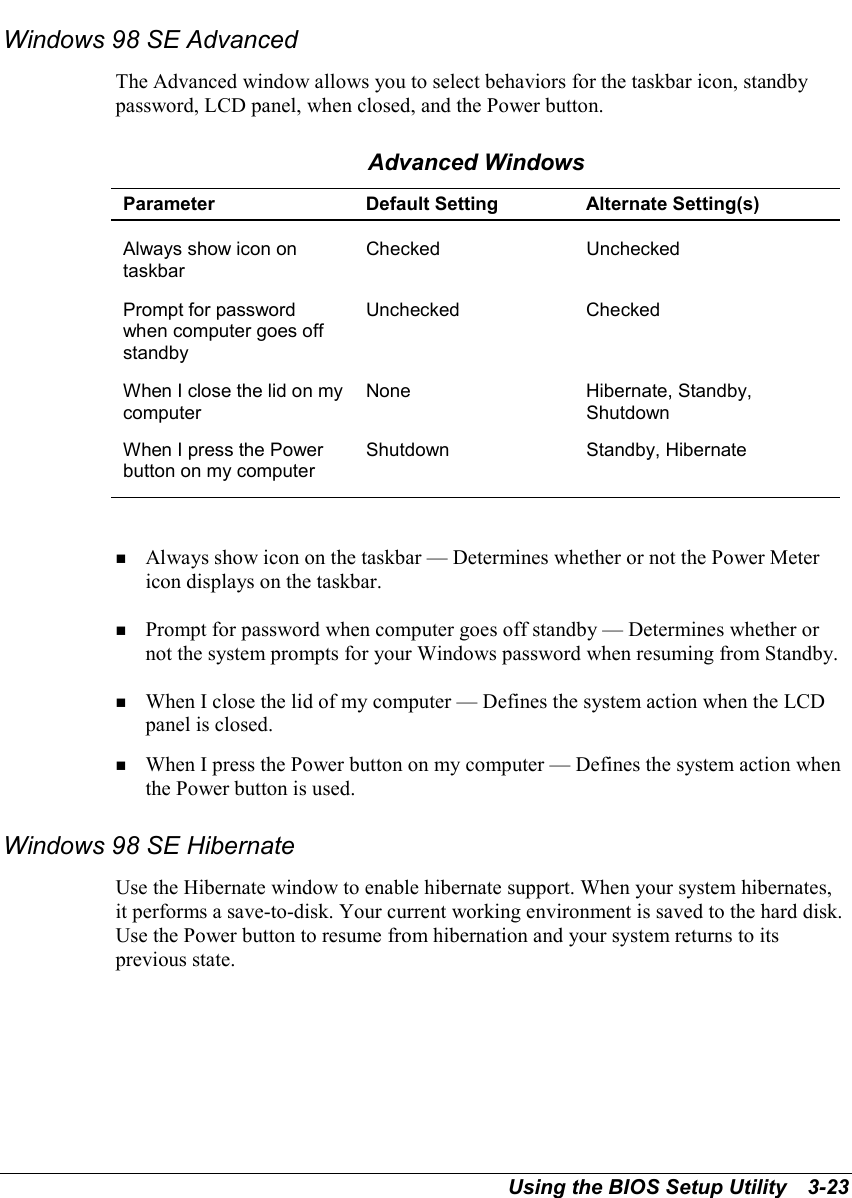
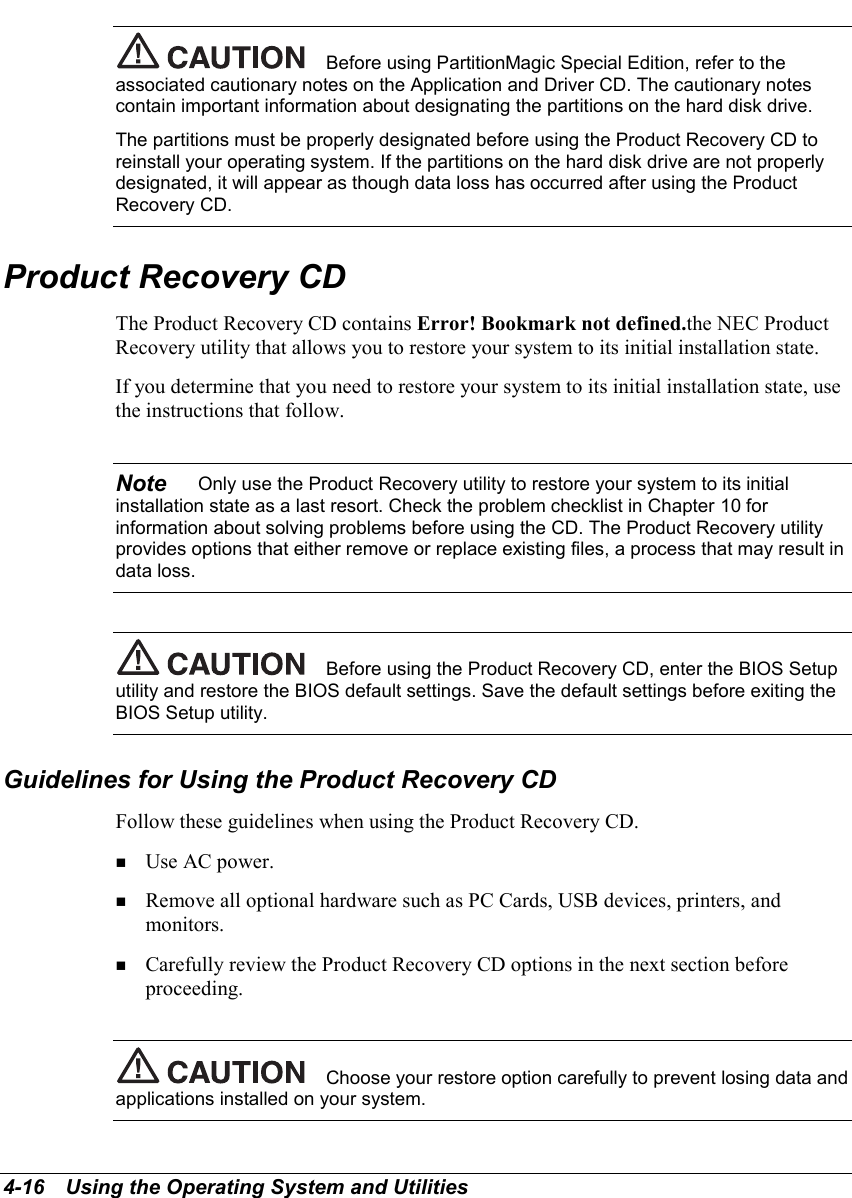
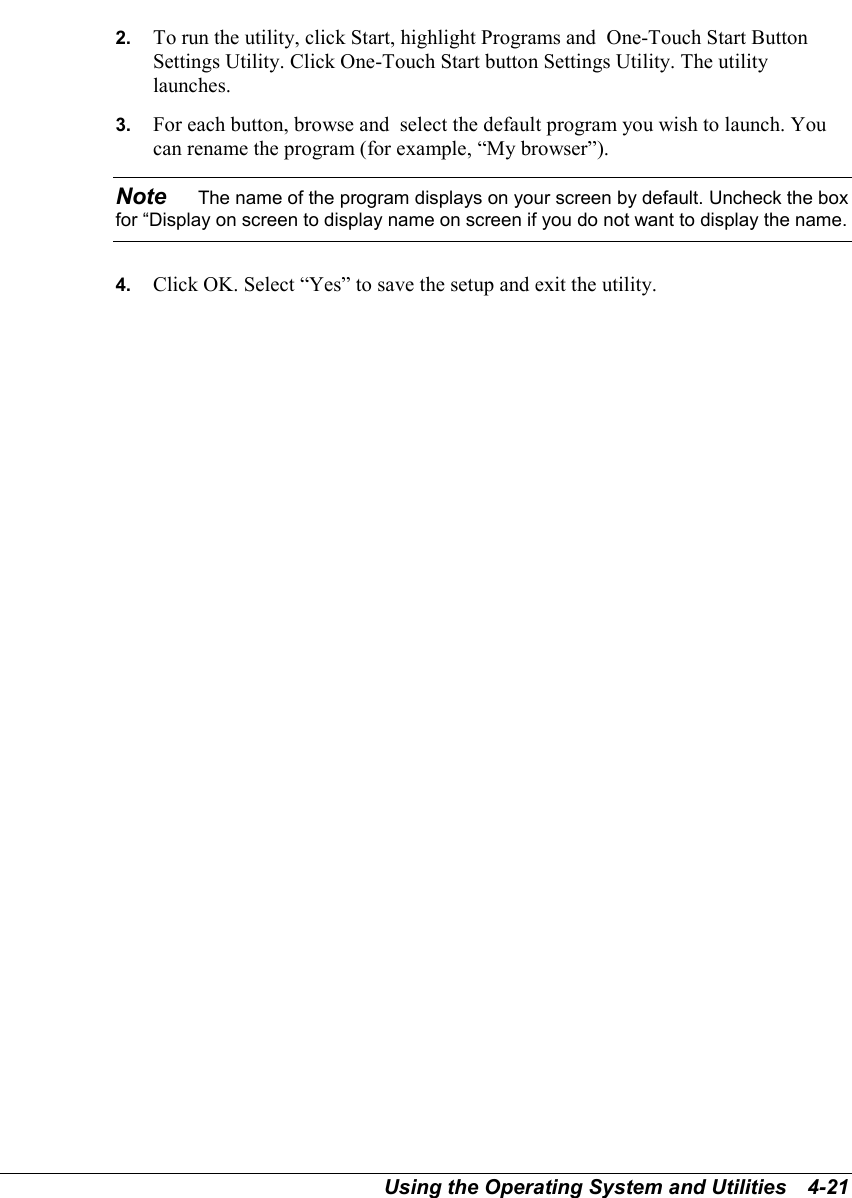
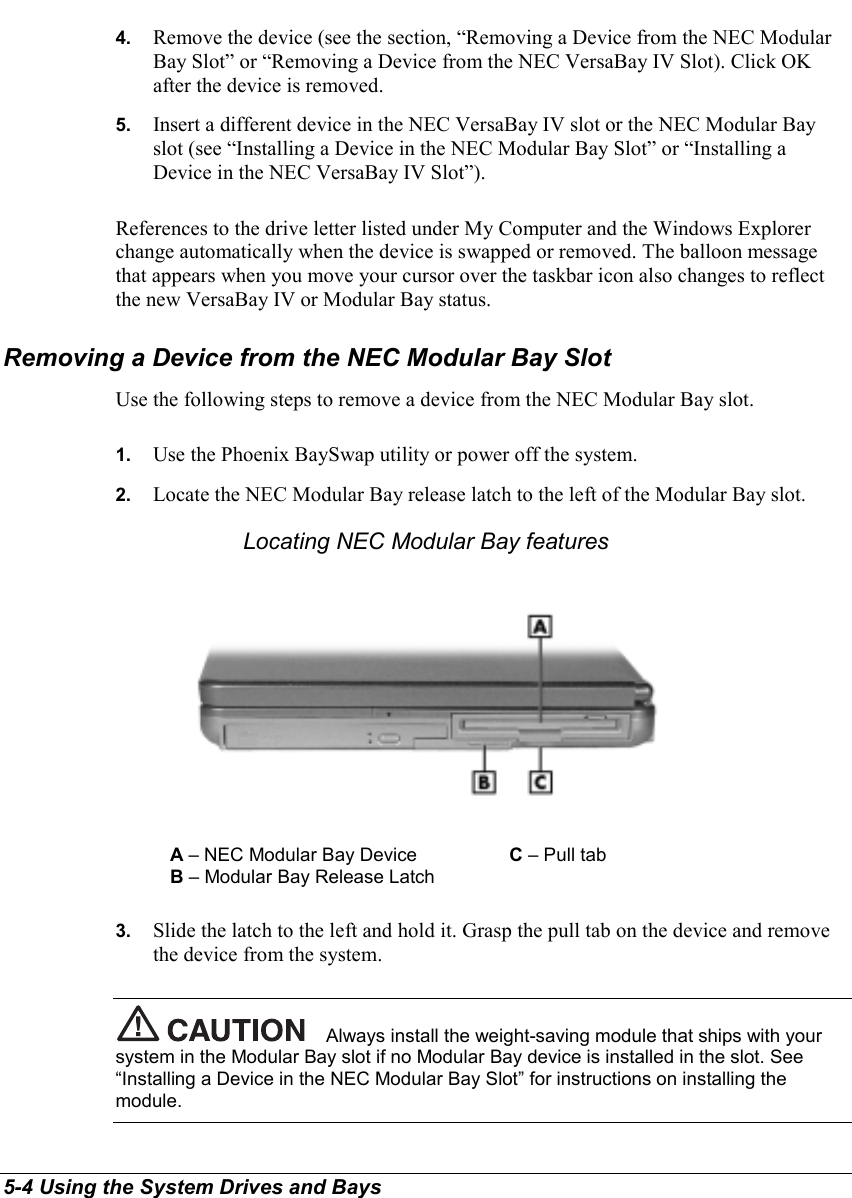
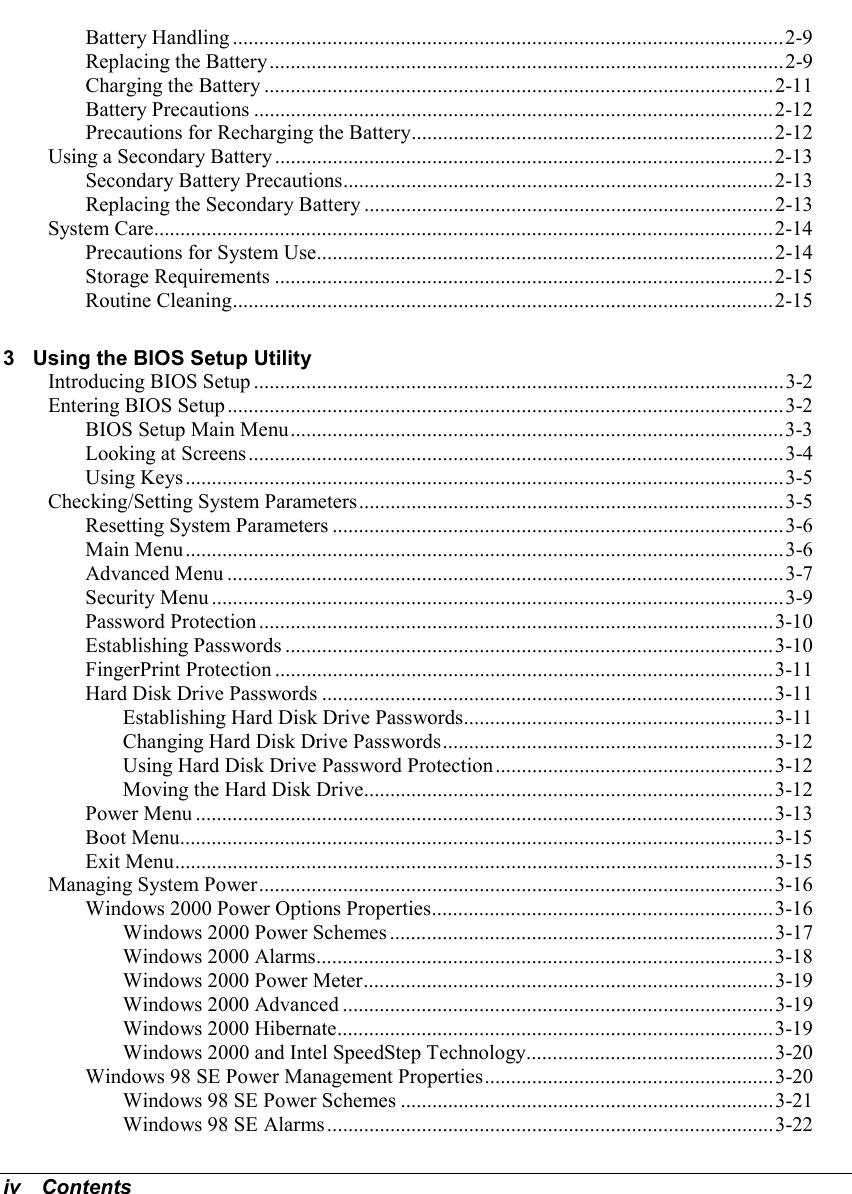
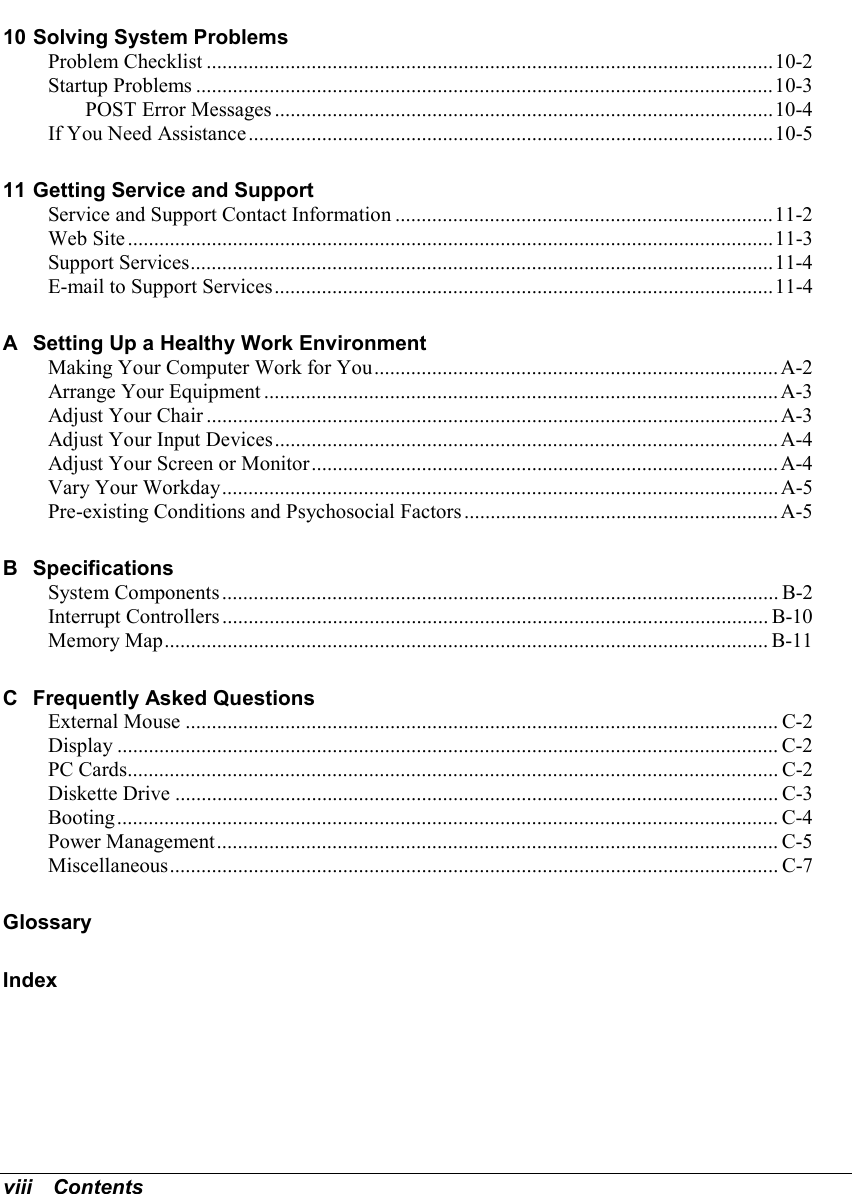
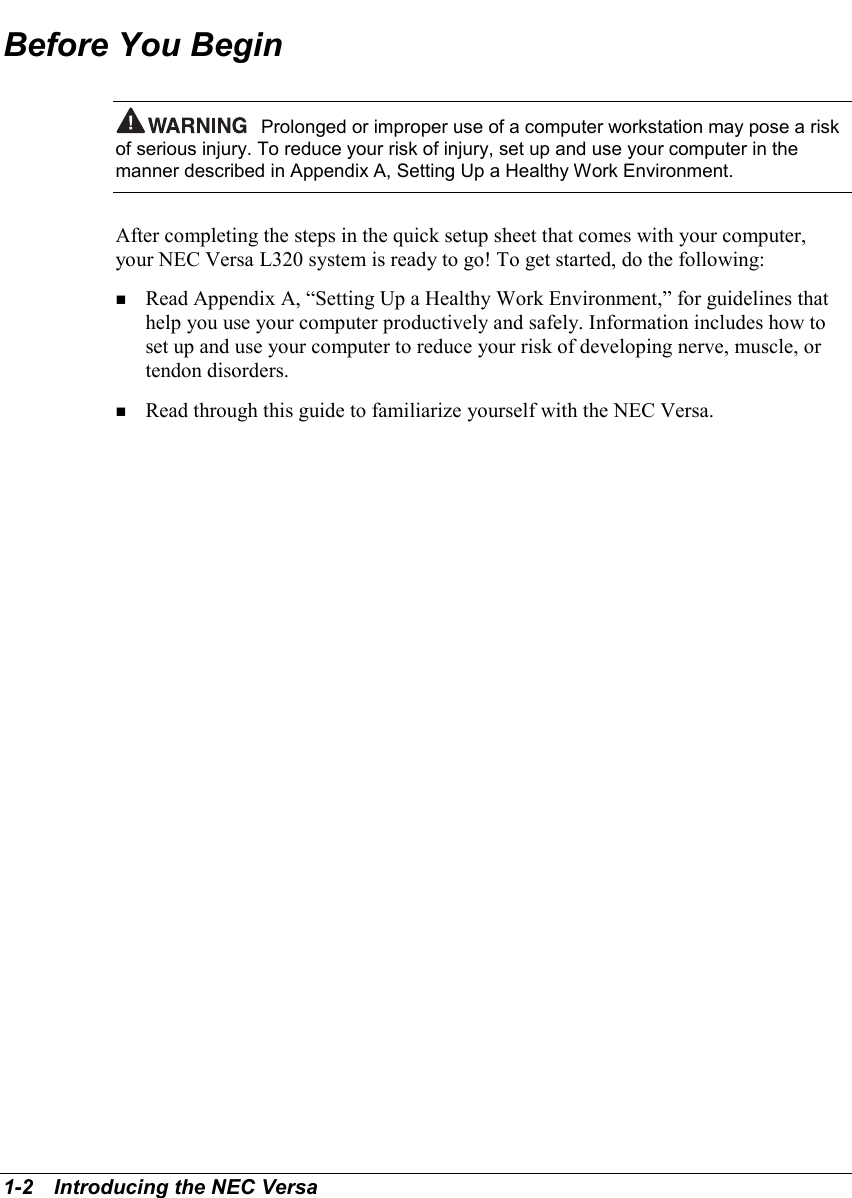
![Using the BIOS Setup Utility 3-13To take advantage of HDD password protection in another system, the system must beequipped with the same HDD password protection feature. To determine if that systemhas HDD password, check the Security Setup in the BIOS Setup to see if there areprovisions for establishing HDD passwords.Power MenuUse the Power menu to control some power saving functions in your system.Note that the Advanced Configuration and Power Interface (ACPI) controls mostpower management functions of Versa L320 systems running the Windows 98 SE orWindows 2000 operating system. In Windows 98 SE, ACPI is configured through thePower Management Properties dialog box. In Windows 2000, ACPI is controlledthrough the Power Options Properties dialog box.For details about ACPI power management, see the section, “Managing SystemPower,” later in this chapter.See the following information on using the Power menu to balance high performanceand energy conservation in your system.Power MenuParameter Default Setting Alternate Setting(s)Power Switch On/Off Suspend/ResumePower ManagementFunctionAlways On Battery OnlyPower Savings Level Customized Disabled,Maximum Power Savings,Maximum PerformanceSuspend Timeout 20 minutes 5, 10, 15, 30, 40, 60 minutes, OffSuspend Mode Suspend Save-to-DiskAuto Save-to-Disk Off After 1 HourSuspend Warning Tone Enabled DisabledIntel® SpeedStep2™technologyEnabled DisabledLid Switch Backlight SuspendRemote Power On Disabled AC Only, AC/BatteryResume On Modem Ring Off OnResume On Time Off OnResume Time [HH:MM:SS]](https://usermanual.wiki/First-Computer/MPC13A.User-Manual-1of-2/User-Guide-170804-Page-56.png)