Firstview Electronic M723A 7 inch tablet User Manual
Shenzhen Firstview Electronic Co. Ltd. 7 inch tablet
UserManual.wiki
>
Firstview Electronic
>
M723A User Manual
User Manual
Navigation menu
Upload a User Manual
Namespaces
Wiki Guide
HTML
PDF
Info
Views
User Manual
Discussion / Help
Navigation
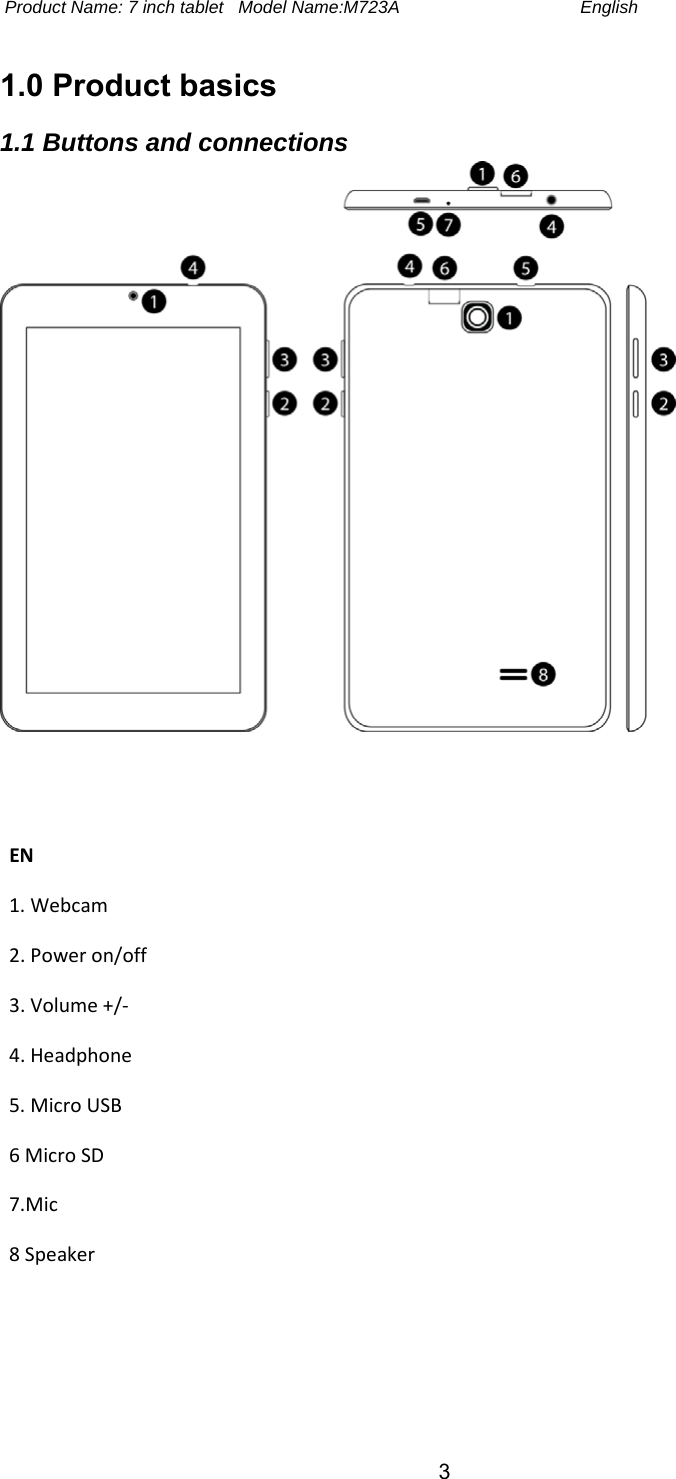
![12P 5.0 Frequently Asked Questions 1) Is there a software update available for my tablet?All tablet firmware updates are posted on http://downloads.pointofview-online.com2) I downloaded [app name] and now it doesn’t work (properly)?Android software was initially developed for mobile phones and some have nosupport for Android devices with larger screens. Try to update the software or find acompatible alternative app. This incompatibility also sometimes occurs with softwarewritten for previous Android versions.3) How can I manually install an APK file?By default, it is not possible to manually install APK files. To enable this you have toenable the setting ‘Unknown sources’. This can be found in the settings menu ->Security.4) My battery is only lasting xx hours!The operating time of the tablet on one battery load depends very much on thespecific tasks that is has to perform. Wi-Fi, Bluetooth and other wirelesscommunication technologies are known to consume a lot of energy. Also CPUintensive applications such as games and HD video clips can use up the energy ofthe battery fast.To maximize the duration of your battery, you can optimize the following settings:- Choose a low or dynamic screen brightness- A short press on the power button will directly place the tablet in standby mode- Download an ‘App killer’ to clear the memory from previous started apps- Disable Wireless devices when not using them- Remove USB devices (these use power as well)- Avoid use/charging extremely hot or cold environments](https://usermanual.wiki/Firstview-Electronic/M723A/User-Guide-3212957-Page-12.png)