Fisher Price 71636 Baby Monitor User Manual manual
Fisher-Price Inc. Baby Monitor manual
manual

Prenatal Sounds
Monitor
Model Number: 71591
w
w
w.
fi
s
he
r
-p
r
i
c
e
.
c
o
m

For proper setup and use, please read these instructions and keep for
future reference.
Includes two AC adaptors to power transmitter and receiver (plugs into
standard household outlets –120V AC). Receiver also runs on battery power
(9V alkaline battery – not included).
Adult assembly is required to install the battery (if used).
Note
Consumer Information
Occasionally a consumer may experience a problem with one of our products. If this
should happen, please call us toll-free, rather than return this product to the store.
Usually, we can solve the problem over the telephone or send you replacement parts.
Please call Fisher-Price® Consumer Relations, toll-free at 1-800-432-KIDS, between
8 AM - 6 PM EST, Monday through Friday. Hearing-impaired consumers using
TTY/TDD equipment, please call 1-800-382-7470.
Or write to:
Fisher-Price® Consumer Relations
636 Girard Avenue
East Aurora, New York 14052
2

Important!
This product cannot replace
responsible adult supervision.
CAUTION
• This product is not intended to be used as a medical monitor and its use should not
replace adult supervision.
• Test sound reception of receiver before first-time use and whenever you change
location of transmitter.
• To prevent entanglement:
- Never place transmitter in a crib or playpen. Keep transmitter and receiver
out of baby’s reach.
- Never use extension cords with the AC adaptors.
• Never use transmitter or receiver near water (ie.: bathtub, sink, laundry tub or wet
basement, etc.).
• Always use transmitter and receiver where there is adequate ventilation.
To prevent overheating, keep transmitter and receiver away from heat sources
such as radiators, heat registers, direct sunlight, stoves, amplifiers, or other
appliances which produce heat.
3
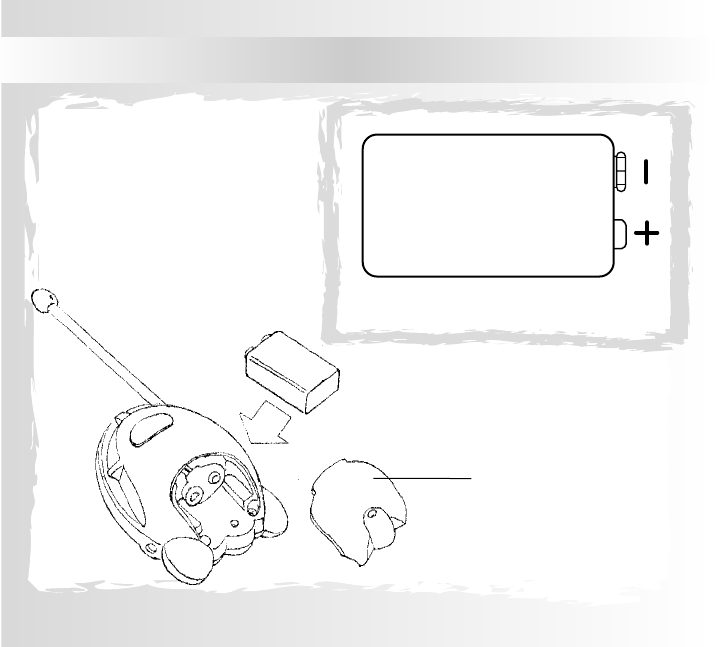
Receiver Battery Installation (Optional)
Battery
Compartment Door
9V (6LR61)
SHOWN ACTUAL SIZE
4

Receiver Battery Installation (Optional)
Battery Tips
• Remove the battery during long periods of non-use. Always remove an exhausted
battery from the product. Battery leakage and corrosion can damage this product.
Dispose of battery safely.
• Do not dispose of batteries in a fire.The batteries may explode or leak.
• Never short circuit the battery terminals.
• A non-rechargeable battery is not to be recharged.
• Only a battery of the same or equivalent type as recommended in the “Battery
Installation” instructions is to be used.
• If a removable rechargeable battery is used, it is only to be charged under
adult supervision.
•
A rechargeable battery is to be removed from the product before it is charged.
• If you use a battery charger, it should be examined regularly for damage to the cord,
plug, enclosure and other parts. Do not use a damaged battery charger until it has
been properly repaired.
• Locate battery compartment door on bottom of receiver.
• Push finger tab on battery compartment door to open battery compartment door.
• Snap terminals of a fresh, 9V alkaline battery into receiver connectors.
• Close battery compartment door.
5
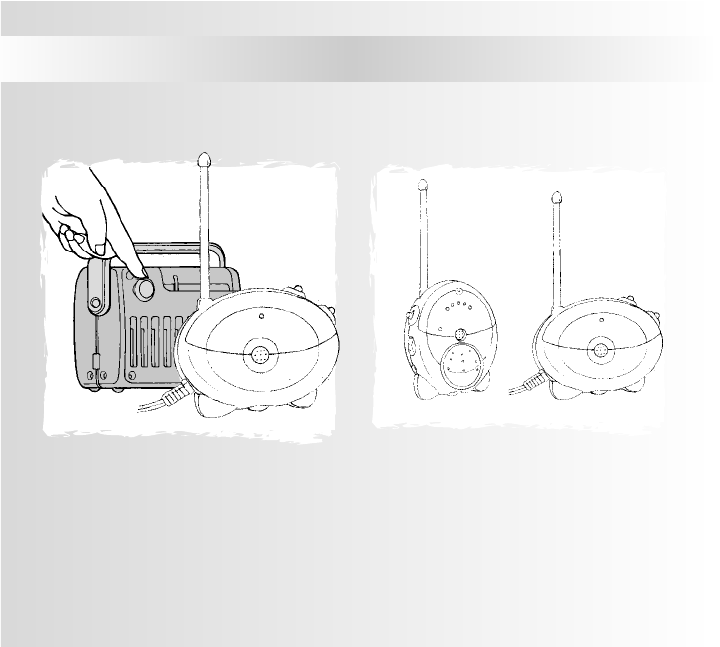
Testing Sound Reception
Test transmitter transmission and receiver reception.
Place transmitter in room in which you
intend to use it. Slide transmitter power
switch to turn power on. Turn on a radio.
If you experience interference (buzzing
or static, etc.) while using one channel
setting, switch both units to other
channel. Selecting a channel is usually
a one time adjustment.
6

Testing Sound Reception
Place receiver in room in which you
intend to use it. Rotate on/off/volume
dial to turn power on. Adjust receiver
location.
Notes:
• Variable light display lights when sound
is received by receiver.
• If all five bars in variable light display
light:
- Receiver power is on and transmitter
power is off.
- Receiver is too far away from
transmitter.
- Receiver and transmitter are not on
same channel.
- Loud sounds are transmitting.
Hint: If you turn receiver power on before transmitter power, you will hear a static
noise and all five bars in variable light display light.Simply turn volume down and turn
transmitter power on.
7

Setup and Use
8
1
4
3
1
7
3
2
6
5

Setup and Use
IMPORTANT! Test sound reception of this monitor before first time use and
whenever you change location of transmitter (see page X).
Set transmitter channel switch to same channel as receiver.
Place transmitter in same room with child. Point microphone directly toward
crib or play area.
Unwrap and fully extend AC adaptor cord for best transmission.
Insert AC adaptor jack into transmitter socket and plug into wall outlet.
Slide transmitter on/off switch to turn power on. Power indicator lights.
Place receiver where you will see or hear it.
Unwrap and fully extend AC adaptor cord for best reception. Insert AC adaptor
jack into receiver socket and plug into wall outlet.
Note: To use a 9V alkaline battery for power source, refer to “Receiver Battery
Installation” instructions on this page.
Rotate receiver on/off/volume dial to turn power on. Power indicator lights.
Rotate on/off/volume dial to adjust volume.
1
2
3
4
5
6
7
9

Problems and Solutions
1
Circuit Breaker
10
2
6
2
1
2
3
5
4
“Ma, Mah,
Da, Da…”
BUZZZZ
BUZZZZZ
BUZZZZZ

Problems and Solutions
Transmitter power off. Power
indicator not lit.
You hear static or buzzing because
transmitter channel switch is not
on same channel as receiver.
Transmitter power off. Power indi-
cator not lit. Light switch that con-
trols power flow to wall outlet off.
Transmitter power off. Power
indicator not lit. AC adaptor cord
plug-to-outlet not connected.
Transmitter power off. Power indi-
cator not lit. Power is off because
circuit breaker for baby’s room off.
You hear static or buzzing and all
five bars lit on receiver.
PROBLEMS SOLUTIONS
Turn transmitter power on.
Power indicator lights.
Make sure channel switches on
both transmitter and receiver set
to same channel.
Make sure light switch that controls
power flow to wall outlet is on.
Check AC adaptor cord plug-to-
outlet connection.
Make sure house fuses and circuit
breakers are on.
Check all five solutions above. Any
one or more of these solutions
should solve the problem.
1
2
3
4
5
6
1
2
3
4
5
6
11

Problems and Solutions
12
PROBLEM
SOLUTION
You hear static or buzzing because
receiver is out of range of transmitter.
Note: Range varies depending on
surrounding conditions such as noise
levels, physical obstructions and
signal interference.
Move receiver closer to transmitter.
Hint: If you cannot hear your child and
all five bars do not light, your receiver
battery is weak. Replace receiver battery
with a fresh, 9V alkaline battery or use
AC adaptor for power source.
STATIC
STATIC
STATIC
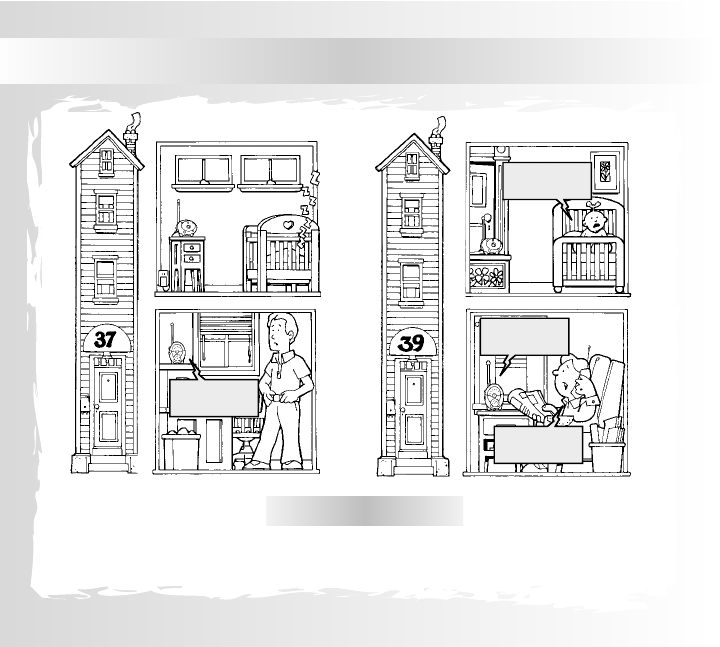
Problems and Solutions
“Did you read
about…”
PROBLEM
You can hear conversations or sounds from other homes. There is signal interference
due to other nursery monitors on same channel or cordless telephones.
13
“Wah, Wah,
Wah…”
“Wah, Wah,
Wah…”
“Did you read
about…”

Problems and Solutions
Change channel switches on both transmitter and
receiver to eliminate source of interference.
SOLUTION
Hints:
- Do not use more than one transmitter
and one receiver at same time in same
household.
- Always remember that you are using
public airwaves when using your monitor.
Conversations, even from rooms near
transmitter, may broadcast to other nursery
monitors, radios, cordless telephones, or
scanners outside your home.To protect
privacy of your home,always turn
transmitter off when not in use.
14
“Wah, Wah,
Wah…”

Care
Excess dirt in transmitter microphone will hamper transmission of sound. Clean
outer surface of transmitter and receiver with a cloth lightly dampened with a mild
cleaning solution.
Never immerse transmitter, receiver or AC adaptors.
16

FCC Note (United States Only)
This equipment has been tested and found to comply with the limits for a Class B digital device,
pursuant to part 15 of the FCC rules.These limits are designed to provide reasonable protection
against harmful interference in a residential installation.This equipment generates, uses and can
radiate radio frequency energy and, if not installed and used in accordance with the instructions,
may cause harmful interference to radio communications. However, there is no guarantee that
interference will not occur in a particular installation. If this equipment does cause harmful inter-
ference to radio or television reception, which can be determined by turning the equipment off
and on, the user is encouraged to try to correct the interference by one or more of the following
measures:
- Reorient or relocate the receiving antenna.
- Increase the separation between the equipment and receiver.
- Connect the equipment into an outlet on a circuit different from that to which the receiver
is connected.
- Consult the dealer or an experienced radio/TV technician for help.
CAUTION: Changes or modifications not expressively approved by the manufacturer responsible
for compliance could void the user’s authority to operate the equipment.
Prenatal Sounds Monitor
Model Number: 00000
This device complies with Part 15 of the FCC Rules. Operation is subject to the following two
conditions: (1) This device may not cause harmful interference and (2) this device must accept
any interference received, including interference that may cause undesired operation.
Prenatal Sounds Monitor
Consumer Affairs Department
636 Girard Avenue
East Aurora, New York 14052
17

If you have any questions about this product:
In Canada, call 1-800-567-7724, or write to: Mattel Canada Inc., 6155 Freemont Blvd.,
Mississauga, Ontario L5R 3W2.
In Great Britain, telephone 01628 500303.
In Australia, Mattel Australia Pty. Ltd., 658 Church Street, Locked Bag #870, Richmond,Victoria
3121 Australia. Consumer Advisory Service 1-800-800-812 (valid only in Australia).

Fisher-Price, Inc., a subsidiary of Mattel, Inc., East Aurora, New York 14052, U.S.A.
©2001 Mattel, Inc. All Rights Reserved.
® and ™ designate U.S. trademarks of Mattel, Inc.
Printed in Hong Kong 00000-0000
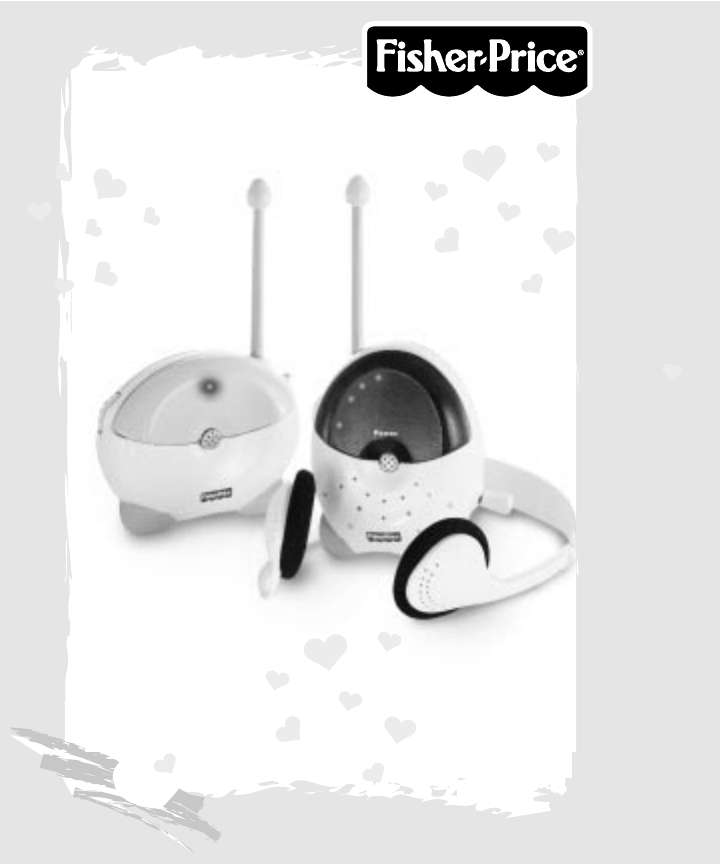
Baby Sounds Monitor

Congratulations!
2
You’ve heard it before, but we’ll say it again – Congratulations!
We know the anticipation is building. That’s why we've developed
our Prenatal Monitor to hear the wonderful sounds your baby
makes before she’s born! You’ll hear kicks, hiccups, and the
passing of nutrients through the placenta. And if you listen very
carefully, you may be able to hear his heartbeat!
Please keep in mind, that unlike a costly, ultrasound audio device
called a Doppler (used in your physician’s office), our Prenatal
Monitor simply amplifies sounds coming from the womb, similar
to listening through a stethoscope. For example, your baby’s
heartbeat will sound like a loud rhythmic gushing sound from a
Doppler versus a faint, fast beating drum sound from our
Prenatal Monitor. And, it’s important to understand that many
factors will affect what you'll hear with our Prenatal Monitor.
The position of the baby, baby's activity level, the baby’s weight,
your weight, the stage of pregnancy, your position and where you
place the Prenatal Monitor all contribute to what you will hear.
With a little practice and patience, you will
be able to hear and detect your baby’s
sounds. Please read this instruction manual
thoroughly for helpful hints and important
user information BEFORE using this product.
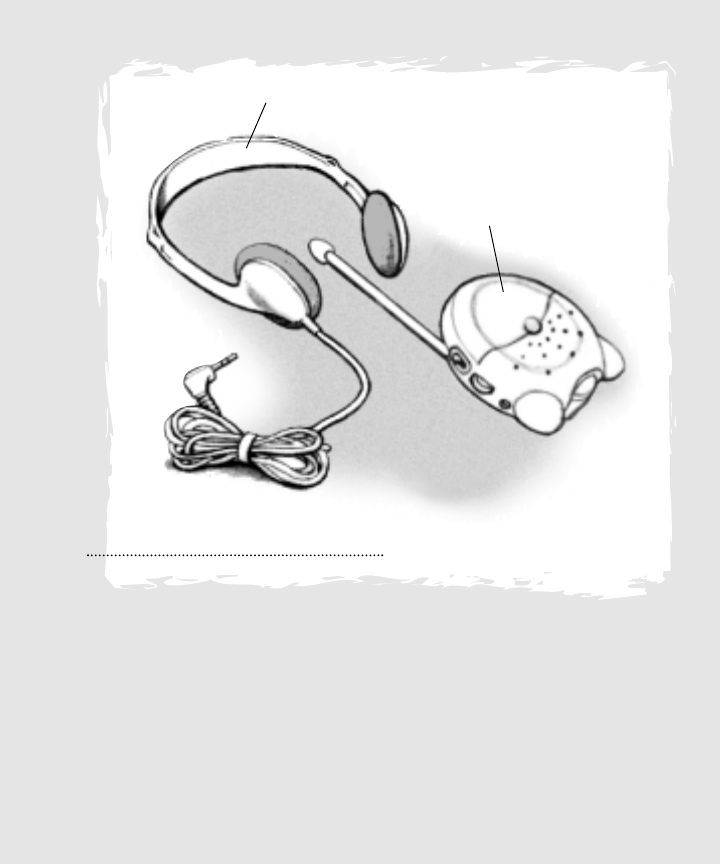
Headphones
Monitor
The Kit
3
• Please keep this instruction
manual, as it contains
important information.
• Requires one 9 volt
alkaline battery for
operation (not included).
• Adult assembly is required
for battery installation. No
tools required.
Prenatal Monitor

• We recommend use only during the last
trimester (28-40 weeks) of pregnancy.
This is when fetal sounds are strongest.
• Do not expect this product to amplify
sounds the same way a Doppler device
amplifies sounds.
• Make sure battery power is not too low.
Use only a new, 9 volt alkaline battery
in the monitor.
• Use the monitor only in a quiet room.
• The best time to listen is 3-4 hours
after eating, when you are relaxed
and have a slower heartbeat.
IMPORTANT! Avoid laying flat on
your back for an extended period
of time while using this product.
• Use the monitor on bare skin.
Additional barriers between baby
and the amplifier will affect your
chance of hearing fetal sounds.
• Position the volume control at
a moderate level to avoid static.
Tips for Use
4
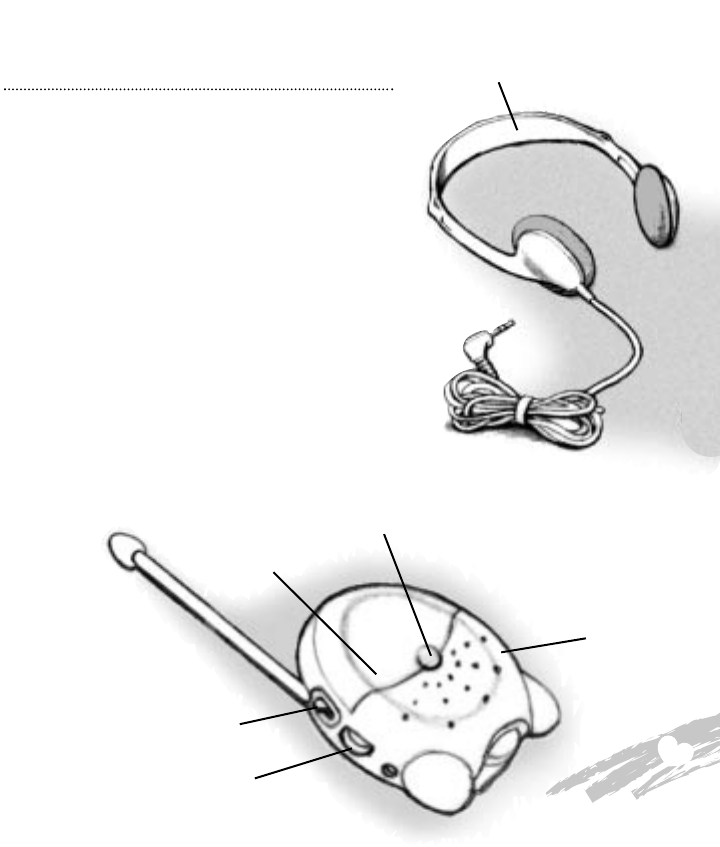
Monitor – Requires one 9 volt
battery. Amplifies baby’s sounds
from the womb.
Headphones – Plugs into
monitor and are adjustable to fit
around your head comfortably.
Power/Volume Dial – Rotate to
turn power ON or OFF and to a
desired listening level.
Power Indicator – Lights when
power is turned ON.
Sounds Button – Press and hold
to hear sounds.
Listening Cone – Place on bare
skin and move slowly to detect
baby’s sounds.
Features Headphones
Monitor
Power/Volume Dial
Sounds
Button
Power
Indicator
5
Channel Selector
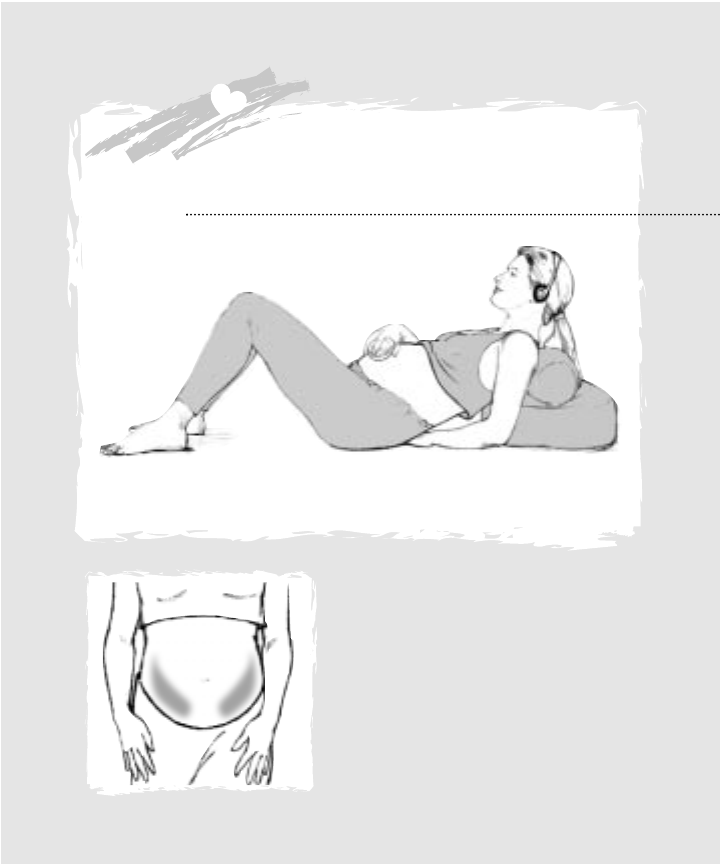
Instructions
6
Step B
Hint: In the last trimester, the
best areas to place the listening
cone for baby's sounds is below
the belly button and to the
right side of your belly. If you
do not hear sounds, try the left
side too!

7
4. Shift your clothing so that
you can place the monitor
microphone directly on your
skin.
5. Begin by positioning the
listening cone about an inch
below your belly button and
several inches to right. Press
and hold the sound button
and listen carefully to detect
your baby’s sounds.
6. What do you hear? Be
patient, and listen carefully.
Refer to page 8 and 9 for
descriptions of sounds.
7.Slowly move the listening
cone an inch at a time and
again listen carefully to
detect your baby’s sounds.
Hint: You may need to
move the listening cone in
several locations before you
hear your baby's sounds.
By Step
1. You will hear your baby
sounds best if:
- you are in a quiet room
- you are relaxed
- it is 3 - 4 hours after eating
- you are laying down or
reclined with your upper
body supported by pillows.
IMPORTANT! Avoid laying
flat on your back for an
extended period of time while
using this product.
2. Insert the headphone plug
into the headphone jack in
the monitor. Fit the
headphones onto your head.
Adjust the size of the
headphones, if necessary.
3. Rotate the monitor
power/volume dial ON. Select
a moderate volume level.

8
What Did You Hear?
Series of uneven thumps
Two rapid, soft drumbeats
Whooshing or swishing
A beating drum
A very soft -- rapidly beating
drum or the clippity-clop of a
galloping horse
Growling or gargling
Your baby’s kicking!
Hiccups
Nutrients passing through
the placenta
Your own heartbeat
Your baby’s heartbeat
Your own stomach's noises
or your intestine is gurgling
Sound What could it be?
What Did You Hear?

9
This is probably the sound most often heard. And,
we’re sure you’ll recognize kicking more by its feel
than its sound!
You might notice specific times of the day when your
baby hiccups. Also, you’ll feel a light tapping in the
same cadence of the sound – two quick thumps.
Liquid nutrients from your body are passed to your
baby through the placenta.
Your own heart beats about 100 times per minute and
will be quite audible – especially if you have the
monitor too high on your abdomen. Try lowering the
monitor to approximately two inches below and
several inches to the right of your belly button.
A fetal heart beats about 120 – 180 times a minute,
much faster than our own.
These noises are not associated with your baby.
Explanation
Sounds
10
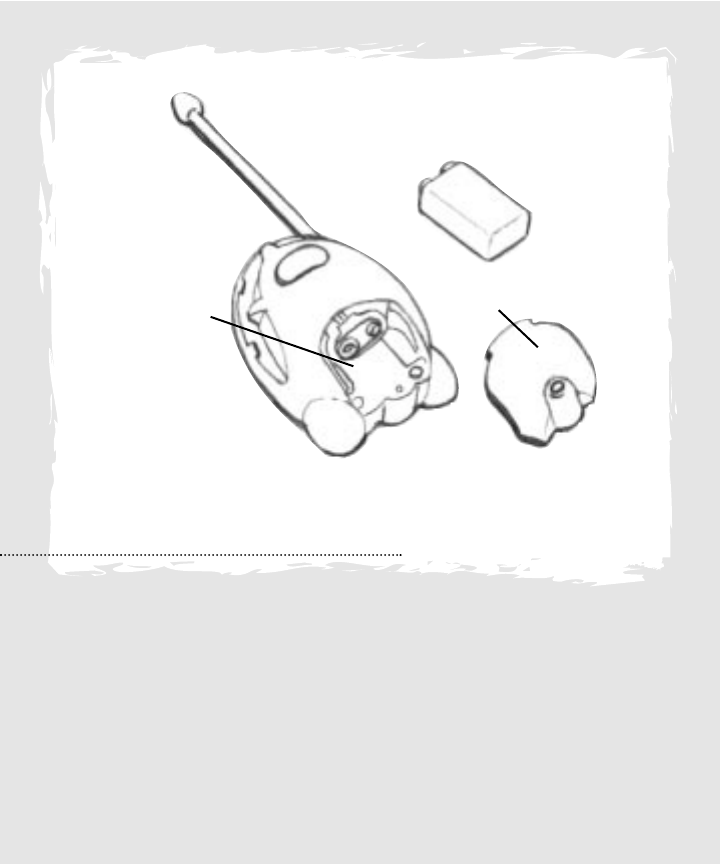
• Press down on the
battery compartment
door finger tab.
Remove the battery
compartment door.
• Insert a 9 volt battery
as indicated inside the
battery compartment.
Hint: Make sure the
battery is on top of
the ribbon for easy
battery removal.
• Replace the battery
compartment door.
Battery
Installation
Battery
Compartment
Battery Compartment
Door
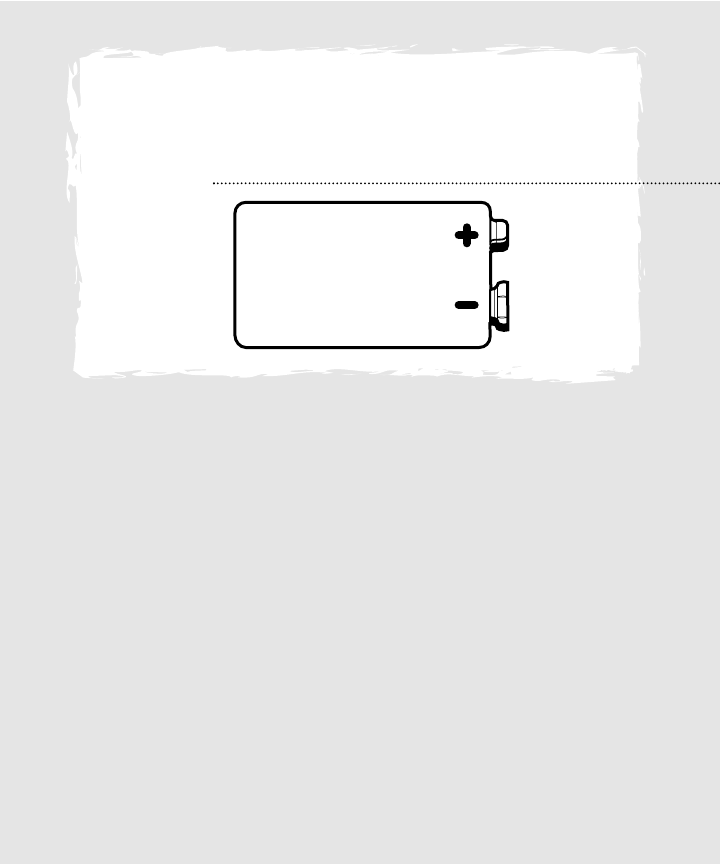
11
SHOWN ACTUAL SIZE
9V
Battery
Information
• Do not mix old and
new batteries.
• Do not mix different types of
batteries: alkaline, standard
(carbon-zinc) or recharge-
able (nickel-cadmium).
• Remove the batteries during
long periods of non-use.
Always remove exhausted
batteries from the toy and
remote. Battery leakage
and corrosion can damage
this toy. Dispose of
batteries safely.
• Never short circuit the
battery terminals.
• Non-rechargeable batteries
are not to be recharged.
• Only batteries of the same
or equivalent type as
recommended in the
Battery Installation
instructions are to be used.
• If removable rechargeable
batteries are used, they are
only to be charged under
adult supervision.
• Rechargeable batteries are
to be removed from the toy
before they are charged.
• If you use a battery
charger, it should be
examined regularly for
damage to the cord, plug,
enclosure and other parts.
Do not use a damaged
battery charger until it has
been properly repaired.

12
This product is not a medical device, and
should not be used or relied upon in any way for
diagnostic or other medical purposes. Any concerns
about your pregnancy should be addressed to a
medical practitioner. This product is not intended
to be and should not be used as a substitute for
regular prenatal care by an appropriate medical
practitioner. You are encouraged to seek such
prenatal care in connection with your pregnancy,
This product should be used only in accordance
with the instructions provided and the
manufacturers and distributors of this product
are not responsible for inappropriate use. The
manufacturer expressly disclaims liability for
incidental, consequential, or special damages
of any nature.
Prenatal Monitor is
NO
NOT
T a Medical Device
Monitor is
Monitor is Not
Not
a Medical Device
a Medical Device
Prenatal Monitor

Remember....
13
• We know that you’ll want to hear your baby’s
heartbeat more than any other sound! But,
patience and very careful listening are
required to locate the best position to hear your
baby’s heartbeat, which will sound like a soft,
fast beating drum. It will take a little practice to
pick up this faint sound, so listen carefully.
• It is perfectly normal to hear your baby’s
heartbeat on some days and not others due to
your baby’s position and movements. It is also
normal that you will hear a heartbeat one
moment and not the next. Don’t panic! Often
your baby is moving or is in a position where it
is difficult to pick up the heartbeat.
• Many factors will affect what you will hear with
our Prenatal Monitor. The position of your baby,
baby's activity level, baby’s weight, your weight,
the stage of pregnancy, your position and where
you place the Prenatal Monitor on your belly all
contribute to what you will hear.
•Don’t be disappointed if you do not hear your
baby’s sounds immediately. The more you use
this product, the better you will become at
detecting your baby’s sounds.
• If you have any questions about this product,
please call 687-3163.

Model Number 70000pr-0920
Printed in China
Fisher-Price, Inc., a subsidiary of Mattel, Inc.,
East Aurora, New York 14052, U.S.A.
©2001 Mattel, Inc., All Rights Reserved.
® and ™ designate U.S. tradmarks
of Mattel, Inc.