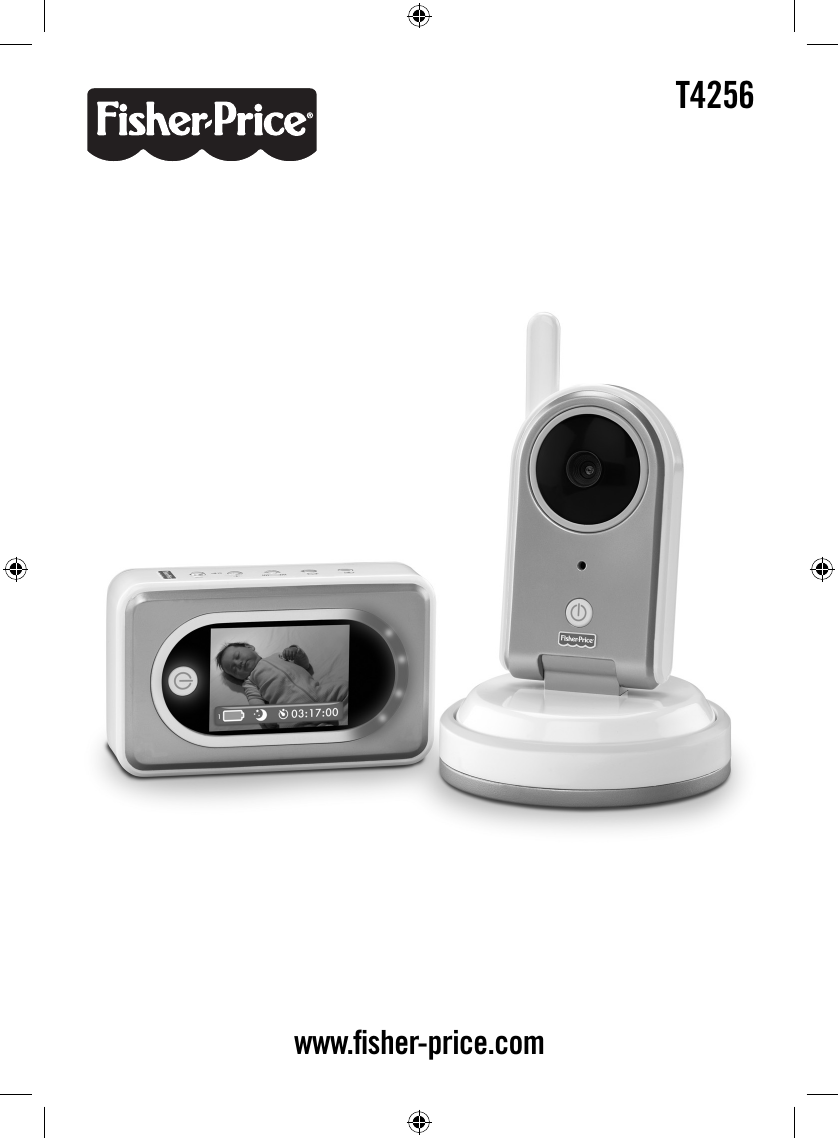
Fisher Price T4256R-10 Digital Video Monitor (Parent Unit) User Manual T4256pr 0920 indd

Fisher-Price Inc. Digital Video Monitor (Parent Unit) T4256pr 0920 indd

Users Manual

T4256 T4256 www.fi sher-price.comwww.fi sher-price.com
2Important!To prevent electric shock, do not immerse in water; wipe clean with damp cloth.DANGERTo prevent strangulation with power cord, never place transmitter (camera) within reach of child.WARNINGThis product cannot replace responsible adult supervision.CAUTION
3• Fully charge the camera and parent unit (each with a battery pack installed) for four hours before fi rst-time use.• For proper setup and use, please read these instructions.• Please keep this instruction sheet for future reference, as it contains important information.• Camera operates on AC current (use enclosed docking station) or 6V NiMH rechargeable battery pack (included). Parent unit operates on AC current (use enclosed AC adaptor/charger) or 3.6V NiMH rechargeable battery pack (included). • Adult assembly is required to install the wall mount. Tools needed for assembly: electric drill, ¼" drill bit, hammer and Phillips screwdriver (tools not included).• This product is not intended to be used as a medical monitor and its use should not replace adult supervision.• Test sound/video reception of parent unit before fi rst-time use and whenever you change location of the camera. • Adults Note: Periodically examine this product for damage to the cord, housing or other parts that may result in the risk of fi re, electric shock or injury. If the product is damaged, do not use it. • Never use extension cords with the AC adaptor/charger or docking station power cord.• Never use camera or parent unit near water (i.e. bathtub, sink, wet basement, etc.).• Always use the camera and parent unit where there is adequate ventilation. To prevent overheating, keep away from heat sources such as radiators, heat registers, direct sunlight, fi re, stoves, amplifi ers, fi re, excessive heat or other appliances that produce heat. • Fisher-Price® does not recommend the use of two monitors in one house. • Always remember that you are using public airwaves when using your monitor. Conversations, even from rooms near the camera, may broadcast to other nursery monitors, radios, cordless telephones or scanners outside your home. To protect the privacy of your home, always turn off the camera when notin use. • Do not connect to more than the recommended number of power supplies.• The AC adaptor/charger and docking station are not toys.• Disconnect the AC adaptor/charger from the parent unit and the docking station power cord from the wall outlet before cleaning.• If this product begins to operate erratically, you may need to reset the electronics. Press the camera power button OFF and press again to turn back ON; press the parent unit power button OFF and press again to turn power back ON.• Carrier Frequency: 2.4 Ghz• Product features and decoration may vary from photographs.Important!
4FeaturesParent UnitSide View Back View104 51131 267894
51  Power Button and L.E.D. – Press to turn parent unit power ON or OFF. The power button lights when parent unit power is ON.2  On-Screen Menu Bar  – Displays the parent unit battery indicator and nap timer. Flip to vertical view to see the battery indicators for both the parent unit and camera, nap timer, clock and range.3  2.4" Video Screen 4  Sound Lights – Let's you "see" baby's sounds. 5  Internal Antenna – For best reception, do not block the internal antenna. 6  Volume/Menu Navigation Buttons – Press the up or down button to adjust the volume on theparent unit. Press the up or down button when the settings menu is on the screen to scroll through menu choices. 7  Display Button – Press to turn the video screen ON or OFF.8  Nap Timer Button – Press the button to start the nap timer; press again to stop the nap timer; press the button a third time to reset the nap timer9 Settings Button - Press to open the settings menu and adjust the brightness, contrast, clock and sound activation settings.10   DC Input Jack – Insert the AC adaptor/charger pin to use AC power/charge the parent unit battery.11   Clip – Place the parent unit in the clip. Fasten the clip to your clothes to stay in touch with baby around your house and yard.Features
61613161415CameraFeatures
7Features12   Camera Lens13   Power Button and L.E.D. – Press to turn camera power ON or OFF. The power button lights when camera power is ON. 14   Microphone 15   Night Vision L.E.D.s 16   Docking Station  – Use to charge the camera battery.
8Fasteners Shown Actual SizeWall Mount PartsWall Mount BracketCord WrapWall Anchor – 4#8 x 2" Screw – 4
9Charging the Battery(Inside the Camera)IMPORTANT! Fully charge the camera (with battery pack inside) for four hours before fi rst-time use.• Fit the camera into the docking station.• Plug the docking station power cord into a standard wall outlet.Notes: If power fl ow to the wall outlet is controlled by a switch, make sure the switch is “ON”. Use the docking station power cord only in a wall outlet. Do not plug the docking station power cord into a ceiling outlet. To connect to a supply that is not in the United States, use an adaptor (not included and sold separately) with the proper confi guration for the power outlet.
10Charging the Battery (Inside the Parent unit)• Use only the included AC adaptor/charger! Do not use any other adaptor/charger.• Fit the AC adaptor/charger pin into the DC input jack on the parent unit.• Plug the AC adaptor/charger into a standard wall outlet.Notes: If power fl ow to the wall outlet is controlled by a switch, make sure the switch is “ON”. Use the AC adaptor/charger only in a wall outlet. Do not plug the AC adaptor/charger into a ceiling outlet. To connect to a supply that is not in the United States, use an adaptor (not included and sold separately) with the proper confi guration for the power outlet.• If you are monitoring baby while charging the battery pack, you will see the charging icon  on the video screen.IMPORTANT! Fully charge the parent unit (with battery pack inside) for four hours before fi rst-time use. DC Input Jack
11Testing Sound/Video Reception  • Place the camera in the room where you intend to use it. • Point the camera toward the area you will be monitoring. Adjust the camera angle by rotating the camera up or down.• If using AC power, fi t the camera into the docking station and plug the power cord into a wall outlet.• Press the power button on the camera to turn the power ON. The button lights. • Turn on a radio.Test camera transmission and parent unit reception before installing the wall mount bracket and cord wrap (if used) and each time you change location of use.RadioCamera Power Button
12Testing Sound/Video Reception  • Place the parent unit in the room where you intend to use it.• Press the power button on the front of the parent unit to turn power ON. The button lights.• Adjust the parent unit orientation or location for best reception.• When sound is picked up by the parent unit, the sound lights will turn on. -  One or two lights indicate quieter sounds.-  Three or more lights indicate louder sounds. • If you cannot see an image on the video screen, adjust the camera location or camera angle.Hint: Make sure you are not covering (with your hand) the parent unit internal antenna.• Repeat this procedure in every room you plan to use the camera and parent unit.Parent Unit Power ButtonSound LightsInternal Antenna
13Camera Wall Mount InstallationTo prevent strangulation with power cord, never place transmitter (camera) within reach of child.WARNINGIMPORTANT! Test the reception of the monitor before installing the wall mount bracket and cord wrap. Use the assistance of one adult to hold the camera against the wall in the spot you want to install it. Then, test the reception of the parent unit in several locations around your house. Please refer to the Test-ing Sound/Video Reception section of these instructions.
14• To provide the greatest viewing range, we recommend you install the wall mount bracket at least six feet from the fl oor. • Make sure the camera lens does not have an obstructed view of your baby. Adjust the camera up or down.• Allow adequate ventilation of the camera when mounted. Do not mount the camera above heating vents or other heat producing sources. Do not mount the camera where it can receive direct sunlight. • Install the wall mount bracket on a fl at section of the wall. The wall mount bracket cannot be corner mounted. • Make sure the camera docking station will reach a wall outlet before installing the wall mount bracket.To prevent entanglement, never use an extension cord.Camera Wall Mount Installation6 ft.6 ft.
15Camera Wall Mount Installation• Using a ¼" drill bit, drill one hole through each pencil mark you made on the wall.• Hold the wall mount bracket against the wall in the location you want to install it. Make sure the wall mount bracket is straight. • Using a pencil, make a mark on the wall inside the upper hole and lower hole on the wall mount bracket. • Set the wall mount bracket aside. Wall Mount Bracket12
16• Fit a wall anchor into each of the drilled holes.• Tap each wall anchor lightly with a hammer until the ends of each wall anchor are even with the surface of the wall. • Align the holes on the wall mount bracket with the wall anchors. • Insert two screws into the holes in the wall mount bracket and tighten with a Phillips screwdriver. Do not over-tighten. Wall AnchorCamera Wall Mount Installation34
17• Position the cord wrap against the wall, so that it is centered below the wall mount bracket and as close to the fl oor as possible.• Move the cord wrap approximately ½" towards the wall outlet. • Using a pencil, make a mark on the wall inside both holes in the cord wrap. • Set the cord wrap aside.Camera Wall Mount InstallationCord Wrap 5Wall Mount Bracket
18• Using a ¼" drill bit, drill one hole through each pencil mark you made on the wall.• Place a wall anchor into each of the drilled holes.• Tap each wall anchor lightly with hammer until the ends of each wall anchor are even with the surface of the wall. Wall AnchorCamera Wall Mount Installation76
19Camera Wall Mount Installation• Align the holes on the cord wrap with the wall anchors. • Insert two screws into the holes in the cord wrap and tighten with a Phillips screwdriver. Do not over-tighten. Cord Wrap• Fit the camera into the docking station. • Slide the camera docking station into the wall mount bracket. 89Docking StationCamera
2010Camera Wall Mount InstallationIMPORTANT! Make sure the cord is taught between the camera docking station and cord wrap. Excess cord can form loops or extend into the crib and present a strangulation hazard.• Extend the docking station power cord straight down the wall to the cord wrap. • Wrap the docking station power cord around the cord wrap, leaving just enough to reach the wall outlet. Make sure there is no slack in the docking station power.• Slide the lever on the front of the cord wrap and thread the docking station power cord through the groove in the front of the cord wrap. Make sure the docking station power cord is fully inserted in the groove. • Plug the docking station power cord into the wall outlet. IMPORTANT! Make sure there is no slack in the cord. Use the cord wrap.GrooveCord WrapLever
21Setup/On Screen Displays Main Menu• First, turn both the camera and parent unit power ON. Then press the settings/menu   button on the parent unit to see the main menu.Note: The fi rst time you turn on the parent unit you will see the main menu. Use the instructions in this section to set up the parent unit. You can also open the settings/menu at any time to adjust these settings.• Press the volume up   or down   buttons to scroll through menu options. As you scroll, the menu choices highlight on the screen.• Press the settings/menu   button to choose:    Brightness    Contrast    Set Clock    Voice Activated Screen    ExitHint: The main menu turns off if you do not scroll through choices or make a selection within approximately 30 seconds. Simply press the settings/menu  button again to return to the main menu.
22Setup/On Screen Displays  Brightness• Press volume    buttons to adjust the brightness on the screen.• Press the settings/menu   button to make your selection and return to the main menu.• Press volume    buttons to scroll to the exit icon  . Press the settings/menu   button to exit the menu screen.  Contrast• Press volume    buttons to adjust contrast on the screen.• Press the settings/menu   button to make your selection and return to the main menu. • Press volume    buttons to scroll to the exit icon   and press the settings/menu   button to exit the menu screen.
23Setup/On Screen Displays  Set Clock - AM/PM Format• Press the volume   or   buttons to scroll to AM/PM.• Press the settings/menu   button to confi rm your selection.• Press the volume   or   buttons to set the hour. Press the    settings/menu   button to confi rm the selection.• Press the volume   or   buttons to set the minutes. Press the    settings/menu   button to confi rm the selection.• Press the volume   or   buttons to set AM or PM. Press the    settings/menu   button to confi rm the selection.• Press the volume   or   buttons to scroll to the exit icon   and    press the settings/menu   button to exit the menu screen.
24Setup/On Screen Displays  Set Clock - 24 Hour Format• Press the volume   or   buttons to scroll to 24-hour clock format.• Press the settings/menu   button to confi rm your selection.• Press the volume   or   buttons to set the hour. Press the settings/menu button   to confi rm the selection.• Press the volume   or   buttons to set the minutes. Press the settings/menu button   to confi rm the selection. • Press the volume   or   buttons to scroll to the exit icon   and press the settings/menu   button to exit the menu screen.
25Setup/On Screen Displays     Voice ActivatedYou can set the parent unit to voice activated mode to conserve battery power or for night time use.   If the video screen is turned off and baby makes noise, the video screen automatically turns back ON. It will remain on for 30 seconds and then turn OFF after the last sound detected. You can also press any button on the parent unit to turn the video screen back ON.  Video screen does not automatically turn ON when baby makes noise. Press the display button on the top of the parent unit to turn the video screen ON; press again to turn OFF. • Press volume   or   buttons to scroll through the menu. Press the settings/menu   button to make your selection.• Press volume   or   buttons to scroll to the exit icon   and press the settings/menu   button to exit the menu screen.
26On Screen Displays Range •  The number of bars indicates signal strength.Note: The range, clock and battery indicators only appear when the parent unit is in a vertical view. Out of Range •  The out of range warning will fl ash on the video screen and you will hear a tone when the parent unit is out of range or the camera isturned off.
27On Screen DisplaysBattery IndicatorsNotes: The number next to the on-screen battery indicator corresponds to the number on the back of the parent unit and camera. Both battery indicators are only visible when the parent unit is in a vertical view. When the parent unit is in a horizontal view, only the parent unit's battery indicator displays.   Indicates parent unit/camera is using battery power.   Indicates battery power is low (and you will hear a tone).  When displayed (and blinking), indicates that parent unit/camera is using AC power and is charging.  When displayed (and not blinking), indicates that parent unit/camera is using AC power (and is fully charged). Nap Timer•  Press the nap timer button   to start the nap timer. Press again to stop the time. Press a third time to reset the timer.Note: When the parent unit is in a vertical view,  the nap timer will move to the center of the screen, as shown. When you are fi nished using the nap timer, it will move to the upper right corner of the menu.
28• Place the camera in the same room with child. Position the camera lens so it is facing child. For the best viewing range, the camera should be approximately six feet away from baby. • To use AC power, fi t the camera into the docking station.• Plug the power cord into a standard wall outlet. Use the power cord only in a wall outlet. Do not plug the power cord into a ceiling outlet.• Press the power button to turn the power ON. The button lights. UseIMPORTANT! Test the sound and video reception of the monitor before fi rst time use and whenever you change the location of the camera (see Testing Sound/Video Reception section of these instructions).
29Use• To use AC power with the parent unit, unwrap and fully extend the AC adaptor/charger (for best reception). Insert the AC adaptor/charger pin into the DC input jack on the parent unit and plug into a standard wall outlet.• Press the power button on the parent unit to turn the power ON.  • Press the volume buttons to turn the parent unit volume up  or down . • To monitor baby without video, press the display button at the top of the parent unit. To turn video back on, simply press the button again. • The parent unit can be used to stay in touch with baby around your house or yard. The parent unit’s range is up to 450 feet (137 meters) away from the camera under permitting conditions. The out of range warning will fl ash on the screen and you will hear a tone when the parent unit is out of range. • Press the power button to turn the parent unit power OFF.
30When the light in baby’s room is too low, the camera will automatically switch to night vision mode. The moon icon will appear on the menu bar, and the image on the video screen will appear in black and white, not color.Night Vision ModeMoon Icon
31Battery ReplacementIf you need to replace your NiMH rechargeable battery pack, please contact Fisher-Price® Consumer Relations at www.service.fi sher-price.com or call 1-800-432-5437. Parent Unit• Locate the battery compartment door on the back of the parent unit.• Loosen the screw in the battery compartment door with a Phillips screwdriver. Remove the battery compartment door. • Remove the exhausted battery pack and dispose of it properly. • Plug the new rechargeable battery pack into the battery connector. Then, insert the battery pack in the battery compartment.• Replace the battery compartment door and tighten the screw with a Phillips screwdriver. Do not over-tighten. Camera• Loosen the two screws in the bottom of the camera with a Phillips screwdriver. • Remove the base from the camera and dispose of it properly.
32Battery Safety InformationIn exceptional circumstances, batteries may leak fl uids that can cause a chemical burn injury or ruin your product. To avoid battery leakage:• If replacing the battery pack, insert it as indicated inside the battery compartment.• Always remove an exhausted battery pack from the product. Dispose of the battery pack safely. Do not dispose of product in a fi re. The battery pack inside may explode or leak. Contact Fisher-Price® Consumer Relations at service.fi sher-price.com or call 1-800-432-5437 to purchase a battery pack.• Never short-circuit the battery pack terminals.• Use only batteries of the same type, as recommended.
33Problem SolutionNo image on parent unit screen Press the display button. You can also change the voice acti-vated setting to  . The video screen automatically turns on when baby makes noise. Batteries in parent unit are weak or dead. Use AC adaptor/charger and to charge the battery and as a power source.Camera lens is obstructed. Adjust the camera angle.Parent unit beeps and out of range screen displays  .Parent unit is out of range of camera. Move parent unit closer to camera.Note: Range varies depending on surrounding conditions such as noise levels, physical obstructions and signal interference. Under optimal conditions, the range is up to 450 feet. Turn the parent unit to change the orientation.Camera power is off. Turn camera power on.Do not block the internal antenna on parent unit.Loose power cord connection and camera power is off. Check camera docking station power cord plug-to-outlet connection.No power to wall outlet and camera power is off. Make sure light switch that controls power flow to wall outlet is on.Power is off because circuit breaker for room is off. Make sure house fuses and circuit breakers are on.Parent unit power button does not lightParent unit power is off. Turn parent unit power on.Battery pack in parent unit is weak or dead. Use AC adaptor/charger to charge the battery and as a power source.Power is off because circuit breaker for room is off. Make sure house fuses and circuit breakers are on.No power to wall outlet and power is off. Make sure light switch that controls power flow to wall outlet is on. Problems & Solutions
34Problem SolutionParent unit beeps and displays low battery icon  on screenIf the low battery icon with a 1 is displayed, the battery pack in parent unit is weak or dead. Use AC adaptor/charger to charge the battery and use as a power source.If low battery icon with a 2 is displayed, the battery pack in camera is weak or dead. Place the camera in the docking station to charge the battery and use as a power source.Camera power L.E.D. does not lightCamera power is off. Turn camera power on.Loose power cord connection and camera power is off. Check docking station power cord plug-to-outlet connection.No power to wall outlet and camera power is off. Make sure light switch that controls power flow to wall outlet is on.Power is off because circuit breaker for baby’s room is off. Make sure house fuses and circuit breakers are on.You can hear conversations orsounds from other homesThere is signal interference due to other nursery monitors on same channel or cordless telephone use. You may need to pair the parent unit and camera. Remove the parent unit battery door and press the pairing button with a paperclip. The power button will blink when the pairing button is released. Then, turn over the camera and press the pairing button with a paperclip. The power button will flash on both units after the pairing button is pressed. When the pair is complete, the power button on both units will go back to solid.Problems & SolutionsHint: If, after checking all of these solutions, you believe that your camera power cord or AC adaptor are damaged, please contact Fisher-Price®.
35Care• Excess dirt in camera microphone will hamper transmission of sound. Wipe all parts with a damp cloth. Do not immerse any part of this monitor.• Protect the environment by not disposing of this product with household waste (2002/96/EC). Check your local authority for recycling advice and facilities (Europe only).FCC Statement (United States Only)This equipment has been tested and found to comply with the limits for a Class B digital device, pursuant to part 15 of the FCC rules. These limits are designed to provide reasonable protection against harmful interference in a residential installation. This equipment generates, uses and can radiate radio frequency energy and, if not installed and used in accordance with the instructions, may cause harmful interference to radio communications. However, there is no guarantee that interference will not occur in a particular installation. If this equipment does cause harmful interference to radio or television reception, which can be determined by turning the equipment off and on, the user is encouraged to try to correct the interference by one or more of the following measures:Reorient or relocate the receiving antenna.Increase the separation between the equipment and receiver.Connect the equipment into an outlet on a circuit different from that to which the receiver is connected.Consult the dealer or an experienced radio/TV technician for help.Note: Changes or modifi cations not expressly approved by the manufacturer responsible for compliance could void the user’s authority to operate the equipment.Video MonitorModel Number: T4256This device complies with Part 15 of the FCC Rules. Operation is subject to the following two conditions: (1) This device may not cause harmful interference and (2) this device must accept any interference received, including interference that may cause undesired operation.Video MonitorConsumer Relations Department636 Girard AvenueEast Aurora, New York 14052, U.S.ATo maintain compliance with the FCC's RF exposure guidelines, place the transmitter at least 20 cm from users. Make sure the transmitter is not located near or operated along with any other antenna or transmitter.ICES-003    NMB-003This Class B digital apparatus complies with Canadian ICES-003. Operation is subject to the following two conditions: (1) this device may not cause harmful interference and (2) this device must accept any interference received, including interference that may cause undesired operation.Cet appareil numérique de la classe B est conforme à la norme NMB-003 du Canada. L’utilisation de ce dispositif est autorisée seulement aux conditions suivantes : (1) il ne doit pas produire de brouillage et (2) l’utilisateur du dispositif doit être prêt à accepter tout brouillage radioélectrique reçu, même si ce brouillage est susceptible de compromettre le fonctionnement du dispositif.
Fisher-Price, Inc., a subsidiary of Mattel, Inc., East Aurora, New York 14052, U.S.A.©2010 Mattel, Inc. All Rights Reserved.® and ™ designate U.S. trademarks of Mattel, IncPRINTED IN CHINA T4256pr-0920CONSUMER ASSISTANCEAYUDA AL CONSUMIDORSERVICEÀ LA CLIENTÈLE1-800-432-5437 (US & Canada)Fisher-Price, Inc., 636 Girard Avenue, East Aurora, NY 14052.Hearing-impaired consumers/Clientes con problemas auditivos/Pour les malentendants : 1-800-382-7470.En México: 59-05-51-00 Ext. 5205 ó 01-800-463-59-89

Navigation menu