Fitbit FB150 Wireless Activity Tracker Dongle User Manual Zip Product Manual
Fitbit, Inc. Wireless Activity Tracker Dongle Zip Product Manual
Fitbit >
Users Manual
Product Manual

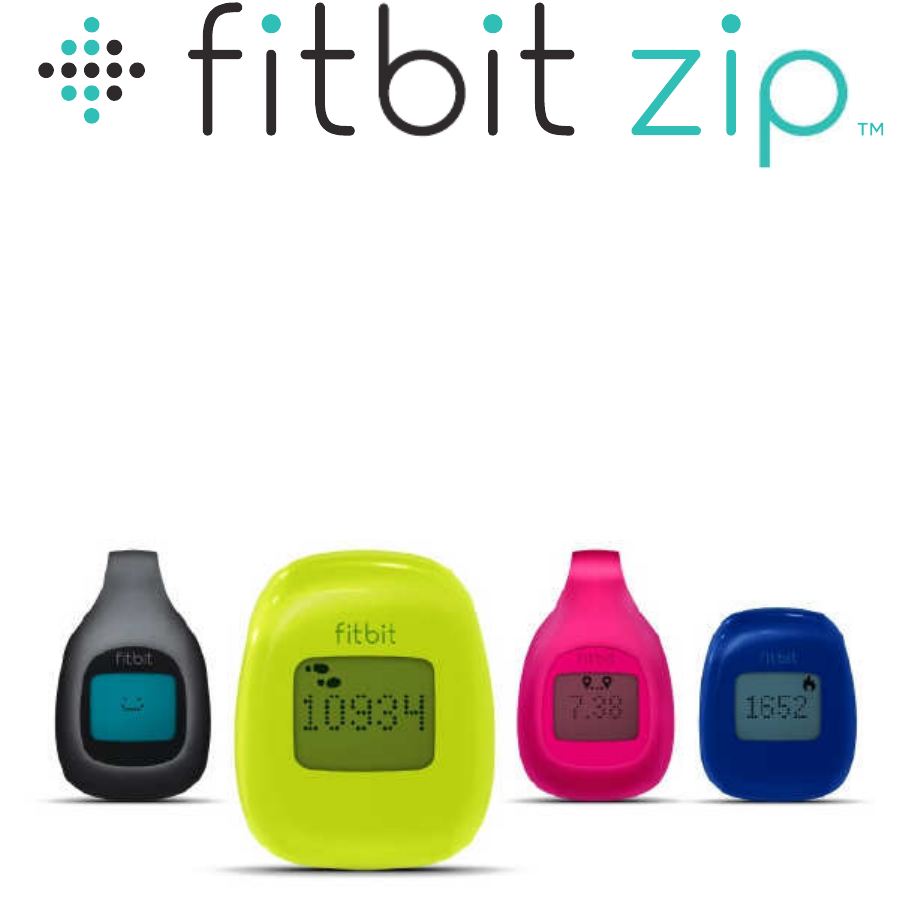
Fitbit Zip Product Manual
1
2
3
6
9
9
9
11
10
10
10
10
10
11
11
11
12
12
Contents
Gett ing Started
What's Included
Sett ing up your F itbit Zip
Install ing the Fitbit Connect software
Pairing your F itbit Zip to a mobile device
Using your Fitbit Zip
Wearin g your F itbit Zip tracker
Battery
Display
W h e n Your Zip Goes to Sleep
Using the Fitbit Connect Applicat ion
O pen Main Menu
Syn c N o w
Set Up Device
Devi ce Update
Troubleshoot ing
General Zip Informat ion
Environmental C on d it ion s
P C / M a c requirements
Browsers supported
Statements
Federal Comm unicat ions Comm ission
(FCC)
and Industry Canada (I C)
Statement
Help
Gett ing Started
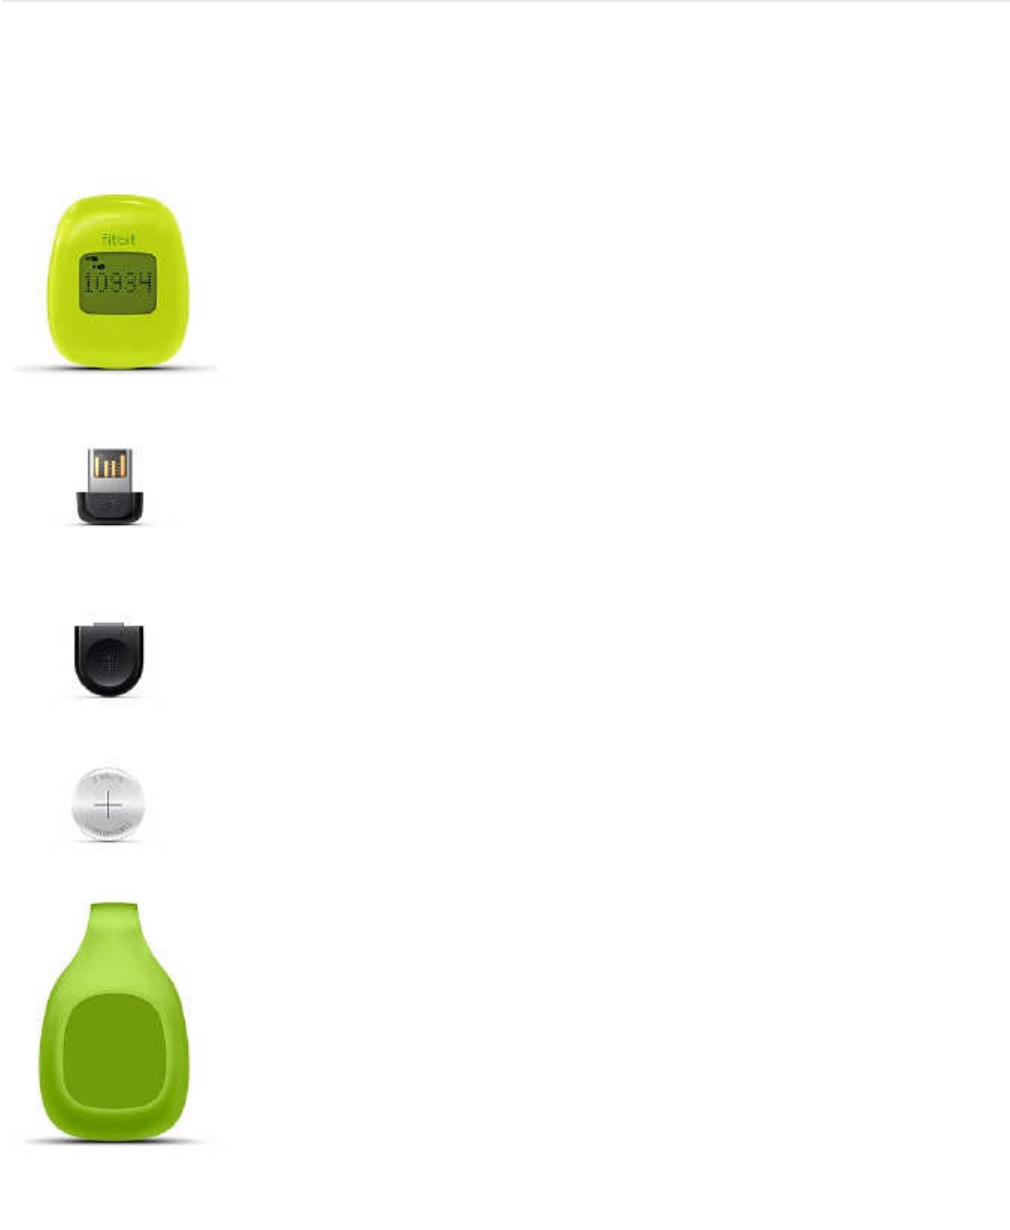
W h a t ' s I nc l u d e d
Yo ur F itbit Zip W i reles s Act ivity Tracker will contain:
•
Fitbit Zip W irel es s Act ivity Tracker
•
wireless USB don gle
•
battery d oo r tool
•
3V
coin battery,
CR2025
•
belt clip
•
Fitbit Zip Quick Start Guide
1
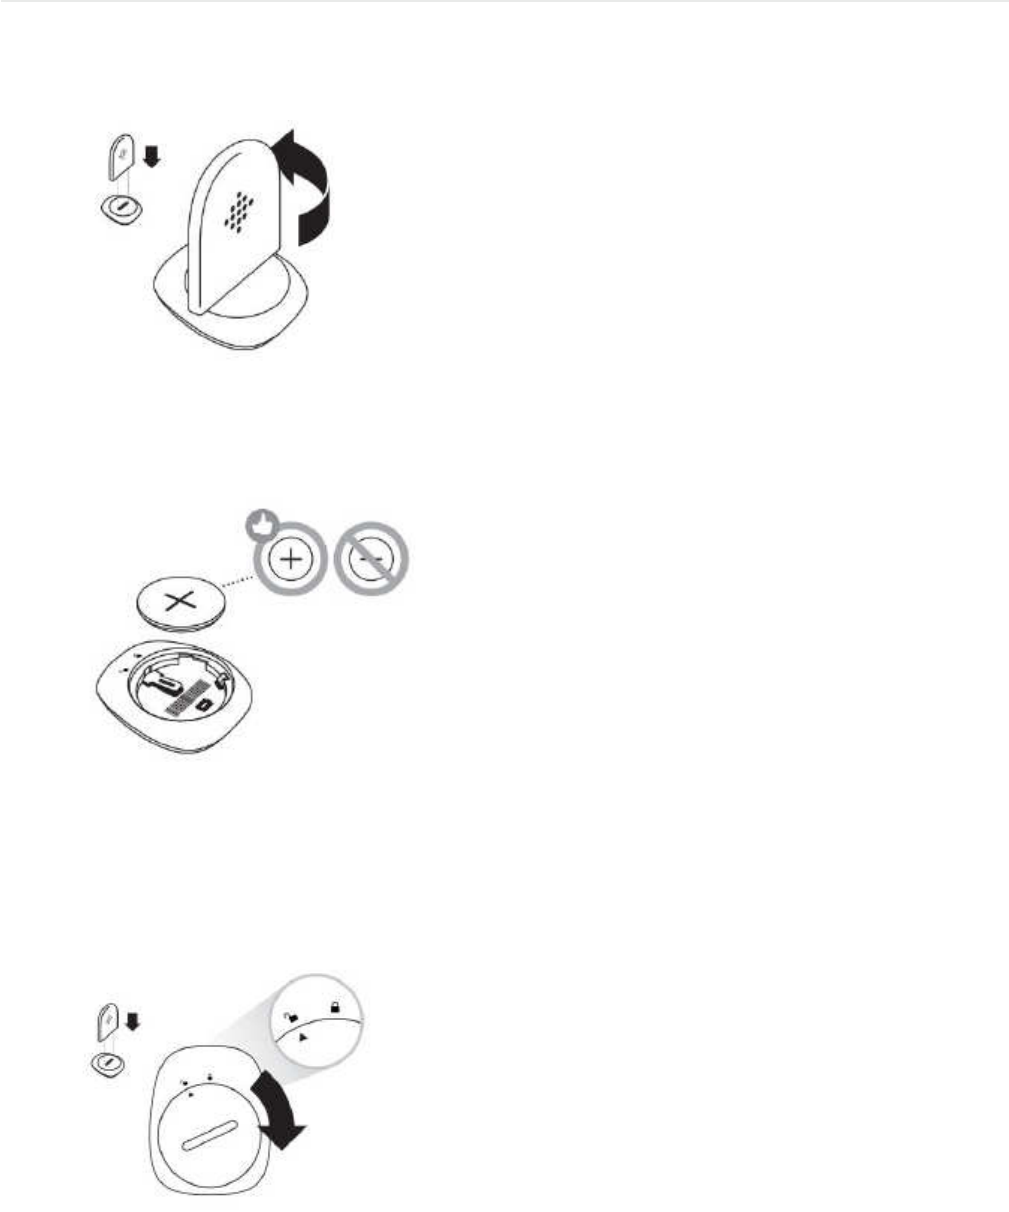
Sett ing Up Your F itbit Zip
1.
Remove your Zip from its packaging.
2.
Use the provided battery door tool to unlock the battery door. Insert the tool
into the slot on the b a ck of the unit, and turn the door counterclockwise.
3. O n ce the door has been removed, insert the pro vid e d battery into the back
of the unit, with the “+” sign facing up. The battery will rest in the center of the
compartment.
4. On ce the battery is in place, al ign the arrow on the battery do or with the ‘un-
lock’ icon on your Zip to put the battery door in place. Use the battery door tool
to ‘lock’ the battery doo r by turning it clockwise unt il the arrow on the door lines
up with the ‘lock’ icon.
2
5. O nc e the d isplay come s on, you will b e ready to proce e d with setup. The f irmware version of
your Zip wil l appear on the display, fol lowed by the Fitbit Smiley. The series of smiley faces are
used to represent your act ivity level. The d is pl ay will remain o n for
30
minutes after insert ing
the battery.
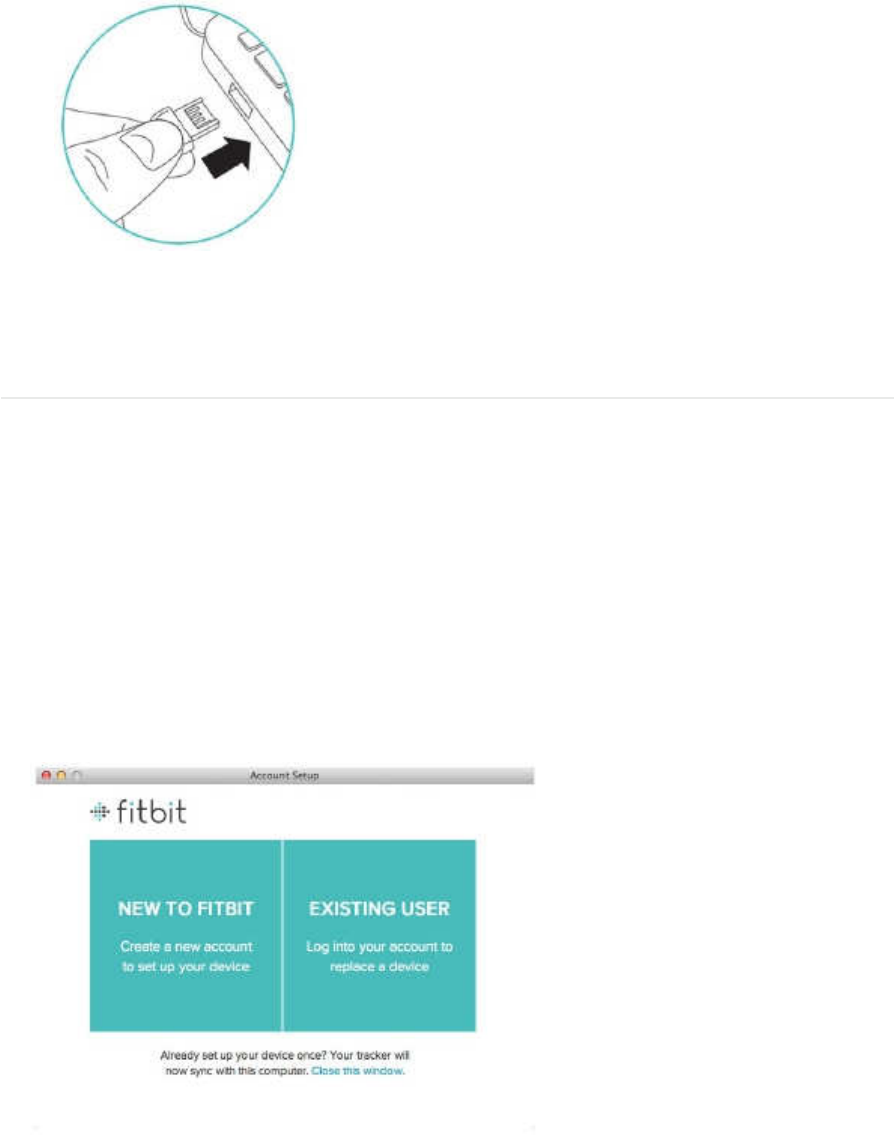
6. Take the USB dong le from the b o x and plug it into a USB port on your computer.
7. You are n o w ready to instal l Fitbit Connect.
Instal ling the F itbit Connect software
1.
Go to www.f itbit.com/start/zip
2. Select the pink “Download” link to down load F itbit Connect.
3. O pe n the F itbit Connect f ile and fol low ons creen instruct ions.
4. The f irst t ime you o p en Fitbit Connect, you will have the opt ion to create a n ew accoun t
if you are n e w to Fitbit or login to your account if you are an exist ing user.
If you already have a Fitbit.com acco un t an d y o u want to use the Zip with your exist ing
account, proc e ed with Zip setup using that email address.
*There c an only be on e Tracker per Fitbit.com account. If you already have an Ultra or Zip
associated with Fitbit.com, linking a n e w device to it will unl ink the prev ious device.
To monitor your Zip and your Ultra simultaneously, create a n e w Fitbit.com accoun t with a n e w
email address.
3

6. You will be prompte d to tel l us a few details about yourself.This informat ion helps to
person al ize your experience with your Zip and makes your calorie burn and d istance data more
accurate. Before cl ic king “Next,” ensure that your Zip is within
5
inches of the US B d ongle
pl ugge d into your computer. If another Zip is nearby, m ove it further away.
7. After you click “Next” the F itbit software wil l search for your Zip.
8. W h e n your Zip has been d is co ve red , y o u wil l be pr om p te d to enter the
4
digit pairing
number d i sp laye d on y our Zip's screen.
4
•
The pairing numbe r will d isplay with the rad io icon an d begin with a 0. It may take u p to
30
se c on ds for this n umber to appear.
•
If the number doe s not display, cl ick “I don’t see a number.” You will then be prompted to:
•
Make sure the battery is inserted and your Zip screen is on.
•
Move n earby Trackers away from the dongle.
•
Make sure that your Zip is removed from the cl ip case.
9.
After y ou enter the number d isp layed on the scree n of your Zip, it will b e linked to your
Fitbit account.
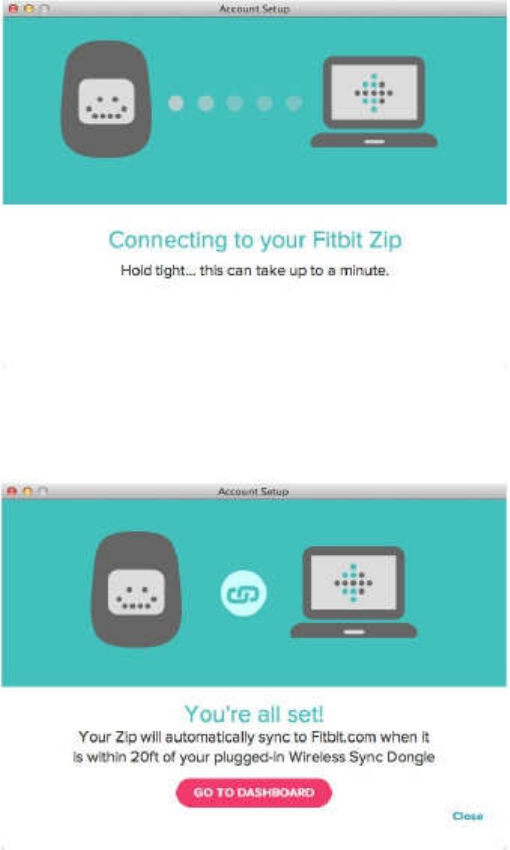
10. O n ce your Zip has be en l inked with your Fitbit.com account, yo u wil l see an “All Set” screen,
which will al low y o u to click through to Fitbit.com, where y ou can acc es s all of the informat ion
s yn c ed from your Zip to your account.
5

Pairing your F itbit Zip to a mobile device
The Fitbit Zip wil l s y nc with compat ible Bluetooth Smart devices. Currently, the iPhone 4S,
iPhone 5, iPod Touch, iPad Mini an d 3 r d generat ion iPad will s y nc to the Fitbit One.
Devi ces that d o not have Bluetooth 4.0 /B luetoo th Smart comp at ibil ity won’t s y n c directly with the
Fitbit Zip.
1. Down lo ad the latest F itbit app for your device. If you already have the Fitbit app, y ou ma y need
to update it at this t ime. C he ck the
App
Store to see if there is a Fitbit a p p u pdate available.
2. O p en the Fitbit app. If you already have a Fitbit a ccount and would like to syn c your Fitbit Zip
with that account, tap the “L og in” button. Please note that only one tracker can be paired to your
account at a t ime.
If you have mult iple trackers, you’l l n eed to have mult iple Fitbit accounts.
If you are n e w to Fitbit (or have an exist ing F itbit devi ce that yo u would like to cont inue to use with
a different email address), yo u c an sign up for a n e w accoun t b y tapping the “Get started” button.
3. If you are n e w to Fitbit, y o u will be asked for your personal informat ion on the fol lowing screen.
4. If you don’t already have an account,
on the next scree n you’l l b e asked for the email address
and pass word you’d like to use with Fitbit.
5. B e sure that the battery has been inserted in your Zip. Make sure that your Zip is awake by giving
it a tap.
6. Move your tracker close to your mobile device, then tap “Set u p Now”. If y ou see a “Link Now”
button instead, you already have a tracker associated with the email y ou entered at login. Tap “Link
Now” to sy nc the tracker to your F itbit account.
7. Select “Zip”.
8. After select ing “Zip”, tap “Start” on the n ext screen. Your mobile device will begin to search for
your tracker.
9. W h e n the “ We found a F itbit Zip” screen appears, tap “Next”.
10. W h e n your tracker has been d i scov ered, yo u wil l b e asked to enter the numb er on your tracker’s
d ispla y into your mobile device.
11. Yo ur mobile devi ce will n o w link your tracker to your Fitbit account.
Cl ick “Done” in the up pe r right corner of the “You’re all set” screen to return to the Fitbit ap p an d
see any stats that have been synced.
Cl icking “F itbit Zip 101” wil l bring u p tw o screens with basic informat ion about using your Zip.
6
Using your Fitbit Zip
Wearing your Zip
•
Yo ur Zip is most accurate when wor n o n or very close to the body.
A
shirt pocket, bra, pants
pocket, belt, or waistband are all ideal places to wear your Zip. Try out a few different locat ions
to see what is most comfo rtable an d se cure for you.
•
A
belt cl ip is provided, design ed to keep it cl ipp ed to yo ur clothing.
•
Yo ur Zip is sweat, rain, an d splash resistant, but not waterproof. It is not intended to be worn
swimming.
Battery
•
Yo ur Zip runs on a replaceable
3V
coin battery, CR 20 25.
•
Yo ur battery should last 4- 6 months with regular use.
•
A
battery icon will appear on your Zip d ispl ay when the battery has drained to 25%.
A
flashing battery icon ind icates that your Zip is very c lose to bein g completely out of battery
life, an d that data c ould be lost if your Zip is not sy nced before replacing the battery.
•
If your Zip battery drains, purchase a n e w
3V
coin battery, CR 2025. Use the provided battery
do or tool to unlock the battery door compartment, located on the b a ck of the Zip. Your old
battery can b e recycled.
Display
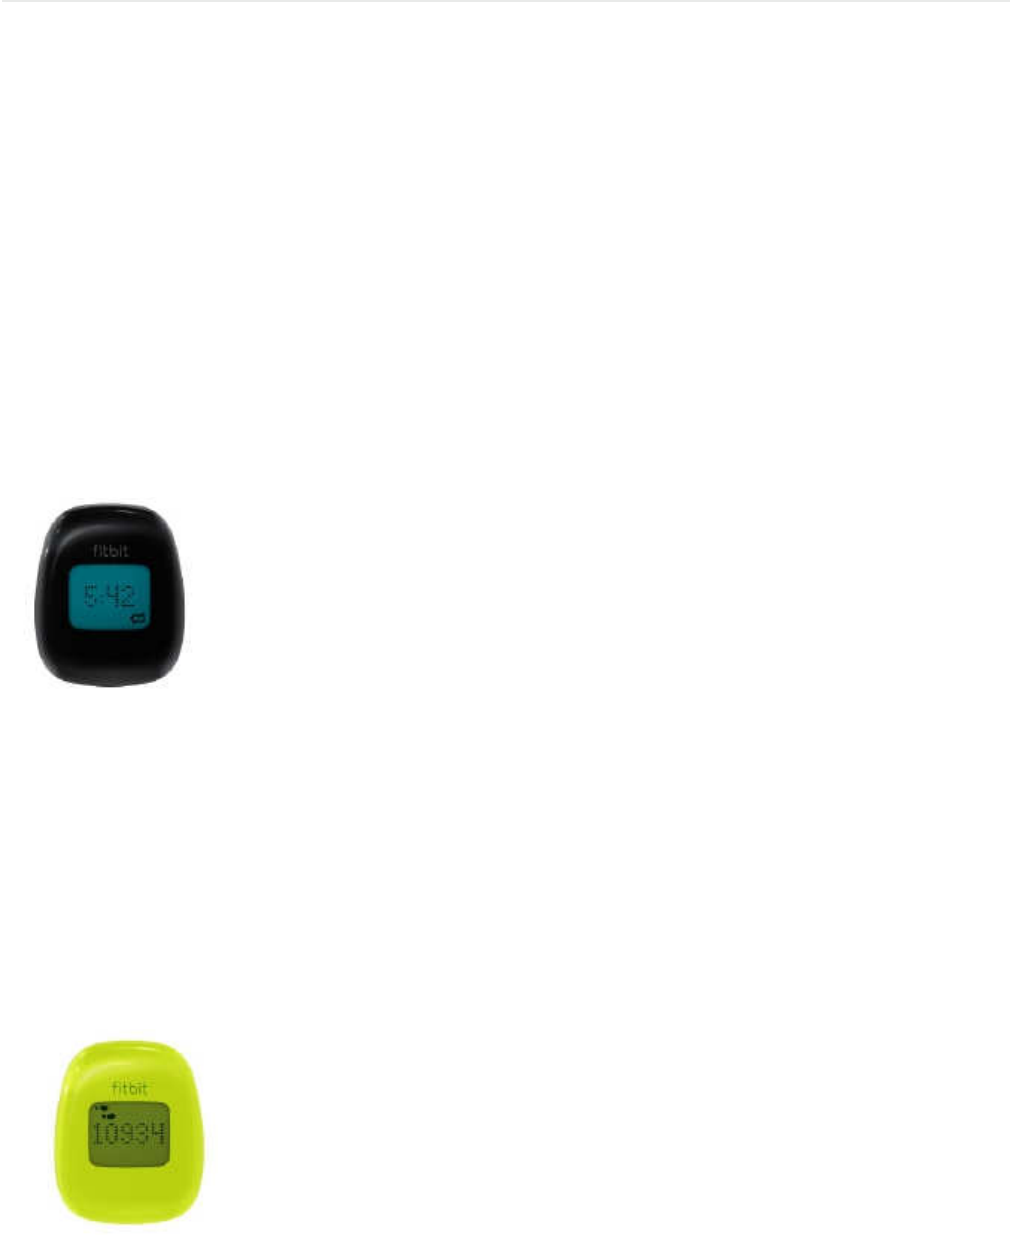
The d isp la y s ho w s your stats, as wel l as the t ime. Tap your Zip to progress from one screen to
the next.
•
Steps
•
The steps d isplayed represent your daily total.
Yo ur Zip resets automat ical ly each da y at
7

midnight.
•
Wal k ing and running steps are d isplayed as a comb i ne d total.
•
Going to your Fitbit.com Dashboar d an d c l ick in g “Sett ings” can remove the ste p d isplay.
f itbit.com/sett ings /device/tracker
•
Distance
•
Zip calculates your d i st ance bas ed on your step count and stride length. Your stride
length is est imated bas ed on your height, weight, age, an d gender. Yo u also h ave the op-
t ion of entering your o w n stride length for more accuracy. (Link here to Calculat ing Stride
length)
•
Distance can be viewed in either miles or kilometers b y changin g your sett ings.
f i tbit.c om/us er/pr of i le/ed it
•
Going to your Fitbit.com Dashboar d an d c l ick in g “Sett ings” can remove the d ist an ce d is-
play. f itbit.com/sett in gs/device/tracker
•
Calorie Burn
•
Zip record s how many calories you’ve burn ed ba se d on your act ivit ies throughout the
day an d your Basal Metabol ic Rate (BMR). (link to BMR def init ion/explanat ion of BMR)
•
W h e n you manual ly log an act ivity on F itbit.com, the calorie burn associated with it will
be a dde d to your Zip the next t ime yo u sync.
•
The total d isp la ye d is h o w man y calories you have burn ed since midnight, i nclud i ng yo ur
BMR.
•
Going to your Fitbit.com Dashboar d an d c l ick in g “Sett ings” can remove the calorie d is-
play. f itbit.com/sett in gs/device/tracker
8

•
Clock
•
The clock sh ow s the current t ime. If the t ime is not correct, please s yn c your Zip and make sure
that have selected the appropriate t ime zone in your Fitbit.com prof ile.
f i tbit.c om/us er/pr of i le/ed it
•
Going to your Fitbit.com Dashboar d an d c l ick in g “Sett ings” can remove the clock.
f itbit.com/sett ings /device/tracker
•
Fitbit Smiley
•
These faces wil l change, dep end i ng on your act ivity level.
•
Going to your Fitbit.com Dashboar d an d c l ick in g “Sett ings” can remove the Fitbit Smiley d isplay.
f itbit.com/sett ings /device/tracker
•
L o w Battery Ind icat or
•
W h e n your battery dr op s belo w 25% a low battery indicator wil l s how on the d is pl ay of your Zip,
as w el l as on your F itbit.com prof ile und er “Devices.”
A
flashing battery indicates that you need to
replace the battery as soo n as possible.
W h e n Your Zip Goes to Sleep
To con serve battery life, your Zip sleeps during periods of inact ivity.
Zip wil l sleep after approximately
20
s e co n ds if n o steps are recorded, and 2 minutes after act ivity.
O n ce your Zip is asleep, the d isplay o n y our Zip will remain off unt il moved, unless your Zip has n e w
data to s ync to Fitbit.com.
9

Using the Fitbit Connect Applicat ion
The Fitbit Conne ct Appl icat ion al lows yo u immed ia tely s ync your Zip, set up a device and
provides acce s s to troubleshoot ing resources.
To use the applicat ion, cl ick the F itbit icon in the taskbar an d select “Open Main Menu”
from the drop dow n.
Fo r W i n d o w s users only, right-cl ick the F itbit icon to acce ss the menu items.
Fr o m the main menu, yo u have the fol lowing opt ions:
•
Sync
Now:
This opt ion al lows you to view your current stats by imm ed iate ly s en d ing any n e w in-
format ion gathered on your Zip to your F itbit account. Al though the Zip wil l s ync every 15 minutes
given the appropriate cond i t i on s, us e this feature when you want to see the most recent data
from
your Zip.
•
Set
up
Device:
Use this opt ion here to set u p you r Zip if y ou have not already paired your Zip to
a Fitbit accoun t (or if yo u have a replacement).
•
Check
for
Device
update:
Select this opt ion to check for updates that ma y be available for yo ur
device.
•
Troubleshooting:
Onl ine Help: F in d onl ine help via manuals, FAQs, community forum s and d irect
acc ess to customer support.
•
Expor t
Logs:
If yo u are having trouble with yo ur Zip, support ma y ask you to export logs to pro-
vide more technical support.
10

General Zip Informat ion
Environmental C ond it ions
•
Zip is not waterproof. It should not be w orn while swimming. Zip is splash, rain
and sweat proof.
•
Operat ing temperature: 32° to 104°
F
(0°
to
40°
C)
•
Non-operat ing temperature: -0 ° to 130°
F
(-17.7° to 54.4°
C)
•
Relat ive Humidity: The d evice should not be su b me rg ed in more than 1 meter of water for
any amount of t ime.
•
Maximum operat ing alt itude:
30,000
feet (9,144
m)
•
Non-operat ing temperature: -0 ° to 130°
F
(-17.7° to 54.4°
C)
•
c.
Size and We ight
•
Height: 1.5 inches ( 35 .6 mm)
•
W id th : 1.1 inches (28.9 mm)
•
Depth: 0 . 3 8 inch (9.6 m m )
•
Weight: 0.282 (0.018 lb., 8 grams )
P C
/
Mac requirements
•
W i n d o w s XP and up
•
Mac OSX 10.5 and u p
•
USB Port
•
Internet connect ion
Br ows ers s up p or te d
•
Chro me 12 and up
•
F i re fo x 3.6.18 a nd up
•
Internet Explorer
7
and u p
•
Safari 5.0.5 and up
11

Statements
F e d e r a l C o m m u n i c at i o n s C o m m i s s i o n
(FCC)
St at eme nt
This device compl ies with
FCC
part 15 of the
FCC
Rules an d Industry Canada l i ce nse-exempt RSS
standard(s). Operat ion is subject to the fol lowing tw o cond it i ons:
(1) This device may not cause interference, an d
( 2 ) This device must acc ep t any interference, in clud in g interference that may caus e undesired op-
erat ion of the device.
Changes or mod i f ica t i on s not expressly a pp rove d by the party responsible for c ompl ianc e could
void the user's authority to operate the equipment.
Fo r a Class
B
digital device or peripheral, the instruct ions furnished the user shall include the
fol lowing or similar statement, placed in a prominen t locat ion in the text of the manual:
Note: This equipmen t has been tested and f ound to com ply with the limits for a Class
B
digital
device, pursuant to part 15 of the
FCC
Rules. These limits are design ed to provid e reasonable
protect ion against harmful interference in a resident ial instal lat ion. This equipment generates, uses
and can radiate rad io frequency energy and, if not instal led an d used in acco rd an c e with the
instruct ions, may cau se harmful interference to ra d io communicat ions. Howeve r, there is no
guarantee that interference will not occ ur in a part icular installat ion. If this equipmen t doe s cause
harmful interference to r ad i o or television recept ion, which can b e determined by turning the
equipmen t off and on, the user is enc ouraged to try to correct the interference b y on e or more of
the fol lo wing measures:
• Reorient or relocate the receiving antenna.
• Increase the separat ion betwe en the eq uipmen t and receiver.
• Con nect the equipme nt into an outlet on a circuit d ifferen t from that to which the receiver is
connected.
• Consult the dealer or an experi enced r a d i o /T V technician for help.
This device meets the
FCC
and IC requirements for
RF
exposur e in p ub l ic or un control led
environments.
Troubleshoot ing and Help
Troubleshoot ing an d assistance for your F itbit On e tracker ca n b e found at help.f itbit.com.
12