Flyingvoice Technology FIP12WP IP PHONE User Manual rev
Flyingvoice Technology Co., Ltd. IP PHONE rev
UserManual.wiki
>
Flyingvoice Technology
>
FIP12WP User Manual
User Manual-rev
Navigation menu
Upload a User Manual
Namespaces
Wiki Guide
HTML
PDF
Info
Views
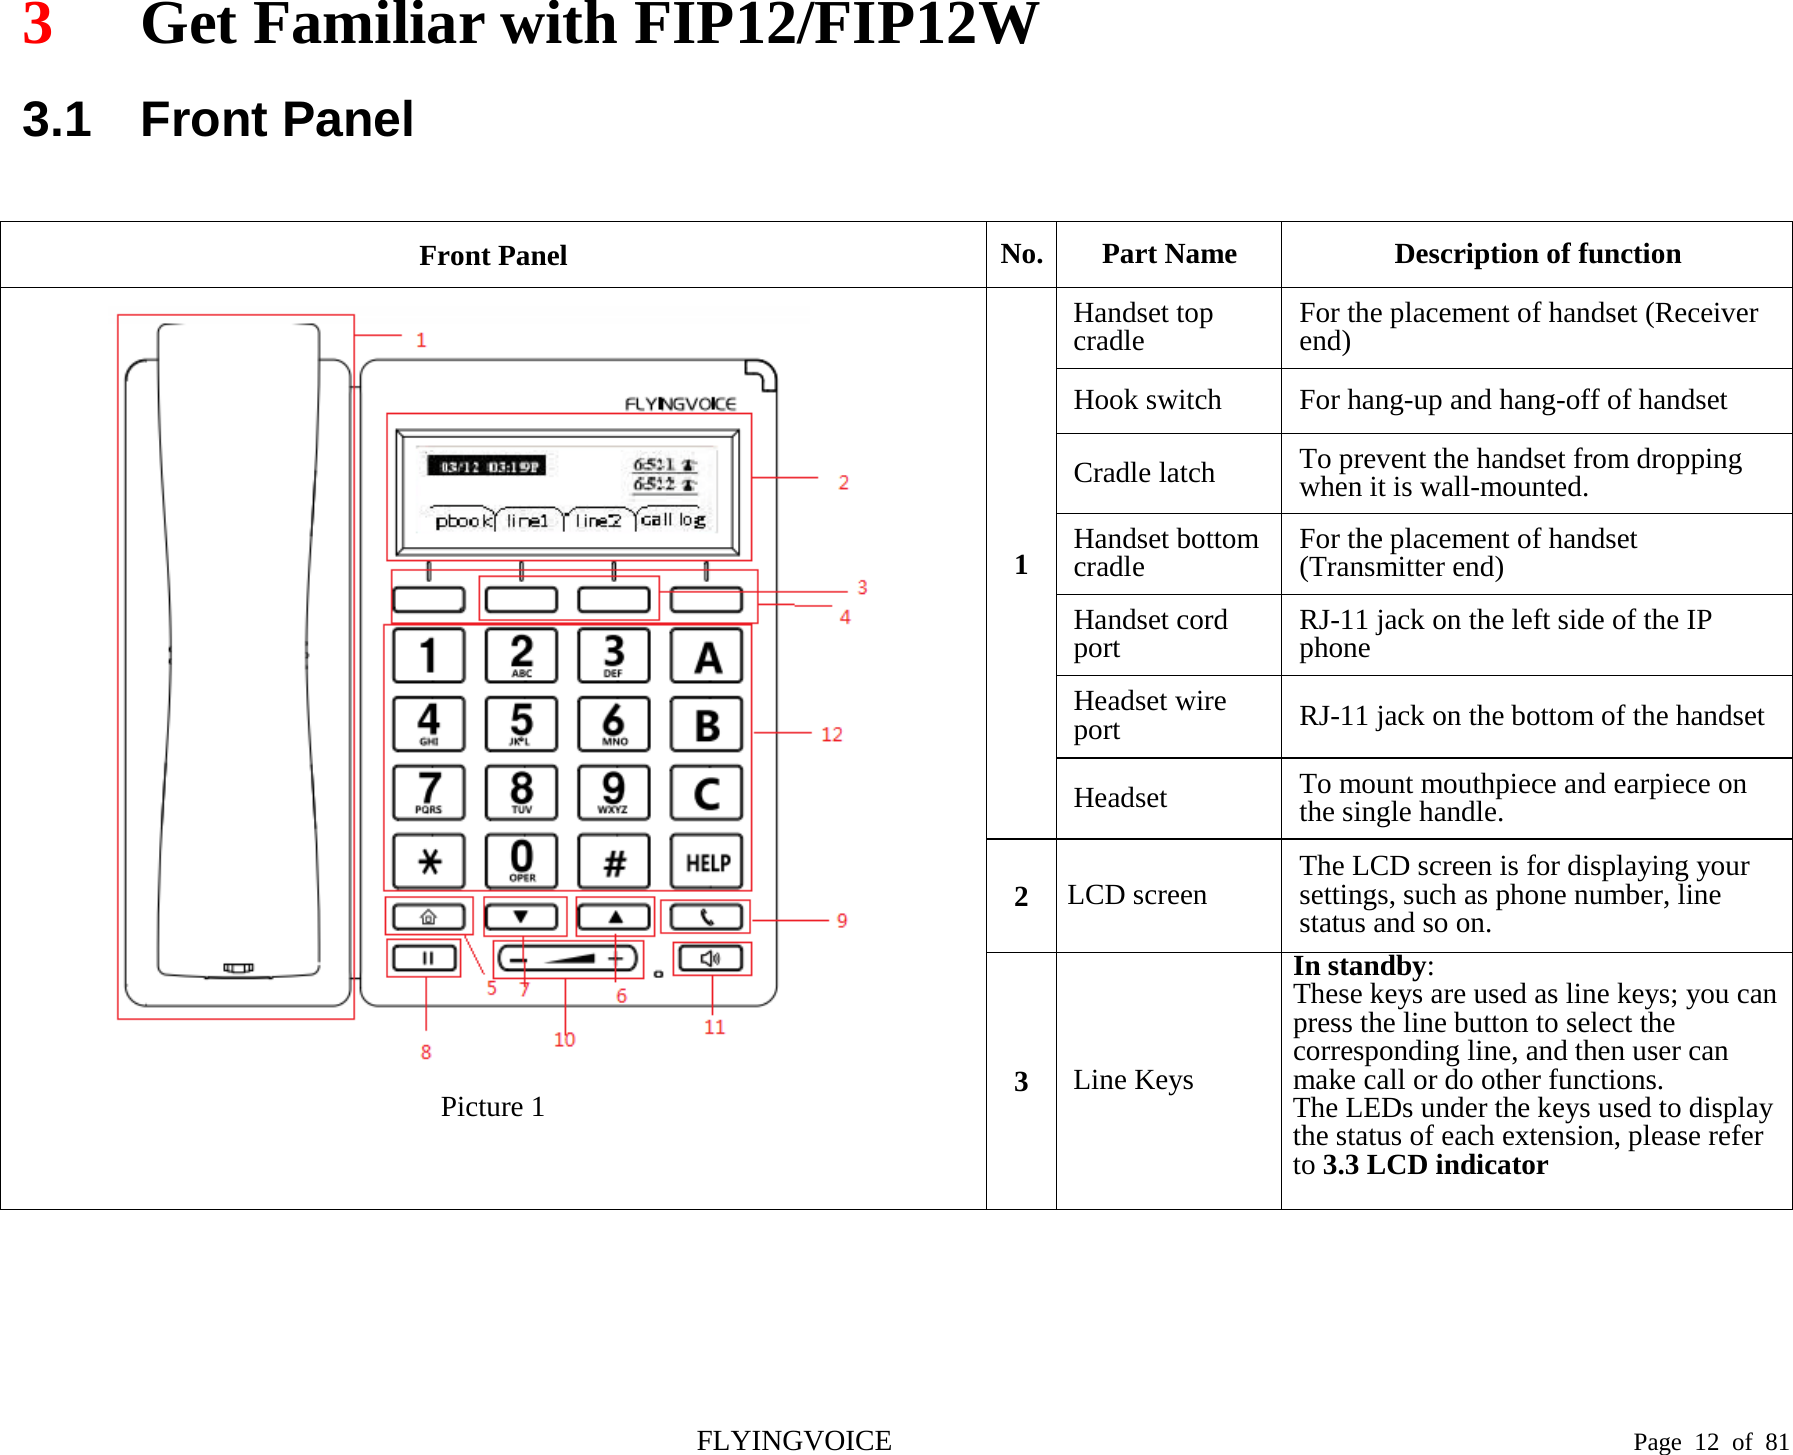
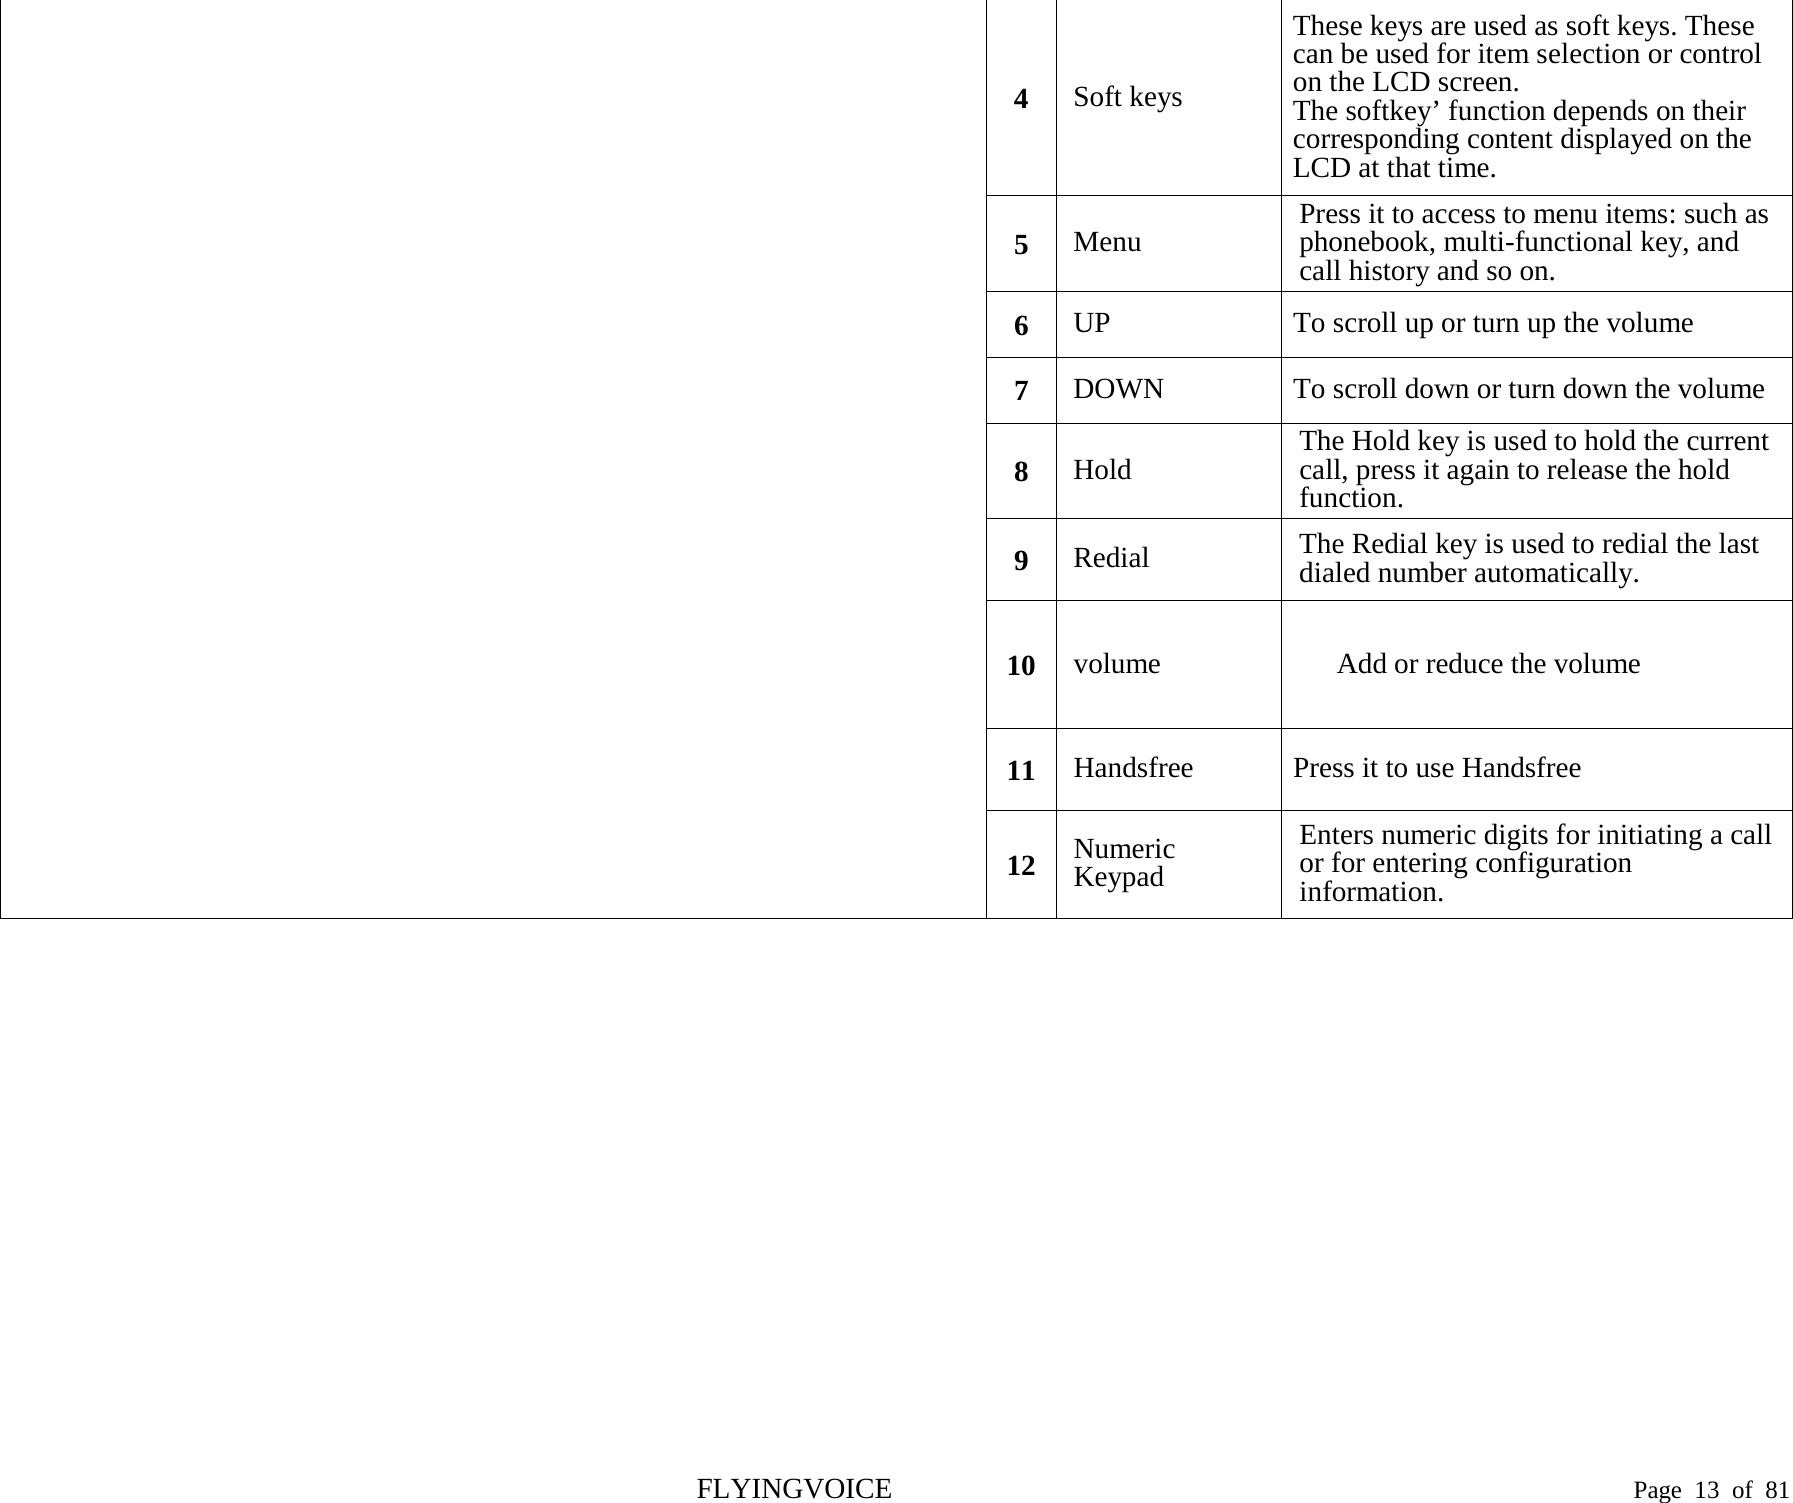
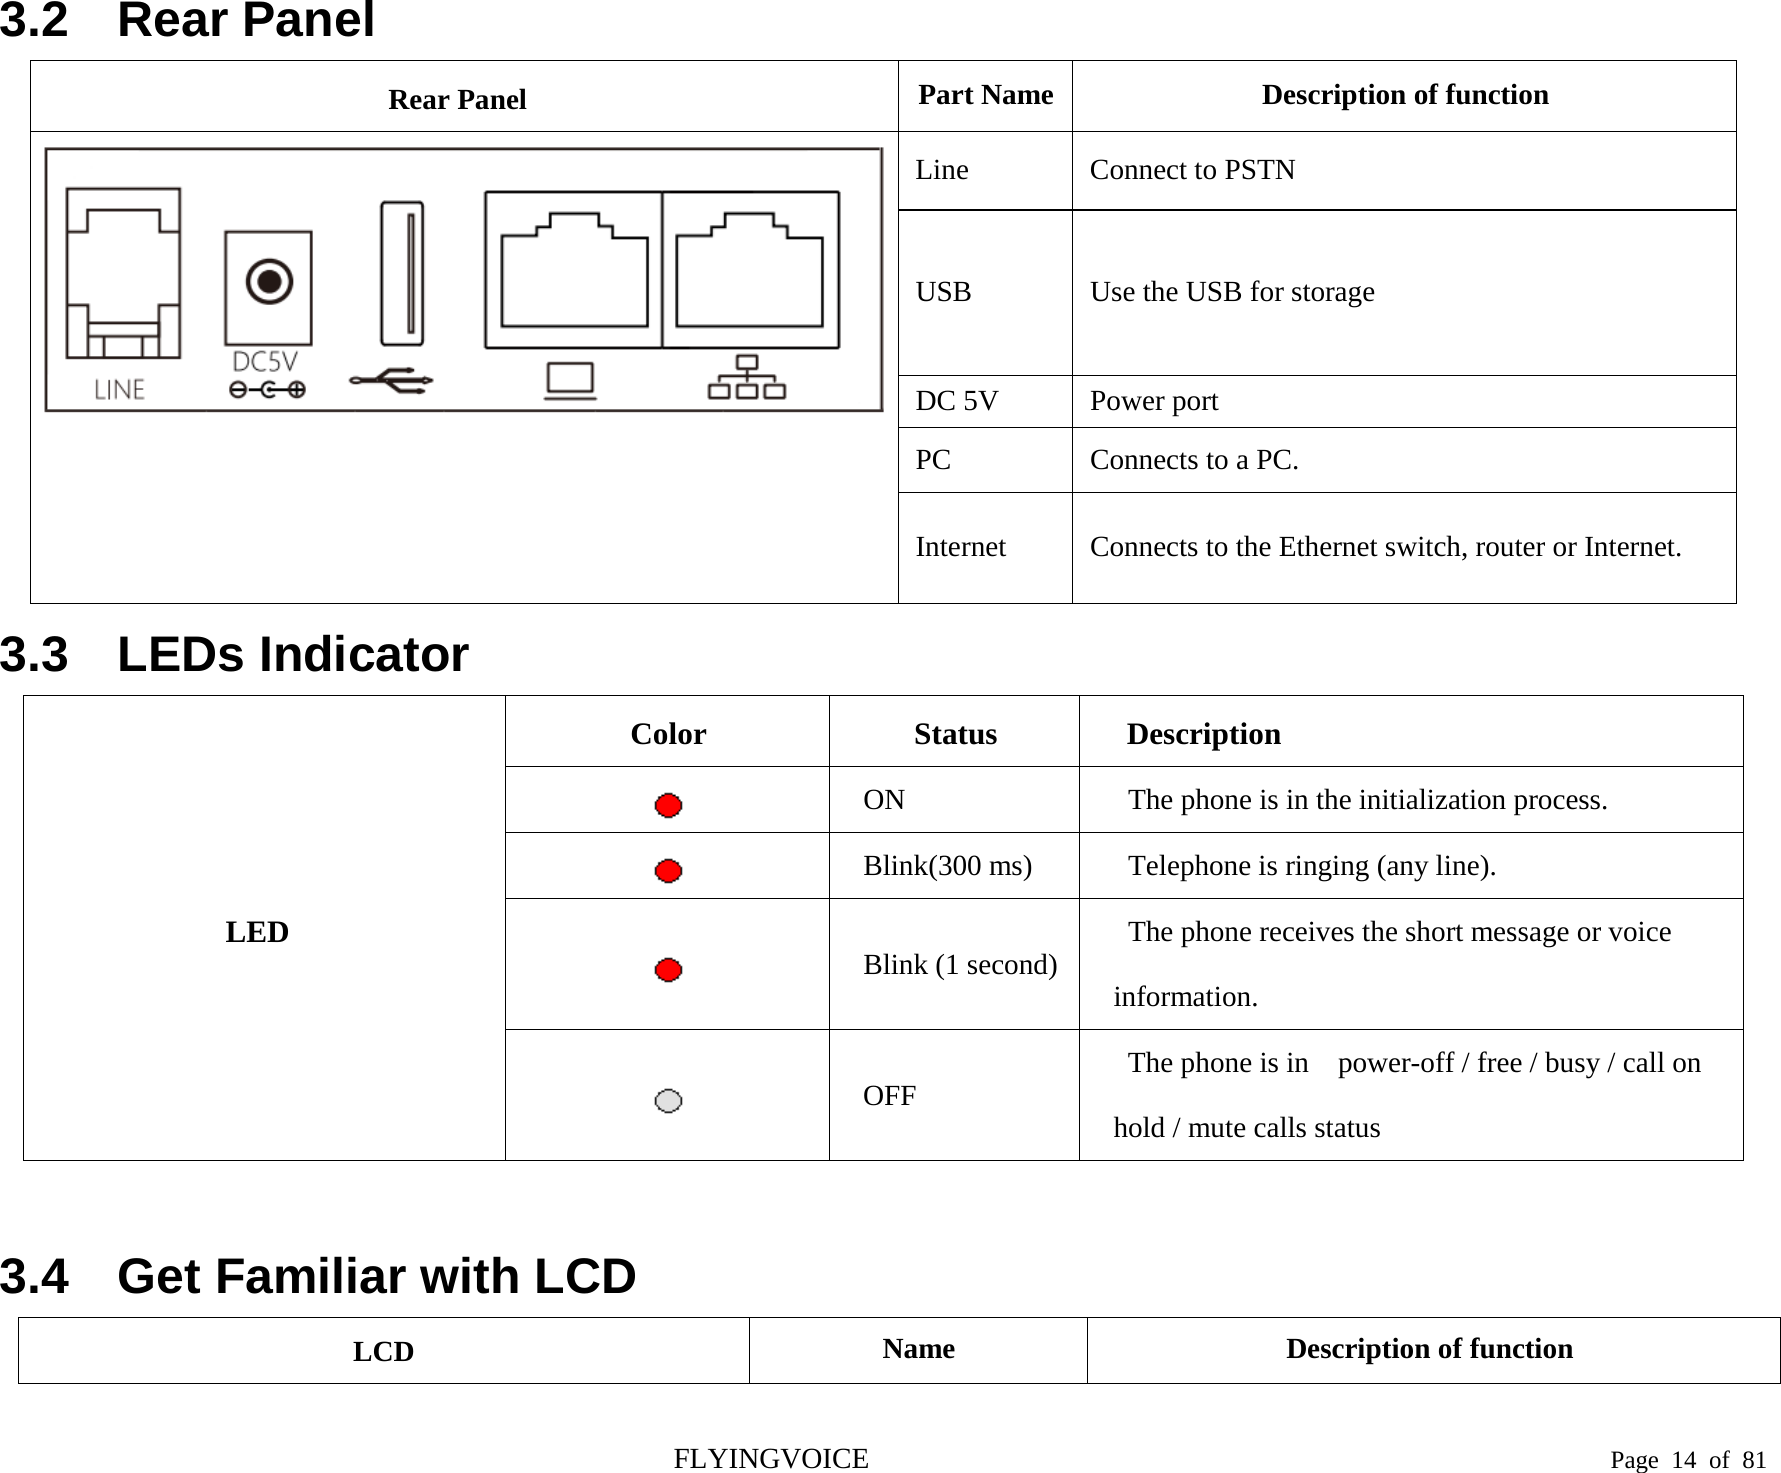
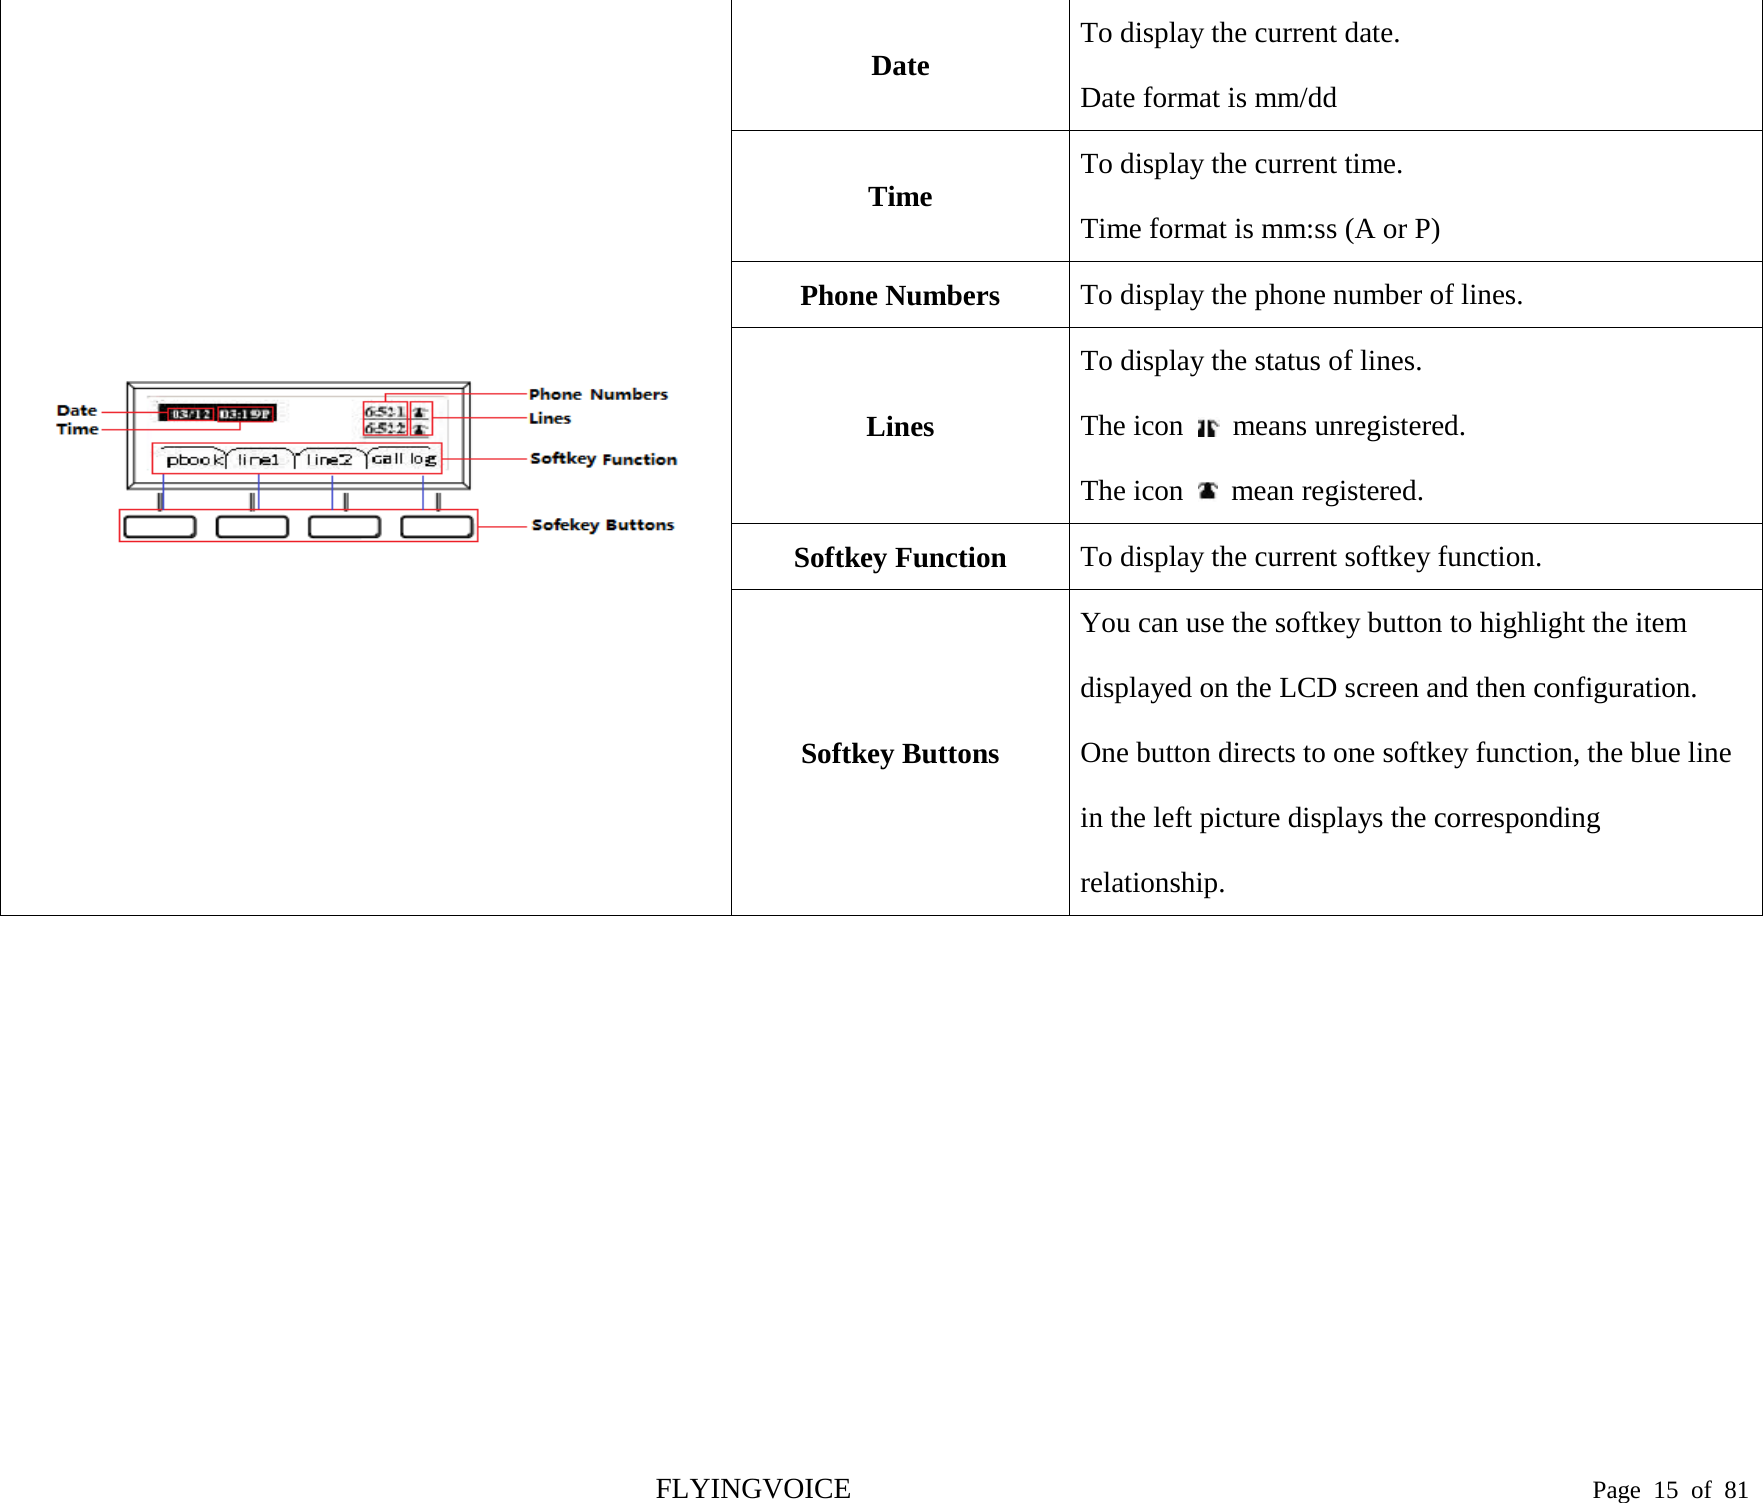
User Manual
Discussion / Help
Navigation

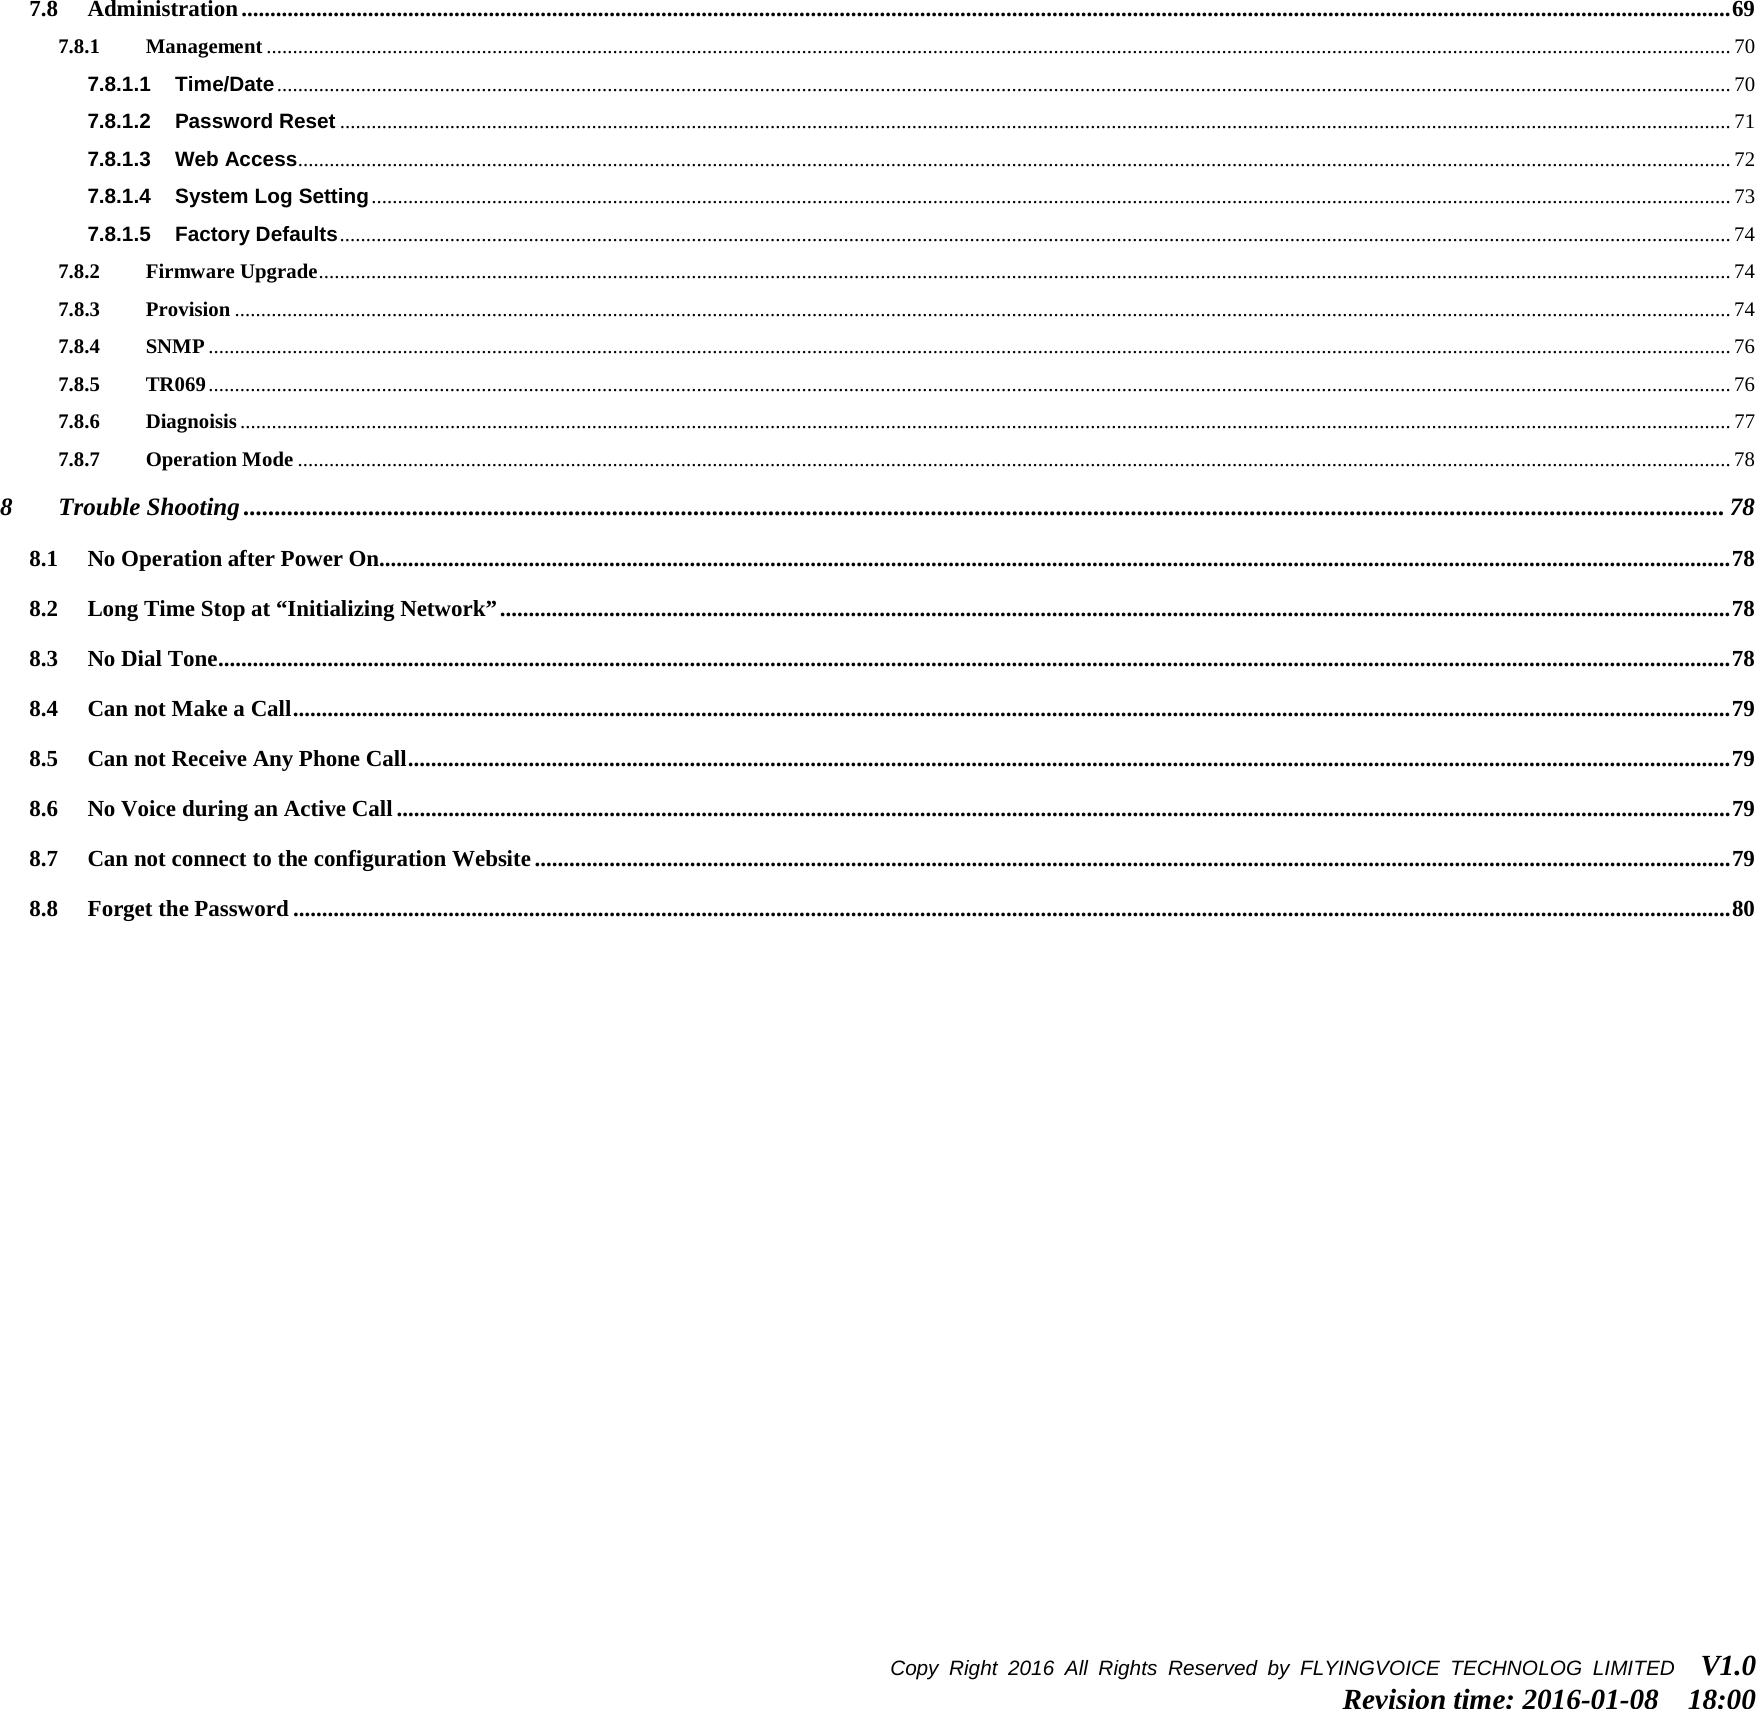

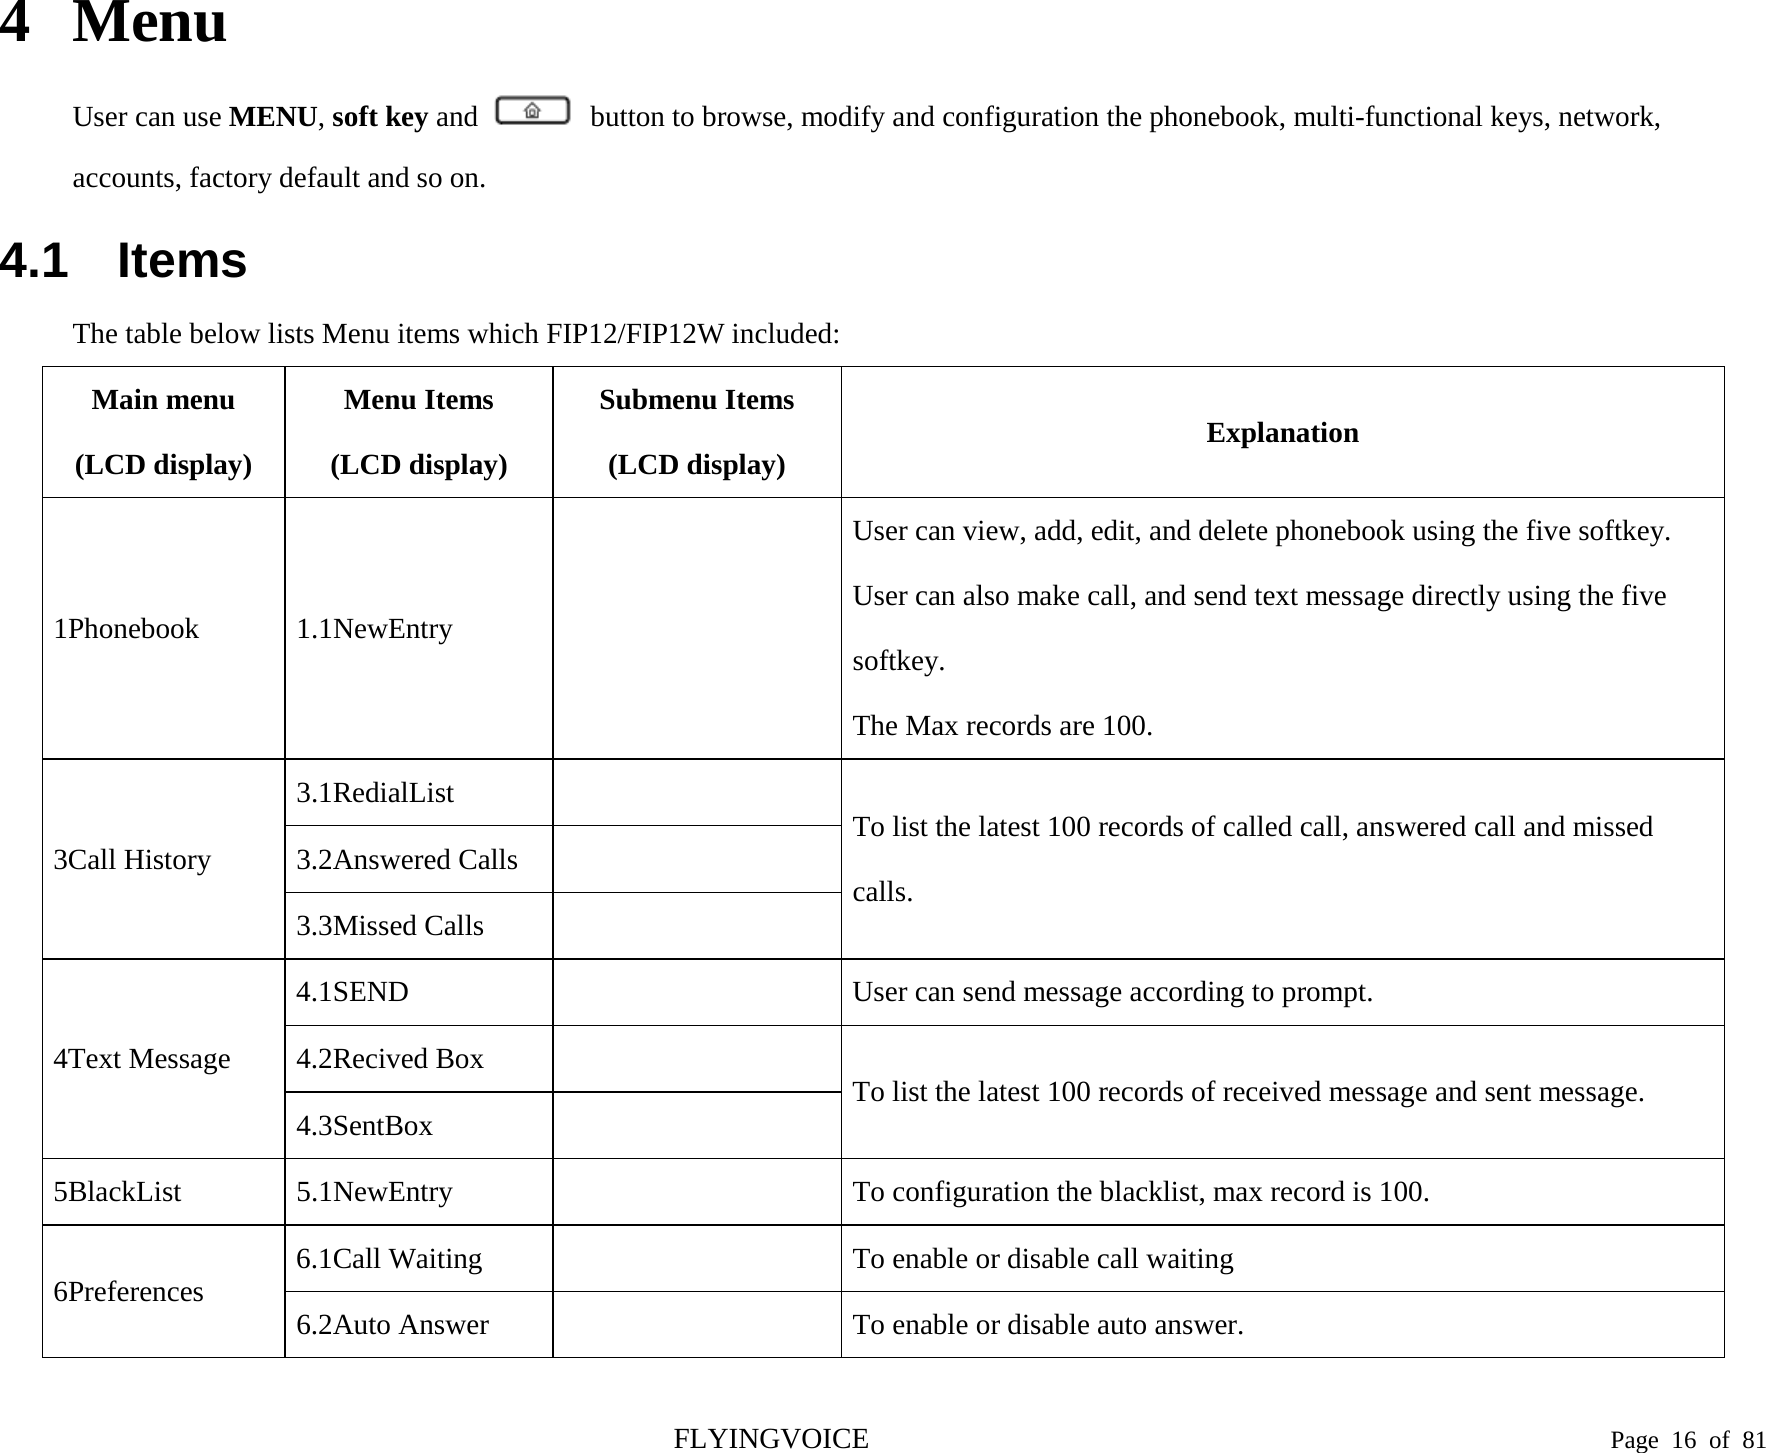

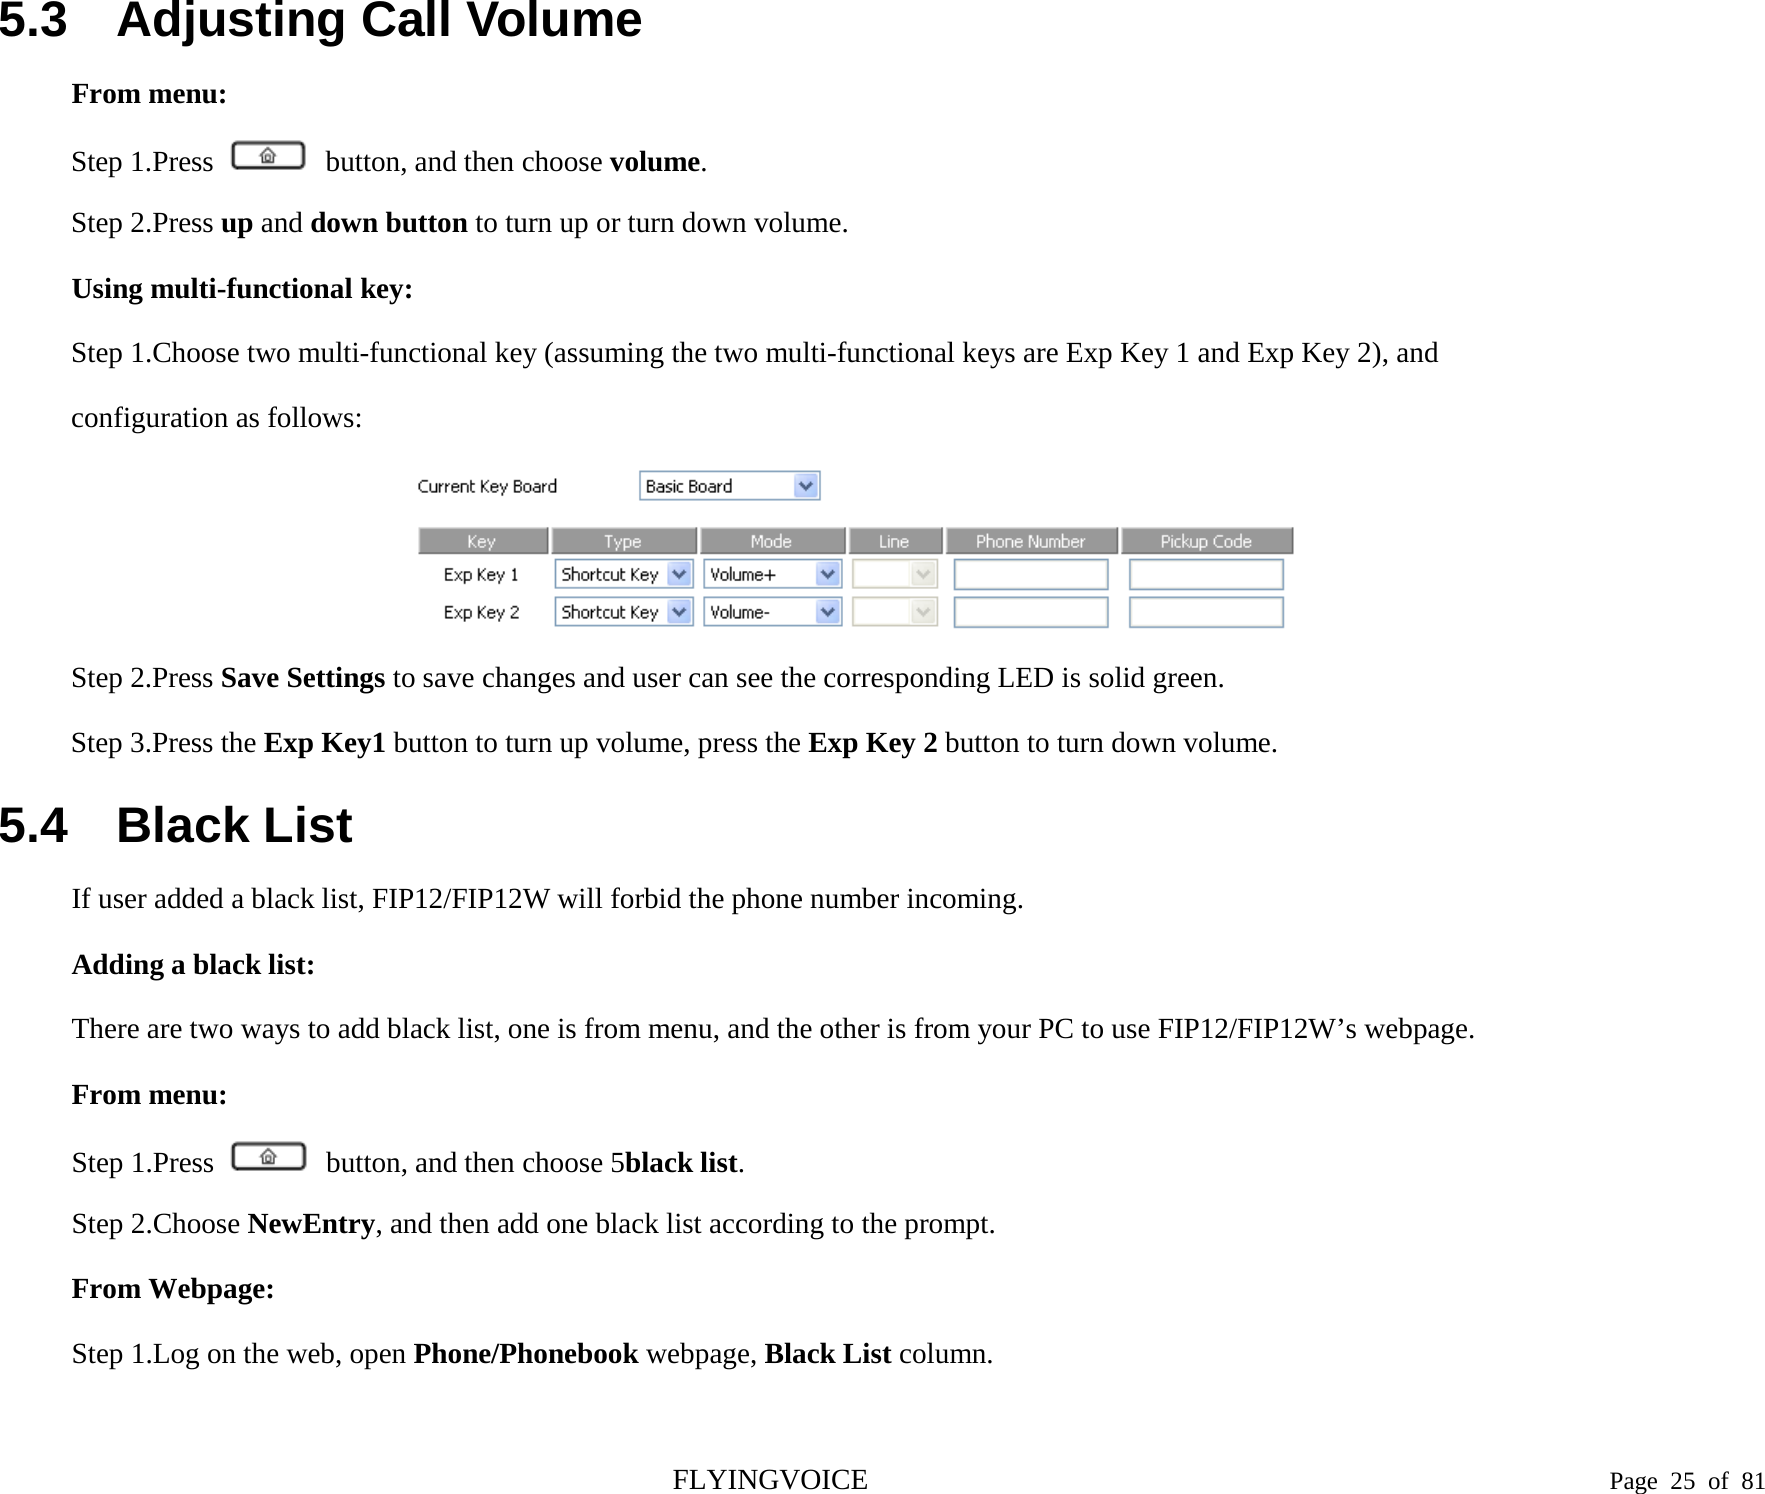
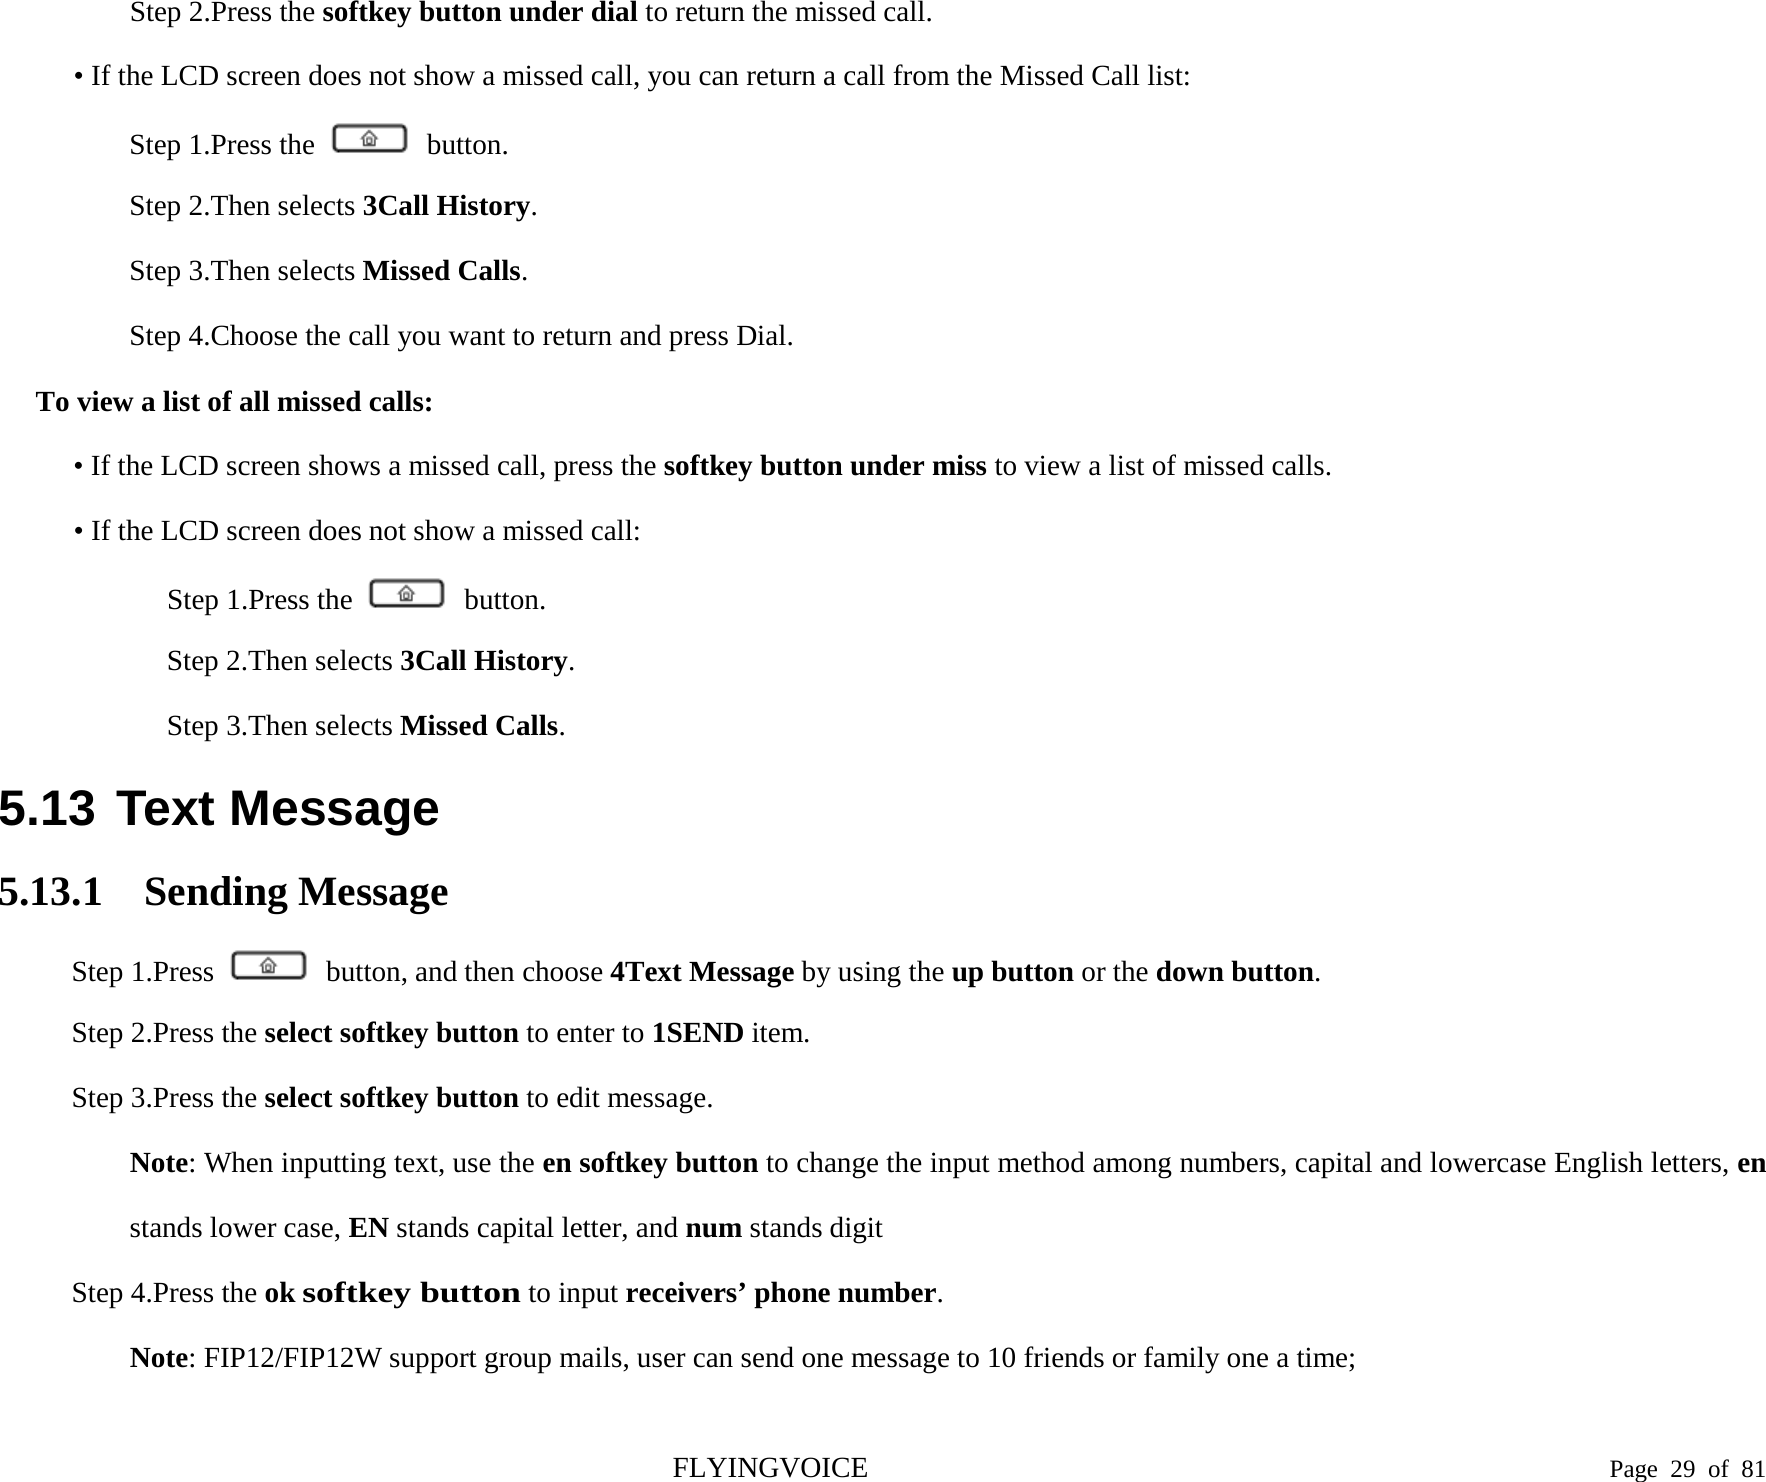
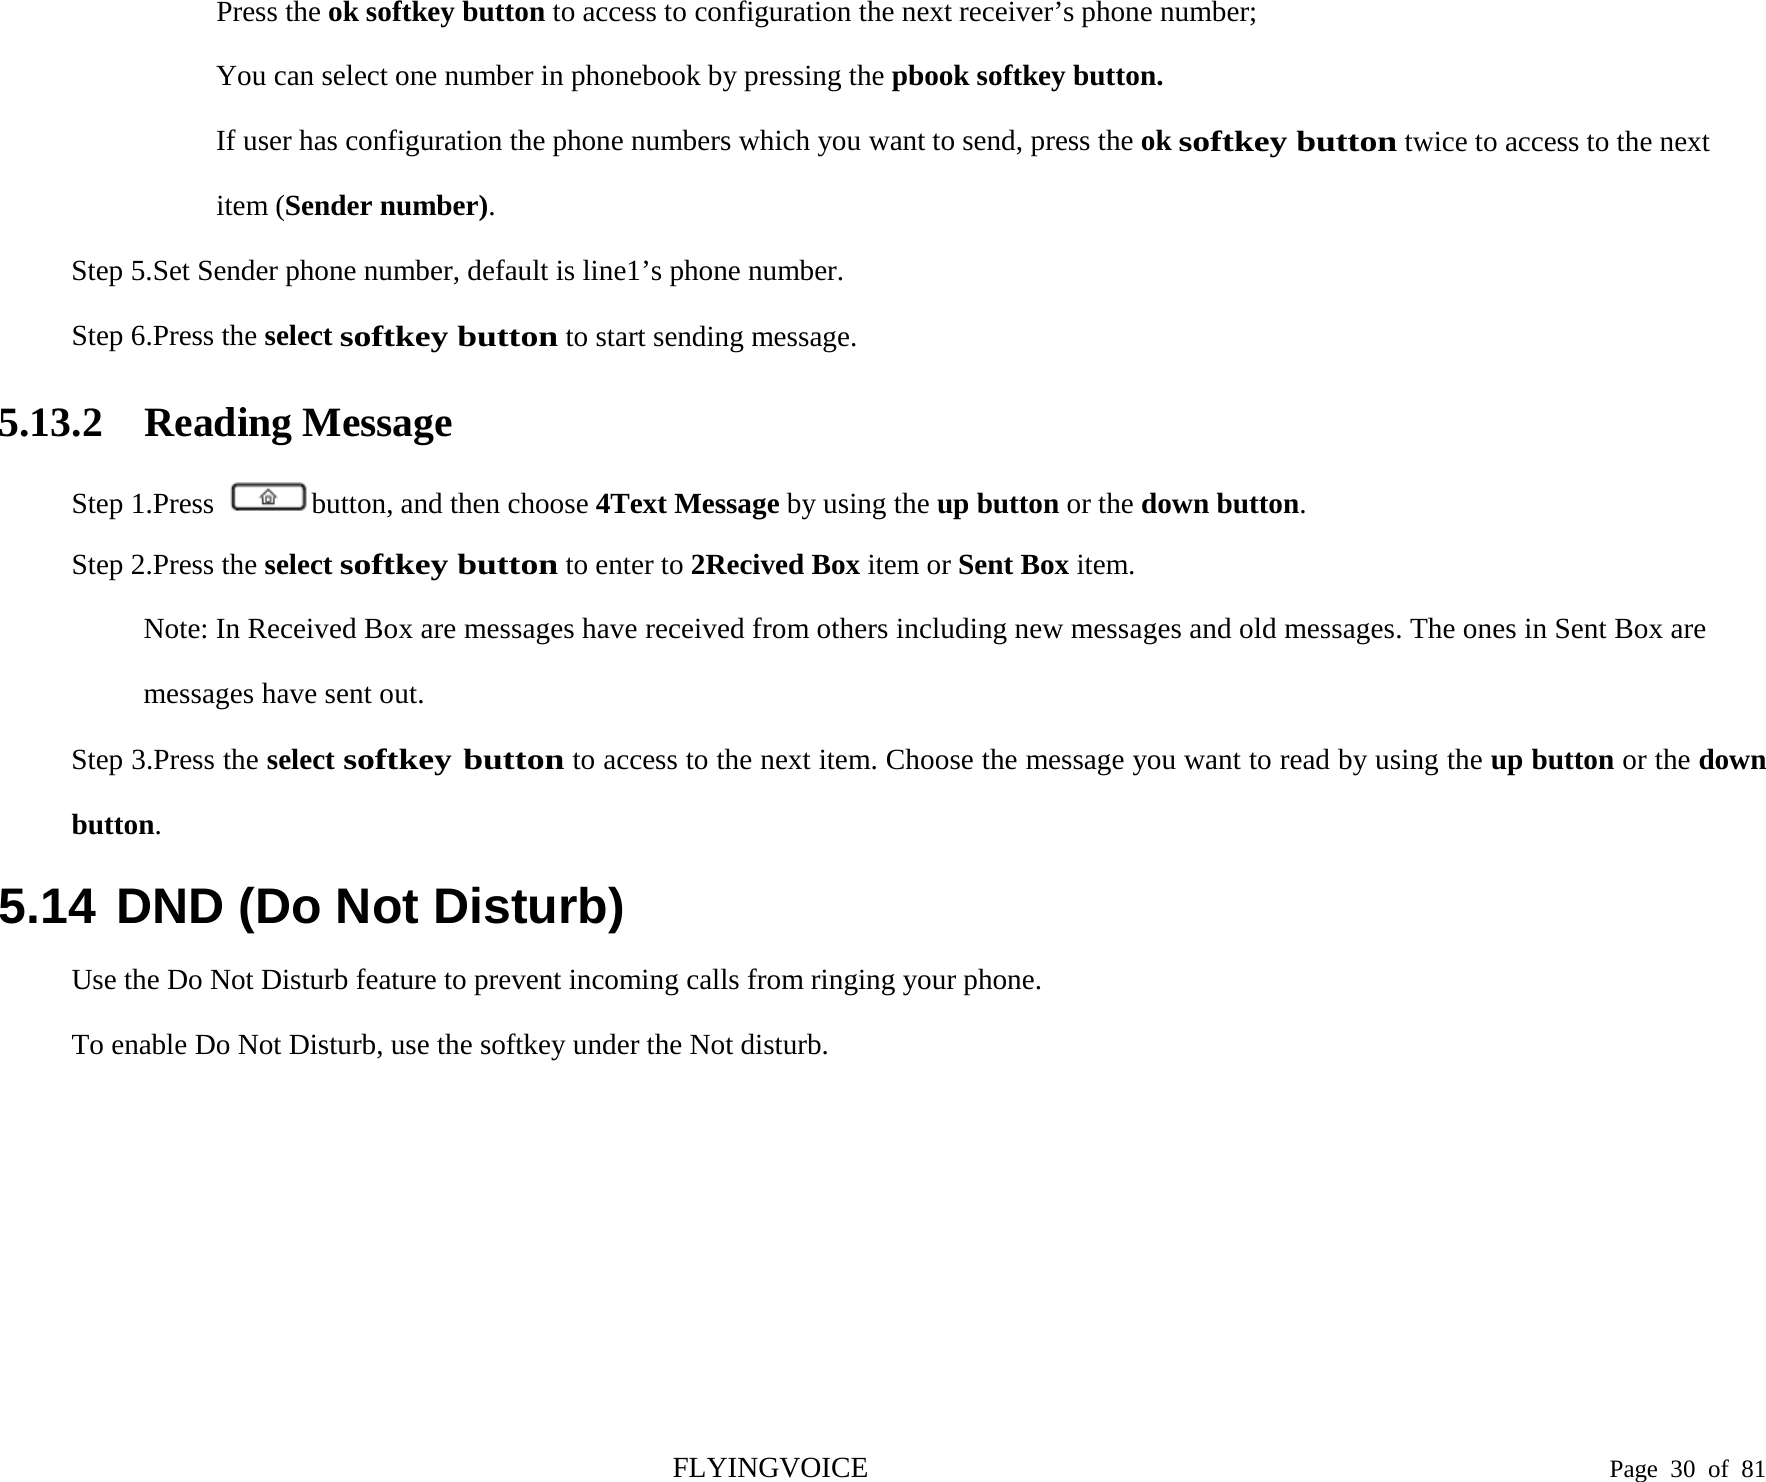

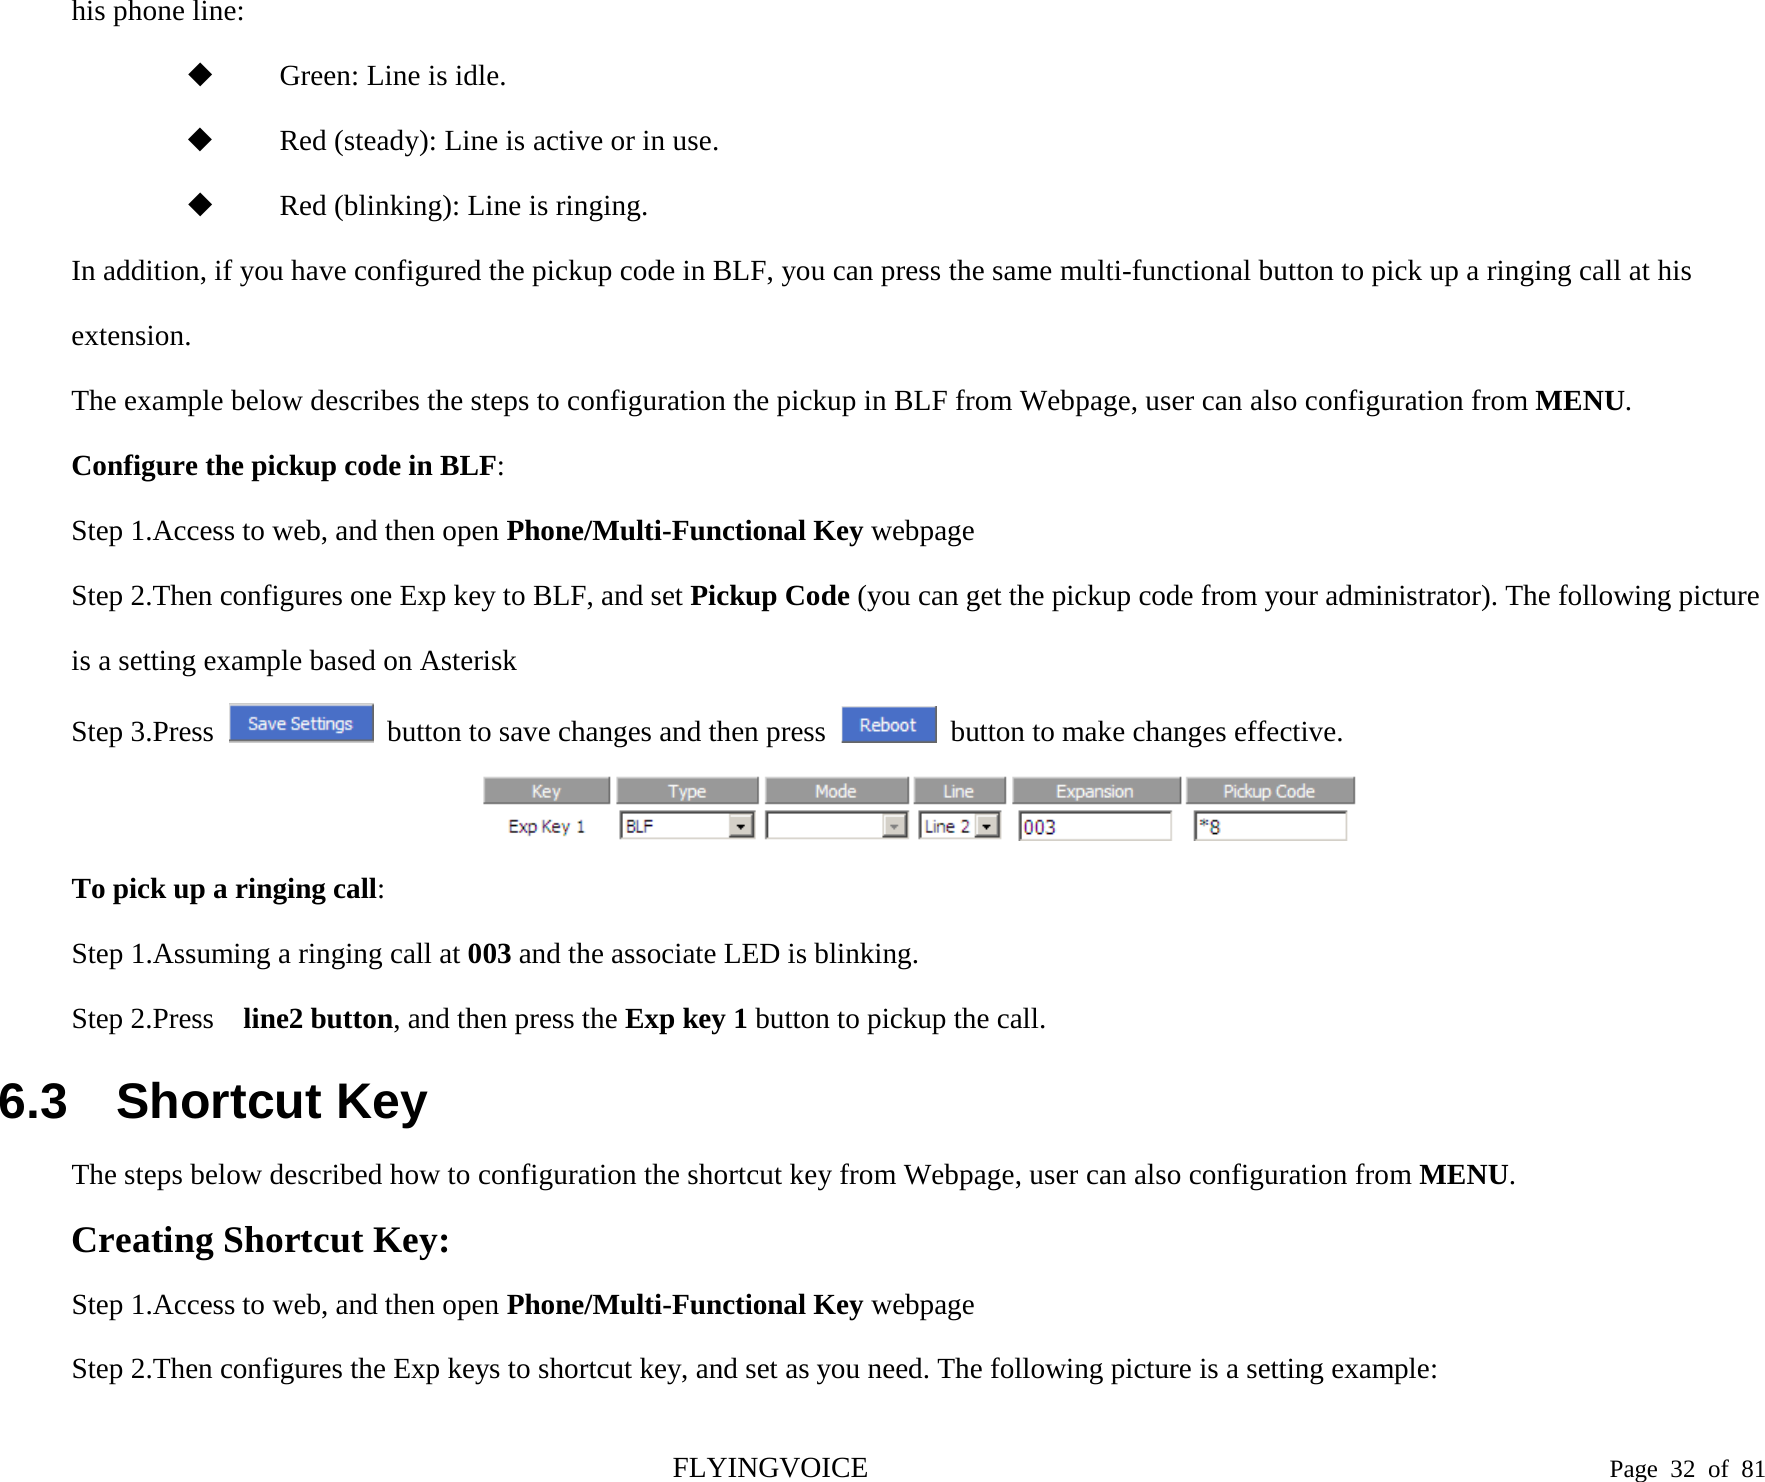
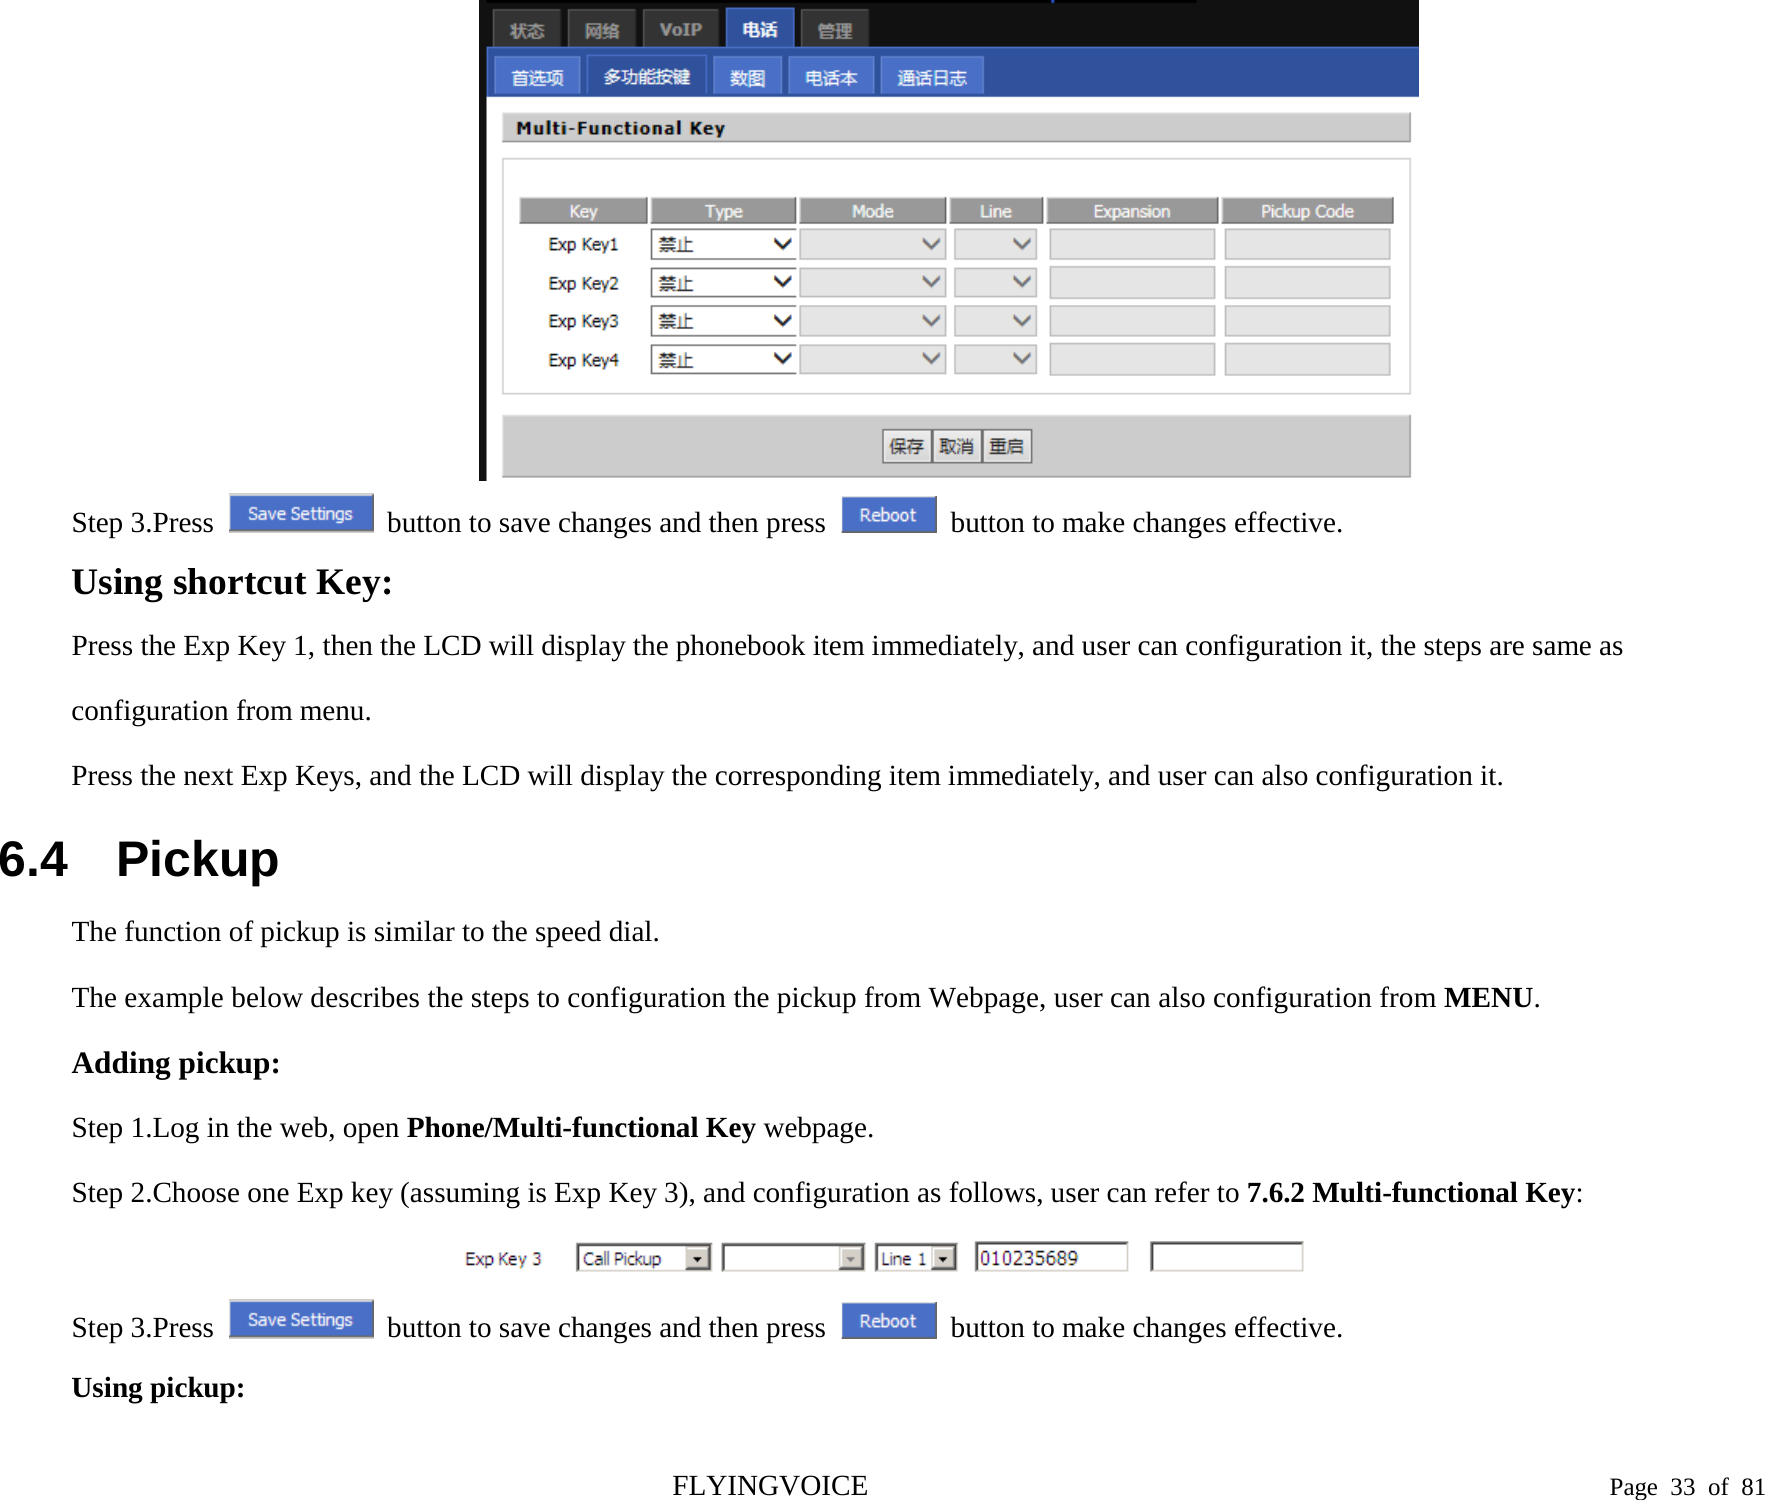
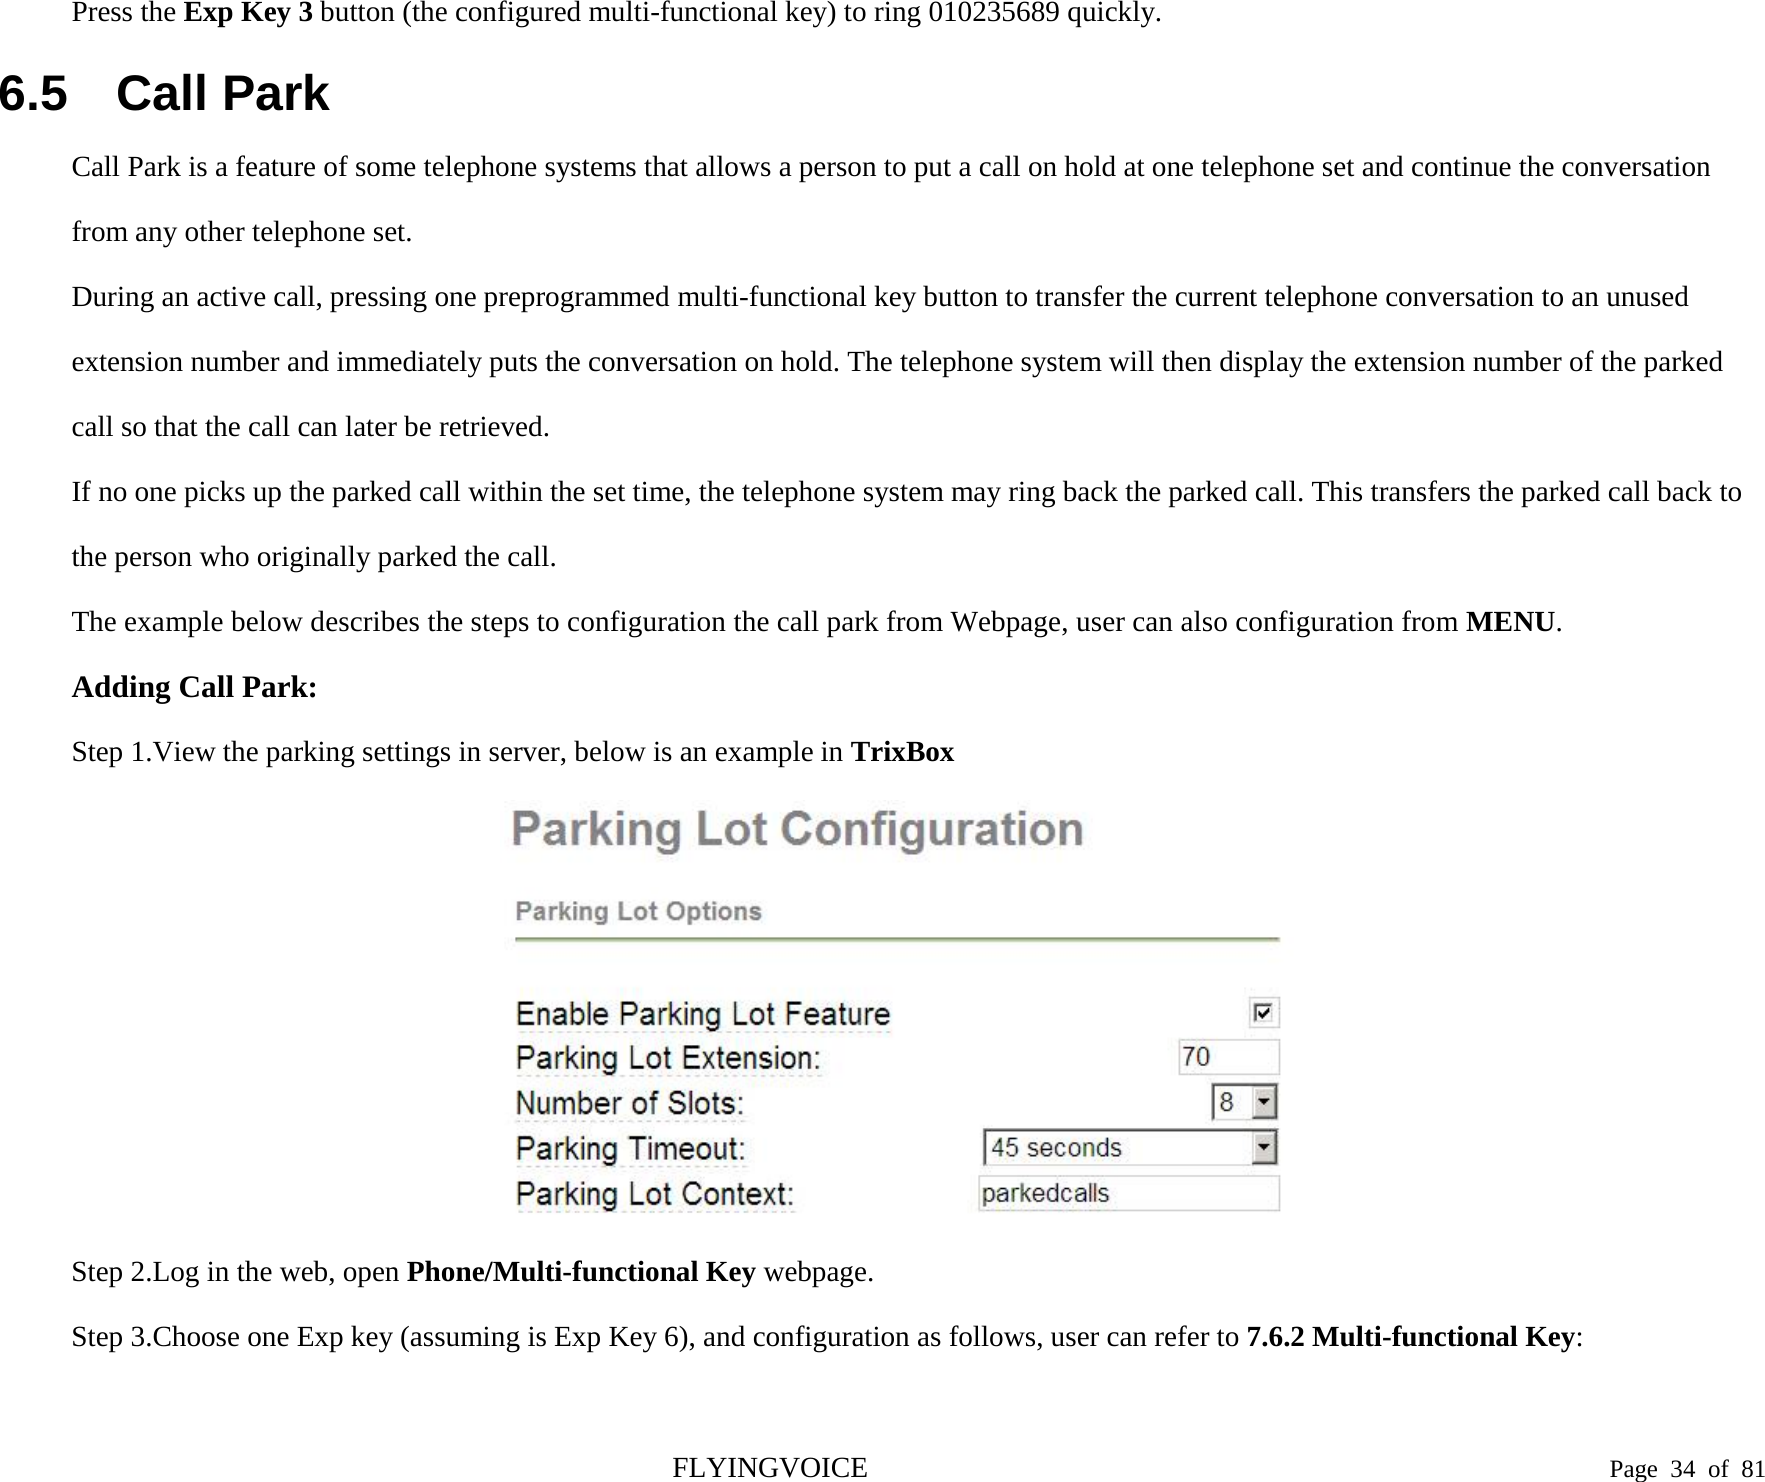

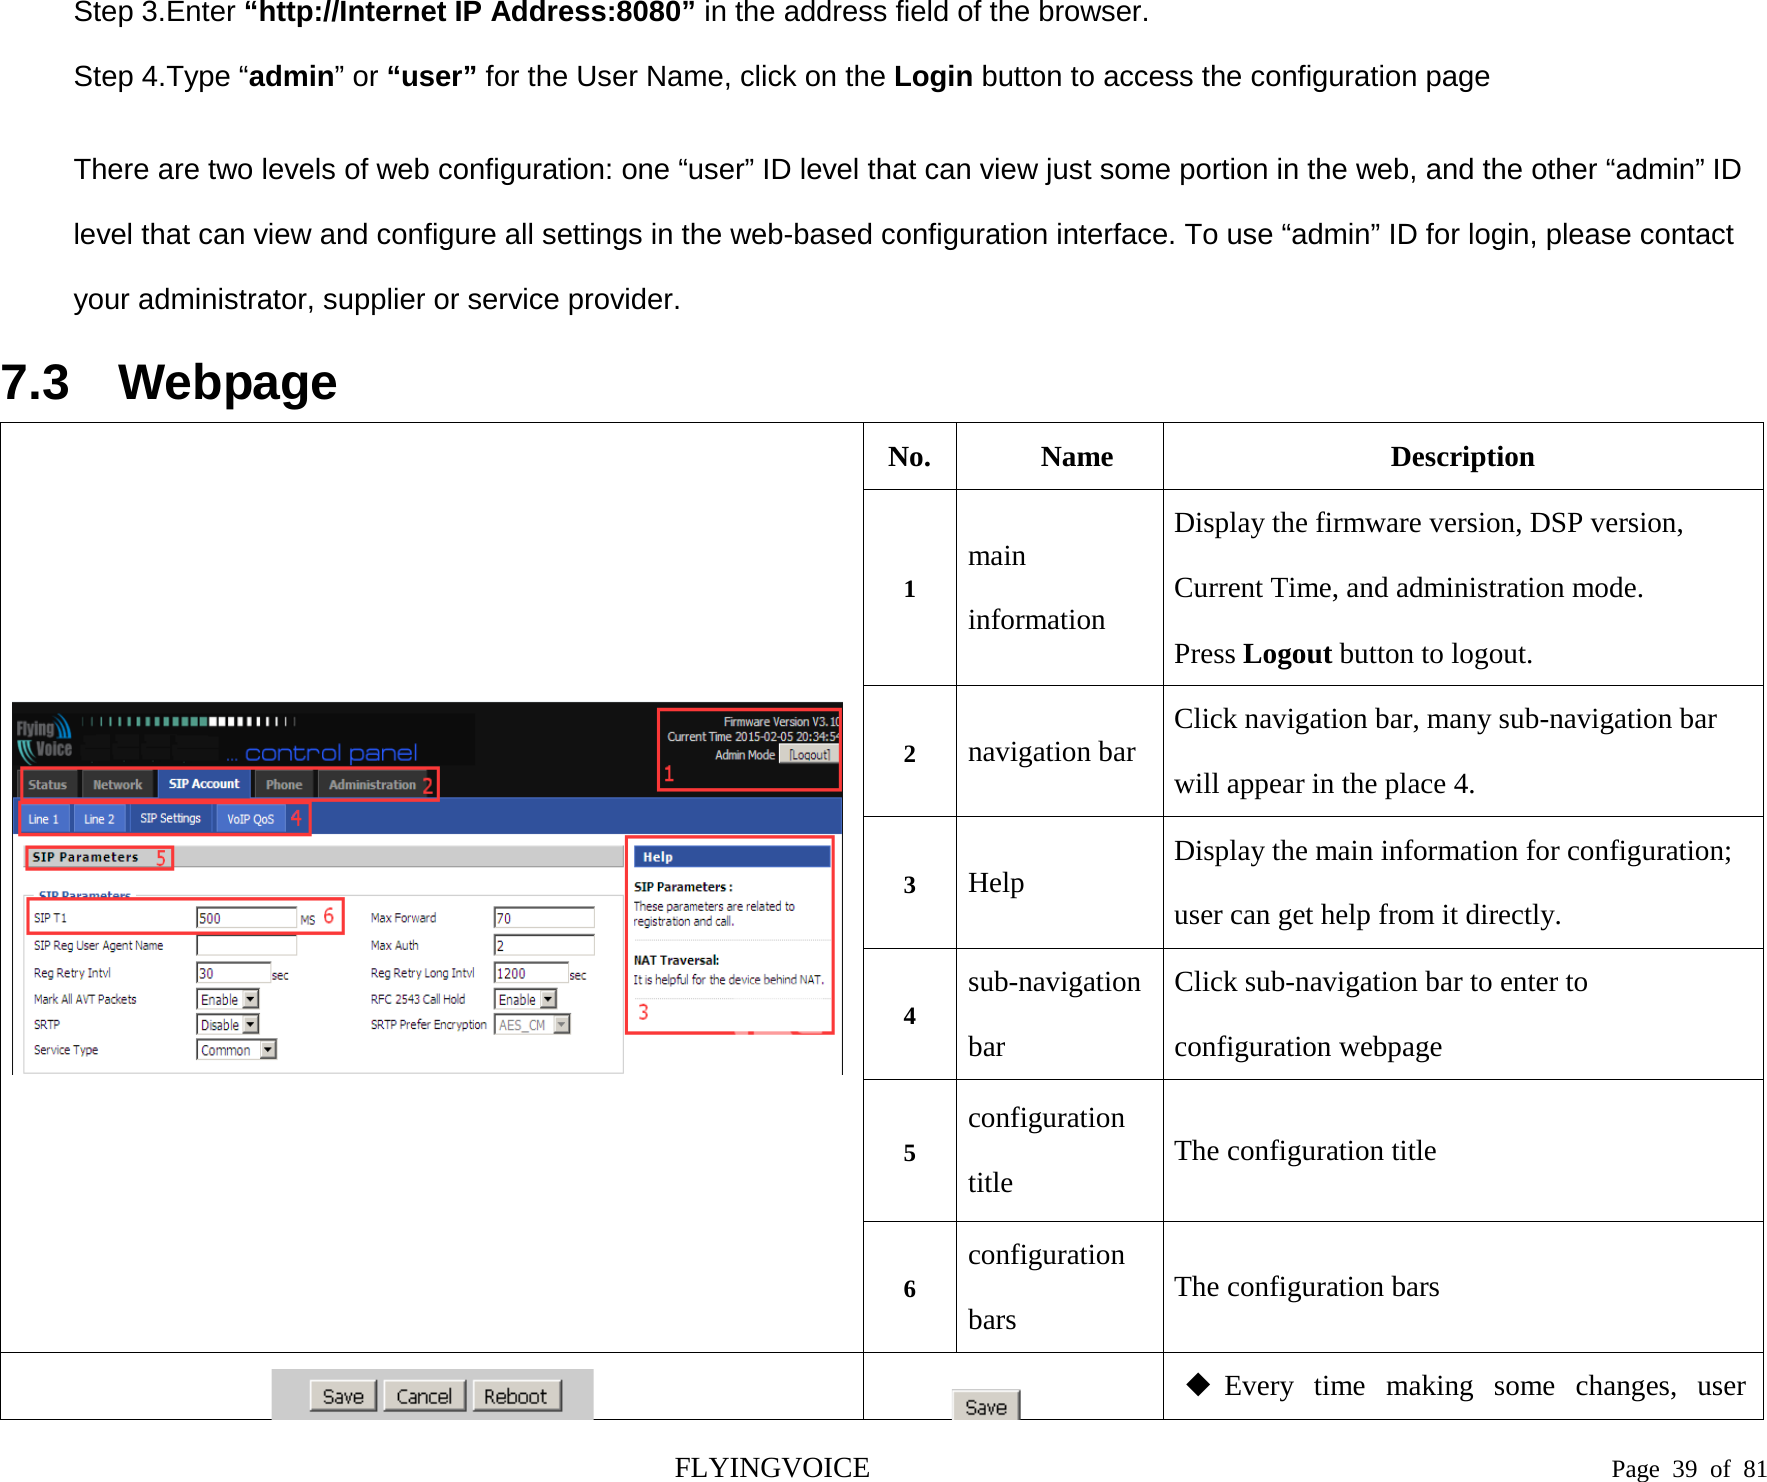
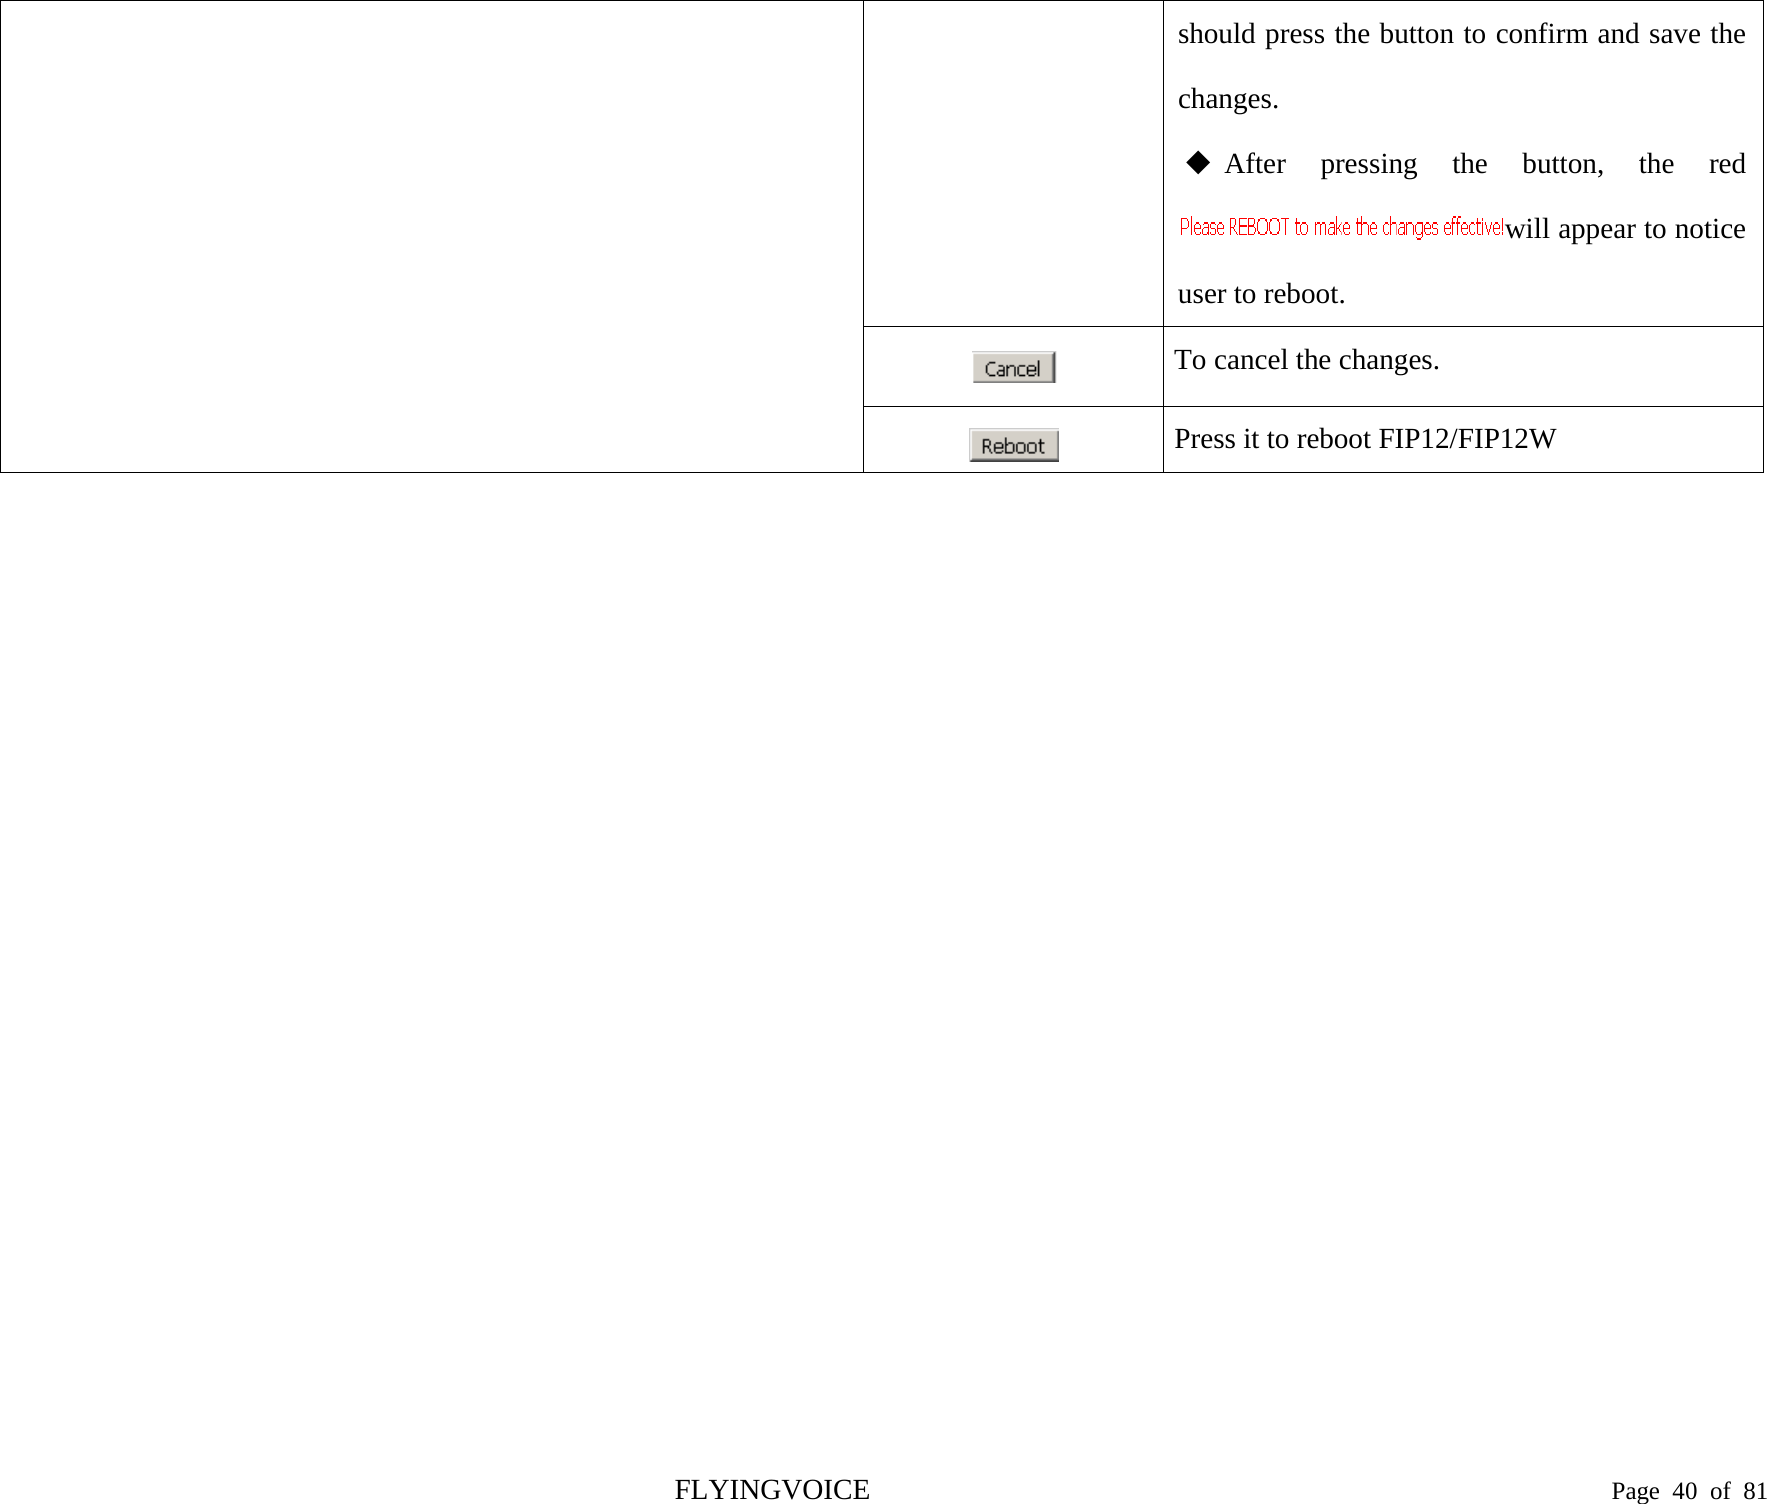
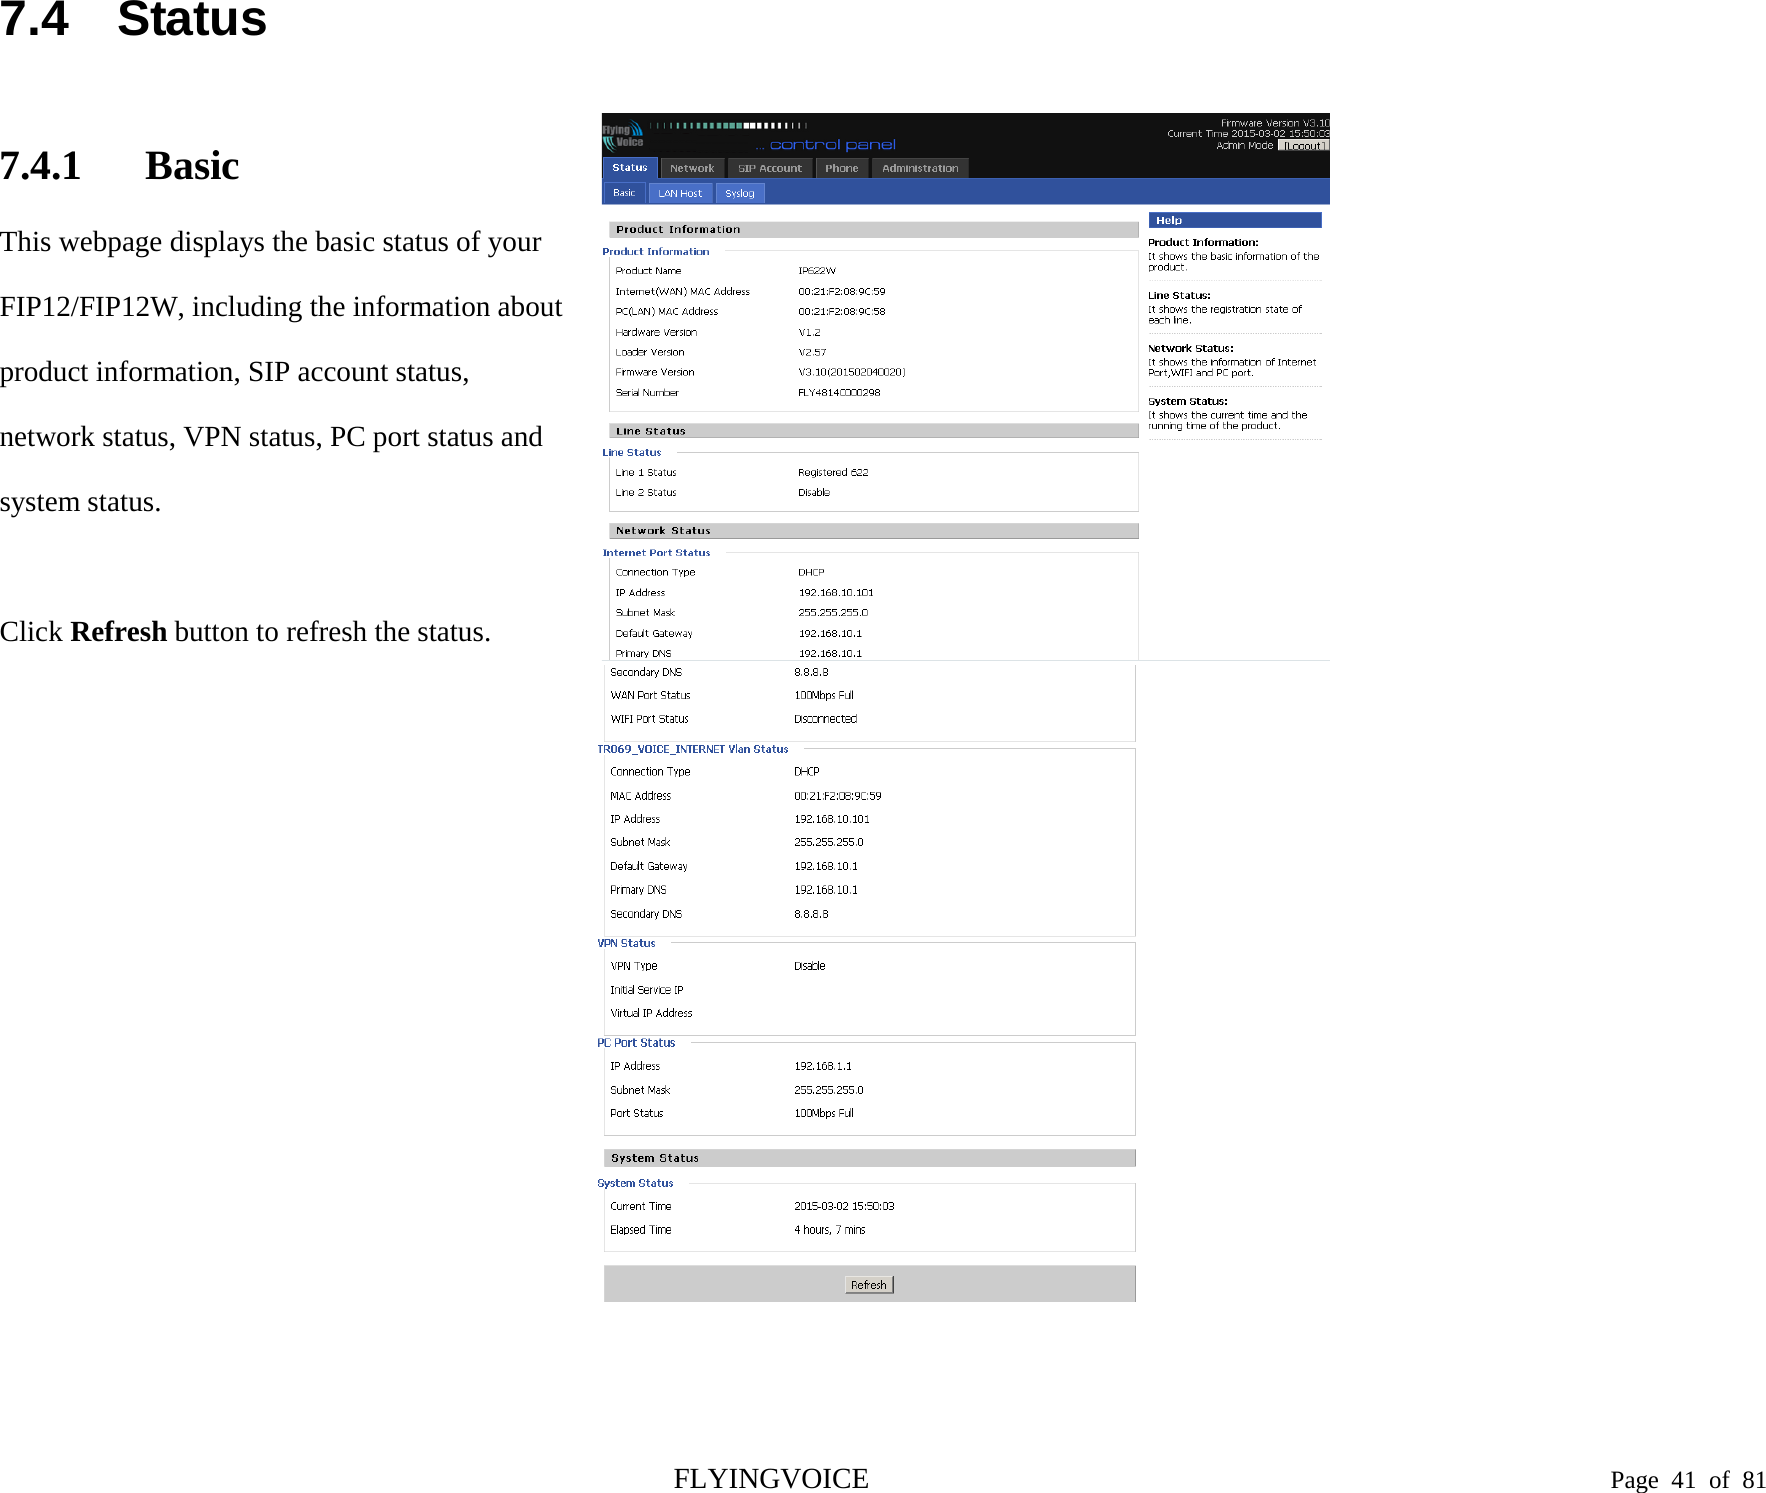
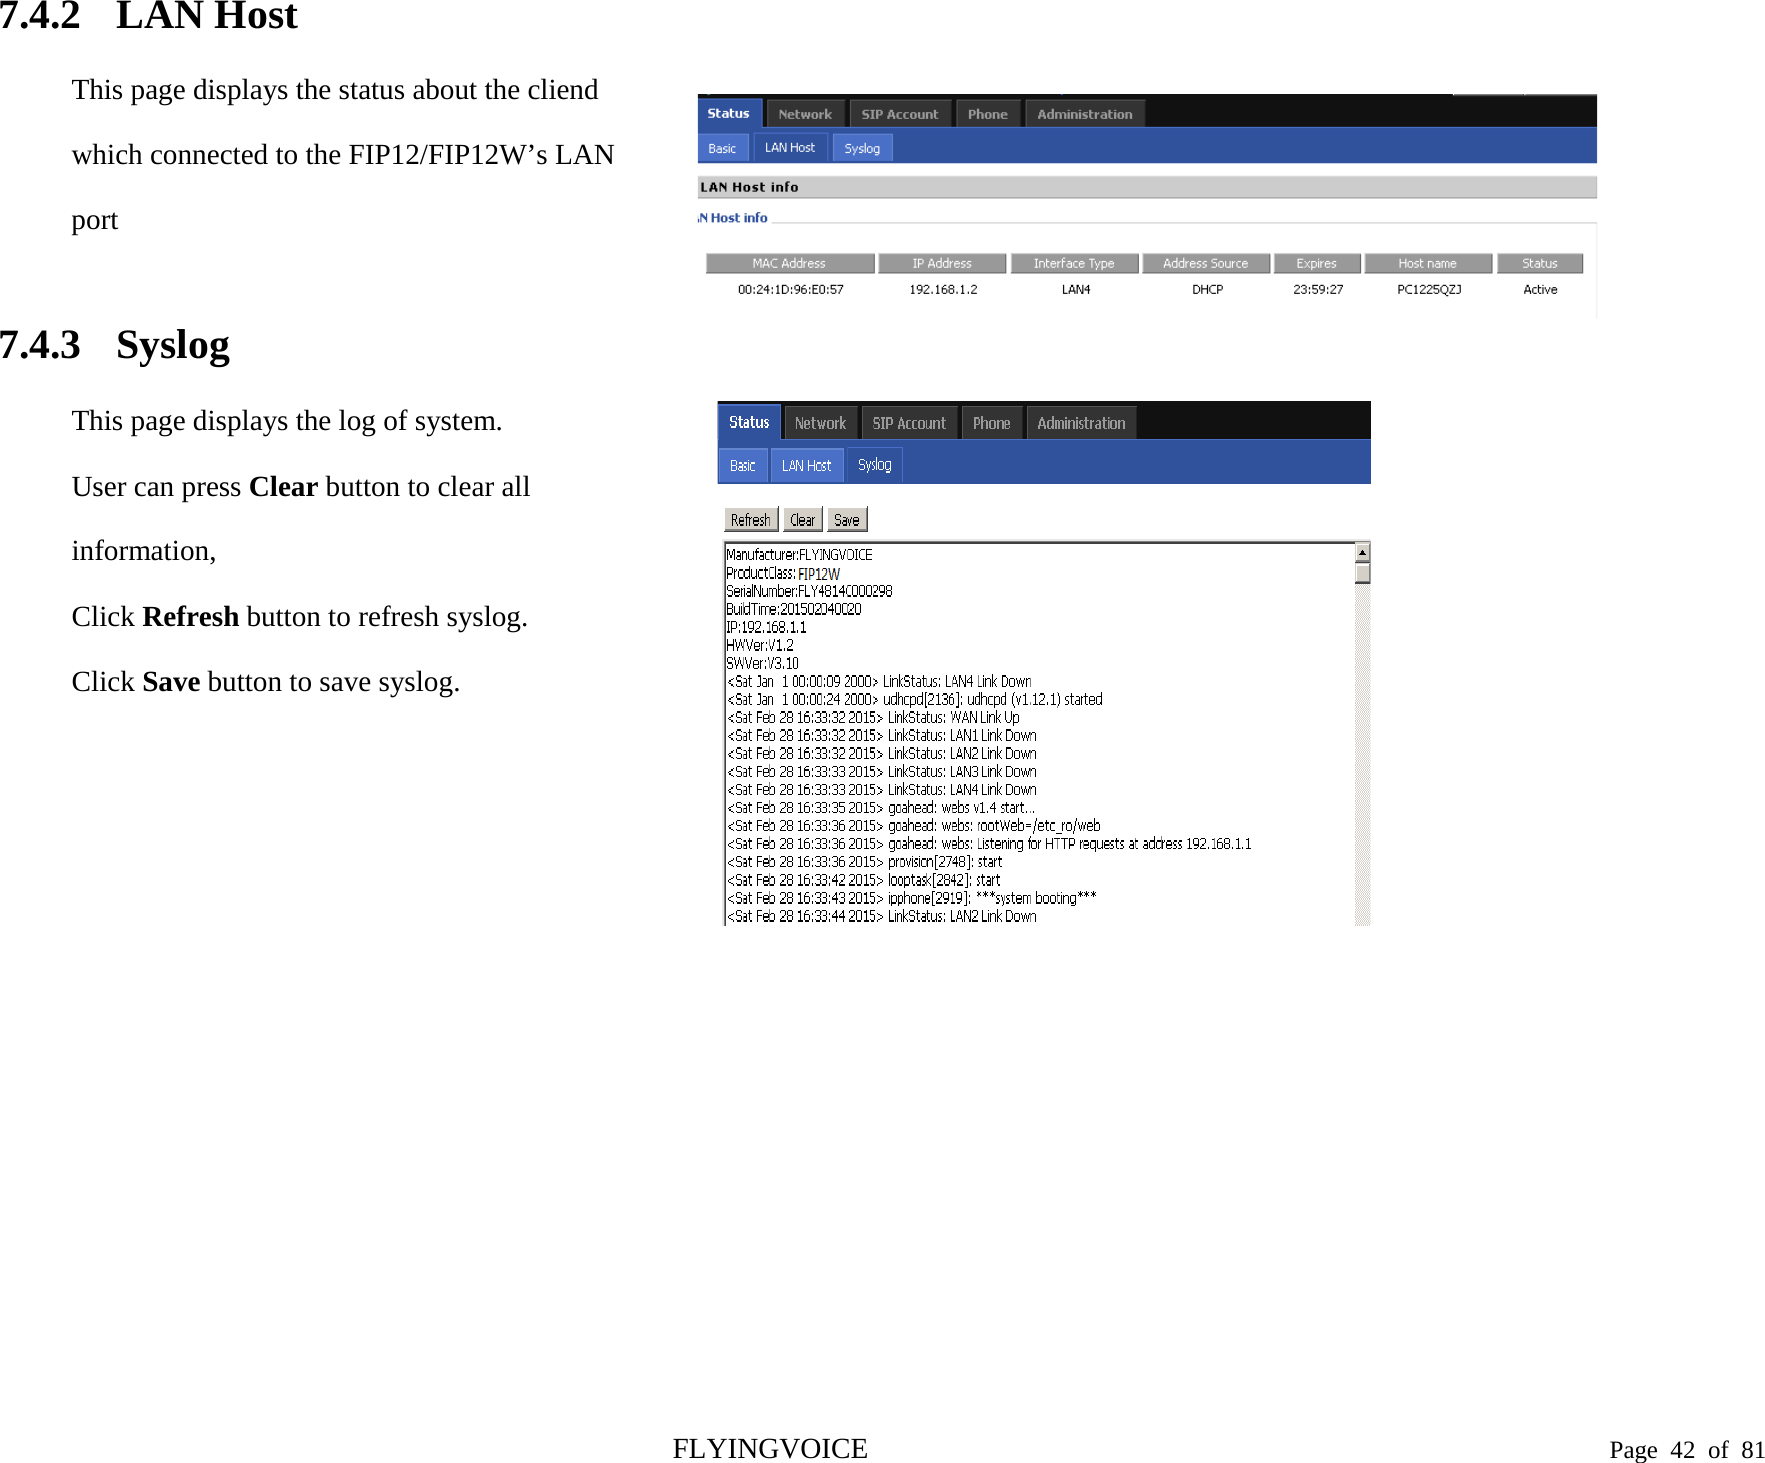
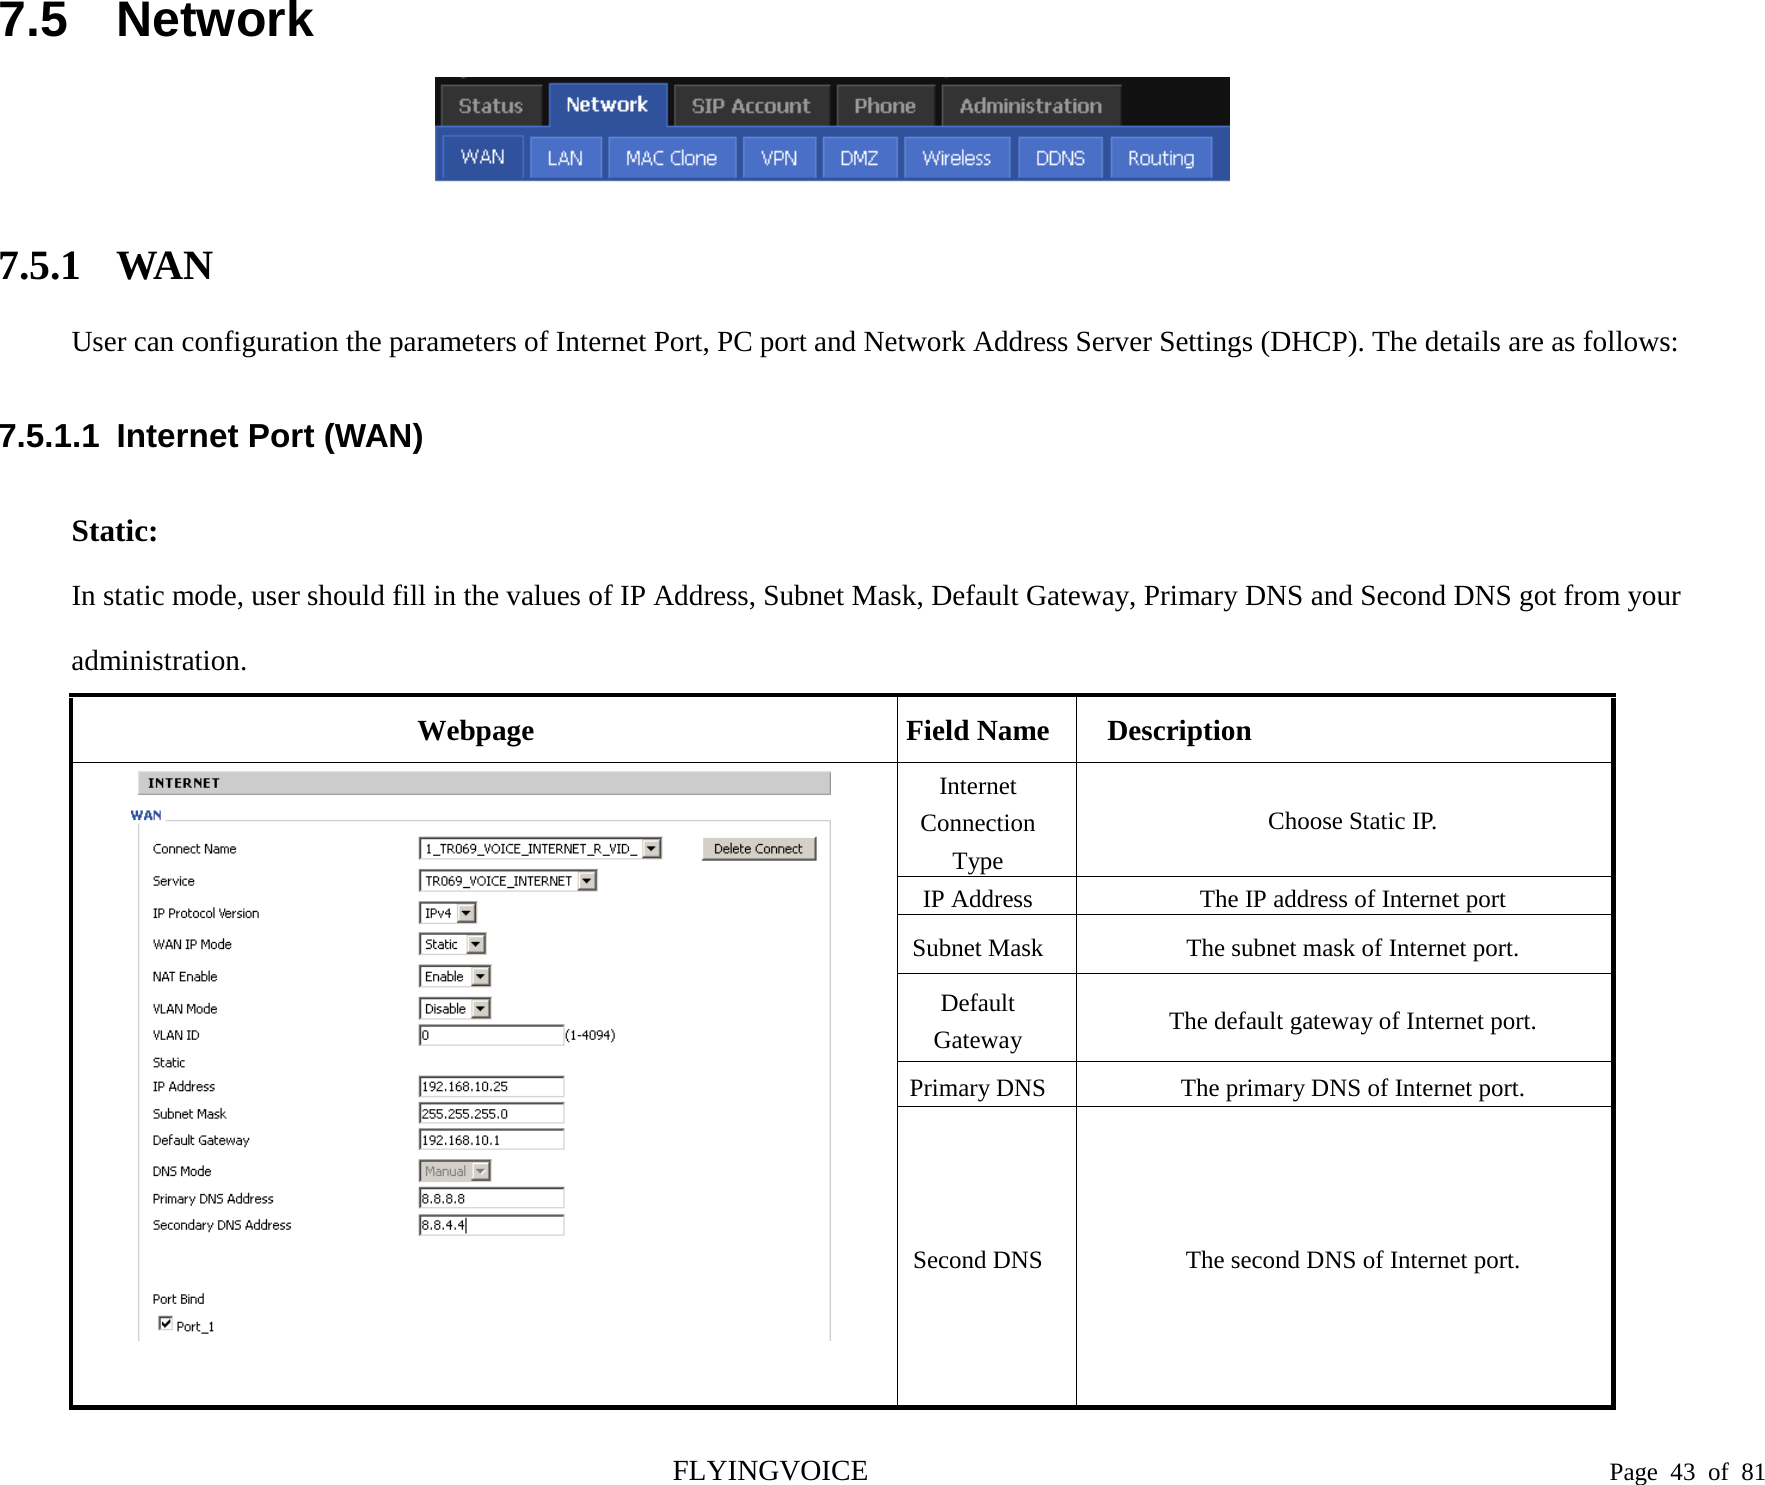
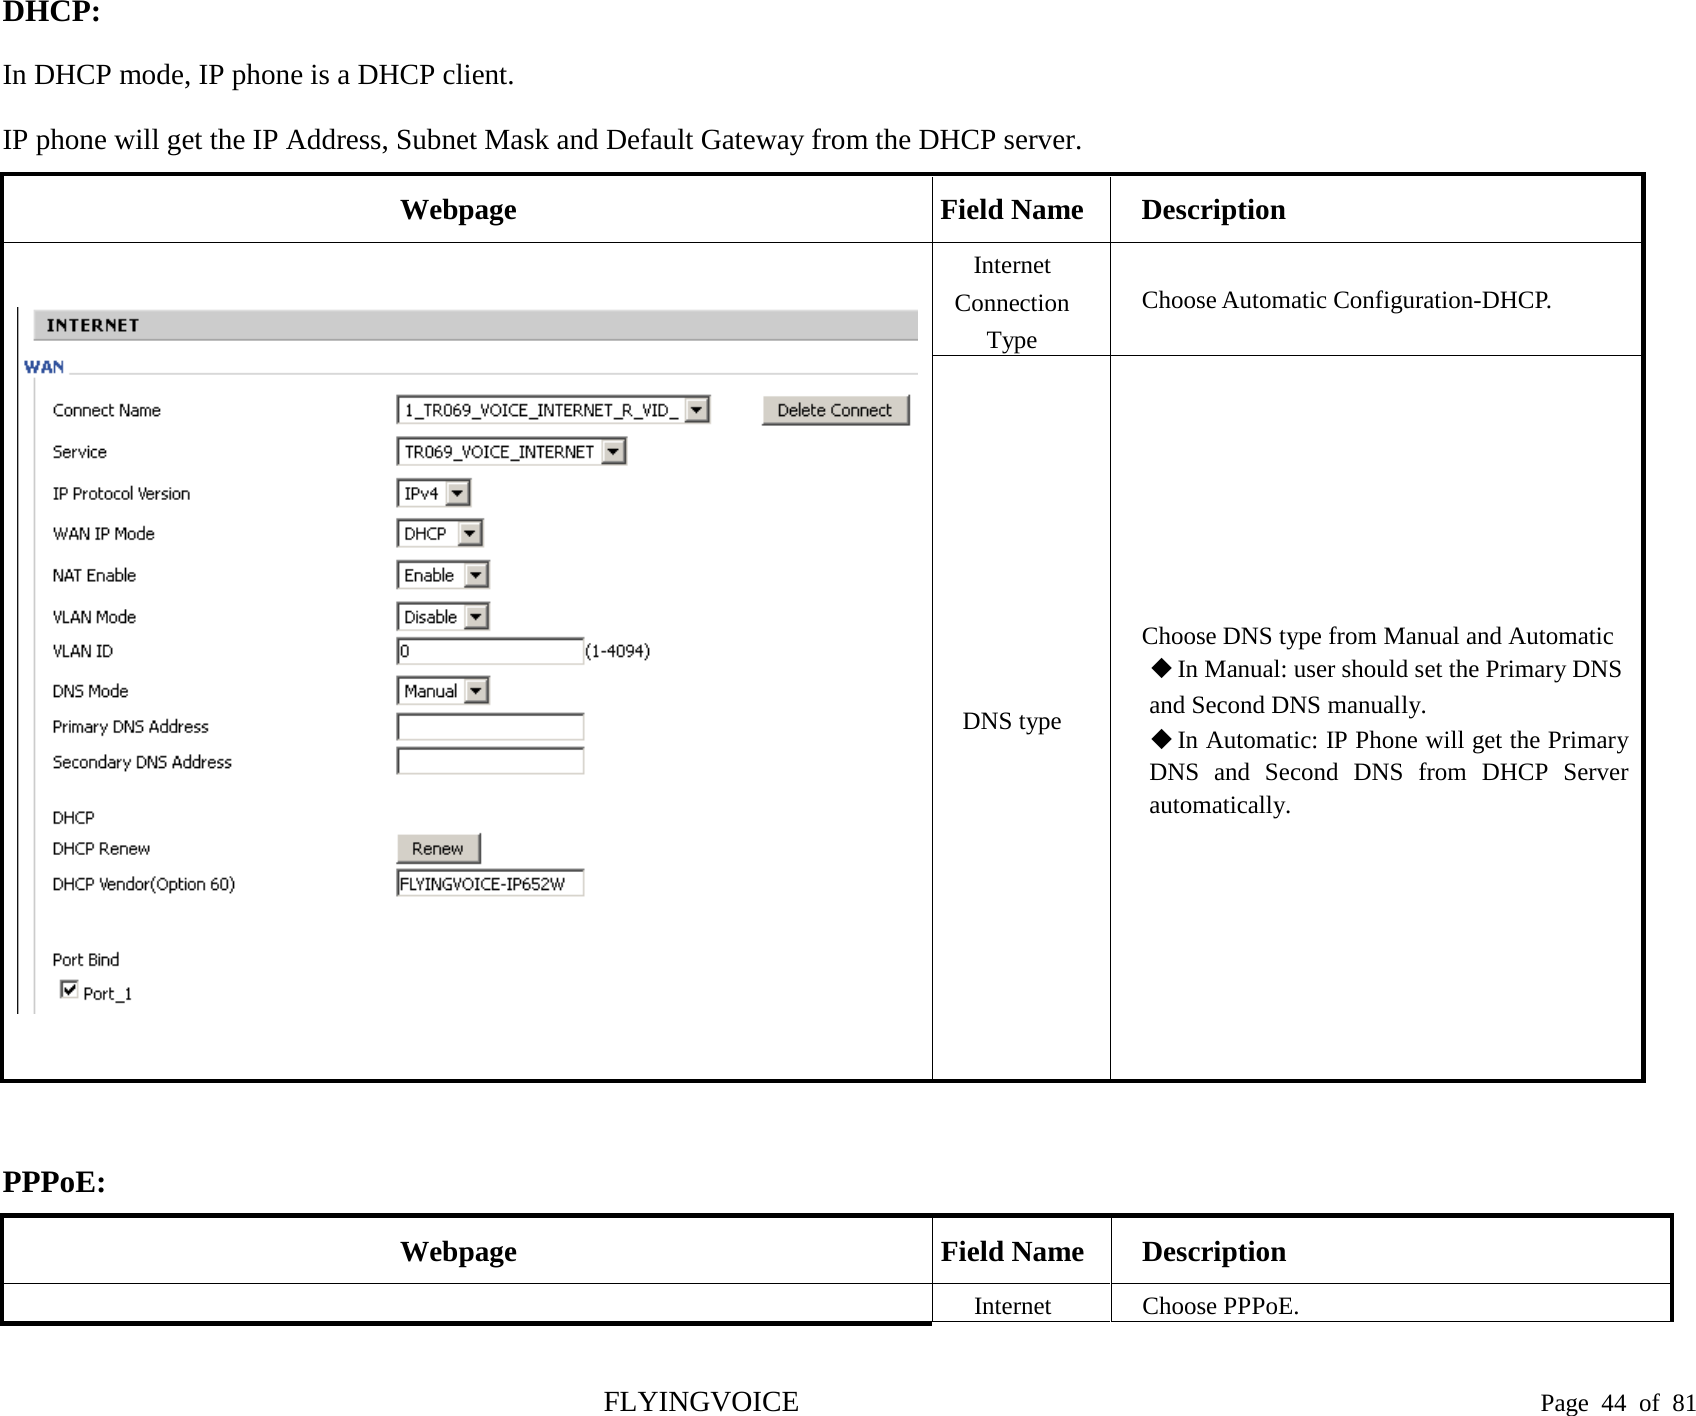
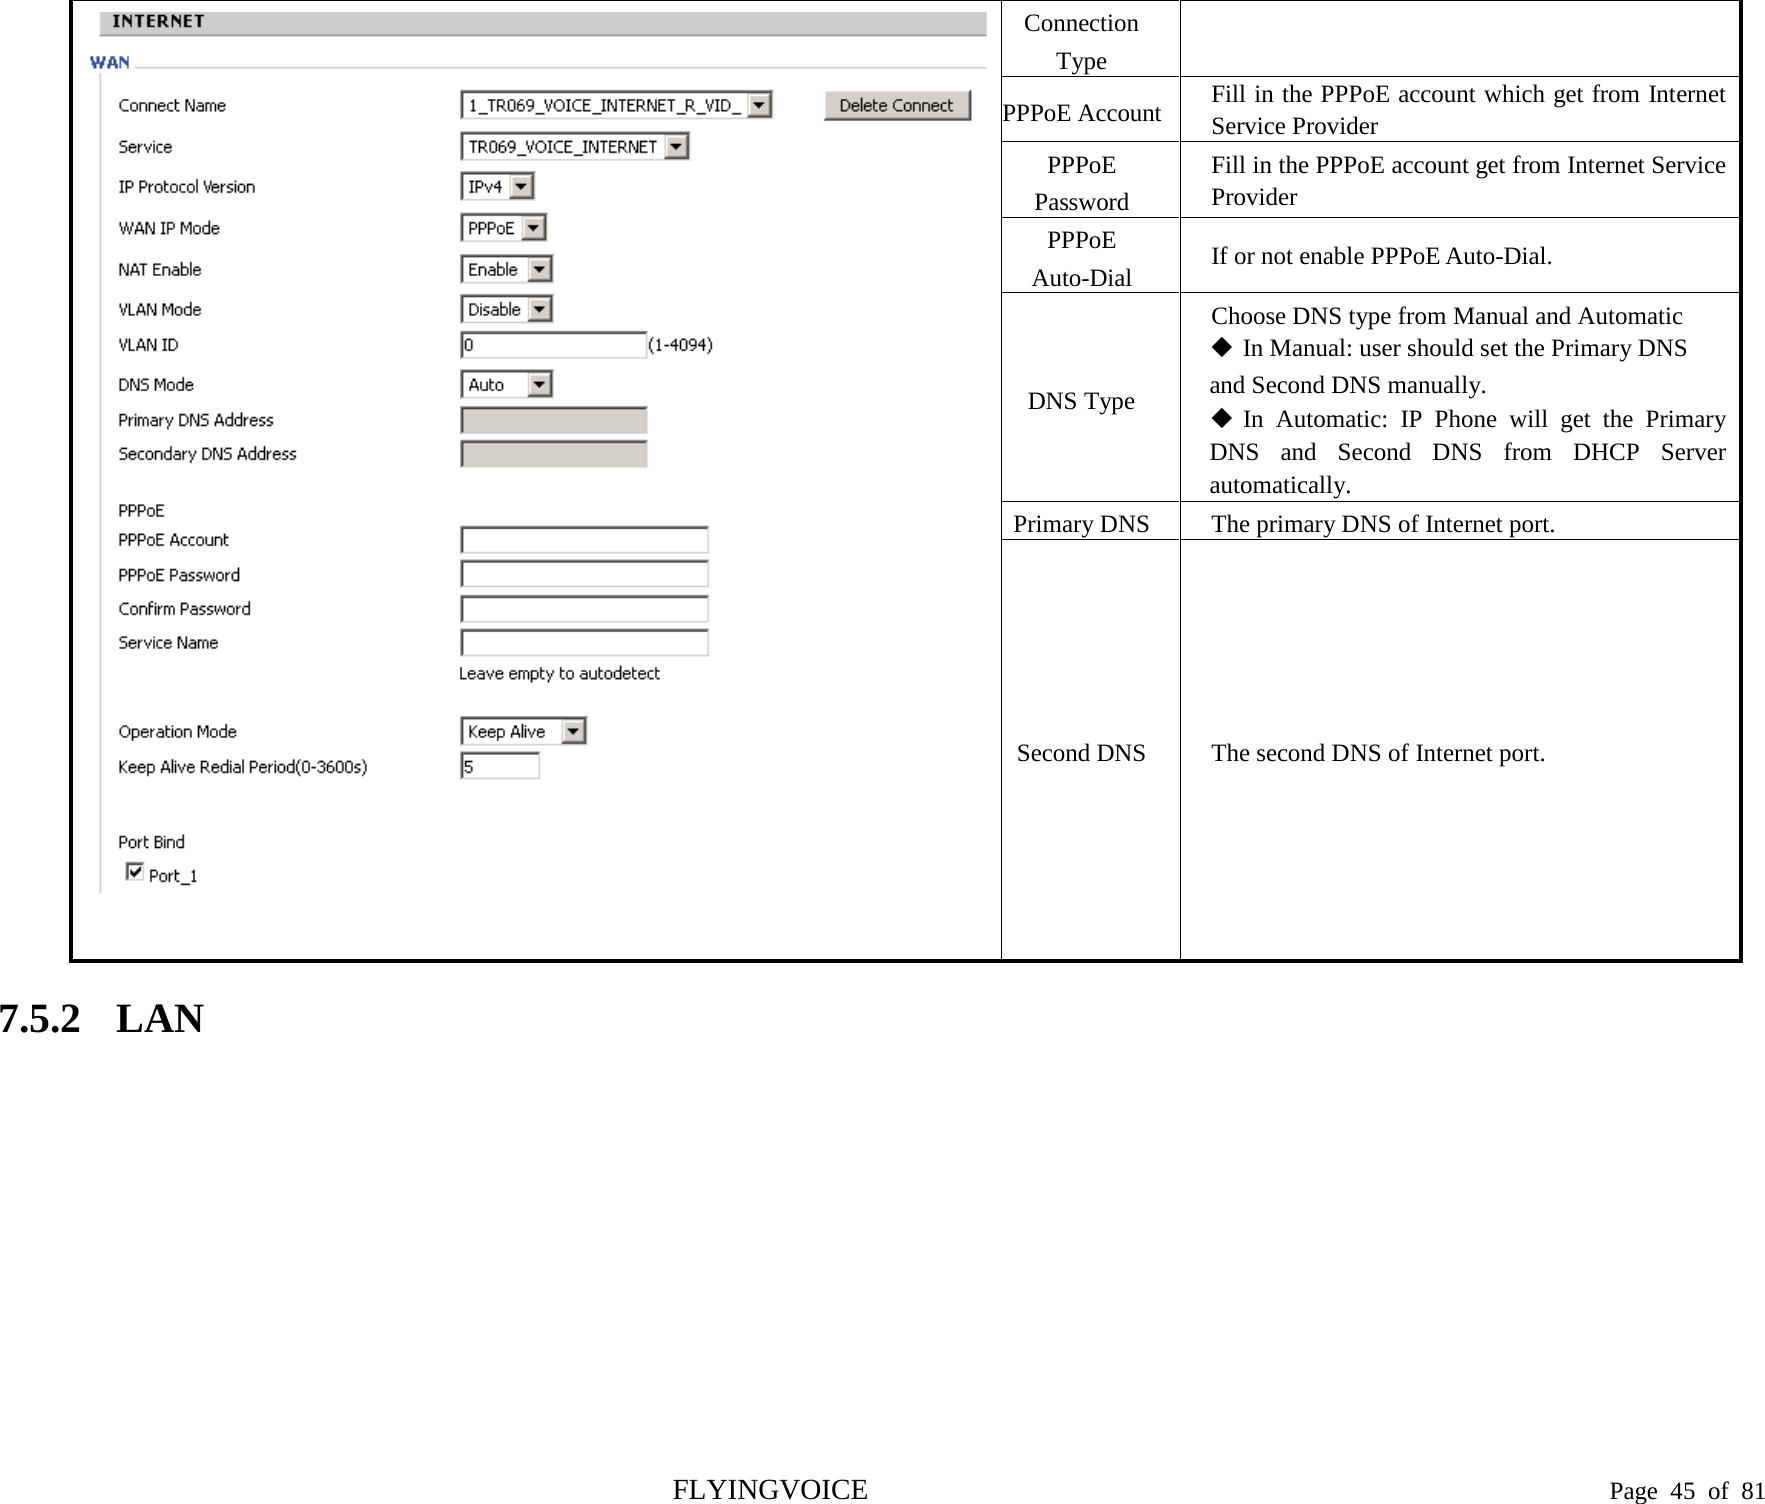
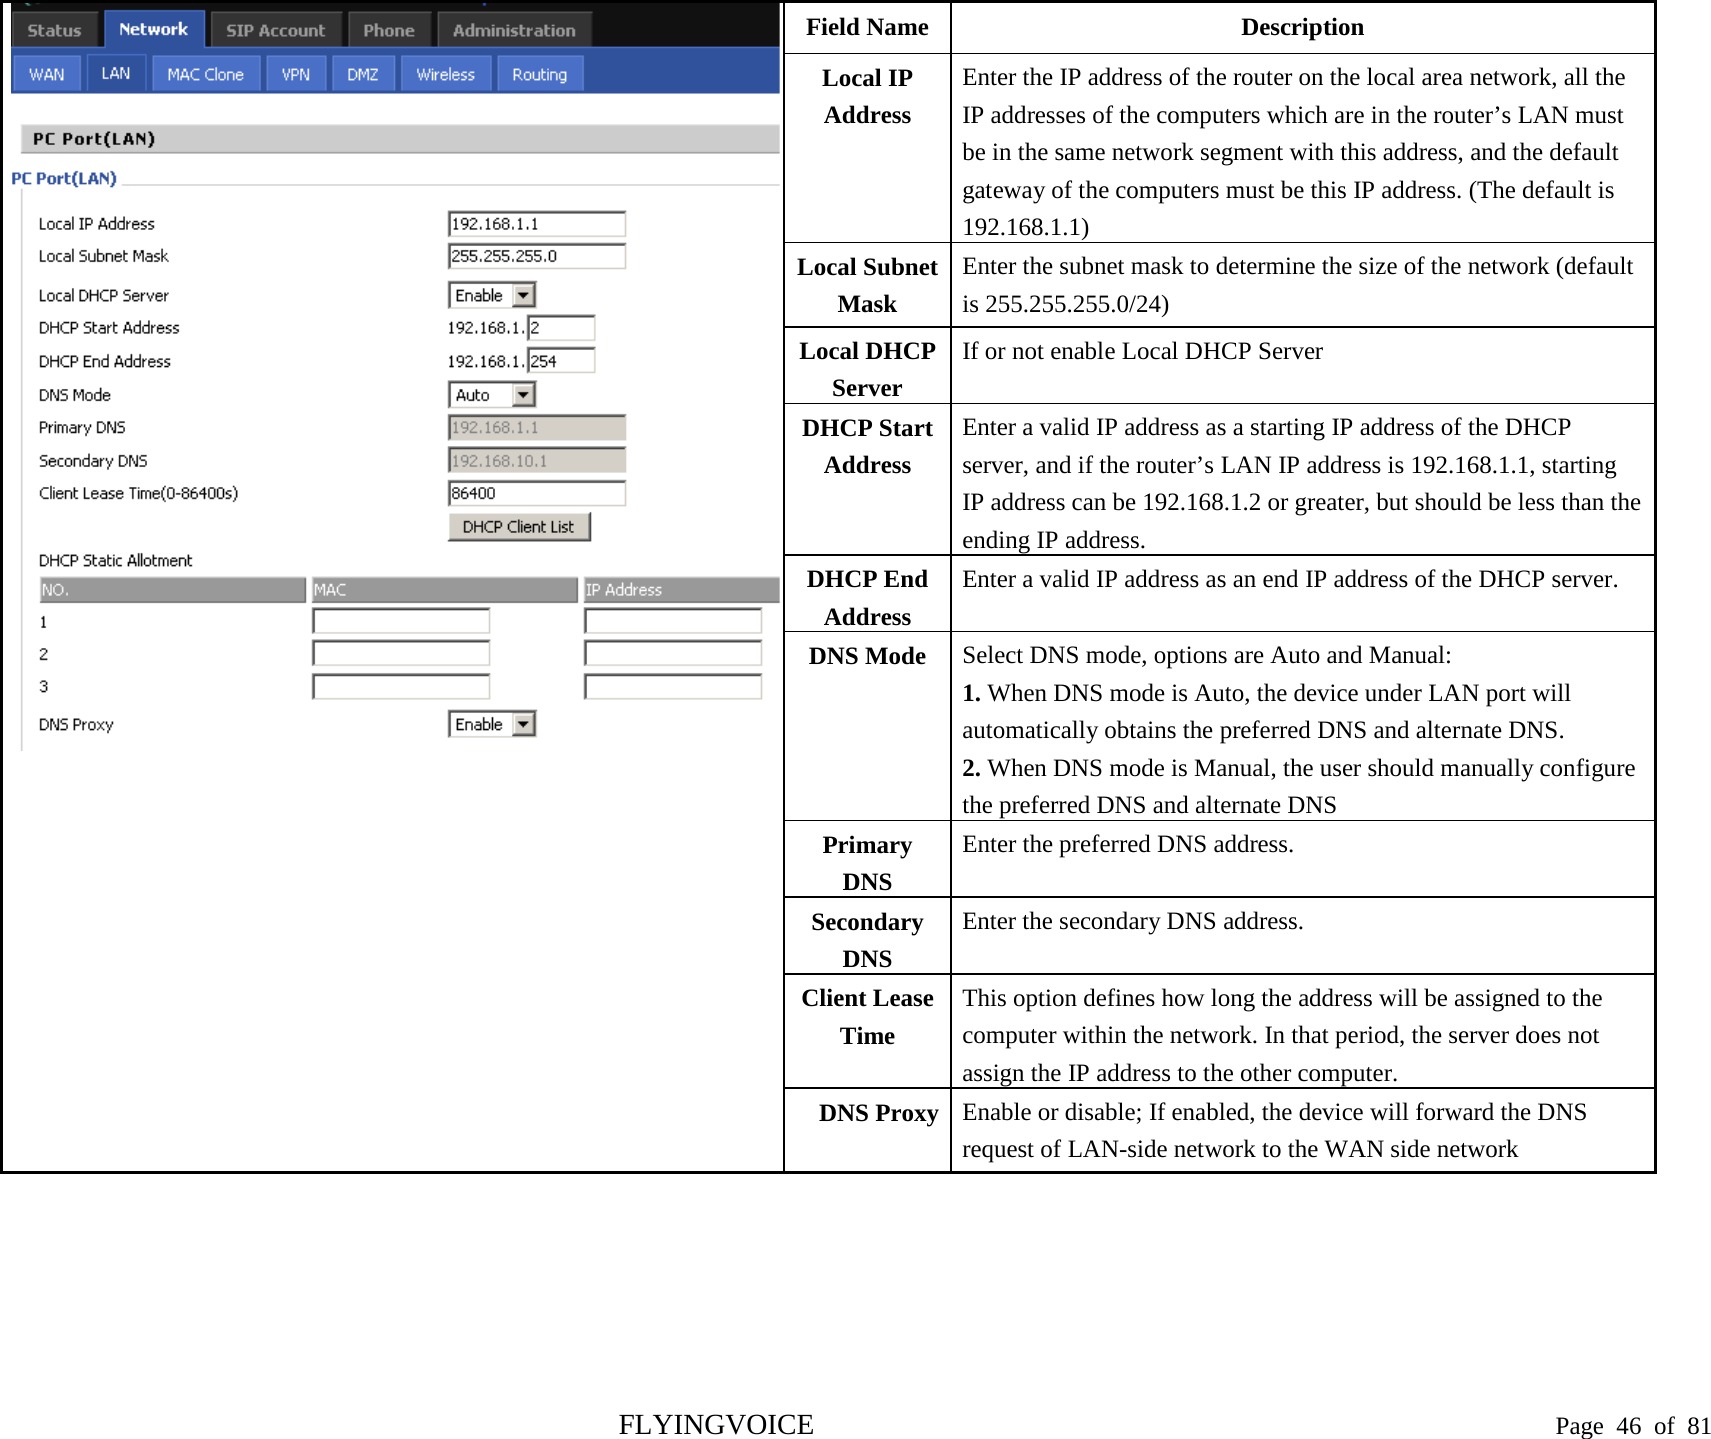
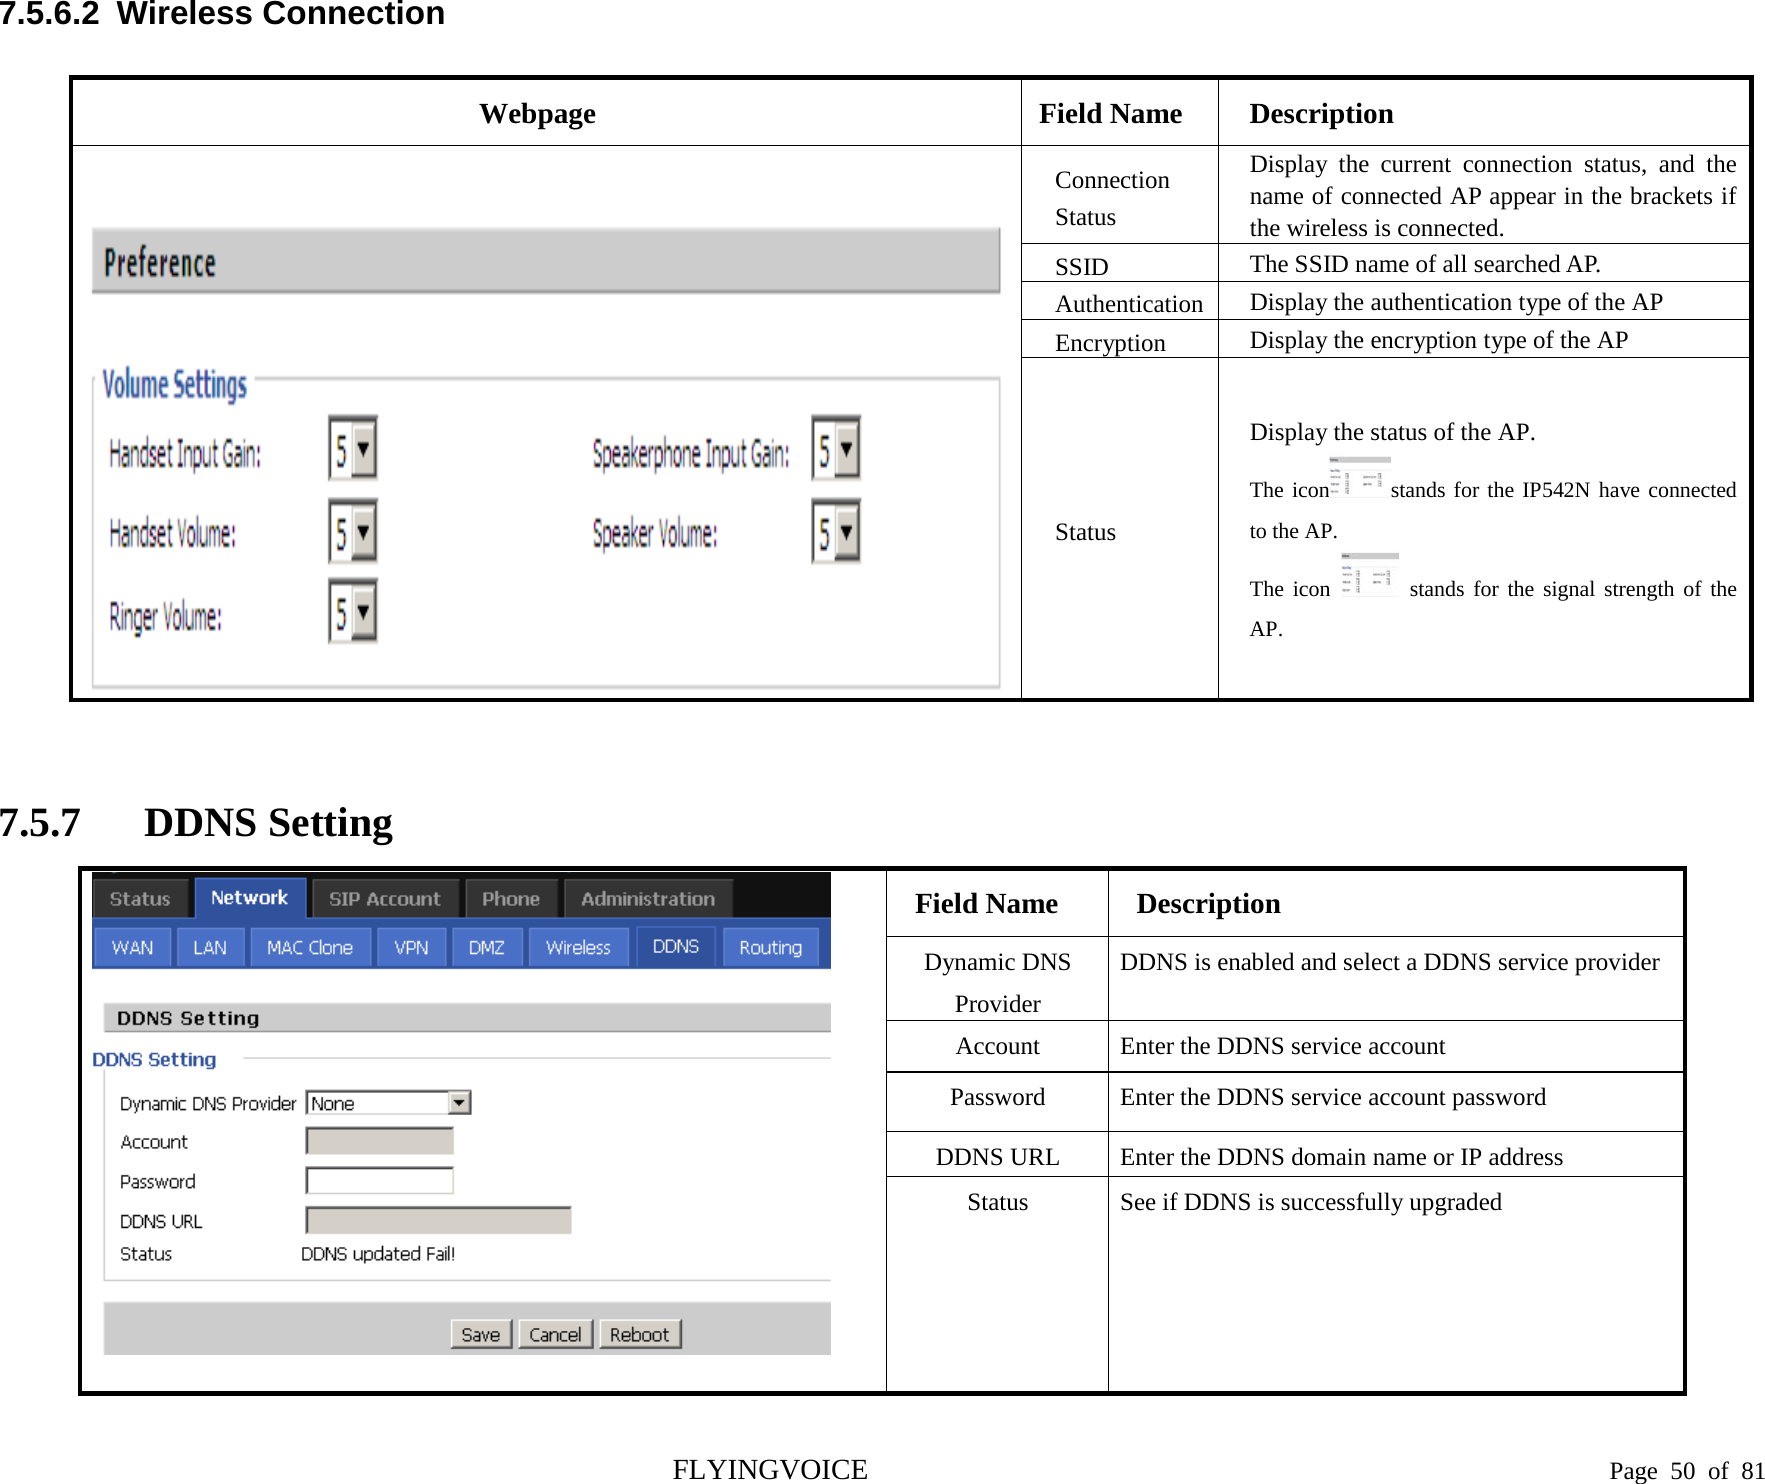
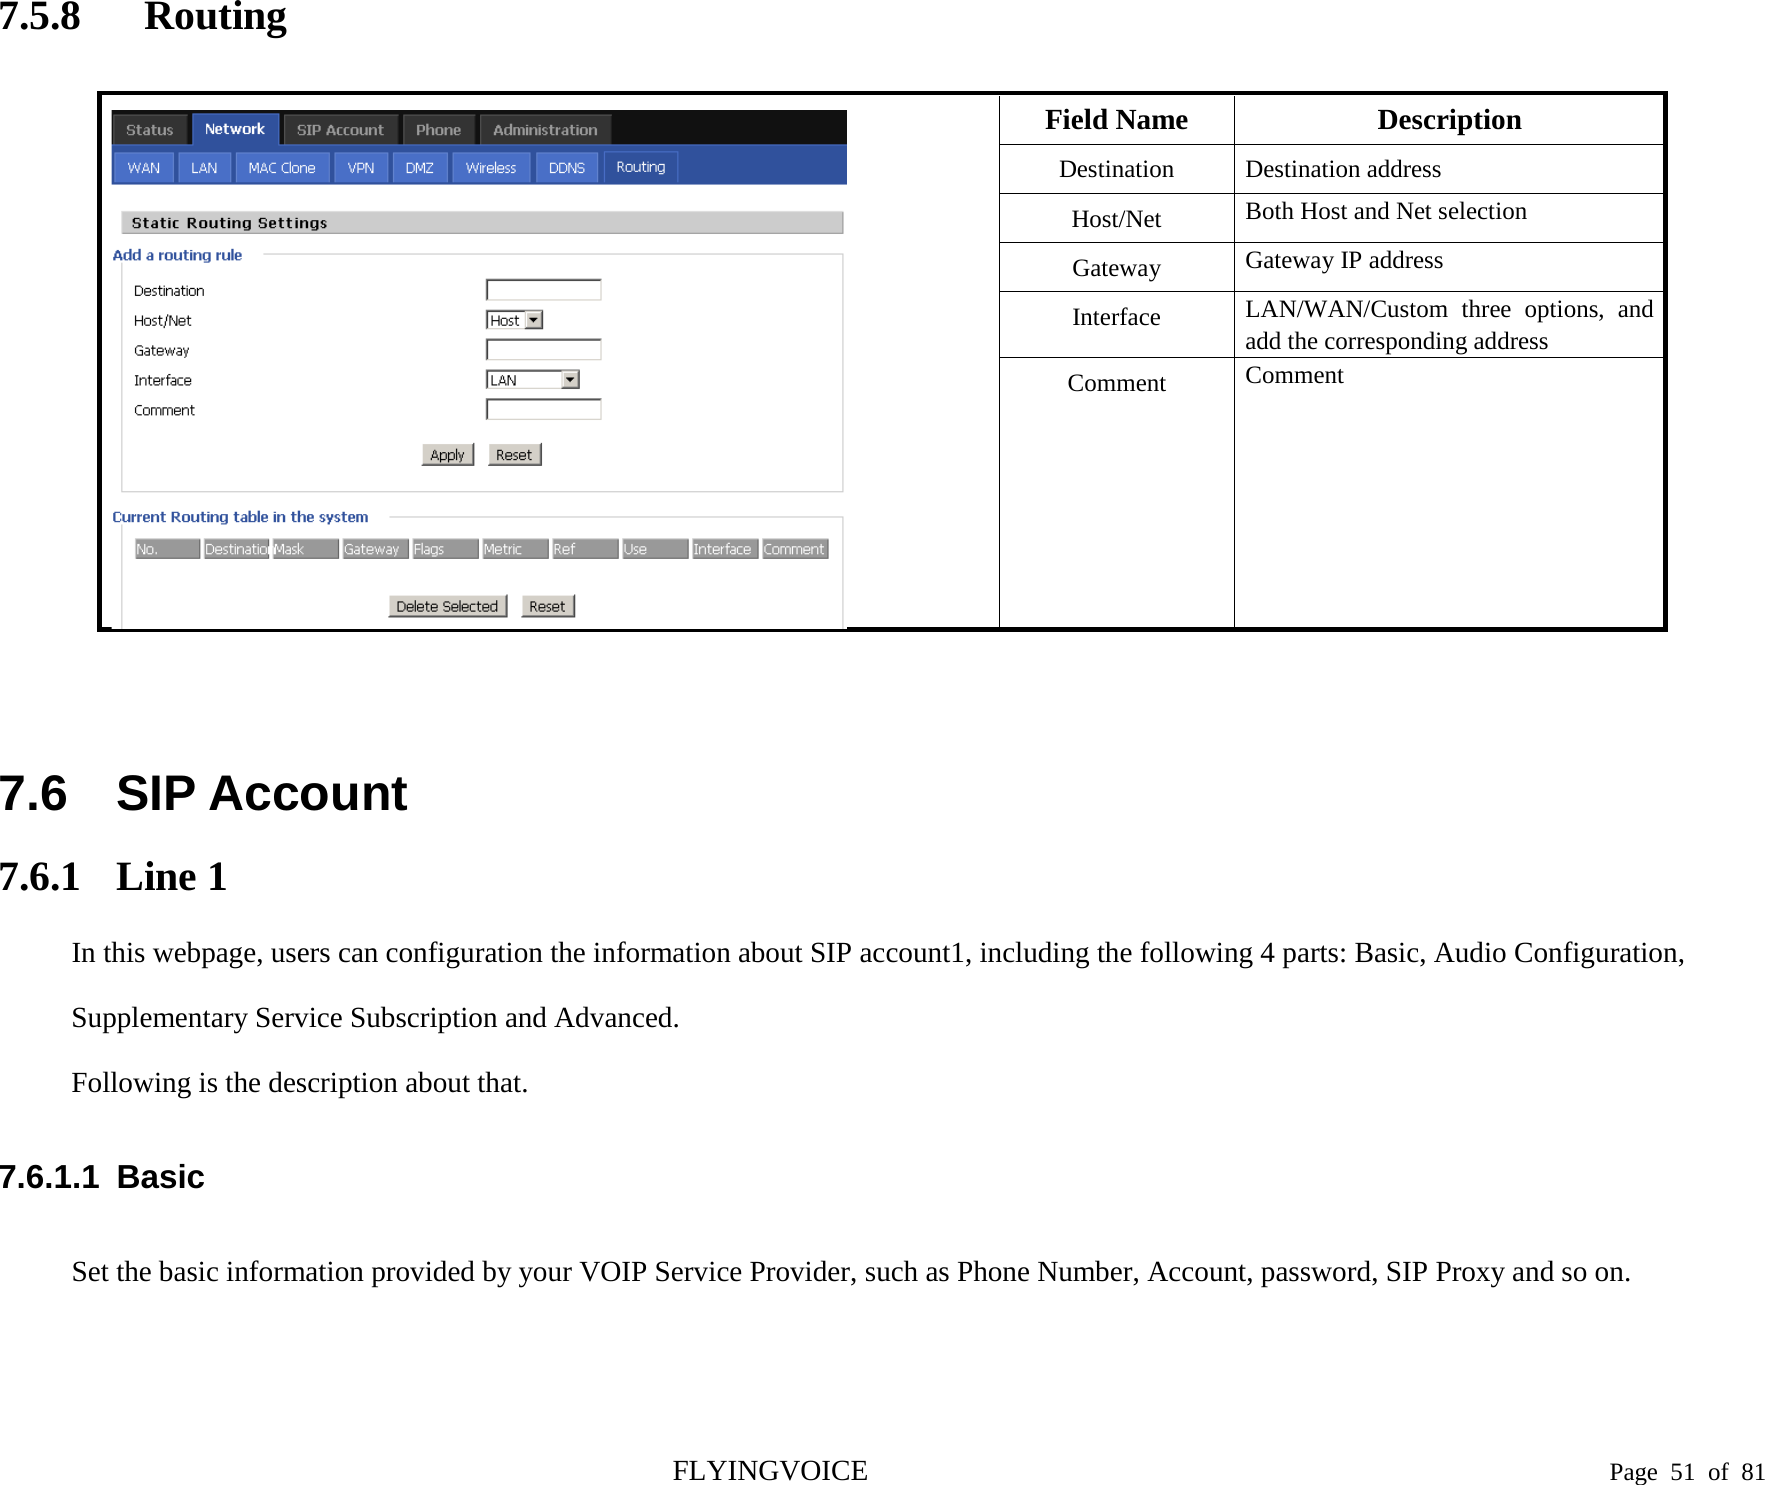
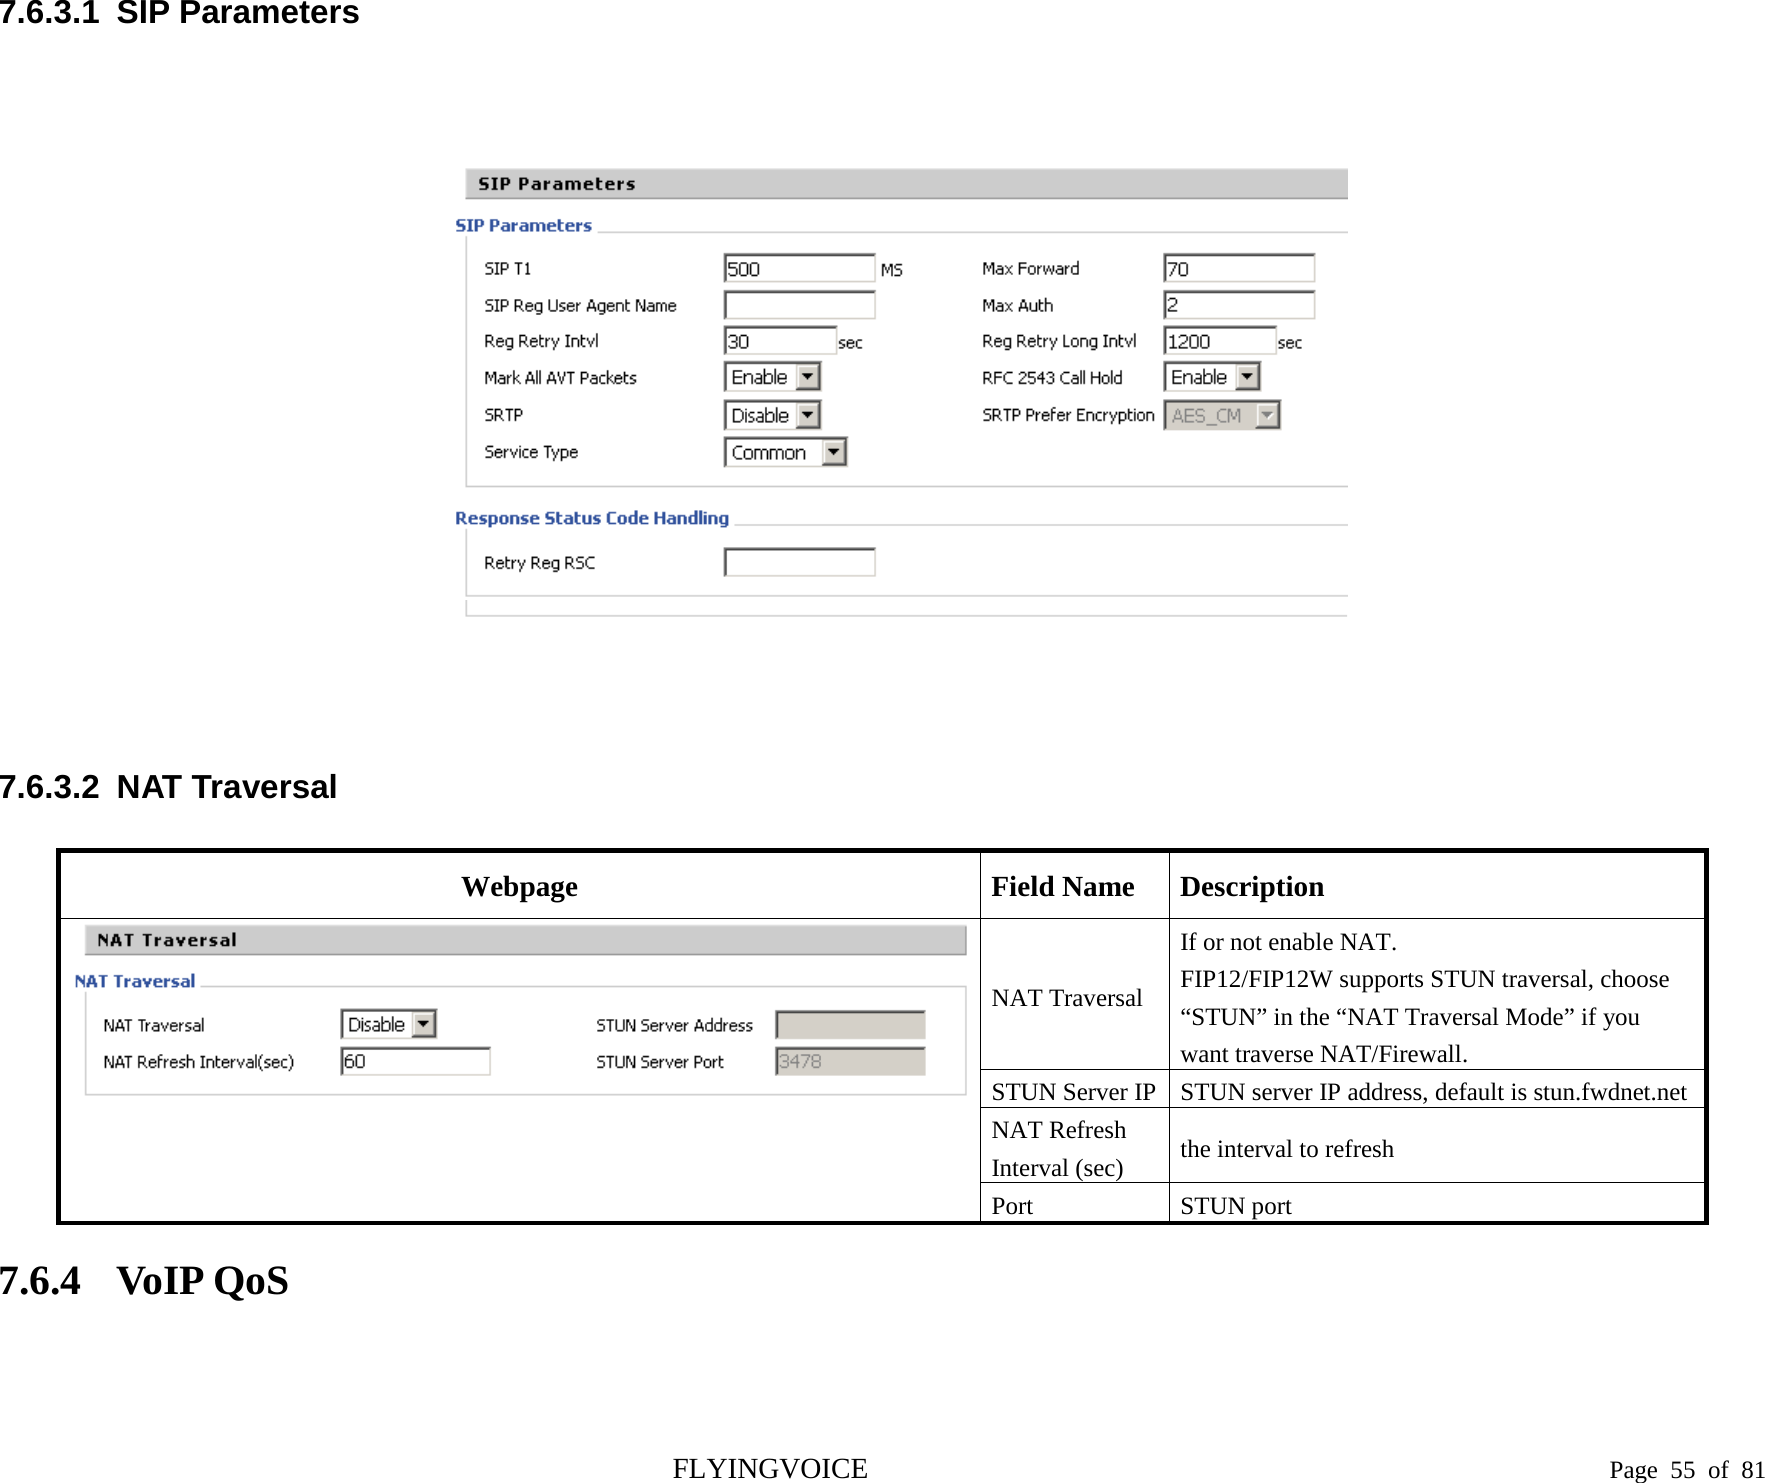

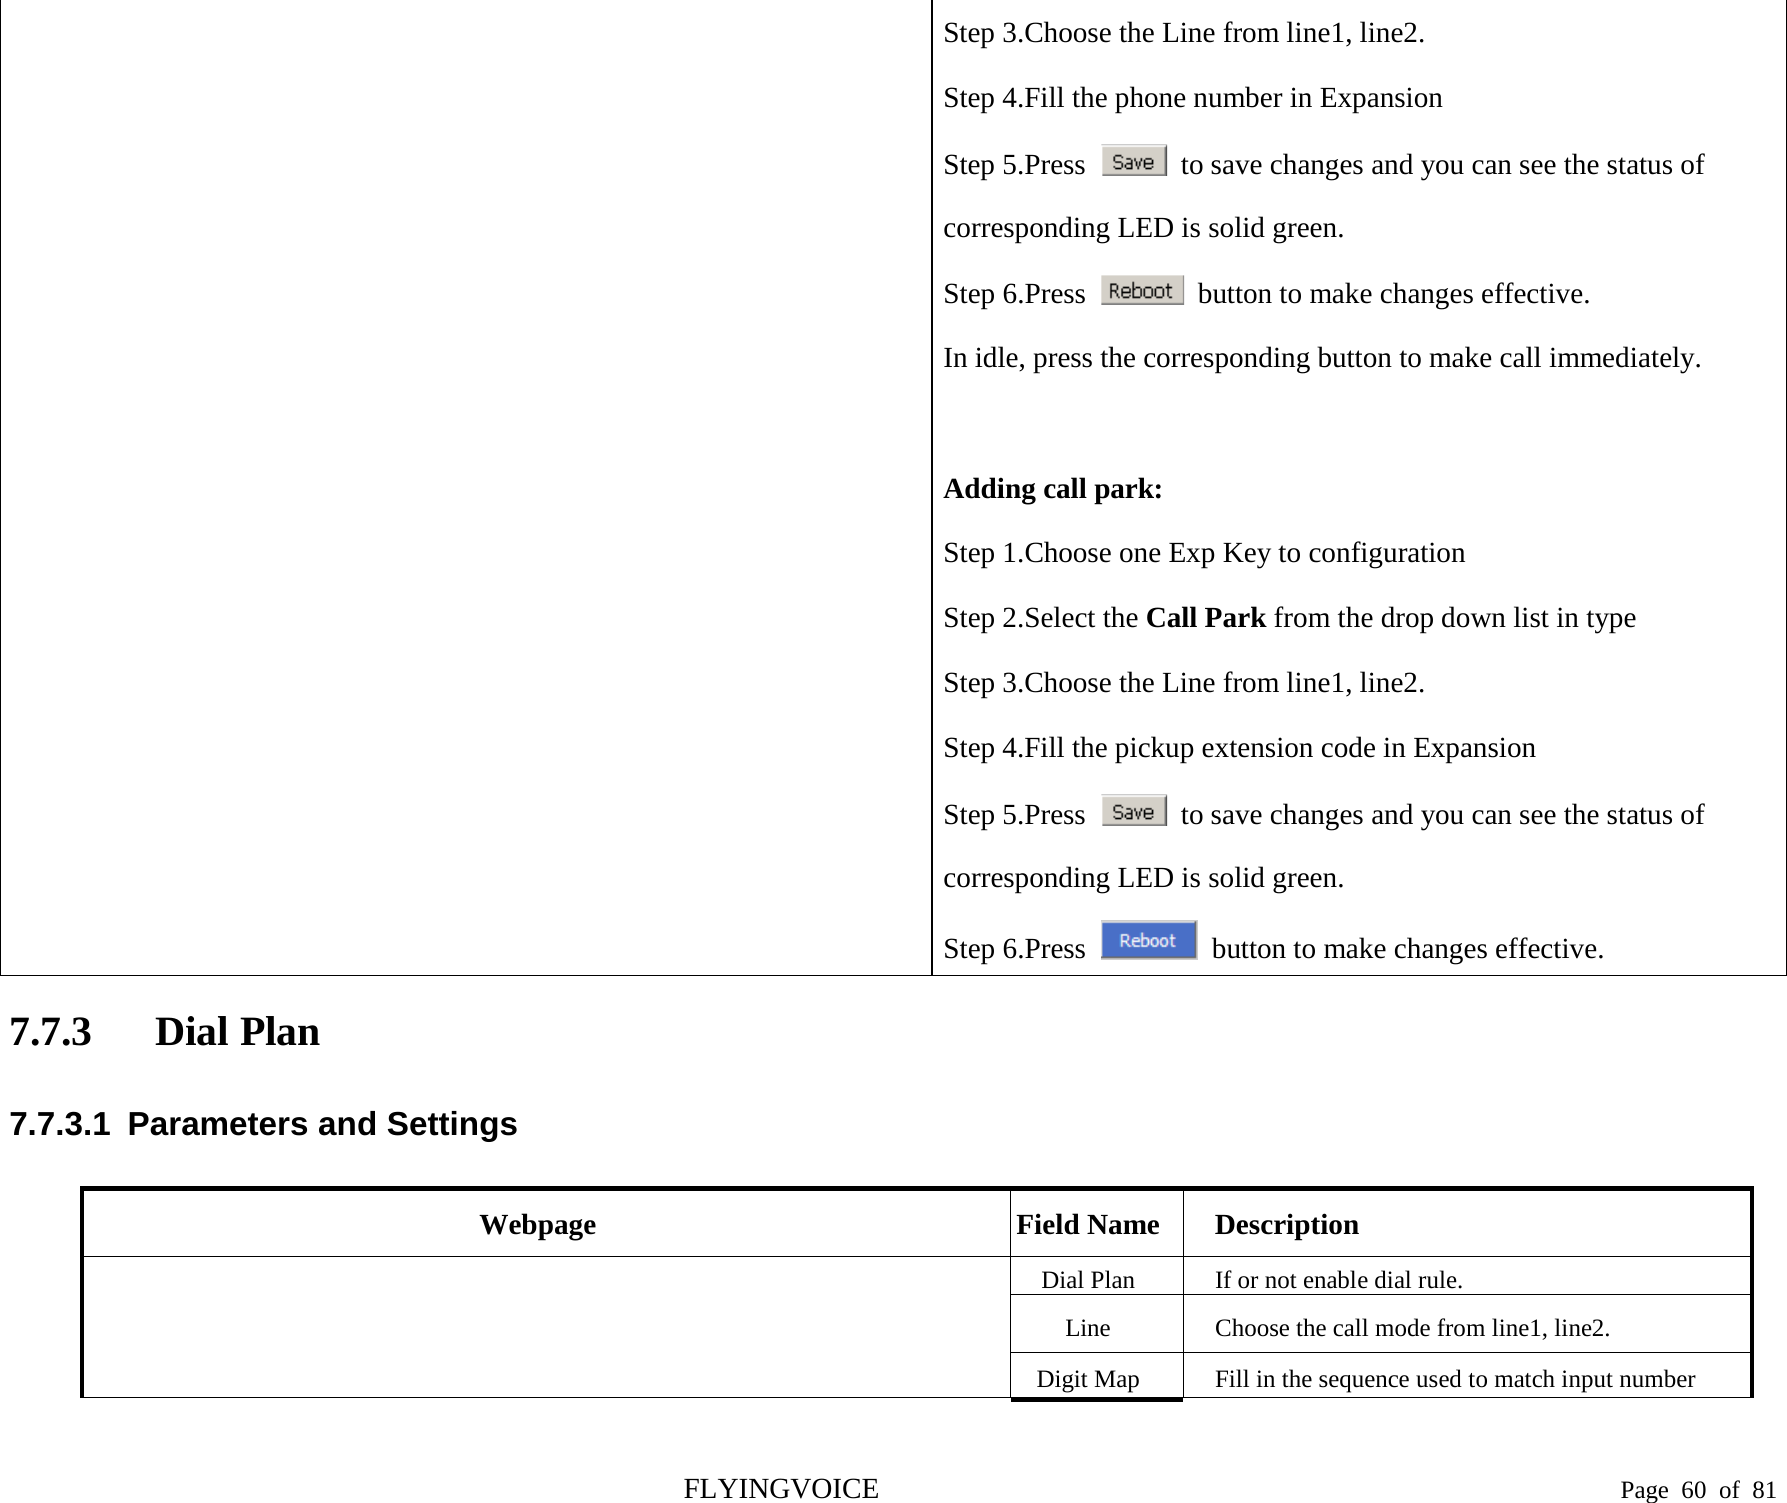
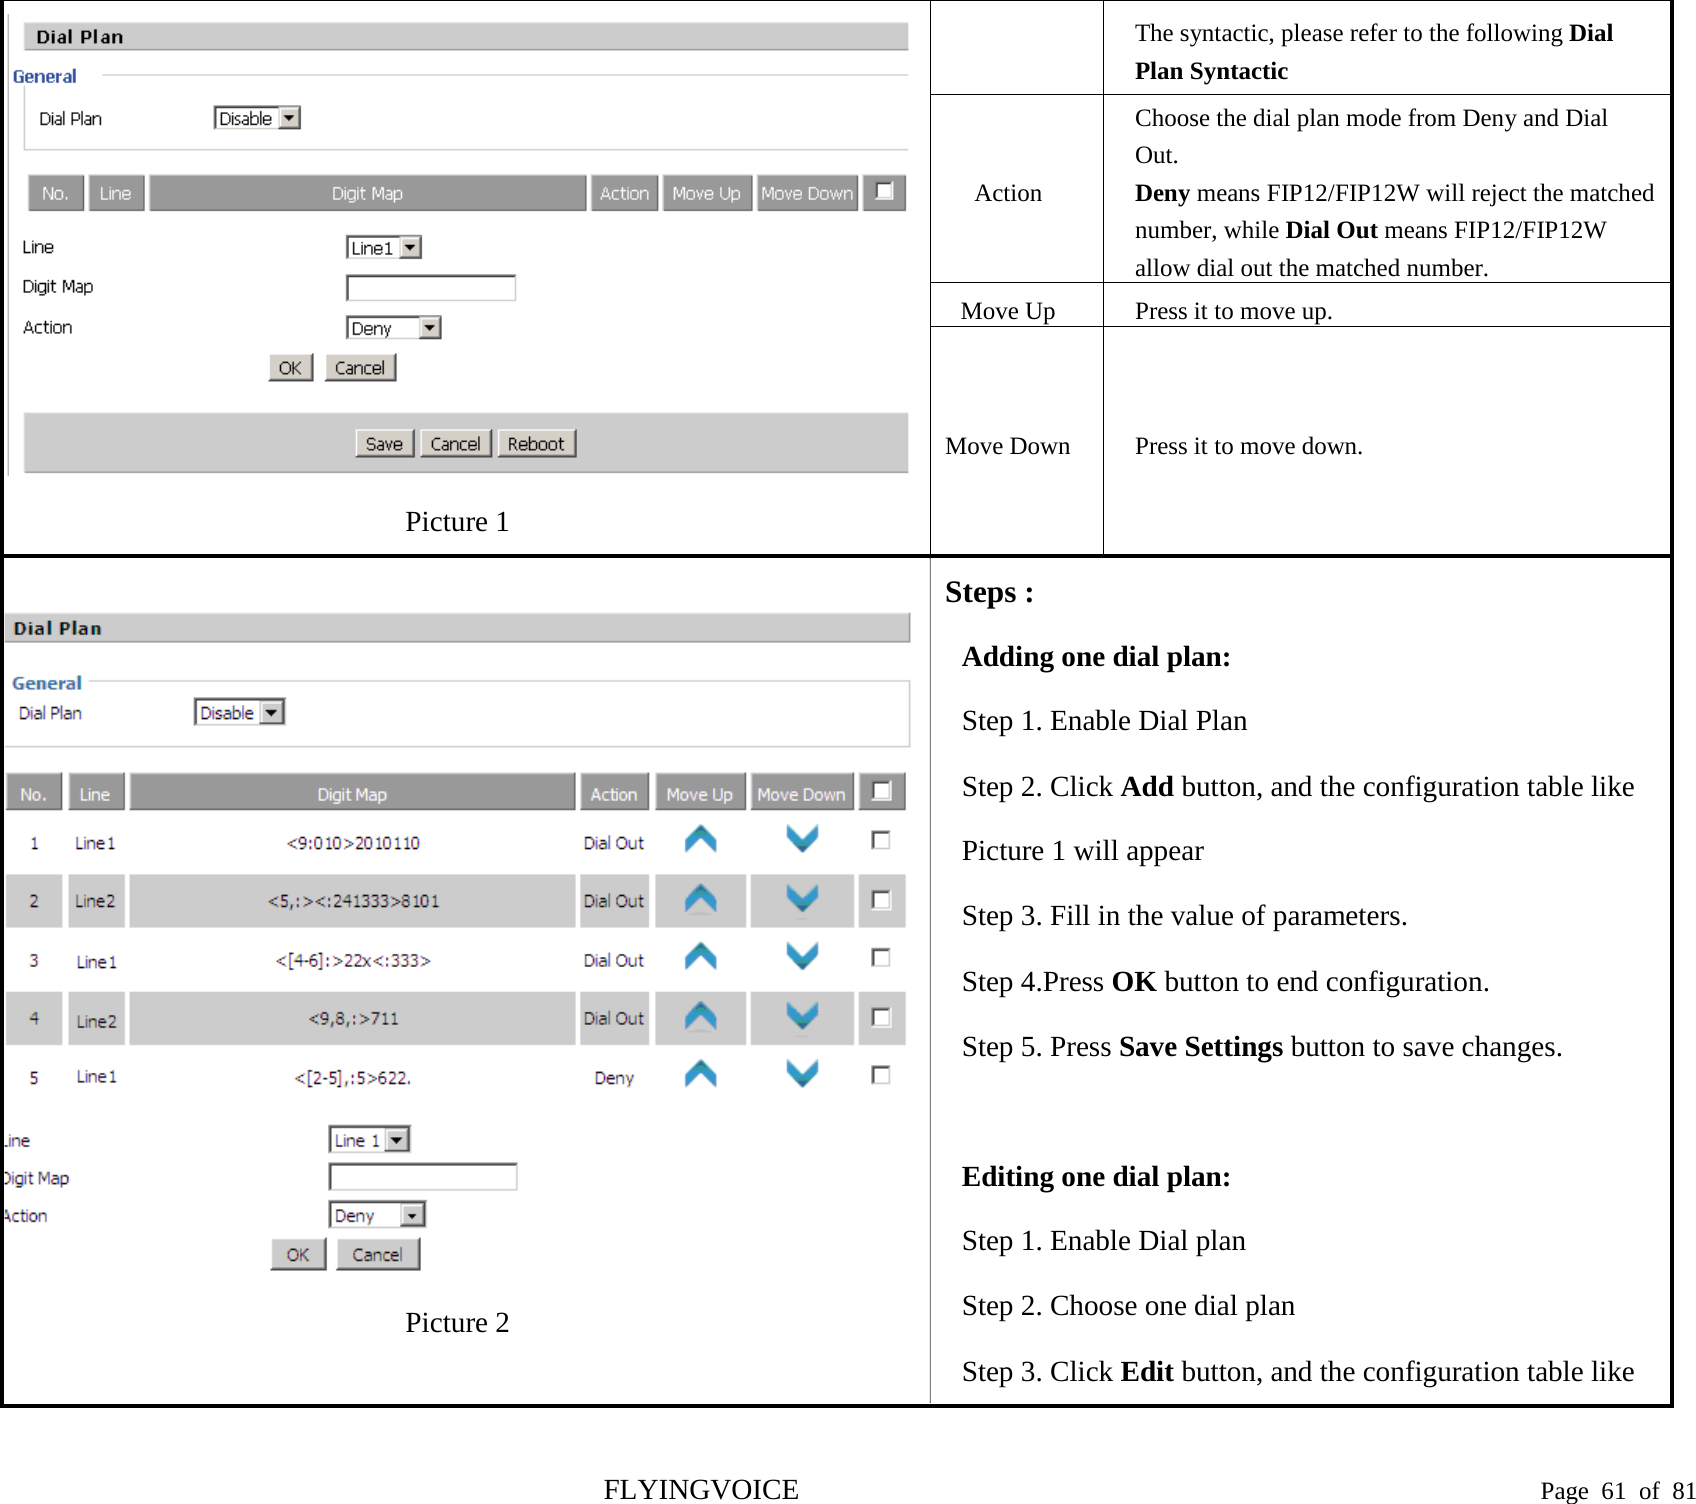
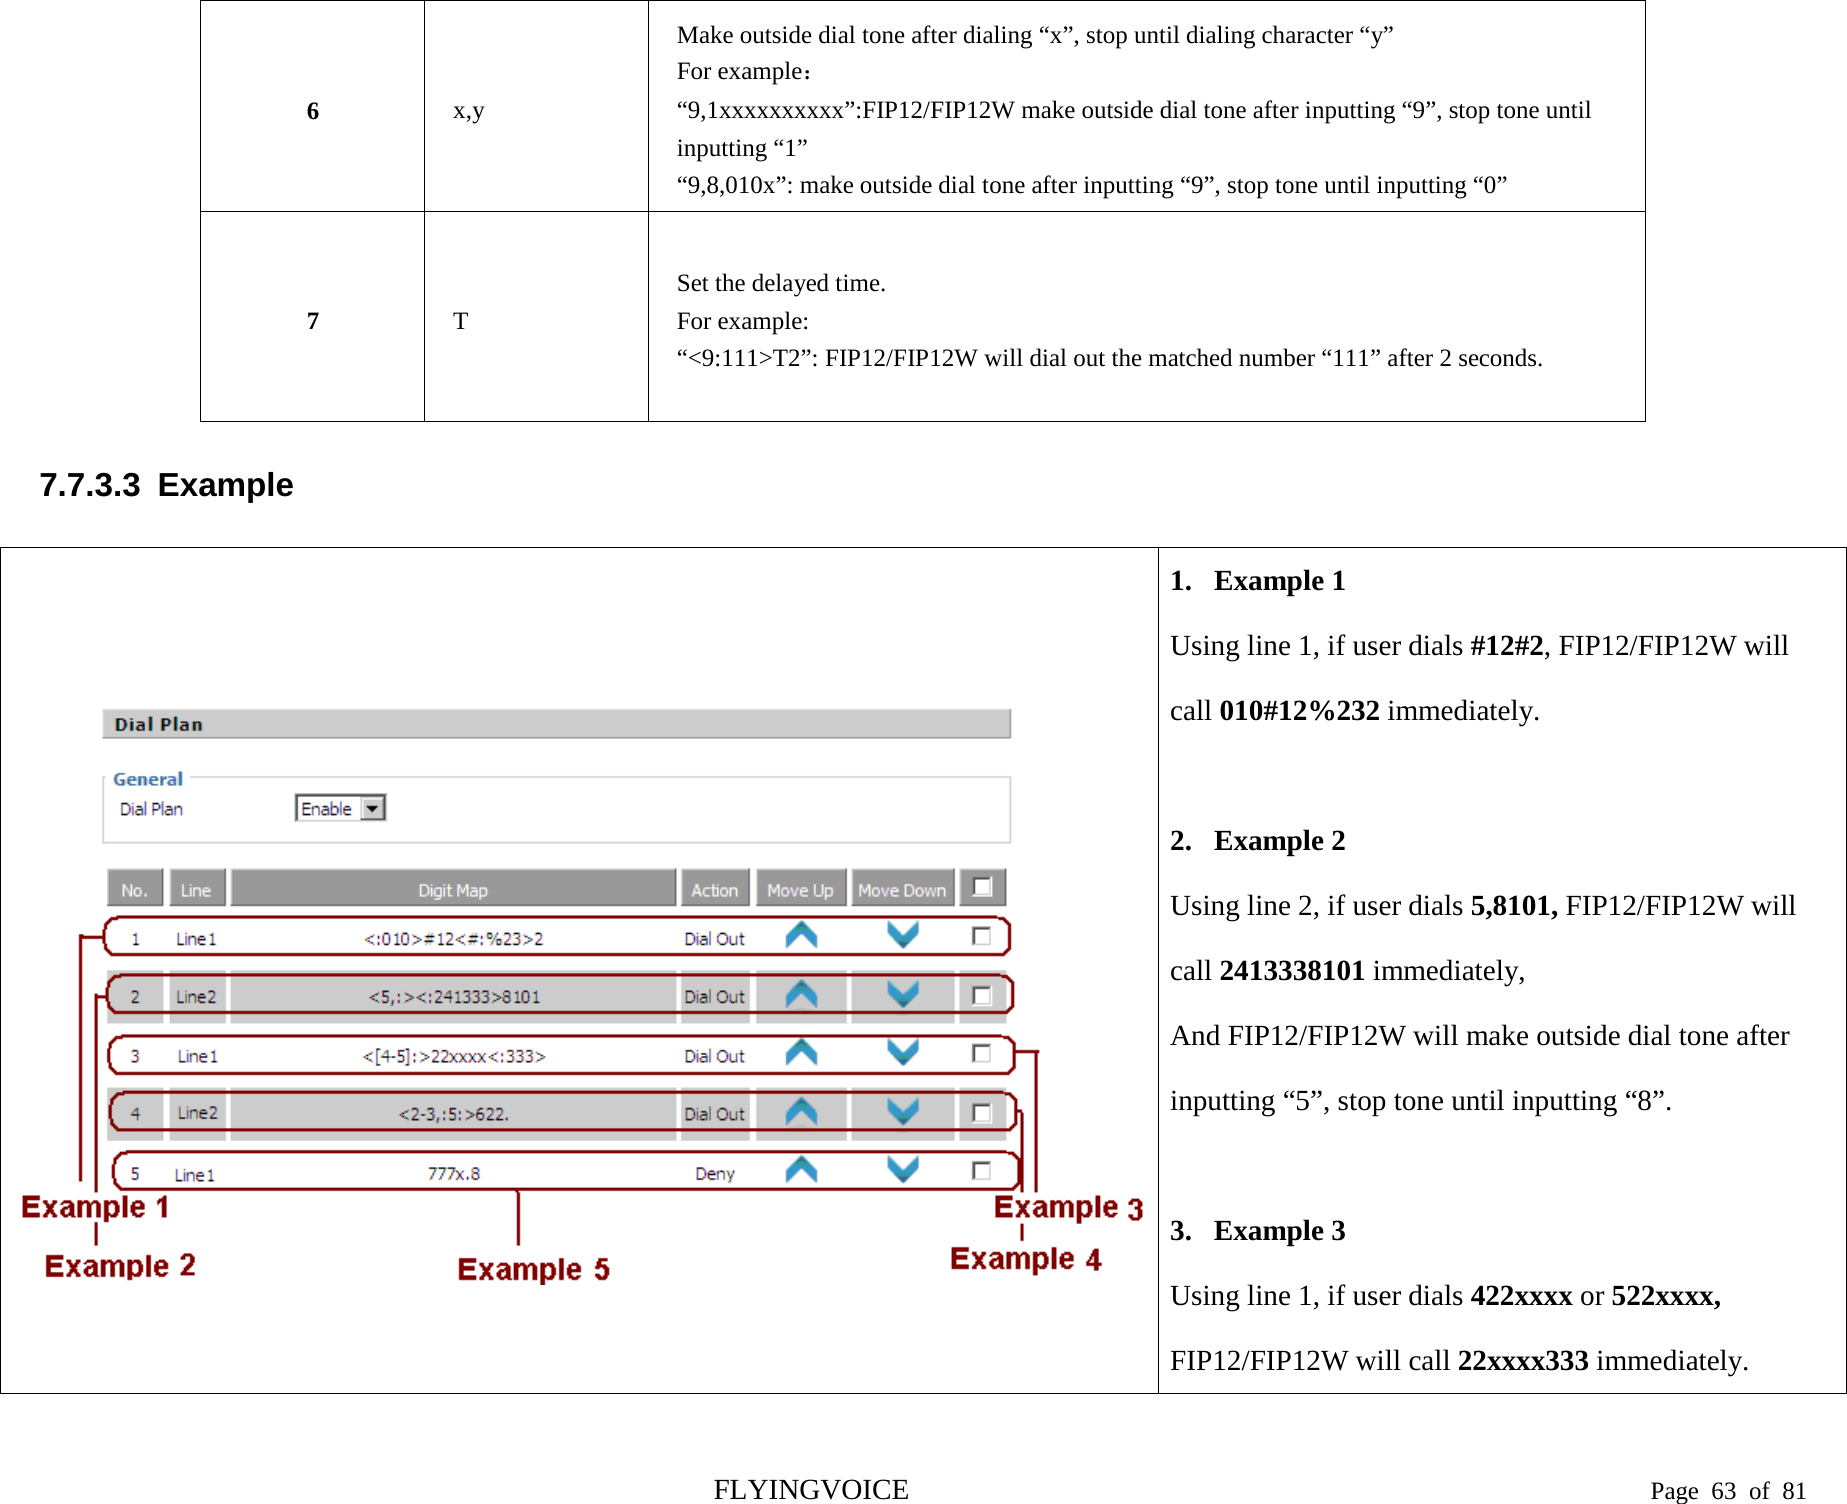
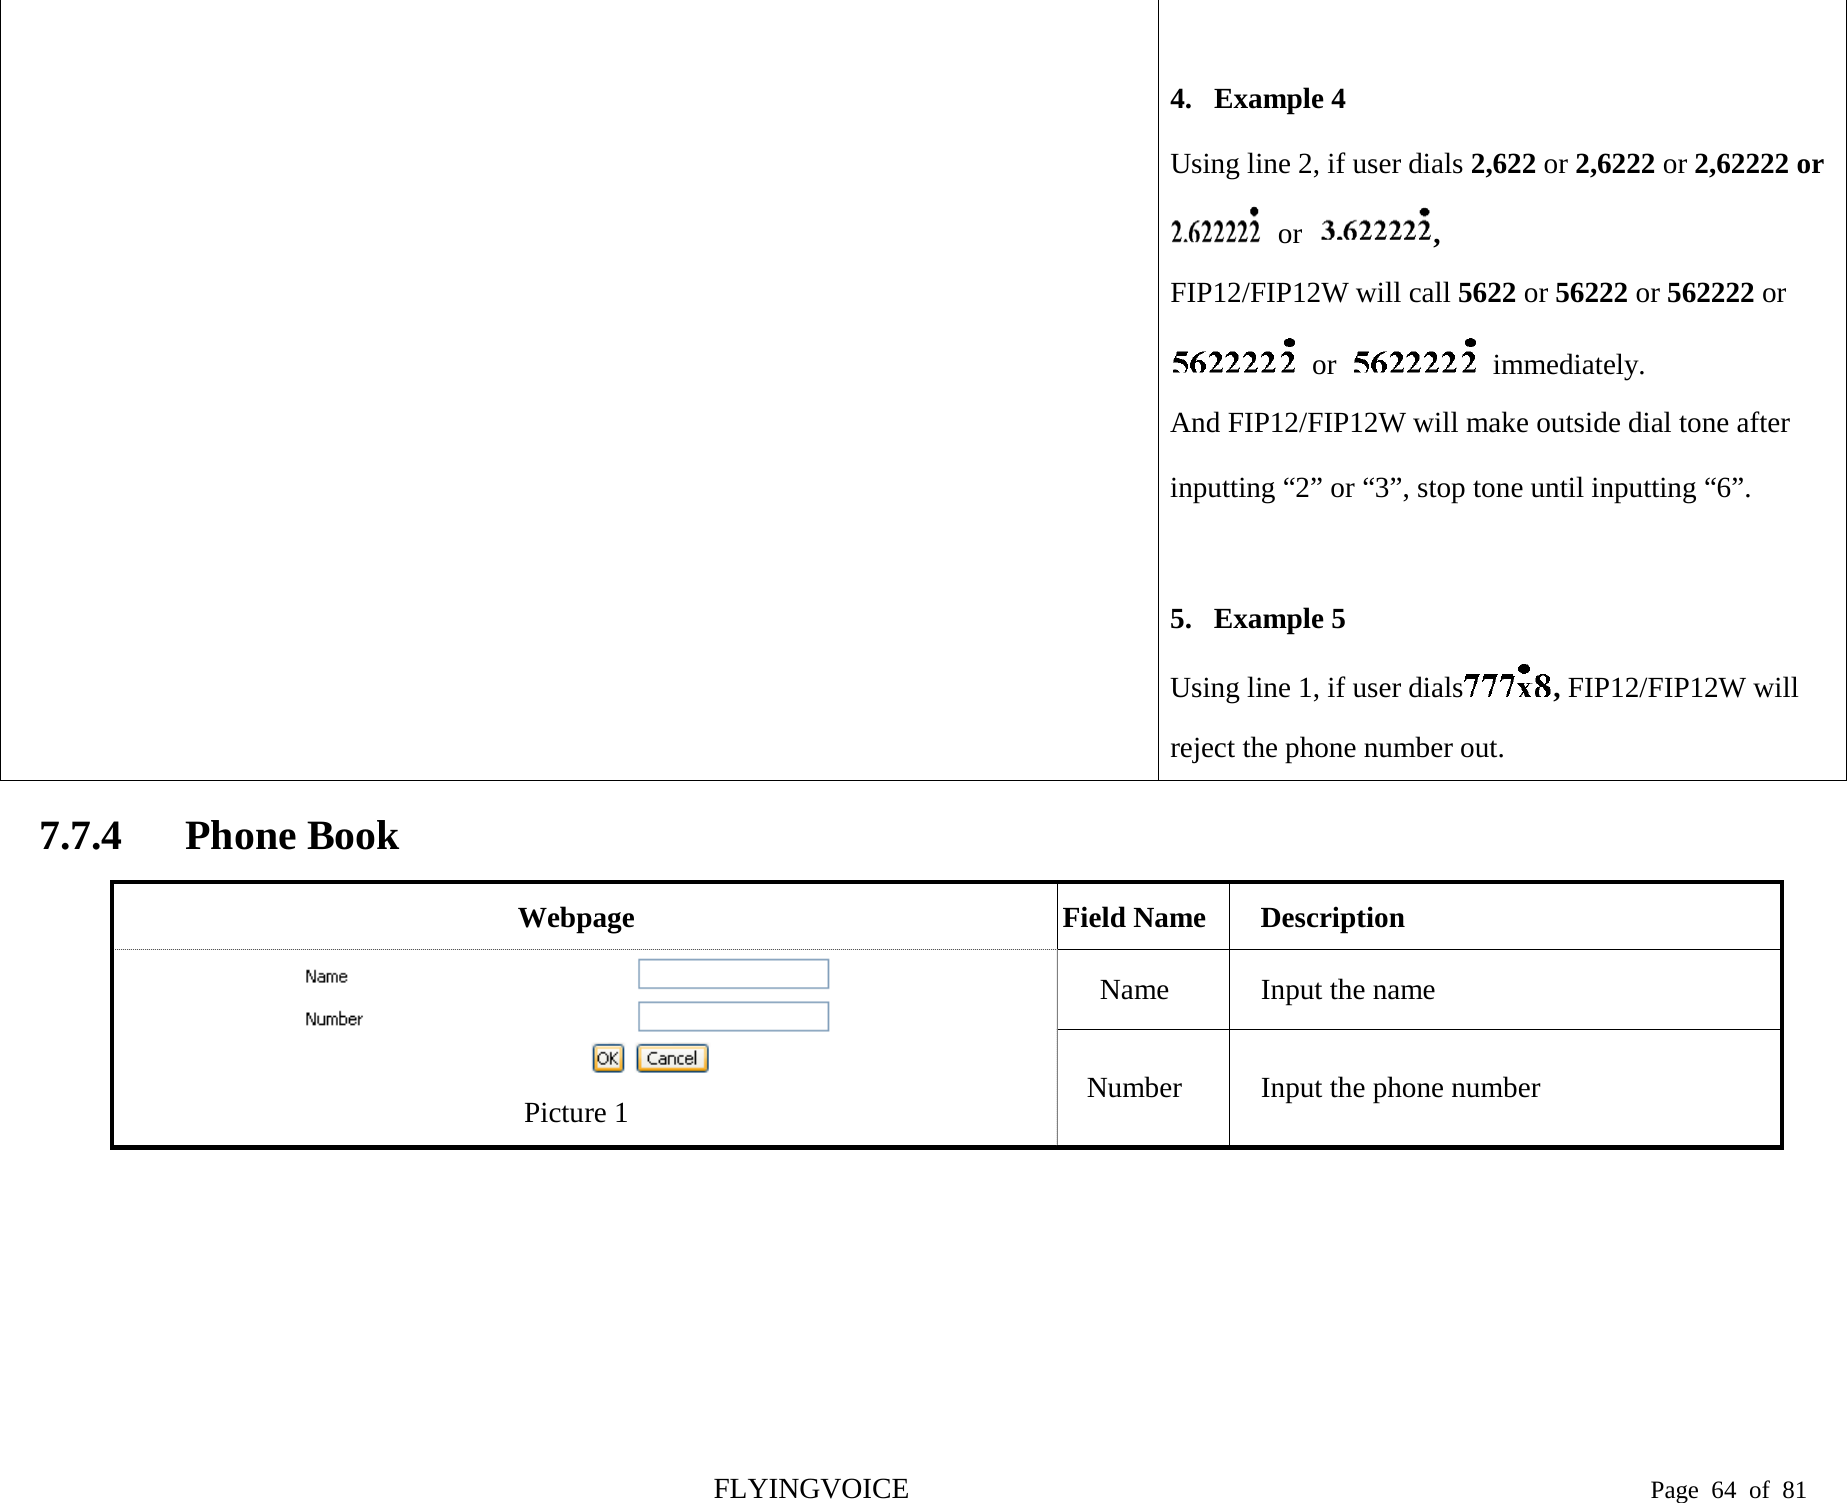
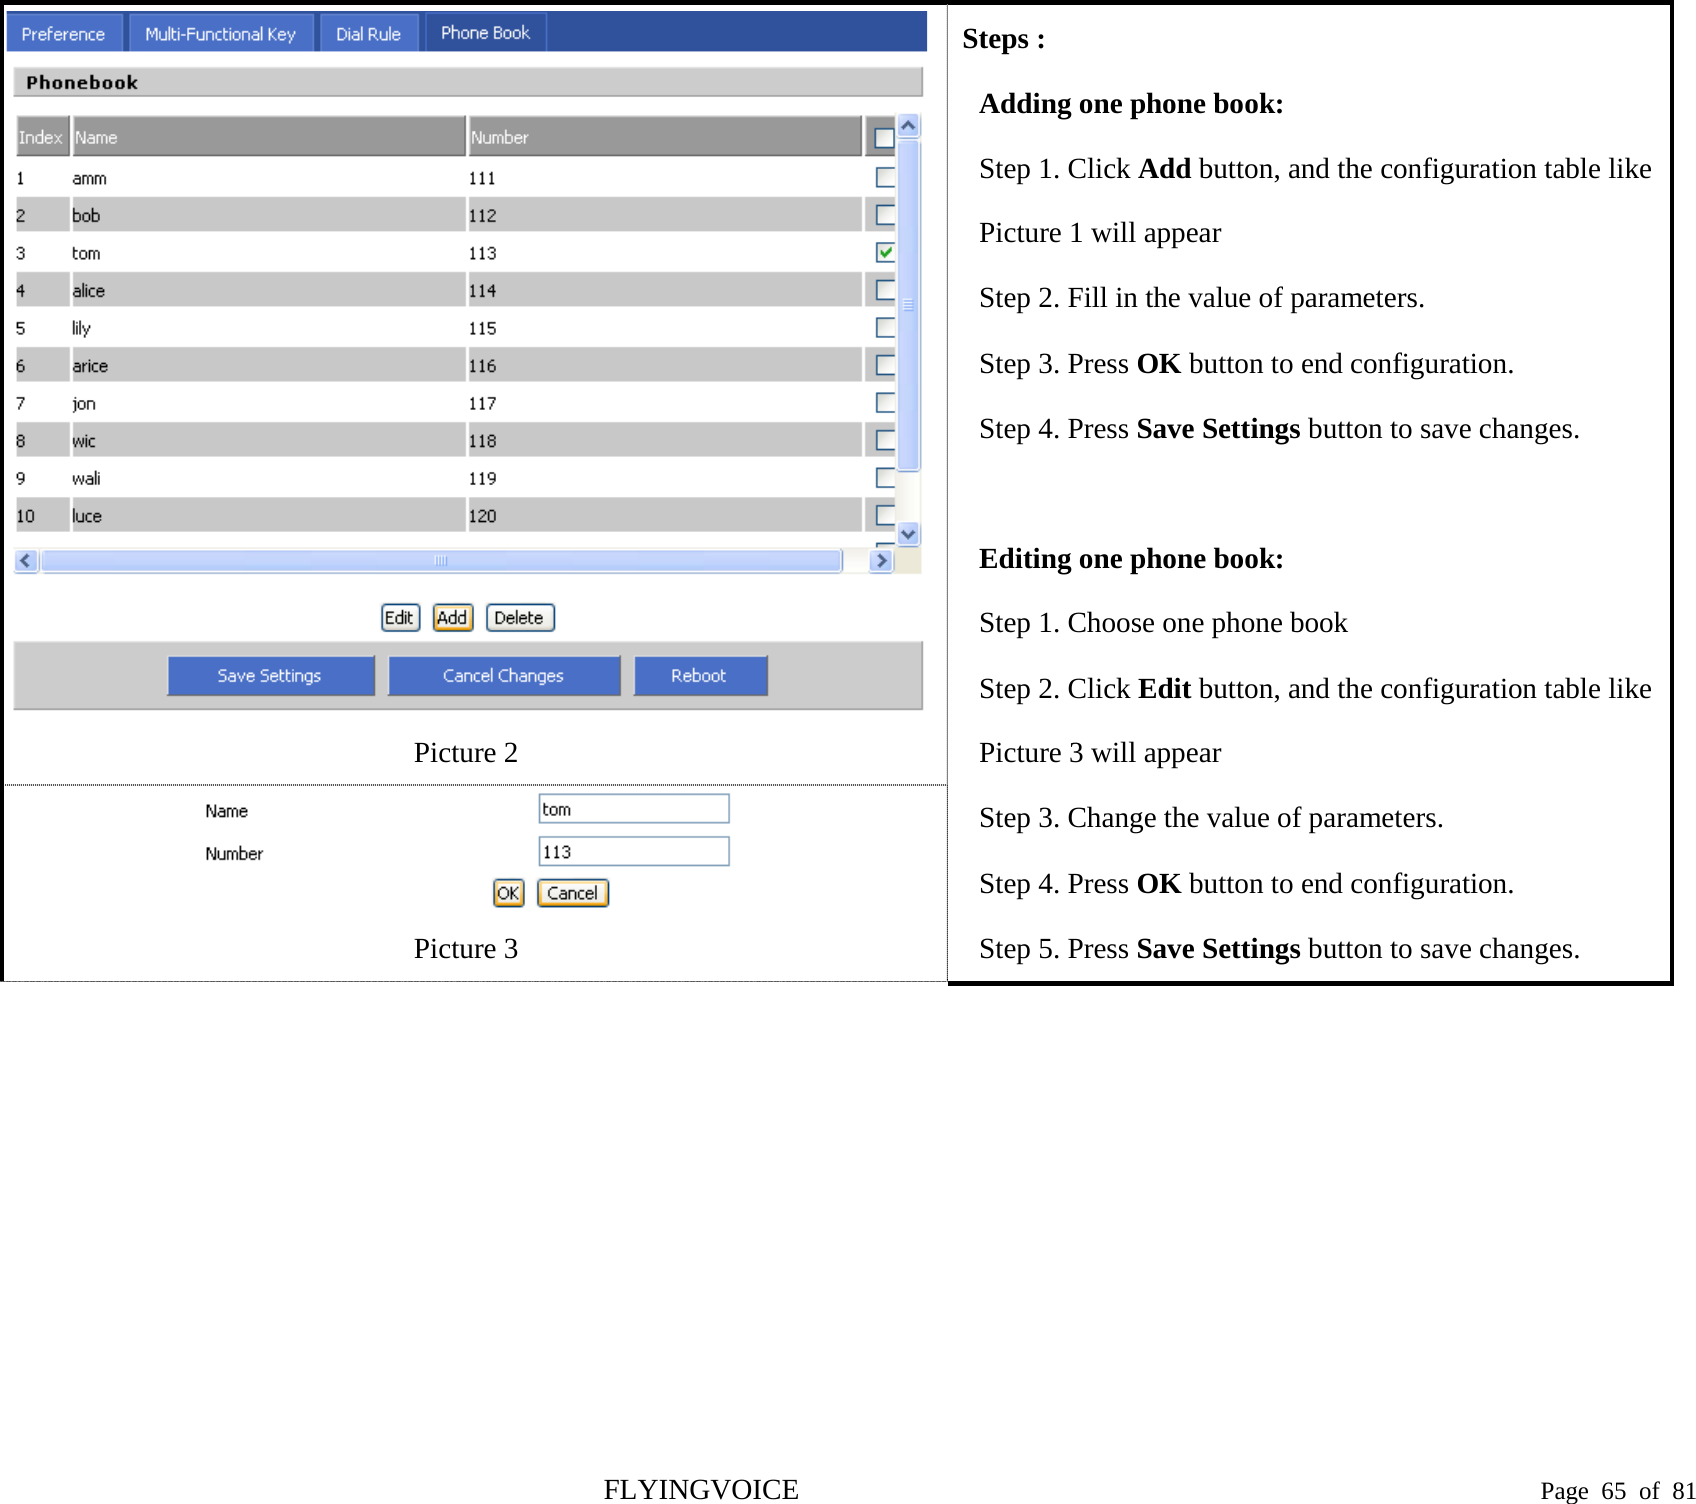
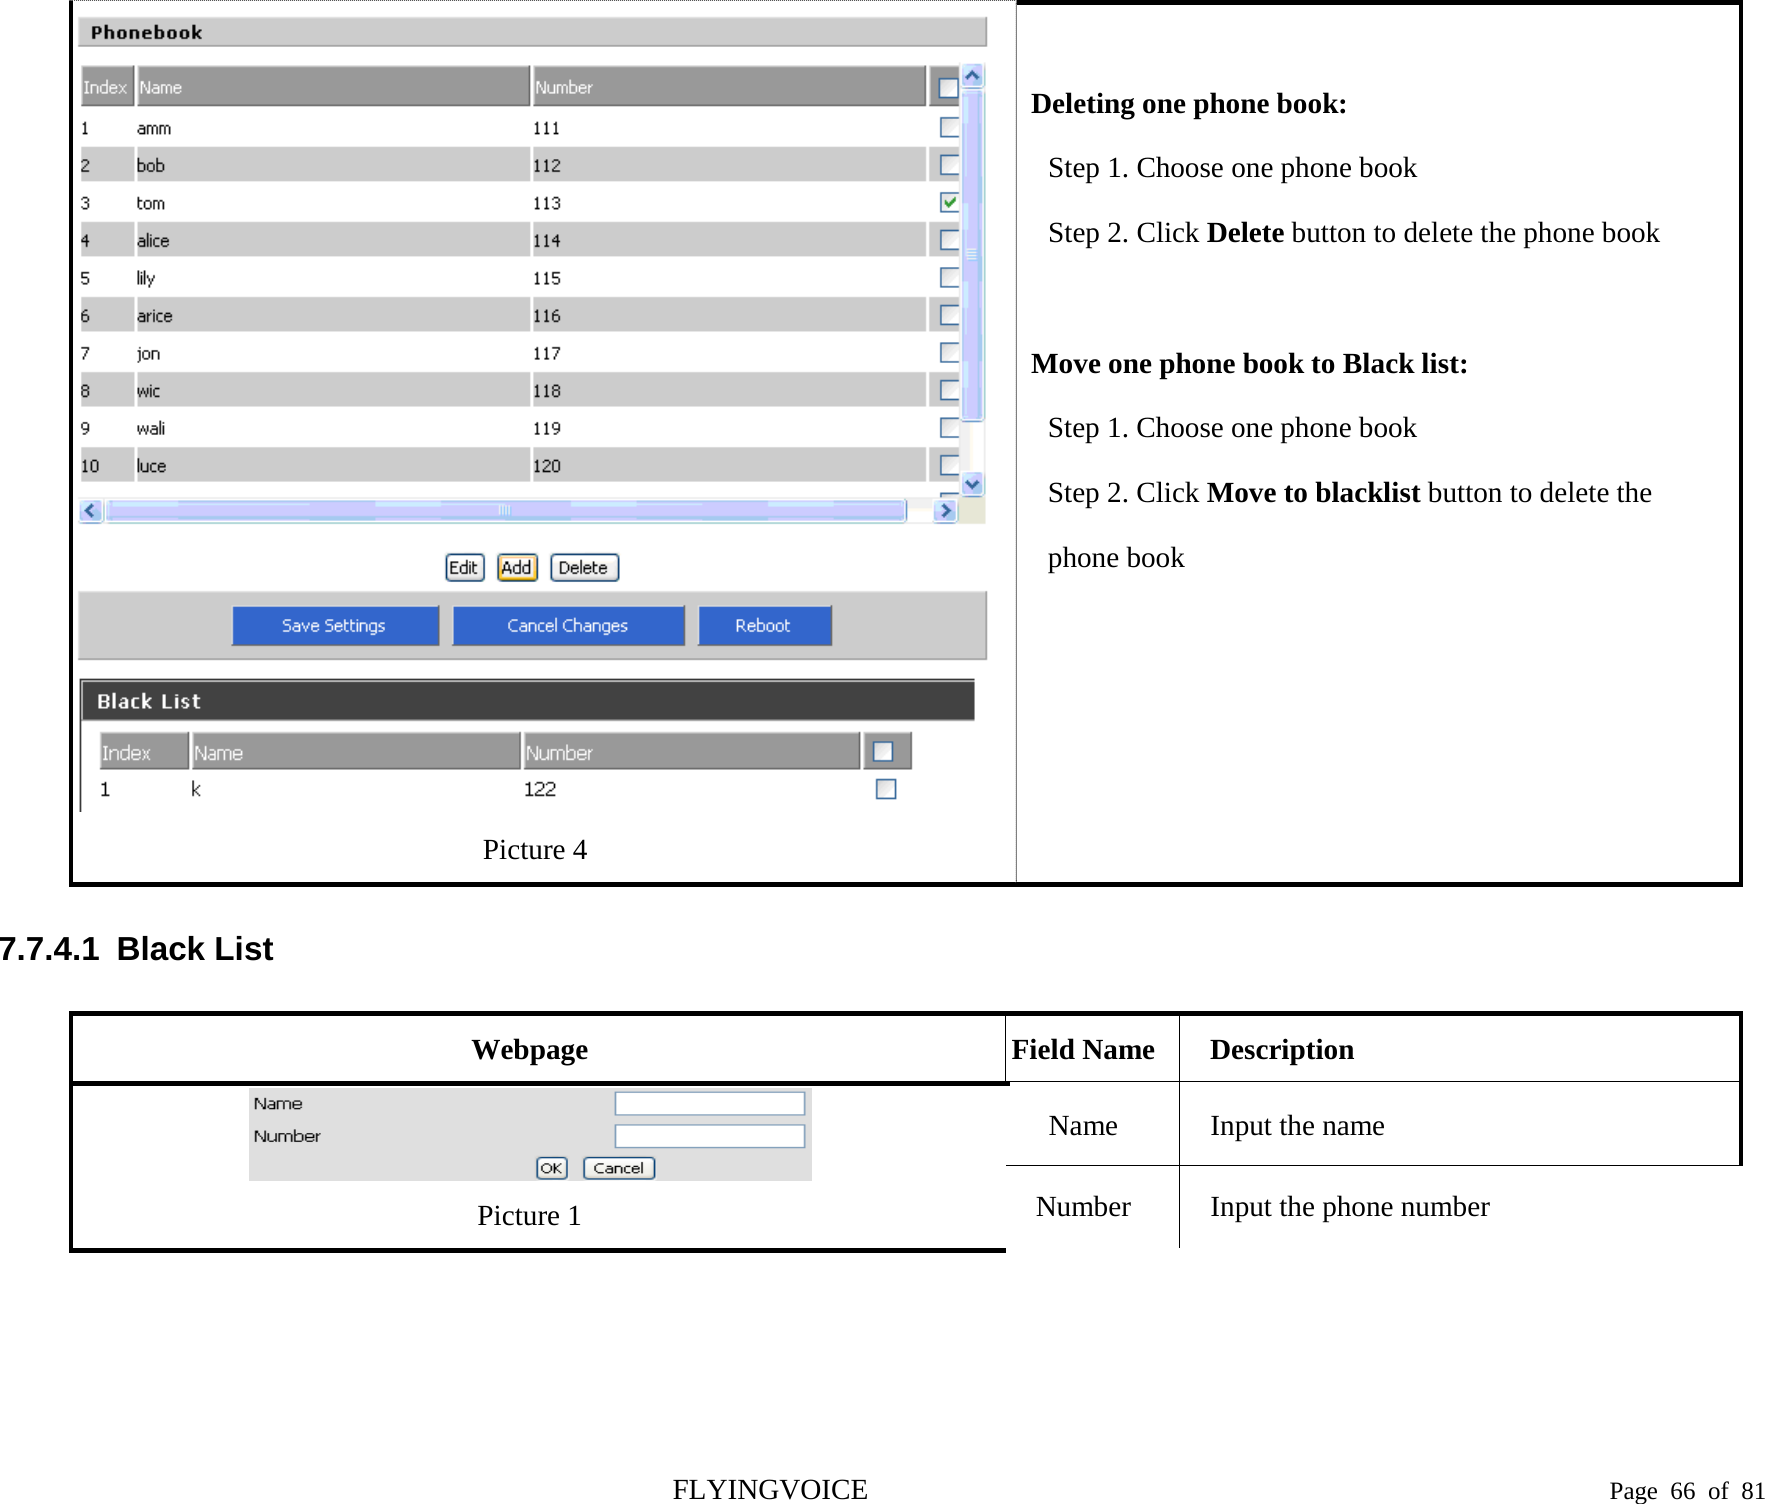
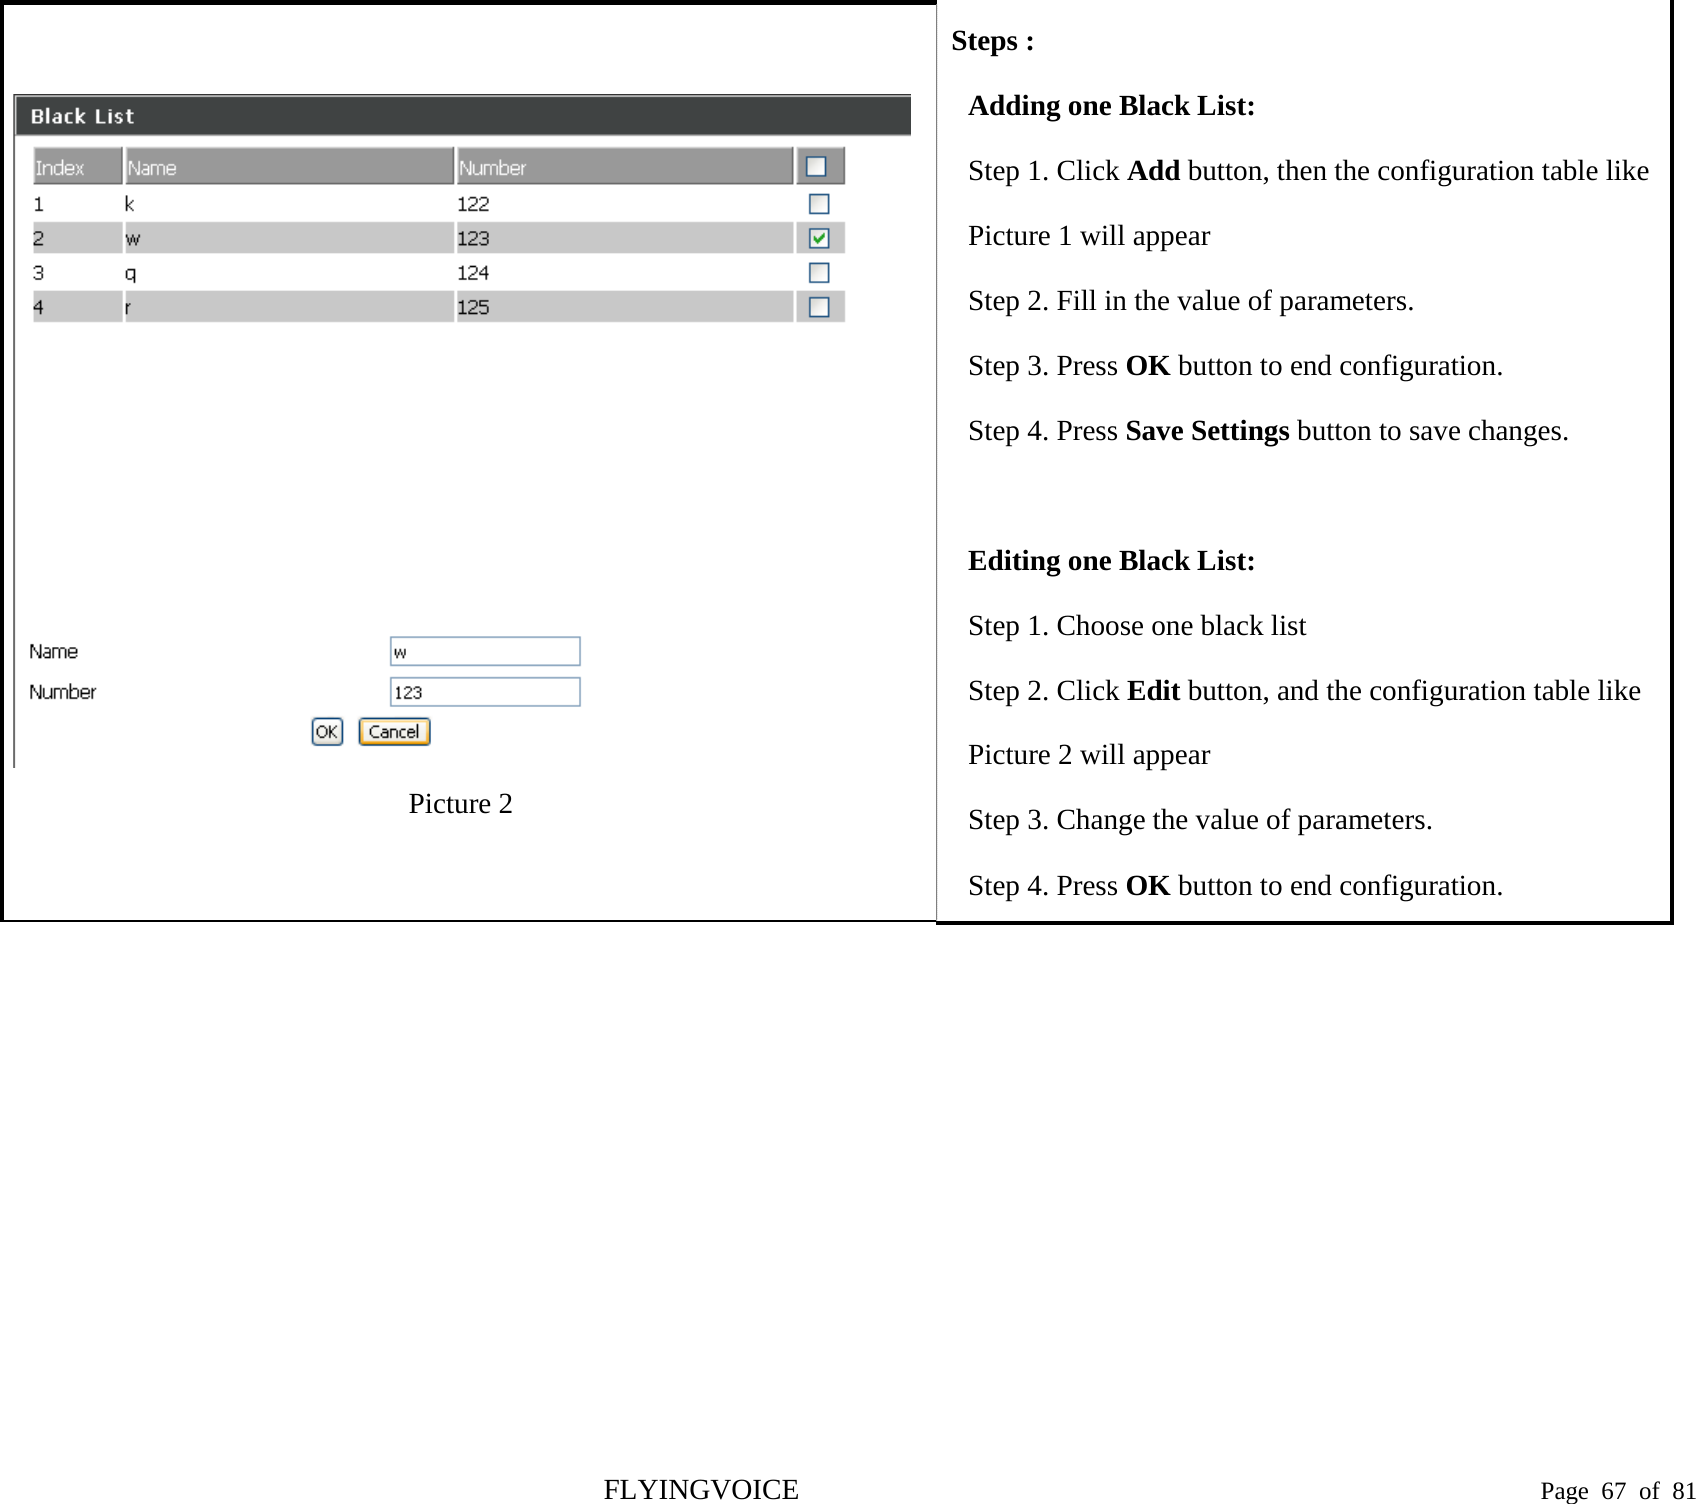
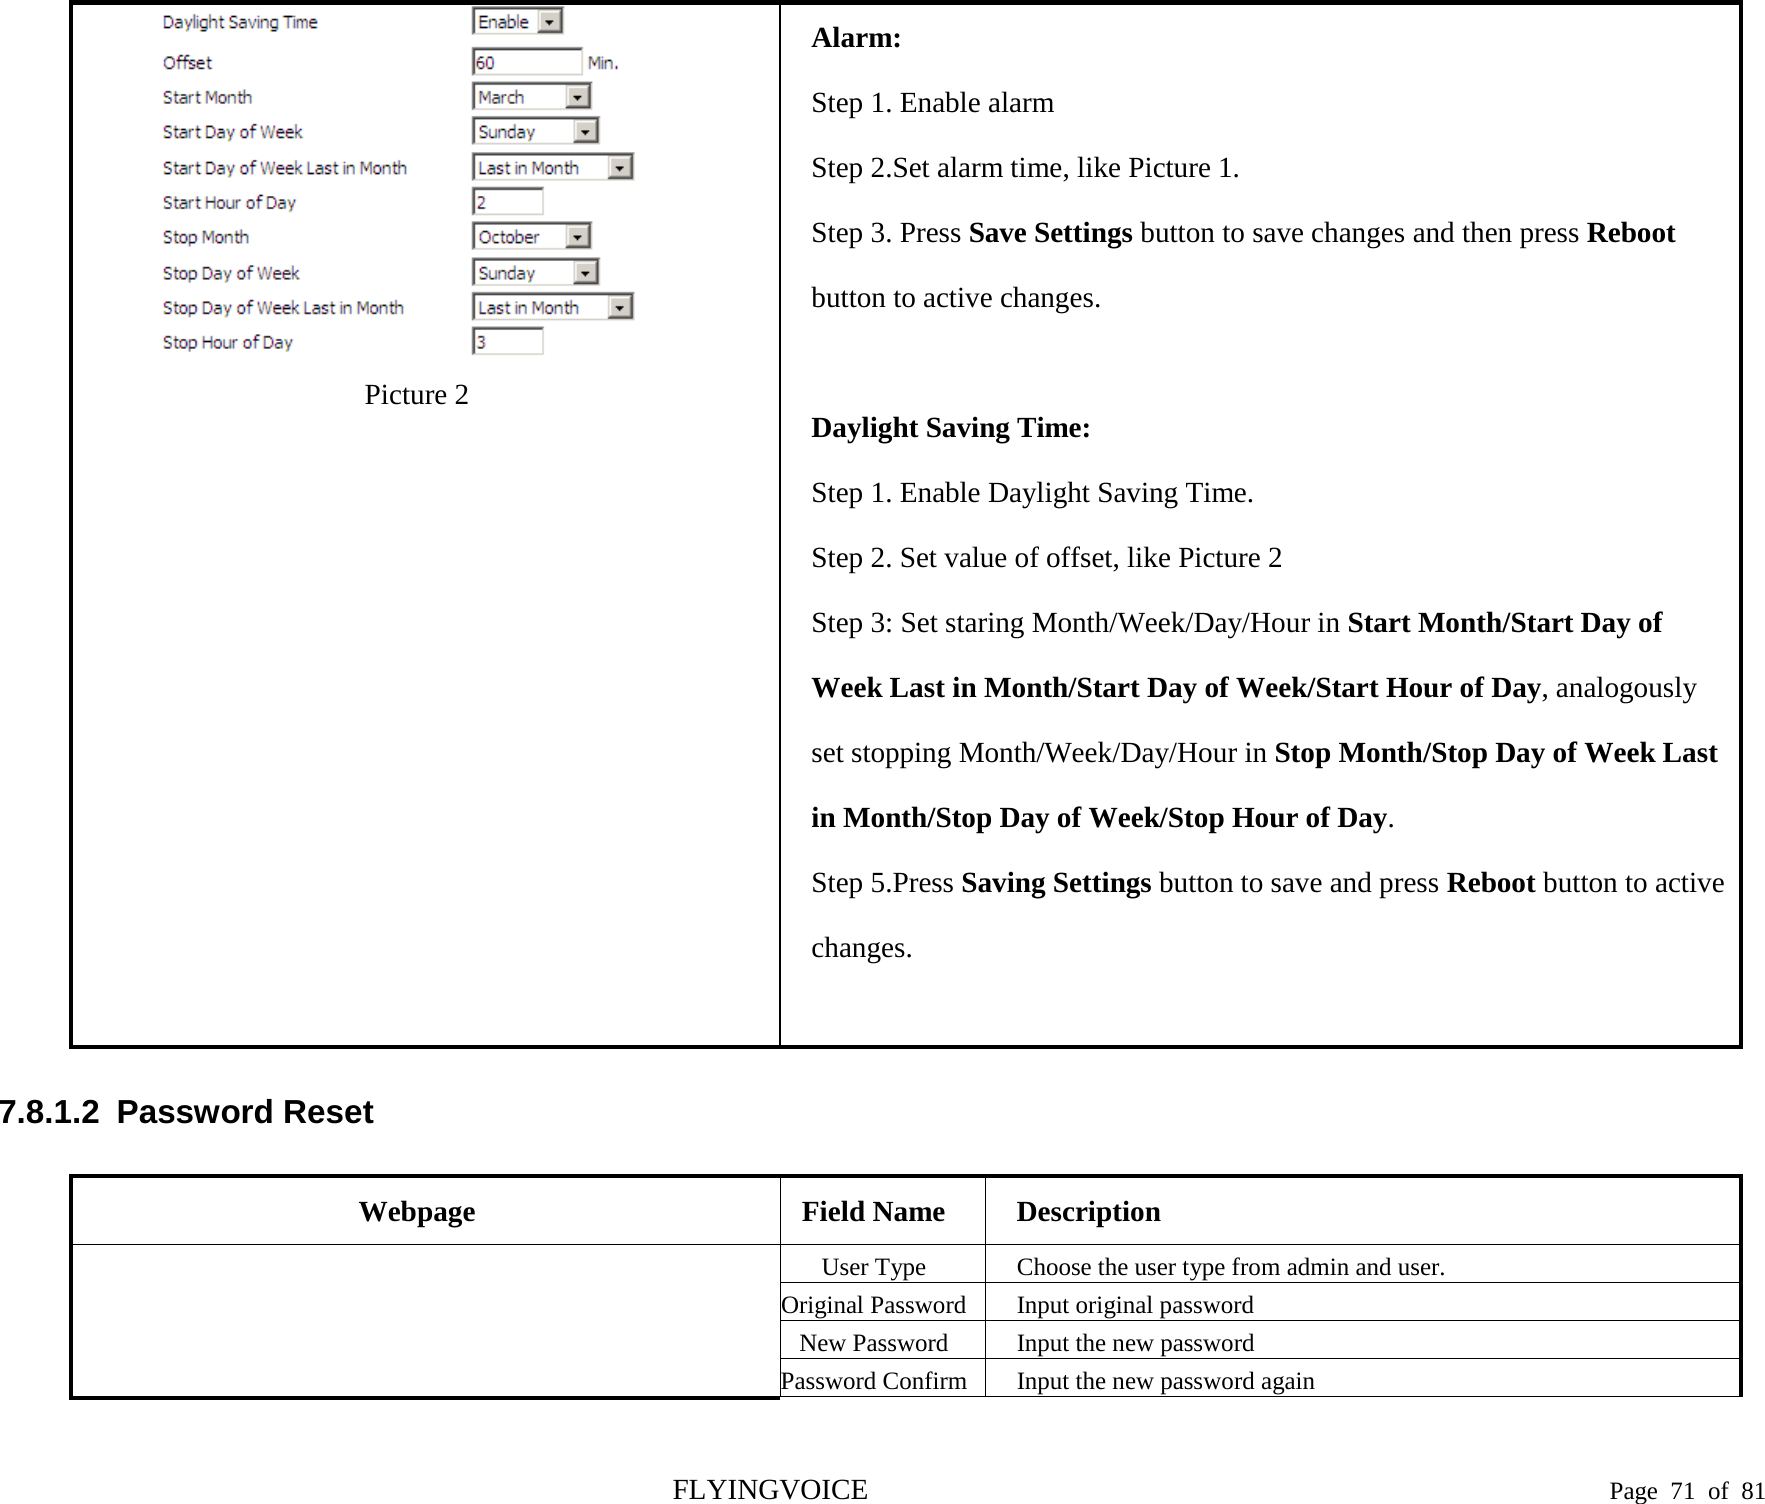
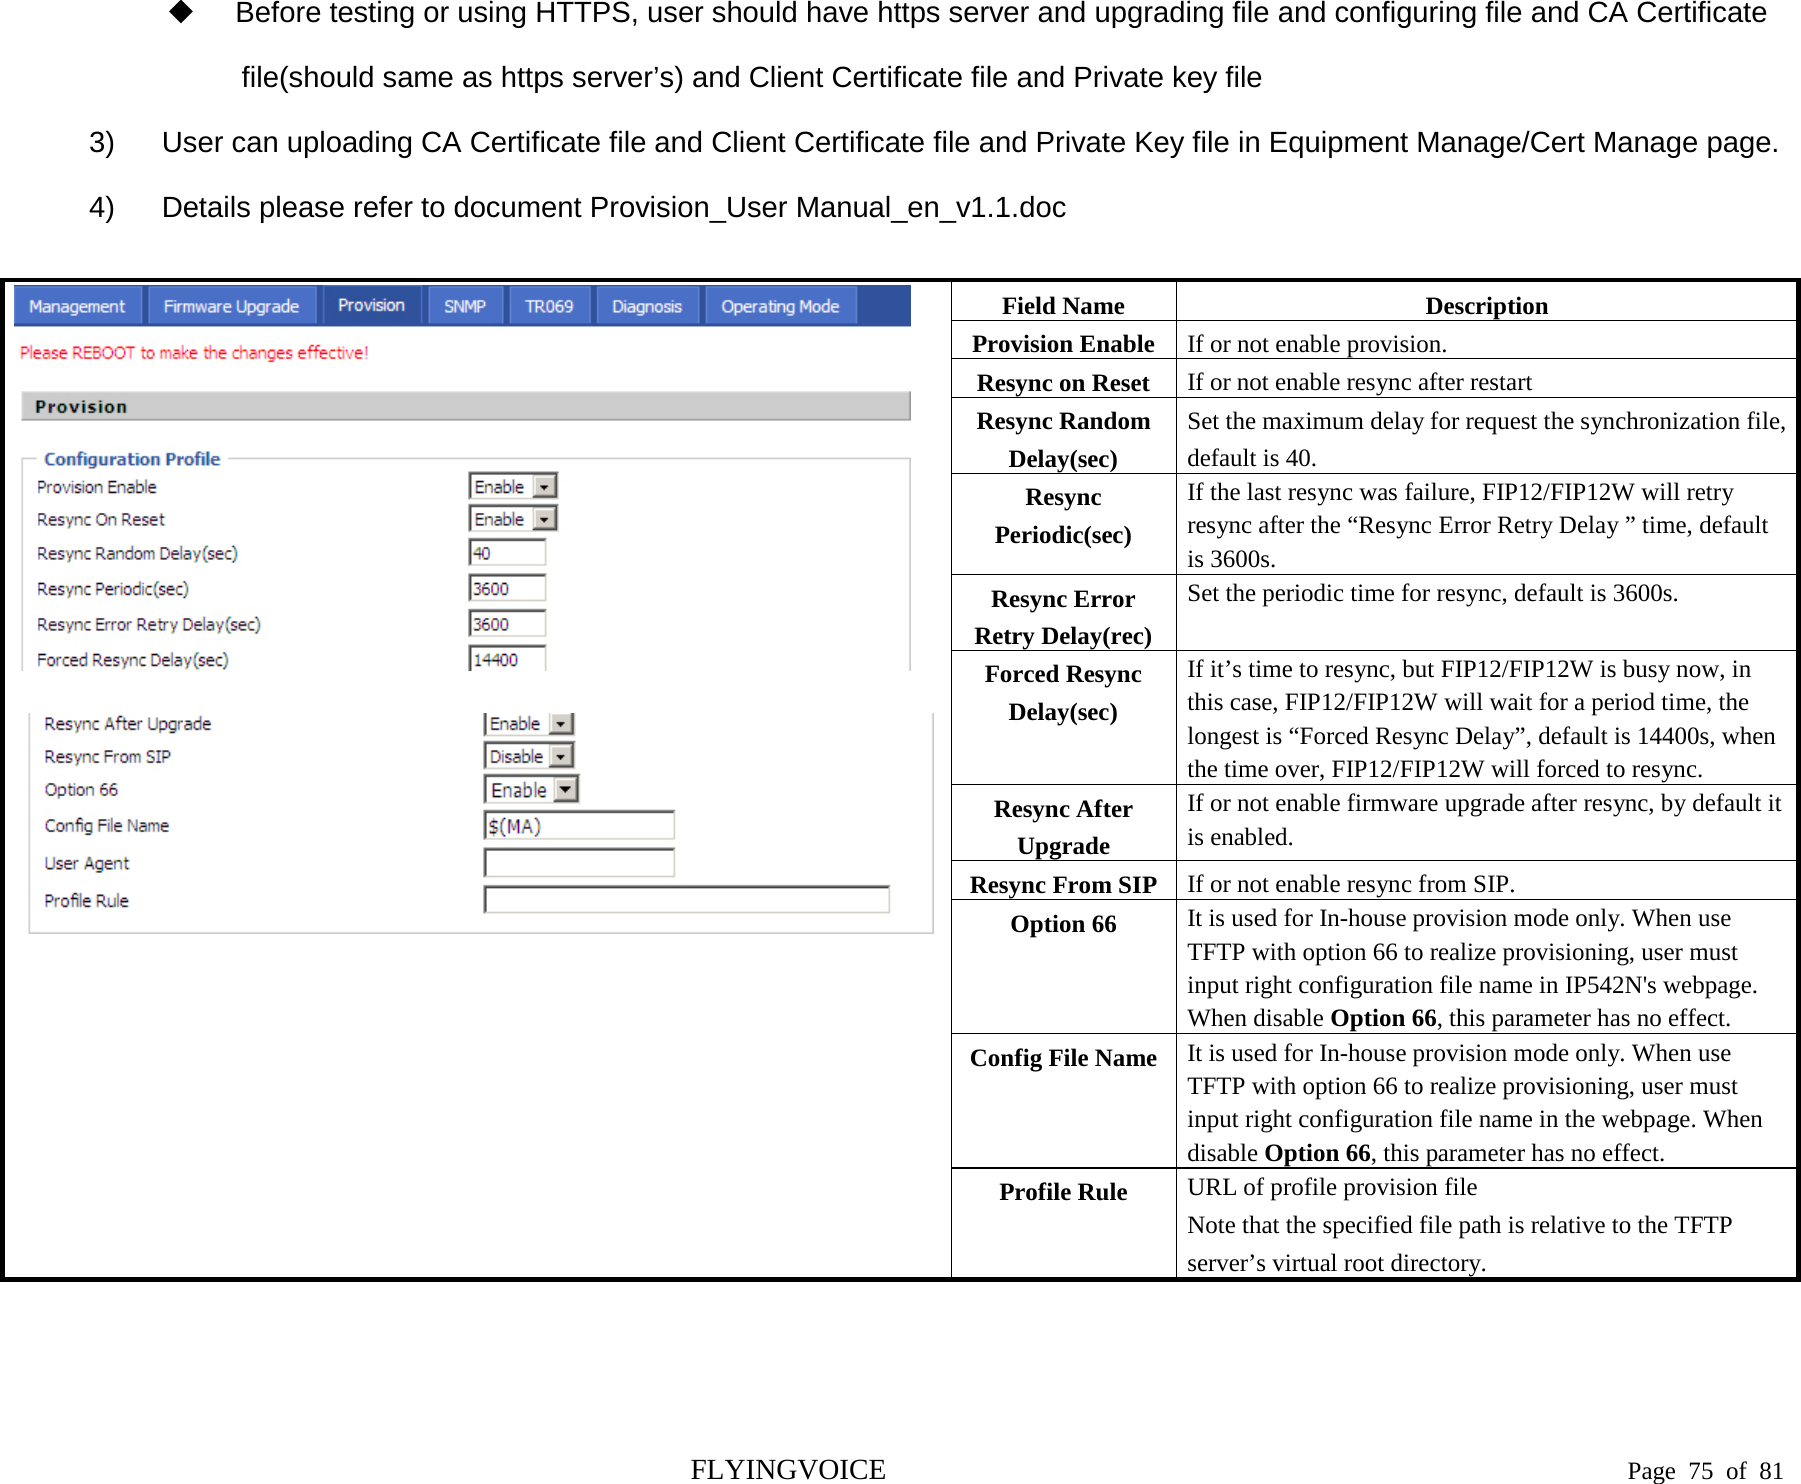
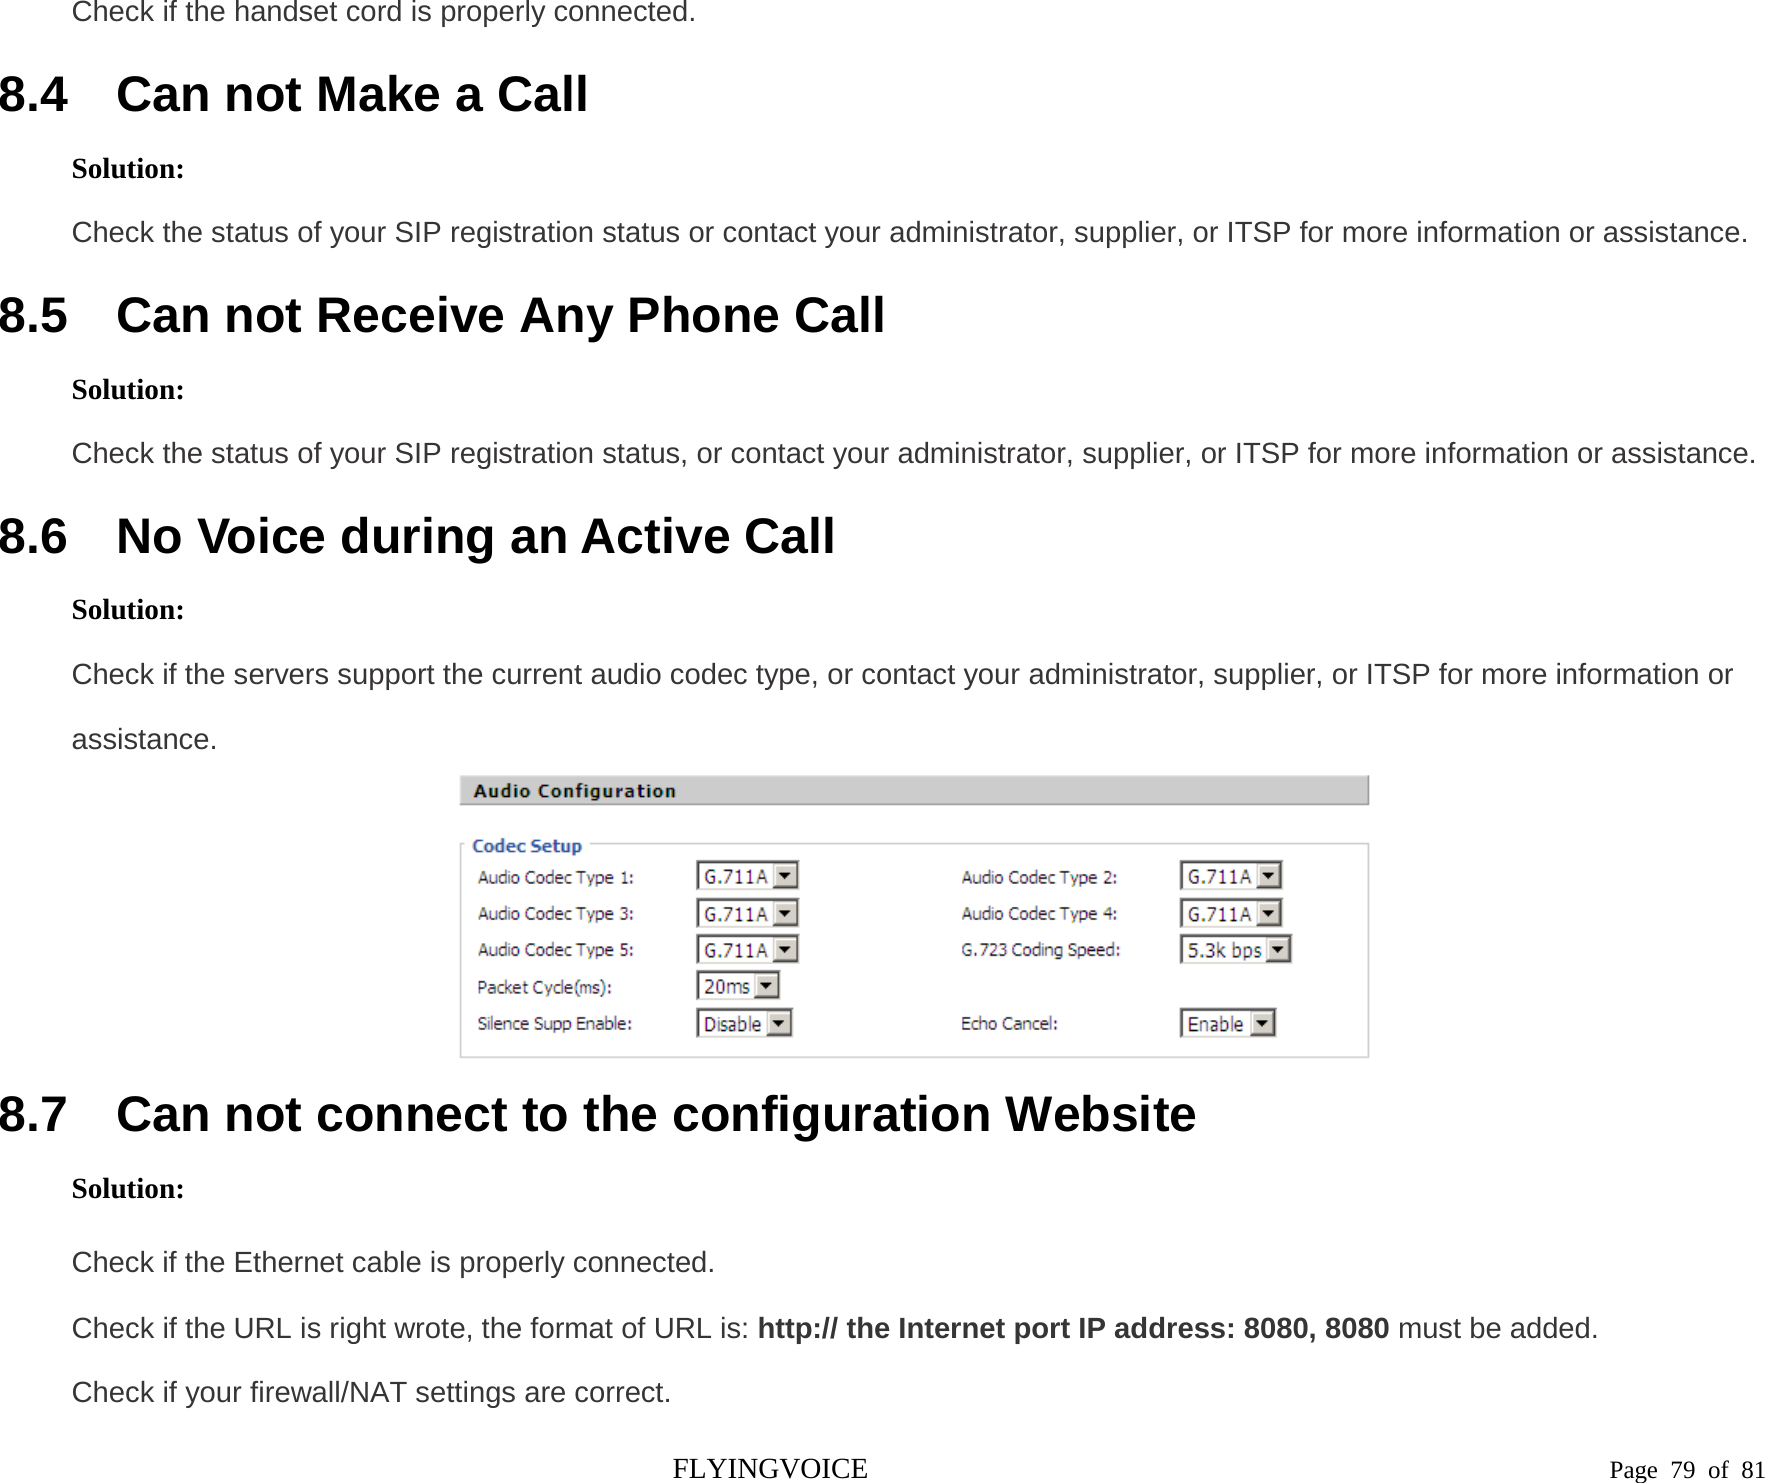
![Picture 2 will appear Step 4. Change the value of parameters. Step 5.Press OK button to end configuration. Step 6. Press Save Settings button to save changes. Deleting one dial plan: Step 1. Enable Dial plan Step 2. Choose one dial plan Step 3. Click Delete button to delete the dial plan 7.7.3.2 Dial Plan Syntactic No. String Description 1 0 1 2 3 4 5 6 7 8 9 * # Legal characters 2 X Lowercase letter x stands for one legal character 3 [sequence] To match one character form sequence. For example: • [0-9]: match one digit form 0 to 9 • [23-5*]: match one character from 2 or 3 or 4 or 5 or * 4 x. Match to , , , …... For example: “01.”: can match ”0”, “01”, “011”, ”0111”, …….., ”01111…” 5 <dialed: substituted> Replace dialed with substituted. For example: <8:1650>123456:input is “85551212”, output is“16505551212” FLYINGVOICE Page 62 of 81](https://usermanual.wiki/Flyingvoice-Technology/FIP12WP/User-Guide-3143693-Page-62.png)