Food Network Coffeemaker 18008 Users Manual 3999_cofmkr_man
Food Network Coffeemaker 18008 Approved3999Coffeemaker
2015-02-09
: Food-Network Food-Network-Food-Network-Coffeemaker-18008-Users-Manual-551643 food-network-food-network-coffeemaker-18008-users-manual-551643 food-network pdf
Open the PDF directly: View PDF ![]() .
.
Page Count: 15
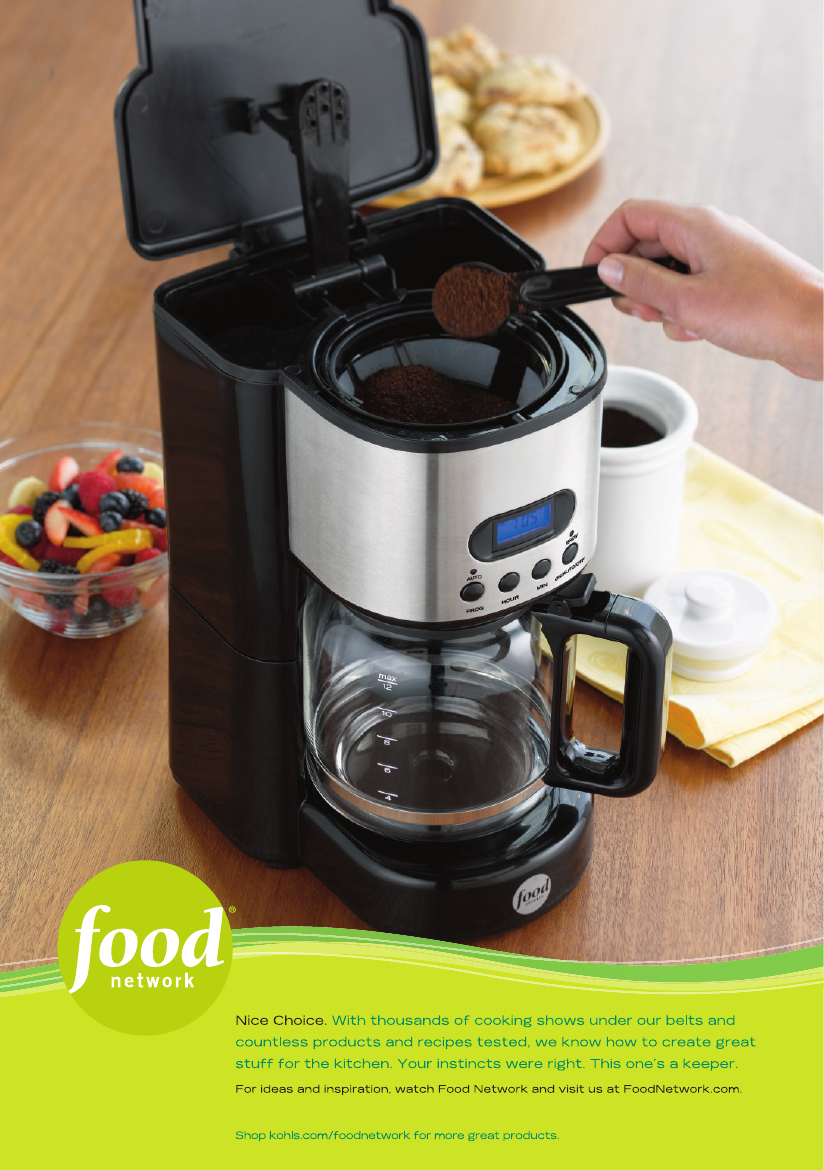
STYLE #18008
instruction and recipe booklet
12-cup programmable
coffeemaker

1
Food Network
table of contents
Important Safeguards ........................................................................................ 3
Other Consumer Safety Information ................................................................. 6
Parts & Features .................................................................................................. 9
Assembly & Use ................................................................................................ 11
Care & Cleaning ............................................................................................... 16
Warranty & Customer Service ........................................................................... 18
A Note from Food Network ...................................................................................... 19
Recipes ................................................................................................................. 20
Notes .................................................................................................................... 23

2Food Network 3
Food Network
When using electrical appliances, basic safety precautions should always be followed
including the following:
1. Read all instructions.
2. Do not touch hot surfaces. Use handles or knobs.
3. To protect against electrical hazards, do not immerse cord, plug or
the appliance in water or other liquid.
4. This appliance is not intended for use by persons (including children)
with reduced physical, sensory or mental capabilities, or lack of experience
and knowledge, unless they have been given supervision or instruction
concerning use of the appliance by a person responsible for their safety.
5. Children should be supervised to ensure that they do not play with the
appliance.
6. Unplug from outlet when not in use and before cleaning. Allow to cool
before putting on or taking off parts, and before cleaning the appliance.
7. Do not operate any appliance with a damaged cord or plug, or after the
appliance malfunctions or has been damaged in any manner. Bring it to
a qualifi ed technician for examination, repair or electrical or mechanical
adjustment.
8. The use of accessories or attachments not recommended by the
manufacturer may result in fi re, electric shock or injury.
9. Do not use outdoors.
10. Do not let cord hang over edge of table or counter, or touch hot surfaces.
11. Do not place on or near a hot gas or electric burner, or in a heated oven.
12. Always fi ll water reservoir fi rst then plug cord into the wall outlet.
13. To interrupt the brewing cycle at any time, press the OFF button.
Remove plug from wall outlet.
14. Do not use appliance for other than intended use.
15. Extreme caution must be used when moving an appliance containing
hot liquids.
IMPORTANT SAFEGUARDS

4Food Network 5
Food Network
16. Always use the carafe with the lid closed before serving any hot coffee.
Scalding may occur if the coffee maker lid is removed during the
brewing cycle.
17. The carafe is designed for use with this appliance. It must never be used
on a range top.
18. Do not place the carafe on a wet or cold surface, or in a microwave oven.
19. Do not use the carafe if it is cracked or has a loose or weakened handle.
20. Do not clean the carafe or the warming plate with cleansers, steel wool
pads or other abrasive material.
ADDITIONAL IMPORTANT SAFEGUARDS
WARNING: This appliance generates heat and escaping steam during use.
Proper precautions must be taken to prevent the risk of burns, fi res or other
injury to persons or damage to property.
1. All users of this appliance must read and understand this owner’s manual
before operating or cleaning this appliance.
2. The cord to this appliance should be plugged into a 120V AC electrical
outlet only.
3. Use water only in this appliance! Do not put any other liquids or food
products in this appliance. Do not mix or add anything to the water placed
in this appliance, except as instructed in the Care & Cleaning Instructions
to clean the appliance.
4. DO NOT attempt to move an appliance containing hot liquids. Allow
appliance to cool completely before moving.
5. Keep appliance at least 4 inches away from walls or other objects during
operation. Do not place any objects on top of appliance while it is
operating. Place the appliance on a surface that is resistant to heat.
6. If this appliance begins to malfunction during use, immediately press
the OFF button and unplug the cord. Do not use or attempt to repair the
malfunctioning appliance.
7. If this appliance falls or accidentally becomes immersed in water or any
other liquid, unplug it immediately. Do not reach into the water! Do not
use this appliance after it has fallen into or has become immersed in water.
8. The appliance must be left to cool down suffi ciently before adding more
water to avoid exposure to steam.
9. Always use fresh, cool water in your appliance. Warm water or other
liquids, except as listed in cleaning section, may cause damage to
the appliance.
10. DO NOT put carafe into a microwave oven.
11. DO NOT leave empty carafe on warming plate when appliance is turned
ON, as the carafe may crack or become otherwise damaged.
CAUTION: To prevent injury when utilizing the Auto Pause
& Serve feature, replace carafe within 30 seconds of removing during
brewing process.
SAVE THESE INSTRUCTIONS.
FOR HOUSEHOLD USE ONLY.
6Food Network 7
Food Network
other consumer
safety information
Plasticizer Warning
CAUTION: To prevent Plasticizers from migrating to
the fi nish of the countertop or tabletop or other furniture, place NON-
PLASTIC coasters or place mats between the appliance and the fi nish of
the countertop or tabletop. Failure to do so may cause the fi nish to darken;
permanent blemishes may occur or stains can appear.
Electric Power
If the electrical circuit is overloaded with other appliances, your appliance
may not operate properly. It should be operated on a separate electrical circuit
from other appliances.
Short Power Supply Cord Information
The provided short power-supply cord (or detachable power-supply cord)
should be used to reduce the risk resulting from entanglement or tripping
over a longer cord. Do not use an extension cord with this product.
Polarized Plug
This appliance has a polarized plug (one blade is wider than the other). To
reduce the risk of electric shock, this plug will fi t in a polarized outlet only one
way. If the plug does not fi t fully into the outlet, reverse the plug. If it still does
not fi t, contact a qualifi ed electrician. Do not modify the plug in any way.
Carafe Safety Precautions
1. Do not use a cracked carafe having a loose or weakened handle.
2. This carafe is designed to be used only on the warming plate of your
coffee maker. Do not use in a conventional oven.
3. To avoid breakage, handle carafe with care. Avoid impact. Glass will
break as a result of impact. Use care when fi lling with water to avoid
hitting faucet.
4. Do not place hot carafe on cool or wet surface. Allow to cool before
washing or adding liquids.
5. Do not set empty carafe on a hot heating surface. Do not clean with
steel wool pads, abrasive cleanser or any other materials that may
scratch.
6. Do not bump, scratch or boil dry.
7. Discard carafe if it is cracked, scratched or heated while empty for
an extended period of time.
FCC Warning:
WARNING: Changes or modifi cations to this unit not expressly approved
by the party responsible for compliance could avoid the user’s authority to
operate the equipment.
Note: This equipment has been tested and found to comply with the limits of a
Class B digital device, pursuant to Part 15 of the FCC Rules. These limits are
designed to provide reasonable protection against harmful interference in a
residential installation. This equipment generates uses and can radiate radio
frequency energy and, if not installed and used in accordance with
the instructions, may cause harmful interference to radio communications.
However, there is no guarantee that interference will not occur in a particular
installation. If this equipment does cause harmful interference to radio or
television reception, which can be determined by turning the equipment off
and on, the user is encouraged to try to correct the interference by one or more
of the following measures:
• Reorient or relocate the receiving antenna.
• Increase the separation between the equipment and receiver.
• Connect the equipment into an outlet on a circuit different from that
to which the receiver is connected.
• Consult the dealer or an experienced radio/TV technician for help.
8Food Network 9
Food Network
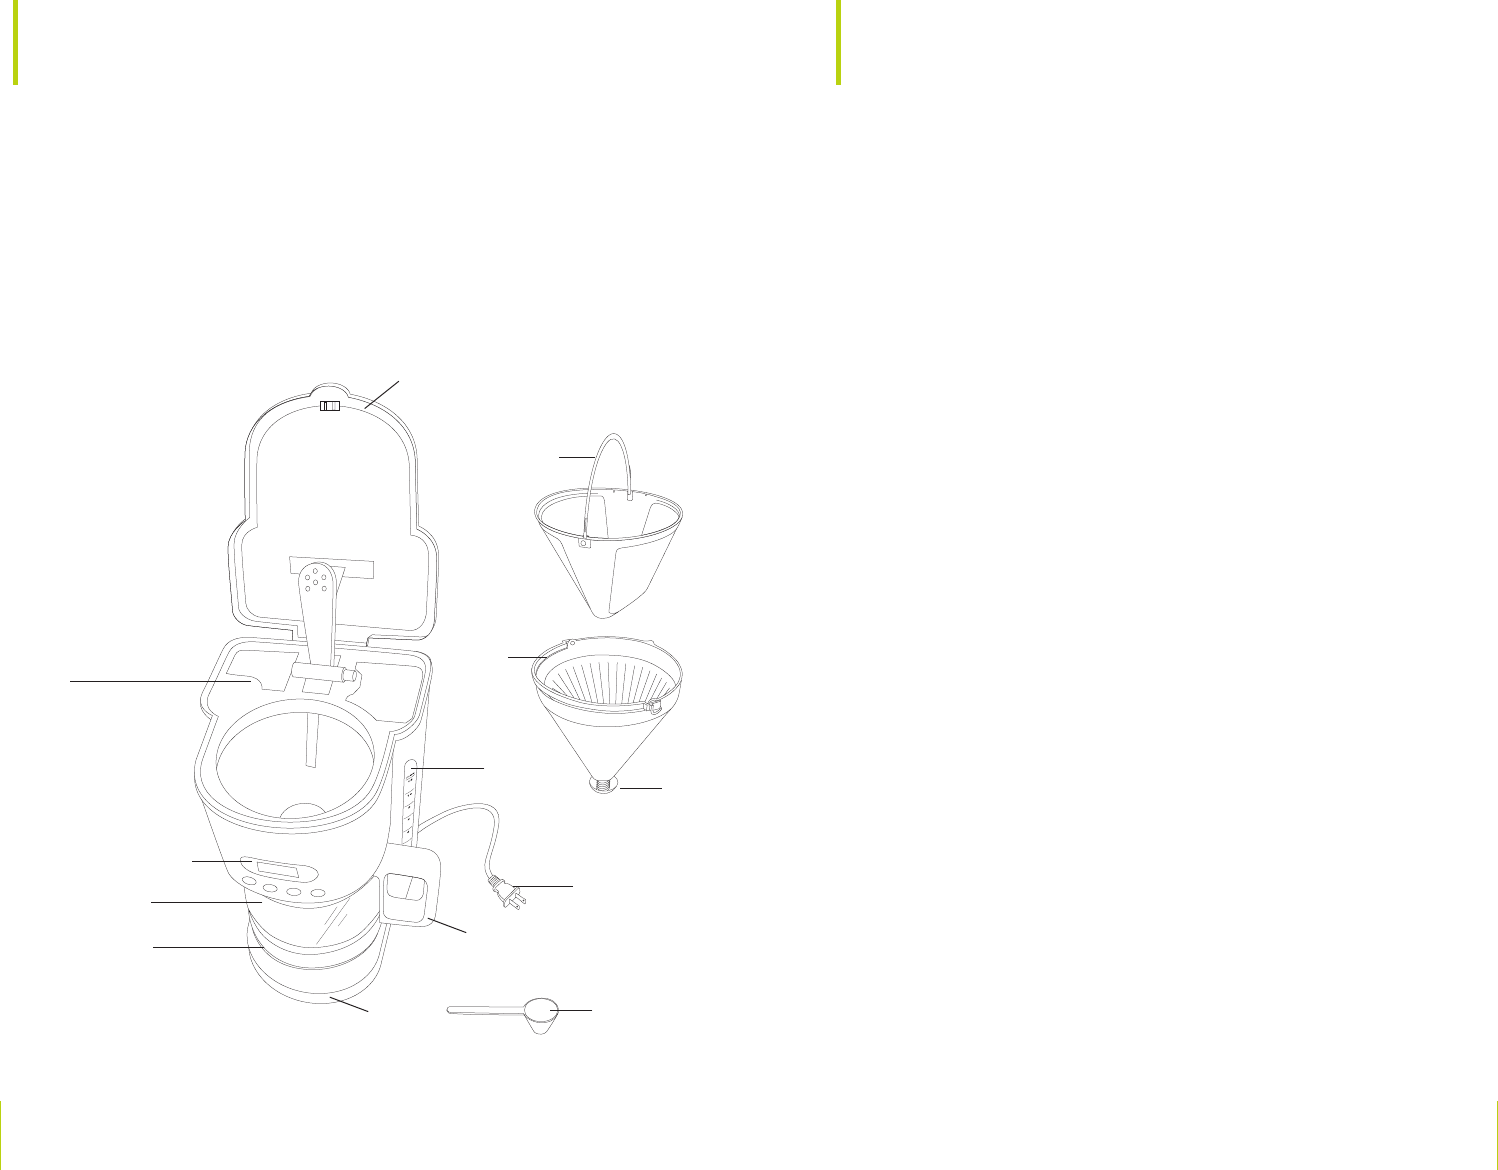
1. Coffee Maker Lid
2. Reusable Nylon Filter Basket
3. Water Reservoir
4. Removable Filter Holder
5. Water Level Indicator
6. Automatic Drip Stop Flow Valve
7. Control Panel
8. Polarized Plug
9. Carafe with Lid
10. Carafe Handle
11. Warming Plate
12. Base
13. Measuring Scoop
parts & features
(7)
(8)
(10)
(12)
(9)
(11)
(2)
(4)
(3)
(1)
(5)
(6)
(13)
Coffee Yield
12-Cup Coffee Maker: 12 (5-oz.) cups
Note: A 5-oz. cup is the American industry standard and is used by most Coffee Maker
manufacturers. To fi ll your favorite over-sized mug, fi ll Coffee Maker reservoir with
enough water for 3 to 4 cups (15 to 20 ounces).
WARNING: TO REDUCE THE RISK OF FIRE OR ELECTRIC SHOCK,
DO NOT REMOVE THE BOTTOM COVER. NO USER-SERVICEABLE
PARTS INSIDE. REPAIR SHOULD BE DONE BY AUTHORIZED SERVICE
PERSONNEL ONLY.
Reusable Nylon Filter Basket
The reusable nylon fi lter basket takes the place of disposable paper fi lters.
Simply place the reusable nylon fi lter basket into the removable fi lter holder.
Unfold and use handle to lift basket of used coffee grounds up and out of the
Coffee Maker; fold handle down to close water reservoir lid.
10 Food Network 11
Food Network
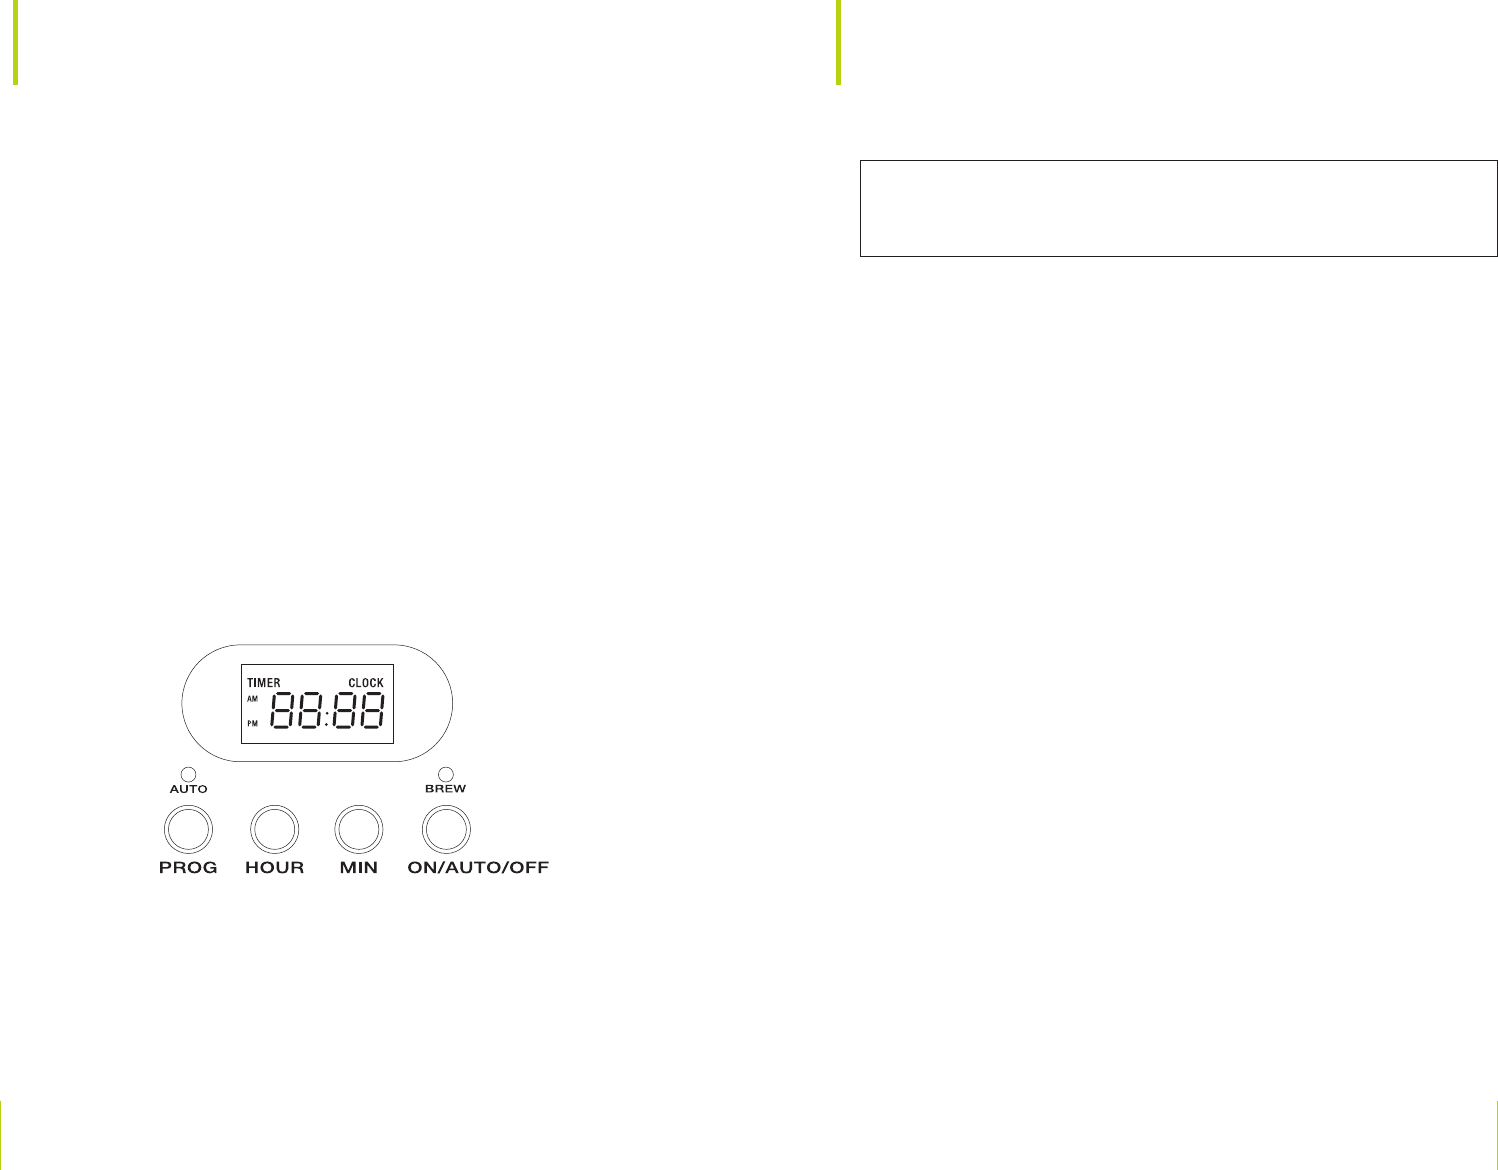
Control Panel
1. LCD Digital Display: Window: Digital clock with AM/PM, Timer and
Clock display.
2. BREW Light: Illuminates when the Coffee Maker is in operation.
3. AUTO Light: Illuminates when the Coffee Maker is in PROG mode and
the Coffee Maker is set to begin brewing at a future programmed time.
4. PROG Button: Press fi rst to set the digital clock’s current time. Press
again to set the AUTO future brewing time.
5. AUTO Button: When the desired AUTO start time appears in the display
window, press the AUTO button.
6. HOUR Button: Advances the HOUR. Press to adjust time in hours for
digital clock display and AUTO brew programming. Hold button to fast
advance.
7. MIN button: Advances the MINUTES. Press to adjust time in minutes
for digital clock display and AUTO brew programming. Hold button to
fast advance.
CAUTION: To protect against electrical shock, do not
immerse the Coffee Maker or allow power cord to come into contact with
water or other liquids.
1. Remove all packing material and labels from the inside and outside of the
Coffee Maker. Place the unit on a fl at, clean surface. Unused cord may be
stored inside the hidden cord storage area in the back of the unit to keep
countertop neat.
2. Before preparing coffee, thoroughly clean the glass carafe with lid,
measuring scoop and removable fi lter holder in hot, sudsy water. Rinse
and dry. Replace disassembled parts. (See Care & Cleaning Instructions
for a detailed description.)
3. Clean the inside of the Coffee Maker by brewing 2 full carafes of tap water
(see Brewing Coffee Instructions following). Do not add paper fi lter or
ground coffee for this initial cleaning.
Note: At the end of the fi rst cycle, press the OFF button and allow 15 minutes
for the unit to cool.
4. Brew a second carafe of fresh water.
5. Wait an additional 15 minutes to allow heating element to cool before
brewing your fi rst carafe of coffee.
Brewing Coffee Instructions
1. Plug Coffee Maker into a 120V AC electrical wall outlet. The LCD will
fl ash 12:00 AM until the time is set.
2. Using the front tab, lift to open the Coffee Maker lid. Fill carafe with cold
tap water and pour into water reservoir at the back of the unit. The water
level indicator can be easily viewed on the right side of the unit. No less
than 2 cups is recommended.
Note: The amount of brewed coffee will always be less than the amount of water
placed into Coffee Maker, since about 10% is absorbed by coffee grounds and fi lter.
3. Place a basket-shaped paper or reusable nylon fi lter basket in the
removable fi lter holder. Measure 1 heaping scoop of drip or regular grind
coffee for each cup of coffee desired. For stronger or milder coffee, adjust
amount of coffee to suit your taste.
assembly & use

12 Food Network 13
Food Network
4. Turn the removable fi lter holder so that the fl at side faces the front of the
Coffee Maker, and the tab is at the back right. Make sure the fi lter holder
drops down into the housing. Close the lid.
5. Place empty carafe on the warming plate.
6. Press the ON button; the BREW indicator light will illuminate. The display
will stop fl ashing. The Coffee Maker will begin the brew cycle.
Note: To interrupt the brewing process at any time, press the OFF button;
the BREW indicator light will turn OFF, then remove plug from wall
outlet.
7. Using the Auto Pause & Serve feature: If you wish to serve a cup of coffee
before the brew cycle is completed, simply remove carafe from warming
plate. Dripping will automatically cease. Return carafe to position on
warming plate; dripping will resume.
CAUTION: To prevent injury when utilizing auto pause and
serve feature, replace carafe within 30 seconds of removing during the
brewing process.
8. Upon completion of the brew cycle, wait at least 1 minute until the brew
dripping from the fi lter holder into the carafe has stopped. The carafe lid
should be kept in place to facilitate safe serving and help keep coffee at
proper serving temperature.
9. To keep coffee hot, return carafe to the warming plate after serving. The
Coffee Maker will automatically advance to a KEEP WARM mode during
which the warming plate will cycle ON and OFF as it maintains the ideal
serving temperature. The BREW indicator light will remain illuminated.
Note: The Coffee Maker will turn OFF automatically after 2 hours.
The BREW indicator light will turn off.
10. Press the OFF button to turn the Coffee Maker OFF when the carafe is
empty or when unit is not in use
Brewing a Second Carafe of Coffee
1. To brew another carafe of coffee, press the OFF button. It is recommended
that the Coffee Maker should be OFF and allowed to cool for 15 minutes
between cycles.
CAUTION: Failure to allow Coffee Maker to cool could
cause hot steam and spray when the water is added to the water reservoir.
The hot steam can cause severe burns.
2. While the unit is OFF, dispose of paper fi lter with used coffee grounds.
Note: If the reusable nylon fi lter basket was used, discard used coffee
grounds, rinse and replace.
3. Rinse the glass carafe and removable fi lter holder in cool, clean water.
4. Replace the cleaned removable fi lter holder.
5. Repeat steps for brewing coffee.
Setting the Current Time
1. Plug the Coffee Maker into a 120V AC outlet. The LCD will fl ash
12:00 AM until the time is set.
Note: You do not need to set the time if you are not using the AUTO feature.
2. Press the PROG button once. The word “CLOCK” will be shown in the
upper right corner of the display window to indicate that you are in the
current time-setting mode.
3. Press the HOUR button to set the hours, then press the MIN button to set
the minutes; release the buttons to advance one digit at a time. Hold down
the HOUR or MIN buttons to fast advance.
Note: Pay attention to the AM and PM setting.
Note: If no buttons are pressed after 5 seconds, the time setting mode will expire
and the LCD will display the current time.

14 Food Network 15
Food Network
Setting the AUTO Start Time
1. Press the PROG button until the word “TIMER” appears in the upper left
corner of the display window to indicate that you are in the future AUTO
time setting mode.
2. Press the HOUR button, then the MIN button to set the future AUTO
start time; release the buttons to advance one digit at a time. Hold down
the HR or MIN buttons to fast advance.
Note: Pay attention to the AM and PM setting.
Note: If no buttons are pressed after 5 seconds, the setting mode will expire and
the LCD will display the current time.
3. When the desired future AUTO start time appears in the display window,
press the AUTO button. The blue AUTO indicator light will illuminate.
WARNING: Make sure the Coffee Maker is set up to brew coffee: Fill the
water reservoir at least to the 2-cup level, add fresh ground coffee to a
clean coffee fi lter and close the lid. Place the empty carafe in position on
warming plate
4. When the preset time is reached, the AUTO indicator light will turn off;
the BREW indicator light will illuminate and the Coffee Maker will begin
brewing coffee.
5. When brewing is complete, the Coffee Maker will advance to a 2 hour
KEEP WARM mode. The BREW indicator light will remain illuminated.
6. To cancel the preset AUTO start time, press the OFF button to turn the
Coffee Maker OFF. Press the ON button and the Coffee Maker will begin
the brew cycle immediately.
7. To change the preset AUTO start time, simply press the PROG button
twice until “TIMER” appears in the upper left corner of the display
window. Then press the HOUR button the MIN button until the new
AUTO future start time is displayed. Activate the AUTO feature by
pressing the AUTO button until the blue AUTO indicator light illuminates.
Hints for Great-Tasting Coffee
• A clean Coffee Maker is essential for making great-tasting coffee. Regular
cleaning, as described in the Care & Cleaning Instructions and Descaling
sections of this owner’s manual is highly recommended.
• Always use fresh, cold water in your Coffee Maker.
• Finer grinds, such as drip and ADC coffee, promote fuller extraction and
provide rich, full-bodied coffee. Regular grind will require slightly more
coffee per cup to provide the strength of a fi ner grind.
• Store coffee in a cool, dry place. Once coffee has been opened, keep it tightly
sealed in the refrigerator to maintain freshness.
• For optimum coffee, buy whole beans and grind them fi nely just
before brewing.
• Do not re-use coffee grounds since this will greatly impair coffee fl avor.
• Reheating coffee is not recommended. Coffee is at its peak fl avor
immediately after brewing.
• Small oil droplets on the surface of brewed, black coffee is due to the
extraction of oil from the coffee grounds. Oiliness may occur more
frequently if heavily roasted coffees are used. Overextraction may also cause
oiliness, indicating a need to clean your Coffee Maker.
AutoPause & Serve
1. After approximately 2 cups of coffee have been brewed, the carafe may
be slowly removed and the coffee will stop dripping.
2. The fl ow valve is located on the bottom of the fi lter holder and is activated
when the carafe is removed. The design makes it possible for you to remove
the carafe and pour a cup of coffee before the entire carafe is brewed.
3. IMPORTANT: When replacing the fi lter holder, the fl ow valve must be
properly inserted into the front hole of the machine, so that it can be seen
as it sits on the top of the carafe lid.
4. When using this feature, make sure that the carafe is replaced under
the fi lter holder within 30 seconds to prevent overfl ow.

16 Food Network 17
Food Network
care & cleaning
This appliance requires little maintenance. It contains no user-serviceable
parts. Any servicing requiring disassembly other than cleaning must be
performed by a qualifi ed appliance repair technician.
1. Always make sure Coffee Maker is unplugged and warming plate is cool
before attempting to clean.
2. After daily use, dispose of paper fi lter with used coffee grounds. Wash the
removable fi lter holder and glass carafe in hot, sudsy water. If necessary,
scrub the inside of the carafe lid with a soaped kitchen brush.
WARNING: To avoid breakage, handle carafe with care. Avoid impact.
Glass will break as a result of impact. Use care when fi lling with water to
avoid hitting faucet.
3. Wipe the exterior with a damp cloth to remove superfi cial stains. For
stubborn stains, use a nylon or plastic pad with a non-abrasive cleanser.
Do not use metal scouring pads or abrasive cleansers.
4. Dry and replace disassembled parts. Turn the removable fi lter holder so
that the fl at side faces the front of the Coffee Maker, and the tab is at the
back right. Make sure the fi lter holder drops down into the housing.
Note: It is normal for the reusable fi lter to change color after use.
5. Close the lid.
Descaling
Special cleaning of your Coffee Maker is recommended at least once a month,
depending on frequency of use and quality of water used in the unit. If water
in your area is especially hard, the following cleaning procedure should be
performed every 2 weeks, since minerals in water can detract from the fl avor
of the coffee and possibly lengthen brew time.
1. Fill carafe with 1 part white vinegar to three parts cold water. Pour water
and vinegar solution into the water reservoir.
2. During cleaning, more steam will occur than during normal brewing.
3. BREW THE VINEGAR SOLUTION UNTIL CARAFE IS HALF FULL.
Press the OFF button to turn Coffee Maker OFF. When liquid stops
dripping from fi lter holder into the carafe, remove the carafe and allow
liquid to cool for 15 minutes. When cooled, lift lid and pour liquid back
into the water reservoir.
4. Close the lid. Return carafe to the warming plate.
5. BREW THE VINEGAR SOLUTION again, allowing all the cleaning
solution to empty into the carafe. After dripping has stopped, discard
contents of the carafe.
6. Allow Coffee Maker to cool for 15 minutes, rinse by brewing a carafe full of
cold water. Insert a fresh paper fi lter into the fi lter holder before brewing.
7. At end of brew cycle, press the OFF button. Discard water in the carafe.
Remove used fi lter and wash carafe and removable fi lter holder in hot
sudsy water. Dry parts thoroughly.
8. When Coffee Maker has cooled, wipe exterior with a dry cloth..This
appliance requires little maintenance. It contains no user-serviceable
parts. Any servicing requiring disassembly other than cleaning must be
performed by a qualifi ed appliance repair technician.
Storing Instructions
1. Unplug unit and allow to cool.
2. Feed the cord into the cord storage area located at the back of the unit.
3. Store in its box or in a cool, dry place.
4. Never store unit while it is still plugged in.
Dishwasher-safe Parts
• Carafe
• Scoop - top rack
• Removable fi lter holder - top rack
• Reusable nylon fi lter basket - top rack
18 Food Network
warranty & customer service
What does your warranty cover? Any defect in material or workmanship.
For how long after the original purchase? Two years.
What will we do? Provide you with a new one.
How do you make a warranty claim?
• Save your receipt.
• Properly pack your unit. We recommend using the original carton
and packing materials.
• Return the product to your nearest Kohl’s store or call Customer
Assistance at 1-877-342-4337 (1-877-34-CHEFS).
What is not covered by your warranty?
• Parts subject to wear, including, without limitation, glass parts, glass
containers, cutter/strainer, blades, seals, gaskets, clutches, motor brushes,
and/or agitators, etc.
• Commercial use or any other use not found in printed directions.
• Damage from misuse, abuse, or neglect, including failure to clean
product regularly in accordance with manufacturer’s instructions.
How does state law relate to this warranty?
• This warranty gives you specifi c legal rights, and you may also have
other rights which vary from state to state or province to province.
• This warranty is in lieu of any other warranty or condition, whether
express or implied, written or oral, including, without limitation, any
statutory warranty or condition of merchantability or fi tness for a
particular purpose.
• Kohl’s, Food Network and the product manufacturer expressly disclaim
all responsibility for special, incidental and consequential damages or
losses caused by use of this appliance. Any liability is expressly limited to
an amount equal to the purchase price paid whether a claim, however
instituted, is based on contract, indemnity, warranty, tort (including
negligence), strict liability, or otherwise. Some states or provinces do not
allow this exclusion or limitation of incidental or consequential losses so
the foregoing disclaimer may not apply to you.
If you have a claim under this warranty, please call our Customer
Assistance number. For faster service, please have the model, type and series
numbers ready for the operator to assist you. These numbers can be found
on the bottom of your appliance.
This coffee maker was designed for cooks, by cooks. We took all
the features we loved from all the coffee makers we’ve used over the
years and put them together to make this one. We love it, and we hope
you will too.
Here’s how to get the most out of your coffee maker:
• Freshness matters: buy just as much coffee as you need for a week
from a place that has brisk turnover. If you’ve got a choice between
whole beans or preground, buy whole beans. Store them room-temp
in something airtight and grind them in a coffee grinder when you
need them.
• One tablespoon of whole beans is equivalent to a tablespoon
of ground.
• If you like your coffee dark and heavy (like at the coffee chains),
go with a dark roast like French, Italian, or espresso. For mellow,
full flavor go with light-roast.
• A regular cup of dark- or light-roast coffee has a little more caffeine
than an espresso shot.
For ideas and inspiration, watch Food Network and visit us at FoodNetwork.com.
How to Make Coffee
Cups Cold Water Mellow Brew Strong Brew
211/4 cups 2 tablespoons
ground coffee*
1/4 cup
ground coffee*
421/2 cups
1/4 cup
ground coffee*
1/2 cup
ground coffee*
8 5 cups
1/2 cup
ground coffee*
3/4 cup
ground coffee*
*The spoon included with your coffeemaker (pictured on page 8) measures 1 tablespoon.
The recipes on the next few pages should put you well on the way
to coffeemaker success.
20 Food Network
20
21
Food Network
recipes
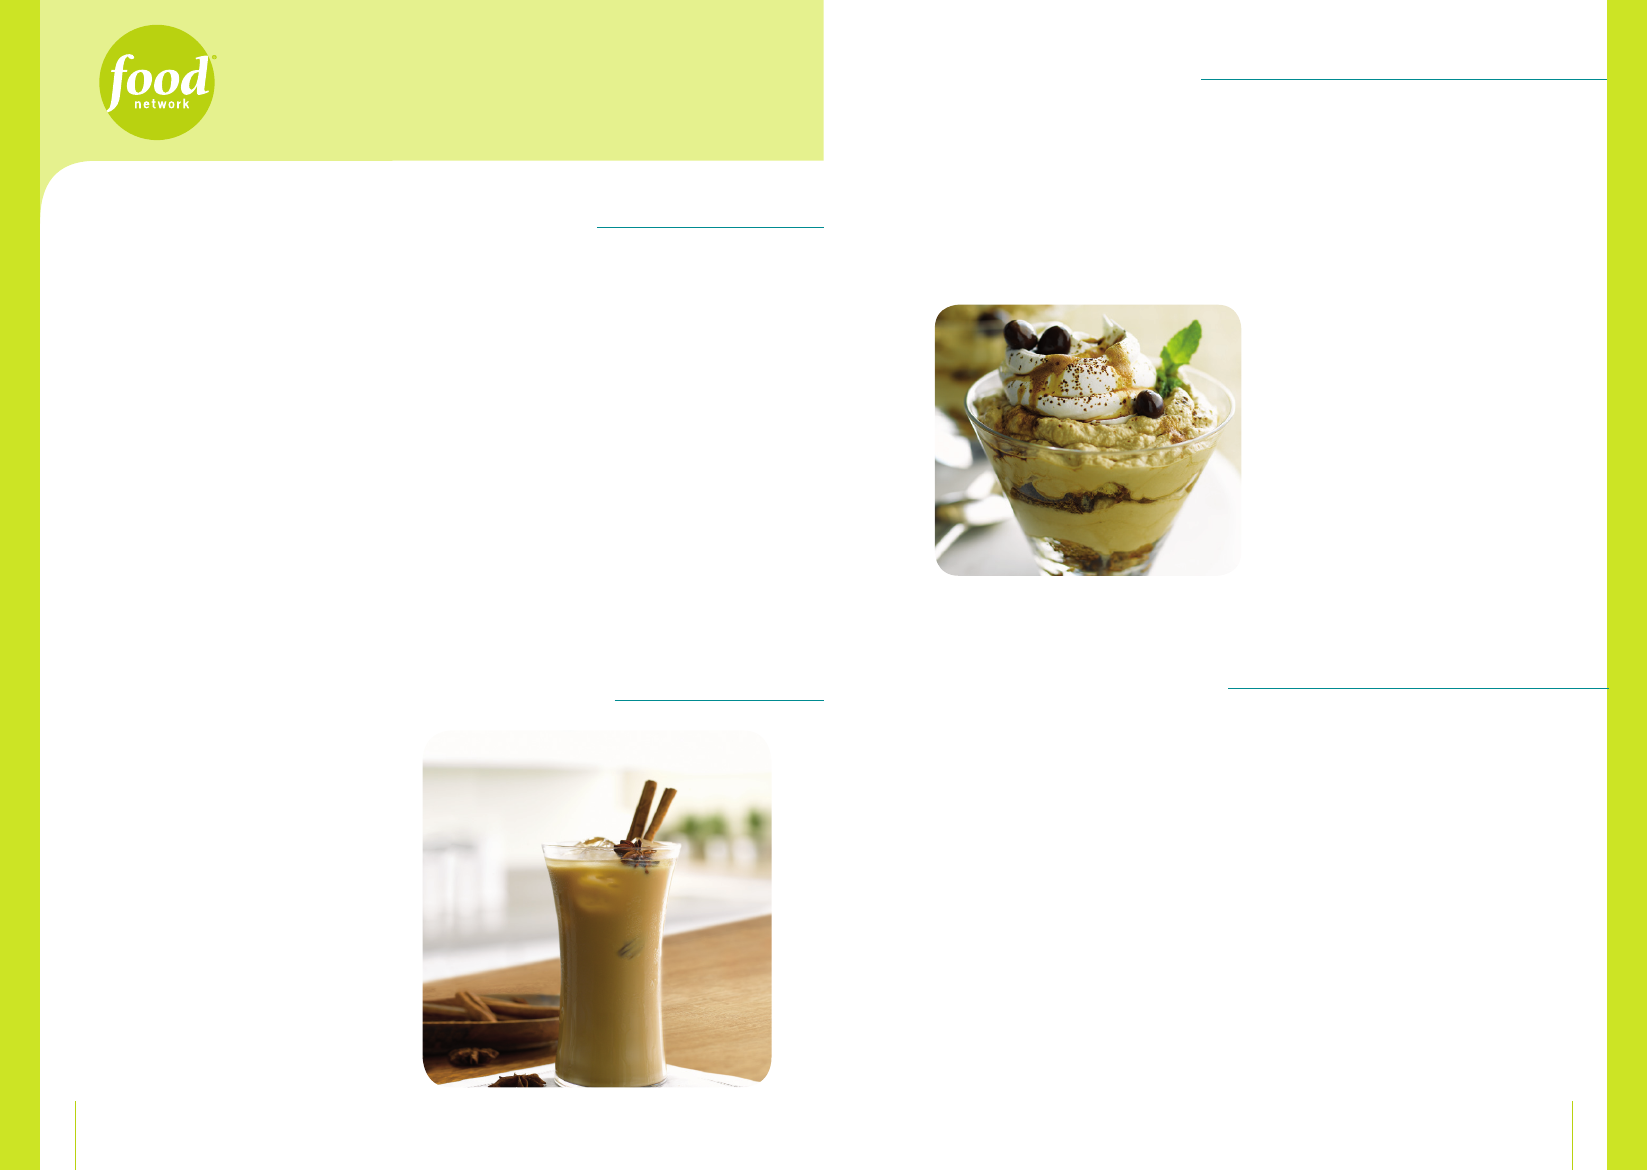
vietnamese-style iced coffee
1 cup sweetened condensed milk
4 cups strong brewed New Orleans coffee
(coffee with chicory)
Well-chilled ice cubes
quick & easy chocolate cake
1 stick unsalted butter
1/2 cup freshly brewed coffee
1/4 cup unsweetened Dutch-process cocoa
1 cup all-purpose fl our
1 cup granulated sugar
1/4 teaspoon baking powder
1/4 teaspoon fi ne salt
1/8 teaspoon baking soda
1/4 cup sour cream
1 large egg, room temperature
1/2 teaspoon pure vanilla extract
Confectioners’ sugar for dusting
1. Preheat oven to 350°F. Butter 9-inch round cake
pan, line bottom with a round of parchment paper,
then lightly butter paper.
2. Put butter, coffee, and cocoa in a microwave-safe
bowl, cover with plastic wrap, and microwave on
HIGH until butter melts, about 2 minutes.
Whisk to combine.
3. Meanwhile, whisk fl our, granulated sugar, baking
powder, salt, and baking soda in a large bowl. Beat
sour cream with egg and vanilla in a small bowl.
Whisk hot cocoa mixture into dry ingredients. Stir
in sour cream mixture just to combine; don’t
overmix. Scrape batter into pan and bake until a
toothpick inserted into cake comes out clean, about
35 minutes. Cool cake on a rack for 15 minutes,
then unmold, turn it upright, and cool completely.
Dust with confectioners’ sugar and serve.
Makes 6 servings.
Briskly stir the sweetened condensed milk into the
chilled coffee until blended. Fill 4 tall glasses with
ice and pour in the coffee mixture.
Makes 4 servings.
Cook’s Note: Avoid diluted iced coffee by freezing
some extra coffee into cubes.
espresso frappe
1 cup strong coffee
1 pint vanilla ice cream (2 cups)
4 cups ice
Pinch ground cloves
Pinch ground cinnamon
Garnish:
Whipped cream
Caramel sauce
Chopped chocolate covered espresso beans
Cocoa powder
1. Put all the ingredients in a blender and pulse
just until the ice breaks up into tiny pieces,
small enough to drink with a straw.
2. Divide frappe among glasses. Garnish with
whipped cream, caramel, cocoa powder or
chopped chocolate covered espresso beans as
desired. Serve immediately.
Makes 4 to 6 servings.
tiramisu rapido
1/4 cup coffee liqueur
1/4 cup very strong coffee
6 tablespoons confectioners’ sugar
8 ladyfi ngers, crisp Italian style preferred
8 ounces mascarpone cheese
1/2 cup heavy cream
2 teaspoons ground chocolate or
sweetened cocoa
1. Whisk coffee liqueur, coffee, and 2 tablespoons
confectioners’ sugar in a glass measuring cup.
Pour about 1
/3 cup of mixture over ladyfi ngers in a
shallow bowl, then toss until moistened; set aside.
2. Gently beat with a handheld mixer the remaining
espresso mixture and the 4 tablespoons
confectioners’ sugar into the mascarpone until
smooth. Take care not to overbeat or it gets grainy.
Using the same beaters (no need to clean them),
beat cream to soft peaks, then fold it into
mascarpone mixture.
3. Crumble half the soaked ladyfi ngers into four
parfait or wine glasses. Spoon 1
/4 cup mascarpone
mixture on top; press and spread gently with the
back of the spoon to fi ll the spaces between the
ladyfi ngers. Repeat with remaining ladyfi ngers and
mascarpone.
4. Sprinkle 1
/2 teaspoon ground chocolate on top,
cover with plastic wrap, and refrigerate for at least
1 hour before serving.
Makes 4 servings.
22 Food Network
22
23
Food Network
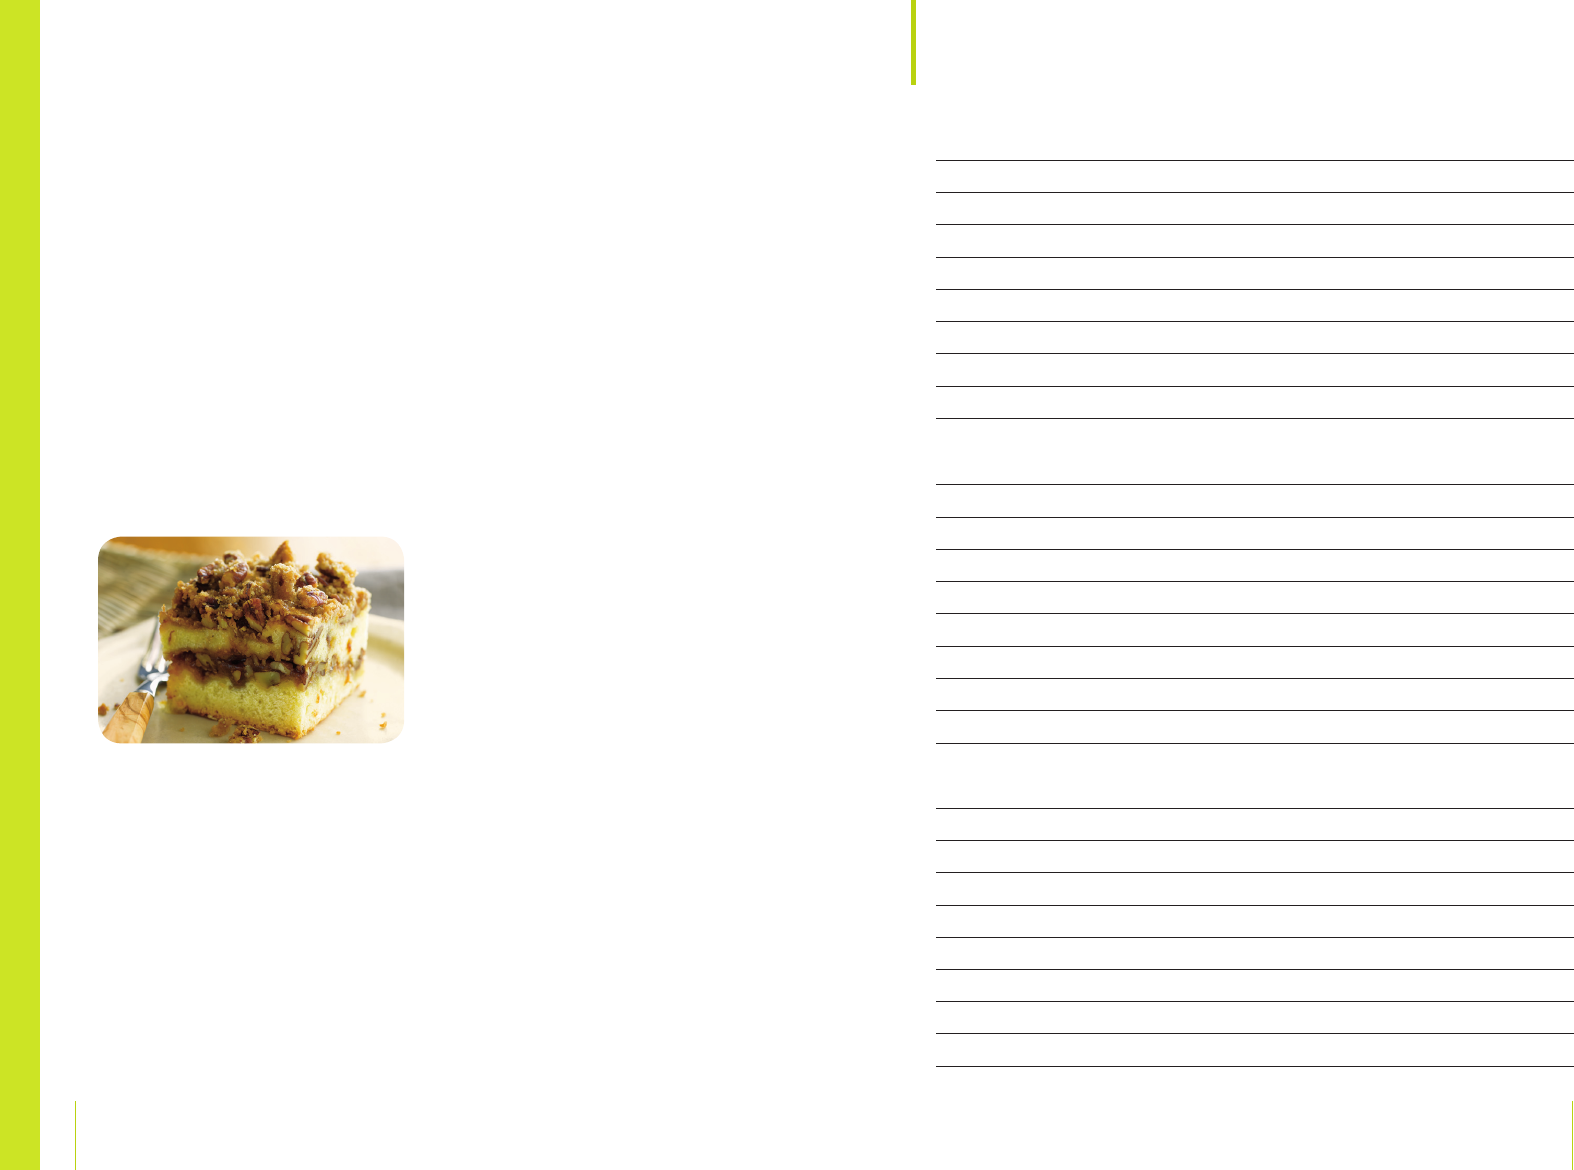
sour cream-pecan coffee cake
Crumbs:
1 cup granulated sugar
2/3 cup packed light brown sugar
2 cup pecans, toasted and chopped
1/3 cup all-purpose fl our
2 tablespoons pure vanilla extract
2 teaspoons ground cinnamon
4 tablespoon unsalted butter, melted
Cake:
21/2 cups all-purpose fl our
1 teaspoon baking soda
3/4 teaspoon salt
11/4 cups sour cream
1 tablespoon pure vanilla extract
12 tablespoons unsalted butter, softened
11/4 cups granulated sugar
3 large eggs, room temperature
Heat oven to 350°F. Line bottom of a 9” square
cake pan with parchment paper; butter paper and
sides of pan.
Crumbs:
Combine sugars, pecans, fl our, pure vanilla and
cinnamon in a small bowl. Add butter and stir to make
moist, coarse crumbs. Set aside.
Cake:
1. Sift fl our, baking soda and salt into a medium
bowl. Mix sour cream with vanilla in a small bowl.
Beat butter and sugar in a large bowl with an
electric mixer on medium speed until light, about
5 minutes. Add eggs 1 at a time, beating well
after each addition. Add fl our mixture in 3 parts,
alternating with sour cream mixture in 2 parts,
beginning and ending with the fl our.
2. Spread 2/3 of the batter in the prepared pan and
sprinkle 1
/2 the crumbs over the top. Spoon the
remaining batter in mounds on top, then spread
it out evenly. Sprinkle the rest of the crumbs
over cake and bake until the top is brown and
a toothpick inserted in the center comes out
clean, about 1 hour. If the top gets dark, cover
with foil and continue to cook until the inside is
cooked through. Cool cake in pan on a rack for 20
minutes, then turn it out of the pan, invert and cool.
Makes 1 (9-inch) cake, 8 servings.
notes
24 Food Network
Food Network and the Food Network logo are service marks
or trademarks of Television Food Network, G.P.
© 2009 Television Food Network, G.P. All rights reserved.
Distributed by Kohl’s Department Stores, Menomonee Falls, WI 53051
Made in China • RN #73277
All recipes contained herein are provided courtesy
of Television Food Network G.P. and shall not be
reprinted, copied or redistributed without the prior
written consent of Television Food Network, G.P.
© 2009 Television Food Network G.P.
All rights reserved.