Forus Electronics DM-FA60 MP3 PLAYER User Manual 1
Forus Electronics Co., Ltd. MP3 PLAYER 1
USERS MANUAL

3
Contents
2
Preparations
Features ........................................................................................................4
Location of Controls ......................................................................................6
Connection to Computer
Connecting to a PC ......................................................................................8
USB Driver Manual Installation ....................................................................10
Windows 98 Installation ..............................................................................12
Use as a Removable Disk ............................................................................13
Remove the USB Cable ..............................................................................14
Firmware Upgrade ........................................................................................15
Basic Usage
Listening to Music ........................................................................................16
Mode Change ..............................................................................................18
Voice Recording............................................................................................19
MP3 Encoding ..............................................................................................20
Search for your favorite music / voice files ..................................................21
FM Radio ......................................................................................................22
FM Encoding ................................................................................................25
Additional Usage
Menu Settings ..............................................................................................26
Using the Play Music Menu ..........................................................................29
Setting Playlist ..............................................................................................31
Sound Configuration ....................................................................................32
Playback Mode Settings ..............................................................................35
Recording Mode Settings ............................................................................37
FM Optimize ................................................................................................41
Display Settings ..........................................................................................43
System Settings............................................................................................45
Product Specifications ..................................................................................49
Customer Support
Troubleshooting ............................................................................................51
Specifications................................................................................................53
Document1 10/13/04 4:16 PM Page 2

5
Features
4
●Voice Recording & MP3 Playback
●FM Radio & Recording
●FM Channel Auto-Store
●Digital Interface (USB)
●MP3 transfer using your PC, Store Recording, E-mail Transfer
●Removable Disk Drive Available
You can carry this MP3 player anywhere and transfer and/or edit
music files using your PC.
●Create Playlist
●File Repeat
●High-speed File Search
●Various Sound Mode Selections
CLASSIC, JAZZ, POP, ROCK, USER1, USER2
●Display Remaining Recording Time
●Monitor Recording Content
●Auto Power Off
Automatically turns off when no button is pressed for 30 seconds.
●Firmware Upgrade
●Graphics LCD
●Background Highlight for LCD
●Connect to external devices using LINE IN for recording
●As a Multi-CODEC Player, supports the MP3, WMA, ASF file
formats.
Document1 10/13/04 4:16 PM Page 4
7
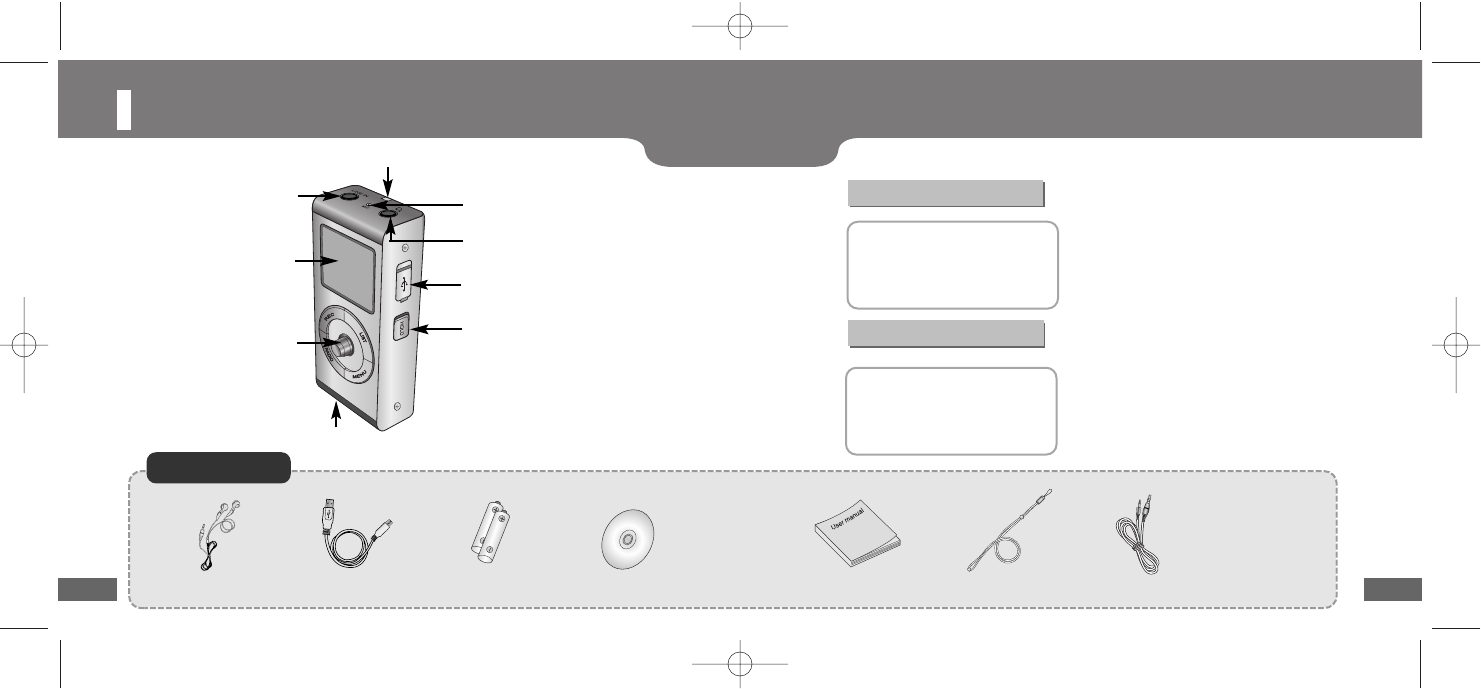
Location of Controls
6
LCD Display
Strap Hole
USB Connector Port
LINE IN /
Input Terminal
Earphone /
Output Terminal
Built –in Microphone
Hold Switch
Battery Cover
Jog key Menu,
Track Navigation/
Fast Search/
Volume Control
COMPONENTS
Earphone User manual
Two Battery
(1.5V AAA/LR03 type)
USB Cable Line In Cable
OO
OOpp
pptt
ttii
iioo
oonn
nn
Arm Band
Carring Case
Installation CD Neck Strap
LCD Display
Insert Battery
1
Press
▲
to push the battery cover up and
then lower it.
2
Insert two batteries (AAA), align them
according to their polarity (+, -) and close
the cover.
Document1 10/13/04 4:16 PM Page 6
9
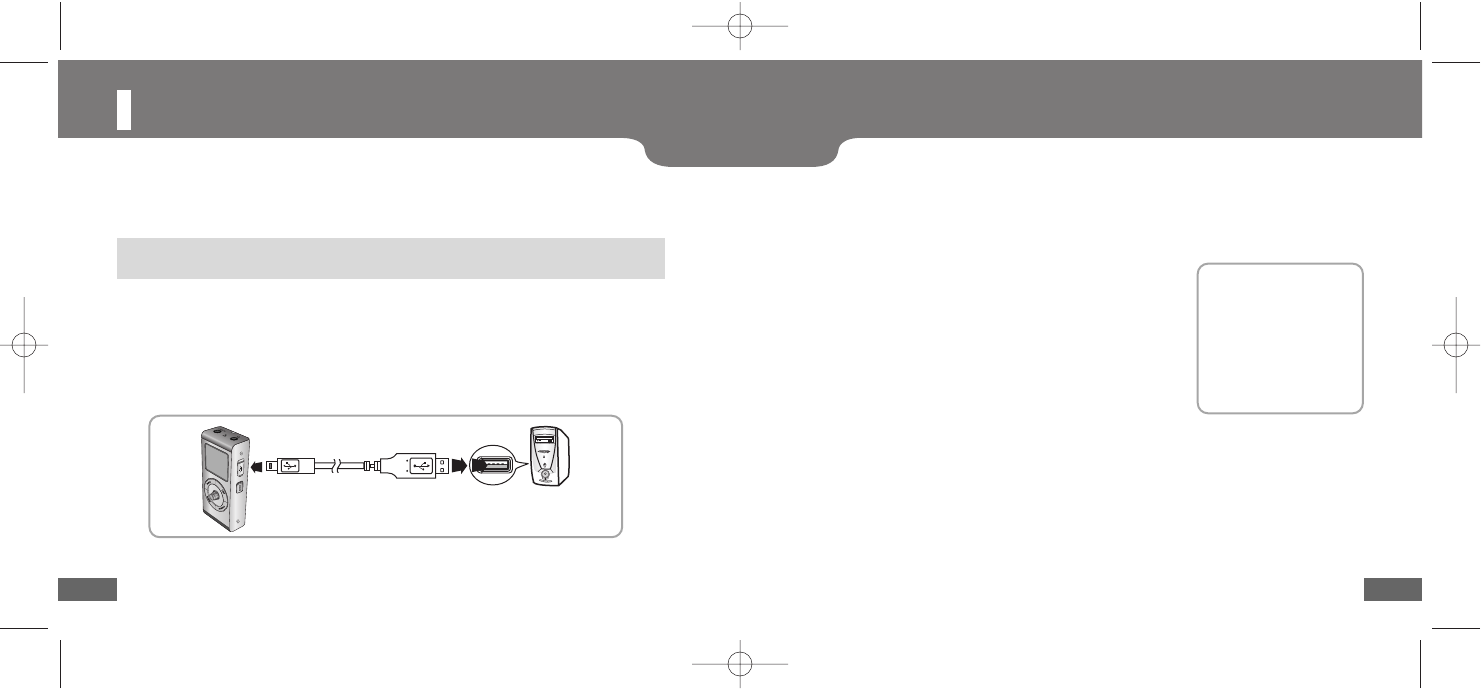
Connecting to a PC
8
Recommended PC Environment
The following is required for normal operation of the player.
■Pentium 133MHz or higher ■CD-ROM Drive (2X or higher) ■Minimum 20MB Free Space
■Windows 98 SE/ME/2000/XP ■Supports USB (1.1) ■VGA Graphics
To transfer mp3 files from a PC, you need to first connect the PC to the MP3 player using the
USB cable provided. A new removable disk volume will be displayed in My Computer.
1
Connect the one end of the USB cable to the USB port of your PC.
2
Turn on the player and plug the other end of the USB cable into the USB port of the player.
- Do not unplug the USB cable during the USB driver installation. This may cause a malfunction
of the player.
-
When you see the internal message “Mass Connect” on the LCD, setup has successfully completed.
3
The system searches for a new device and the USB driver is installed. The installation
process may not be displayed. It is recommended checking the Device Manager if the driver
installation was successful.
4
When done, you’ll see “DM tech MP-00 Device” displayed in the list [Device Manager] as in
the figure below.
5
For problems with the installation as in the figure below, refer to the “USB Driver Manual
Installation”.
How to check USB driver
How to check USB driver
Windows 98:
Control Panel ➝ System ➝ Device Manager ➝ Disk Drives ➝
DM tech MP-00
Windows 2000:
Control Panel ➝ System ➝ Hardware ➝ Device Manager ➝
Disk Drives ➝DM tech MP-00 USB Device
Windows XP:
Control Panel ➝ System ➝ Hardware ➝ Device Manager ➝
Universal Serial Bus controllers ➝Disk Drives ➝
DM tech MP-00 USB Device
Document1 10/13/04 4:16 PM Page 8

11
USB Driver Manual Installation
10
2
Check the list if there are any items with exclamation or question marks (they are displayed
either as Unknown Devices or as corresponding USB devices if properly installed)
3
Double-click the item with an exclamation or question mark, if any.
4
Select the USB driver that you just installed and click [Update Driver].
5
Select a compatible driver and click [Next].
When setup has completed successfully, go to “File Download/Upload” on page ?, and
refer to the instruction below when a problem is encountered with the installation.
1
Checking the Device Manager.
Window 98/ME:
Control Panel ➔System ➔Device Manager
Window 2000 (Professional edition)
Control Panel ➔System ➔Hardware ➔Device Manager
Window XP (Professional edition)
Control Panel ➔Performance and Maintenance ➔System ➔
Hardware ➔Device Manager
Note
●For Windows 2000 users who have problems with the USB driver installation.
Download the latest service pack from Windowsupdate.microsoft.com and install it to your system.
●
For more details on the installation, contact your dealer or customer support.
●
If the problem persists, restart the system and connect the USB cable again.
For Window 98, see the next page.
Document1 10/13/04 4:16 PM Page 10

13
Windows 98 Installation
12
Use as a Removable Disk
Insert the installation CD into your CD-ROM drive, select the “WIN98 mass” folder and
click setup.exe. Do not connect the USB cable prior to the installation.
●Click [Next] to continue with the installation.
●Make sure you restart the system before completing the installation.
Note
●For Window 98, you will not be able to use the player as a removable disk if the
MP-00 program is not installed. Don’t forget to install the USB driver file first.
Transferring Files
1
Turn on the MP-00 player and connect it to your PC.
2
Open Windows Explorer.
3
Select a file that you want to transfer and then drag & drop
it to the removable disk. The transferred files are played
alphabetically. To change the playback order, rename the
files according to the desired alphabetical sequence).
Note
●User created files can be played only in music mode.
●
The order of the music files displayed on the removable disk has nothing to do with
the actual playback order.
●
Keep the USB cable connected until the ‘Do not Disconnect’ warning disappears.
Otherwise, the player may cause a problem.
Document1 10/13/04 4:16 PM Page 12

15
Remove the USB Cable
14
1
From the task bar at the bottom right of your desktop, double-click the green arrow before
unplugging the cable.
2
Select the USB device that you want to remove and click [Stop].
1
Go to http://www.dmtech.co.kr.
2
Download the [Play.rom] file for a firmware upgrade.
When file transfer is completed, follow the instructions below to remove the cable.
Note
●The green arrow does not appear in the Windows 98 operating system. However
you can remove the USB cable when “READY” pops up on the LCD.
Firmware Upgrade
Firmware Download
●You cannot implement the file directly from the homepage.
1
Turn on the player and connect it to your PC.
2
Transfer the [Play.rom] file to the removable disk and turn off the player. Then turn on the
player again after a short pause and the upgrade will proceed automatically.
- Do not remove the USB cable during the firmware upgrade.
This may cause a problem during the process.
Upgrade
Document1 10/13/04 4:16 PM Page 14

17
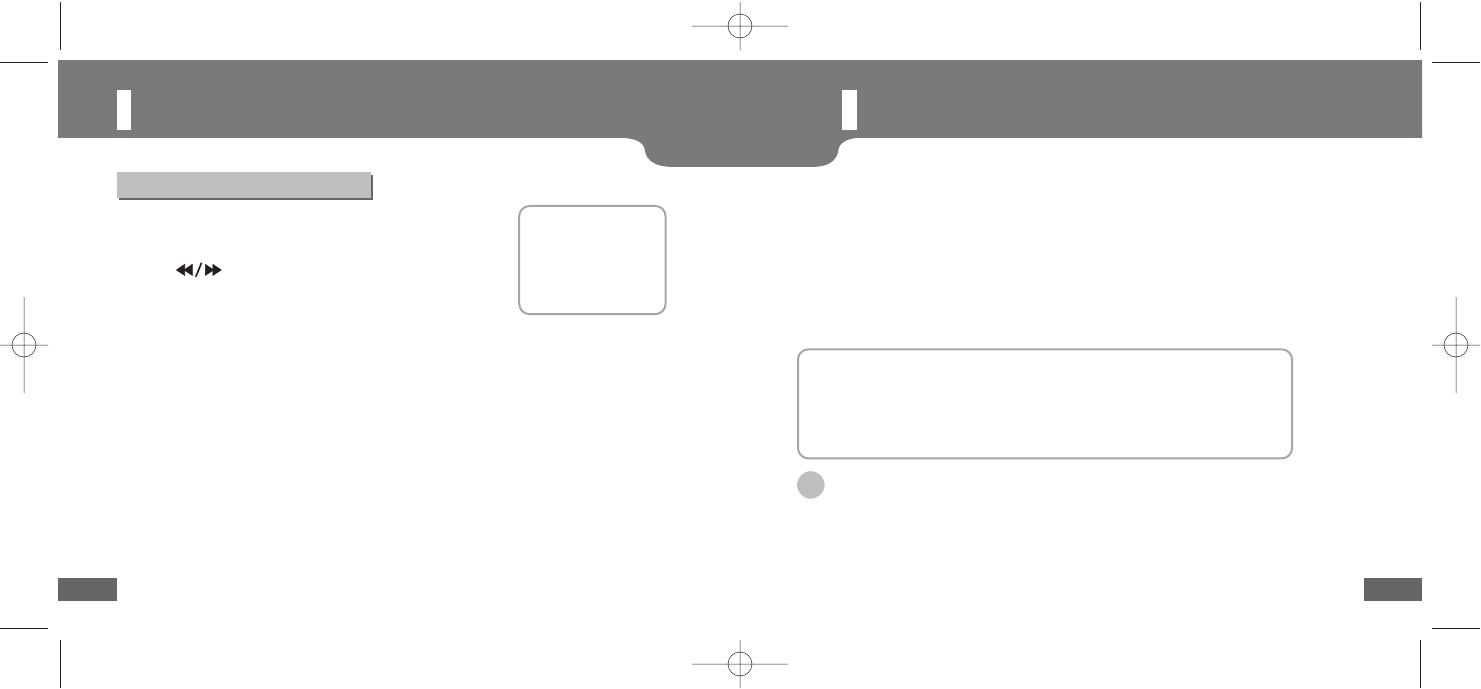
Listening to Music
16
First insert the battery and plug in the earphones properly.
2
Move the jog key to select PLAY MUSIC and
press or move the key to the right.
3
Move the jog key to select Now Play and
press or move the key to the right.
- A music file starts playing.
1
Press the Jog button.
- When the player turns on, the main menu appears.
Playback (Power On)
Stop (Power Off)
●Press and hold down the jog key to turn off the player. When no button is pressed for
30 seconds in Pause mode, the player automatically turns off (see page ?).
Pause
●Press the jog key to pause play.
●Press the jog key again to resume play.
Note
●The player only supports the WMA file format of Windows Media Player (Ver.8.0) at a compression rate of
between 48 and 192 kbps. WMA files below 48 kbps cannot be played.
Hold
●Use Hold when you want to deactivate all button
operations while keeping the current status. This is done
to avoid any unintended operations.
●Push the Hold switch to to display the ( ) mark
on the LCD. This will lock the player. Push the switch in
the opposite direction for the ( ) mark to disappear
and unlock the player.
Volume Control
●You can set the volume from 0 to 40.
Push the jog key up or down to control the volume.
Push up or down and release the key to set the
volume in one level increments; push up or down
and hold down the key for continuous control.
Document1 10/13/04 4:16 PM Page 16

19
Mode Change
18
Voice Recording
Switch between FM and Recording Mode
●Press the RADIO button in pause mode to switch to FM mode.
●Press the REC button in pause mode to switch to voice recording mode.
●Press the REC button again in recording mode to switch off recording mode.
Note
●Press the REC button in FM mode to switch to FM Radio recording (encoding) mode.
●The recording mode is set to voice by factory default. However, when recording mode is switched to
Line-In, voice recording is not possible (see page ? ).
Make recordings with the internal microphone turned towards the source.
Make sure that recording mode is set to Voice (see ‘Mode Selection’ for
recording mode selection).
2
Press REC again to start recording.
- Press the jog key to pause recording and press it again to resume recording.
3
Press REC during the recording to stop recording and create a recording file.
1
Press the REC button.
- The recording time elapsed and the remaining time are displayed on the LCD.
Note
●Recording files are stored in MP3 format in the order of VORC001, VORC002, etc.
●When the player is out of memory, recording will stop.
●When the player is in FM mode or connected to a Line-In cable, recording is not available.
Document1 10/13/04 4:16 PM Page 18
21
MP3 Encoding
20
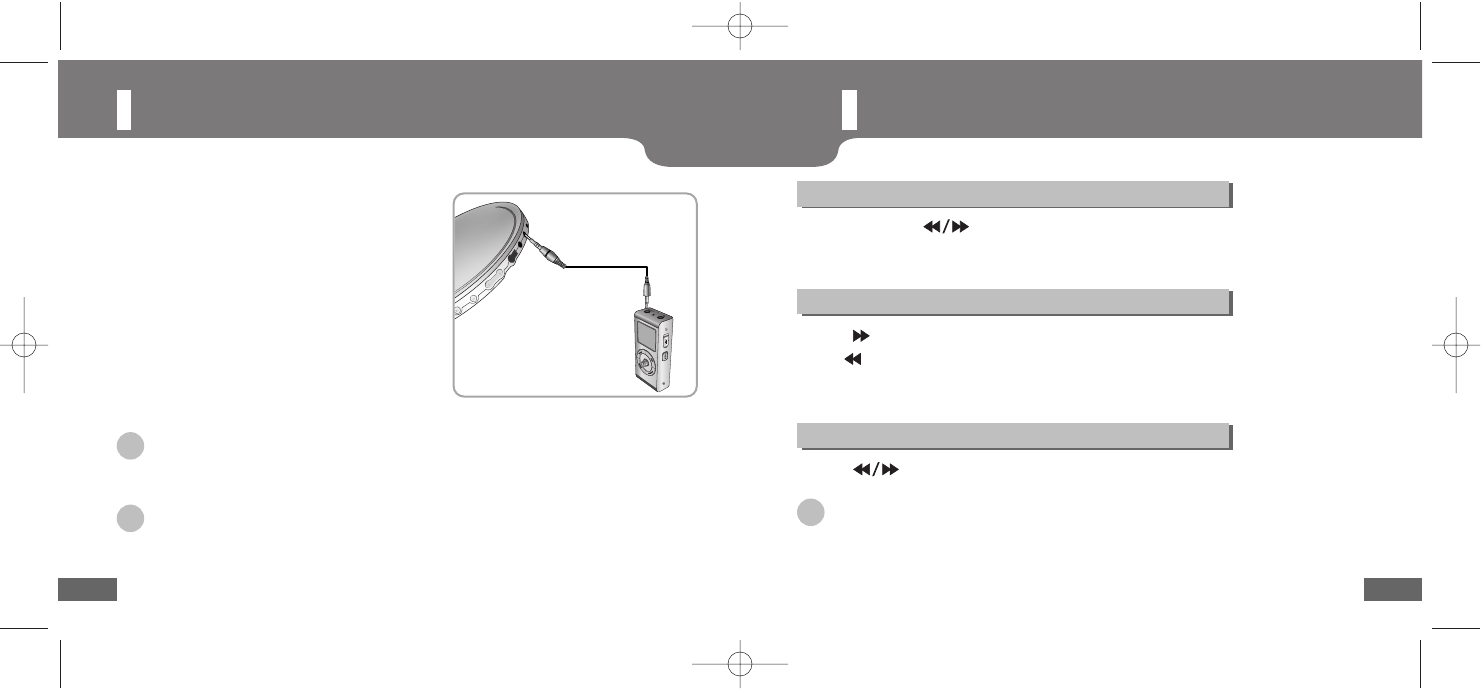
Search for your favorite music / voice files
Make sure recording mode is set to LINE-IN (see ‘Mode Selection’ for recording
mode selection).
2
Press and hold down the REC button to
start MP3 encoding.
- Press the jog key to pause encoding and press it
again to resume encoding.
3
Press REC while encoding to stop encoding and
create an encoded file.
- Encoding is processed in the order of AUDIO001,
AUDIO002, etc. and when done, an MP3 file is
created and saved in the LINE ENC folder.
1
Connect the output (or Line Out) terminal of an
extended device to the Line-In of the player
using the Line-In cable provided.
Note
●You can set the bit rate between 32 and 128 kbps.
●You can also control the encoding volume.
Notice
●The player stops encoding if the Line-In cable is removed during the process.
●Encoding cannot proceed when the player is out of battery.
●Set the volume of the extended device properly before encoding. A too high or low volume can
reduce the encoding quality.
Search for a specific part during playback (Quick Search)
●Push the jog key to the left or right and hold down the jog key to do a fast
search for the part you want. There may be some noise during a quick search.
●Release the jog key to resume playing at normal speed.
File search during playback
●Push to the right and release the jog key during playback to play the next track.
●Pull to the left and release the jog key within 5 seconds of playback to go to the
previous track and start playing; and do the same thing after 5 seconds to start playing
from the start of the current music.
File search in stop mode
●Push to the left or right and release the jog key to go to the previous track.
Note
●VBR (Variable Bit Rate) files may not play even if you pull the jog key to the left within
5 seconds of the start.
●MP2 or MP1 file formats may not play even if you rename the file extension to MP3.
Document1 10/13/04 4:16 PM Page 20
23
FM Radio
22
First press the Radio button to switch to FM mode.
Manual frequency search
●Pull to the left or right and release the jog key to
search for a frequency.
●The frequency is scanned in 0.1 MHz increments.
Automatic frequency search
●Pull to the left or right and hold down the jog key to
scan for available frequencies and then stop scanning.
Saving frequencies manually
2
Push the jog key to the left or right to select
the frequency number and press Radio.
1
Manually scan to a frequency you wish and press the
Radio button to display the save screen.
Saving frequencies automatically
●Press and hold down the RADIO button in FM mode.
- The player will scan through the available frequencies from
87.5 to 108 MHz and save them automatically. When you
select auto save mode, the frequencies available are freshly
saved starting from number 1.
Note
●Mono or Stereo modes are automatically selected.
●The player can save a maximum of 20 frequencies.
2
Pull to the left or right and release the jog
key to search for a previously saved frequency.
-Press the List button again in the preset screen to
switch preset mode off.
1
Press the LIST button in FM mode.
- The Preset screen is displayed.
Search for a Saved Frequency
Document1 10/13/04 4:16 PM Page 22
25
FM Radio
24
FM Encoding
2
Pull to the left or right and release the jog
key to search for a previously saved frequency.
-Press the List button again in the preset screen to
switch preset mode off.
1
Press the LIST button in FM mode.
- The Preset screen is displayed.
Delete a Saved Frequency
2
Press the REC button again.
- The player will encode the current FM broadcast in the MP3 file format.
- Press the jog key to pause encoding and press it again to resume encoding.
3
Press REC while encoding to stop recording and create a recording file.
1
Press the REC button during an FM broadcast.
- The player will switch to FM Radio Record mode.
Note
●Encoding is processed in the order of FMRC001, FMRC002, etc. and the elapsed recording time
and the remaining time are displayed.
●Encoding cannot proceed when the player is out of battery.
Document1 10/13/04 4:16 PM Page 24
Adobe Indesign
27
Menu Settings
26
Activate Menu Mode
MENU MAP
●Menu Button: Enters Menu mode.
●When you push the jog key up or down: Moves between the menu items.
●When you press or push the jog key to the right: Selects a menu item.
●When you push the jog key to the left: Goes to the previous menu item.
■Play Music: Selecting a music file you wish to play.
■Play Option: Selecting a playback mode.
■REC Settings: Configuring the recording and encoding settings.
■FM Optimize: Configuring the local settings of the FM broadcast and the reception
sensitivity.
■Equalizer: Setting the sound equalization.
Document1 10/13/04 4:16 PM Page 26

29
Menu Settings
28
■Display: Configuring the display.
■Settings: Setting up the player details.
■Information: Getting information on the product specifications.
Using the Play Music Menu
You can use the navigation feature to search for a file or switch between modes.
Using Navigation
2
Push the jog key up or down to select Play Music.
3
Press or push the jog key to the right.
- The submenu list “Play Music” will appear.
1
Press the MENU button.
- The main menu will be displayed.
Document1 10/13/04 4:16 PM Page 28
31
Using the Play Music Menu
30
Releasing Folder Play
2
Use the to move to the file you want and push.
- After folder play is released and the selected file will be played.
1
Press and hold the key during folder
playback to move to the Navigation mode.
Folder Playback
2
Select a file or folder to play.
: Move between files or folders within the same directory.
: Move up to the previous folder.
: Move down to the next folder.
3
Push to the right and release the jog key to play the
selected file.
1
Push the jog key up or down to select Navigation.
Play the Playlist
1
Push the jog key up or down to select My PlayList.
Setting Playlist
2
Use the jog key to select a file you wish to register to the
playlist and then press the MENU button.
- The selected file is marked.
- To release the playlist setting, move to the marked file in
Navigation mode and press the MENU button again.
2
Push the jog key up or down to select the file to play,
then push to the right and release the jog key.
- The ( ) mark appears and the selected file is played.
1
Push the jog key up or down to select Navigation.
Setting Playlist
Document1 10/13/04 4:16 PM Page 30
33
Sound Configuration
32
You can enjoy music in a variety of sound modes that you can control according to
your preference.
2
Push the jog key up or down to select Equalizer.
3
Press or push the jog key to the right.
- The submenu list “Equalizer” will appear.
1
Press the MENU button.
- The main menu will be displayed.
EQ Select
2
Push up or down to select the genre mode
and press the Jog key.
(Normal ➔Rock ➔ Jazz ➔ Classic ➔ POP ➔
Uset1 ➔ User2)
1
Push up or down to select EQ Select and
press or push the jog key to the right.
UserEQ1 Set/User2EQ Set
2
Set your preferred sound using the jog key.
: Controls the level of the selected frequency.
: Set the frequency bands (low: 50 Mhz ---
Medium: 1k --- High: 14k). 6. When done, press the jog key.
- When opening EQ Select mode, you will find the Equalizer
mode is set to User1. Repeat this for User EQ2 Set.
1
Push up or down to select UserEQ1 Set and
press or push the jog key to the right.
- The Equalizer screen is displayed according to the
frequency.
You can set the sound in two modes simultaneously
according to your preference.
Document1 10/13/04 4:16 PM Page 32

35
Sound Configuration
34
3D Effects
2
Push the jog key to the left or right to select ON
and press the jog key.
- The 3D icon will be displayed on the LCD.
1
Push up or down to select 3D effects and
press or push the jog key to the right.
You can enjoy 3D sound effects (bass boost).
Control the Bass & Treble
2
Use the jog key to set the levels of the bass and treble
respectively.
: Select Dynamic Bass or Dynamic Treble.
: Sets the level for each item ((-6dB ~ +9dB).
3
When done, press the jog key to confirm your settings.
1
Push up or down to select Bass & Treble and
press or push the jog key to the right.
You can enjoy more dynamic sound by setting the balance.
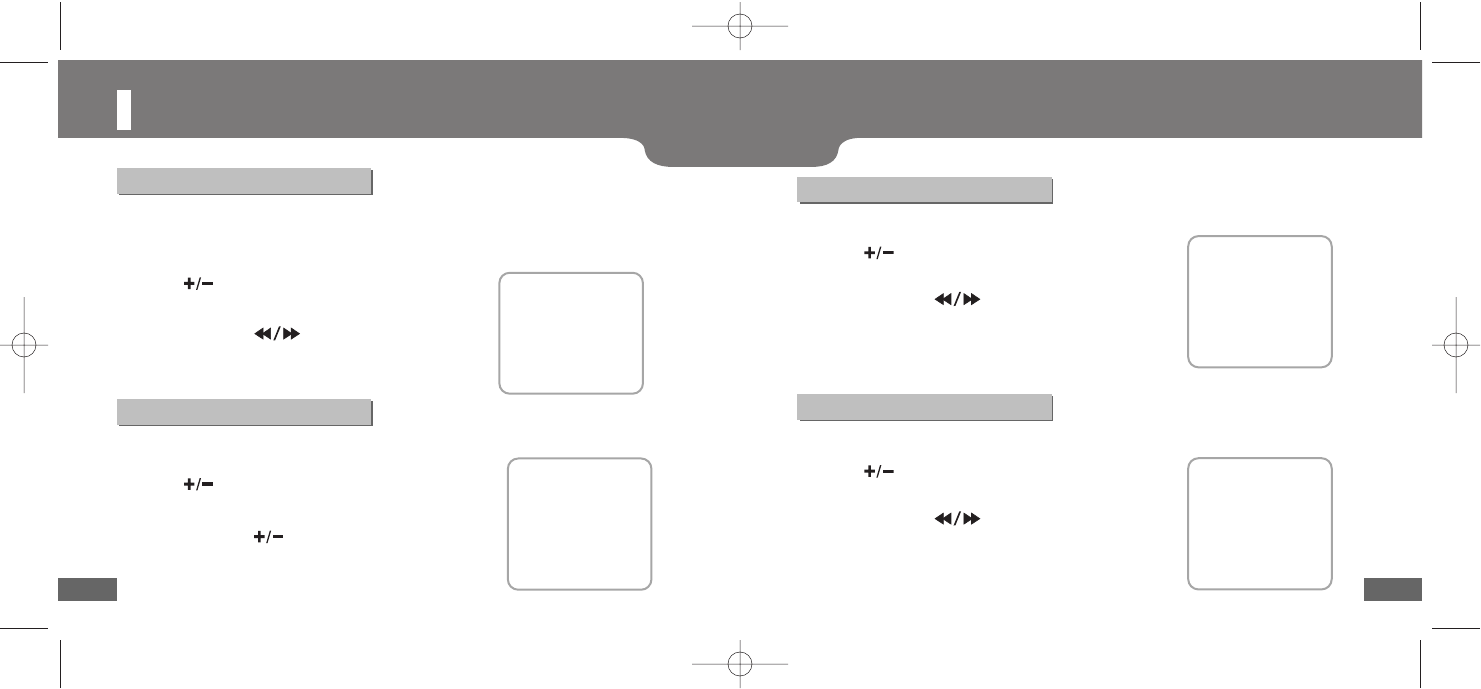
Playback Mode Settings
You can repeat or control the speed of the music playback or even
fade in the volume.
2
Push the jog key up or down to select Play Option.
3
Press or push the jog key to the right.
- The submenu list “Play Option” will appear.
1
Press the MENU button.
- The main menu will be displayed.
Repeat
2
Push up or down to select a playback mode and
press the jog key.
- The selected mode will be displayed on the LCD and the
file will be played in that mode.
One: To listen to just one track.
One@: To listen to just one track repeatedly.
All: To listen to all tracks once.
All@: To listen to all tracks repeatedly.
Shuffle : To listen to all tracks repeatedly and at random.
1
Push up or down to select Repeat Mode and
press or push the jog key to the right.
Document1 10/13/04 4:16 PM Page 34
37
Playback Mode Settings
36
To control the playing speed:
2
Push the jog key to the left or right to select your
preferred playing speed and press the jog key.
- The playing speed ranges from 0% to 200%.
1
Push up or down to select Play Speed and
press or push the jog key to the right.
Fade In
2
Push the jog key to the left or right to select
ON/OFF and press the jog key.
1
Push up or down to select Fade In and press
or push the jog key to the right.
You can set the volume starting from 0 and increase it gradually
according to your preference.
Recording Mode Settings
2
Push the jog key up or down to select REC Settings.
3
Press or push the jog key to the right.
- The submenu list “REC Settings” will appear.
1
Press the MENU button.
- The main menu will be displayed.
Mode Select
2
Push the jog key to the left or right to
select Line-In or Voice and press the jog key.
Select Line-In: When connecting to an extended
device using the Line-In cable for encoding.
Select Voice: When using the internal microphone
for voice recording.
1
Push up or down to select Mode Select and
press or push the jog key to the right.
You should set the mode before using the Line-In cable for encoding or voice
recording. Voice is the factory default.
Document1 10/13/04 4:16 PM Page 36
39
Recording Mode Settings
38
Voice REC Settings
2
Push the jog key up or down to select AGC
ON/OFF.
3
Push the jog key up or down to set the
sampling level and push it to the left or
right to set the level. Then press the jog key to
complete your settings.
1
Push up or down to select Voice REC and
press or push the jog key to the right.
To avoid noise during a voice recording, set the AGC and the sampling / bit rate to optimize
the sound quality of the recording.
Note
●The lower the sampling or the bit rate is, the less the quality of the sound and the smaller the
file size is; the higher the rate is, the better the quality but the bigger the file size becomes.
Line-In REC Settings
2
Push the jog key up or down to select Stereo/Mono.
3
Push the jog key up or down to set the sampling
level and push it to the left or right to set the
level. Then press the jog key to complete your settings.
1
Push up or down to select Line-In REC and
press or push the jog key to the right.
You can select either stereo or mono and set the sampling / bit rate to optimize the
sound quality of the recording.
FM REC Setting
2
Push the jog key up or down to select Stereo/Mono.
3
Push the jog key up or down to set the sampling
level and push it to the left or right to set the
level. Then press the jog key to confirm your settings.
1
Push up or down to select FM REC and press
or push the jog key to the right.
For FM recording, you can select either stereo or mono and set the sampling / bit rate
to optimize the sound quality for the recording.
Document1 10/13/04 4:16 PM Page 38
41
Recording Mode Settings
40
VAD (Volume Audio Detect) Settings
2
Use the jog key to set the level and time.
- You can set the level from 1 to 10 where the higher the
number is, the stronger the sound quality is. You can set the
time from between 1 to 10 seconds. When the level is set to
OFF, the time cannot be set.
1
Push up or down to select VAD Settings and
press or push the jog key to the right.
You can allow the player to set the recording level and time automatically.
Sync Setting
2
Push the jog key to the left or right to set the
time and press the jog key.
- The time can be set from 1 to 10 seconds and when it is
OFF, encoding does not stop and saved as a file even if no
sound is made between files encoded in the MP3 format.
1
Push up or down to select Sync Setting and
press or push the jog key to the right.
This is a feature that identifies mp3 files before saving them when there is no sound
for a specified time during the Line-In recording.
FM Optimize
Set the local FM reception areas and the preset detection levels.
2
Push the jog key up or down to select FM Optimize.
3
Press or push the jog key to the right.
-The submenu list “FM Optimize” will appear.
1
Press the MENU button.
- The main menu will be displayed.
FM Region Settings
2
Push the jog key up or down to select your current
location and press or push the jog key to the right.
KOREA/US : The player can scan through the FM frequency
ranging from 87.5 to 108.0 MHz in 100 KHz increments.
JAPAN : The player can scan through the FM frequency
ranging from 76.0 to 108.0 MHz in 100 KHz increments.
EUROPE : The player can scan through the FM frequency
ranging from 87.5 to 108.0 MHz in 50 KHz increments.
1
Push up or down to select FM Region and
press or push the jog key to the right.
Set the local FM reception region (country).
Document1 10/13/04 4:16 PM Page 40

43
FM Optimize
42
Scan Level
2
Push the jog key to the left or right to set the
Auto preset detect level and press the jog key.
- The higher the FM reception sensitivity is, the easier the
player can receive frequencies.
1
Push up or down to select Scan Level and
press or push the jog key to the right.
Set the local FM reception region (country).
Display Settings
This is a setting mode for the LCD display.
2
Push the jog key up or down to select Display.
3
Press or push the jog key to the right.
-The submenu list “Display” will appear.
1
Press the MENU button.
- The main menu will be displayed.
BackLight
2
Push the jog key up or down and to the
left or right to select Light Color.
BackLight Color: OFF ➔White ➔Blue ➔Red ➔Green,
Yellow ➔Cyan ➔Magenta .
3
Push the jog key up or down to select Off Time and
push it to the left or right to set the Off time.
- The time can be set from between OFF to 5 minutes.
- The backlight stays on when the player is set to Always.
1
Push up or down to select BackLight and
press the jog key.
You can set the backlight color and the Off time.
Document1 10/13/04 4:16 PM Page 42
45
Display Settings
44
LCD Contrast Settings
2
Push the jog key to the left or right to set the
contrast level and press the jog key.
- The level can be set from between 0 to 20.
1
Push up or down to select Contrast and press
the jog key.
Sets the contrast of the LCD display.
Scroll Speed Settings
2
Push the jog key to the left or right to set the
speed level and press the jog key.
- The level can be set from between 0 to 10.
1
Push up or down to select Scroll Speed and
press the jog key.
Sets the contrast of the LCD display.
System Settings
You can configure various settings for the system.
2
Push the jog key up or down to select Settings.
3
Press or push the jog key to the right.
- The submenu list “Settings” will appear.
1
Press the MENU button.
- The main menu will be displayed.
Power Off Settings
2
Push the jog key to the left or right to set the
time and press the jog key.
1
Push up or down to select Power off and
press the jog key.
The player automatically turns off when no button is pressed for a specified time
period. The time can be set from between 10 to 20 seconds.
Document1 10/13/04 4:16 PM Page 44
47
Adobe IndesignSystem Settings
46
Sleep Timer Settings
Sleep Timer Settings
2
Push the jog key to the left or right to set the
time and press the jog key.
1
Push up or down to select Sleep Timer and
press the jog key.
When you set the sleep timer, the player automatically turns off after the set time.
The time can be set from 5 to 180 minutes.
When the timer is set to OFF, the power does not turn off automatically.
OSD Language Settings
2
Push the jog key up or down to select a display
language and press the jog key.
1
Push up or down to select Language and
press the jog key.
You can select your preferred language for the LCD display menu.
Memory Format
2
Push the jog key to the left or right to select
Quick/Low and press the jog key.
- When you select Quick, the formatting is done much faster
than when it is Low. When you want to cancel the formatting,
press the Menu button.
1
Push up or down to select MEM Format and
press the jog key.
Note that once a file is deleted, it can be recovered.
Delete PlayList
2
Push the jog key to the left or right to select
Yes/No and press the jog key.
Yes : Deletes all items of the playlist.
No : The playlist stays as it is.
1
Push up or down to select PlayList and press
the jog key.
Note that once a file is deleted, it can be recovered.
Document1 10/13/04 4:16 PM Page 46
49
System Settings
48
Default Settings
2
Push the jog key to the left or right to select
Yes/No and press the jog key.
Yes : Initializes all settings you selected.
No : Keeps all settings you selected.
1
Push up or down to select Set Default and
press the jog key.
Note that once a file is deleted, it can be recovered.
Product Specifications
You can view various details about the system.
2
Push the jog key up or down to select Information.
3
Press or push the jog key to the right.
- The submenu list “Information” will appear.
1
Press the MENU button.
- The main menu will be displayed.
F/W Version
●Displays the latest updated version and date.
Document1 10/13/04 4:16 PM Page 48
51
Product Specifications
50
MEM Size
●Memory Size : Displays the total memory capacity
and the remaining capacity of the player.
●Recording Time : Displays the total time for voice
recording or encoding, and the remaining time
available.
Font Update
2
Push the jog key to the left or right to select
Yes/No.
Yes : Updates the font file.
No : Cancels the update.
1
Push up or down to select Font Update and
press the jog key.
Note that once a file is deleted, it can be recovered.
Troubleshooting
The software doesn’t work
●Refer to the system Requirements.
The player does not work and the LCD displays nothing.
●Check the battery capacity
●Check to see if the battery is inserted to the right poles ( + , – )
●After connecting it to PC, execute MP-00 Updater in the desktop to update the product.
In PLAY mode, music is not played after pressing the ( ) button
● Check to see if MP3 or WMA files are saved in the built-in memory.
● Check to see if the HOLD button is locked.
Files cannot be downloaded.
●Check to see if the driver is installed correctly in the computer.
●Check the connection between the player and PC.
●Check and/or replace the battery, turn on the play's power.
●Operating system limits the number of files you can save.
Please save your music files by creating a subfolder.
●Check if the memory is full.
Backlight does not work.
● Check the backlight setup.
● When the battery power is low, the backlight will go out.
Document1 10/13/04 4:16 PM Page 50
53
Troubleshooting
52
The buttons do not work.
●Check setting of Hold switch.
●Remove the battery once and then insert it again.
The player keeps being turned off.
●In Stop mode, the power is automatically turned off after ten seconds
(changes depending on settings).
●Check to see if there are files saved in it.
LCD window is dark
●Check Contrast
There is a file saved in yepp, but “No File” appears in the screen.
●After checking whether the folder is played, use the Navigation function to change
the folder.
I cannot properly connect it to PC.
● Win98 : try to connect again after installing yepp Driver.
● WinME : remove the yepp Driver program and press the Start in the desktop to execute
Windows Update. After selecting important update and service pack, execute update all.
● Win2000/XP : Try to connect it again after rebooting PC.
Specifications
Memory Capacity Internal/128MB/256MB/512MB
Voltage 1.5V
Battery AAA (normal size) * 2
LCD Display Graphics LCD (104*64+8lcon)/7 Color LED Back
Lighting/Total 5Line
Size (W*H*D) / Weight ??
Case ABS
File Transfer Rate Maximum of 4.5Mbps
Recording Format MPEG1 Layer3 (includes VBR), WMA, (includes ASF)
Noise Rate 90dB
Earphone Output 10mW
FM Frequency Band 87.5MHz~108.0MHz (World Wide Type)
Maximum Operation Time
Approx. 15Hrs
Supporting OS Windows 98 SE/ME/2000/XP
Document1 10/13/04 4:16 PM Page 52
THIS DEVICE COMPLIES WITH PART 15 OF THE FCC RULES. OPERATION
IS SUBJECT TO THE FOLLOWING TWO CONDITIONS: (1) THIS DEVICE MAY
NOT CAUSE HARMFUL INTERFERENCE, AND (2) THIS DEVICE MUST
ACCEPT ANY INTERFERENCE RECEIVED, INCLUDING INTERFERENCE THAT
MAY CAUSE UNDESIRED OPERATION.
NOTE: THE MANUFACTURER IS NOT RESPONSIBLE FOR ANY
RADIO OR TV INTERFERENCE CAUSED BY UNAUTHORIZED
MODIFICATIONS TO THIS EQUIPMENT. SUCH MODIFICATIONS
COULD VOID THE USER'S AUTHORITY TO OPERATE THE EQUIPMENT.
NOTE: This equipment has been tested and found to comply with the
limits for a Class B digital device, pursuant to part 15 of the FCC
Rules. These limits are designed to provide reasonable protection
against harmful interference in a residential installation. This
equipment generates, uses and can radiate radio frequency energy
and, if not installed and used in accordance with the instructions, may
cause harmful interference to radio communications. However, there
is no guarantee that interference will not occur in a particular
installation. If this equipment does cause harmful interference to
radio or television reception, which can be determined by turning the
equipment off and on, the user is encouraged to try to correct the
interference by one or more of the following measures:
- Reorient or relocate the receiving antenna.
- Increase the separation between the equipment and receiver.
-Connect the equipment into an outlet on a circuit different from that
to which the receiver is connected.
-Consult the dealer or an experienced radio/TV technician for help