Forus Electronics FX-300 Digital Audio Player User Manual
Forus Electronics Co., Ltd. Digital Audio Player Users Manual
Users Manual

2
I n d e x
Feature
Name of each parts
Windows 98/ME driver set up
Connecting main set to PC
Upgrading firmware/fonts
Using DRM
Recharging battery
Power on/off
How to set up Hold switch function
How to control volume
How to change MP3/FM mode
How to choose folder/file
1
3
5
6
7
8
9
9
10
10
10
11
Before using
Connecting to external audio
28
Connection to external device
Listen to FM
Preset of FM channels
Listening to preset channels
Recording FM
24
25
26
27
FM radio
Cautions
Trouble shooting
Specifications
Warranty
29
31
32
Others
Recording with built-in mic.
Playing
Section repeat playback
Deleting files
12
13
14
14
Using
Structure of menu
Using menu
Music mode
Recording mode
FM mode
System mode
15
16
17
19
21
22
Menu
Feature
1
Voice recording & MP3 playback
Graphic LCD(65K OLED )
It is equipped with Graphic LCD by
adopting OLED and support Multi-
Languages.
Digital interface (USB 2.0)
It can be used as a data saving device,
a portable hard disk.
Auto power off
Power turns off automatically in case
of non-use over 1 minute.
Listen to an FM & Recording
Manual tuning / Automatic tuning /
FM recording
Saving FM Channels
Preset FM channels up to 20.
Firmware upgrade
With firmware upgrade, it is available
to improve & enhance new functions.
Adopting portable disk
The function of portable disk enables you
to download & edit any file from PC
anywhere.
Repeat play function
Function of the section repetition
(A-B)
The desired section can be designated
and heard repeatedly.
Function of the music search
(INTRO):
Only the front part of each track is played.
Various equalizer mode
Normal, Classic, Live, POP, Rock, Jazz,
Ultra-Bass, Metal, Dance, Party, Club,
Spatializer, User EQ 1,2
Spatializer (3D sound)
It supports 3D sound in playing music.
Monitoring of recording
4
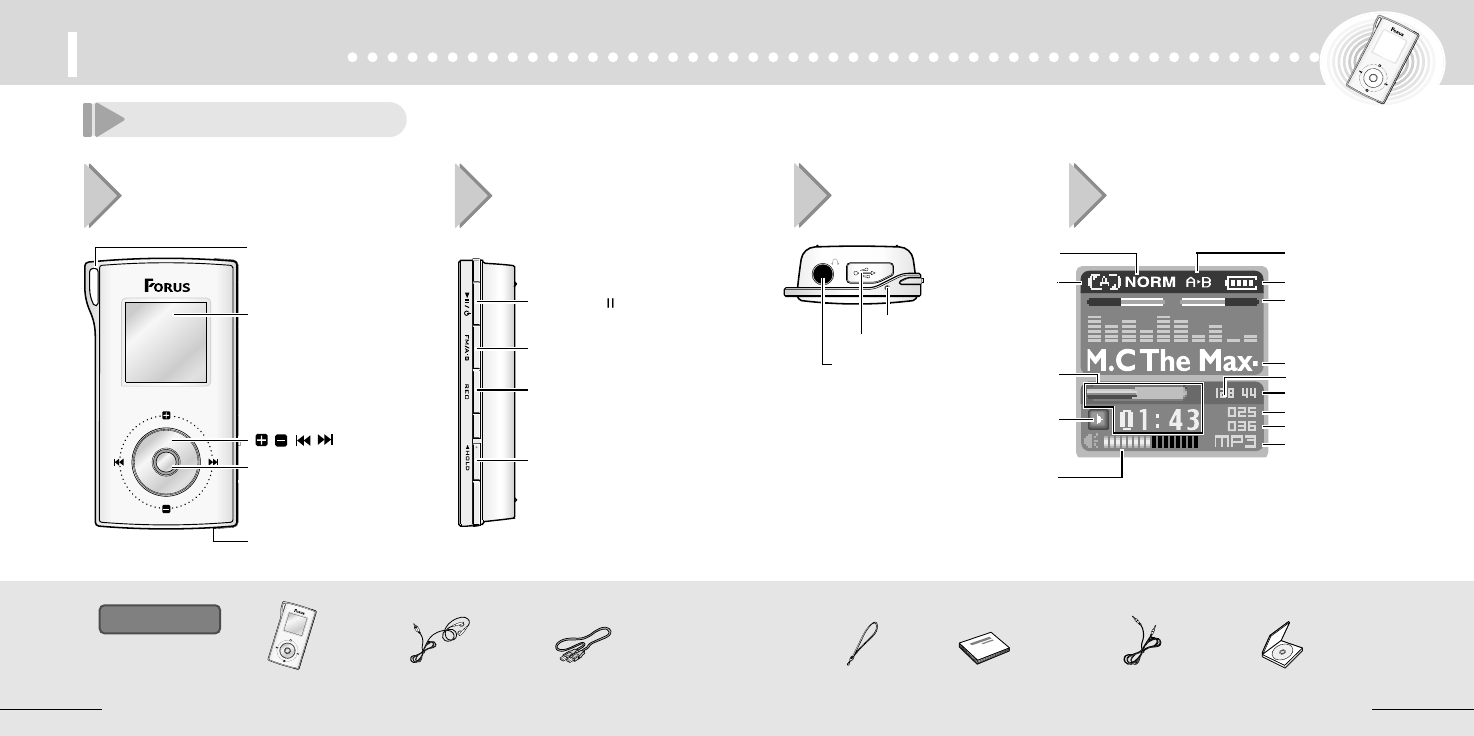
Right Side Top
Built in mic.
FM/Section
repeat(A-B) button
Play/Pause() &
Power ON/OFF button
Rec/Stop button
Hold Switch
Before using
3
Front LCD display
Menu button
Reset button
MP3 player Earphone Neck strap User's manual External device
connection cable
USB connection cable
Accessories
Name of each part
Strap loop
LCD display
button
Bit rate indicator
Battery level indicatorRepeated playback
indicator
EQ mode indicator
Playing time status
indicator
Current status indicator
Stop
Play
Pause
Recording
Play level Indicator
File name indicator
Current file number indicator
Sampling frequency indicator
All file number indicator
File format indicator
Section repeat play indicator
USB port
Volume indicator
CD (win98 driver)
Earphone/
Output terminal
6
Before using
5
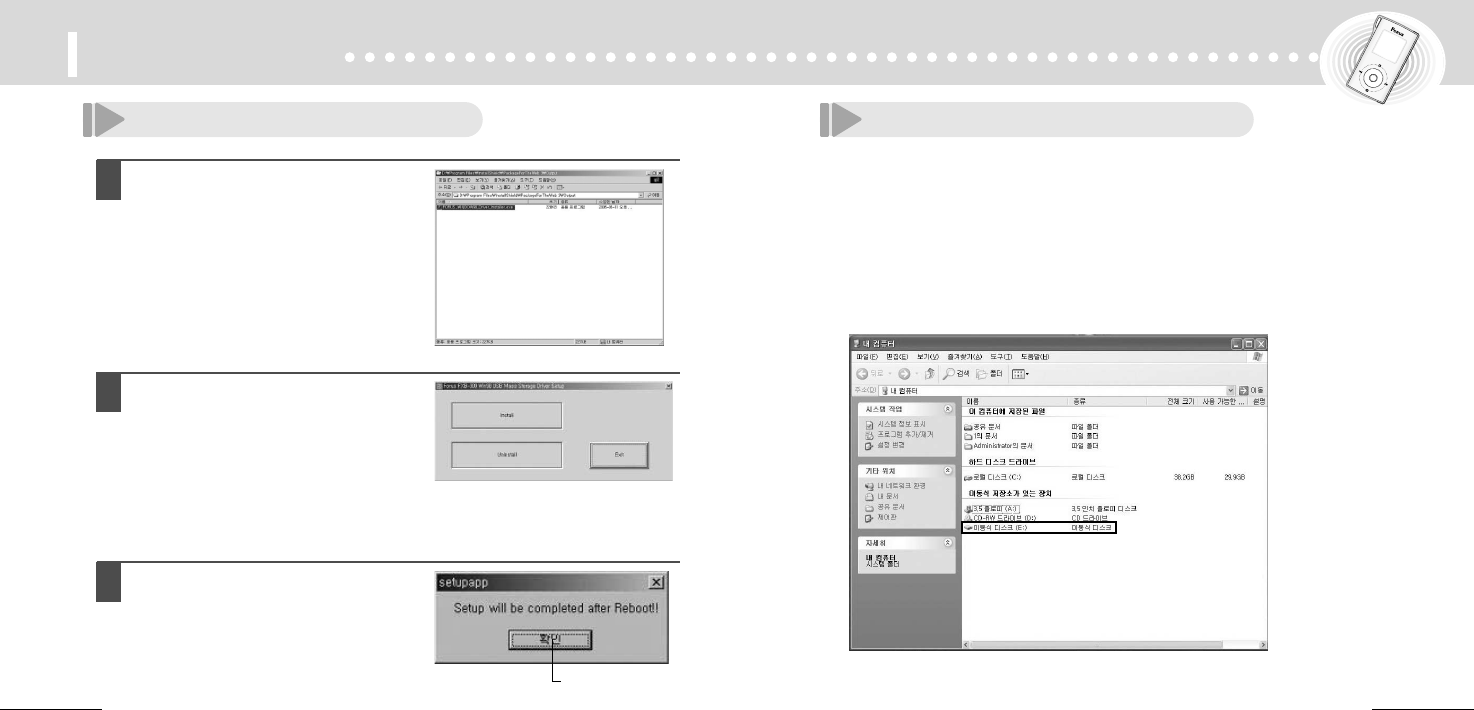
Win98/ME driver set up Connecting main set to PC
For downloading MP3 files from the PC, first connect the MP3 player
to the PC using the USB connection cable. During this operation,
Portable Drive is shown on the PC.
●Connect the USB connection cable to the PC USB port on the PC.
●Connect the USB connection cable to the USB port on the main set.
●USB connected appears on the LCD, Portable Drive is shown as below capture.
●When USB connection fails or connection is removed, USB Disconnected is shown.
●Do not pull out USB connection cable before the message 'Don't Remove USB' is
shown.
1
Execute "Forus_Windows98_Driver_
Installer.exe".
2
After installation, click install
button.
3
When setup is completed,
reboot PC.
Click
8
Before Using
7
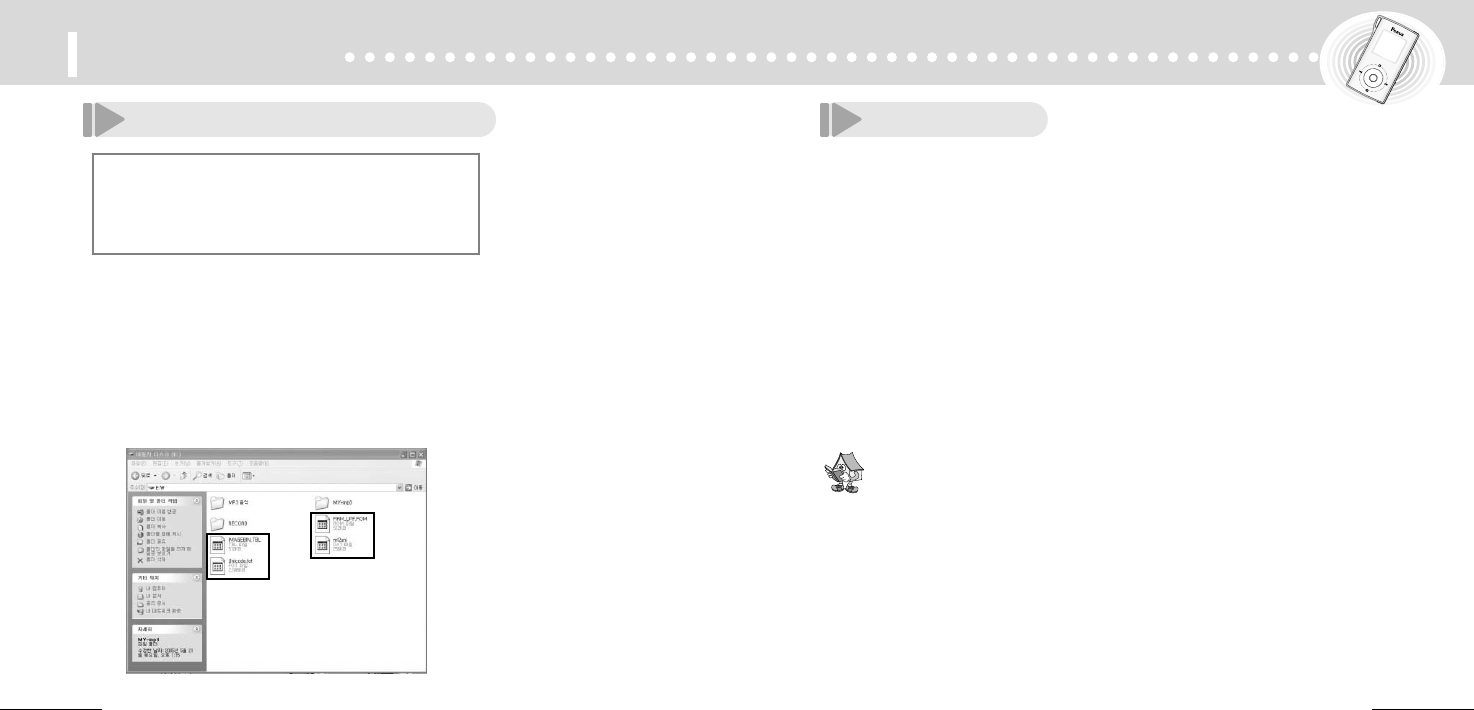
Upgrading firmware/fonts Using DRM
DRM (Digital Rights Management)?
Digital Rights Management, abbreviated DRM, is an umbrella term referring to any of
several technical methods used to control or restrict the use of digital media content
on electronic devices with such technologies installed.
●When format could proceed after firmware upgrade, save three files of
Imagebin.tbl, Ml2uni.dat, Unicode.fot to main set and power on main set
again. Then, upgrade is executed.
●When battery is consumed under level 2, upgrade fails and file of
firm_upf.rom is deleted. It is recommended to recharge battery fully
before upgrade.
Index of files
●Firm-upf.rom : Firmware file
●Imagebin.tbl : Power on/off. Menu image file
●Ml2uni.dat : File of Unicode converting table
●Unicode.fot : Unicode font file
Connect main set to PC through USB cable.
Move & save above 4 files to portable disk.
Remove USB device and disconnect USB cable.
Upgrading firmware is executed automatically and main set
powers off.
Power on main set again.
Upgrading font & other files is executed automatically.
10
Power on/off
To power on
Press Power ON/OFF button
over 1 second.
To power off
Automatic power off
The power automatically turns off when the device is
not in use for more than one minute at STOP mode.
Manual Power OFF
Press the Power ON/OFF button and hold to turn the
power off.
Before using
9
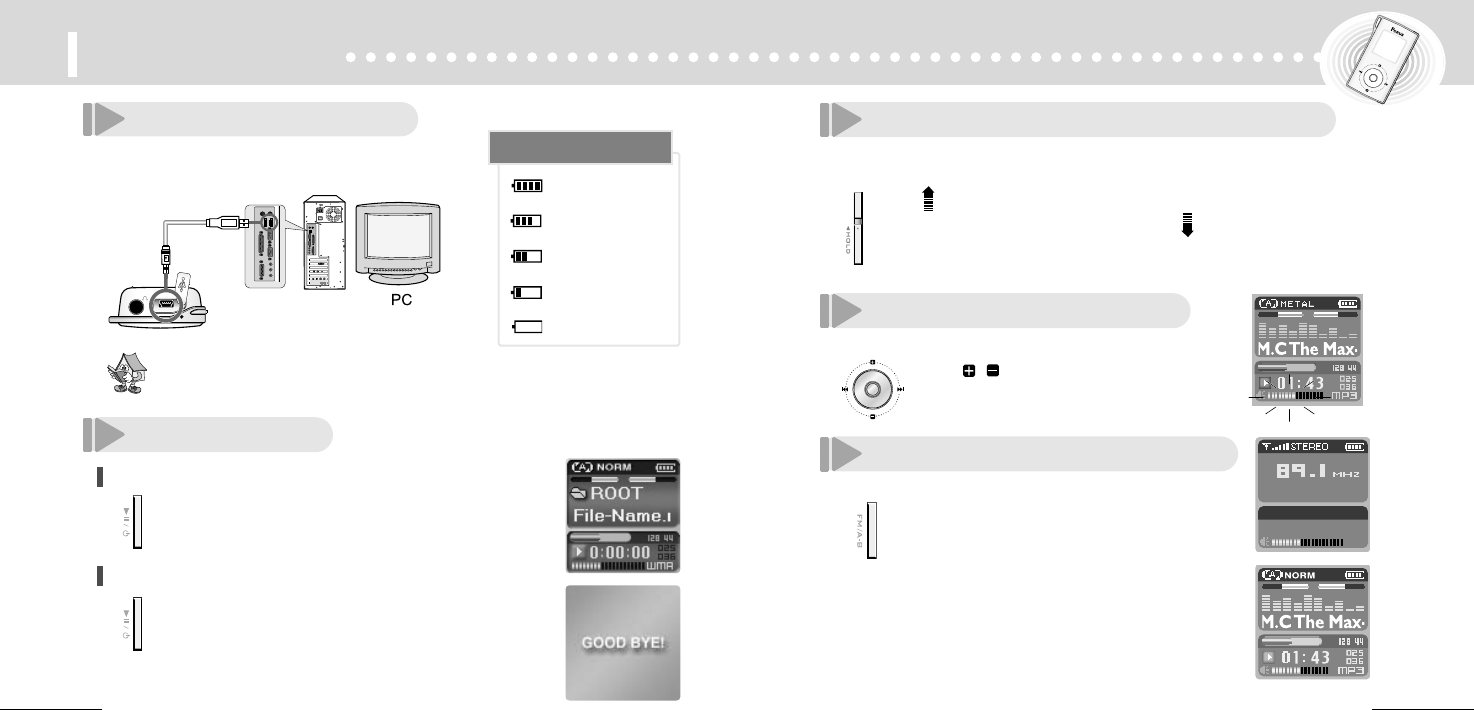
Recharging battery
How to set up Hold switch function
Hold switch performs locking function during playback or recording and manual
power off function at STOP mode.
How to control volume
You can adjust volume within the stage of 0 ~ 30.
How to change MP3/FM mode
Push the Hold switch upward locks the player.
To remove and unlock the player, push the switch
downward.
With ,button, volume
adjusting is available.
Press FM/Section repeat(A-B) button
over 3 seconds.
Press FM/Section repeat(A-B) button
over 3 seconds.
Recharging starts automatically with connection
of main set & PC through USB cable. Enough
A little consumed
Consumed halfway
Consumed much
Recharging required
Check remained battery
At MP3 mode
At FM mode
●It takes normally 2 hours to recharge fully.
1211
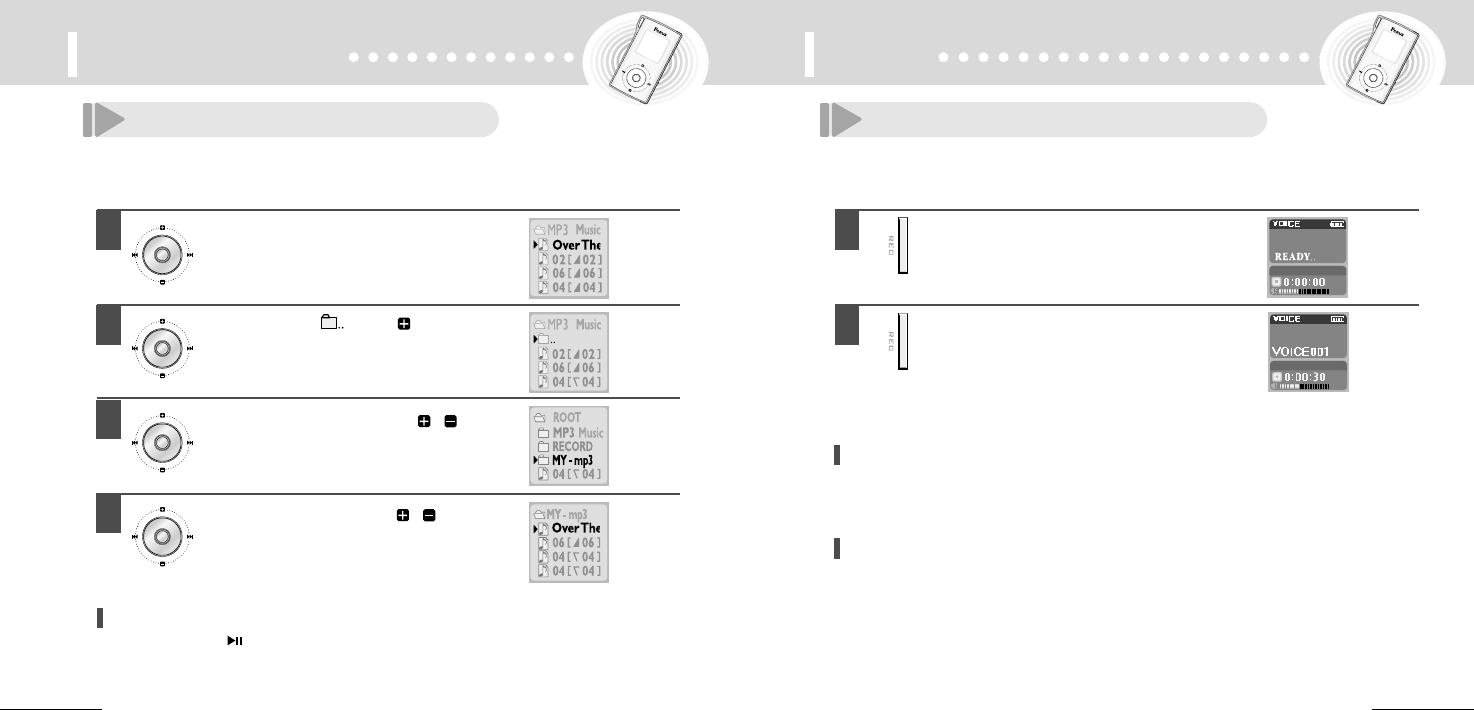
How to choose folder/file
You can choose folder or file to playback.
Before using Using
Recording with built-in mic.
To stop recording
Press Rec/Stop button shortly.
●Then recording stops.
To escape from recording mode
At stop mode, press Rec/Stop button over 3 seconds.
●It is changed into MP3 mode.
1
Press Menu button shortly.
At MP3 mode
2
3
Move to desired folder with
button and press Menu button.
4
Move to desired file with button.
To escape from folder/file mode
Press Play/Pausebutton shortly.
Move to folder( ) with button
and press Menu button.
1
Press Rec/Stop button over 3 seconds.
●Then go to recording mode.
To record
2
Press Rec/Stop button shortly.
●Recording begins and recording time appears
on the display.
●Recording file is saved automatically to Record
folder.
14
Using
13
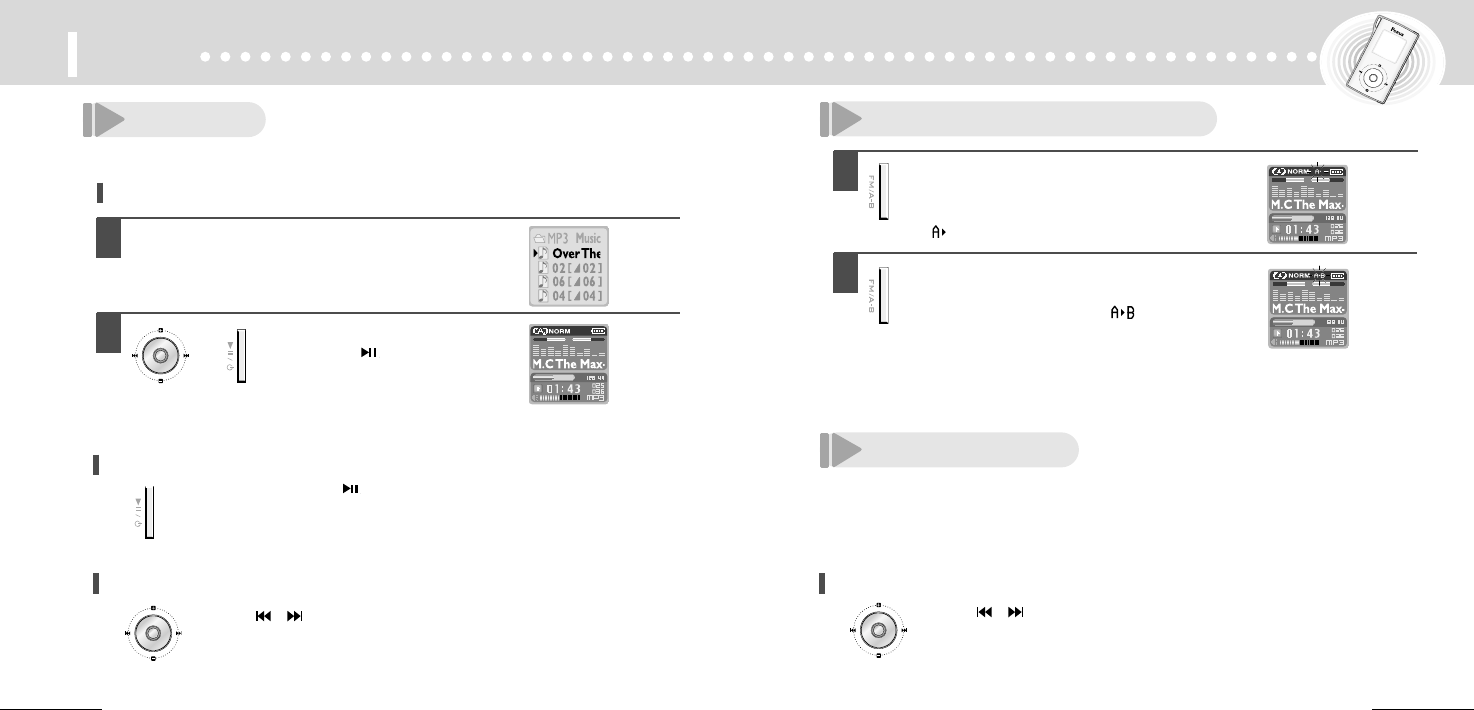
1
Refer to page 11, choose file to play.
2
Press Menu button or
Play/Pausebutton.
To play
To pause playback
Press play/pausebutton.
Playing
To switch into other file during playback
Press button shortly.
To search the desired section within a file
Push button and hold to play the previous or
next part of the currently playing file.
or
Section repeat playback
1
During playback, press FM/Section
repeat(A-B) button at the beginning
of the part you want.
●appears.
2
Pressing FM/Section repeat(A-B) button
again at the end of the section you would
like to repeat will display again and the
player will repeat the section.
To reset the A-B repeat, press FM/Section
repeat(A-B) button in A-B repeat to resume
playback.
Deleting files
This device does not support deleting function.
It is recommended to delete folder or files on the PC.
16
Menu
15
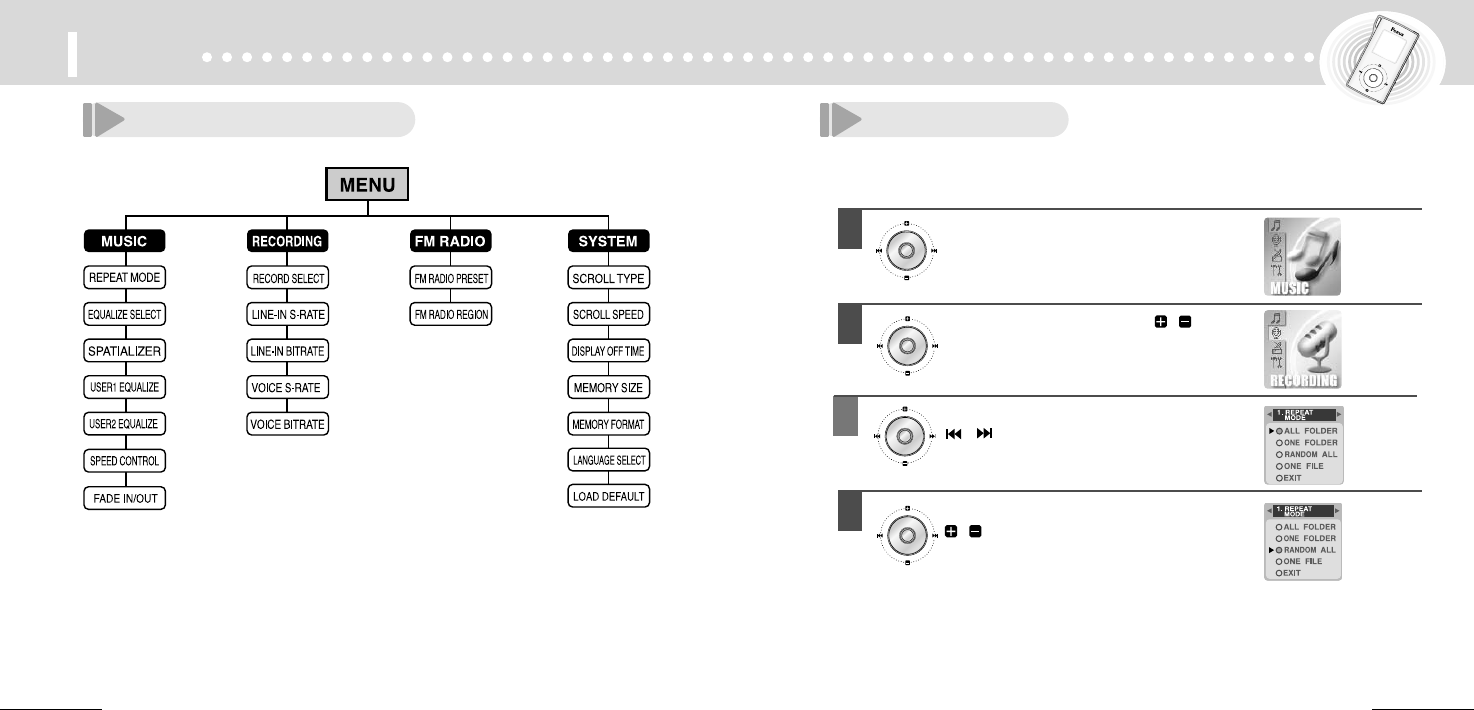
Structure of menu Using menu
1
Press Menu button over 3 seconds.
2
Move to desired menu with
button and press Menu button.
3
Move to desired sub-menus with
button and press Menu button.
4
You can set up sub menu by using
& Menu button together.
��To return to previous mode, press Menu button over 3 seconds.
��To escape from menu, press Rec/Stop button.
18
Menu
17
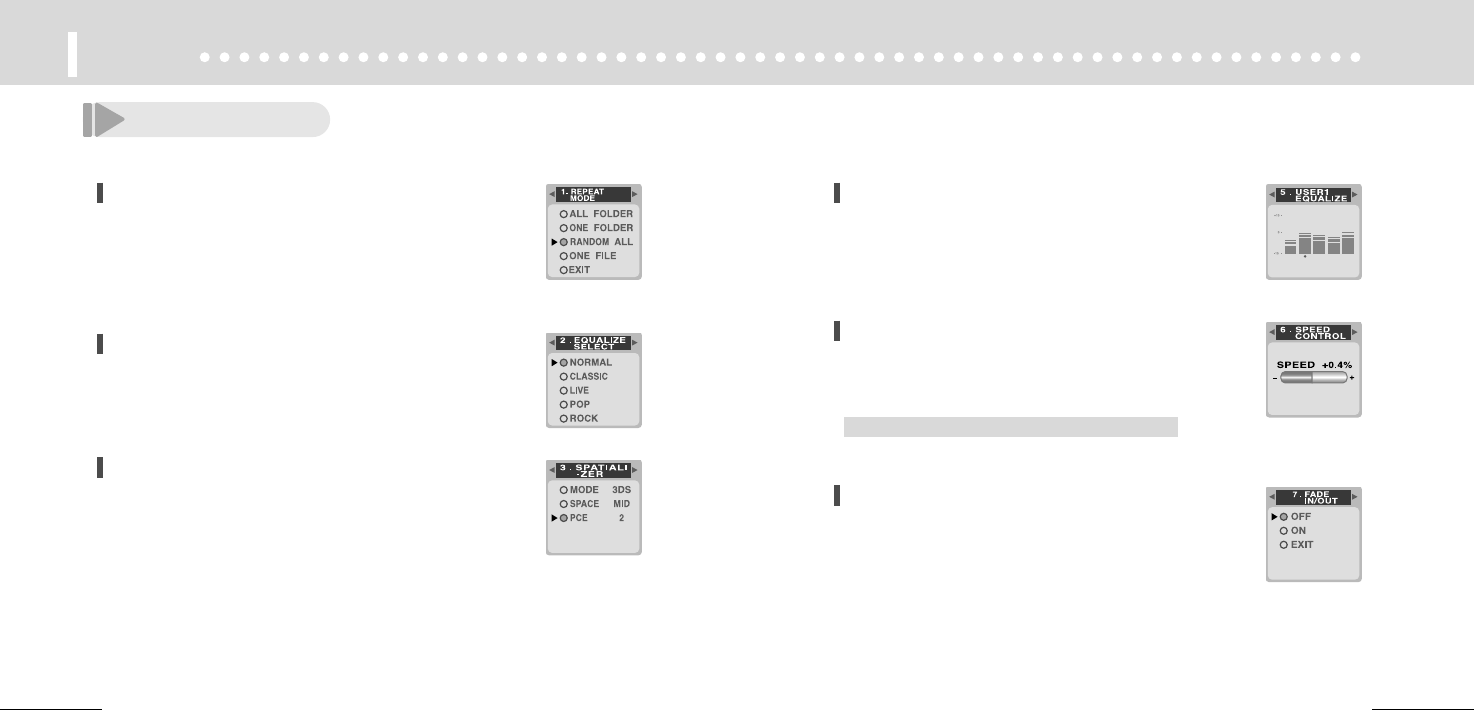
Music mode
MENU > MUSIC > REPEAT MODE
●All folder : Repeat & playback all folders
●One folder : Repeat & playback one folder
●Random all : Repeat & playback all files at random
●One file : Repeat & playback one file
MENU > MUSIC > EQUALIZE SELECT
You can select Normal, Classic, Live, POP, Rock, Jazz,
Ultra-Bass, Metal, Dance, Party, Club, Spatializer, User EQ 1, 2.
●Spatializer : This is 3D sound mode which users can set up.
●User EQ : You can adjust the equalizer.
MENU > MUSIC > SPATIALIZER
This is 3D Sound Mode.
●Mode (3DS, Mode PCE)
●SPACE (High, Mid, Low)
●PCE (0~5) : This is used to improve sound distortion,
MENU > MUSIC > USER1 EQUALIZE
You can adjust the equalizer.
MENU > MUSIC > SPEED CONTROL
This is used to control playback speed.
●You can control playback speed within -25% ~ +25%.
●-25% is the slowest speed , +25% is the fastest speed.
This function is only applied in playing MP3 files.
MENU > MUSIC > FADE IN/OUT
Fade in : Music begins with low volume at the beginning.
Fade out : Music ends with low volume at the end.
2019
Menu
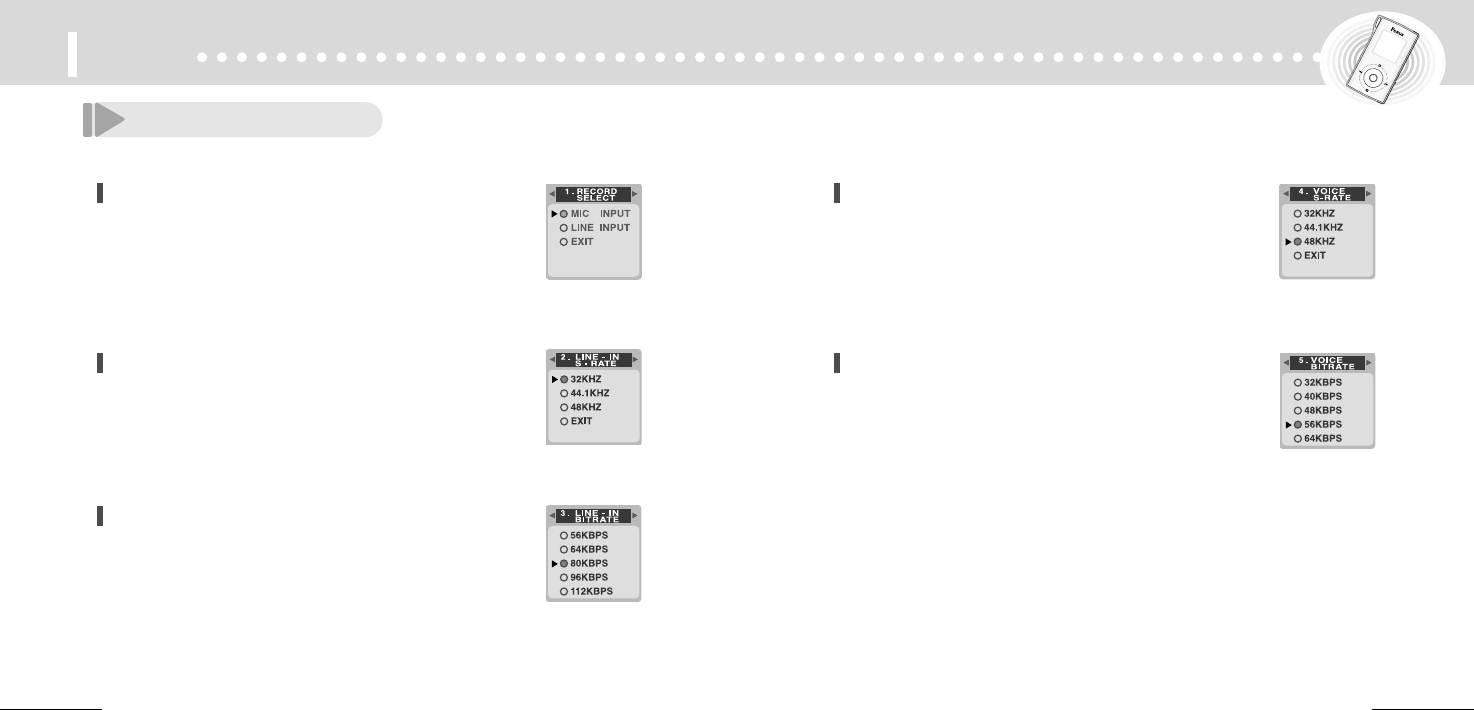
Recording mode
MENU > RECORDING > RECORD SELECT
Select Mic or Line recording.
●MIC INPUT : Recording with built-in mic.
●LINE INPUT : Recording with external device
MENU > RECORDING > LINE - IN S - RATE
When you do line in recording, you can adjust sampling
frequency among 32/44.1/48KHz.
The higher frequency you choose, the better sound quality
you have.
MENU > RECORDING > LINE - IN BITRATE
When you do line in recording, you can adjust bitrate
among 32, 40, 48, 56, 64, 80, 96, 112, 128, 160, 192,
224, 256, 320KBPS.
The higher frequency you choose, the better sound
quality you have.
MENU > RECORDING > VOICE S-RATE
When you do recording with built-in mike, you can adjust
sampling frequency among 32, 44.1, 48KHz.
The higher frequency you choose, the better sound quality
you have.
MENU > RECORDING> VOICE BITRATE
When you do recording with built-in mike, you can
adjust bitrate among 32, 40, 48, 56, 64, 80, 96, 112,
128, 160, 192, 224, 256, 320KBPS.
The higher frequency you choose, the better sound
quality you have.
22
Menu
21
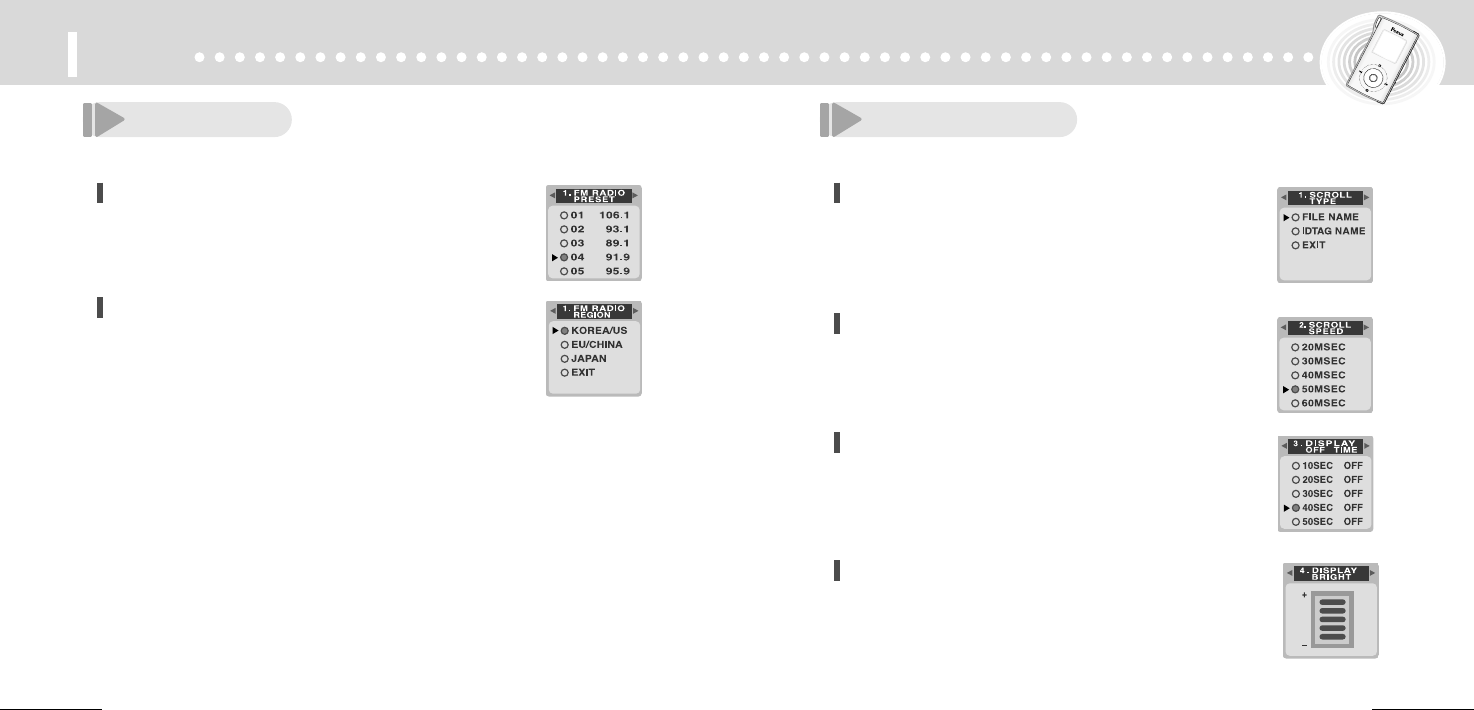
FM mode System mode
MENU > FM RADIO > FM RADIO PRESET
You can listen to saved channels.
MENU > FM RADIO > FM RADIO REGION
Frequency could increase or decrease in 0.1 or 0.05Mhz according
to FM Radio Regions.
●KOREA/US : 87.5MHz~108MHz
●EU/CHINA : 87.5MHz ~ 108MHz
●JAPAN : 76MHz ~ 108MHz
MENU > SYSTEM > SCROLL TYPE
This function is used to display fine name or IDTAG name
during playback.
●FILE NAME : Display file name
●IDTAG NAME : Display tag name
MENU > SYSTEM > SCROLL SPEED
You can adjust scroll speed of file or tag name
among 20 ~ 170 MSEC.
Higher number comes with higher speed.
MENU > SYSTEM > DISPLAY OFF TIME
You can adjust backlight time among 10 ~ 60 seconds.
Backlight is always on at the EVER ON mode.
MENU > SYSTEM > DISPLAY BRIGHT
You can adjust display brightness.
2423
Menu
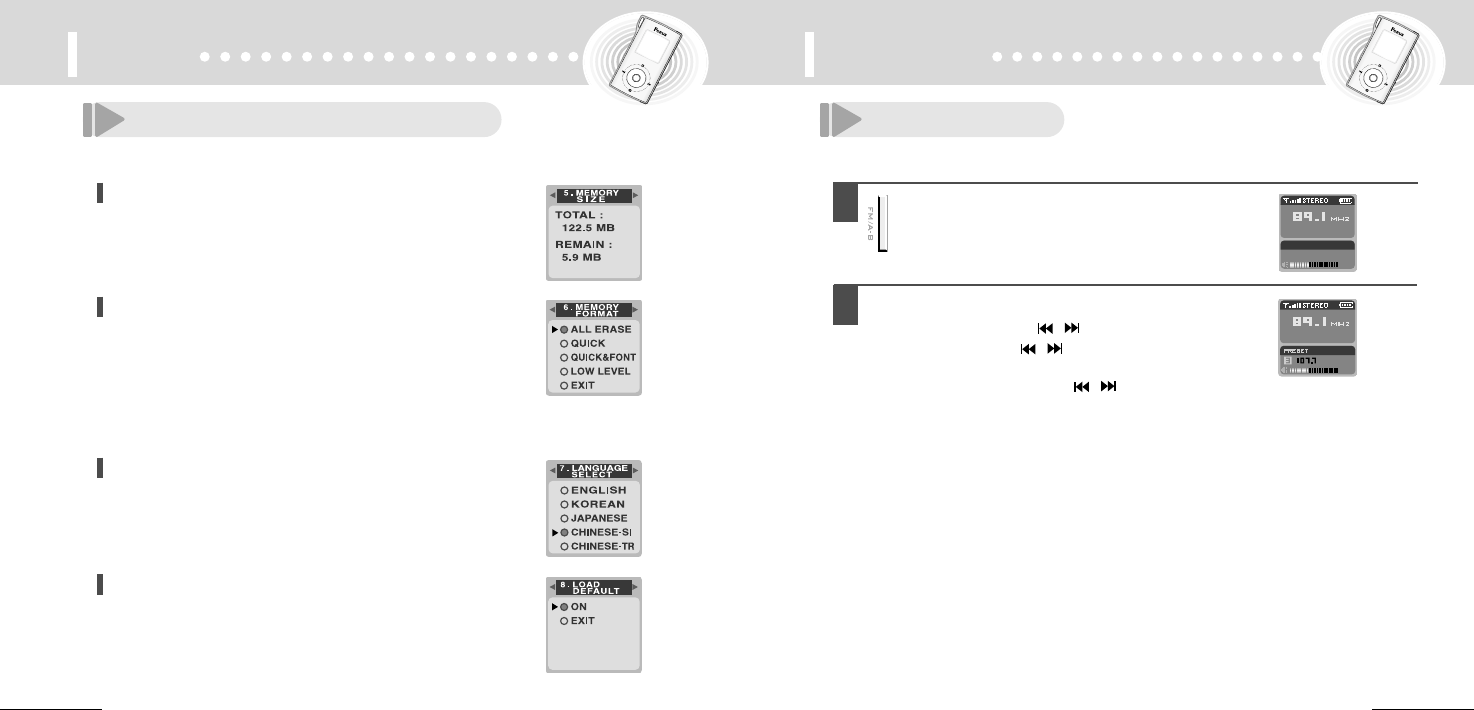
System mode(Continued) Listen to FM
MENU > SYSTEM > MEMORY SIZE
You can check remained memory capacity.
MENU > SYSTEM > MEMORY FORMAT
●All ERASE : Delete all files
●QUICK : Delete all files and return to the default.
●QUICK & FONT : Return to the default and initialize fonts.
●LOW LEVEL : Delete all files and return to the default. Check bad
sector of memory. This function takes long time and it is
recommended to execute this function after battery is charged fully.
MENU > SYSTEM > LANGUAGE SELECT
ENGLISH / KOREAN / JAPANESE / CHINESE-SI /
CHINESE-TR / RUSSIAN.
1
Press FM/Section repeat(A-B) button
over 3 seconds.
●To move into FM Radio.
2
Select channels
●Manual Search : Press button shortly.
●Auto Search : Press button long.
●Preset Search : Press Menu button shortly and select saved
channel with button.
MENU > SYSTEM > LOAD DEFAULT
●On : To initialize the default value at the moment of purchase.
FM radio
2625
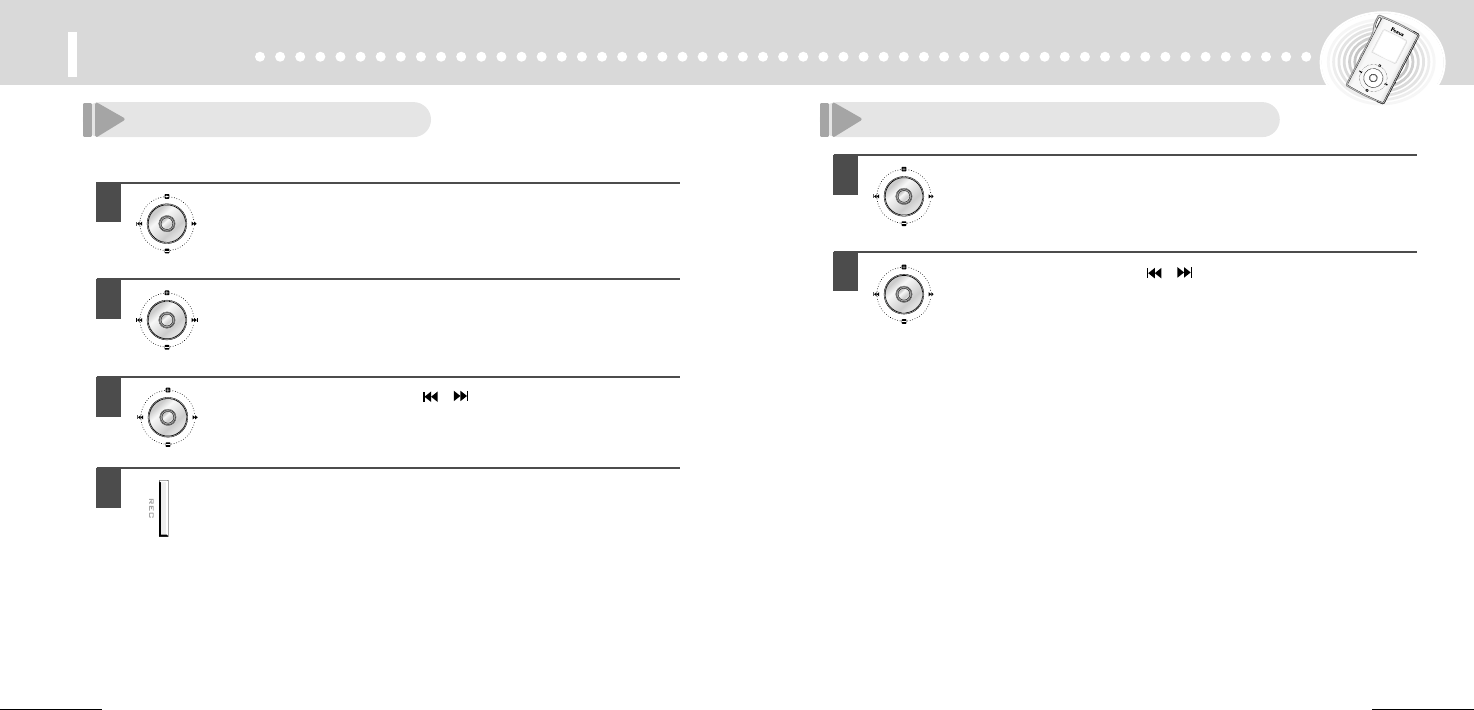
FM radio
1
Select channel.
2
Press Menu button shortly.
3
Select channel number with , button.
4
Then, press Rec/Stop button to save channel.
Preset FM channels
You can save channels up to 20.
1
Press Menu button shortly.
●To escape from preset mode, press Menu button shortly.
2
Select saved channel with , button.
Listening to preset channels
2827
FM radio
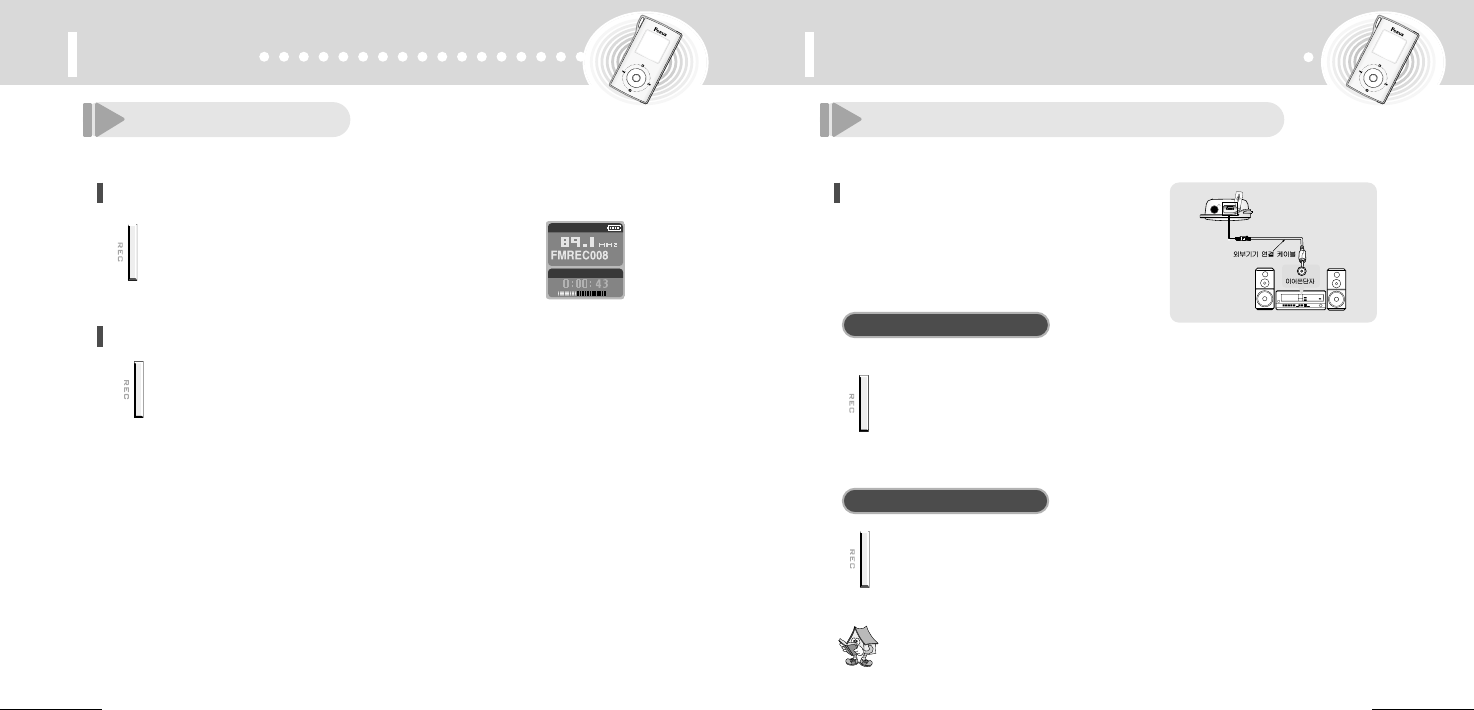
Connection to external device
While listening to FM, press Rec/Stop
button shortly.
Recording FM
To record FM radio
To stop FM recording
Press Rec/Stop button again and
recording stops.
Connecting to external audio
Recording from external device
Connect the audio cable to line in of this
main set and earphone jack of the
external device.
Before recording, set up line input on record select mode.
Press Rec/Stop button and Play button
of external audio at same time.
●Recording begins at the main set.
●Recording file is saved in the Line folder.
Press Rec/Stop button and Stop button of audio.
●You can adjust recording sound level with audio volume key.
To start recording
To stop recording

3029
Cautions
1. Do not drop the unit or give a shock to the unit. It may cause a
malfunction.
2. Do not leave the unit in such a location as described below.
- A place of very high temperature (60)
- A place subject to direct sunlight or near heat sources
- A car with its windows closed (especially in summer)
- A place subject to excessive moisture like a bathroom
- A place subject to excessive dust
3. Do not apply heavy forces to the LCD (Liquid Crystal Display)
unit, or it may cause breakage or abnormal display taking into
account the properties of liquid crystal.
4. If you place cards using magnetism such as cash cards or
transportation pass cards near to the speaker of the unit,
the magnetism may be transformed due to magnetic influence
so that the magnetic cards cannot be used any more.
5. Our company does not reimburse you for any loss from the use
of the MP3 Player or any demand of indemnity from a third party.
6. Message loss due to malfunctions, repairs, etc is not a
responsibility of ours. Please understand this.
For the unit
1. Do not repair, disassemble or modify this unit by yourself.
2. Do not use this unit in an airplane or place where the use of
electronic machines are prohibited.
3. Do not use during you are driving or walking. It may cause an
accident.
For your safety
3231
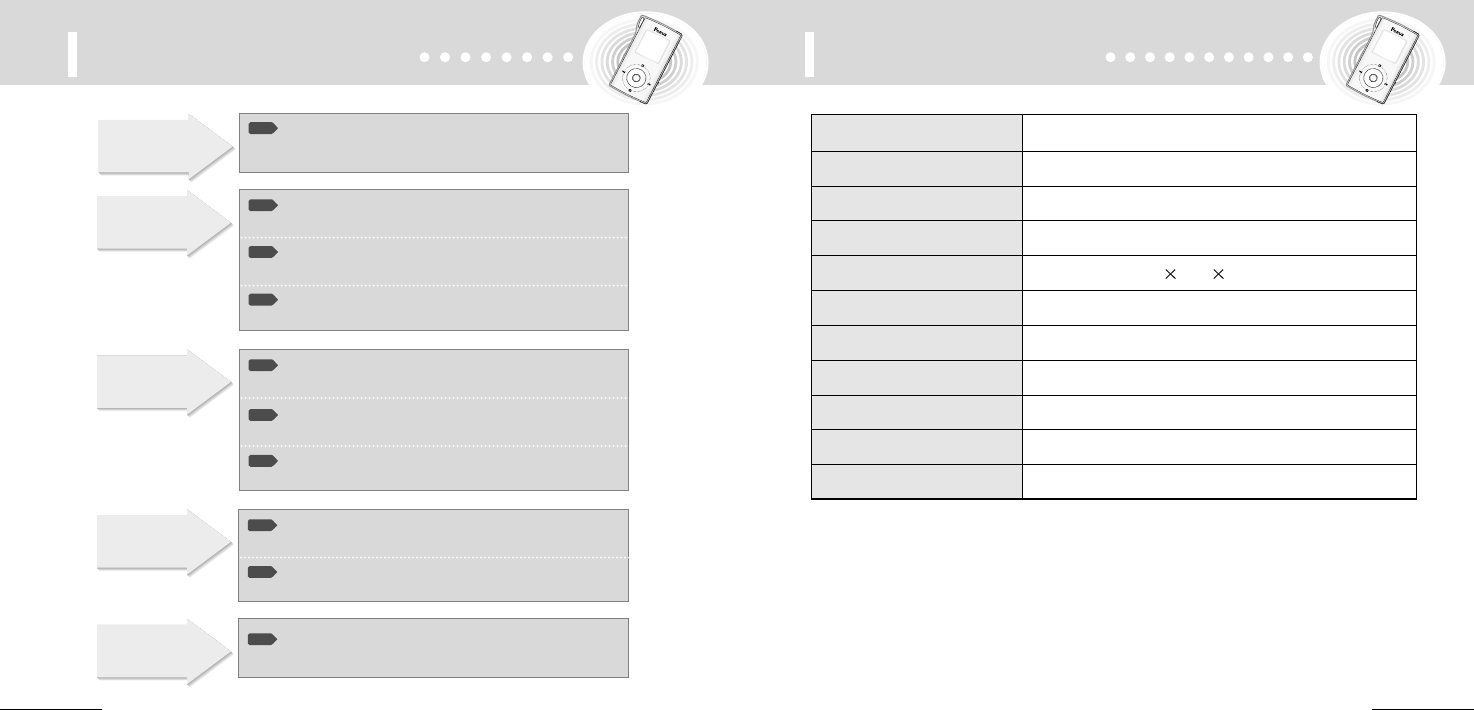
Trouble shooting Specifications
Is the battery's power
exhausted?
Check1
▶
Replace the battery with a
new one. (Refer to page 9)
LCD doesn't
work.
Is the device locked
by the Hold switch?
▶
Release the Hold switch.
Check1
Has the memory or file
numbers been used up?
▶
Delete unnecessary files.
(Refer to pages 14, 23)
Check2
Is the battery's power
exhausted?
▶
Replace the battery with a
new one.(Refer to page 9)
Check3
Recording
doesn't work.
Is the device locked
by the Hold switch?
▶
Release the Hold switch.
Check1
Could it be that there is
no voice file or MP3 file?
▶
Check the folder and file
numbers.
Check2
Playback
doesn't work.
Is the battery's power
exhausted?
▶
Replace the battery with a
new one.(Refer to page 9)
Check3
No sound comes
from the speaker.
Is the volume set to '0'?
▶
Adjust the volume.
(Refer to page 10.)
Check1
Is the earphone plugged
in properly?
▶
Plug the earphone in
properly.
Check2
No power or
malfunction
Press Reset button and press Power ON button
again.
Memory Capacity Internal/128MB/256MB/512MB/1GB
Voltage 3.7V
Battery LI-POLYMER
LCD Graphic OLED(6 Line 96×96 65K color)
Size (WHD)/Weight 35.8 67.3 16mm / 35g
Case ABS
File Transfer Rate 25Mbps(USB 2.0)
Voice Recording MPEG1, Layer-3
Noise 90dB
Earphone Output 10mW
Output Frequency Range 87.5MHz ~ 108.0MHz
Check1
Memo
3433