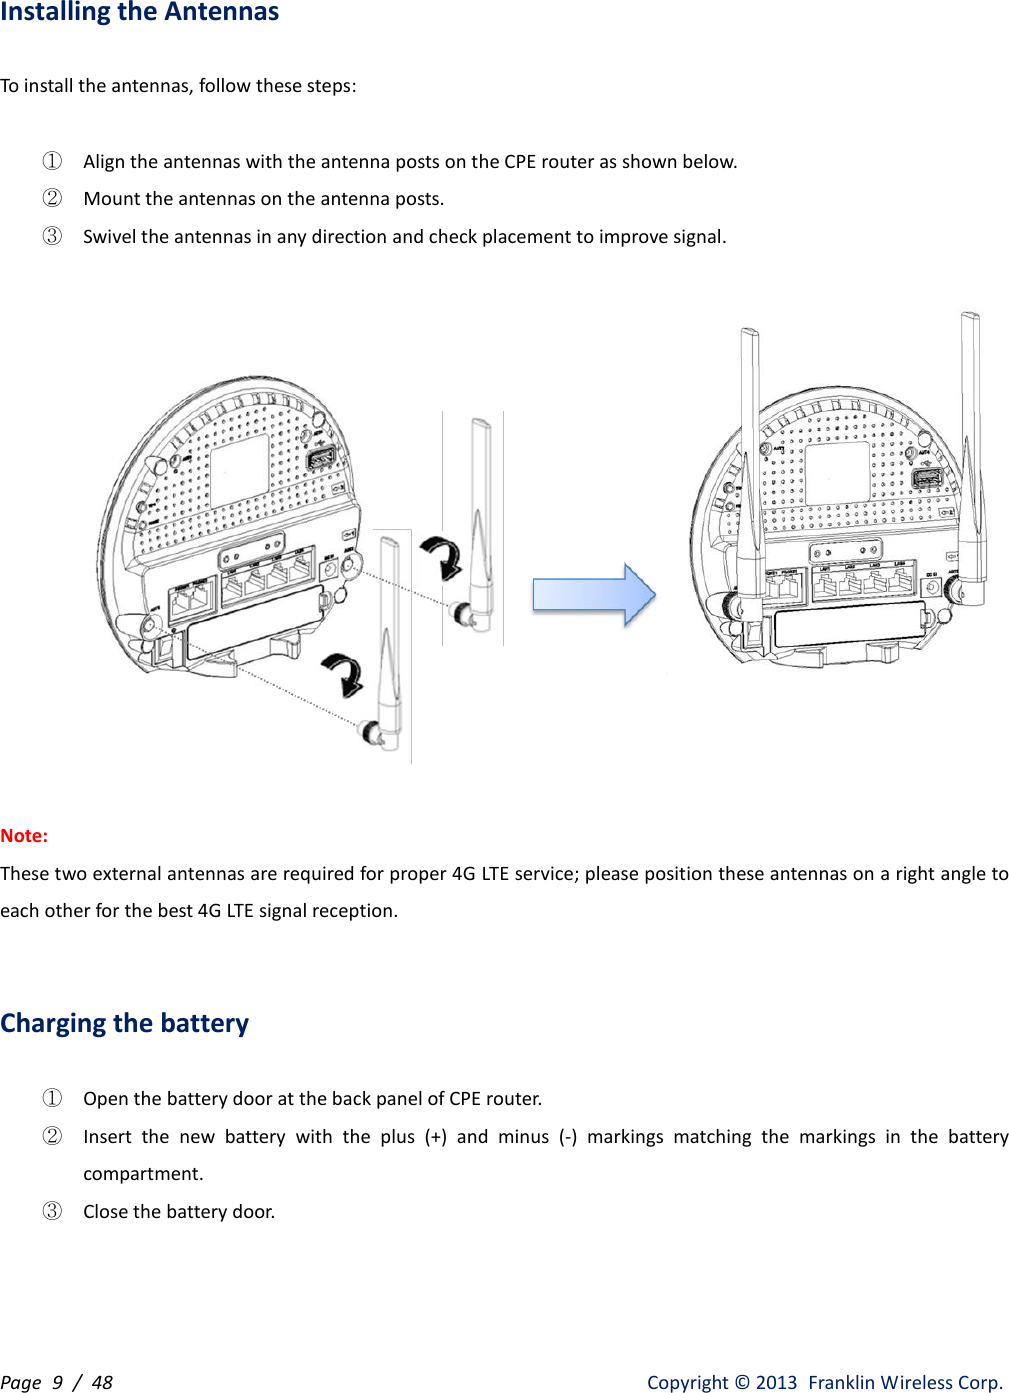
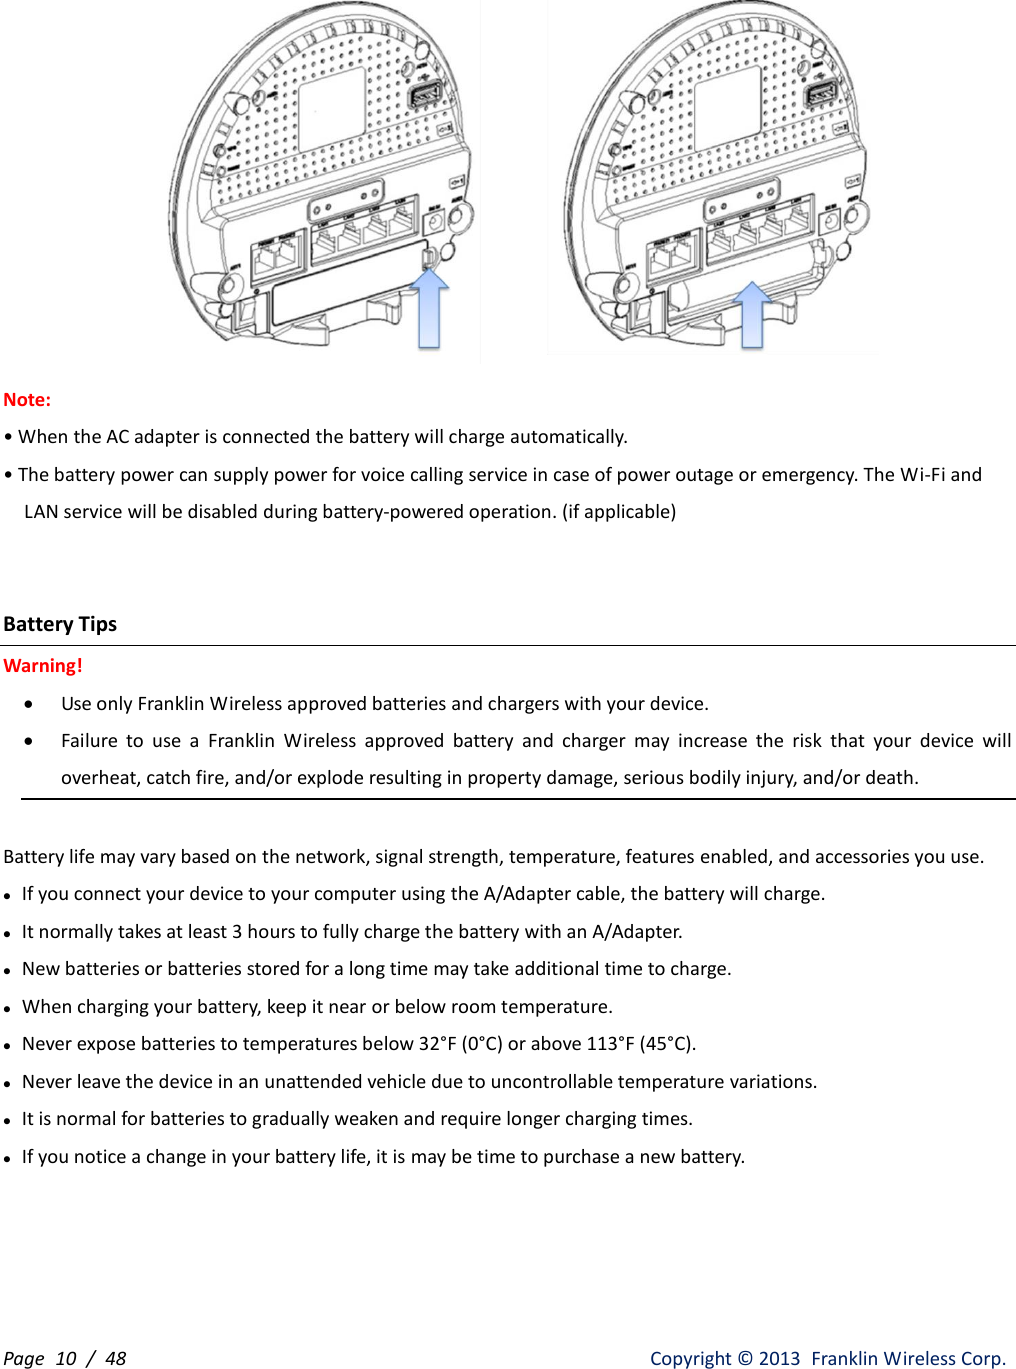
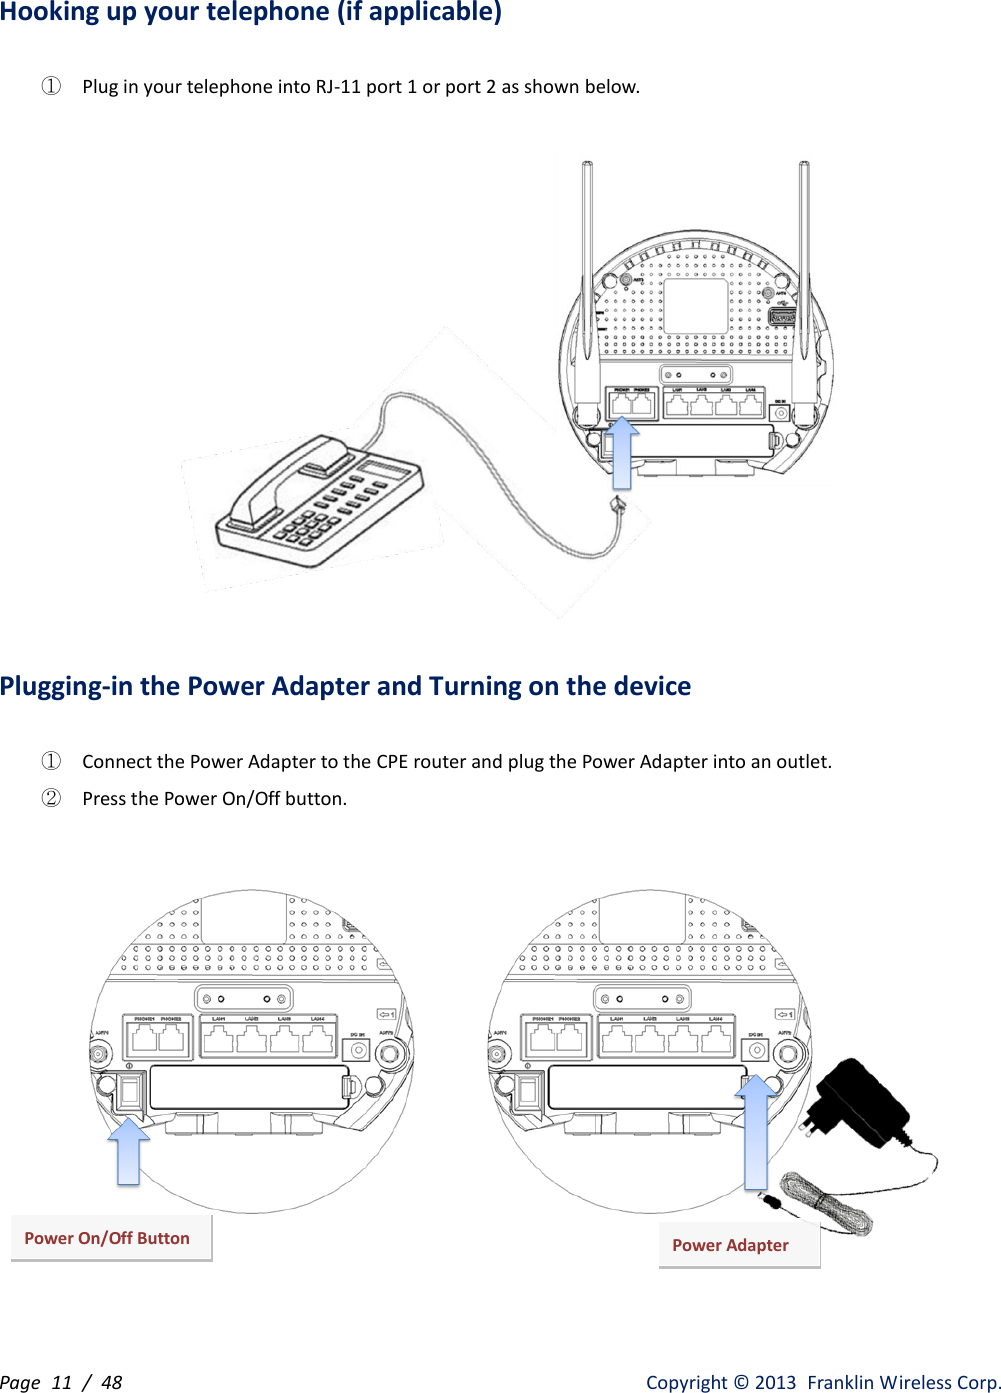
Franklin Technology C774 CPE Router User Manual Table of Contents
Franklin Technology Inc. CPE Router Table of Contents
UserManual.wiki
>
Franklin Technology
>
C774 User Manual
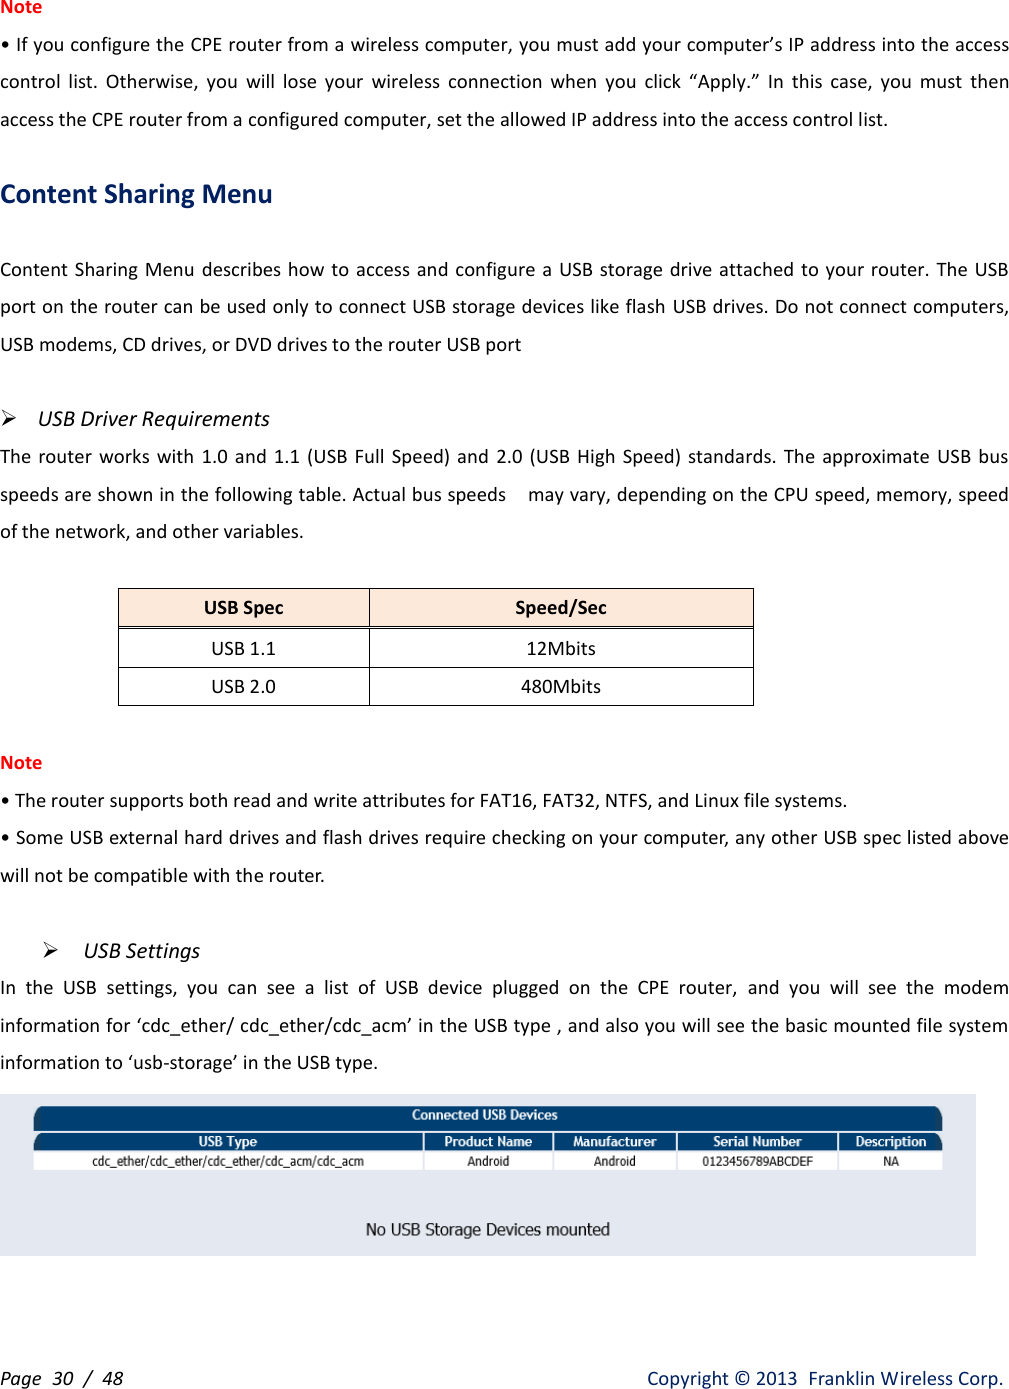
Users Manual
Navigation menu
Upload a User Manual
Namespaces
Wiki Guide
HTML
PDF
Info
Views
User Manual
Discussion / Help
Navigation
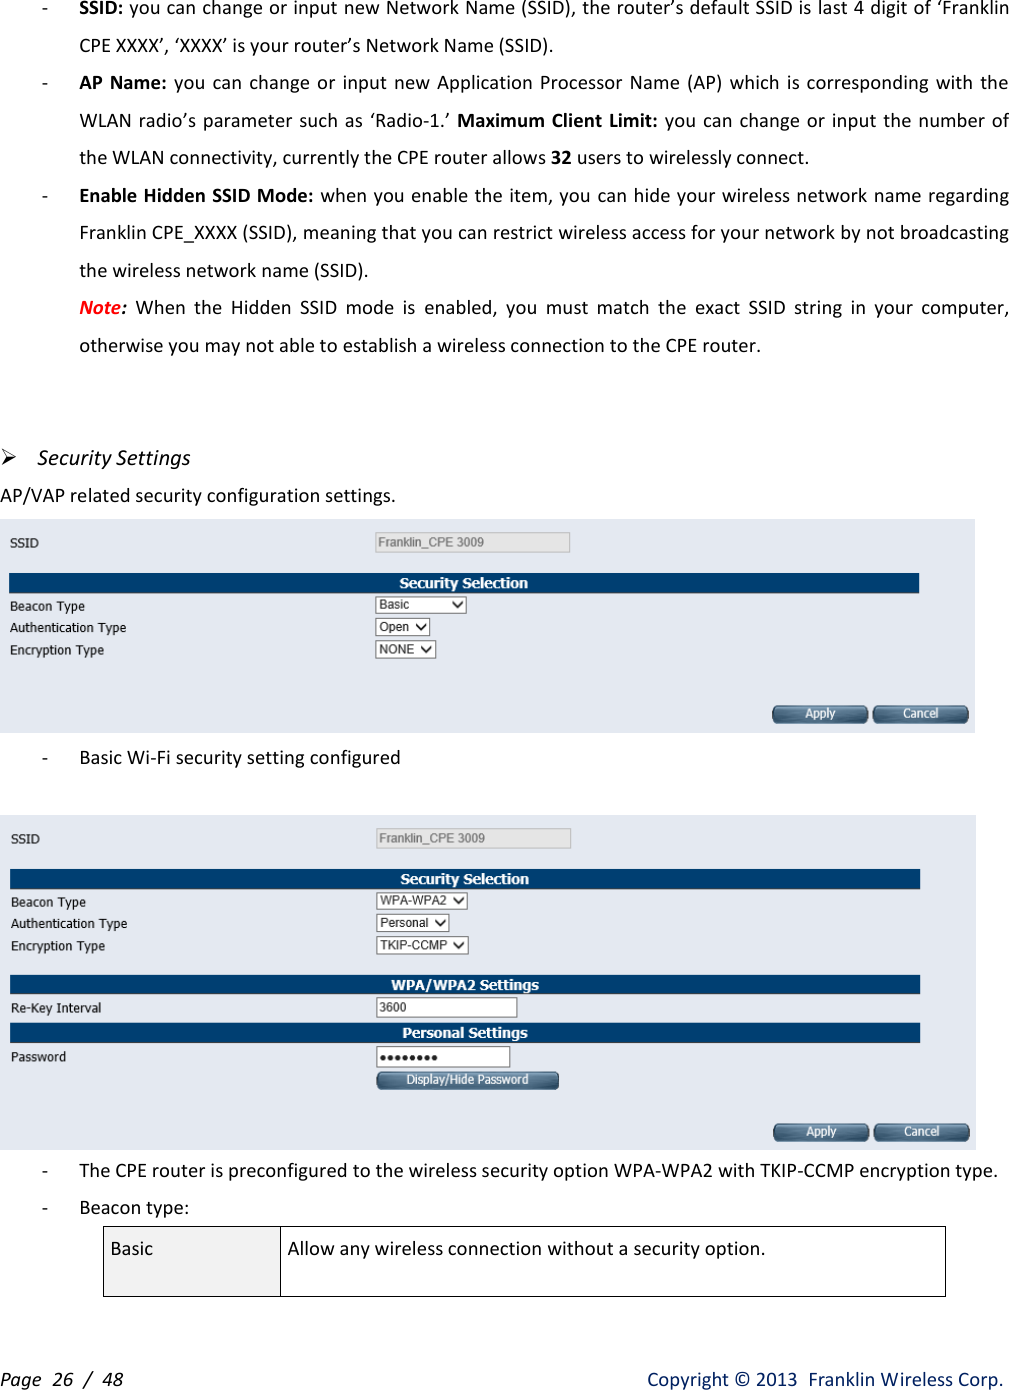
![Page 6 / 48 Copyright © 2013 Franklin Wireless Corp. Service Status Indicator (LED) Description No LED Indicator Description Remark LED Color Solid/Blinking 1 Power No Light - Device is powered off Solid Low battery(battery bar level = 1) Battery is critically low. Please connect to a power source. Blinking External power removed Battery power will be consumed; please connect to ower source. Solid Low battery(battery bar level = 2) Solid Battery bar level = 3+ bars Indicator is green when fully charged. 2 LTE No Light - Device is powered off Solid No service or Inactive Solid Weak Signal LTE service is available Green Solid Good Signal 3 Wi-Fi No light - Radio off Blinking In WPS operation Used for Wi-Fi pairing. Solid Radio on 4 LAN[1..4] No light - No connected LAN users Solid Connected User LEDs indicate whether users 1-4 are active. 5 Voice Mail (if applicable) No light - No voice mail Where supported Solid Voice mail is available Where supported 6 Voice Call (if applicable) No light - Device is powered off Solid No service or Inactive Solid Weak Signal Voice service is available Blinking Conversation in progress Solid Good Signal Blinking Conversational progress](https://usermanual.wiki/Franklin-Technology/C774/User-Guide-2460205-Page-6.png)


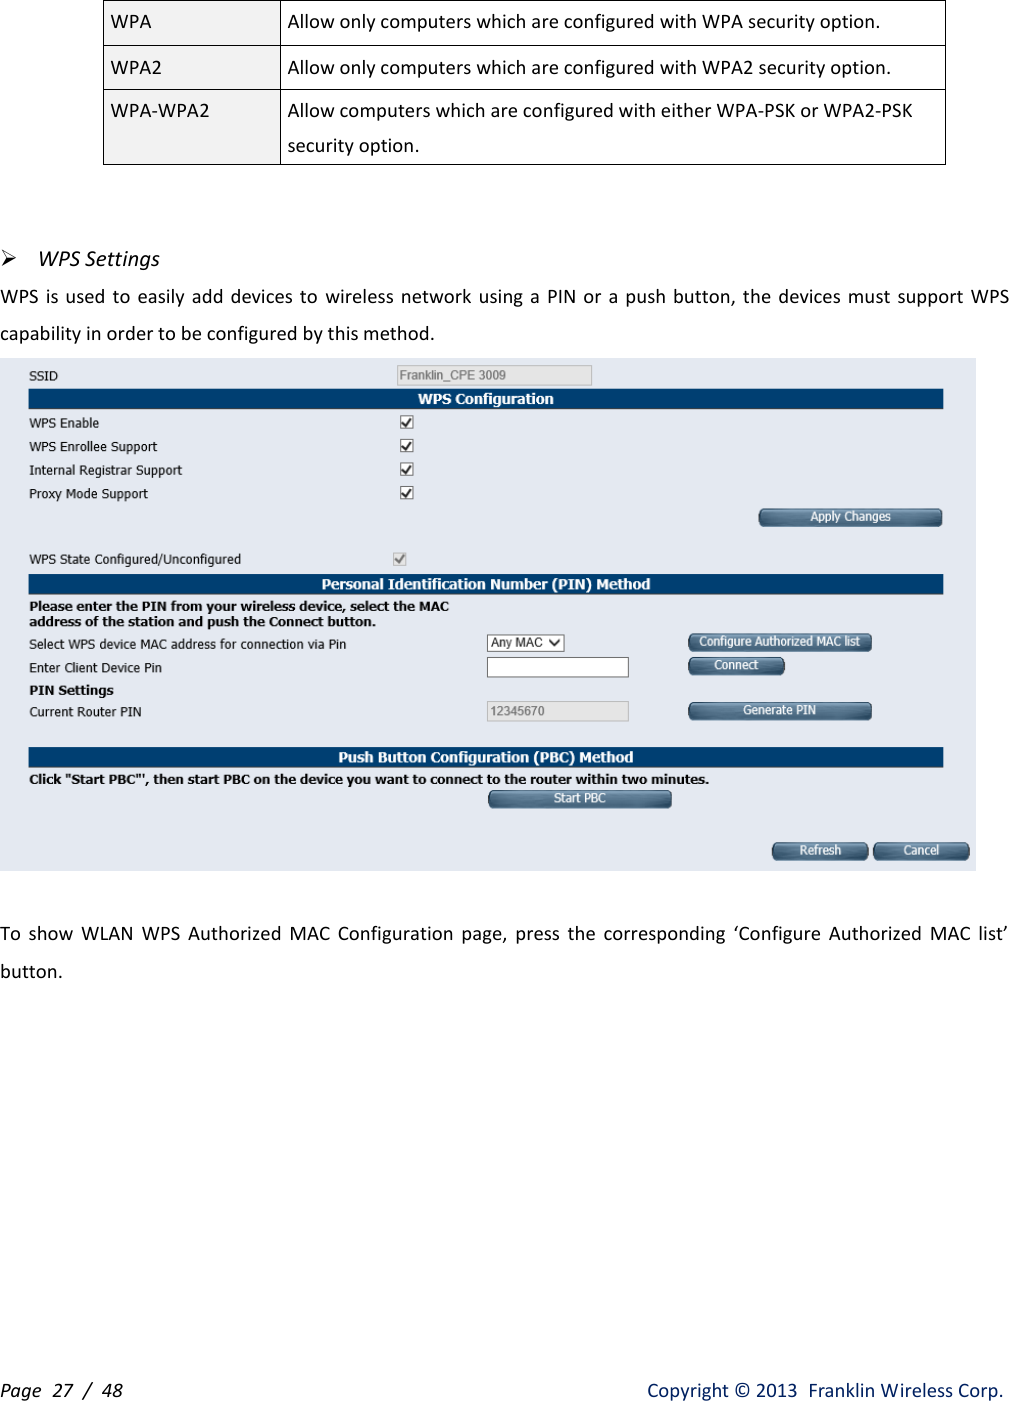
![Page 17 / 48 Copyright © 2013 Franklin Wireless Corp. Device Specifications Feature Description Remark Size (W,D,H) 137mm(H) x 153.8mm(W) x 34.5mm(D) (5.39(H) x 6.06(W) x 1.36(D) (inch) Weight About 283g (9.98 oz) Operating Temperature 0◦C to 60◦C Humidity 65 % Storage Temperature -10 ◦C to 85 ◦C Operating time (Battery) 40 minutes (Voice Call Service only) Battery and charging Li-ion Polymer 1050mAh, 3.7V. Rechargeable Power AC Power Adapter 12V/ 2A LED Indicators Power / LAN [1-4] / Voice / Voice Mail/ Wi-Fi/ LTE Wireless WAN (WWAN) 4G LTE(B13 or B25 / B12), 3G eHRPD (BC0/BC1) Receiver diversity (LTE MIMO and 3G Diversity support) LAN Ethernet Port (RJ-45) x 4EA Voice Call 2G 1xRTT (BC0/BC1) (if applicable) Telephone Port (RJ-11) x 2EA No Fax WLAN IEEE 802.11 b/g/n (2.4GHz) Data Speed 4G LTE 100Mbps downlink / 50Mbps uplink 3GeHRPD 3.1Mbps downlink / 1.8Mbps uplink WLAN 11Mbps/ 54Mbps/ 150Mbps (IEEE 801.11 b/g/n) LAN 10BASE-T / 100BASE-T WLAN & LAN features DHCP server, DDNS, Wireless Mac filtering, Network sharing (Samba) WLAN Security Pre-configurable security (WPA/WPA2PSK) USIM (UICC) Removable UICC Card Support Desktop and Wall mount Supported LTE Antenna LTE Primary & Secondary Antenna Voice Service Antenna Integrated Antenna](https://usermanual.wiki/Franklin-Technology/C774/User-Guide-2460205-Page-17.png)

![Page 32 / 48 Copyright © 2013 Franklin Wireless Corp. - Input a sharing name into the ‘File Share Name’ field like ‘MyShare.’ - Input a folder path string into the ‘Folder Path’ field to ‘/mnt/usb’ which is described on the USB Settings item. - Choose the Access Level on your policy for Read Only or Read-Write. - Select a User which is configured on the User Management item. After finishing the above procedures, you will see the shared folder information. Note • In order to see the mounted folder base on your laptop computer, which is shared by CPE’s SAMBA Server, please see the below steps. - Open Windows Explorer. - Type the CPE Router’s IP Address ‘\\192.168.1.1\[folder Name like MyShare]’ into Windows Explorer. - You will see the shared folder such as ‘MyShare’ • If you type just the router IP address without a shared folder name like ‘\\192.168.1.1’, the network access time on the Windows Explorer will take a long time to find the shared folder. - Open the Command Prompt on your Windows Operating System. - Try typing the router IP address with the shared folder name, for example, “C:\ net use m: \\192.168.1.1\[folder name like MyShare]’](https://usermanual.wiki/Franklin-Technology/C774/User-Guide-2460205-Page-32.png)