Freedom Zed Desk (rev2)p.1050
2014-07-05
: Freedom Zed-Desk zed-desk freedom pdf
Open the PDF directly: View PDF ![]() .
.
Page Count: 2
Before you begin to assemble your piece of furniture, please check to ensure that all parts have been supplied.
Follow instructions closely as deiation from them may void your warrantly and present a possible safety risk.
It is recommended that assembly is done on a soft surface like carpet to avoid any damage.
If you experience any problems with your new purchase please phone our Customer Service Hotline 1800 807 416
(Customers outside Australia should contact their closest Freedom store.)
Care Information:
Peroidically check and re-tighten any fasteners. Wipe down all surfaces surfaces with weekly with a clean cloth.
Do not clean any harsh abrasives or chemicals.
Clean Galss using a recognised glass cleaning product. Avoid any overspray. Although Tempered Glass is stronger than
normal galss it must still be treated with care.
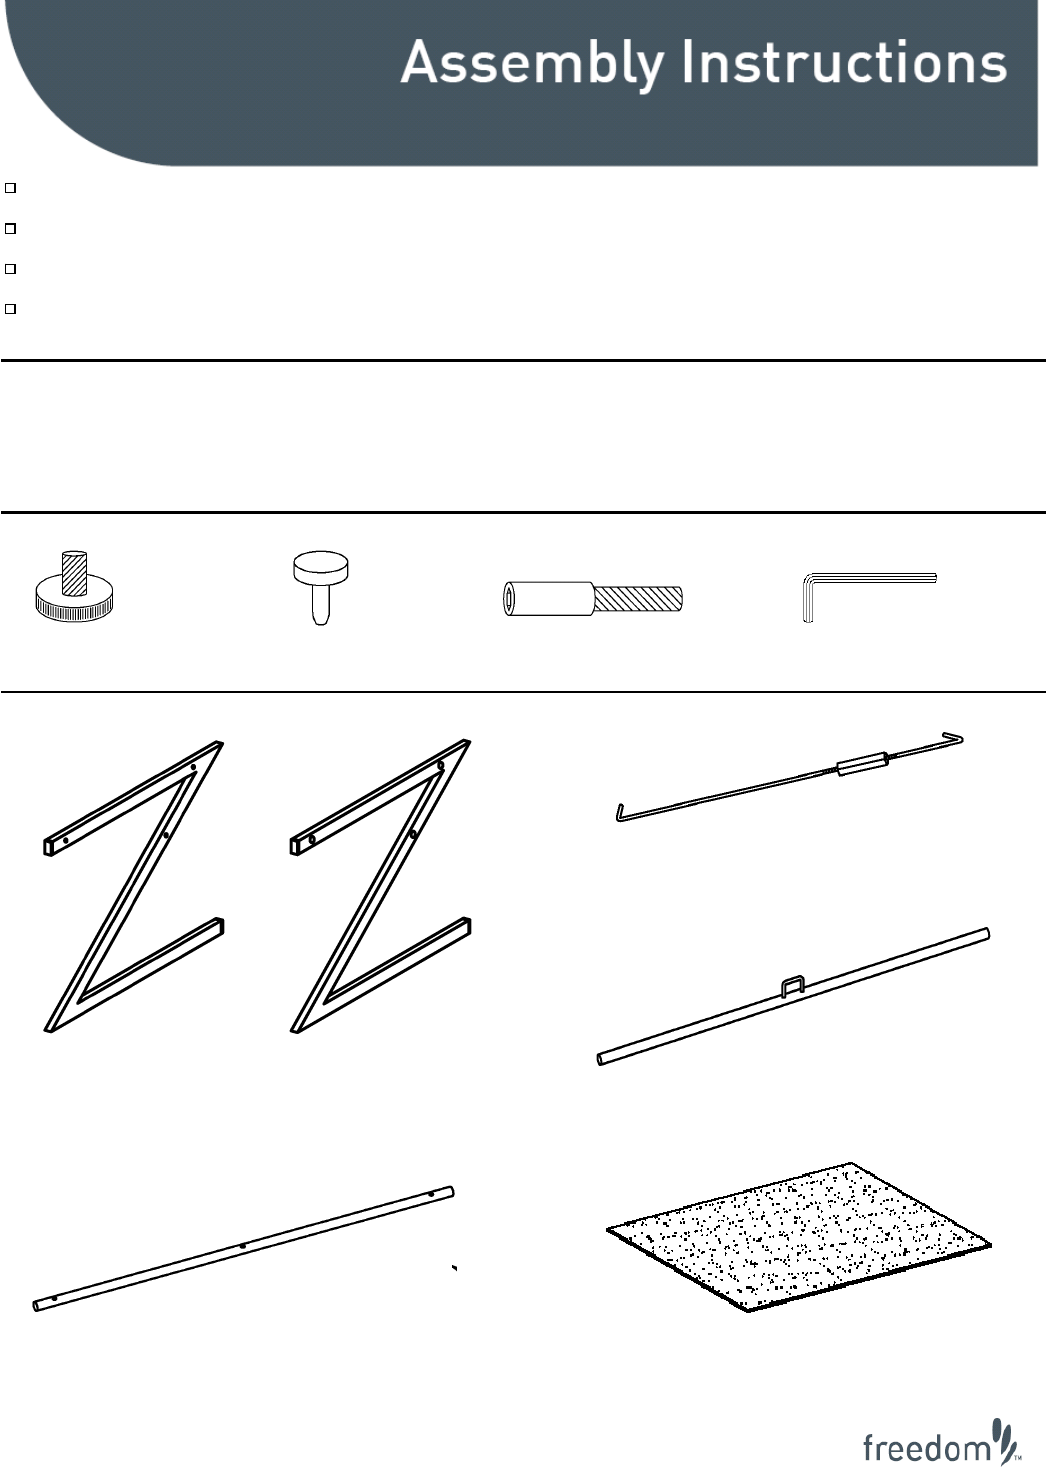
Hardware
4 X Part A
6 X Part B 6 X Part C 1 X Part D
Parts
2 X Part H
1 X Part E (Left Side) 1 X Part F (Right Side) 1 X Part I
2 X Part G
1 X Part J
Page 1
Zed Desk
Finished
:
Page 2
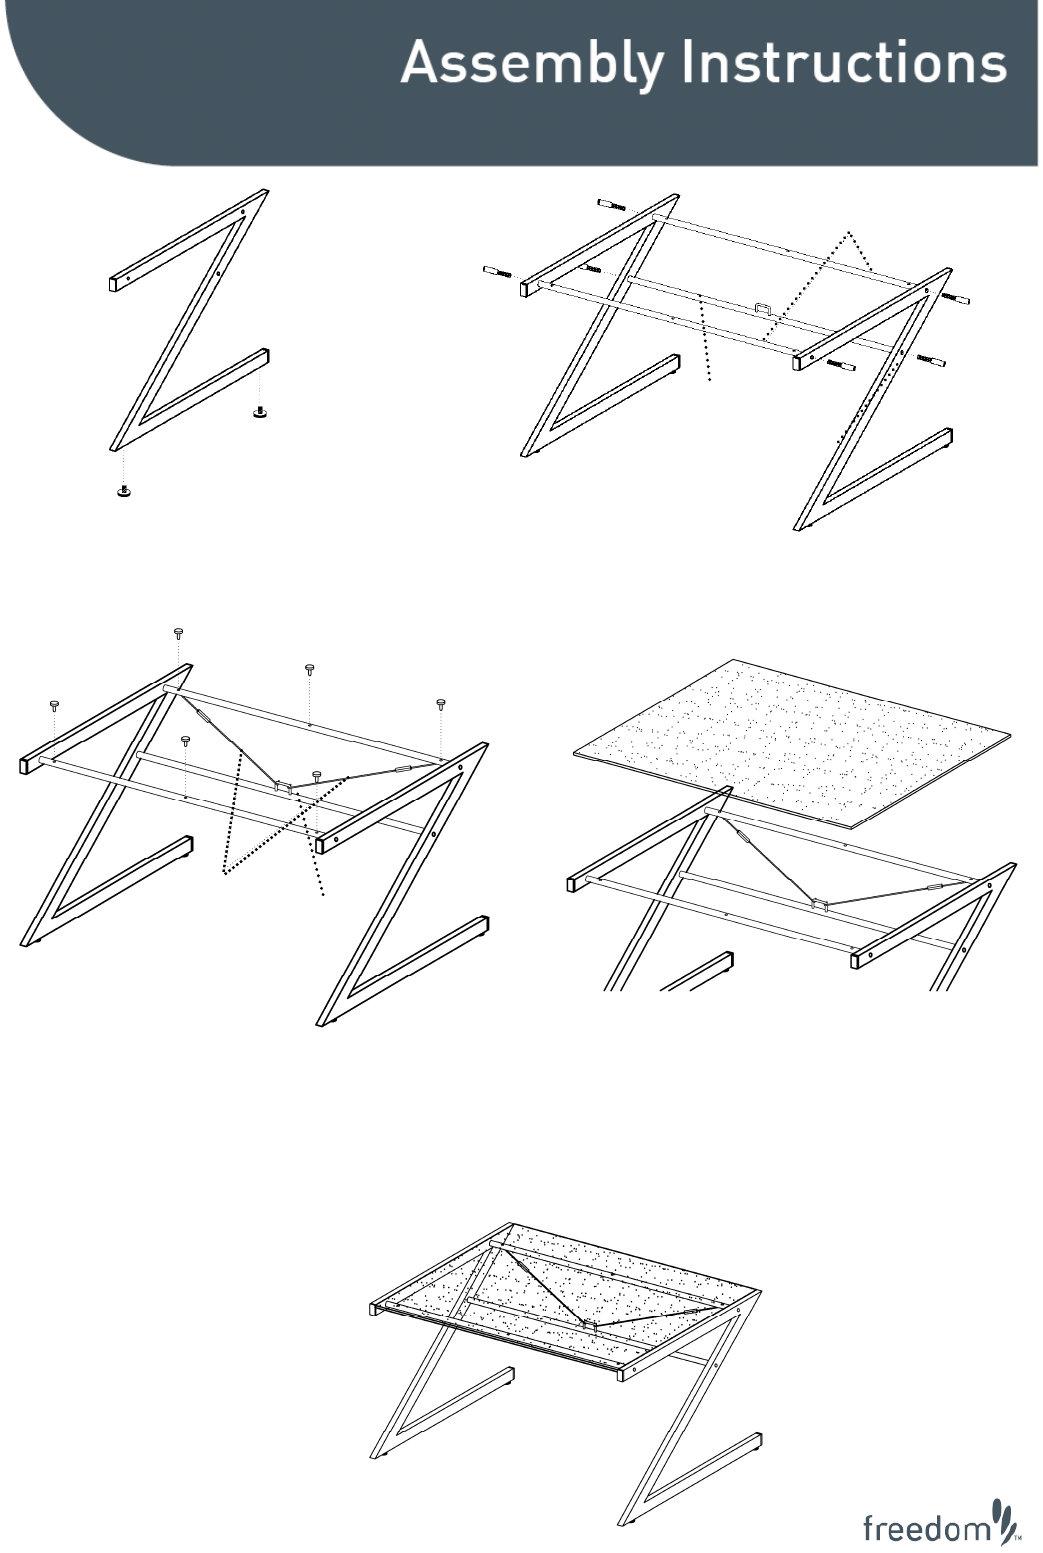
Step 1.
-Screw the 4 Part A into the bottom of the
Left and Right sides.
Part C
Part G
Part F (Right Side)
Part E (Left Side)
Part I
Step 2.
-Using the Part C attach the Part I, and
Part G to the Left and Right sides.
BIG HOLD FCAE outside
Note: Remove any plastic caps that are
on the rods before assembly.
Part J
Part I
Part H (Centre piece)
Part B
Step 4.
-Carefully locate Part J onto the Part B.
-Once all pieces are together frimlytighten all
screws Leave desk by Part A.
-Hook Part H onto Part I.
By screwing the Part H (Centre piece), slot
the hook into Part G holes.
Tighten the Part H by twisting the Part H
(centre piece).
-Insert the 6 Part C into holeson Part G.
Zed Desk
