Fu Hsing A28WG014 Electronic Keypad Deadbolt with Remote User Manual
Taiwan Fu Hsing Industrial Co., Ltd. Electronic Keypad Deadbolt with Remote Users Manual
Fu Hsing >
Users Manual
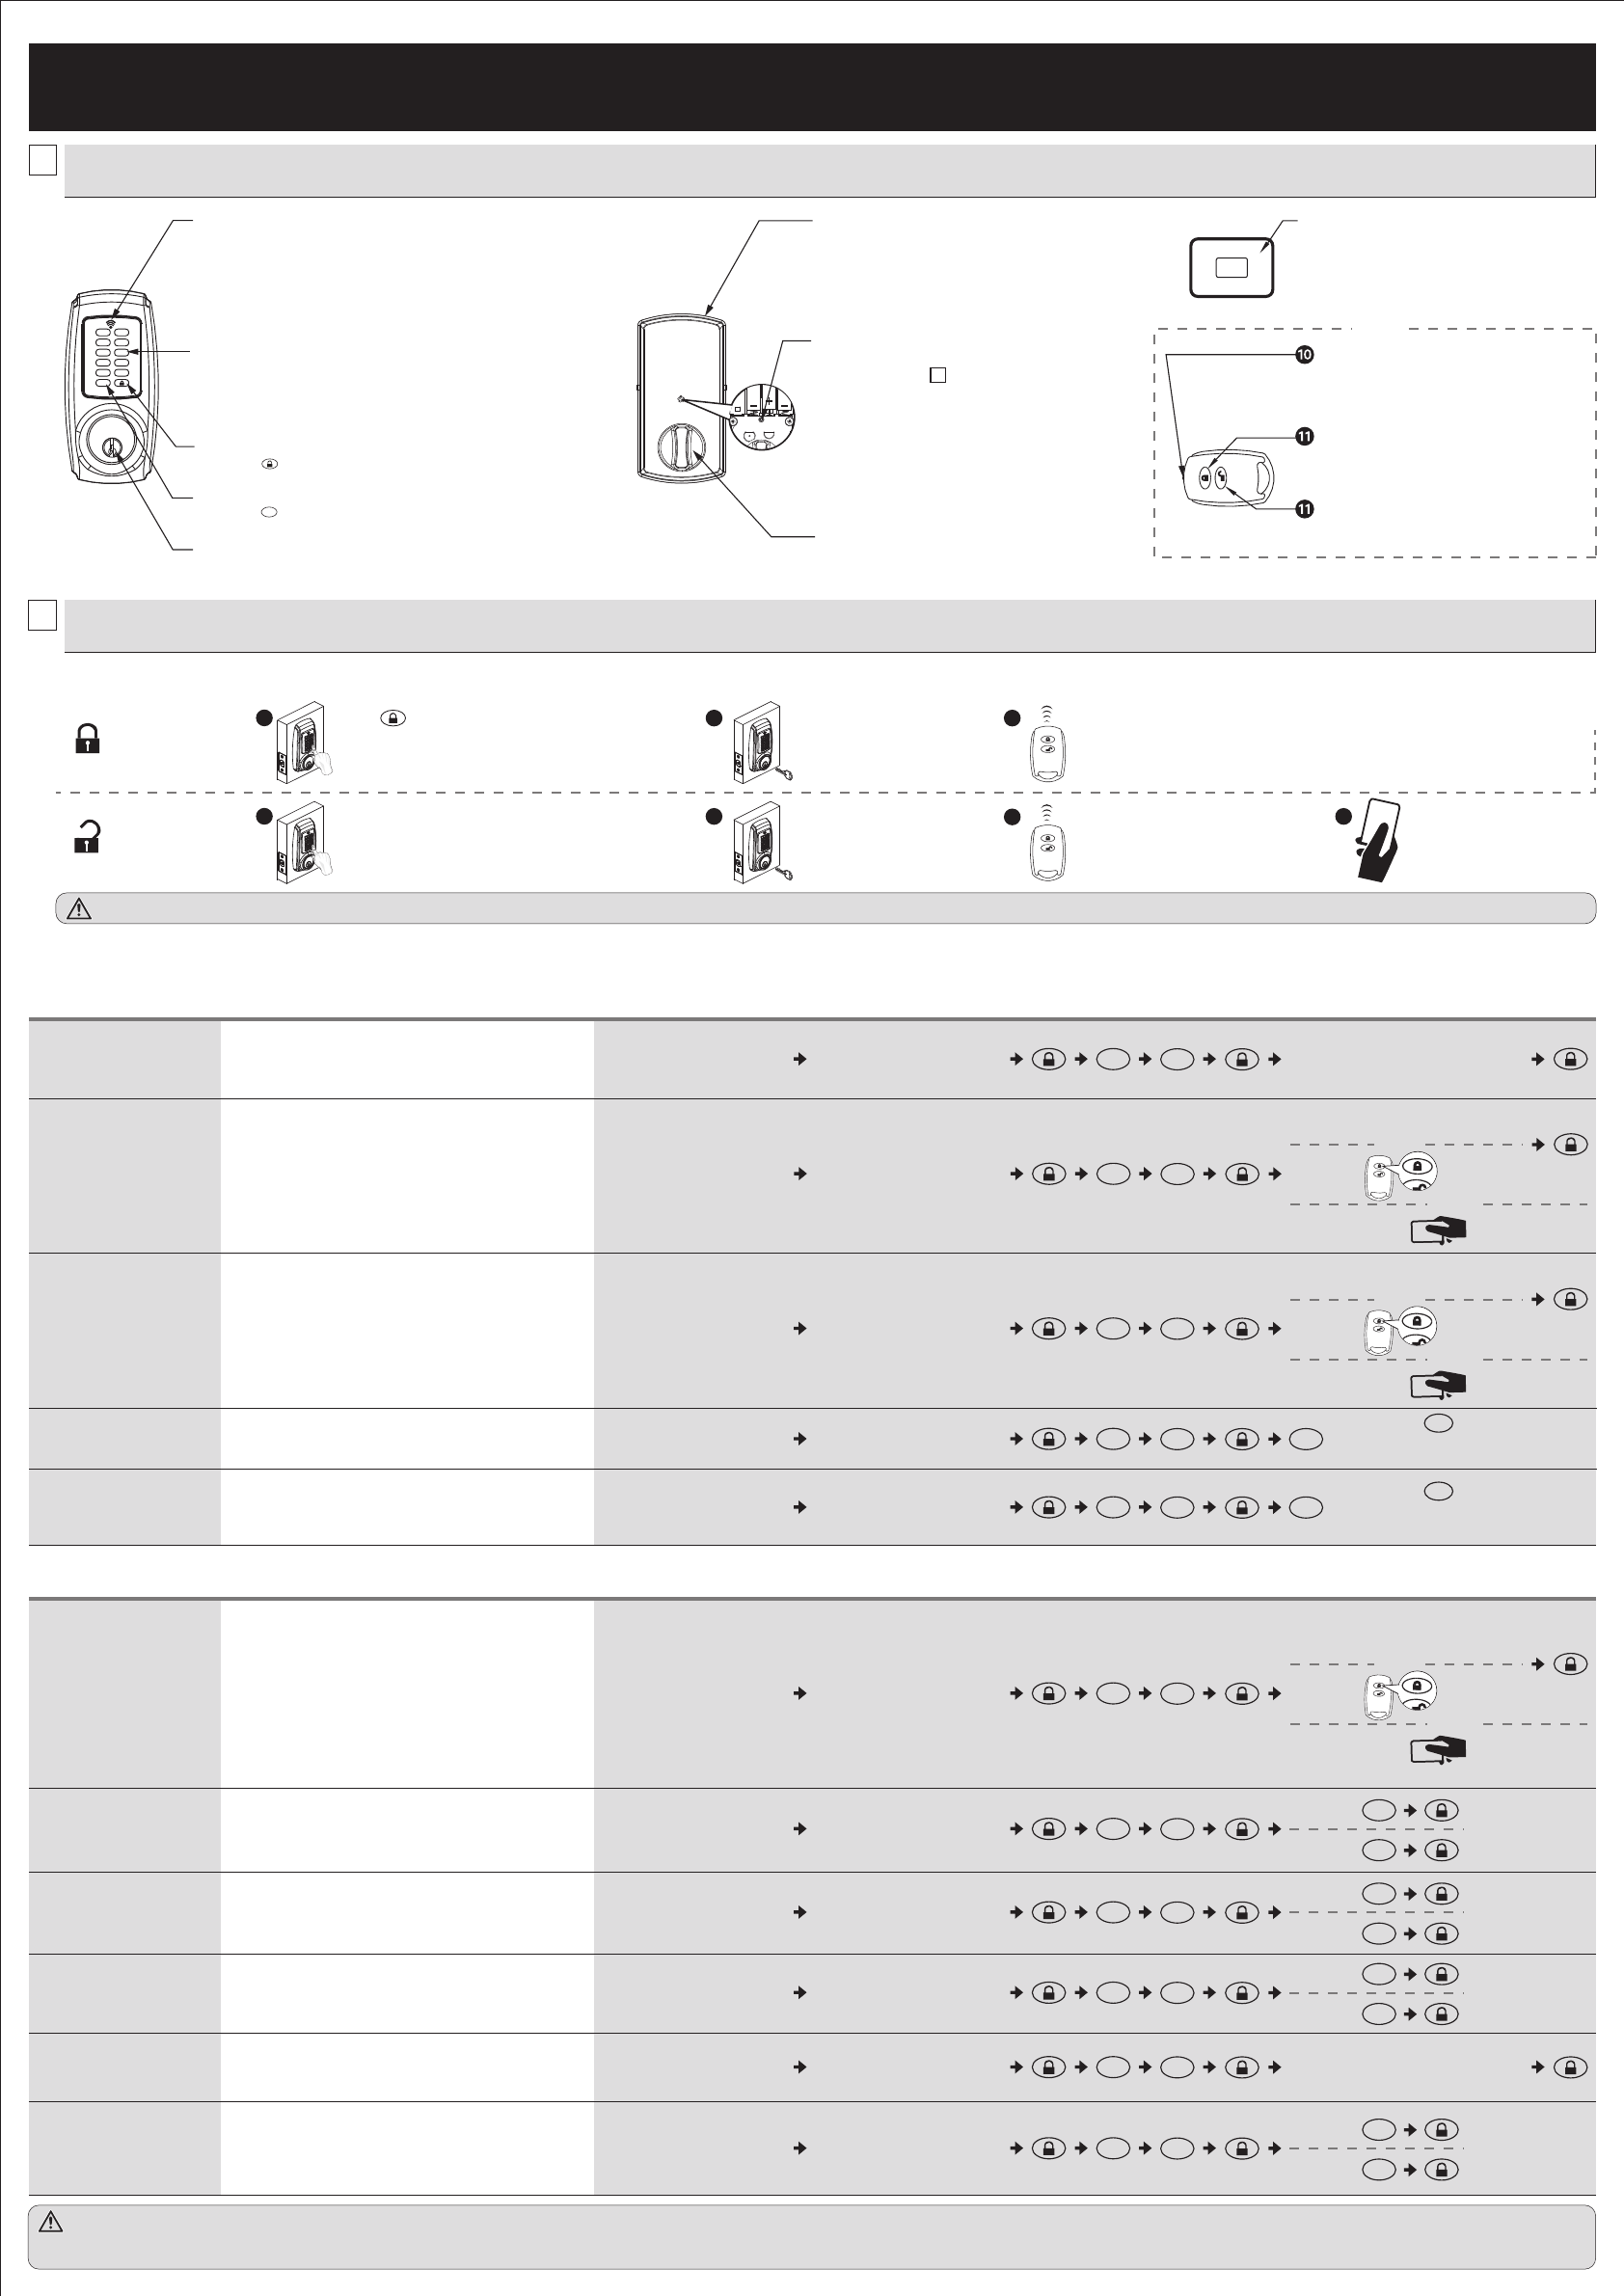
1. Used to lock the lockset .
1. Protects the batteries from unexpected damage.
KEY OVERRIDE
LED INDICATOR
KEYPAD
LOCK BUTTON
CANCEL BUTTON
1
2
3
4
5
6BATTERY COVER
8
1 2
3 4
5 6
7 8
9 0
C
LED INDICATOR
LOCK BUTTON
UNLOCK BUTTON
7
1. Green light: Code entered is valid.
2. Red light: Code entered is invalid / Under setup mode.
3. Yellow light: Low battery warning.
*All batteries should be replaced if yellow light flashes.
1. Unlocks the lockset by entering a valid user code.
2.
Programs the lockset by entering a valid programming code in the programming mode.
1. Press button to lock the lockset.
1. Press button to cancel any input.
C
[SET] BUTTON
INTERIOR THUMBTURN
CARD
RFID CARD
9
1. Used to unlock the lockset .
G00-KPD0LAC13 Rev. 18/04-00
USER GUIDE
1OVERVIEW OF THE LOCKSET
1HOW TO LOCK / UNLOCK THE LOCKSET
2HOW TO LOCK / UNLOCK / PROGRAM THE LOCKSET
The screen is temporarily disabled after 4 consecutive incorrect entries.
2HOW TO PROGRAM THE LOCKSET
・The lockset will exit the programming mode and resume to the stand-by status if no input is made in 10 seconds.
・3 Beeps means something was entered incorrectly. Please redo the step again.
Change Programming Code
Add a User Code(S)
・Programming Code can be used to program or unlock the lockset.
・The default Programming Code is “123456”.
・Add one or more User Codes / Card / Remote Control.
・
User Code
capacity
: 10 sets (4-6 digits) / Card / Remote Control
capacity : 10 sets.
Delete Individual User / Single-
use User Code(S)
・Delete INDIVIDUAL User Code / Card / Remote Control.
Delete All RFID Cards / Remote
Controls At Once
・Delete ALL RFID Cards / Remote Controls.
Button Sound
Auto-lock Mode
・Default Button Sound : on .
・Default Auto-lock delay timer : 10 seconds.
・Auto-lock range : 10 – 99 seconds.
Auto-lock Delay Timer
Vacation Mode ・Enable Vacation Mode willtemporarily disable ALL User Codes.
Only Programming Code or mechanical key can open the lock.
Add Single-use User Code(S) /
Card / Remote Control
・
The Single-use User Code / Card / Remote Control can be used for only
one
successful entry and will be Invalid when the lockset is locked again.
・
T
he Auto-lock should be activated, so the door is locked when the
single-use user leaves the building.
・
Single-use User Code capacity: 5 sets (4 digits). / Card / Remote Control : 10 sets.
・Default Auto-lock Mode : off .
Double Authorization Mode ・When Double Authorization Mode is turned on, both User Code and
RFID Card / Remote Control, must be authenticated to unlock the
lockset.
BASIC SETTINGS
ADVANCED SETTINGS
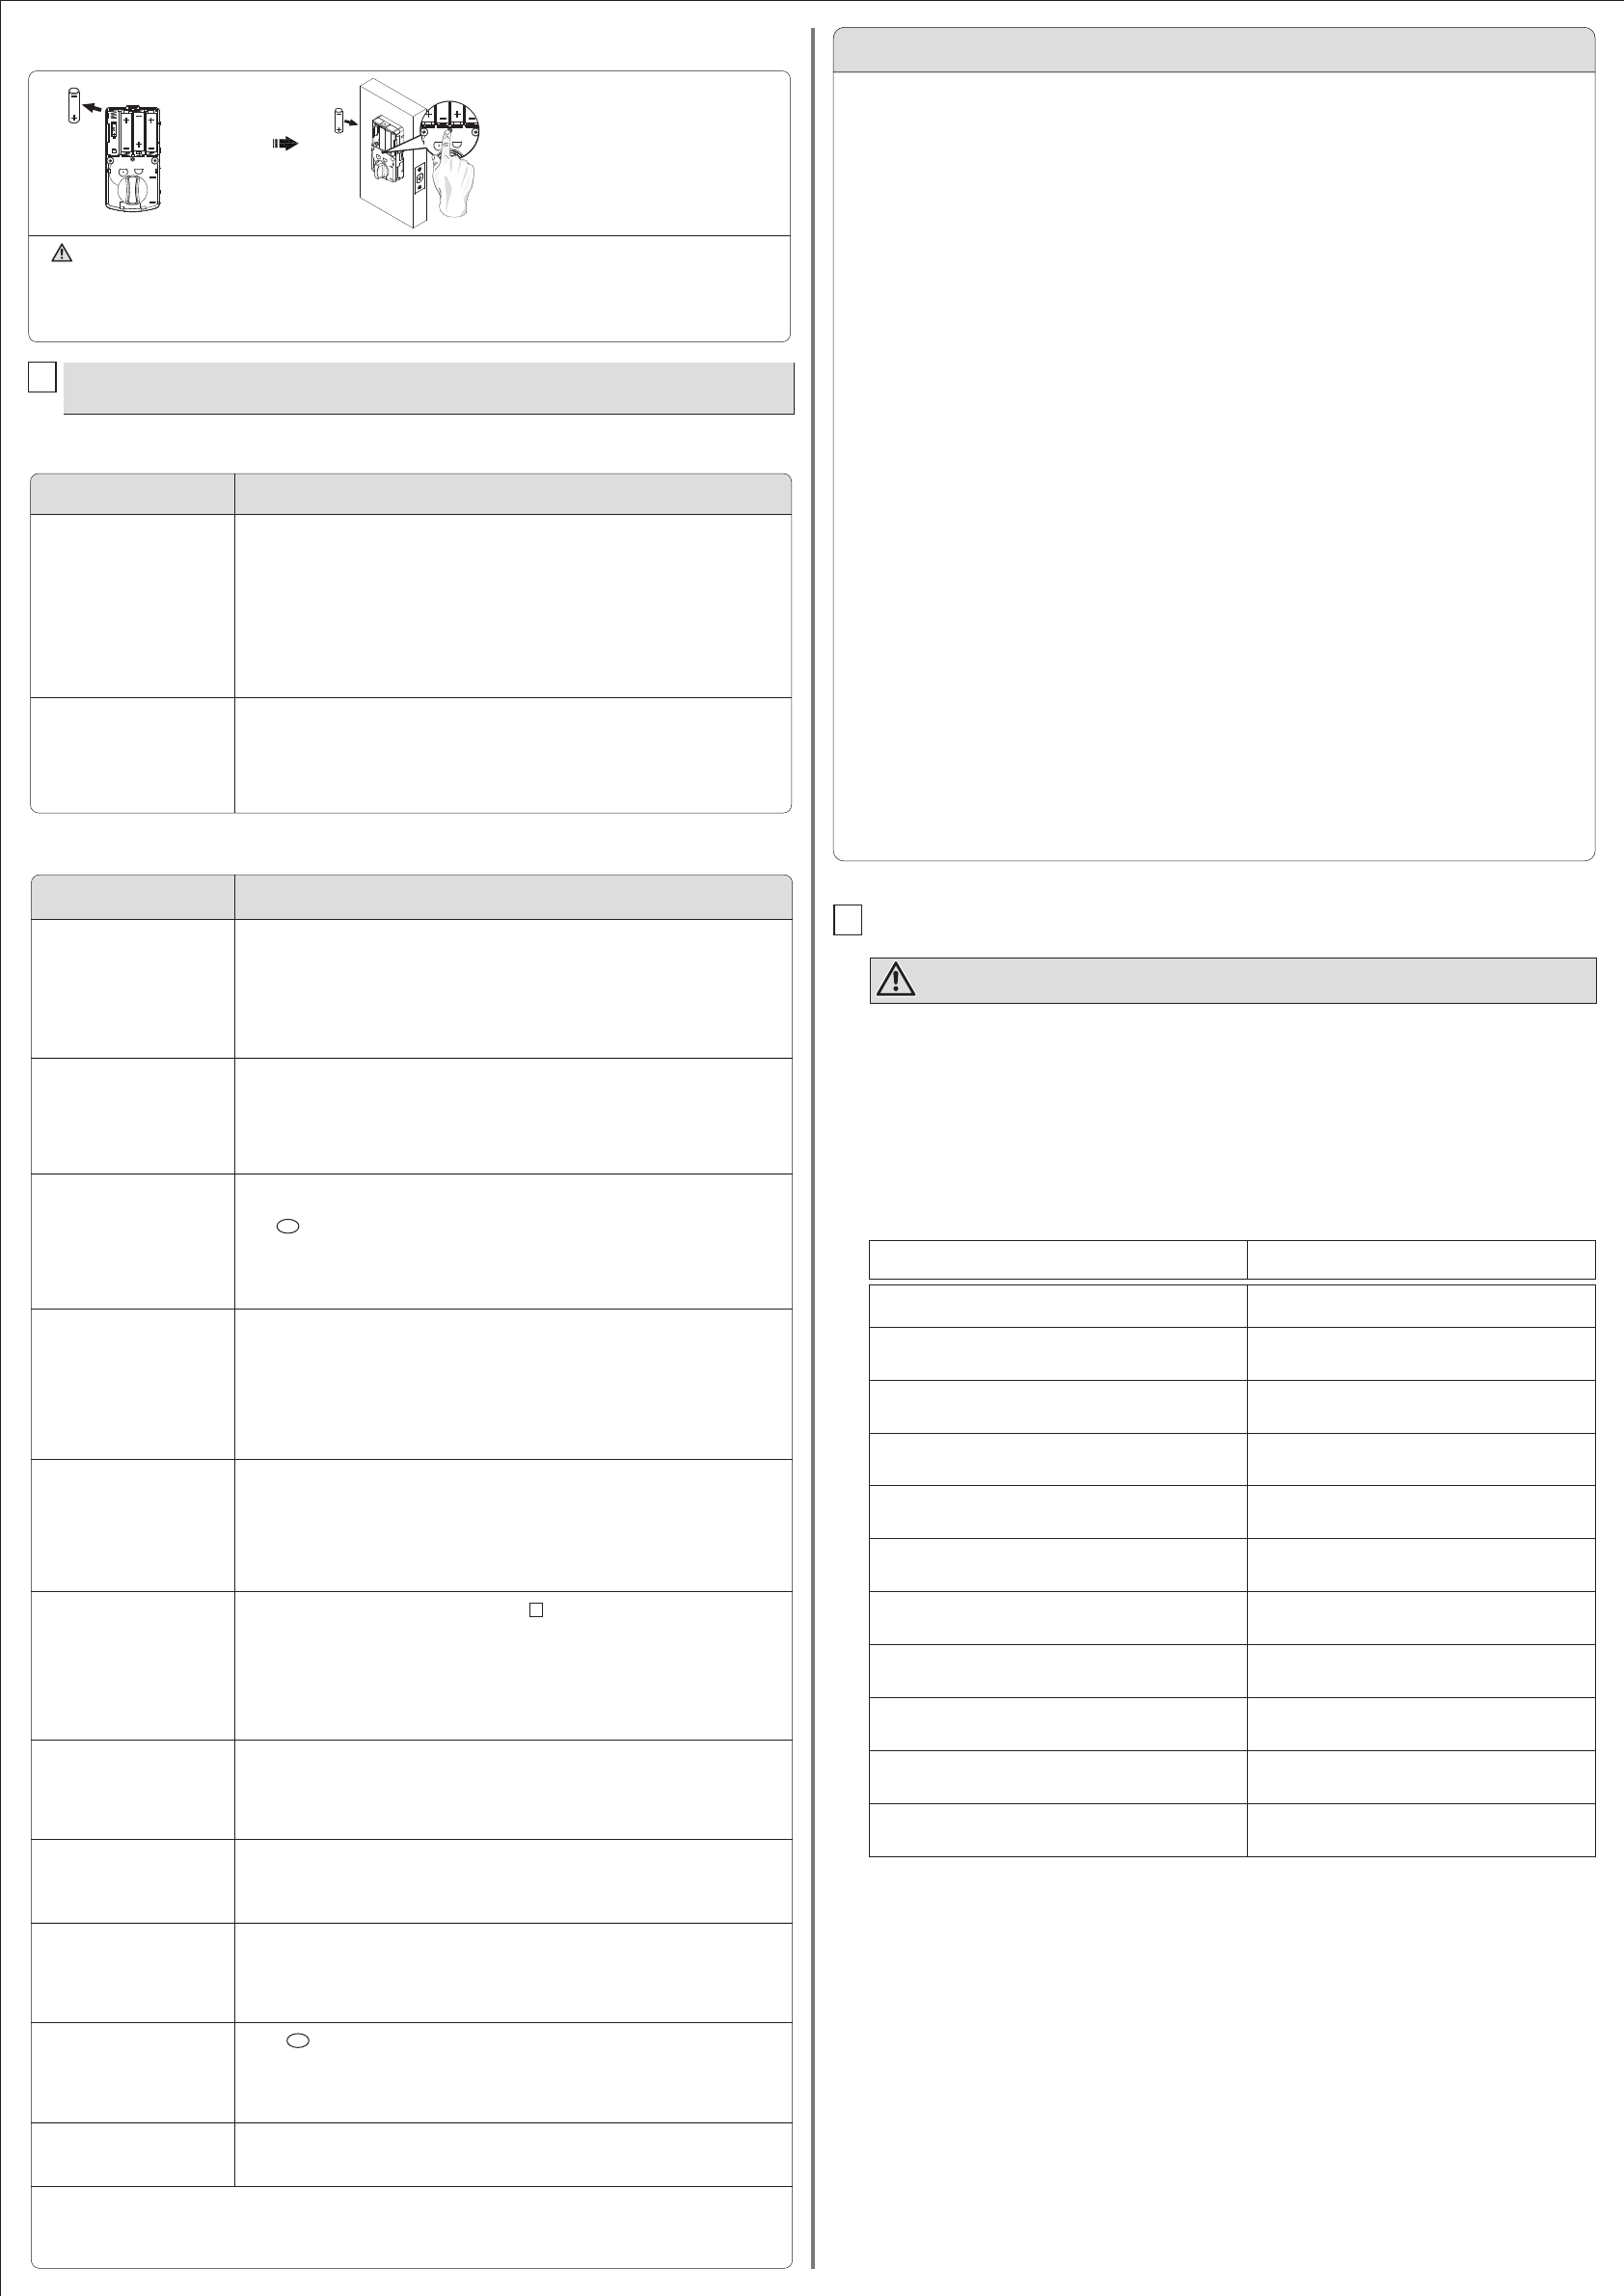
Press button to lock.
( The Green LED will light up and a short beep will sound )
Enter valid User Code or Programming Code to unlock.
To lock
To unlock
Use a mechanical key to lock.
B
Use a mechanical key to unlock.
B
Use a Remote Control to lock
(For remote control version only)
C
Use a Remote Control to unlock
(For remote control version only)
CD
A
AUse a valid RFID Card to unlock
(For RFID version only)
C
C
Press [SET] for 1 second.
Programming Code (6 digits)
40 C
Press and hold ( for over 3 seconds )
Press [SET] for 1 second.
Programming Code (6 digits)
New Programming Code (6 digits)
10
Press [SET] for 1 second.
Programming Code (6 digits)
41C
Press and hold ( for over 3 seconds )
Enter New Amount (10 - 99)
Press [SET] for 1 second.
Programming Code (6 digits)
70
Delete ALL User Codes ・Delete ALL User Codes at once.
Press [SET] for 1 second.
Programming Code (6 digits)
50
Turn On
Turn Off
1
0
Press [SET] for 1 second.
Programming Code (6 digits)
60
Turn On
Turn Off
1
0
Press [SET] for 1 second.
Programming Code (6 digits)
80
Turn On
Turn Off
1
0
Press [SET] for 1 second.
Programming Code (6 digits)
99
Turn On
Turn Off
1
0
1.
Press set button for 1 second to enter programming mode.
2. Please refer to for more information about
programming mode.
22
-
1. Lock or unlock the lockset by a valid key.
Press [SET] for 1 second.
Programming Code (6 digits)
30
OR
OR
User Code (4-6 Digits)
Press [SET] for 1 second.
Programming Code (6 digits)
21
OR
OR
Single-use User Code (4 digits)
Press [SET] for 1 second.
Programming Code (6 digits)
20
OR
OR
New User Code (4-6 digits)
1. Used to lock or unlock the lockset manually.
1. Used to unlock the lockset.
1. Hold the Lock Button for over 3 seconds to
turn on LED.
OR
1. Press button once and continue to enter code according to normal procedures.
C
Programming code
Name User Code
1. Do not share the programming code with anyone else.
2. Keep a written copy of all vaild user codes in a safe place. ( You may use the table below to record
your information)
3. The memory capacity for user codes is 10 sets.
4. It is STRONGLY recommended you change all codes if any security information in the table is lost.
1. Make sure all code inputting processes are completed within 10 seconds.
2. Make sure you have entered the correct programming code.
3. The button should be pressed for over 3 seconds.
C
1. Make sure all code inputting processes are completed within 10 seconds.
2. Make sure you have entered the correct programming code.
3. The new user code will not be accepted if 10 user codes are already stored in the memory.
1. Make sure you have entered the correct user code.
2.
Check to see if the Yellow LED is flashing. If the light is flashing, replace the batteries with new ones.
3. Make sure the strike plate is installed correctly if you see the latch jammed.
1. Refer to ” RESTORE FACTORY SETTING ” section and make sure all steps are followed
correctly.
2. Check to see if the Yellow LED is flashing. If the light is flashing, replace the batteries with new
ones.
-
3
2
1. Check whether the【SET】button is jammed.
2. Re-install the batteries.
1. The batteries are getting low, please reinstall four new batteries for best performance
(Alkaline batteries only ).
1. Press any button on the keypad to initiate LED backlight.
3TROUBLESHOOTING
1INSTALLATION
ANSWERSQUESTIONS
A.
The latch does not operate
correctly
after installation.
1.
Check center of strike hole for alignment with latch hole on the door to ensure free movement
of
the latch bolt.
2.
Make sure the torque blade is properly inserted(in the horizontal position) in the latch drive.
3.
Make sure the bolt direction has been set up following installation. Refer to installation guide.
B. A bump is felt while turning
the thumbturn or the key?
1. Execute lock & unlock function to allow the motor to reposition itself.
2OPERATION
ANSWERSQUESTIONS
A. Keypad does not respond at all. 1. Check to see if the batteries are correctly-installed.
2.
Check to see if the Yellow LED is flashing. If the light is flashing, replace the batteries with new ones.
3. Make sure the cable is well-connected to the port.
B.
Cannot change programming code.
1. Complete the ” CHANGE PROGRAMMING CODE ” process by inputting codes within 10 seconds.
2. Make sure you have entered the new programming code correctly (6 digits ) .
D. Cannot add a new user code.
C. Can not delete all user codes.
E. The lockset can not be unlocked
by keypad.
4Access code list
Do not pass your Programming Code to anyone else.
F. Unable to reset the lockset.
H.
”Auto lock” function does not work.
G. Red LED light is still on after
setting is completed.
I. Yellow LED light keeps flashing.
J.
What should I do if a wrong code
was entered?
K. How to illuminate the keypad?
3RESTORE TO FACTORY SETTINGS
Press and hold SET button while inserting the battery
back. Hold the set button until long beep over.
Remove one battery
1. This will erase all stored information, including bolt direction
2. Please re-enter the default Programming Code to set up the lock after restoring tofactory settings.
AA
AA
AA
AA
AA
AA
AA
AA
AA
DECLARATIONS AND SAFETY STATEMENTS FEDERAL COMMUNICATIONS COMMISSION STATEMENT
This device complies with Part 15 of the FCC Rules. Operation is subject to the following two conditions:
(1) this device may not cause harmful interference, and (2) this device must accept any interference received, including interference
that may cause undesired operation.
Changes or modifications not expressly approved by the party responsible for compliance could void the user's authority to operate
the equipment.
NOTE: This equipment has been tested and found to comply with the limits for a Class B digital device, pursuant to part 15 of the FCC
Rules. These limits are designed to provide reasonable protection against harmful interference in a residential installation. This
equipment generates, uses and can radiate radio frequency energy and, if not installed and used in accordance with the instructions,
may cause harmful interference to radio communications. However, there is no guarantee that interference will not occur in a
particular installation. If this equipment does cause harmful interference to radio or television reception, which can be determined by
turning the equipment off and on, the user is encouraged to try to correct the interference by one or more of the following measures:
- Reorient or relocate the receiving antenna.
- Increase the separation between the equipment and receiver.
- Connect the equipment into an outlet on a circuit different from that to which the receiver is connected.
- Consult the dealer or an experienced radio/TV technician for help.
FCC Caution: To assure continued compliance, any changes or modifications not expressly approved by the party responsible for
compliance could void the user's authority to operate this equipment. (Example - use only shielded interface cables when connecting
to computer or peripheral devices).
IC REGULATIONS
This device complies with Industry Canada licence-exempt RSS standard.
Operation is subject to the following two conditions: (1) this device may not cause interference, and (2) this device must accept any
interference, including interference that may cause undesired operation of the device.
1. Check to see if the Yellow LED is flashing. If the light is flashing, replace the batteries with new
ones.
If the lock appears to be damaged or does not operate properly, please contact customer service for further assistance.