Fujitsu Mobile communications TU12-J01 TG03 User Manual
Fujitsu Mobile communications Limited TG03 Users Manual
TempConfidential_[Short-term confidential]T-01C(TG03) User Manual-English_201011
ᩣᑼળ␠ ᎕ ᭴᭞ᮍ፧ ᭽
፴፷፸ᎊ፧
ขᛒށᦠᯘ˧ᢥᯙ፧
ೋᩞ፧
፧
ᬇឭᣣ፧ ᯪ፧ ᯢᯠᯡᯠᐕᯡᯡᯢᯢᣣᯘᯙ፧
ᬇਠළᣣ፧ ᯪ፧ ᯢᯠᯡᯠᐕᯡᯡᯢᯩᣣᯘᯙ፧
፧
፧
፧
᧲ʬᮦᚭ፧
DOCOMO
W-CDMA, GSM/GPRS and Wireless LAN System
Thank you for purchasing "REGZA Phone T-01C".
Make sure thoroughly read this manual and manuals included with optional accessories before and during use of your T-01C to ensure proper
operation. If any of the contents in this manual are unclear, please contact "docomo Information Center" on the last page of this manual.
The T-01C is your capable partner. Please handle the T-01C with care to ensure a long service life.
Using the FOMA terminal
● Because the FOMA terminal operates using radio signals, it cannot be used in places with no signal (such as inside a tunnel, underground, or in
a building), in places with a weak signal or outside the FOMA service area. You may not use the FOMA terminal on upper floors of a building,
even with no obstructions in sight. There may also be times when the signal is strong and you are not moving but calls are interrupted.
● Please use discretion and mind your manners when using the FOMA terminal in public areas, or crowded or quiet places to keep from bothering others.
● Note that because the FOMA terminal operates using radio signals, your calls are at risk of being intercepted by third parties. However, since the
W-CDMA, GSM/GPRS and Wireless LAN system can automatically scramble all calls through a private call feature, third parties intercepting
your calls will only hear noise.
● The FOMA terminal transmits sound by converting it into a digital signal. If the caller moves to an area with a weak signal and the digital signal
may not be reconverted properly, the received audio may sound different from the original.
● The FOMA terminal supports the FOMA Plus-Area and FOMA HIGH-SPEED Area.
● The FOMA terminal can be used only via the FOMA network provided by DOCOMO and DOCOMO's roaming area.
● Always keep the information you save in the FOMA terminal in a separate note. Even if the data may be lost as a result of malfunction, repair,
change, or other handling of the FOMA terminal, under no condition will DOCOMO be held liable for any lost data saved in the FOMA terminal.
● As with PCs, some user-installed applications may disrupt the stability of the FOMA terminal performance or unexpectedly transmit information
stored in the FOMA terminal via the Internet causing improper use of your location information or personal information. Therefore, verify the
supplier and operating conditions of applications before installing and using them.
● docomo is not liable if your FOMA terminal becomes unstable as a result of the original product information of your FOMA terminal being
tampered with, deleted or otherwise manipulated.
Download the latest information on this manual from the DOCOMO website.
・To download "INSTRUCTION MANUAL" (in PDF format), visit
http://www.nttdocomo.co.jp/english/support/trouble/manual/download/index.html
* The URL and contents of this manual are subject to change without prior notice.
1
Contents/Precautions
Note on Using the T-01C
● The FOMA terminal does not support i-mode functions (i-mode mail, connection to i-mode sites (programs), i-αppli, etc.).
About This T-01C Instruction Manual
● Please note that the "T-01C" is called the "FOMA terminal" in this T-01C Instruction Manual.
● Reproduction or reprint of all or part of this manual without prior permission is prohibited.
● The contents of this manual are subject to change without prior notice.
● Sometimes only parts of screenshots in this manual required for explaining text descriptions are displayed in close up.
● The screenshots in this manual are shown as examples. The actual screens may differ.
Viewing Embedded Manuals in the T-01C
● T-01C operation methods can be checked also in the "Startup Guide" (P. 30) on your FOMA terminal and in the "取扱説明書 (User's Manual)" (P. 33)
in addition to this T-01C Instruction Manual.
2
Contents
Contents/Precautions
Contents/Precautions
Safety Precautions (Always Follow These
Directions) ...................................................4
Waterproof Properties ...............................13
Basic package and main optional parts ....17
Before Using the FOMA
Terminal
Part names and functions .........................18
docomo UIM card......................................19
About the battery pack ..............................20
How to charge the battery pack ................21
Turning your FOMA terminal on/off ...........24
When the display goes out........................24
When the key lock screen is displayed .....25
Setting access points ................................25
How to view icons ....................................27
Notification panel ......................................28
Basic operations (touch panel) .................28
Startup Guide ............................................30
Home screen.............................................31
Viewing the User's Manual .......................33
Application menu ......................................33
Entering text ..............................................35
Call/Network Services
Making calls ..............................................41
Receiving calls ..........................................43
Operations during calls in progress ..........43
Checking histories.....................................44
About contacts ..........................................44
Editing your own contacts .........................48
Network services.......................................48
Settings
About the settings menu ...........................54
Wireless controls.......................................54
Sound & display ........................................59
Multimedia.................................................62
Eco-mode Setting .....................................62
Location & security....................................63
Applications...............................................66
Accounts & sync .......................................68
Privacy ......................................................69
SD card & phone storage..........................70
Search.......................................................71
Language & keyboard ...............................71
Accessibility ..............................................71
Text-to-speech ..........................................72
Date & time ...............................................72
System settings.........................................73
About phone..............................................73
Messaging/Browser
Types of mail available on your FOMA
terminal .....................................................74
Email .........................................................74
sp-mode mail ............................................77
Gmail.........................................................77
SMS ..........................................................80
Google Talk ...............................................82
Using a browser ........................................84
Multimedia
Taking photos with the camera .................89
Media Folder .............................................93
Listing to music .........................................96
Using the stereo earphones ......................97
Using YouTube ..........................................97
1Seg..........................................................98
Linking to DLNA-compatible devices ......103
Convenient Functions
GPS ........................................................104
Osaifu-Keitai ...........................................108
Calendar .................................................110
Alarm Clock............................................. 111
3
Contents/Precautions
STARMEMO ...........................................112
Evernote..................................................114
Calculator ................................................114
Mosimo Camera......................................114
Operating data in the microSD card
from a PC ................................................115
PhoneBookCopy ..................................... 115
Searching for information in your FOMA
terminal or web pages.............................116
Using Android Market .............................116
Using docomo market .............................118
Display Office documents or PDF Files ..119
USB host function ...................................119
Overseas Use
Outline of international roaming (WORLD
WING) .....................................................120
Available services ...................................120
Preparation for use .................................121
Setting for overseas use .........................123
Making/receiving calls in the country
you are visiting ........................................124
Appendix/Index
Introducing options and related
equipment ...............................................125
Troubleshooting (FAQ) ............................125
Warranty and After-Sales Service ...........130
Software update ......................................132
Main specifications..................................137
Specific absorption rate (SAR) of Mobile
phones ....................................................139
FCC notice ..............................................140
FCC RF exposure information ................140
Body-worn operation
...............................141
Declaration of Conformity .......................141
Export Administration Regulations ..........142
Intellectual property right.........................142
RSS rules of use .....................................147
Index .......................................................148
4
Contents/Precautions
Safety Precautions
(Always Follow These
Directions)
■ Before use, read these "Safety
Precautions" carefully and use your
FOMA terminal properly. Keep this
manual in a safe place for future
reference.
■ These precautions contain information
intended to prevent bodily injury to the
user and to surrounding people, as
well as damage to property, and must
be observed at all times.
■ The following symbols indicate
different levels of injury or damage
that may result if the guidelines are not
observed and the FOMA terminal is
used improperly.
Danger
Failure to observe these
guidelines may
immediately result in
death or serious injury.
Warning Failure to observe these
guidelines may result in
death or serious injury.
Caution
Failure to observe these
guidelines may result in
injury and property
damage.
■ The following symbols indicate
specific directions.
Indicates
prohibited
actions.
Indicates
not to use
where it
could get
wet.
Indicates
not to
disassemble.
Indicates
compulsory
actions in
accordance
with
instructions.
Indicates
not to
handle with
wet hands.
Indicates to
remove the
power plug
from
the outlet.
■ "Safety Precautions" are described in
the following categories:
1. Handling the FOMA terminal, battery
pack, adapters (including charger and
conversion adapter for charging),
desktop holder and docomo UIM card
(general) .............................................P. 4
2. Handling the FOMA terminal ...............P. 5
3. Handling the battery pack ................... P. 6
4. Handling the adapters (including charger
and conversion adapter for charging) and
desktop holder ....................................P. 7
5. Handling the docomo UIM card .......... P. 8
6. Handling the FOMA terminal near
electronic medical equipment ............. P. 8
1. Handling the FOMA terminal,
battery pack, adapters
(including charger and
conversion adapter for
charging), desktop holder and
docomo UIM card (general)
Danger
Do not use, store, or leave the
FOMA terminal, battery pack,
adapters, desktop holder and
docomo UIM card in locations
subject to high temperatures, such
as near a fire, in direct sunlight or
inside a car on a hot day.
May cause fires, burns or bodily injury.
Do not place the FOMA terminal,
battery pack, adapters, desktop
holder and docomo UIM card inside
cooking appliances such as
microwave ovens or pressure
cookers.
May cause fires, burns, bodily injury or
electric shock.
Do not attempt to disassemble or
modify the FOMA terminal, battery
pack, adapters, desktop holder and
docomo UIM card.
May cause fires, burns, bodily injury or
electric shock.
5
Contents/Precautions
Continued on next page
Danger
Do not get the FOMA terminal, battery
pack, adapters, desktop holder and
docomo UIM card wet with water,
drinking water, pet urine, etc.
May cause fires, burns, bodily injury or
electric shock.
For details on waterproof properties,
refer to the following section:
→P. 13 "Waterproof Properties"
Use only the battery pack and
adapters (including charger and
conversion adapter for charging)
specified by NTT DOCOMO for use
with the FOMA terminal.
May cause fires, burns, bodily injury or
electric shock.
Warning
Do not subject the FOMA terminal to
strong impacts or throw it.
May cause fires, burns, bodily injury or
electric shock.
Do not allow conductive materials
(such as metal objects and pencil
lead) to come into contact with the
charger terminal, external connector
terminal and stereo earphone jack. In
addition, do not insert such objects.
May cause fires, burns, bodily injury or
electric shock.
Do not cover or wrap the FOMA
terminal with bedding, etc. when using
or charging.
May cause fires or burns.
Warning
Make sure to turn off the FOMA
terminal and stop charging the battery
in locations such as gas stations
where flammable gas may leak.
May cause gas to ignite.
Before using Osaifu-Keitai in and around
gasoline stands, be sure to turn your
FOMA terminal off.
(If the Osaifu-Keitai lock is set, cancel
the lock before turning your FOMA
terminal off.)
If you notice anything unusual such
as an unusual odor, overheating,
discoloration or deformation during
use, charging or storage, immediately
perform the following measures.
・ Unplug the power cord from the
outlet or cigarette lighter socket.
・Turn off the FOMA terminal.
・Remove the battery pack from the
FOMA terminal.
May cause fires, burns, bodily injury or
electric shock.
Caution
Do not leave the FOMA terminal on
unstable surfaces, such as on a
wobbling table or sloped surface.
The FOMA terminal may fall and cause
injury.
Do not store the FOMA terminal in
locations that are subject to humidity,
dust or high temperatures.
May cause fires, burns or electric shock.
Caution
If being used by a child, have a
guardian teach him/her the proper
handling procedures. In addition,
check that the child is using the
FOMA terminal as directed.
May result in bodily injury.
Keep the FOMA terminal out of the
reach of young children.
A young child may swallow components
or suffer other bodily injury.
Be very careful when using the FOMA
terminal continuously with an adapter
(including charger and conversion
adapter for charging) connected for a
long period of time.
The FOMA terminal, battery pack and
adapter (including charger and
conversion adapter for charging) may
become warm if a game or 1Seg is
operated for a long time while charging.
Touching high temperature areas for a
prolonged period of time may cause skin
irritations, itchiness or low-temperature
burn in some people.
Fit the antenna back inside its
compartment inside your FOMA
terminal except during 1Seg
operation.
Holding conversations, for example, with
the antenna extended might result in
unexpected injury to your face or other
parts of the body.
6
Contents/Precautions
2. Handling the FOMA terminal
Warning
Do not aim the infrared port towards
the eyes.
May cause eye injury.
Do not aim the infrared port towards
home electric appliances with an
infrared device during infrared
communication.
The FOMA terminal may interfere with
the operation of infrared devices and
cause an accident.
Do not turn on the camera light near
people's eyes.
May cause vision impairment or accident
by dazzling eyes or surprising them.
Do not allow water or other liquids,
metal parts, flammables or other
foreign objects to enter the docomo
UIM card slot or microSD card slot on
the FOMA terminal.
May cause fires, burns, bodily injury or
electric shock.
Do not turn on the camera light at
anyone driving a car or other
vehicles.
May prevent a driver from driving safely
and cause an accident.
Warning
Turn off the FOMA terminal in areas
where the use of mobile phones is
prohibited, such as in aircraft or
hospitals.
The FOMA terminal may interfere with
the operation of electronic devices and
electronic medical equipment. Follow the
instructions given by the respective
medical facilities regarding the use of
mobile phones on their premises.
In addition, actions such as using a
mobile phone aboard aircraft are
prohibited and punishable by law.
Keep the FOMA terminal away from
the ears during a hands-free call or
while the ringtone is ringing.
When you attach stereo earphones to
the FOMA terminal to play games or
music, do not make the volume too
loud.
Excessive high volume may damage
your hearing. It may also prevent you
from hearing the ambient sounds and
cause an accident.
If you have a weak heart, take extra
precautions when setting the vibrator
and ringtone volume for incoming
calls.
These settings may have harmful effects
on your heart.
If you are using electronic medical
equipment, contact the manufacturer or
vendor to check whether the operation
of the equipment may be affected by
radio waves.
The FOMA terminal may interfere with
the operation of electronic medical
equipment.
Warning
Turn the FOMA terminal off near
high-precision electronic devices or
devices that use weak electronic
signals.
The FOMA terminal may interfere with
the operation of electronic devices.
Take particular care with the following
devices:
Hearing aids, implanted cardiac
pacemakers, implanted cardioverter-
defibrillators, or other electronic medical
equipment. Fire alarms, automatic
doors, and other equipment controlled
by electronic signals. If you use an
implanted cardiac pacemaker, implanted
cardioverter-defibrillator or other
electronic medical equipment, contact
the respective manufacturer or vendor to
check whether the operation of the
equipment is affected by signals.
In case that the display part or
camera lens is damaged, make sure
to pay attention to a broken glass and
the exposed inside of the FOMA
terminal.
The surface of the display's reinforced
glass is covered by a protective film and
the surface of camera lens is a plastic
panel to minimize the possibility of glass
scattering. However, touching the broken
or exposed parts may cause injury.
Caution
Do not swing the FOMA terminal by
its strap, 1Seg antenna, etc.
The FOMA terminal may hit you or
others around you resulting in bodily
injury.
7
Contents/Precautions
Continued on next page
Caution
Do not use the damaged FOMA
terminal.
May cause fires, burns, bodily injury or
electric shock.
Before using the motion controller
(motion sensor), be sure to check
safety around you, firmly grip your
FOMA terminal and do not swing it
more than necessary.
May cause injury or other accidents.
If the display is broken and the liquid
crystal then leaks, do not get the
liquid on your skin (face, hands, etc.).
May result in loss of eyesight and harm
to your skin.
If the liquid gets into your eyes or mouth,
immediately rinse your eyes or mouth
with clean water and see a doctor.
If the liquid comes into contact with your
skin or clothes, immediately wipe it off
with alcohol and wash with water and
soap.
If you use the FOMA terminal in an
automobile, contact the automobile
manufacturer or vendor to check
whether the operation of the
electronic equipment may be affected
by radio waves.
The FOMA terminal may interfere with
the operation of electronic equipment in
some vehicle models. In such cases,
stop using the FOMA terminal.
Use of the FOMA terminal may cause
skin irritations such as itchiness,
rashes or eczema in some people. If
this occurs, immediately stop using
the FOMA terminal and seek medical
treatment.
→P. 9 "Material list"
Caution
Look at the display in a well-lit place,
keeping a certain distance from the
screen.
Otherwise, eyesight may be decreased.
3. Handling the battery pack
■Check the type of battery using the
information printed on the battery pack
label.
Label Battery type
Li-ion 00 Lithium-ion
Danger
Do not touch terminals with metal
objects such as wires. In addition, do
not carry or store the battery pack with
metal necklaces, etc.
The battery pack may catch fire, explode,
overheat or leak.
Check that the battery pack is facing
the correct direction before you
attach it to the FOMA terminal. If you
have difficulty fitting the battery pack
to the FOMA terminal, do not force
the battery pack into place.
The battery pack may catch fire,
explode, overheat or leak.
Do not throw the battery pack into a
fire.
The battery pack may catch fire,
explode, overheat or leak.
Do not puncture, hit with a hammer or
step on the battery pack.
The battery pack may catch fire,
explode, overheat or leak.
Danger
If the battery fluid gets into your eyes,
do not rub your eyes but immediately
rinse your eyes with clean water and
see a doctor.
May result in loss of eyesight.
Warning
If any trouble such as a deformation
or scratches caused by a drop is
found, never use the battery pack.
The battery pack may catch fire,
explode, overheat or leak.
If the battery pack leaks or emits an
unusual odor, immediately stop use
and keep it away from fire.
The battery fluid is flammable and could
ignite causing a fire or explosion.
Prevent your pet from biting the
battery pack.
The battery pack may catch fire,
explode, overheat or leak.
Caution
Do not dispose of used battery packs
together with ordinary garbage.
May cause fires or damage to the
environment. Place tape over the
terminals to insulate unnecessary battery
packs, and take them to a docomo Shop,
retailer or institution that handles used
batteries in your area.
Do not use or charge a wet battery
pack.
The battery pack may catch fire,
explode, overheat or leak.
8
Contents/Precautions
Caution
If the battery fluid leaks, do not get
the liquid on your skin (face, hands,
etc.).
May result in loss of eyesight and harm
to your skin.
If the liquid comes into contact with your
eyes, mouth, skin or clothes,
immediately rinse them with clean water.
If the liquid gets into your eyes or mouth,
immediately see a doctor after rinsing
your eyes or mouth.
4. Handling the adapters (including
charger and conversion adapter
for charging) and desktop holder
Warning
Do not use the adapters (including
charger and conversion adapter for
charging) if the cord is damaged.
May cause fires, burns or electric shock.
Never use the AC adapter or desktop
holder in humid locations such as a
bathroom.
May cause fires, burns or electric shock.
The DC adapter should only be used
in negative grounded vehicles. Never
use this adapter in positive grounded
vehicles.
May cause fires, burns or electric shock.
Do not touch adapters (including
charger and conversion adapter for
charging) if you hear thunder.
May cause electric shock.
Warning
Take care not to short-circuit the
charger terminal when connected to
an outlet or cigarette lighter socket.
Also, take care not to allow any part
of your body (hands, fingers, etc.) to
come into contact with the charger
terminal.
May cause fires, burns or electric shock.
Do not place heavy objects on the
cord of adapters (including charger
and conversion adapter for charging).
May cause fires, burns or electric shock
When plugging/unplugging the AC
adapter into/from the outlet, do not
allow metal straps or other metal
objects to come into contact with the
terminal.
May cause fires, burns or electric shock.
Do not handle the cord and plug of
adapters (including charger and
conversion adapter for charging) with
wet hands.
May cause fires, burns or electric shock.
Always use the specified power
supply and voltage.
When using overseas, use an AC
adapter that can be used overseas.
Using the incorrect voltage may cause
fire, burns or electric shock.
AC adapter: 100V AC
DC adapter: 12/24V DC (for negative
grounded vehicles only)
AC adapter usable overseas: 100 to
240V AC (Connect only with household
AC outlet)
Warning
If the fuse in the DC adapter blows,
always replace it with a fuse of the
specified type.
May cause fires, burns or electric shock.
Refer to the relevant manual for
information on the correct fuse
specifications.
Wipe off any dust on the power plug.
May cause fires, burns or electric shock.
Fully plug the AC adapter into the
outlet.
May cause fires, burns or electric shock.
Always grasp the power plug when
unplugging the adapters from the
outlet or cigarette lighter socket. Do
not forcibly pull by the cord of
adapters (including charger and
conversion adapter for charging).
May cause fires, burns or electric shock.
Unplug the power cord from the
outlet or cigarette lighter socket when
not using the adapters for a long
time.
May cause fires, burns or electric shock.
Should water or other liquids enter
the adapters, remove the power plug
from the outlet or cigarette lighter
socket immediately.
May cause fires, burns or electric shock.
Always unplug the power plug from
the outlet or cigarette lighter socket
before cleaning the adapters.
May cause fires, burns or electric shock.
9
Contents/Precautions
Continued on next page
5. Handling the docomo UIM card
Caution
Be careful with the cutting surface
when detaching the docomo UIM card.
May cause bodily injury.
6. Handling the FOMA terminal
near electronic medical
equipment
■ The precautions detailed here conform
to the guidelines drawn up by the
Electromagnetic Compatibility
Conference Japan, regarding the
protection of electronic medical
equipment from signals emitted by
mobile phones.
Warning
Observe the following in hospitals or
other medical facilities.
・
Do not take the FOMA terminal into
operating rooms, ICUs (Intensive Care
Units) or CCUs (Coronary Care Units).
・
Turn off the FOMA terminal inside
hospital wards.
・
Turn off the FOMA terminal even in an
area outside hospital wards, such as a
hospital lobby, when electronic
medical equipment is in use nearby.
・
Where a medical facility has specific
instructions prohibiting carrying and
use of mobile phones, observe those
instructions strictly.
Warning
Turn off the FOMA terminal in
crowded places such as rush-hour
trains in case somebody nearby has
an implanted cardiac pacemaker or
implanted cardioverter-defibrillator.
Electromagnetic signals may have
harmful effects on the operation of
implanted cardiac pacemakers and
implanted cardioverter-defibrillators.
If you have an implanted cardiac
pacemaker or implanted cardioverter-
defibrillator, always carry or use the
FOMA terminal at least 22 cm away
from your implant.
Electromagnetic signals may have
harmful effects on the operation of
implanted cardiac pacemakers and
implanted cardioverter-defibrillators.
Patients receiving medical treatment
away from a hospital or medical
facility (e.g. home treatment) who are
using electronic medical equipment
other than implanted cardiac
pacemakers or implanted
cardioverter-defibrillators should
consult the respective manufacturers
for information regarding the effects
of signals on the equipment.
Electromagnetic signals may have
harmful effects on the operation of
electronic medical equipment.
Material list
Part Materilal/Surface
treatment
Certifiaction
nameplate
Polyester film
Display Tempered glass/
Shatterproof film
Front panel PC resin/Urethane coating
Rear panel PC resin/Non-continuous
deposit + UV cured coating
Back
cover
Cover
body
PC resin/Urethane coating
Camera
periphery
PC resin/Non-continuous
deposit + UV cured coating
Camera,
external
connector
terminal
periphery
PC resin/UV cured coating
Inner sheet Magnetic sheet/Polyester
film
Back key/Home key/
Menu key
PC resin/Non-continuous
deposit + UV cured
coating
External connector
terminal cover
PC resin + Polyester
elastomer resin/Non-
continuous deposit + UV
cured acrylic coating
Camera panel Acrylic resin/UV cured
acrylic coating
Camera light panel Acrylic resin
Infrared port panel PC resin/Deposit + UV
cured acrylic coating
1Seg antenna
Stainless steel
+
ABS resin/
UV cured acrylic coating
Strap hole
Stainless steel/Nickel coating
+ Tin nickel coating

10
Contents/Precautions
Part Materilal/Surface
treatment
Charger terminal ABS resin + stainless
steel/Nickel coating + gold
plating
Power key/Volume
keys/Camera key
PC resin/UV cured acrylic
coating
1Seg antenna
compartment
Polyester film
Side key fastener
plate
Stainless steel/Nickel
coating
Screws ・Steel/Trivalent chromium
plated
・Steel/Trivalent chromium
plated + silica coating
Battery terminal
(terminal section)
Beryllium copper/Gold
plating
Battery terminal
(socket section)
LCP
PCB protective
sticker
Polyester film
Communication
antenna protective
sticker
PC resin film
Warning label Polyester film
docomo
UIM
card slot
Fitting
section
LCP
Guide Stainless steel/Nickel
coating
Metal
terminal
section
Copper alloy/Nickel
coating + palladium nickel
coating + gold plating
Part Materilal/Surface
treatment
Battery
pack
Battery
pack
nameplate
PET/UV matte varnish
printing
Battery
pack case
(terminal
section
side)
PA resin/Electrical
discharge fine-grain finish
Battery
pack case
(removal
clasp side)
PC resin/Electrical
discharge fine-grain finish
Terminal
section
Glass epoxy substrate/
Gold plating
Water leak
sticker
Woodfree paper
Handling precautions
General notes
●Although the T-01C has waterproof
properties, do not immerse the FOMA
terminal in water, and do not let water
splash on the supplied or optional
accessories.
The battery pack, adapters (including
charger and conversion adapter for
charging), desktop holder and docomo UIM
card are not waterproof. Do not use them in
humid or steamy areas such as bathrooms
and avoid exposing them to rain and other
forms of moisture. If they are carried close to
skin, perspiration may cause internal
components to corrode and result in
malfunction. Note that if problems are found
to be due to moisture, they are not covered
by warranty and in some cases may be
irreparable. Even where repairs are possible,
repair charges will be incurred since such
damage is not covered by warranty.
●Clean only with a soft dry cloth (such
as the type used for eyeglasses).
・
Forceful rubbing of the display with a
dry cloth may scratch the surface.
・
Note also that the display coating may
stain if moisture or soiling is left on the
surface for a long period.
・
Never use chemicals such as alcohol,
thinner, benzene or detergent, as these
agents may erase the printing on the
FOMA terminal or cause discoloration.
●Occasionally clean terminals with a
dry cotton swab, etc.
Unclean terminals may result in poor
connections and loss of power. Keep
terminals clean with a dry cotton swab, etc.
Take care not to damage terminals while
cleaning them.
●Do not place the FOMA terminal near
an air conditioning vent.
Condensation formed due to rapid
changes in temperature may cause
internal corrosion and lead to malfunction.
●Do not apply excessive force to the
FOMA terminal and battery pack when
using them.
Carrying the FOMA terminal in a tightly
packed bag, or sitting on the FOMA
terminal in your pocket may damage the
display, internal components or battery
pack, or result in malfunction.
Keeping an external device connected to
the external connector terminal or stereo
earphone jack may damage the
connector or result in malfunction.
11
Contents/Precautions
●Do not rub or scratch the display with
a metal object, etc.
May damage the display and cause
malfunction or breakage.
●Read the respective manuals supplied
with the battery pack, adapters
(including charger and conversion
adapter for charging) and desktop
holder carefully.
Notes about the FOMA terminal
●Do not forcefully press the surface of
the touch panel, or operate with a
pointed object such as a fingernail,
ballpoint pen, pin, etc.
May damage the touch panel.
●Avoid using the FOMA terminal in
extremely high or low temperatures.
Use the FOMA terminal within the range
of a temperature between 5C and 40C
(limiting to temporary usage in bathrooms
over 36C) and a humidity between 45%
and 85%.
●Using the FOMA terminal close to
landline phones, TVs or radios may
have harmful effects on the operation
of such equipment. Move as far away
as possible from such items before
use.
●Keep a separate memo and note
information stored in the FOMA
terminal.
DOCOMO shall not be liable for any loss
of content.
●Do not drop or otherwise subject the
FOMA terminal to severe impact.
May damage the FOMA terminal and
cause malfunction.
●When connecting an external device
to the external connector terminal or
stereo earphone jack, do not put it in
obliquely or do not pull it while it is
plugged in.
May damage the FOMA terminal and
cause malfunction.
●The FOMA terminal becomes warm
while you are using or charging it but
this is not a malfunction.
●Do not leave the camera in direct
sunlight.
May cause discoloration or burn-in.
●Use the FOMA terminal with the
external connector terminal cover on.
If the cover is open, dust, water and
others enter inside and may cause a
malfunction.
●Do not use the FOMA terminal without
the back cover.
May detach the battery pack or cause
malfunction or damage.
●While using a microSD card or USB
device, do not remove them from the
FOMA terminal or turn off the FOMA
terminal.
May cause data loss or malfunction.
●Do not place magnetic cards near the
FOMA terminal.
The stored magnetic data in cash cards,
credit cards, telephone cards, floppy
disks, etc. may be erased.
●Do not place magnetized items near
the FOMA terminal.
Putting strong magnetism close to the
FOMA terminal may cause an error.
Notes about the battery pack
●The battery pack is a consumable
product.
Though the usage time varies by
conditions of use, change the battery
pack if the battery level is extremely low
even after fully charged. Purchase a
specified new battery pack.
●Charge the battery pack at ambient
temperatures between 5C and 35C.
●The usage time for a battery pack
depends on the usage environment
and deterioration of battery pack.
●Depending on usage conditions, the
battery pack may swell as it
approaches the end of its service life
but this will not cause problems.
●Note the following when the battery
pack is stored.
・ The storage with the battery pack fully
charged (immediately after charging is
completed)
・ The storage with empty battery level
(cannot turn the FOMA terminal on)
May lower the performance or shorten
the life of the battery pack.
We recommend you store the battery
pack at a battery level of approximately
40% or the two-bar battery level icon
shown as a guide.
12
Contents/Precautions
Notes about the adapters (including
charger and conversion adapter for
charging) and desktop holder
●Charge the battery pack at ambient
temperatures between 5C and 35C.
●Do not charge battery pack in the
following locations.
・ Areas with high humidity or dust, or in
areas exposed to strong vibrations
・ Close to landline phones, TVs, radios,
etc.
●The adapters (including charger and
conversion adapter for charging) may
become warm during charging but
this is not a malfunction.
●Do not use a DC adapter to charge the
battery pack when the car engine is
not running.
May cause the car battery to run down.
●When using an outlet with a fall-off
prevention mechanism, follow the
instructions in the user's manual of the
outlet.
●Do not subject the adapters and
desktop holder to strong impacts. Also,
do not deform the charger terminal or
external connector terminal.
May cause a malfunction.
Notes about the docomo UIM card
●Do not apply unnecessary force when
inserting/removing the docomo UIM
card.
●Do not insert the docomo UIM card
into another IC card reader/writer.
Please note that you are liable for any
damage as a result of such action.
●Always keep the IC area clean.
●Clean the docomo UIM card with a
soft dry cloth (such as the type used
for eyeglasses).
●Keep a separate memo and note
information stored in the docomo UIM
card.
DOCOMO shall not be liable for any loss
of content.
●To protect the environment, please
take any unnecessary docomo UIM
cards to a docomo Shop or retailer.
●Do not damage, touch haphazardly or
short-circuit the IC.
May cause data loss or malfunction.
●Do not drop or otherwise subject the
docomo UIM card to severe impact.
May cause a malfunction.
●Do not bend the docomo UIM card or
place heavy objects on it.
May cause a malfunction.
●Do not insert the docomo UIM card to
the FOMA terminal with a label or
sticker attached on the card.
May cause a malfunction.
Notes on using the Bluetooth
function
●The FOMA terminal supports security
features compliant with the Bluetooth
standards, but the security may not
be sufficient depending on the
configuration.
Take care of the security when making
data communication using the
Bluetooth function.
●Please be aware that DOCOMO shall
not be responsible for any data leak
which may occur when making data
communication using the Bluetooth
function.
●Frequency band
The frequency band used by the
FOMA terminal's Bluetooth/wireless
LAN function is indicated on the
battery pack compartment. The
following are the descriptions:
2.4: This radio equipment uses the
2400 MHz band.
FH/DS/OF: Modulation scheme is the
FH-SS, DS-SS or OFDM
system.
1: The estimated interference distance
is 10 m or less.
4: The estimated interference distance
is 40 m or less.
■■■
:The full band between
2400 MHz and 2483.5 MHz
is used and the band of the
mobile identification
device can be avoided.
Available channels vary depending on
the country.
For use in an aircraft, contact the
airline beforehand.
13
Contents/Precautions
● Cautions on using Bluetooth devices
The operating frequency band of this
product is used by industrial,
scientific, medical equipment and
home electrical appliances such as
microwave ovens, as well as by
private radio stations for identifying
mobile units in the manufacturing
lines of plants (radio stations
requiring a license), specified low-
power radio stations (radio stations
requiring no license), and amateur
radio stations (hereinafter referred to
as "another station").
1. Before using this product, confirm
that "another station" is not being
operated nearby.
2. In the event of this product causing
harmful radio wave interference
with "another station", promptly
change the usage place or stop
radio wave emission by turning off
the power, etc.
3. If you have further questions,
contact "docomo Information
Center" on the last page of this
manual.
Notes about wireless LAN (WLAN)
●Wireless LAN
Do not use wireless LAN near
magnetic devices such as electrical
appliances or AV/OA devices, or in
radio waves.
・ Magnetism or radio waves may
increase noises or disable
communications (especially when
using a microwave oven).
・ When used near a TV, radio, etc.,
reception interference may occur, or
TV screen image may become fuzzy.
・ If there are multiple wireless LAN
access points nearby and the same
channel is used, search may not
work correctly.
●Cautions on using 2.4 GHz devices
The operating frequency band of
WLAN devices is used by industrial,
scientific, medical equipment and
home electrical appliances such as
microwave ovens, as well as by private
radio stations for identifying mobile
units in the manufacturing lines of
plants (radio stations requiring a
license), specified low-power radio
stations (radio stations requiring no
license), and amateur radio stations
(radio stations requiring a license).
1. Before using this device, confirm
that private radio stations for
identifying mobile units, specified
low-power radio stations and
amateur radio stations are not
being operated nearby.
2. If this device causes harmful radio
interference to a private radio
station for identifying mobile units,
immediately change the frequency
band or stop using the device, and
contact "docomo Information
Center" on the last page of this
manual for crosstalk avoidance,
etc. (e.g. partition setup).
3. If this device causes radio
interference to a specified low-
power radio station or amateur
radio station, contact "docomo
Information Center" on the last
page of this manual.
Notes on FeliCa
●The T-01C does not support FeliCa
transmission functions.
For this reason, some functions will be
unavailable for exchanging, sending or
receiving data between mobile phones.
●When an unavailable function has been
used, the message "This is non-Osaifu-
Keitai-compliant application." is
displayed.
Caution
●Never use the FOMA terminal that is
modified. Using a modified device
violates the Radio Law.
The FOMA terminal has acquired the
certification of conformity with technical
regulations for the specified radio station
based on the Radio Law, and the
"Technical Conformity Mark " is printed
on the nameplate of the FOMA terminal
as a certificate.
If the screws of FOMA terminal are
removed and a modification is given to
the inside, the certification of conformity
with technical regulations will become
invalid.
Never use the FOMA terminal without the
valid certification. Doing so violates the
Radio Law.
14
Contents/Precautions
●Be careful when using the FOMA
terminal while driving.
Using a mobile phone in hand while
driving is regarded as a punishable act.
This excludes unavoidable situations
such as helping an injured or sick person
or maintaining public safety.
●Use the Bluetooth function only in
Japan.
The Bluetooth function in the FOMA
terminal has been certified as being
compliant with the domestic radio wave
standards. Using the function overseas
may result in punishment.
●Use the wireless LAN (WLAN) function
only in Japan.
The wireless LAN function in the FOMA
terminal has been certified as being
compliant with the domestic radio wave
standards. Using the function overseas
may result in punishment.
Waterproof Properties
To ensure correct use, read "Waterproof
Properties" before use. Failure to observe
the content described in this section while
using your FOMA terminal may result in the
terminal being immersed in water or the
intrusion of sand or other foreign objects,
and cause overheating, fire, electric shock,
injury, or malfunction.
If the back cover and external connector
terminal cover are tightly closed, the T-01C
has a waterproof rating equivalent to IPX5
(JIS IP5)*1 and IPX7 (JIS IP7)*2 (based on
in-house testing).
*1 IPX5 equivalent: The FOMA terminal will
maintain its operability as a phone even if it is
sprayed with water from a 6.3 mm diameter
nozzle at a distance of 3 meters for more than
three minutes at a rate of 12.5 liters per minute
from any direction.
*2 IPX7 equivalent: The FOMA terminal will
maintain its operability as a phone even if it is
submerged in a tank of still tap water at room
temperature to a depth of 1 meter for
approximately 30 minutes.
Note
● The above definition does not guarantee
proper operation of the FOMA terminal in
every possible condition during actual
use. Malfunctions determined to be
caused by misuse by the customer are not
covered by the warranty.
In the rain
●You can make calls without an umbrella
in the rain (less than 20 mm rainfall per
hour).
* Water drops on the display might cause the
touch panel to malfunction.
●Do not open the back cover or external
connector terminal cover if the FOMA
terminal is exposed to rain, water drops,
or your hands are wet.
In the bathroom
●You may handle the FOMA terminal in
the bathroom but do not immerse it into a
bathtub.
* Water drops on the display might cause the
touch panel to malfunction.
●You may experience poor signal
reception depending on the position of
the bathroom.
●Extreme changes in temperature may
produce condensation. Wait until the
FOMA terminal has reached room
temperature before bringing it from a
cold environment into a warm bathroom.
●Do not immerse or drop the FOMA
terminal into a bathtub.
●Do not place the FOMA terminal under
pouring water from a faucet or
showerhead. The FOMA terminal is not
designed to withstand high water
pressure.
By the swimming pool
●Do not immerse or drop the FOMA
terminal into a swimming pool.
15
Contents/Precautions
Washing the FOMA terminal
●You can wash the FOMA terminal under
a mild flow of water (up to 6 liters/minute
of room temperature (5C to 35C) tap
water) holding it about 10 cm from the
faucet or showerhead. Do not spray the
FOMA terminal with high-pressure water
because it is not designed to withstand
high water pressure. Also, do not
submerge the FOMA terminal in water
for extended periods of time.
●Attach the back cover tightly, and holding
the external connector terminal cover so
it does not open, wash the FOMA
terminal with your hands. Do not use any
brushes or sponges.
●Do not wash the FOMA terminal in a
washing machine or ultrasound bath.
Important items to remember
before use
●When viewing 1Seg, place your FOMA
terminal at a stable location for use.
●Do not place your FOMA terminal directly
on sand at a beach, for example. Sand
or other small particles might get inside
the stereo earphone jack, earpiece,
microphone, speaker, antenna opening,
or other openings, causing the volume to
drop, or sand getting inside your FOMA
terminal itself might cause overheating or
malfunction.
●Make sure that the back cover and
external connector terminal cover are not
partially open when attaching the covers.
* See "Removing the back cover" (P. 15).
* See "How to open/close the external connector
terminal cover" (P. 14).
●To maintain your FOMA terminal's
waterproof properties, parts must be
replaced once every two years even if
the terminal is not damaged. To replace
parts, your FOMA terminal must be
handed over to a specified repair
counter. Parts replacement will be
charged for. Contact "docomo
Information Center" on the last page of
this manual.
●Do not use the FOMA terminal
underwater (including key operations).
Doing so may result in malfunction.
●Do not leave the FOMA terminal in humid
areas (bathroom, kitchen, etc.) for an
extended period of time. The FOMA
terminal is not moisture-proof.
●The FOMA terminal is only waterproof
against fresh water and tap water at
room temperature (5C to 35C).
Do not do any of the actions shown by
the following symbols.
Contact with soap/
detergents/
bath salts
Splashing with
seawater
Splashing with
swimming pool water
Use in hot spas
Splashing with hot
water
Splashing with
chemicals
Contact with sweat Contact with
sand/mud
●If anything other than water (seawater,
detergent, sand, mud, etc.) gets on the
FOMA terminal, quickly rinse it off with
water.
16
Contents/Precautions
To maintain waterproof properties
Rubber seals
The rubber seals on the inner edges of the
external connector terminal cover and back
cover protect the FOMA terminal from
water. Note the following precautions.
●Do not remove or damage the rubber
seals.
●The waterproof feature may fail if liquids
other than fresh water or tap water at
room temperature (5C to 35C) (warm
water, seawater, detergent, chemicals,
sweat, etc.) come in contact with the
rubber seals.
●Do not open or close the back cover and
external connector terminal cover while
wearing gloves. Keep the covers clean.
Just a small particle (strand of hair, grain
of sand, fine fiber, etc.) on the rubber
seals can cause water leaks. Remove
even the smallest amount of dirt with a
clean dry cloth.
●Do not insert sharp objects into the gaps
around the back cover and external
connector terminal cover. Doing so may
damage the rubber seals and cause a
water leak.
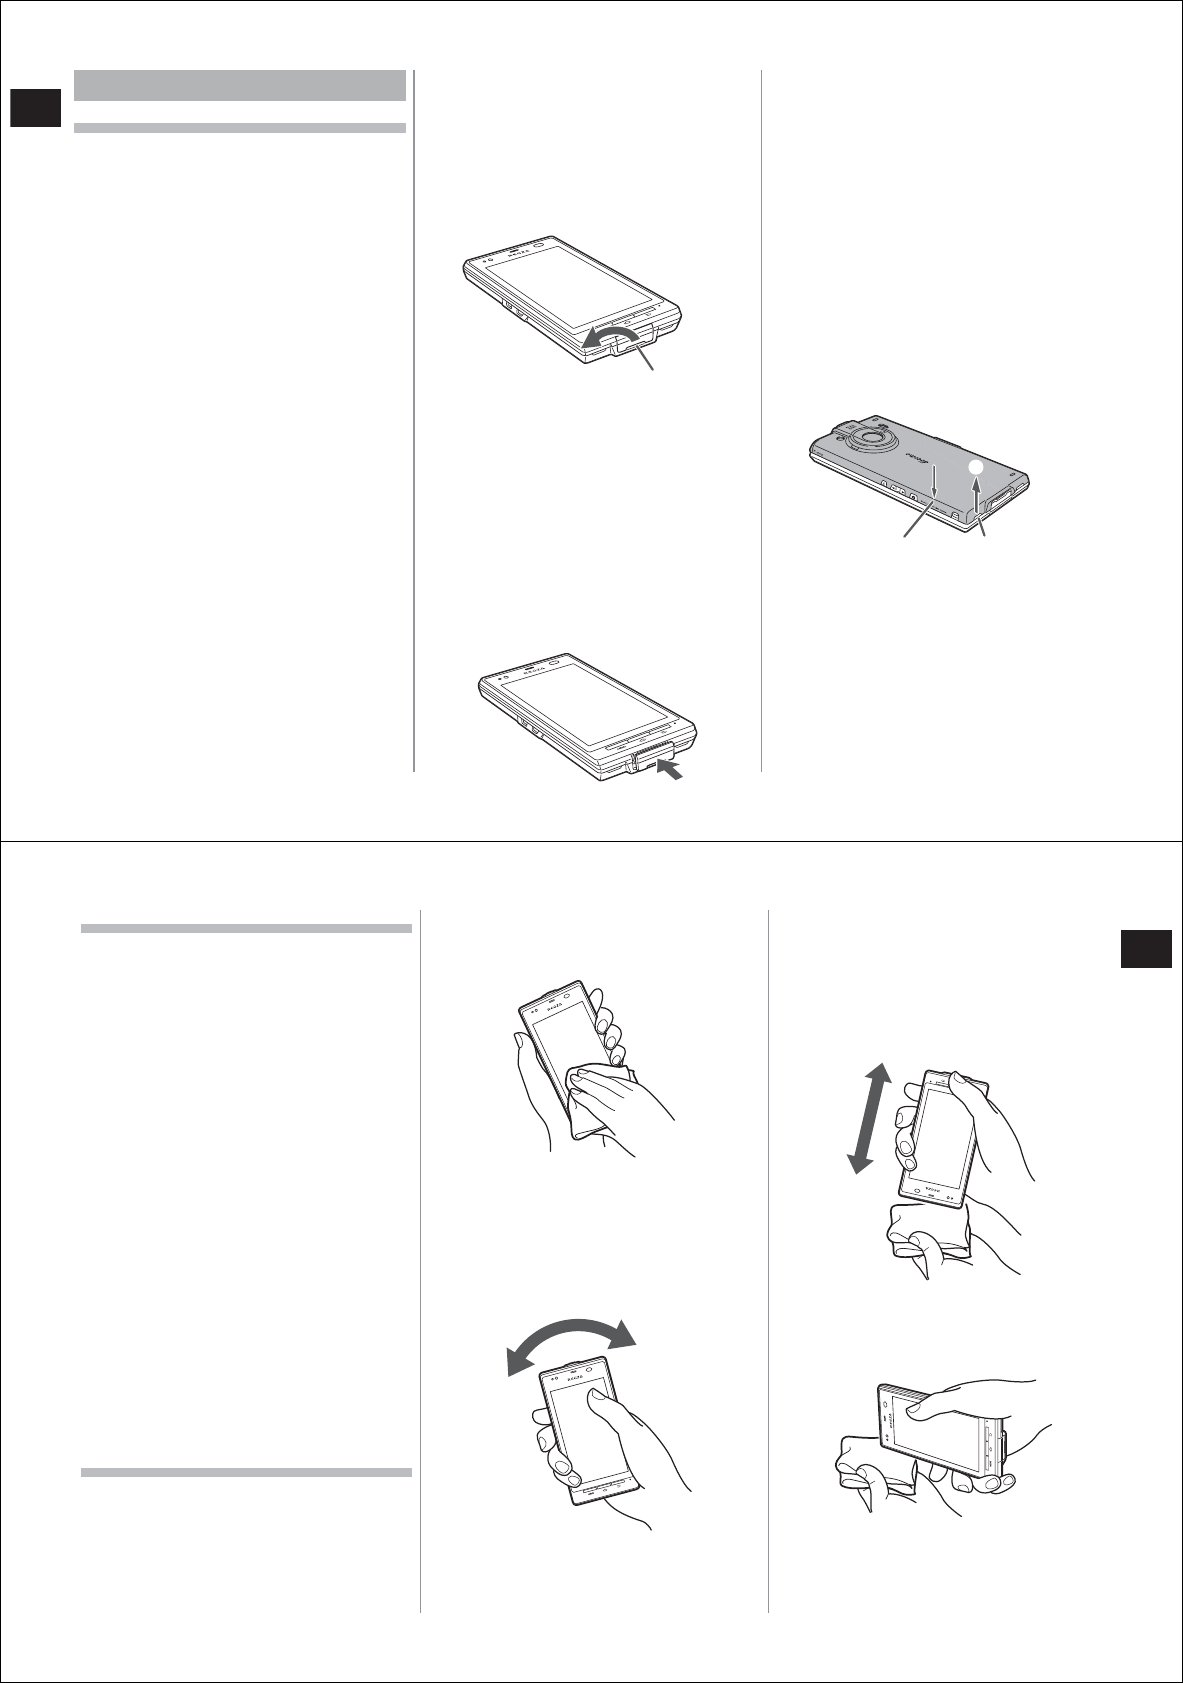
■ How to open/close the external
connector terminal cover
■ Opening the external connector terminal
cover
1 Hook your fingernail on the
groove, and open in the direction
of the arrow.
■ Closing the external connector terminal
cover
1 Firmly press in and close the
external connector terminal
cover in the direction of the
arrow so that there is no gap
between your FOMA terminal and
the cover.
● To maintain waterproof performance,
close the cover reliably while making sure
that there are no parts of the cover rising
off from your FOMA terminal.
■Removing the back cover
●Attach and remove the back cover while
holding your FOMA terminal in your hand
taking care not to scratch the display or
other parts of the terminal.
●Before removing the back cover,
thoroughly wipe off any water from your
FOMA terminal.
1 Hook you fingernail into the back
cover removal section, lift up the
back cover vertically (①) until the
clasp at the bottom side of the
camera key comes away. Hook
your fingernail under the back
cover removal section, and lift
up the cover vertically to remove
the back cover (②).
Groove
Back cover removal
section
Clasp at the bottom side
of the camera key
①
17
Contents/Precautions
If the FOMA terminal gets wet
●
If the FOMA terminal gets wet with water
or snow, drain water and wipe the FOMA
terminal with a clean dry cloth. Note that
any water that you do not wipe off or that
remains in the gaps may get your clothes
or bag wet.
* Do not leave the FOMA terminal with water on
it, as doing so may cause a short circuit in the
external connector terminal, stereo earphone
jack or charger terminal, and cause a
malfunction.
* In cold climates, water on the FOMA terminal
may turn to frost. Using the FOMA terminal with
frost may cause a malfunction. Do not leave
the FOMA terminal in the cold without wiping
off water.
●Do not leave your FOMA terminal, stereo
earphone jack and antenna with water
drops on them. The structure of the keys
is such that water will get inside.
However, if water does get inside,
remove any water (see below).
●If water or snow gets on the FOMA
terminal, wipe it off with a clean dry cloth.
Note that any water that you do not wipe
off or that remains in the gaps may get
your clothes or bag wet.
Removing water in your FOMA
terminal
Using your FOMA terminal with water
drops still on it might cause the volume of
the speaker, for example, to drop.
Also, water might get inside from the gaps
between the keys. If this happens, wipe off
any water from your FOMA terminal by the
following procedure.
1 Wipe any water off that remains
on the surface of the FOMA
terminal with a clean dry cloth.
2 Hold the FOMA terminal firmly
(as shown below) and shake it at
least 20 times until water stops
coming out. Turn the FOMA
terminal around and repeat.
Grip the FOMA terminal firmly to prevent
dropping it.
3 Hold the FOMA terminal firmly
(as shown below) with the stereo
earphone jack facing downward
and shake it at least 20 times
until water stops coming out.
Grip the FOMA terminal firmly to prevent
dropping it.
4 Pat the FOMA terminal with a dry
cloth to remove any water
remaining in the microphone,
earpiece, speaker, keys, etc.
18
Contents/Precautions
5 Place the FOMA terminal on a
dry cloth and let it dry at room
temperature (approximately 30
minutes).
Some water may remain on the FOMA terminal
even after the above procedure.
Do not place the FOMA terminal near anything
that should not get wet.
Notes on charging the battery
pack
The battery pack, desktop holder and
adapters (including charger and conversion
adapter for charging) are not waterproof. Be
sure to check the following points before
and after charging the battery pack.
●Never charge the battery pack if the
FOMA terminal is wet. If you are charging
the battery pack after the FOMA terminal
has been wet, remove water and wipe
the FOMA terminal with a clean dry cloth
before placing it in the desktop holder or
opening the external connector terminal
cover.
●If you charge the battery pack with the
external connector terminal cover open,
be sure to tightly close the cover when
charging is finished. We recommend
using the desktop holder to charge the
battery pack to prevent water from
getting into the external connector
terminal.
●Never charge the battery pack if the
FOMA terminal is wet. Doing so may
cause electric shock or short circuit
resulting in a fire or malfunction.
●Do not touch the desktop holder or
adapters (including charger and
conversion adapter for charging) with wet
hands. Doing so may cause electric
shock.
●Do not use the desktop holder or
adapters (including charger and
conversion adapter for charging) near
water, such as in a bathroom, shower
room, kitchen or washroom. Doing so
may cause a fire or electric shock.
Other precautions
●Never immerse the FOMA terminal in or
splash it with hot spring water, soap
water, detergent water, juice or water
with bath salts in it, etc.
●Do not use the FOMA terminal in places
where boiling water may splash on it, in
saunas or near hot air (e.g. hairdryer).
The FOMA terminal is not designed to
withstand high temperatures.
●Do not jab the stereo earphone jack,
earpiece, microphone or speaker with
cotton swabs or any sharp objects. Doing
so may reduce waterproof quality.
●The FOMA terminal does not float in
water.
●Do not drop the FOMA terminal or
subject it to excessive shock. Doing so
may damage waterproof quality.
●Use the FOMA terminal at an ambient
temperature of 5C to 40C (limiting to
temporary usage in bathrooms over 36C)
and a humidity of 35% to 90%. Using the
FOMA terminal in an extremely hot or
cold place that is outside the range may
damage waterproof quality.
●If the back cover is damaged, replace it.
Water may get inside the FOMA terminal
through the damaged area and cause
electric shock or corrode the battery
pack.
●If water or any other liquid gets on the
FOMA terminal while the back cover or
external connector terminal cover is
open, the liquid may get inside the FOMA
terminal and cause electric shock or
malfunction. If this happens, do not use
the FOMA terminal. After turning the
power off and removing the battery pack,
contact "docomo Information Center" on
the last page of this manual.
●Do not leave water in the stereo
earphone jack, earpiece, microphone or
speaker. Doing so may reduce call
quality.
●Do not connect stereo earphones when
the FOMA terminal is wet. Doing so may
cause a malfunction.
19
Contents/Precautions
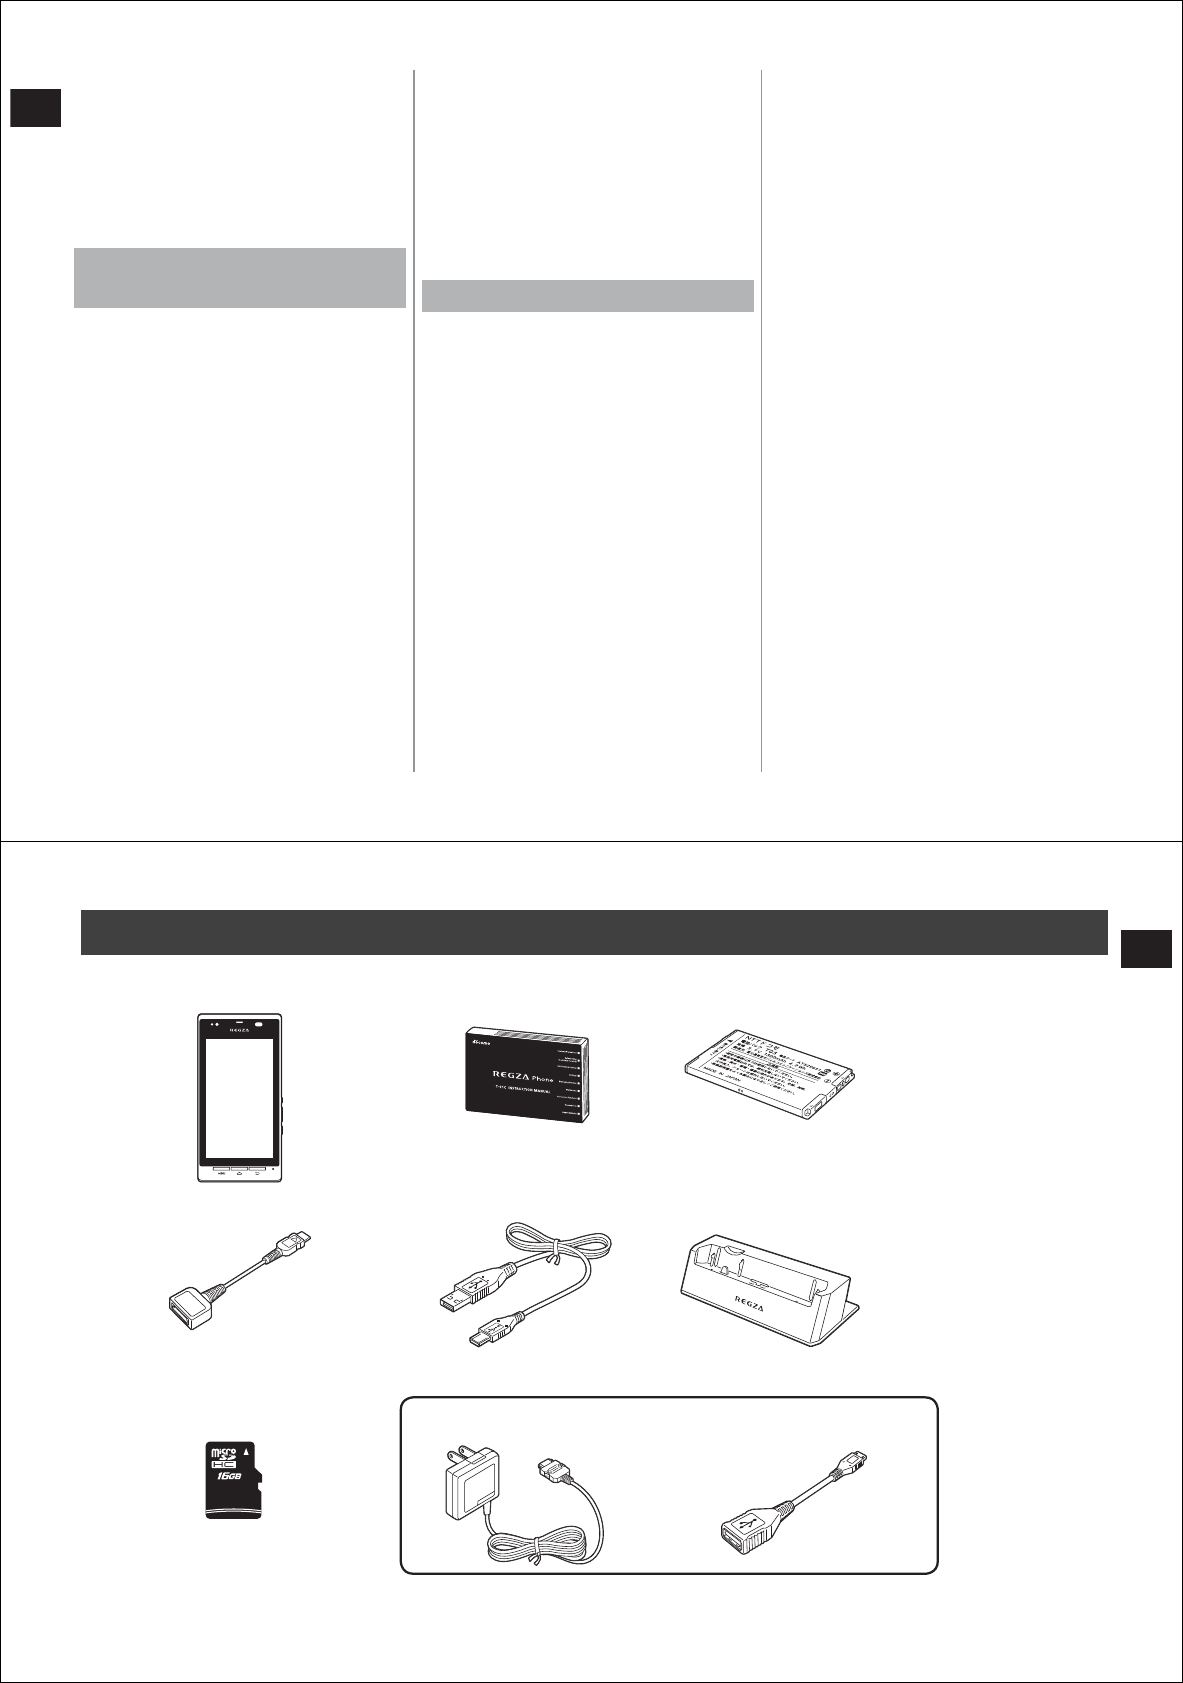
Basic package and main optional parts
■Supplied accessories
T-01C (includes Back Cover T04 and warranty) Instruction manual (Japanese) Battery Pack T03
FOMA charging microUSB adapter T01 PC connection USB cable T01 Desktop Holder T02
■Sample
■Main optional parts
microSDHC card (16 GB/T) (includes user's
manual)
FOMA AC Adapter 01/02
(includes warranty and user's manual) USB cable for external device
connection T01 (includes user's manual)
This is attached to your FOMA terminal at
purchase.
For details on other optional parts→P. 125
20
Before Using the FOMA Terminal
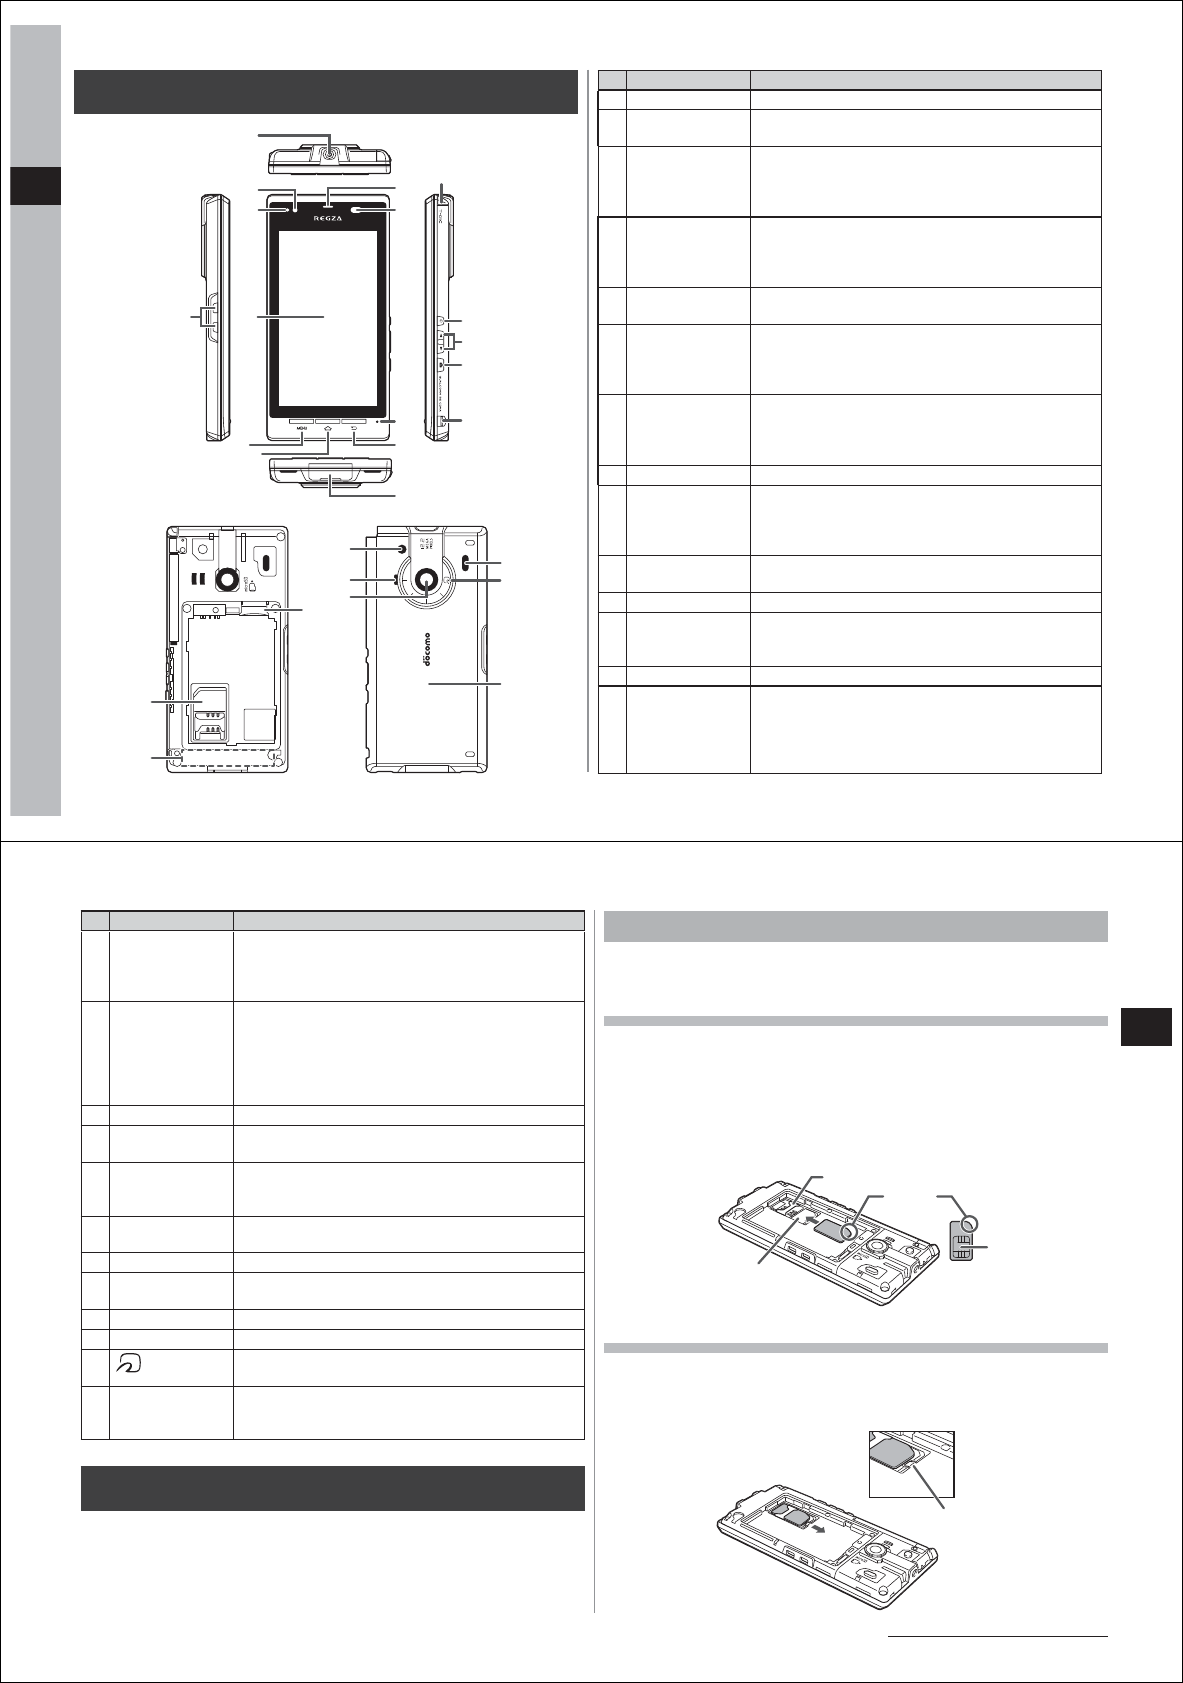
Part names and functions Name Description
①Charger terminal Terminal for charging using the desktop holder.
②Stereo earphone
jack
Connects commercially available stereo
earphones.
③Brightness
sensor
Detects the brightness of the surrounding area to
automatically adjust the brightness of the display's
backlight. Do not cover the sensor area with your
hand. This may interfere with the sensor.
④Notification LED ・Lit (red): Charging in progress
・Flashing (green): Incoming call or missed call
notification, new/unread mail, etc.
・Lit (green) once: Power on
⑤Display
(Touch panel)
Slide your finger to scroll screens, or tap items to
select them.
⑥Menu key MPressing quickly displays option menus that are
available in the current screen.
Pressing for a long time during text entry displays/
hides the keyboard.
⑦Home key APressing for a long time displays recently used
applications.
Pressing quickly returns the display to the home
screen.
⑧Earpiece You can hear the other party's voice from here.
⑨Proximity sensor This sensor is for preventing inadvertent or
erroneous operation of the touch panel during a
call. Sticking a protective sheet or stickers on the
proximity sensor might cause it to malfunction.
⑩Microphone Your voice is sent out from here. This becomes the
MIC during recording.
⑪Back key RReturns the display to the previous screen.
⑫External
connector
terminal
Connect the FOMA charging microUSB adapter
T01 or PC connection USB cable T01 (provided).
⑬1Seg antenna Extend this antenna to watch 1Seg.
⑭Power key CPress for a long time to turn the power on (P. 24).
Pressing this for a long time while the power is on
sets/disables the manner mode, Public mode and
Airplane mode, and turns the power off.
Pressing quickly sets/disables the Sleep mode (P. 24).
⑭
⑯
⑰
⑮
⑨
⑪
⑫
⑩
⑧⑬
⑤
②
③
⑥
①
④
⑦
⑳
⑱
⑲
21
Before Using the FOMA Terminal
Continued on next page
Name Description
⑮Volume keys
E/F
Adjust the other party's voice or speaker volume
(P. 43).
Pressing F for one second or more sets/disables
the Manner mode.
⑯Camera key DPressing for one second or more activates the
camera.
This is used as the shutter key in the shooting
screen or for starting/ending video shooting.
Press quickly to activate composition of
STARMEMO.
⑰Strap hole ―
⑱docomo UIM
card slot
Attach the docomo UIM card (P. 19) here.
⑲Built-in antenna The FOMA antenna is built-in. To receive calls in
better reception conditions, do not cover the
antenna with your hand during use.
⑳microSD card
slot
Insert the microSD card into here (P. 70).
Camera light This lights during camera shooting.
Speaker You can hear ringtones, music and the other party's
voice during use of the speaker phone.
Camera lens Shoots still pictures and video (P. 89).
Infrared port Used for IrDA communications.
mark Hold this mark up to the reader when using
Osaifu-Keitai.
Back cover Do not peel off the sticker on the rear of the back
cover. Doing so might disable reading/writing of the
IC card.
docomo UIM card
The docomo UIM card is an IC card that stores the telephone number
and other customer information. Telephone calls and email cannot be
made or received or other operations cannot be performed unless the
docomo UIM card is properly attached to your FOMA terminal.
● For details on the docomo UIM card, refer to the manual for the
docomo UIM card.
Attaching/removing the docomo UIM card
● Before attaching/removing the docomo UIM card, be sure to first turn
your FOMA terminal off, and remove the back cover and battery pack.
Attaching the docomo UIM card
1 Insert the docomo UIM card into the guide with its
IC surface face down
● Pay attention to the direction the notch is facing.
● For details on how to remove the back cover and the battery pack,
see "Removing the back cover" (P. 15) and "Removing the battery
pack" (P. 21), respectively.
Removing the docomo UIM card
1 Slide the docomo UIM card in the direction of the
arrow while pressing against the removal clasp with
your finger
docomo UIM card
compartment
Guide
IC
Notch
Removal clasp
22
Before Using the FOMA Terminal
Note
● When handling the docomo UIM card, take care not to touch or
damage the IC part of the card. Also, note that the docomo UIM
card sometimes breaks if you exert unnecessary force in trying to
attach or remove it.
Security codes of the docomo UIM card
The docomo UIM card has two security codes, namely PIN1 and PIN2.
Both of them are set "0000" at the subscription. They can be changed
by yourself (P. 64).
Differences in docomo UIM cards
The differences between the FOMA card (blue) and docomo UIM card
(green/white) are as follows.
Item FOMA Card
(blue)
docomo UIM card
(green/white)
Number of telephone number
digits that can be registered to
contacts on the docomo UIM card
Max. 20 Max. 40
WORLD WING Not available Available
WORLD WING
WORLD WING is DOCOMO's FOMA international roaming service that
allows you to make and receive calls with the same phone number
overseas by attaching the docomo UIM card (green/white) into the
FOMA terminal compatible with the service.
● If you subscribed to FOMA services on or after September 1, 2005,
separate subscription is not required. If you declined to use WORLD
WING at subscription to FOMA services or you have canceled it, you
need to make an application again.
● If you subscribed to FOMA services on or before August 31, 2005 and
have not yet made an application to WORLD WING, you need to
make an application.
● There are some unavailable charging plans.
● When your docomo UIM card (green/white) is lost or stolen overseas,
promptly contact DOCOMO and conduct the procedure for canceling
use of the docomo service. For inquiries, see the "docomo
Information Center" on the last page of this manual. Note that
transmission/calling charges after the docomo UIM card is lost or
stolen are incurred to the subscriber.
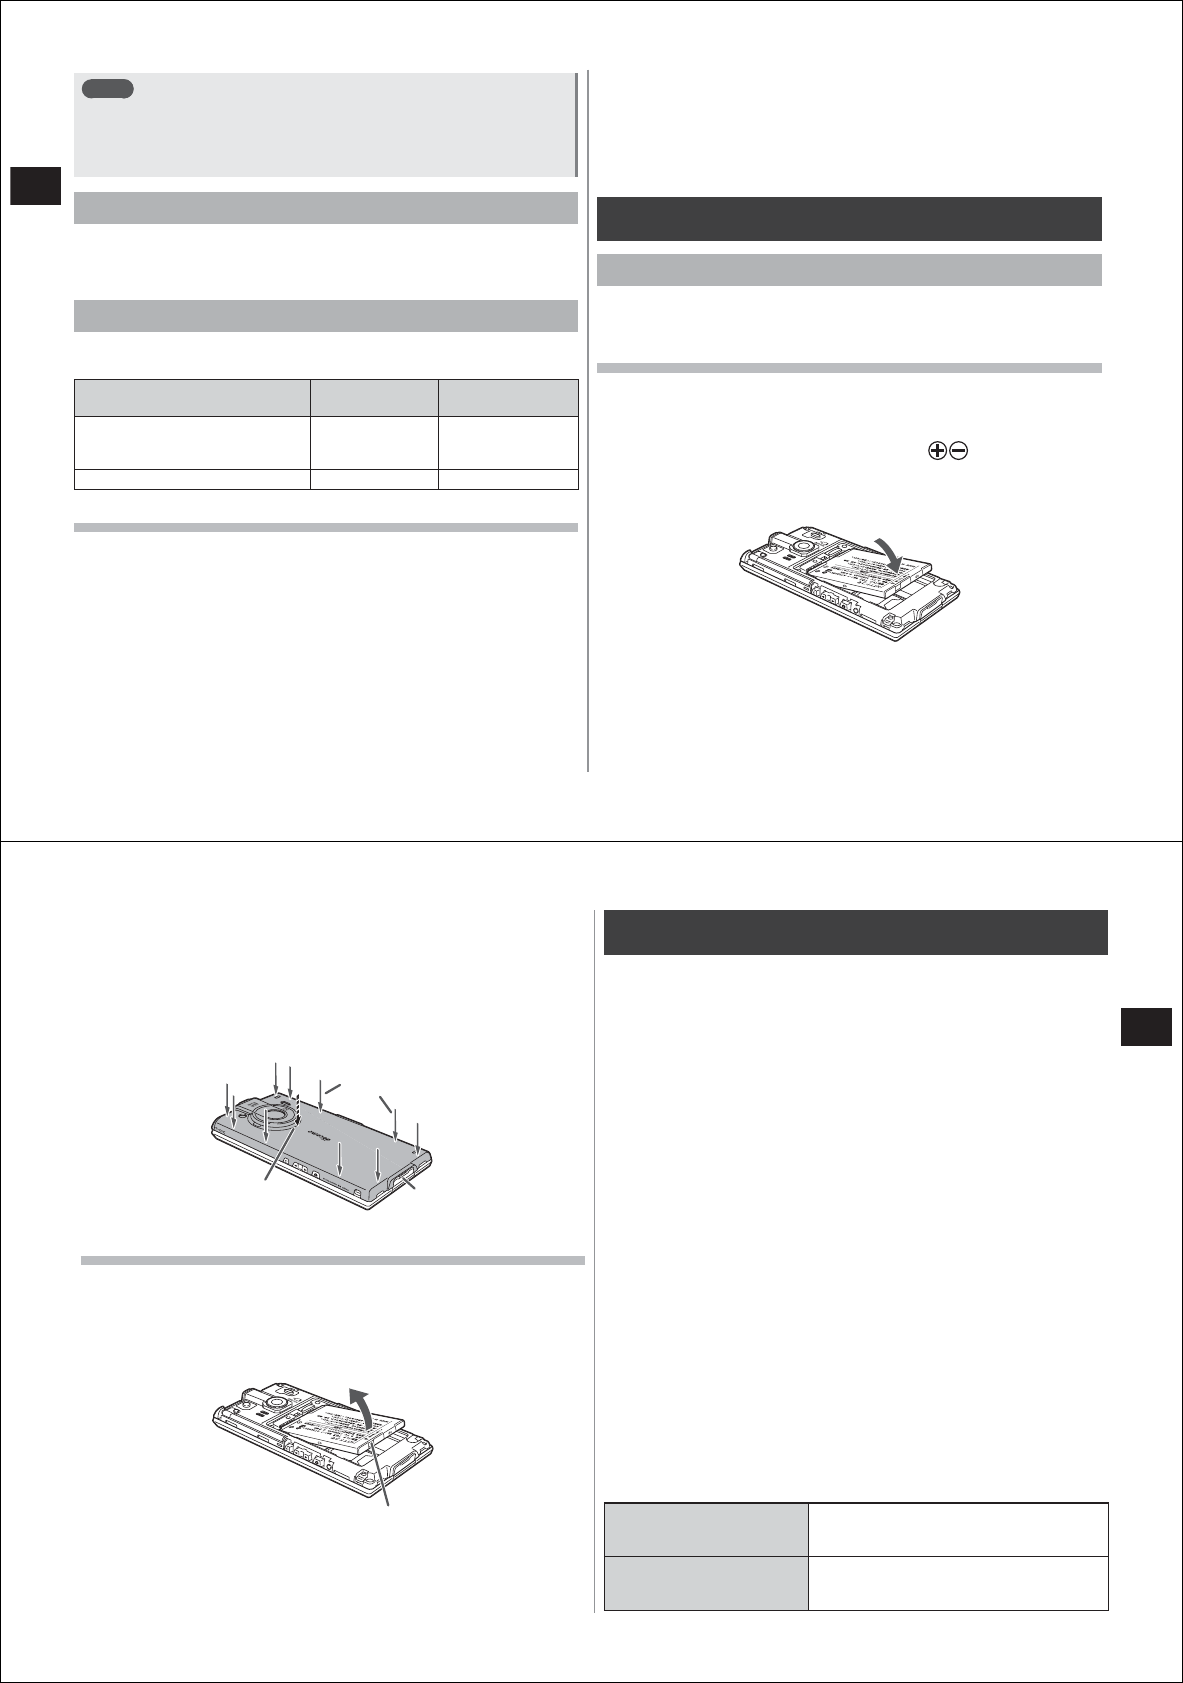
About the battery pack
Attaching/removing the battery pack
● Before removing the battery pack, turn your FOMA terminal off.
● Use the Battery Pack T03 exclusively for this FOMA terminal.
Attaching the battery pack
1 Remove the back cover (P. 15)
2 Attach the battery pack
● With the side of the battery pack with the marks facing up,
align the metal terminals on the battery pack with the metal
terminals on your FOMA terminal, and attach the battery pack in
the direction of the arrow.
3 Check the orientation of the back cover and attach
it so that it fits onto the body
23
Before Using the FOMA Terminal
4 Firmly press each of the 10 clasps on the outside of
the back cover one at a time, and last of all firmly
press the clasp on the inside
● To maintain waterproof performance, attach the back cover
securely while making sure that there are no parts of the cover
rising off from your FOMA terminal.
* See "Waterproof Properties" (P. 13).
Removing the battery pack
1 Remove the back cover (P. 15)
2 Remove the battery pack
● Lift up the battery pack by using the removal clasp to remove the
pack.
How to charge the battery pack
When you purchase your FOMA terminal, the battery pack is not fully
charged. Be sure to charge the battery pack before use.
■Precautions during charging
● Be sure to attach the battery pack on your FOMA terminal to charge it.
● If you charge the battery pack while using your FOMA terminal, it
might take time for charging to complete or charging might not
complete. Also, if functions that consume large current, such as data
communications or calls, are used continuously, the battery pack
might continue to lose power or run out of power even while it is being
charged.
● During charging, your FOMA terminal or AC adapter might heat up.
This, however, is not a malfunction. Charging is sometimes stopped
temporarily for safety's sake when your FOMA terminal heats up. Stop
use of your FOMA terminal immediately if it becomes extremely hot.
● In the following cases, a charging error occurs and the notification
LED flashes (red).
・When the charging voltage is too high
・When the battery pack overcharges/overdischarges
・When charging does not complete even after 5 hours
When a charging error occurs, currently activated functions are
deactivated, and key operations are limited. Either remove the
charger, or remove the battery pack.
■Approximate charging times
These times were calculated when this FOMA terminal was turned off
and the battery pack was charged in a completely run down state. The
approximate charging times increase if the battery pack is charged with
your FOMA terminal turned on or it is charged at a low temperature.
FOMA AC Adapter 01/02
(sold separately)
FOMA charging microUSB adapter T01:
approx. 200 minutes
Desktop holder: approx. 160 minutes
FOMA DC Adapter 01/02
(sold separately)
FOMA charging microUSB adapter T01:
approx. 200 minutes
Desktop holder: approx. 160 minutes
Clasp on
the inside (1)
Clasps on
the outside (10)
External connector
terminal cover
Removal clasp
24
Before Using the FOMA Terminal
■Operation time on full charge (estimate)
The following time varies by the battery condition or operating
environment. For the details, see P. 138.
Continuous
stand-by time
FOMA/3G Stationary (Auto): Approx. 370 hours
Moving (Auto): Approx. 330 hours
Moving (3G static): Approx. 330 hours
GSM Stationary (Auto): Approx. 250 hours
Continuous talk
time
FOMA/3G Approx. 280 min.
GSM Approx. 260 min.
1Seg watching
time
with REGZA
settings on
Approx. 210 min.
with REGZA
settings off
Approx. 240 min.
■Battery pack life
The battery pack is a consumable accessory. The usage duration of the
battery per one charge decreases gradually each time the battery is
recharged. Using your FOMA terminal for long periods while charging it,
shortens the life of the battery pack.
When the usage duration per one charge becomes about half of a new
battery pack, the life of the battery pack is assumed to be almost over. It
is recommended that you replace the battery pack ahead of time.
Depending on the usage condition, the battery pack may be inflated as
it comes to be end of its life. This is not a malfunction.
● Return all spent battery packs to NTT DOCOMO or a dealer,
or a recycling shop to protect the environment.
■Usable charging adapters
● For details, refer to the manual for the AC adapter or DC adapter you
are using.
FOMA AC Adapter 01
(sold separately)
This adapter supports only 100 VAC.
FOMA AC Adapter 02/
FOMA AC Adapter 01
for Global use (sold
separately)
Though this adapter supports voltages between
100 to 240 VAC, the power plug is exclusively
for 100 VAC (domestic use). To use the adapter
overseas, a plug adapter suited to the power
outlet at the country you are visiting, etc. is
required. Also, do not charge the battery pack
using a transformer for travel use.
FOMA DC Adapter
01/02 (sold separately)
−
■How to check remaining battery power
An icon showing the approximate remaining battery power is displayed
on the status bar (P. 27).
When the battery is just about to run out, a warning message is
displayed, and the power will be cut off after a while.
Note
● When charging is started with no battery power remaining, your
FOMA terminal sometimes might not be activated even by turning
its power on. If this happens, charge the battery pack with your
FOMA terminal turned off, and wait a while before turning your
FOMA terminal on again.
25
Before Using the FOMA Terminal
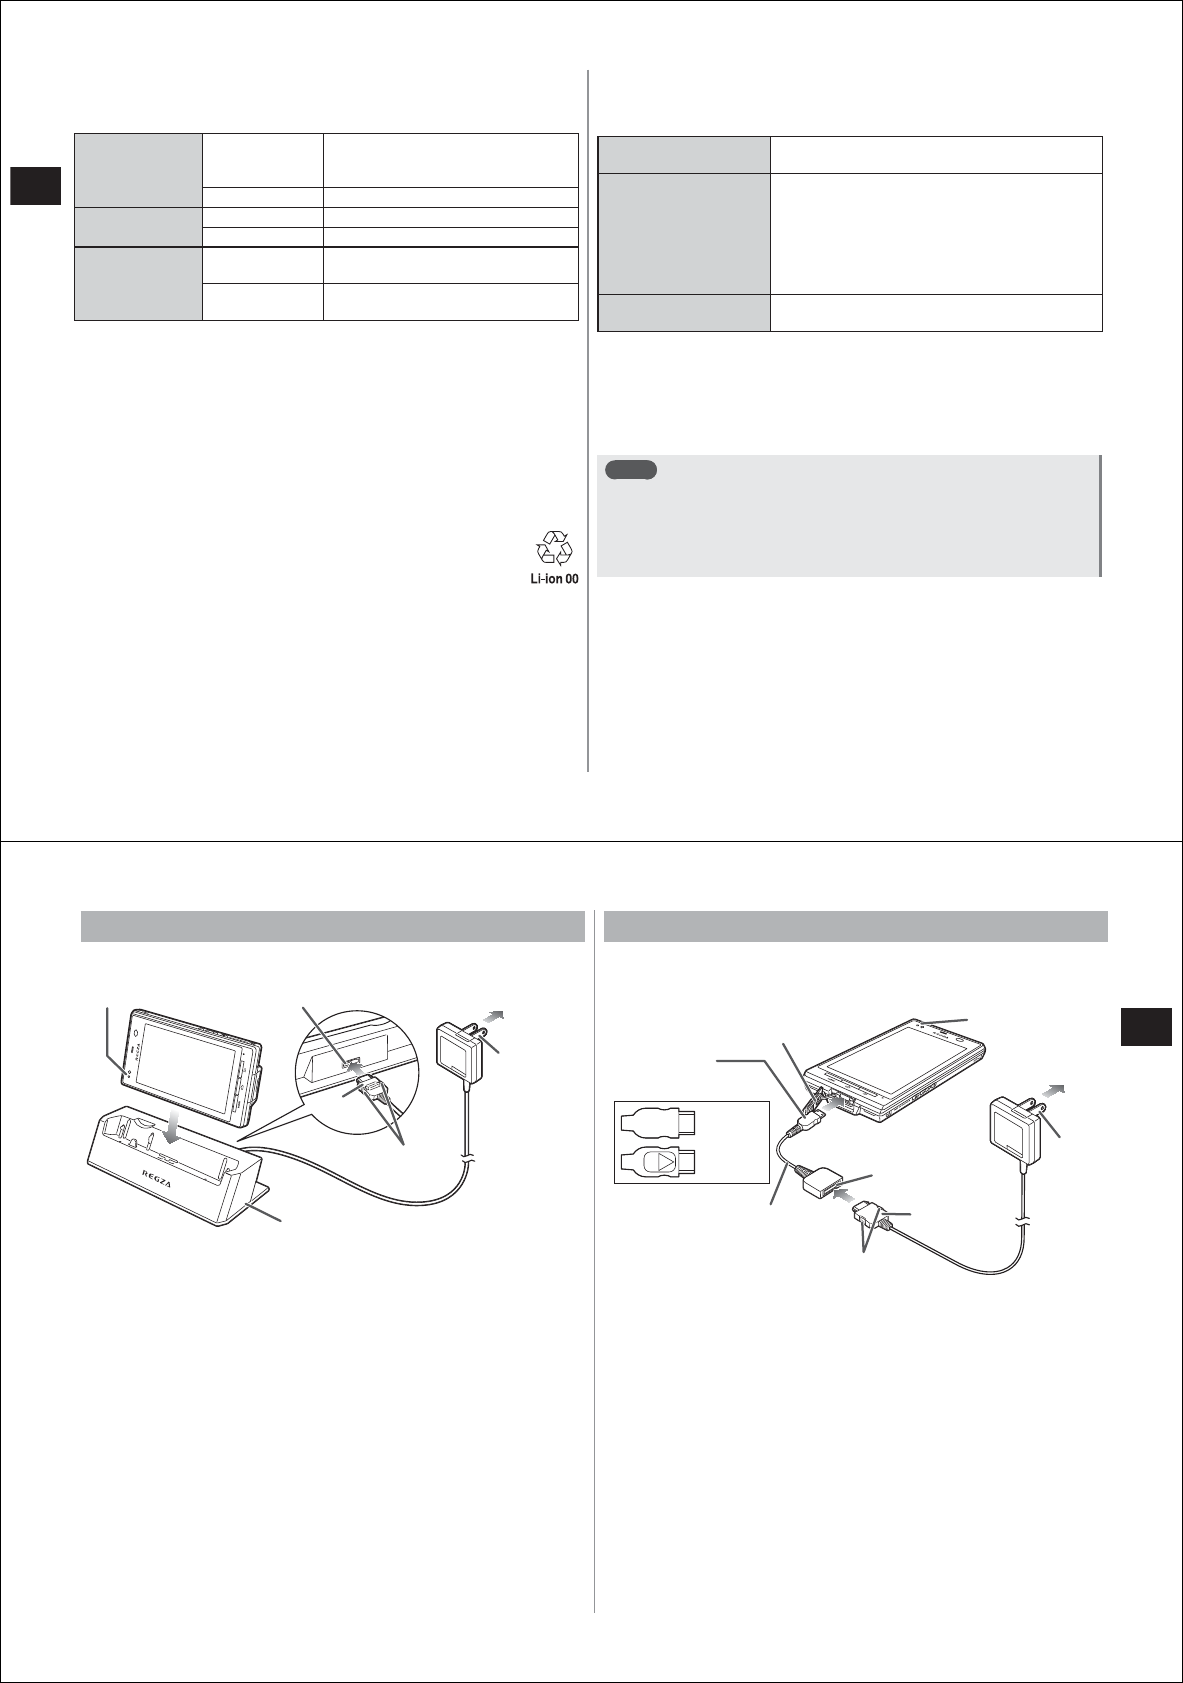
Charging using the desktop holder
The following describes how to charge the battery pack using the FOMA
AC Adapter 01/02 (sold separately) and Desktop Holder T02 (provided).
1 Insert the AC adapter connector into the external
connector terminal on the desktop holder
● Insert the connector with its inscribed side face up and horizontal
to the external connector terminal.
2 Insert the AC adapter power plug into the power outlet
3 Place your FOMA terminal with battery pack
attached into the desktop holder
● During charging, the notification LED lights (red), and goes out
when charging is completed.
4 When charging ends, remove your FOMA terminal
from the desktop holder
5 Disconnect the AC adapter from the external
connector terminal on the desktop holder
● Draw out the adapter horizontally while pressing in the release
buttons on both sides of the connector.
6 Disconnect the AC adapter power plug from the
power outlet
Charging using the AC adapter
The following describes how to charge the battery pack using the FOMA
AC Adapter 01/02 (sold separately) and the FOMA charging microUSB
adapter T01 (provided).
1 Insert the AC adapter connector into the external
connector terminal on the charging microUSB
adapter
● Insert the connector with its inscribed side face down and
horizontal to the external connector terminal with its label side face
down.
2 Open the external connector terminal cover on your
FOMA terminal, and insert the microUSB plug of the
charging microUSB adapter into your FOMA
terminal
● When inserting the microUSB plug into your FOMA terminal, insert
it horizontally into the external connector terminal with the
inscribed side of the microUSB plug face down.
3 Insert the AC adapter power plug into the power outlet
● During charging, the notification LED lights (red), and goes out
when charging is completed.
AC adapter
Connector
Power plug
Desktop Holder T02
Release buttons
External connector terminalNotification LED 100 VAC outlet
microUSB plug
* with its inscribed side
face down
FOMA charging microUSB
adapter T01
AC adapter
Connector
with
inscription
w/o
inscription
External connector
terminal
Power
plug
Notification LED
100 VAC outlet
Release buttons
External connector terminal cover
26
Before Using the FOMA Terminal
4 When charging ends, disconnect the microUSB
plug from your FOMA terminal, and close the
external connector terminal cover
5 Disconnect the AC adapter from the external
connector terminal on the charging microUSB
adapter
● Draw out the adapter horizontally while pressing in the release
buttons on both sides of the connector.
6 Disconnect the AC adapter power plug from the
power outlet
Note
● The FOMA charging microUSB adapter T01 is for connecting the
AC adapter to your FOMA terminal. Even if your FOMA terminal is
connected to a PC via the FOMA USB cable, for example, data
communications or charging cannot be performed. For connecting
to a PC, use the PC connection USB cable T01 (provided).
Charging using the PC connection USB cable
You can charge your FOMA terminal from a PC if your FOMA terminal is
connected to the PC by the PC connection USB cable (provided).
● When the "新しいハードウェアの検索ウィザードの開始 (Start new
hardware search wizard)" screen is displayed on the PC, select "キャ
ンセル (Cancel)".
Playing back slideshows during charging
You can play back slideshows by various methods after charging has
begun.
1
→"SlideShow"
2 Select the "Enable when charging" checkbox
3 Set the image and image transition method
Note
● During slideshow playback, is displayed at the bottom
right of the screen. When this is tapped, the following operations
are possible from the left: pause, clock display, and return to
previous operation screen.
Turning your FOMA terminal on/off
Turning your FOMA terminal on
1 Keep
C pressed (for about two seconds) until your
FOMA terminal vibrates once and the notification
LED lights (green)
After a while, the key lock screen is displayed.
Turning your FOMA terminal off
1 Keep
C pressed until the Phone options menu is
displayed
2 "Power off"→"OK"
When the display goes out
If you have not operated your FOMA terminal for a set period of time,
the display indication will automatically go out and your FOMA terminal
will enter the Sleep mode.
1 Press
C or A
The Sleep mode is deactivated, and the key lock screen is displayed.
27
Before Using the FOMA Terminal
Note
● To manually set your FOMA terminal to the Sleep mode, press cC
while the display is active.
● The Sleep mode is deactivated when you receive an incoming call
or SMS.
When the key lock screen is displayed
1 Slide "Unlock" at the bottom right of the screen
upwards
This cancels the key lock.
Setting access points
Access points for Internet connection are pre-registered. However, you
can add or change these access points as required.
● sp-mode and mopera U access points are already set. At purchase,
the sp-mode is set as the default access point.
Checking the access point in use
1
→"Settings"→"Wireless controls"→"Mobile
networks"→"Access Point Names"
● At purchase, the "spモード (sp-mode)" checkbox is selected.
Setting additional access points
[New APN]
● Never set the MCC to other than 440 and the MNC to other than 10.
Otherwise, they will no longer be displayed on screen.
1
→"Settings"→"Wireless controls"→"Mobile
networks"→"Access Point Names"
2 M→"New APN"
3 "Name"→enter the name of the network profile to
create→"OK"
4 "APN"→enter the access point name→"OK"
5 Enter other items required by the
telecommunications carrier
6 M→"Save"
Note
● When the MCC and MNC settings have been changed and the
access point is no longer shown on the access point name screen,
either reset these settings to their defaults or manually set the
access point.
Key lock screen
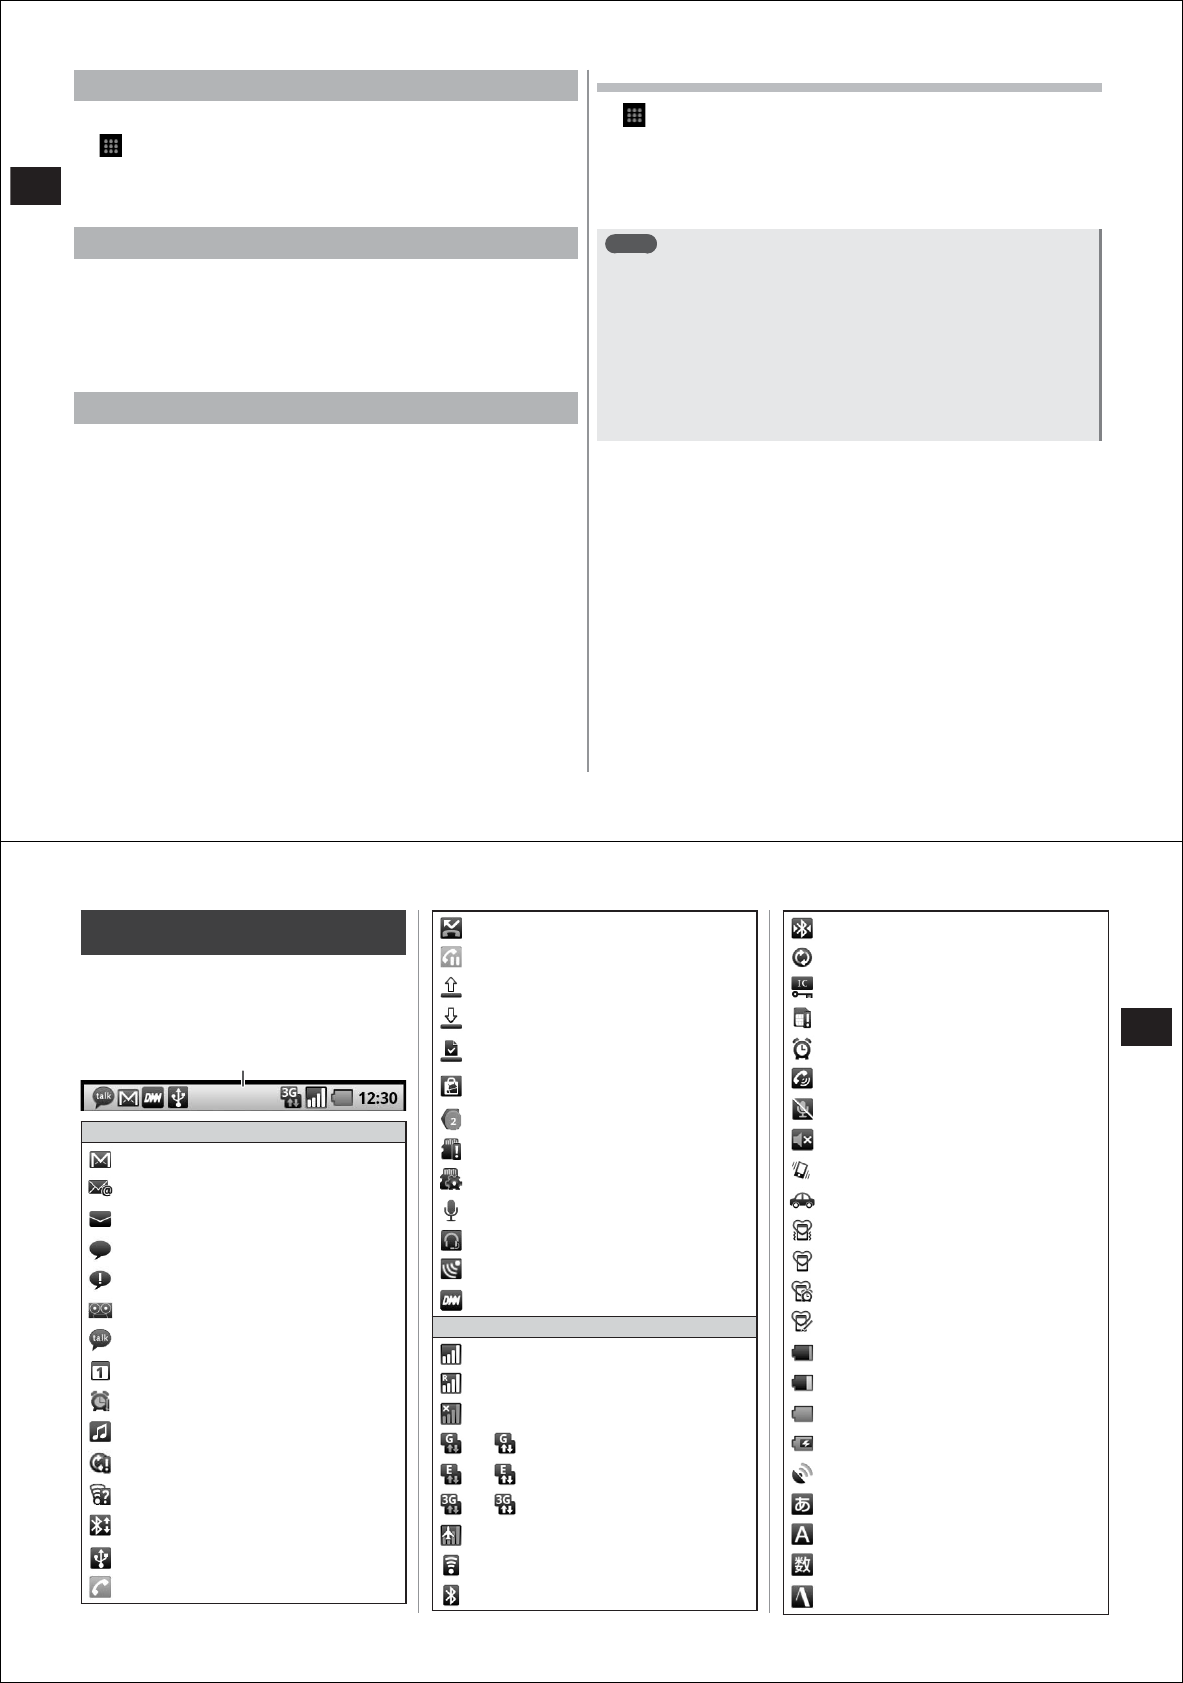
28
Before Using the FOMA Terminal
Initializing access points
Initialization of access points returns them to their default state.
1
→"Settings"→"Wireless controls"→"Mobile
networks"→"Access Point Names"
2 M→"Reset to default"
sp-mode
The sp-mode is an Internet connection service for NTT DOCOMO's
smartphones. Besides providing Internet access, it allows you to use
mail services, for example, that use the same mail addresses (@
docomo.ne.jp) as i-mode.
● The sp-mode is a charged service and must be subscribed to. For
details on the sp-mode, visit DOCOMO's home page.
mopera U
mopera U is an NTT DOCOMO Internet connection service. If you have
subscribed to mopera U, you can use Internet after making the simple
settings.
● mopera U is a charged service and must be subscribed to.
Setting mopera U
1
→"Settings"→"Wireless controls"→"Mobile
networks"→"Access Point Names"
2 Select the "mopera U
(スマートフォン定額)
(mopera U
(Smartphone flat-rate))" or "mopera U設定 (mopera
U settings)" checkbox
Note
● "mopera U設定 (mopera U settings)" is the access point for setting
mopera U. If you use the access point for setting mopera U, packet
transmission charges will not be incurred. Note that you can
connect to only the initial setting screen or the change setting
screen. For details on mopera U settings, visit the mopera U home
page.
● To use "mopera U(スマートフォン定額)
(mopera U (Smartphone
flat-rate))", subscription to "Pake-hodai double/Pake-hodai simple"
is required. For details on mopera U (Smartphone flat-rate), visit
DOCOMO's home page.
29
Before Using the FOMA Terminal
How to view icons
Various icons that show the status of your
FOMA terminal appear in the status bar.
Notification icons appear on the left side of the
status bar, while status icons appear on the
right side.
Notification icons
New Gmail
New email
New sp-mode mail
New SMS
Failed to send SMS
Voice Mail message
New instant message
Calendar schedule
Alarm snoozing
Playing back music
Synchronization trouble
Wi-Fi on and wireless LAN network
available
USB connected
Call in progress
Missed call
Call on hold
Data upload completed
Data download completed
Installation of application from Android
Market, etc. completed
Android Market application update
available
Hidden notification
microSD card not inserted
Earphone connected
1Seg receiving
DiXiM Server activated
Status Icons
Reception status
Roaming
Out of service area
/
GPRS connected/in use
/
EDGE connected/in use
/
3G (packet) connected/in use
Airplane mode
Wi-Fi connected
Bluetooth function on
Connected to Bluetooth device
Synchronizing data
Osaifu-Keitai lock set
docomo UIM card not inserted
Alarm set
Speaker phone on
MIC mute
Ringtone volume 0
Vibration on
Public mode (Drive mode)
Manner mode
Manner mode (Silent)
Manner mode (Alarm)
Original manner
Charging required
Battery power low
Sufficient battery power
Charging
GPS positioning
ATOK kana input mode
ATOK alphanumeric input mode
ATOK number input mode
ATOK pictogram/emoticon/symbol,
common phrases, text code input
Status bar
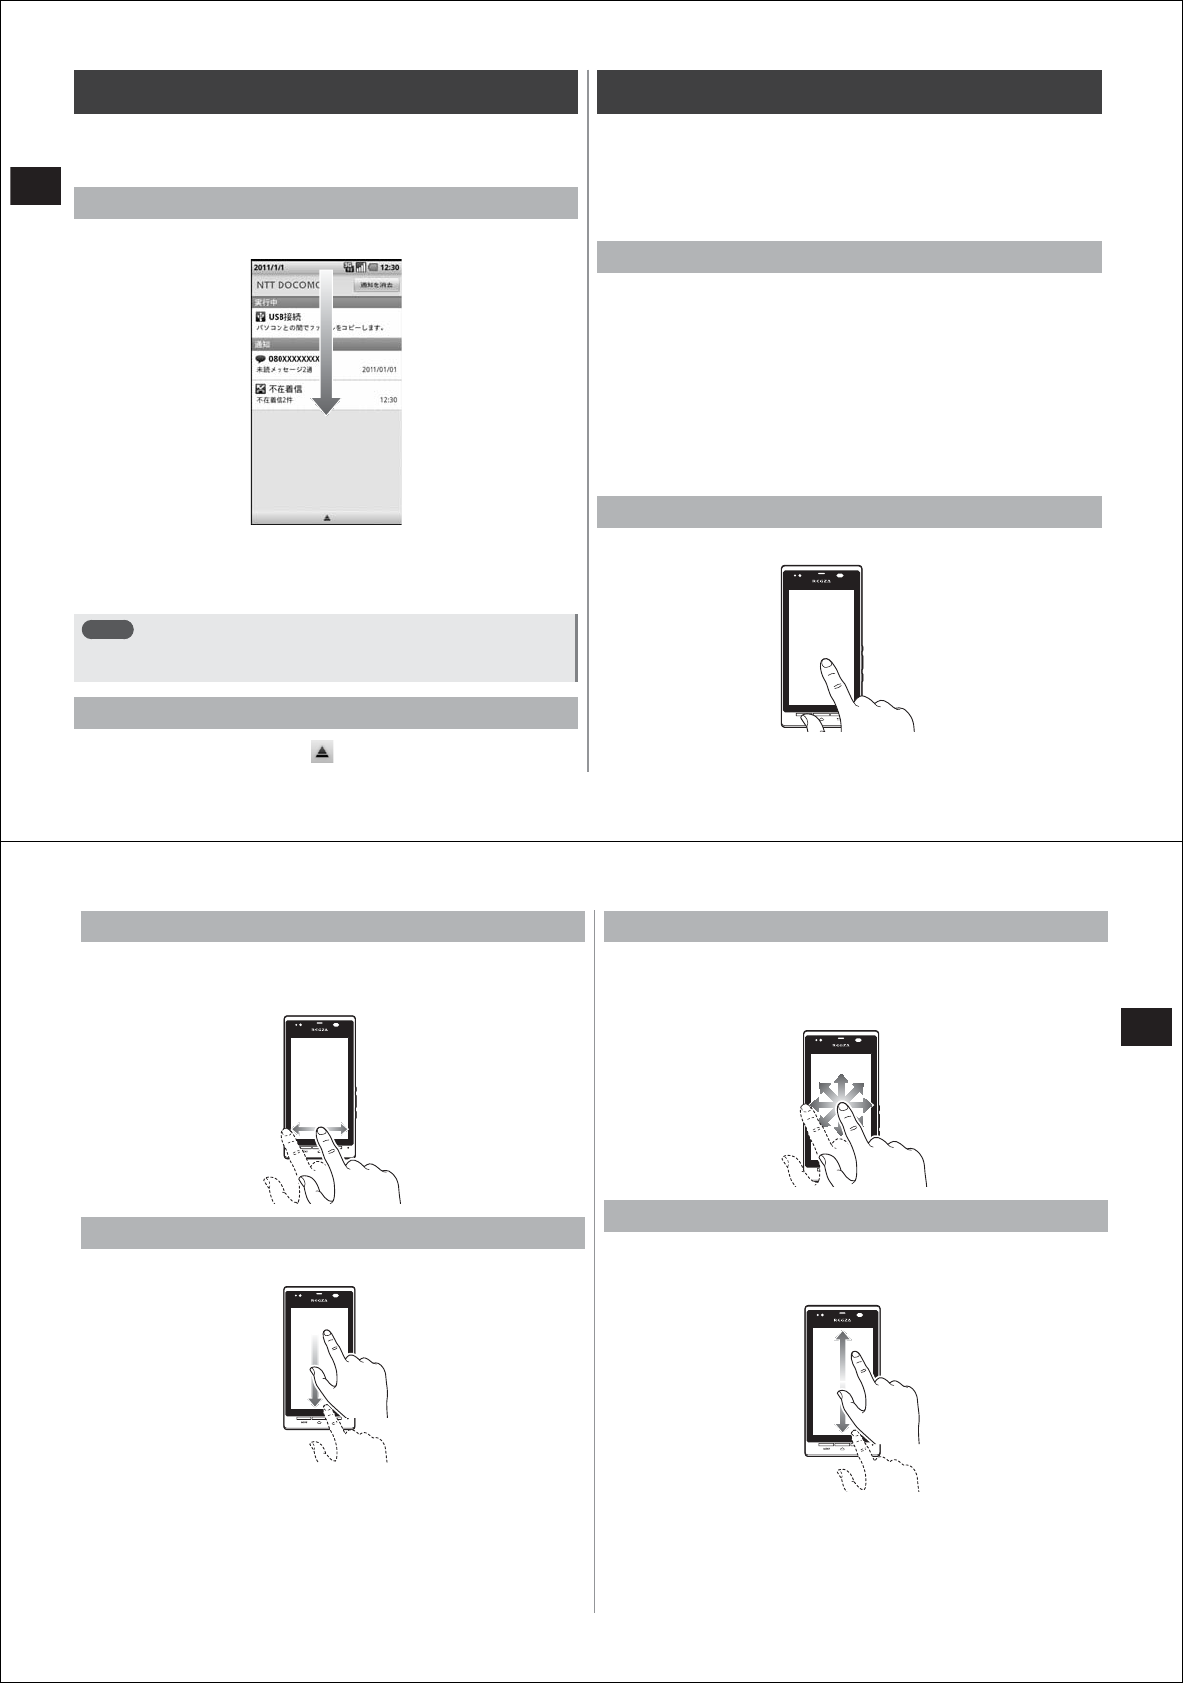
30
Before Using the FOMA Terminal
Notification panel
Notification icons are displayed on the notification panel. You can open
messages, schedules and other notifications directly from the
notification panel.
Opening the notification panel
1 Drag the status bar downwards
● Applications are activated by tapping the notification.
● Tapping "Clear" clears the display inside the notification panel.
Note, however, that the display sometimes cannot be cleared
depending on the content of the notification.
Note
● You can also open the notification panel by mM→"Notifications"
in the home screen.
Closing the notification panel
1 Drag the bar (part with ) at the bottom of the
notification panel upwards, or press R
Basic operations (touch panel)
The display on this FOMA terminal is a touch panel, and operations are
performed by directly touching the touch panel with your finger. Your
FOMA terminal incorporates a motion sensor that detects the terminal's
orientation and movement. The screen display mode is switched by this
motion sensor depending on how you hold your FOMA terminal,
horizontally or vertically.
Cautions when using the touch panel
The touch panel is designed to be touched lightly by your finger. Do not
exert too much pressure with your finger or press sharp-pointed objects
(fingernails, ballpoint pens, pins, etc.) against it.
● In the following cases, the touch panel may not work even if you
touch it. It may also malfunction.
・Operation with a gloved finger
・Operation with your fingernails
・Operation with foreign objects placed on the operation pad
・Operation with protective sheets or stickers on the touch panel
・Operation by wet hands
・Operation under water
Tapping
Lightly tap an item or icon on screen to select it.
31
Before Using the FOMA Terminal
Flicking
Quickly slide your finger on screen to the left and right when there are
multiple pages (e.g. multiple still pictures or setting screens) to select
the previous or next screen.
Dragging
Move your finger with it touching an item or icon on screen.
Panning
Dragging the screen itself in all directions to display parts of the screen
you want to view if the entire screen cannot fit in the display, for
example, when viewing web pages or Office files, or you want to zoom
in on still pictures.
Scrolling
The scroll bar is displayed when a contact list or application menu, for
example, cannot fit in the display. Slide the screen up/down or left/right
to display hidden parts of the screen.
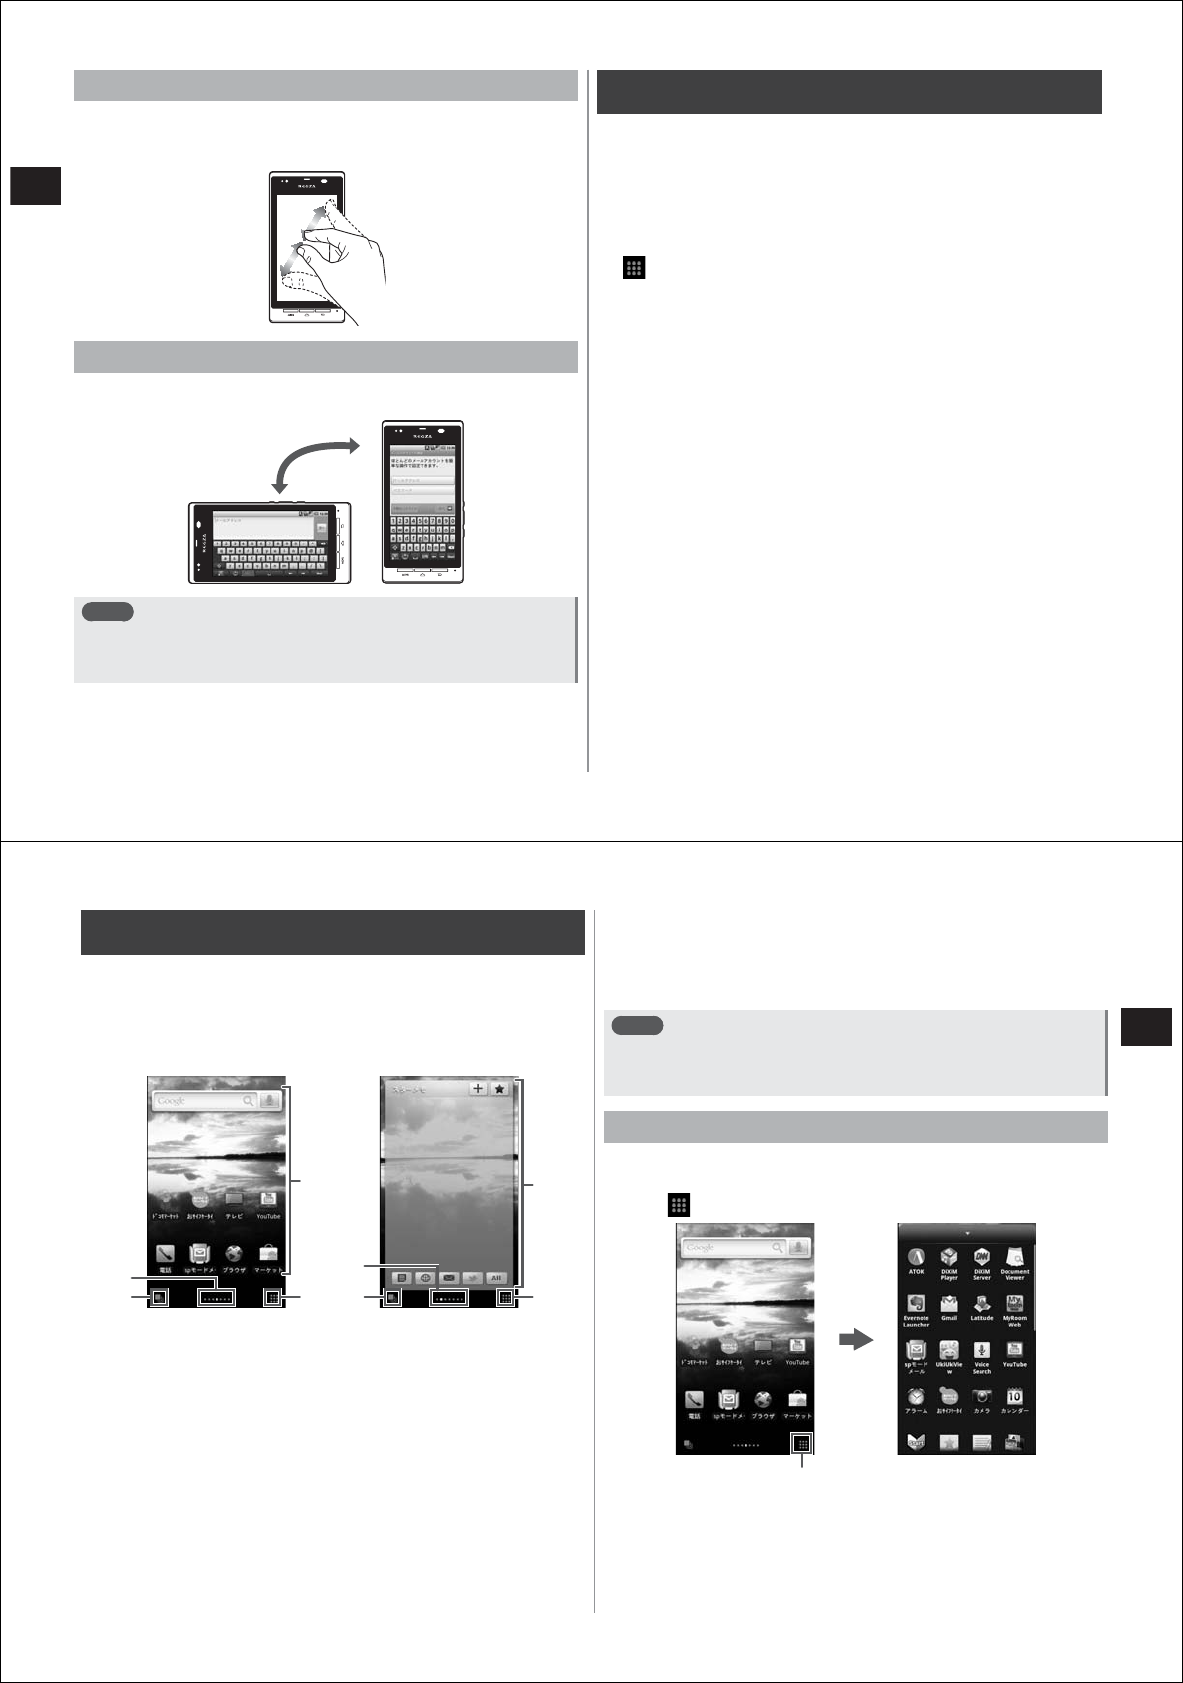
32
Before Using the FOMA Terminal
Pinching
Spread two fingers (pinch out) on screen to zoom in and bring your two
fingers together (pinch in) to zoom out when a web page or still picture,
for example, is displayed.
Switching the portrait/landscape display mode
You can switch the landscape/portrait screen display mode by changing
how you hold your FOMA terminal, horizontally or vertically.
Note
● The screen display mode sometimes cannot be switched even by
re-orienting your FOMA terminal depending on the screen that is
currently displayed.
Startup Guide
This application shows first-time users how to operate your FOMA
terminal and make settings.
It includes basic operation training, basic settings and a glossary.
● When this application is activated, a large amount of content is
downloaded, and this might incur high packet transmission charges.
We strongly recommend subscribing to flat-rate packet services such
as "Pake-hodai double".
1
→"Startup Guide"
33
Before Using the FOMA Terminal
Home screen
The home screen is the start screen from which an application is
activated, and can be called up by pressing A.
On a home screen, up to nine screens can be set by a combination of
My Palette, on which applications and widgets can be freely arranged,
and palettes (stationary widgets). You can select these screens by
sliding the home screen to the left and right.
① The number and position of currently set home screens is displayed
as icons.
② Tap to select the palette.
③ Customize area
At purchase, the following applications and widgets are set on your
FOMA terminal:
My Palette 1: Quick Search Box, docomo market, おサイフケータイ
(Osaifu-Keitai), TV, YouTube, Phone, spモードメール
(sp-mode mail), Browser, Market
My Palette 2: Weather, Maps, Gmail, ToruCa, Startup Guide, Camera,
mosimo camera, Media Folder, Infrared
④ Tap to display the menu of applications currently registered on your
FOMA terminal.
⑤ Palette display area
At purchase, Calculator, STARMEMO, Tweets, Calendar, and News
RSS Reader are set. Also available are Common Items, Common
sites, Friends, Bookmarks, Call History, Messages, E-mail, Pictures,
and mixi.
Note
● The Settings menu (P. 54) can be displayed from the option menu
by the following operation.
In the home screen, mM(→"More")→"Settings"(/"Display all")
Calling up the application menu from a home screen
You can activate applications registered on your FOMA terminal or
change the settings on your FOMA terminal from home screens.
1 Tap
2 Scroll the screen up and down, and tap the
function/item you want to activate
③
④
My Palette 1
②
①
⑤
④
Palette (STARMEMO)
②
①
Tap here
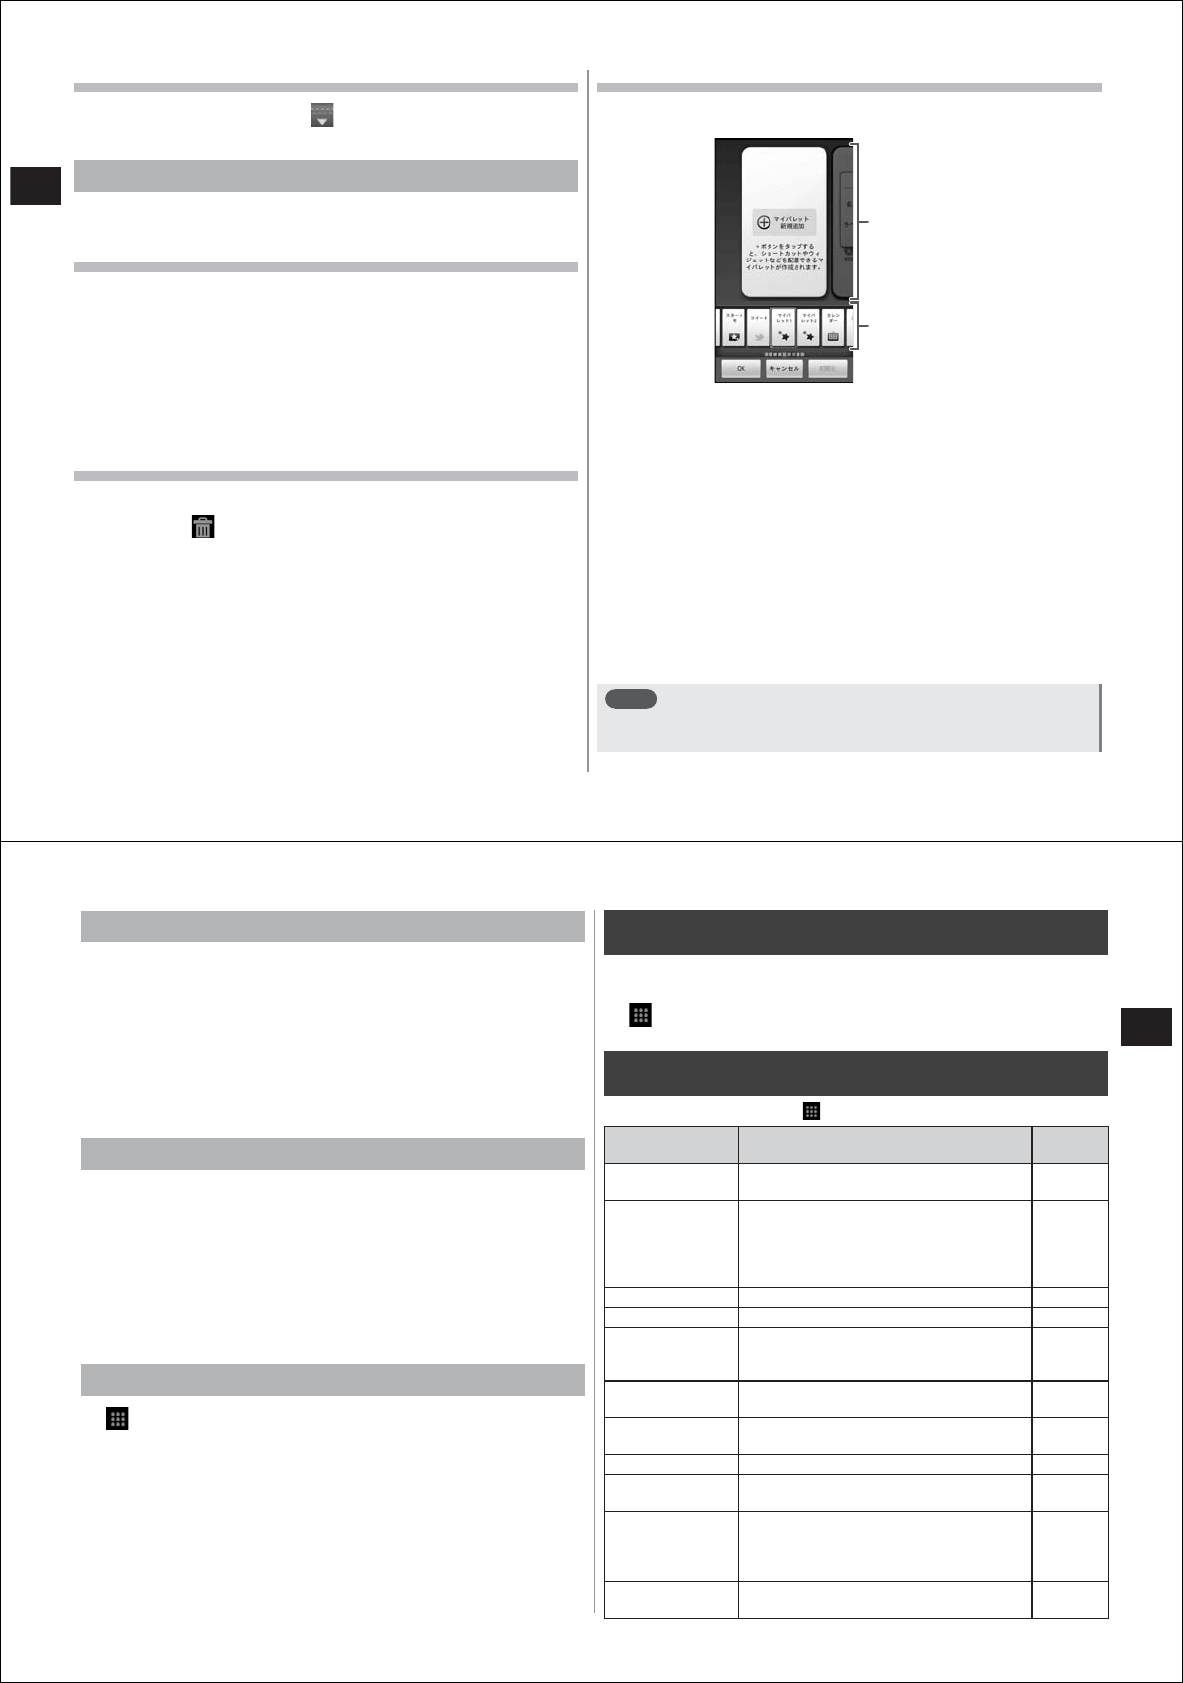
34
Before Using the FOMA Terminal
Closing the application menu
1 Drag the bar (part with ) at the top of the
application menu downwards, or press R
Customizing My Palette
You can freely arrange your favorite widgets and application shortcuts
on a home screen.
Adding applications
1 In My Palette, M→"Add"
● You can also do this by tapping the palette display area for one
second or more.
2 Tap "Shortcuts"/"Widgets"/"Folders"/"Wallpaper"
3 Tap the application you want to add
4 Drag the application to where you want to place it
Deleting applications
1 Drag the application you want to delete from My
Palette to
Adding My Palettes
1 In the home screen, M→"Home screen settings"
2 Tap "Add New My Palette"
3 Tap the "Name" field and enter the palette name
4 Tap "OK"
5 Tap
▼ on the label and select an icon
6 Drag the new palette you made to the settings box
● To cancel a setting, drag the palette from the settings box to the
palette selection area.
● Drag the palettes in the settings box to re-arrange them. The
palette placed in the center will be the home screen that is
displayed when A is pressed.
7 Tap "OK"
Note
● Palettes can be returned to their default state when you purchased
your FOMA terminal by tapping "Reset"→"OK" after step 1.
Palette selection
area
Settings box
35
Before Using the FOMA Terminal
Setting a palette
Set handy palettes, such as Calculator, Calendar or Common sites, to a
home screen.
1 In the home screen, M→"Home screen settings"
2 Flick the palette selection area to the left and right,
and drag the palette you want to display to the
settings box
3 Tap "OK"
Changing the home screen wallpaper
1 In the home screen, M→"Wallpaper"
2 Tap "Live wallpapers"/"Preset"/"Wallpaper(Media
Folder)" and select an image
● When you have selected an image at "Wallpaper(Media Folder)",
drag it inside the trimming frame to specify the position, drag the
corners of the trimming frame to zoom in or out, and then tap "○".
3 Tap "Set wallpaper"
Switching to the Android standard home screen
1
→"Homescreen selector"→"OK"
2 Tap "Launcher"
● If the "Use by default for this action." checkbox is selected, the
home screen selection screen will no longer be displayed after
A is pressed.
Viewing the User's Manual
The User's Manual can be used to check basic operation methods and
how to make settings on your FOMA terminal.
1
→"取扱説明書 (User's Manual)"
Application menu
This is displayed by tapping .
Application Outline Reference
page
ATOK You can set predictive conversion and
register user dictionary terms.
P. 3 8
DiXiM Player
You can play back content on your FOMA
terminal on a DLNA-compatible TV or PC, or
you can play back content on a DLNA-
compatible PC or network-connected HDD
(NAS) on your FOMA terminal.
P. 103
DiXiM Server Activates and sets the DLNA server. P. 103
Document Viewer You can view Office files and PDF files. P. 119
Evernote
You can save your own ideas, observed
information, etc. so that it can be viewed on
your FOMA terminal, PC, etc.
P. 11 4
Gmail You can send and receive Google account
email.
P. 7 7
Latitude You can mutually check your position with a
friend's on a map.
P. 106
MyRoom Web You can display MyRoom Web pages. −
sp-mode mail You can send and receive emails containing
pictograms.
P. 7 7
UkiUkiView
You can display icons representing emotions
overlaid with a posted message near your
current position or at position information at
a location on a map.
P. 108
Voice Search Searches for information in your FOMA
terminal or web pages by audio.
P. 11 6
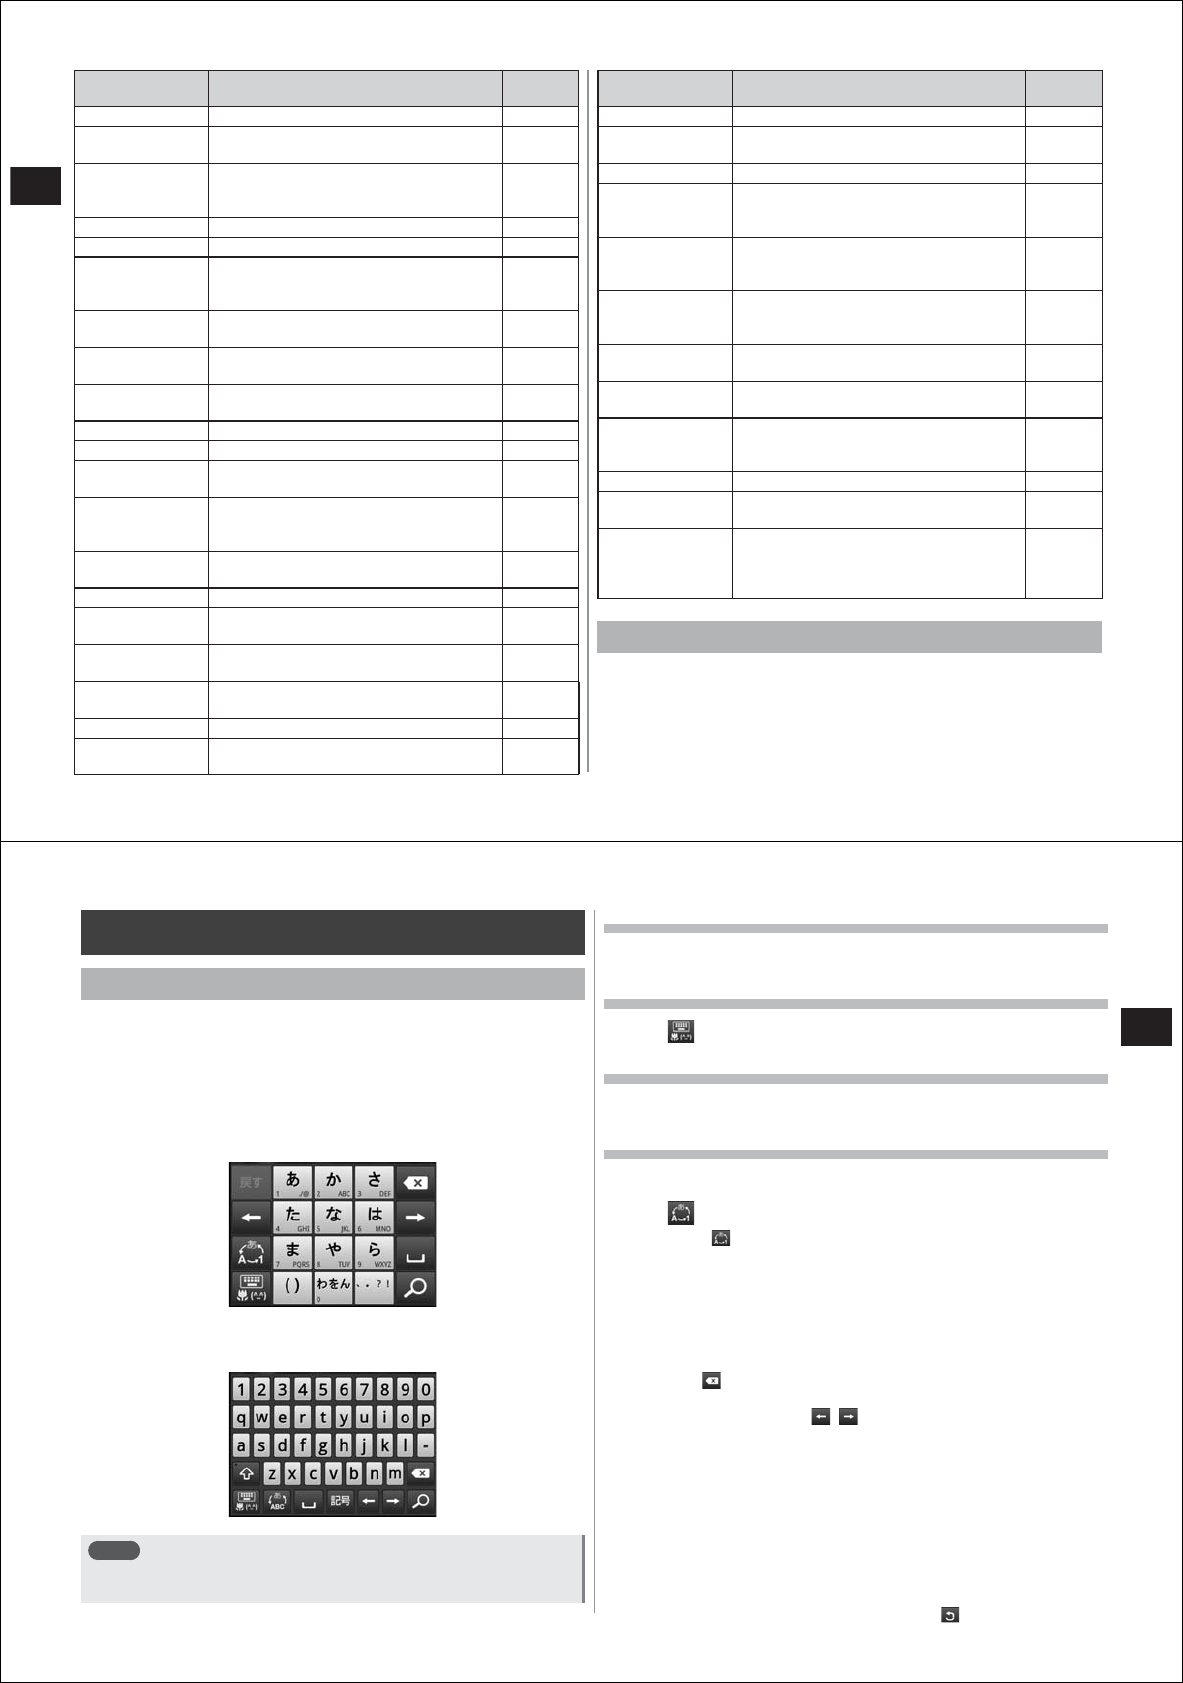
36
Before Using the FOMA Terminal
Application Outline Reference
page
YouTube You can view YouTube videos. P. 97
Alarm Clock You can set alarms to specific days of the
week and times.
P. 111
おサイフケータイ
(Osaifu-Keitai)
You can pay for things in stores simply by
holding your FOMA terminal up to the store's
scanner.
P. 108
Camera Shoots still pictures. P. 92
Calendar Registers job schedules, etc. P. 110
Startup Guide
This application shows first-time users how
to operate the FOMA terminal and make
settings.
P. 3 0
STARMEMO You can check the STARMEMOs you have
composed.
P. 11 3
Create new You can create five types of memos: text,
handwritten, voice, photo, and video.
P. 11 2
SlideShow You can play back slideshows after charging
has begun by various methods.
P. 2 4
TV You can view 1Seg. P. 99
Talk You can chat using Google Talk. P. 82
docomo market You can easily access docomo
recommended sites and handy applications.
P. 11 8
ToruCa
Can be used as electronic cards that can be
obtained by Osaifu-Keitai, flyers and
restaurant cards, coupon tickets, etc.
P. 109
Navigation You can acquire a detailed guide to your
destination.
P. 106
Camcorder Shoots video. P. 92
Browser You can view web pages just as you can on
a PC.
P. 8 5
Places You can search detailed information of
places nearby.
P. 107
Home screen
settings
You can switch the home screen to the
Android standard home screen.
P. 3 3
Market You can use Android Market. P. 116
Maps You can display your current position, and
search other places and routes.
P. 105
Application Outline Reference
page
Music Plays back music. P. 96
Email You can send and receive email to and from
PCs.
P. 7 4
Messaging You can send and receive SMS. P. 80
Media Folder
You can display still pictures or video taken
with the camera or downloaded from web
pages and saved on microSD card.
P. 9 3
mosimo camera
If you take photos with the mosimo camera,
it can detect subject's movement or faces,
and attach special effects to them.
P. 11 4
取扱説明書
(User's Manual)
The User's Manual can be used to check
basic operation methods and how to make
settings on your FOMA terminal.
P. 3 3
IrDA You can receive contacts via IrDA
communications.
P. 5 6
Settings Makes various settings on your FOMA
terminal.
P. 5 4
Calculator
You can perform addition, subtraction,
multiplication, division, and other calculation
operations.
P. 11 4
Phone You can make calls. P. 41
PhoneBookCopy You can copy contact data between your
FOMA terminal and the microSD card.
P. 11 5
Contacts
You can enter telephone numbers and mail
addresses, Twitter account information, etc.
and make calls from contacts through simple
operation.
P. 4 4
Activating recently used applications
You can display and activate recently used applications.
1 Press
A for one second or more
2 Tap the application you want to activate
37
Before Using the FOMA Terminal
Entering text
ATOK keyboard
On this FOMA terminal, you can enter text using the keyboard displayed
on screen. You can switch between the following two types of ATOK
keyboard and use them selectively.
■Number keyboard
This is the most popular keyboard used on mobile phones. You can use
four input modes on this keyboard: mobile phone input, gesture input,
gesture input Pro, and flick input.
■QWERTY keyboard
On this keyboard, Japanese is entered using the English alphabet.
Note
● You can also switch to the Android keyboard to enter English
characters (P. 38).
Displaying the keyboard
1 Tap the text entry field
Switching the keyboard
1 Tap
Hiding the keyboard
1 Press
R
Entering text on the number keyboard
1 Select the number keyboard (P. 35)
2 Tap to select the desired input mode
● If you tap for one second or more, the ATOK menu will be
displayed, and you can make ATOK settings or register dictionary
terms, and select the English/Japanese input modes.
3 Enter text
● Conversion candidates are displayed at the top of the keyboard
each time you enter text. You can display conversion candidates
not on screen by scrolling to the left and right.
● Tapping deletes the character immediately to the left of the
cursor.
● To move the cursor, tap / .
● To return the previously applied text to its pre-conversion state,
tap "戻す (Back)".
● Predictive conversion candidates are not included in the displayed
conversion candidates by tapping "変換 (Convert)" after entering text.
● Entered text can be converted to katakana/numbers/alphabet
characters/date (double-byte characters/single-byte characters) by
tapping "カナ英数 (Kana/alphanumerics)" after entering text.
● Entered text can be converted to hiragana/double-byte katakana/
single-byte katakana by tapping "後変換 (Post-convert)" after
tapping "変換(Convert)".
● To display characters in reverse order, tap .
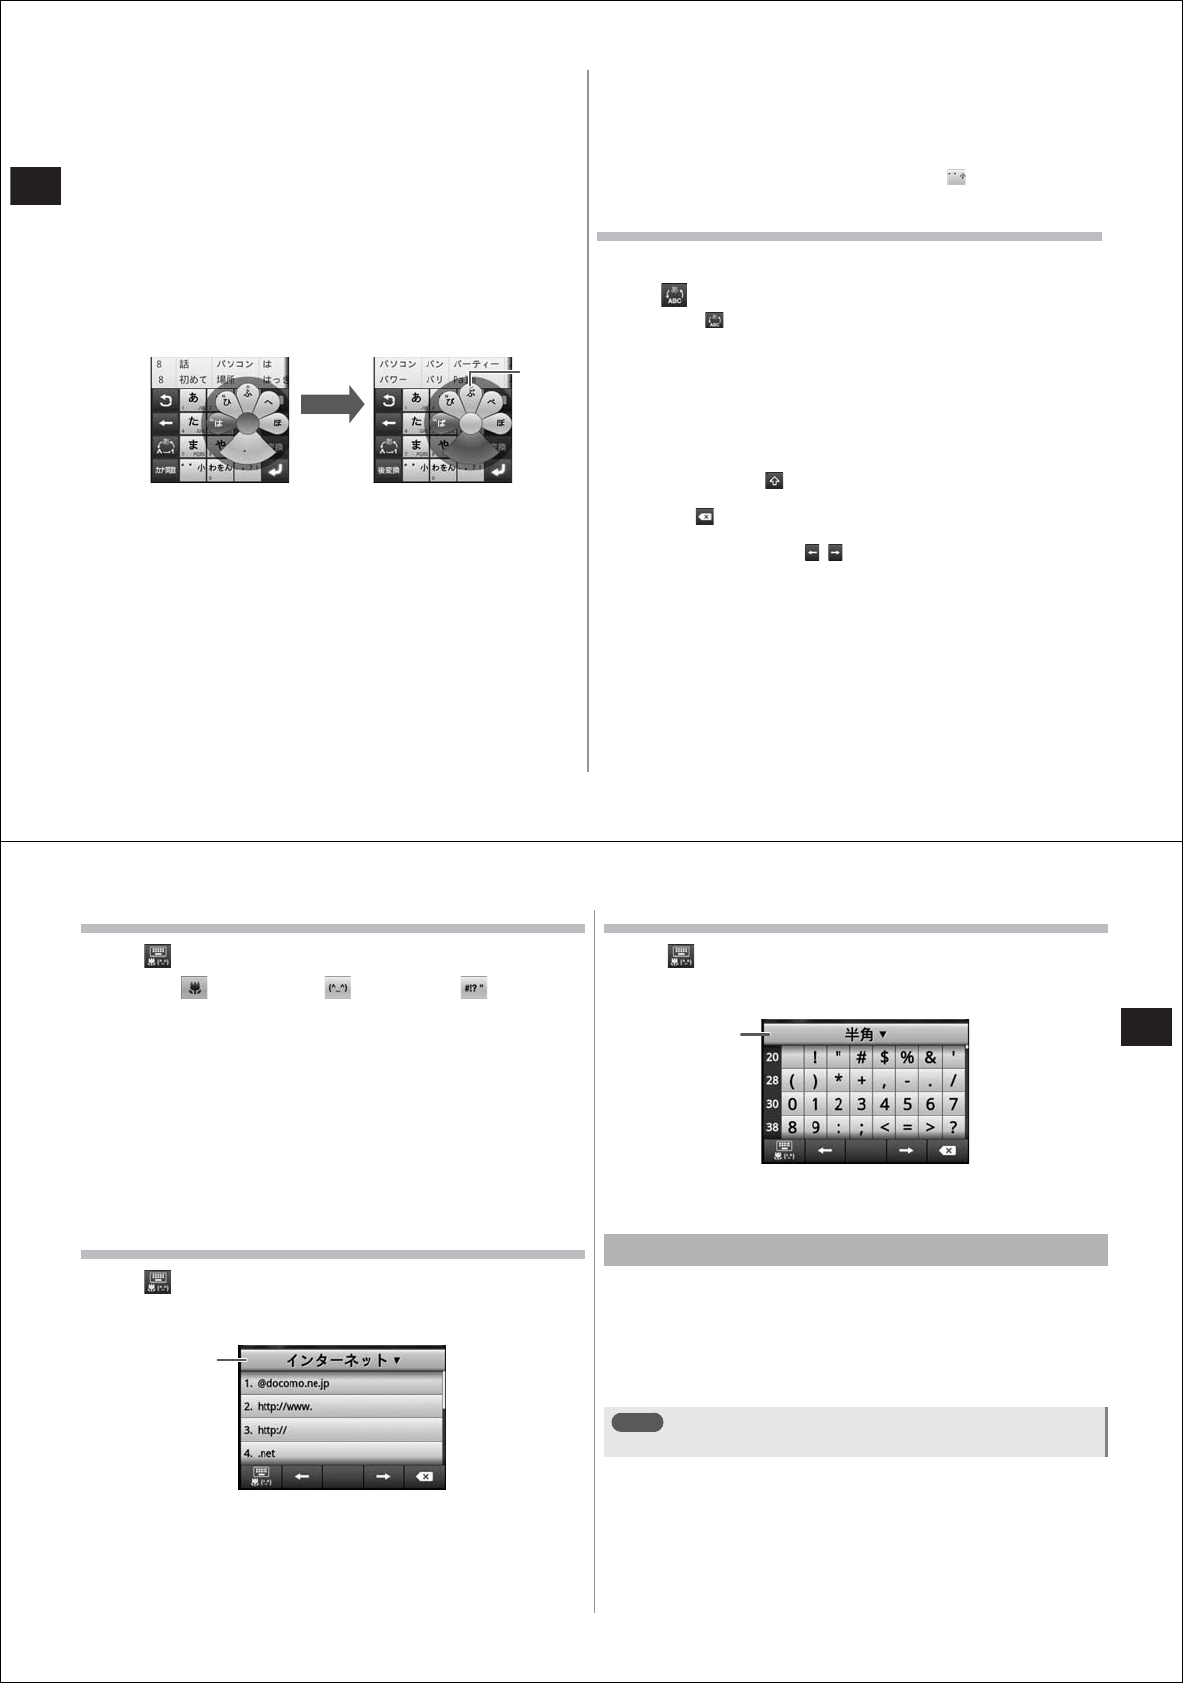
38
Before Using the FOMA Terminal
■Mobile phone input
In this input mode, you continuously tap a key assigned the character
you want to enter until the desired character is displayed.
■Gesture input
In this input mode, if you tap and leave your finger on the key assigned
the character you want to enter, characters (gesture guide) will be
displayed around that key. Slide your finger to the desired character
without removing your finger from the screen.
● To enter ten-ten, maru, or small characters, slide once or twice
downwards without removing your finger from the screen. A gesture
guide for ten-ten, maru, or small characters will be displayed around
that key. Slide your finger to the desired character without removing
your finger from the screen.
Example) To enter "ぱ"
● In the alphanumeric input mode, you can switch between uppercase
and lowercase characters by sliding downwards without removing
your finger from the screen.
■Gesture input Pro
In addition to entry in gesture input mode, you can quickly continuously
tap a key assigned the character you want to enter until the desired
character is displayed.
■Flick input
In this input mode, if you tap and leave your finger on the key assigned
the character you want to enter, characters (flick guide) will be displayed
on that key. Flick towards the desired character without removing your
finger from the screen.
● To enter ten-ten, maru, or small characters, tap once or twice after
flicking.
Entering on the QWERTY keyboard
1 Select the QWERTY keyboard (P. 35)
2 Tap to select the desired input mode
● If you tap for one second or more, the ATOK menu will be
displayed, and you can make ATOK settings or register dictionary
terms, and select the English/Japanese input modes.
3 Enter text
● Conversion candidates are displayed at the top of the keyboard
each time you enter text. You can display conversion candidates
not on screen by scrolling to the left and right.
● You can toggle between the uppercase screen and the lowercase
screen by tapping . Numbers can be entered in the lowercase
screen.
● Tapping deletes the character immediately to the left of the
cursor.
● To move the cursor, tap / .
● Predictive conversion candidates are not included in the displayed
conversion candidates by tapping "変換 (Convert)" after entering
text.
● Entered text can be converted to hiragana, double-byte katakana,
single-byte katakana, or English characters by tapping "後変換
(Post-convert)" after entering text.
Slide twice
downwards
Gesture
guide
39
Before Using the FOMA Terminal
Entering by the pictogram/emoticon/symbol palette
1 Tap for one second or more
2 Slide to (pictogram)/ (emoticon)/ (symbol)
without removing your finger from the screen
3 Select the category, and select the pictogram/
emoticon/symbol you want to enter from the item
list
● You can display categories not on screen by scrolling the category
field at the top of the palette to the left and right.
● You can display items not on screen by scrolling the item list to the
left and right.
● You can display the history list beginning with the newest entered
item by tapping "履歴 (History)" at the top left of the palette. You
can also enter items from this history list.
Entering common phrases
1 Tap for one second or more
2 Slide to "定型文 (Common phrases)" without
removing your finger from the screen
3 Select the category, and tap the common phrase
you want to enter from the list
Entering from the character code table
1 Tap for one second or more
2 Slide to "文字コード (Character codes)" without
removing your finger from the screen
3 Select the category, and tap the character you want
to enter from the list
Switching to the Android keyboard
You can also switch to the Android keyboard to enter English
characters.
● The Android keyboard does not support the Japanese input mode.
1 Tap the text entry field for one second or more
2 "Input method"→"Android keyboard"
Note
● To return to the ATOK keyboard, select "ATOK" at step 2.
Category
Category

40
Before Using the FOMA Terminal
Setting ATOK
Setting the ATOK keyboard
1
→"ATOK"→"Software keyboard"
2 Set the required items
Keypad sound When this checkbox is selected, the operation tone
sounds each time you tap a key.
Keypad
vibration
When this checkbox is selected, your FOMA terminal
vibrates each time you tap a key.
Input mode* Sets the input mode on the number keyboard.
Auto cursor
moving*
When the "Enable auto cursor moving" checkbox is
selected, the cursor automatically moves to the right
and stands by for entry of the next character if you
do not tap for a set period of time during multi-
tapping. You can also set the tap interval or time it
takes until the cursor moves.
Character
delete key*
When "[BS]Backspace" is selected, the character
immediately to the left of the cursor is deleted when
is tapped.
When "[CLR]Clear" is selected, the character
immediately to the right of the cursor is deleted when
"Clear" is tapped.
Gesture guide* When setting by gesture input Pro, if this checkbox
is deselected and "OK" is tapped, the gesture guide
is no longer displayed.
When this checkbox is selected, you can set the time
until the gesture guide is displayed after a key is
tapped.
* Number keyboard only
Entry/conversion related settings
1
→"ATOK"→"Entering/Converting"
2 Set the required items
Input
prediction
When this checkbox is selected, predictive
conversion candidates are displayed.
Showing
prediction
cand
If this checkbox is selected with predictive conversion
enabled, input predictive candidates are displayed
before the next character is entered.
Auto space
insert
If this checkbox is selected, a space is automatically
inserted after a word is applied in the English input
mode (P. 36, P. 3 7).
■Deleting learned data
Once a phrase or expression is entered, it is automatically stored in
memory, and is displayed as a predictive conversion candidate. All
learned data can be deleted and your FOMA terminal can be returned
to its default state by initializing learned data.
1
→"ATOK"→"Entering/Converting"
2 "Initializing learning data"→"OK"
Changing the keyboard design
1
→"ATOK"→"Design"
2 Set the required items
Theme Sets the design theme of the ATOK software
keyboard.
Font size Sets the text size of conversion candidates.
number of lines to
display (vertical
screen)
Sets the number of lines to display conversion
candidates in the portrait display mode.
number of lines to
display (horizontal
screen)
Sets the number of lines to display conversion
candidates in the landscape display mode.
41
Before Using the FOMA Terminal
User dictionary
You can register frequently used words to a user dictionary in advance.
When you enter characters with the same reading, words in the user
dictionary will be given priority over other conversion candidates and
displayed first.
■Registering words to a user dictionary
1
→"ATOK"→"Tools"→"Dictionary utility"
The ATOK dictionary utility screen is displayed.
2 M→"新規登録 (New)"
3 Enter the word to register at "単語 (Word)"
4 Enter the reading at "読み (Reading)"
5 Select the part of speech, and tap "登録 (Register)"
■Modifying registered words
1 In the ATOK dictionary utility screen, tap the word
you want to modify
2 Modify its registered content, and tap "修正 (Modify)"
■Deleting registered words
■Deleting one dictionary entry
1 In the ATOK dictionary utility screen, tap the word
you want to delete for one second or more
2 "
削除 (Delete)"→"はい (Yes)"
■Deleting all entries
1 In the ATOK dictionary utility screen, M→"全削除
(Delete all)"→"はい (Yes)"
■Saving registered words to microSD card
1 In the ATOK dictionary utility screen, M→"一覧出
力 (Output list)"
2 At the "場所 (Output to)" field, select "sdcard" and
select the folder to save the registered words in
3 Enter the file name
4 "OK"→"実行 (Execute)"→"閉じる (Close)"
Note
● To read word data saved on the microSD card, do the following:
In the ATOK dictionary utility screen, mM→"一括登録 (Batch
register)"→at the "場所 (Output to)" field, select "sdcard"→select
the folder→select the file→"OK"→"登録 (Register)"→"閉じる (Close)"
Adding common phrases
1
→"ATOK"→"Tools"→"Common phrase utility"
The common phrase list screen is displayed.
● You can add new categories by M→"カテゴリー (Category)"
→M→"新規作成 (New)".
2 M→"新規作成 (New)"
3 Enter the common phrase, and select the category
at the "カテゴリー (Category)" field
4 Tap "登録 (Register)"
Editing common phrases
■Editing the body text of common phrases
1 Select the common phrase you want to edit in the
common phrase list screen
42
Before Using the FOMA Terminal
2 Enter the changes, and tap "登録 (Register)"
● When the body text of a newly created common phrase is edited,
changes will also be made to its title. To disable the link between a
title and body text, perform "Changing the title of a common
phrase" (P. 40).
■Changing the title of a common phrase
1 Tap the common phrase whose title you want to
change in the common phrase list screen for one
second or more
2 Tap "タイトル変更 (Change title)"
3 Enter the changes, and tap "OK"
■Changing the category of a common phrase
1 Tap the common phrase whose category you want
to change in the common phrase list screen for one
second or more
2 Tap "カテゴリー移動 (Move category)"
3 Select the category
■Deleting a common phrase
1 Tap the common phrase you want to delete in the
common phrase list screen for one second or more
2 "
削除 (Delete)"→"はい (Yes)"
Note
● To return common phrase data to its default state, do the following:
In the common phrase list screen, mM→"初期化 (Initialize)"→"はい
(Yes)"
Initializing ATOK settings
Initialization returns ATOK settings to their default state.
1
→"ATOK"→"Initializing settings"
2 Tap "OK"
Note
● Learned data, words in the user dictionary and additional common
phrases are not deleted even if ATOK settings are initialized.
43
Call/Network Services
Making calls
1
→"Phone"
2 Enter the phone number of the other party
● If you enter the wrong phone number, tap to delete the number
you entered.
3 Tap "SEND"
4 When you have finished the call, tap "End" or press
M
Note
● If your face, or something, comes close to the proximity sensor
during a call, the display goes out, it is redisplayed by moving
away from the sensor.
Emergency call
● This FOMA terminal supports "Location notification of emergency
call".
When dialing an emergency number such as 110, 119, and 118, the
information of your location (location information) is automatically
notified to the agency that receives the emergency call (e.g. the
police station). Depending on your location and the signal reception
status, the agency that received the emergency call may not be able
to confirm the exact location.
If the location information is notified, the name of the agency that
received the emergency call is displayed on the stand-by display.
If you are not sending your caller ID by calling with "184" added or
other means, your location information and phone number are not
notified. However, if the agency that received the emergency call
considers your location information and phone number necessary for
important purposes, such as life saving, the agency can retrieve them
regardless of your settings.
In addition, the area/timing to introduce "Location notification of
emergency call" depends on the state of preparation in each agency
that receives emergency calls.
● When calling 110, 119, and 118 from your FOMA terminal, the police
or fire station may return your call for verification purposes. State that
you are calling from a mobile phone, and give your phone number
and exact location.
Remain stationary to ensure that you are not disconnected while
making an emergency call, and keep the FOMA terminal turned on to
receive calls for approximately ten minutes afterwards.
● Depending on the region, calls to the police or fire station may not be
connected.
1
→"Phone"
2 Enter an emergency call number
Emergency call Phone number
Police call 110
Fire and emergency rescue 119
Sea distress call 118
3 Tap "SEND"
Note
● Emergency calls cannot be made in Japan if the docomo UIM card
is not inserted.
● Emergency calls can be made by tapping "Emergency call" if it is
displayed on screen. Note, however, that emergency calls cannot
be made even by tapping "Emergency call" if the PIN code entry
screen is displayed or the PIN code is locked (PUK lock) (P. 64).
44
Call/Network Services
Entering touch-tone signals (DTMF tones)
This feature is used for services such as listening to calls on your home
answering machine, ticket reservations and bank balance inquiries.
1
→"Phone"
2 Enter the phone number, tap " " for one second or
more, and enter a pause (,)
3 Enter the message (touch-tone signal) to send
● Enter "0" to "9", "*" and "#".
● When sending multiple messages, separate each message with a
pause (,) delimiter.
4 Tap "SEND"
Note
● For details on sending touch-tone signals during a call, see
"Operations during calls in progress" (P. 43).
Showing/hiding caller ID at each call
[186/184]
You can specify whether or not to show your telephone number (caller
ID) on the other party's telephone when you make a call.
● Your caller ID is important personal information. So, take care when
notifying people about it.
1
→"Phone"
2 Enter the phone number of the other party
3 M→"Hide My ID" (Add 184)/"Show My ID" (Add
186)
4 Tap "SEND"
Note
● Show/hide caller ID can be batch set in "Caller ID Notification
Service" (P. 52).
Making an international call
[WORLD CALL]
● For details on use overseas, see "Overseas Use" (P. 120).
For details on unclear points about WORLD CALL, contact the
"docomo Information Center" on the last page of this manual.
1
→"Phone"
2 Add "+" (tap "0" for one second or more), enter
country code, area code (city code) and the other
party's phone number
● If the area code (city code) begins with "0", omit the "0". However,
"0" must be included when making a call to some countries or
regions such as Italy.
● When selecting from the country list and entering "+ country
code", enter the area code (city code) and the telephone number,
and select M→"Add Country code".
3 Tap "SEND"
Note
● Country codes can be registered by tapping
→"Phone"→mM
→"Country code setting".
45
Call/Network Services
Receiving calls
1 You have an incoming call
2 Tap or press D
● To reject incoming calls, either tap or press M for one
second or more.
● If you had a call in the sleep mode or while key operations or the
screen were locked, slide to the right end to answer the call.
To reject the call, slide to the left end.
3 When you have finished the call, tap "End" or press
M
Note
● On this FOMA terminal, calls cannot be put on hold.
● If your face, or something, comes close to the proximity sensor
during a call, the display goes out, it is redisplayed by moving
away from the sensor.
■To temporarily mute the ringtone during an incoming call
During an incoming call, press E or F.
Operations during calls in progress
The following operations are possible in the call in progress screen.
① Temporarily puts the call on hold*1*2
② Name or telephone number
③ Ends the call
④ Calls another party*2
⑤ Turns the Bluetooth head set on*1
Switches to hands-free talking using
the Bluetooth head set.
⑥ Call time
⑦ Displays the dial pad*1
Sends touch-tone signals (DTMF
tones).
⑧ Turns the MIC off (mute)*1
Makes your voice inaudible to the
other party.
⑨ Turns the speaker phone on*1
Makes the other party's voice audible
from the speaker.
*1 Tapping again restores the screen to
the previous state.
*2 Catch Phone (P. 50) must be
subscribed to.
Note
● Grayed out items are unavailable.
Adjusting the in-call volume
[In-call volume]
1 During a call in progress, press E (increase
volume) or F (decrease volume)
Note
● The in-call volume can be adjusted only during a call in progress
and not at other times.
③
①
④
⑤
②
⑦
⑧
⑨
⑥
Call in progress screen
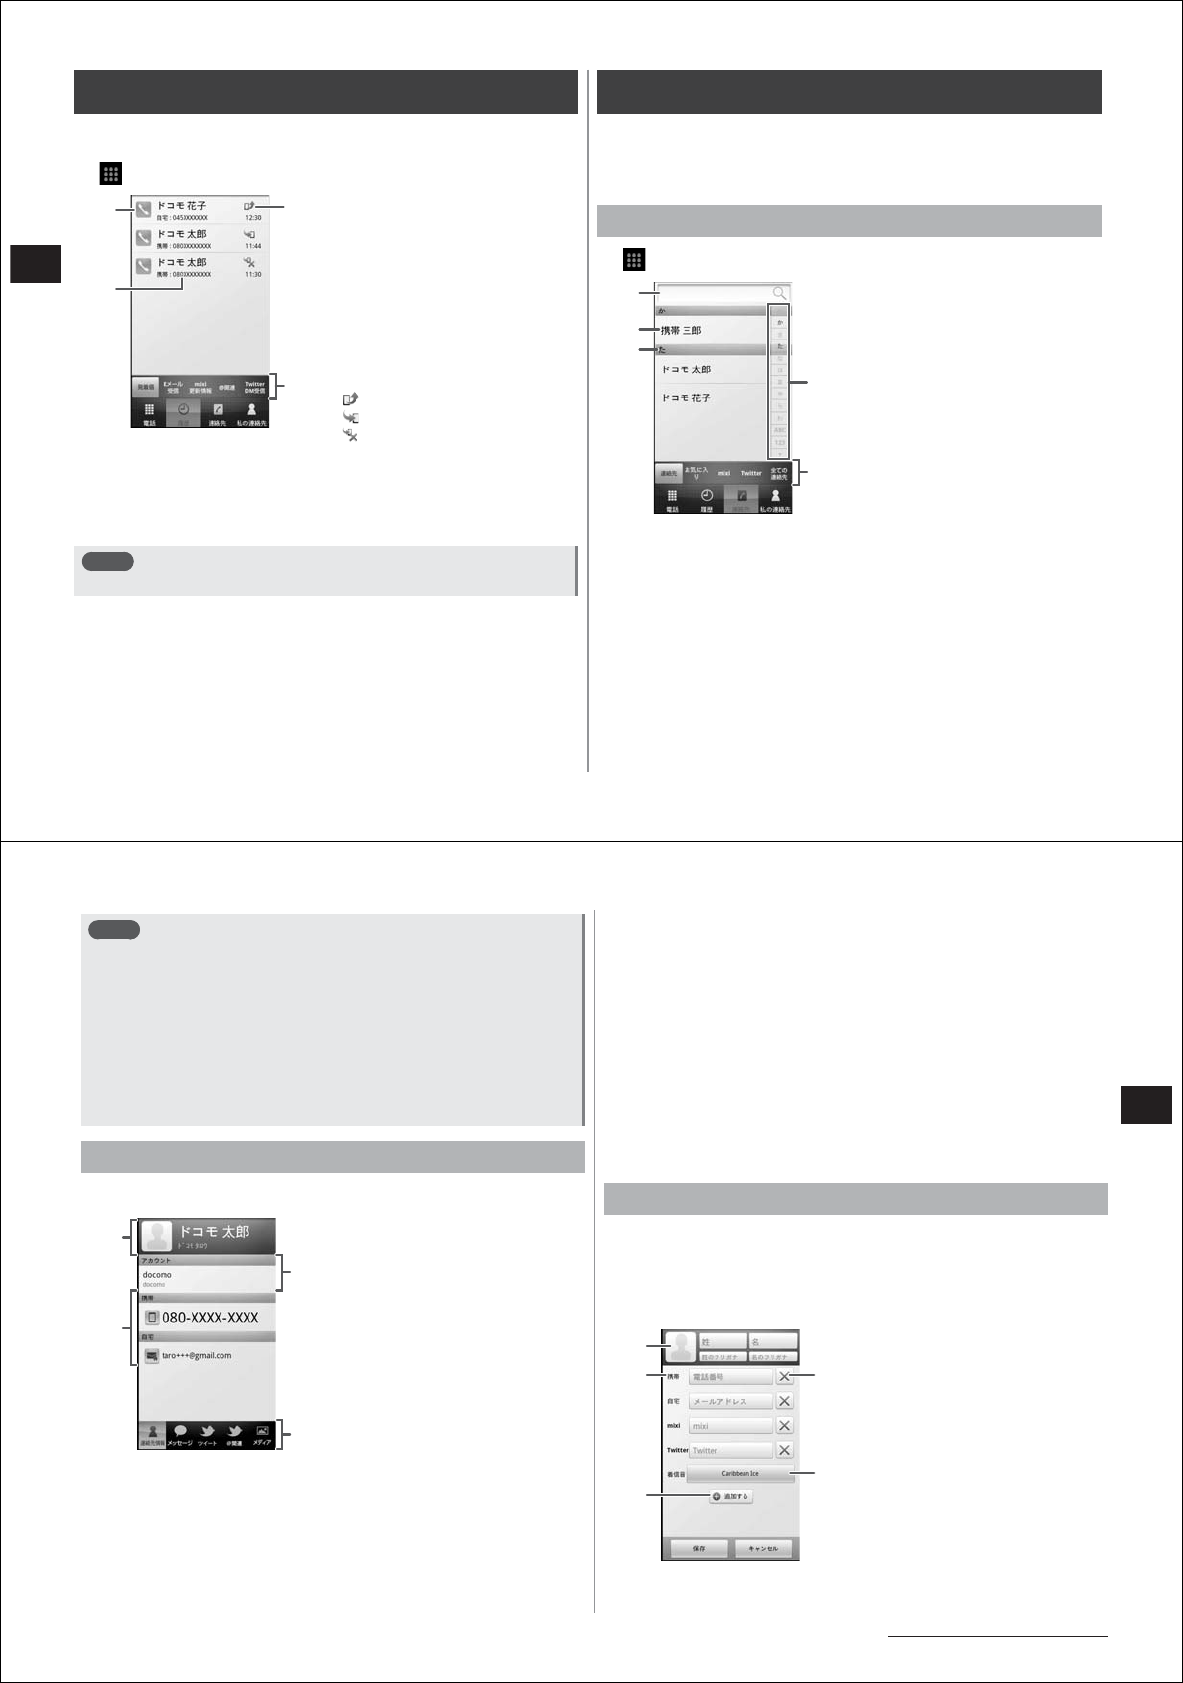
46
Call/Network Services
Checking histories
You can check your FOMA terminal's dialed/incoming call history,
Twitter send/receive history, mixi update information, etc.
1
→"Phone"/"Contacts"/"Histories"
① Tap to dial a call
② Name or telephone number
Tap to display the action list. Tap
an item in the action list, and
display dialed calls, SMS
transmission, contact registration
or the personal information
screen.
You can delete the history by
tapping for one second or more.
③ History icons
Outgoing call history
Incoming call history
Missed call history
④ Palette selection tab
■History screen sub-menus
You can refresh the display, customize palettes (P. 46), delete history
lists, and set accounts (P. 68) by pressing M in the history screen.
Note
● Sub-menu items differ according to the palette.
About contacts
Besides telephone numbers and email addresses, you can import
account information, such as Twitter and mixi, to contacts. This way,
you can contact registered parties or check update information through
simple operation from contacts.
Displaying the contact list
1
→"Contacts"
① Search box
Enter the name (first or last,
(kana)) in this search box to
search for contacts.
② Name
Tap to display the personal
information screen.
You can make outgoing calls,
send SMS, register favorites,
edit/delete/share contacts, and
perform other operations by
tapping for one second or more.
③ Index bar
④ Index
Jumps to the index bar of the
tapped letter.
⑤ Palette selection tab
■Contact list sub-menus
You can register contacts (P. 45), delete contacts, refresh the display,
customize palettes (P. 46), set accounts (P. 68), import/export contacts
(P. 47), and perform other operations by pressing M in the contact
list.
①③
④
History screen
(Dialed/incoming palette)
②
③
①
②
④
Contact list
(Contact palette)
⑤
47
Call/Network Services
Continued on next page
Note
● Sub-menu items differ according to the palette.
● mixi accounts and Twitter accounts are synchronized by mM→
"Refresh" on a Favorite palette or on all contact palettes. Google
accounts are not synchronized.
● To synchronize Google accounts, in the contact list mM→"Account
settings"→select the Google account→mM→"Sync now".
● Only contacts with telephone numbers can be displayed or contacts
of specific mail accounts or groups can be displayed by mM→
("More"→)"Display options" on the contact palette or on all contact
palettes.
Displaying personal information
1 Tap a name on the contact list
① Face shot and name
② Personal registered information
Displayed items differ according
to the contact's registered
information.
Outgoing calls can be made or
SMS or email can be sent by
tapping an item or tapping it for
one second or more.
③ Contact's email account
④ Palette selection tab
The following palettes are available in the personal information screen.
The palette to be displayed can be set at "Customizing palettes" (P. 46).
● Personal information palette
You can check the registered information of the selected person.
● Messages palette
You can check the history of SMS sent/received from the selected
person, and send SMS to that person.
● Twitter/Twitter@/Twitter DM palette
You can check tweets, replies and direct messages from the selected
person, and send replies and direct messages to that person.
● Media palette
You can acquire the photo or video of the selected person from
Picasa or YouTube.
■Personal information screen sub-menus
You can edit/delete contacts, refresh the display, send via IrDA,
customize palettes (P. 46), and set accounts (P. 68) by pressing M in
the personal information screen.
Registering a contact
1 In the contact list, M→"Create new"
2 Select an email account
● When a docomo account is selected, you can enter mixi and
Twitter account information.
① Tap to set the face shot
② Tap to change the label
A new label can be created by
selecting "Custom".
③ Tap to add items and labels
④ Tap to delete items
⑤ Tap to set the ringtone
①
Personal information screen
(Personal information palette)
④
③
②
②
③
①
④
⑤
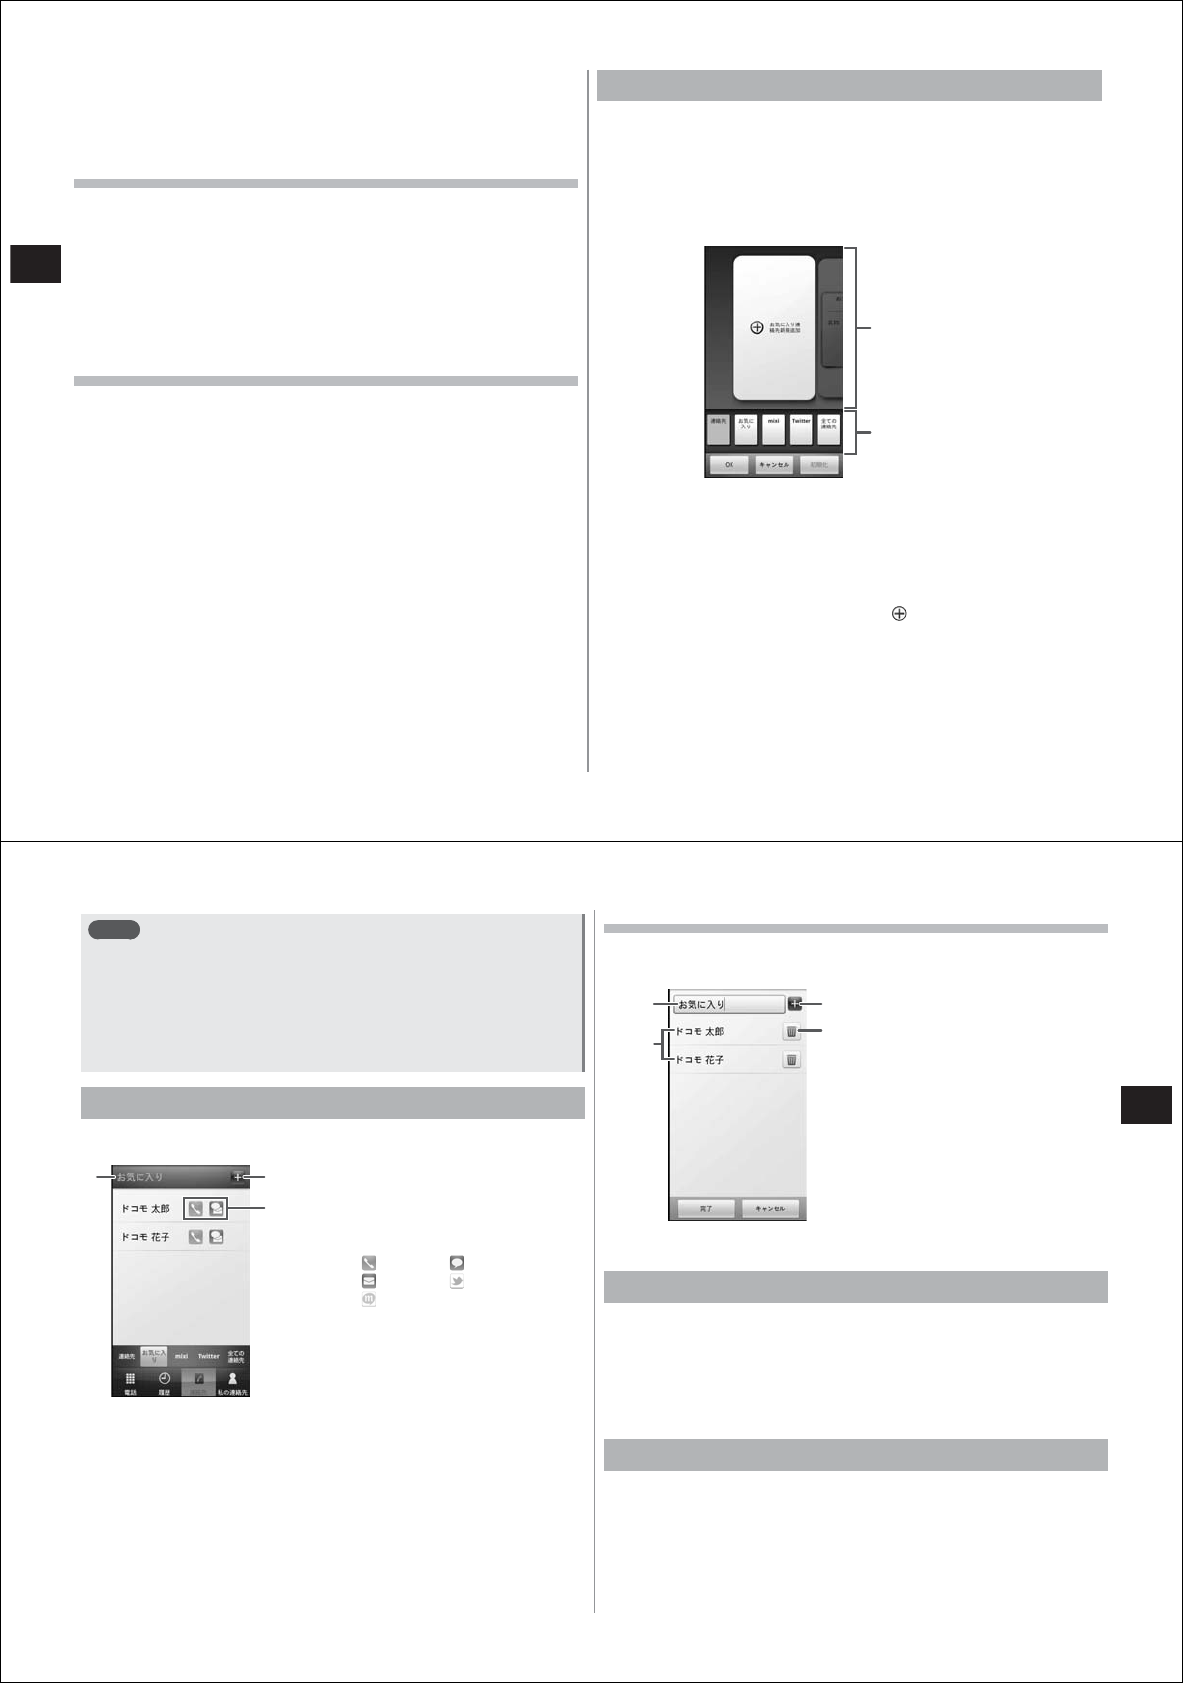
48
Call/Network Services
3 Enter name, telephone number, email address, and
other required items
4 Tap "Save"
Registering contacts from a history
1 In the history screen (P. 44), select the other party
you want to register, and tap "Add to Contacts"
2 Tap "New contact" or "Add to contacts"
● When you have selected "New contact", select an email account.
● When you have selected "Add to contacts", select a contact.
3 Enter the required items, and tap "Save"
Registering contacts from the mixi or Twitter palette
You can register the mixi or Twitter account information of the other
party to a contact in the docomo account on your FOMA terminal.
1 On the mixi or Twitter palette, tap the other party
you want to register for one second or more
2 Tap "Add to contacts"
3 Tap "Create new" or "Search contacts"
● When you have selected "Create new", select an email account.
● When you have selected "Search contacts", select a contact.
4 Enter the required items, and tap "Save"
Customizing palettes
You can set or re-arrange the palettes to be displayed. Up to five
palettes can be set.
1 In the contact list or history screen (P. 44), M
→"Display settings"
● In the personal information screen, M→"Individual display
setting".
2 Drag the palette you want to display to the settings
box from the thumbnail area
● Flick the thumbnail area to the left and right to select the palette.
● To cancel the setting, drag the palette from the settings box to the
thumbnail area.
● Drag the palettes in the settings box to re-arrange them.
● To make a new Favorite palette, tap to enter a name, and
tap "OK".
3 Tap "OK" when the settings are completed
Thumbnail area
Settings box
49
Call/Network Services
Note
● Palettes can be returned to their default state when you purchased
your FOMA terminal by tapping "Initialize"→"Yes" after step 1.
● A newly made Favorite palette remains in the thumbnail area even
after tapping "Cancel" at the bottom of the screen. To delete a
Favorite palette from the thumbnail area, tap "×"→"Yes".
● Favorite palettes deleted from the thumbnail area cannot be
restored even by tapping "Cancel" at the bottom of the screen.
Using Favorite palettes
You can quickly contact another party or check refresh information if
you use a Favorite palette.
① Name of Favorite palette
② Tap to add a contact to a Favorite
palette
③ Checks contacts/refresh information
by the selected means
Ex) Phone SMS
email Twitter
mixi
①②
Contact list
(Favorite palette)
③
Editing Favorite palettes
1 In the Favorite palette, M→"Edit Favorite
Contacts"
① Tap to enter the name of the
Favorite palette
② Drag to sort the order
③ Tap to add a contact to a Favorite
palette
④ Tap to specify the contact to
delete from the Favorite palette
2 Tap "Done" when editing is completed
Editing contacts
1 Tap the contact you want to edit in the contact list
for one second or more
2 Tap "Edit"
3 Enter the items you want to change, and tap "Save"
Deleting a contact
1 Tap the contact you want to delete in the contact
list for one second or more
2 "Delete"→"Yes"
①③
④
②
50
Call/Network Services
Importing/exporting contacts
1 In the contact list, M→"More"→"Import"/"Export"
2 Select and operate each of the import/export items
■To import contacts
SIM card Specifies the contacts you want to add from contacts
saved on the docomo UIM card to import them.
SD card Selects one or multiple contact data stored on the
microSD card to import them, or import all contacts.
IrDA Receives all contacts via IrDA communications. After
contact data is received, select "add to the contact list"
or "delete all before add".
■To export contacts
SD card Backs up contact data to the microSD card.
IrDA Sends all contacts via IrDA communications.
Editing your own contacts
You can check the telephone numbers on your FOMA terminal. You can
also enter and edit your own information.
1
→"Phone"/"Contacts"/"Owner info"
2 M→"Edit"
3 Edit the items
Face shot, Last name,
First name, Furigana
You can set a face shot and enter name.
Owner information You can check your own telephone number,
and enter your mail address and URL.
Account information mixi, Twitter, YouTube, Picasa, and Flickr
account information is displayed. Tap to
enable setting of the account (P. 68).
4 Tap "Save"
51
Call/Network Services
Network services
You can use the following docomo network services on your FOMA
terminal.
For a brief outline and details on how to use each service, see the
reference page in the table below.
Service name Monthly
fee Subscription Reference
page
Voice Mail Service Charged Required See below
Call Waiting Service Charged Required P. 50
Call Forwarding Service Free Required P. 51
Caller ID Notification Service Free Not required P. 52
Public Mode (Drive Mode) Free Not required P. 53
Public Mode (Power Off) Free Not required P. 53
● Network services are not available outside the service area or in
places out of signal range.
● For details, see "Mobile Phone User's Guide [Network Services]".
● For subscription and inquiries, contact "docomo Information Center"
on the last page of this manual.
Voice Mail Service
Voice Mail Service is a service for answering incoming voice calls with a
reply message and recording callers' messages when the FOMA
terminal is outside the service area or turned off, or when you cannot
answer calls.
● You can record up to 20 messages respectively for calls with
approximately 3 minutes of recording time per message. Messages
are saved for up to approximately 72 hours.
● If a call is not answered when Voice Mail Service is activated, the call
is saved as a missed call in the Incoming History and is displayed
on the status bar.
● This FOMA terminal does not support the videophone call Voice Mail
Service. Make a voice call to "1412" to disable videophone call.
● When a Voice Mail message is recorded, is displayed on the
status bar. Also, the "VM: XX" notification SMS (where, XX is the
number of Voice Mail messages) is received from NTT DOCOMO.
You can dial the Voice Mail Service Center by opening the notification
panel and tapping the notification.
Basic flow of Voice Mail Service
Activate the Voice Mail Service
Your FOMA terminal will receive a voice call
The call is connected to the Voice Mail Service
Center if not answered
The caller records a Voice Mail message
To immediately record a message without hearing a
reply message, for example, when you are in a
hurry, press "#" when the reply message is played.
You are notified that there is a Voice Mail message
at the Voice Mail Service Center
Play the Voice Mail message
52
Call/Network Services
Using the Voice Mail Service
1
→"Settings"→"Call settings"→"Network service
setting"
2 Tap "Voice mail service"
3 Select the item you want to use
Activate Voice
Mail
Select "OK" to activate the Voice Mail Service.
Set ring time Enter the ring time (0 to 120 seconds), and tap
"OK".
When the ring time is set to 0 seconds, a record of
the incoming call is not left in the incoming call
history, and the caller is connected directly to the
Voice Mail Service Center.
Deactivate Voice
Mail
Select "OK" to deactivate the Voice Mail Service.
Check Voice
Mail setting
Checks the current settings.
Play messages When "OK" is selected, a call is made to the Voice
Mail Service Center. Operate according to the
voice guidance to play back the Voice Mail
message.
Voice Mail
setting
When "OK" is selected, a call is made to the Voice
Mail Service Center. Operate according to the
voice guidance to change the settings.
Check
messages
Checks whether or not you have Voice Mail
messages.
Notification
settings
You will be notified by a sound or vibration if there
is a new Voice Mail message in the Voice Mail
Service Center.
Select the "Notification" or "Vibration" checkbox.
Activate notice
call
If you have an incoming call while your FOMA
terminal is turned off or you are outside the service
area, you will be notified by an SMS when your
FOMA terminal is turned on again or you move
back inside the service area.
When "All Calls" is selected, you will be notified of
all incoming calls.
When "Calls with Caller ID" is selected, you will be
notified of only incoming calls from callers with
specific caller IDs.
Deactivate
notice call
Select "OK" to deactivate incoming call notification.
Notice call
status
Checks the current status of incoming call
notification.
4 Tap "OK"
● "OK" sometimes cannot be tapped depending on the items used.
Call Waiting Service
Call Waiting Service is a service for placing the current call on hold and
answering a new incoming call when your FOMA terminal notifies you
by a ringtone during a call to notify you of another call. In addition, you
can also place the current call on hold and make a new call to another
party from your FOMA terminal.
Note
● Charges are incurred by a caller even while the call is on hold.
53
Call/Network Services
Setting Call Waiting Service
1
→"Settings"→"Call settings"→"Network service
setting"
2 Tap "Call waiting"
3 Select the item you want to use
Activate Call Waiting Select "OK" to activate the Call Wating Service.
Deactivate Call
Waiting
Select "OK" to deactivate the Call Waiting
Service.
Check Call Waiting
setting
Checks the current settings.
4 Tap "OK"
Placing the current caller on hold to answer another
incoming call
1 You can hear a beeping tone during a call
The incoming call screen is displayed when you move your face
away from the proximity sensor.
2 Tap , or slide to the right end
Place the original caller on hold, and answer the new incoming call.
● You can also answer new incoming calls by pressing D.
● To end the original call and answer the new incoming call, M
→"End current call & answer".
3 Switch to the original caller
■To end a conversation with the new caller
Tap "End", or press M.
Your conversation with the new caller ends, and you are switched
to the original caller.
■To place the new caller on hold
Tap (switch).
Your conversation with the new caller is placed on hold, and you
are switched to the original caller. To switch between parties, tap
(switch).
Placing a caller on hold to call another party
1 During a call, tap (Hold).
The original caller is placed on hold.
2 Tap "Add call", and enter the telephone number of
the other party
3 Tap "SEND"
You can talk to the other party that you have called.
■To end the call with the other party
Tap "End", or press M.
Your call with the other party ends, and you are switched to the
original caller.
■To place the other party you have called on hold
Tap (switch).
Your call with the other party you have called is placed on hold,
and you are switched to the original caller. To switch between
parties, tap (switch).
Note
● If you are not subscribed to the Call Waiting Service or Call
Forwarding Service, calls cannot be placed on temporary hold
even by tapping (Hold) during a call.
54
Call/Network Services
Call Forwarding Service
Call Forwarding Service is for forwarding calls to a designated phone
number when your FOMA terminal is outside the service area, is turned
off, or cannot be answered within the set ring time.
● If a call is not answered when Voice Mail Service is activated, the call
is saved as a missed call in the Incoming History and is displayed
on the status bar.
Basic flow of Call Forwarding Service
Register the telephone number of the forwarding
destination
Activate the Call Forwarding Service
Your FOMA terminal will receive a voice call
The call is automatically forwarded to the designated
destination if it is not answered
Call Forwarding Service fees
Caller ➡Call Forwarding Service
subscriber ➡Forwarding
destination
Fees are charged to the caller. Fees are charged to the Call
Forwarding Service subscriber.
Note
● Even if the Call Forwarding Service is activated, you can make
calls if you answer an incoming call while the ringtone is sounding.
Setting the Call Forwarding Service
1
→"Settings"→"Call settings"→"Network service
setting"
2 Tap "Call forwarding"
3 Select the item you want to use
Activate Call
Forwarding
Enter the telephone number of the forwarding
destination and the ring time (0 to 120
seconds). (Contacts can be called up by
tapping .) Tap "OK" to activate the Call
Forwarding Service.
When the ring time is set to 0 seconds, a
record of the incoming call is not left in the
incoming call history, and the caller is
forwarded directly to the forwarding
destination.
Deactivate Call
Forwarding
Select "OK" to deactivate the Call Forwarding
Service.
Register number Changes the telephone number of the
forwarding destination. (Contacts can be
called up by tapping .) Tap "OK" to reflect
the changes you have made.
If FWD number
busy*
When "Connect" is selected, the incoming call
is connected to the Voice Mail Service Center
if the forwarding destination is busy.
Check Call
Forwarding setting
Checks the current settings.
* The Call Forwarding Service must be subscribed to.
4 Tap "OK"
Setting Call Forwarding guidance
You can set whether or not to play the voice guidance informing the
caller that the call will be forwarded.
1
→"Phone"→enter "1429"→"SEND"
● Set according to the voice guidance.
55
Call/Network Services
Caller ID Notification Service
You can display your telephone number on the other party's telephone
when you make a voice call.
● Your telephone number is important personal information. So, take
care when notifying people about it.
1
→"Settings"→"Call settings"→"Network service
setting"
2 Tap "Caller ID notification"
3 Select the item you want to use
Check setting Checks the current settings.
Activate/Deactivate Tap "Notify" to set caller ID notification.
4 Tap "OK"
Note
● If you hear a message asking you to notify the caller ID, enable
caller ID notification or add "186" and call again.
● Displaying or hiding of the caller ID can be specified each time that
a call is made (P. 42). Setting to specify notification for each
individual call is given priority over the caller ID notification setting.
Setting the Public mode (drive mode)
The Public mode (drive mode) is an automatic answering service used
to ensure good manners in public places. Set the Public mode (drive
mode) to play a message for the caller stating that you are unable to
answer the call since you are currently driving or you must refrain from
speaking (in a train, bus, cinema, etc.), and that the call will be
disconnected.
● This mode can be set or canceled even if you are outside the service
area or out of signal range.
● You can make calls from your FOMA terminal even if the Public mode
(drive mode) is set.
1
→"Settings"→"Sound & display"
2 Select the "Public mode" checkbox
When the Public mode (drive mode) is set
The ringtone does not sound even if you have an incoming call on your
FOMA terminal. Incoming calls are recorded as missed calls in the
incoming call history.
● A message is played for the caller stating that you are currently
driving or are in a place where you must refrain from using a mobile
phone, and the call is disconnected.
● Ringtones for email or alarms do not sound.
● When your FOMA terminal is not turned on, the Public mode (drive
mode) message is not played, and the caller will hear the same
message as that played when you are outside the service area.
56
Call/Network Services
Setting the Public mode (Power off)
The Public mode (Power off) is an automatic answering service used to
ensure good manners in public places.
Set the Public mode (Power off) to play a message for the caller stating
that your FOMA terminal is turned off or are somewhere where your
FOMA terminal must be turned off (hospital, airplane, near priority seats
on a train, etc.), and that the call will be disconnected.
1
→"Phone"→enter " 25251"→"SEND"
The Public mode (Power off) is set. (Nothing changes on the
Homescreen.)
When a call is received while the Public mode (Power off) is set and
your FOMA terminal is turned off, a message will be played to the
caller stating that you cannot answer the call since you are in a
place where mobile phones must be turned off and that you will call
back later.
■Disabling the Public mode (Power off)
→"Phone"→enter " 25250"→"SEND"
■Checking the Public mode (Power off) setting
→"Phone"→enter " 25259"→"SEND"
When the Public mode (Power off) is set
The Public mode (Power off) remains set until it is disabled. The setting
is not disabled merely by turning your FOMA terminal on.
The Public mode (Power off) message is played even if your FOMA
terminal is outside the service area or you are out of signal range.
● A message is played for the caller stating that you are in a place
where your FOMA terminal must be turned off, and the call is
disconnected.
57
Settings
About the settings menu
You can make various settings on your FOMA terminal from the settings
menu. To display this menu,
→"Settings".
● Some settings menu items are described in chapters other than this
one. To find which page each item is described on, check the Index
(P. 148) at the back of this Instruction Manual.
Wireless controls
Setting the Airplane mode
When this mode is set, wireless communications (telephone, packet
communications and Bluetooth function) on your FOMA terminal are
disabled.
1
→"Settings"→"Wireless controls"
2 Select the "Airplane mode" checkbox
Using the Wi-Fi function
You can use the Wi-Fi function on your FOMA terminal to connect to
your home or in-company network and the access point of public
wireless LAN services to use mail and the Internet.
■Radio interference with the Bluetooth function
Wireless LANs (IEEE802.11b/g) use the same frequency band (2.4
GHz) as the Bluetooth function. For this reason, using the wireless LAN
function of your FOMA terminal at the same time as the Bluetooth
function may cause radio interference, a drop in communications speed,
noise, or failed connections.
The same phenomena will also occur if a Bluetooth device is used
nearby even when only the wireless LAN function of your FOMA
terminal is used. If this happens, perform the following measures:
1. Keep your FOMA terminal at least 10 m away from the Bluetooth
device.
2. Turn the Bluetooth device off if it is within 10 m of your FOMA
terminal.
■Available channels
The Wi-Fi function on your FOMA terminal can be used in the frequency
bands of channels 1 to 11.
Enabling the Wi-Fi function to connect to a network
1
→"Settings"→"Wireless controls"
2 Select the "Wi-Fi" checkbox
Available Wi-Fi networks are scanned by enabling the Wi-Fi
function.
3 Tap "Wi-Fi settings"
The names and security settings (open network or protected by
security) of detected networks are displayed at the "Wi-Fi networks"
section.
4 Select the Wi-Fi network, and tap "Connect"
● When a security-protected Wi-Fi network is selected, enter the
preset security key, and tap "Connect".
Note
● Packet communications can be used even when the Wi-Fi function
is enabled. Note, however, that Wi-Fi is given priority while a Wi-Fi
network connection is established. When the Wi-Fi network
connection is disconnected, communications automatically
switches over to packet communications.
Enabling notification of an open network
Set notification when a Wi-Fi open network is detected.
● Enable Wi-Fi in advance.
1
→"Settings"→"Wireless controls"→"Wi-Fi
settings"
2 Select the "Network notification" checkbox
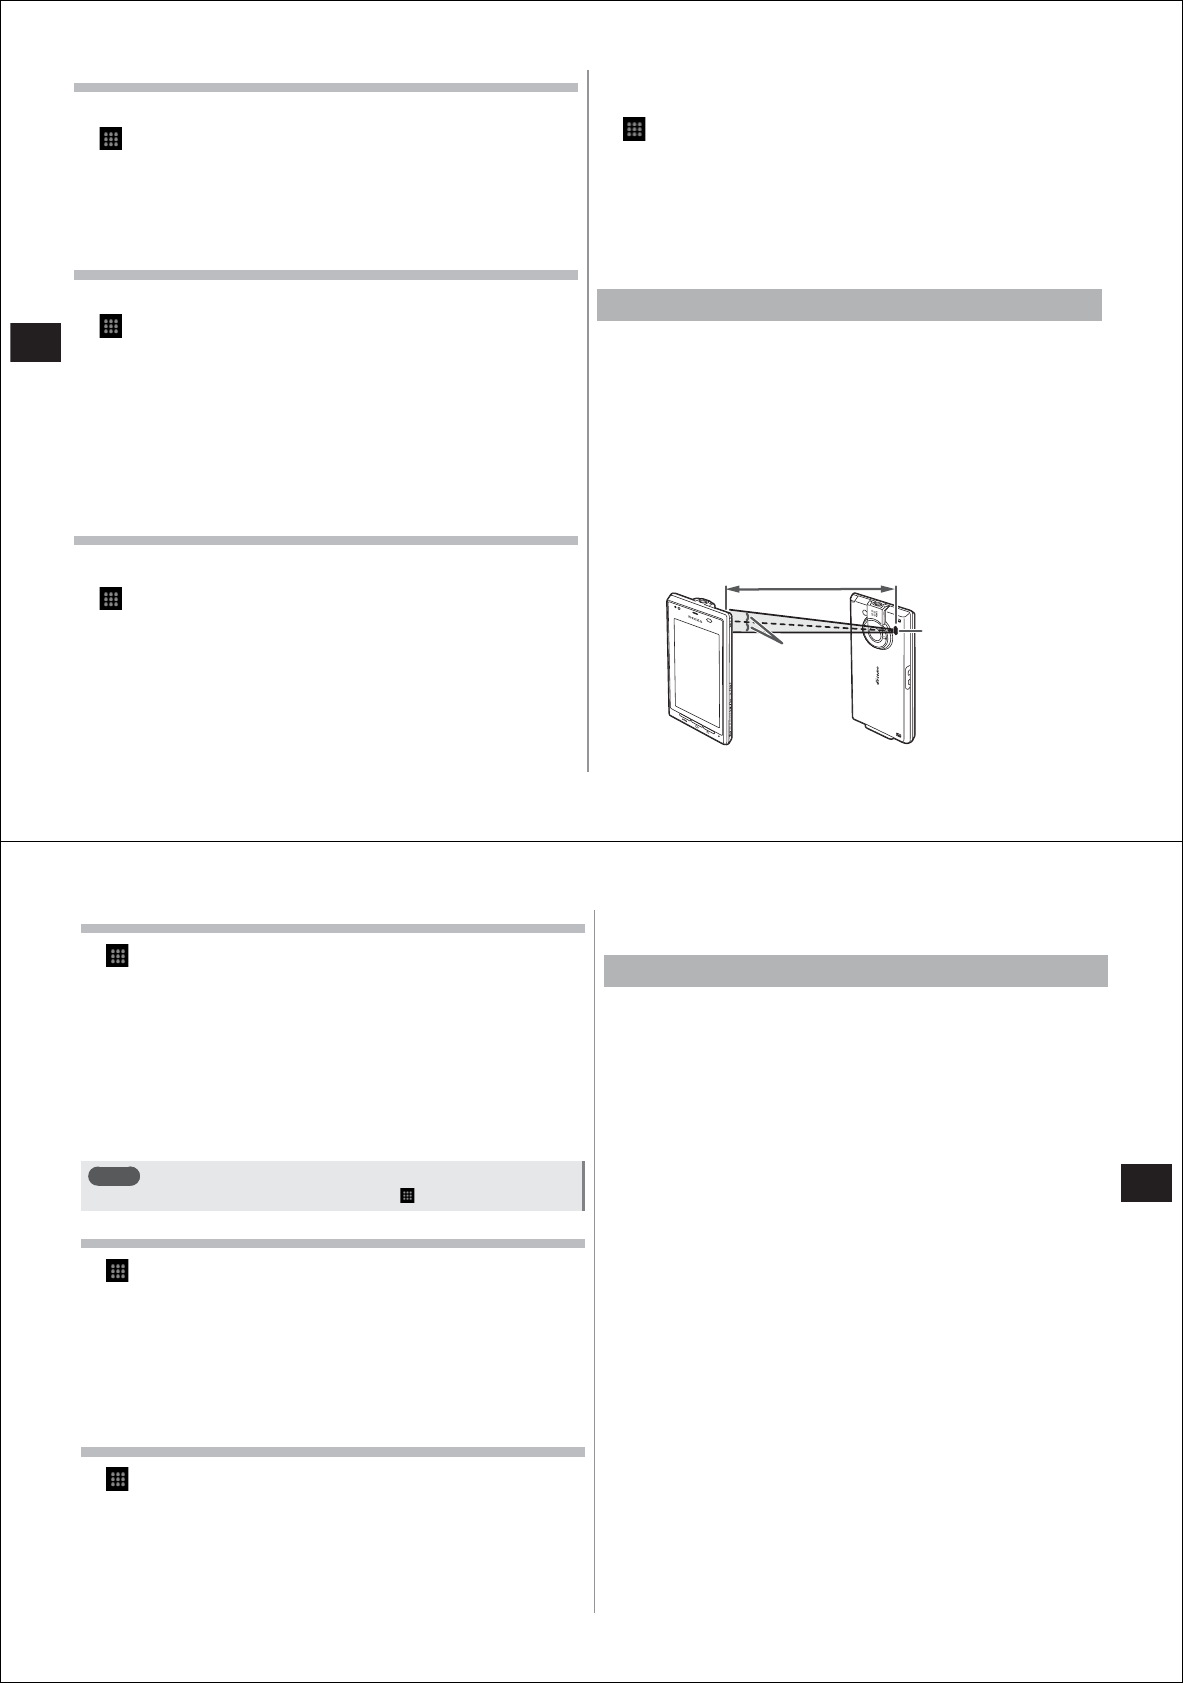
58
Settings
Manually scanning Wi-Fi networks
● Enable Wi-Fi in advance.
1
→"Settings"→"Wireless controls"→"Wi-Fi
settings"
2 M→"Scan"
Scanning of Wi-Fi networks is started, and detected Wi-Fi networks
are displayed at the "Wi-Fi networks" section.
Manually adding Wi-Fi networks
● Enable Wi-Fi in advance.
1
→"Settings"→"Wireless controls"→"Wi-Fi
settings"
2 Tap "Add Wi-Fi network"
3 Enter the network SSID of the Wi-Fi network you
want to add, and select security
4 If necessary, enter additional security information
5 Tap "Save"
Wi-Fi detailed settings
■Checking the MAC address
1
→"Settings"→"Wireless controls"→"Wi-Fi
settings"
2 M→"Advanced"
The MAC address is displayed under "MAC address".
■Using static IP addresses
You can also enter static IP addresses for connecting to Wi-Fi networks.
1
→"Settings"→"Wireless controls"→"Wi-Fi
settings"
2 M→"Advanced"
3 Select the "Use static IP" checkbox
4 Tap "IP address" and other entry items, and enter
the required information
Using IrDA communications
You can send and receive contacts to and from other FOMA terminals
and other devices that have an IrDA communications function.
● IrDA communications is limited to within approximately 20 cm. Also,
the infrared port must not be moved or re-oriented until data
communications is completed.
● If the infrared port is dirty, wipe clean with a soft, dry cloth taking care
not to scratch the port. Dirt on the port might result in IrDA
communications failure.
● IrDA communications sometimes cannot be performed properly in
direct sunlight, under fluorescent lighting or near infra-red devices.
● Data communications sometimes cannot be performed easily
depending on the other party's FOMA terminal.
Infrared port
Within approximately 20 cm
15°
59
Settings
Receiving contacts via IrDA communications
1
→"Settings"→"Wireless controls"→"Receive
IrDA"
■To receive one contact
Tap "Import one contact".
After receiving the contact data, tap "add to the contact list"→"OK".
■To receive all contacts
"Import all contacts"→enter a 4-digit authentication pass
code→"Receive".
After receiving the contact data, select "add to the contact list" or
"delete all before add", and tap "OK".
Note
● Contacts can also be received by tapping
→"IrDA".
Sending contacts via IrDA communications
1
→"Contacts"
2 Tap the contact you want to send
● The recipient must set his or her FOMA terminal to the receive
standby mode.
3 M→"Send via IrDA"
4 Tap "OK" when the transmission is completed
Sending your own contact via IrDA communications
1
→"Phone"/"Contacts"/"Owner info"
2 M→"IrDA"
● The recipient must set his or her FOMA terminal to the receive
standby mode.
3 Select the checkbox of the item you want to send,
and tap "Send"
4 Tap "OK" when the transmission is completed
Using the Bluetooth function
You can send data to nearby Bluetooth devices by wireless
communications using the Bluetooth function on your FOMA terminal.
You can also talk handsfree or listen to music wirelessly if you connect
a Bluetooth earphone microphone or wireless headphones to your
FOMA terminal.
● For details on the Bluetooth supported version and profiles, see P. 138.
● For details on settings and operation methods, refer to the manual for
the connected Bluetooth device.
● A wireless connection between your FOMA terminal and all Bluetooth
devices is not guaranteed.
■Cautions when using the Bluetooth function
Pay attention to the following points to ensure a good connection.
1. Keep the distance between your FOMA terminal and another
Bluetooth device to within approximately 10 m with no obstructions in
sight. The distance for ensuring a good connection may become
significantly shorter depending on the surrounding environment
(walls, furniture, etc.) or the structure of a building.
2. Move your FOMA terminal and Bluetooth device at least 2 m away
from other equipment (electrical appliances, AV devices, OA devices,
etc.) before connecting them. In particular, move your FOMA terminal
and Bluetooth device at least 3 m away from microwave ovens
because of the extreme effect. Otherwise, a normal connection
sometimes cannot be made when such equipment is turned on. Also,
your FOMA terminal and Bluetooth device are subject to noise from
TV or radio sets, disrupting images.

60
Settings
■Radio interference with wireless LANs
Wireless LANs (IEEE802.11b/g) use the same frequency band (2.4
GHz) as the Bluetooth function. For this reason, using the Bluetooth
LAN function of your FOMA terminal at the same time as the wireless
function may cause radio interference, drop in communications speed,
noise, or failed connections.
Also, even when only the Bluetooth LAN function of your FOMA terminal
is used, the same phenomena will occur if a Bluetooth function-installed
device is used nearby. If this happens, perform the following measures:
1. Keep your FOMA terminal at least 10 m away from the Bluetooth
function-installed device.
2. Turn the Bluetooth function-installed device off if it is within 10 m of
your FOMA terminal.
Turning the Bluetooth function on to enable
detection of your FOMA terminal
1
→"Settings"→"Wireless controls"
2 Select the "Bluetooth" checkbox
3 Tap "Bluetooth settings" and select the
"Discoverable" checkbox
Your FOMA terminal can be detected for approximately 120 seconds
from other Bluetooth devices.
● When your FOMA terminal is detected by another Bluetooth
device and receives the pair setting request, either tap "Pair" or
advance to step 4 of "Setting pairs with other Bluetooth devices".
Note
● Packet communications is available even with the Bluetooth
function enabled.
● When you are not connecting by Bluetooth communications,
disable the Bluetooth function to prevent battery wear.
● The Bluetooth function enabled/disabled setting is held even when
your FOMA terminal is turned off.
● The Bluetooth function cannot be used while your FOMA terminal
is turned off.
Renaming your FOMA terminal
You can change the name of your FOMA terminal that is displayed on
other Bluetooth devices.
● Enable the Bluetooth function in advance.
1
→"Settings"→"Wireless controls"→"Bluetooth
settings"
2 Tap "Device name"
3 Enter the new name, and tap "OK"
Setting pairs with other Bluetooth devices
You can connect your FOMA terminal to Bluetooth headphones and talk
handsfree by setting your FOMA terminal as a pair with other Bluetooth
devices.
Once you have set your FOMA terminal as a pair with a Bluetooth
device, the pair setting is stored in memory.
● To do this, enable the Bluetooth function in advance and make sure
that the Bluetooth your FOMA terminal is to be paired with can be
detected.
1
→"Settings"→"Wireless controls"→"Bluetooth
settings"
2 Tap "Scan for devices"
Detected Bluetooth devices are displayed in the Bluetooth terminal
list.
3 Tap the Bluetooth device you want to connect to
4 If necessary, enter the pass code (PIN), and tap
"OK"
The pair setting and connection status are displayed under the
name of the Bluetooth device in the Bluetooth device list.
61
Settings
Connecting to a paired Bluetooth device
1
→"Settings"→"Wireless controls"→"Bluetooth
settings"
2 In the Bluetooth terminal list, tap the device you
want to connect to
Note
● To connect to an unpaired device, tap on the device in the
Bluetooth terminal list for one second or more, and tap "Pair &
connect".
Sending files by Bluetooth communications
The following describes an example of the operation to send an image
in the media folder by Bluetooth communications.
● First set the recipient's FOMA terminal so that is can be detected.
1 Open the media folder, and tap the image you want
to send for one second or more
● For details on the media folder, see P. 93.
2 "Share"→"Bluetooth"
● If the Bluetooth function is disabled, tap "Turn on".
3 In the Bluetooth terminal list, tap the recipient's
FOMA terminal
When is displayed on the status bar, open the notification panel
and check that transmission is completed.
Receiving files by Bluetooth communications
1 Enable detection of your FOMA terminal
will be displayed on the status bar.
2 Open the notification panel, and tap "Bluetooth
share: Incoming file"
3 Tap "Accept"
When is displayed on the status bar, open the notification panel
and check that reception is completed.
Disconnecting a Bluetooth device
1
→"Settings"→"Wireless controls"→"Bluetooth
settings"
2 In the Bluetooth terminal list, tap a connected
device
3 Tap "OK"
Unpairing a Bluetooth device
1
→"Settings"→"Wireless controls"→"Bluetooth
settings"
2 In the Bluetooth terminal list, tap a paired device for
one second or more
3 Tap "Unpair" or "Disconnect & unpair"
62
Settings
Connecting to a VPN (Virtual Private Network)
VPN (Virtual Private Network) is a technology for accessing information
in a protected local network, such as that in a company or a university,
from the outside. To set a VPN connection from your FOMA terminal,
obtain security information from your network administrator.
Adding VPNs
1
→"Settings"→"Wireless controls"→"VPN
settings"
2 Tap "Add VPN"
3 Tap the type of VPN you want to add
4 Follow the network administrator's instructions and
set each of the VPN setting items
5 M→"Save"
The new VPN is added to the list in the VPN setting screen.
Connecting to a VPN
1
→"Settings"→"Wireless controls"→"VPN
settings"
The newly added VPN is displayed in the list in the VPN setting
screen.
2 Tap the VPN you want to connect to
3 Enter the required authentication information, and
tap "Connect"
When the connection to the VPN is made, the notification icon will
be displayed on the status bar.
Disconnecting a VPN
1 Opening the notification panel
2 Tap the notification indicating the current VPN
connection to disconnect it
● When the VPN is disconnected, the notification on the status bar
is grayed out. The connection can be enabled again by opening
the notification panel and tapping the notification.
Turning packet communications off
1
→"Settings"→"Wireless controls"→"Mobile
networks"
2 Deselect the "Packet connection" checkbox
63
Settings
Sound & display
Setting the Manner mode
When the Manner mode is set, tones emitted from your FOMA terminal,
such as call and mail ringtones or alarm tones and the sound of media
playback sound, can be muted.
1
→"Settings"→"Sound & display"→"Manner
mode"
2 Select the "Enable manner mode" checkbox
Note
● The focus lock sound or shutter sound in camera photography and
the recording start and end sounds in video photography sound
even when the manner mode is set.
Changing the Manner mode type
1
→"Settings"→"Sound & display"→"Manner
mode"→"Select manner mode"
2 Select the item
Manner mode No sound is emitted from your FOMA terminal, and
incoming calls and alarms are notified by vibration.
Manner
mode(Silent)
No sound is emitted and vibration is turned off.
Manner
mode(Alarm)
This is the same as the regular Manner mode
except that the alarm volume and vibration follow
the alarm setting (P. 111).
Original manner Volume and vibration can be set for each type of
sound.
Setting Original manner mode
1
→"Settings"→"Sound & display"→"Manner
mode"→"Original manner settings"
2 Tap "Volume"
3 Tap "Ringer volume"/"Media volume"/"Alarm
volume"/"Notification volume"
4 Slide the slider to adjust the volume
5 "OK"→R
6 Tap "Vibration"
7 Select or deselect the "Phone ringtone"/"Alarm"/
"Vibrate touch screen"/"Notification" checkboxes
Adjusting the volume
You can adjust the volume of ringtones, alarm tones and the media
playback sound.
1
→"Settings"→"Sound & display"
2 Tap "Ringer volume" or "Media volume"
3 Slide the slider to adjust the volume
● You can adjust the volume of notification tones by deselecting the
"Use incoming call volume for notifications" checkbox.
4 Tap "OK"
Note
● You can also adjust the ringtone volume by pressing eE or fF while
your FOMA terminal is standing by.
64
Settings
Setting ringtone/notification tone/operation
tone/vibration
1
→"Settings"→"Sound & display"
2 Set the items
Phone ringtone Sets the call ringtone.
Phone vibrate Sets whether or not to notify incoming calls by
vibration.
Notification
ringtone
Sets the notification tone, for example, when the
Eco mode is activated or position measurement is
started when a USB connection is made or USB
storage is set to "Turn Off".
Audible touch
tones
Switches the dial pad operation tone on/off.
Audible
selection
Switches the operation tone during menu selection
on/off.
Haptic
feedback
Switches vibration on/off during soft key operation or
specific operations.
SD card
notifications
Sets whether or not to sound the notification tone
when a USB connection is made or USB storage is
set to "Turn Off".
Setting MIC input
You can set the voice input destination when a stereo earphone is
connected to the stereo earphone terminal on your FOMA terminal.
1
→"Settings"→"Sound & display"→"MIC Input"
2 Tap "Phone MIC" or "Earphone MIC"
● When a stereo earphone without a MIC is connected, select
"Phone MIC". When a stereo earphone with a MIC is connected
and you want to send your voice to the other party from the
earphone's MIC, select "Earphone MIC".
Note
● When a stereo earphone is not connected, your voice is sent from
your FOMA terminal's MIC regardless of the MIC input setting.
Setting the background image of the key lock
screen
1
→"Settings"→"Sound & display"→"Photo
Screen"
2 Tap "Picture settings" and select an item
None The wallpaper of the home screen is displayed.
Picture The selected image is displayed.
Folder Images in the selected folder are displayed as a
slideshow.
Flickr Enter one or more keyword.
Images matching the keyword are automatically
acquired from the images publicized in Flickr, and
are displayed as a slideshow.
Picasa Enter one or more keyword.
Images matching the keyword are automatically
acquired from the images publicized in Picasa, and
are displayed as a slideshow.
3 When "Flickr" or "Picasa" is selected, set "Update
interval" and "Network to be used"
● When "Specified time" is selected at "Update interval", tap
"Update time" to specify the time.
65
Settings
Changing the screen display
Disabling automatic screen orientation
1
→"Settings"→"Sound & display"
2 Deselect the "Orientation" checkbox
Note
● Some applications, such as 1Seg, camera and video recording, do
not follow the "Orientation" setting. Also, the screen display mode
is fixed to landscape in some applications such as YouTube video
playback, UkiUkiView and mosimo camera.
Setting the screen brightness
You can set the screen brightness and the delay before the backlight
turns off.
1
→"Settings"→"Sound & display"→"Backlight
settings"
2 Tap "Brightness"
● To adjust the brightness to suit the surrounding conditions, select
the "Adjust automatically" checkbox.
3 Slide the slider to adjust the brightness, and tap
"OK"
4 Tap "Screen timeout" and select the time
Displaying by animation
You can set whether or not to display by animation when displaying
screens or items.
1
→"Settings"→"Sound & display"→"Animation"
2 Tap "No animations"/"Some animations"/"All
animations"
Multimedia
You can set whether or not to automatically correct 1Seg or YouTube
images. You can also set whether or not to use the high-quality sound
function for the media playback sound.
1
→"Settings"→"Multimedia"
2 Select or deselect the "REGZA settings" checkbox
● When the checkbox is selected, the high image quality engine is
used to automatically correct 1Seg or YouTube images.
3 Tap "High-quality sound settings" and select an
item
Noise-reduction When this checkbox is selected, the playback
sound from the speaker or earphones is made
easier to pick up even when the surrounding area
is noisy.
Loudspeaker
Offset
When this checkbox is selected, the quality of
playback sound from the speaker is improved.
Note
● The high sound quality setting is not applied to the voice of the
other party in incoming calls.
● The noise reduction function is not applied to the playback sound
from Bluetooth headsets.
66
Settings
Eco-mode Setting
You can set to switch selected functions to the Eco mode when the
remaining battery power falls below the preset level (%).
Setting the battery level
1
→"Settings"→"Eco-mode Setting"→"Apply
battery level"
2 Tap "30%"/"25%"/"20%"/"15%"/"10%"/"5%"/"Eco-
mode OFF"
Note
● When the remaining battery power falls below the preset level for
the first time after your FOMA terminal was bought or after a reset,
a confirmation screen for switching to the Eco mode is displayed.
To deactivate the Eco mode, select the "Deactivate Eco-mode."
checkbox and tap "Close". From the second time onwards, the Eco
mode will be switched to without this confirmation screen being
displayed, and a notification indicating that your FOMA terminal is
in the Eco mode will be displayed on the status bar.
Setting functions to set to the Eco mode
1
→"Settings"→"Eco-mode Setting"→"Select
Eco-mode option"
2 Select or deselect the checkbox for each function
3 Tap "Done"
Location & security
Security codes used on your FOMA terminal
Some functions for convenient use of your FOMA terminal require
security codes. In addition to the password for locking your FOMA
terminal, there are also network security codes, for example, for using
your FOMA terminal in network services. Use security codes selectively
for specific individual applications to make the most of your FOMA
terminal.
■Precautions for various security codes
・
Do not use easily guessed numbers for security codes to be set
such as "birthday", "part of a phone number", "address or room
number", or simple numbers and number sequences such as "1111"
or "1234". Also, keep a separate note of preset security codes in
case you forget them.
・
Take sufficient care to keep security codes private. DOCOMO is not
liable for any loss if security codes are found out and improperly
used by others.
・
If you forget your security codes, you must bring your identification
(driver's license, etc.) as proof of your being the actual subscriber,
your FOMA terminal and docomo UIM card to a docomo shop. For
details, contact "docomo Information Center" on the last page of this
manual.
・
The PUK (PIN Unlock Key) is noted in the subscription application
form (customer copy) you received at the time of subscription at a
docomo shop. If you made a subscription outside a docomo shop,
you must bring your identification (driver's license, etc.) as proof of
your being the actual subscriber, your FOMA terminal and docomo
UIM card to a docomo shop, or contact "docomo Information Center"
on the last page of this manual.
67
Settings
Network security code
The network security code is the 4-digit code required for confirming the
subscriber's identity when receiving an order at a docomo shop or
"docomo Information Center", or for accessing various network services.
You can set any code at the time of subscription, and can change the
code yourself.
For those with a "docomo ID/password" from the general support site
"My docomo"* exclusively for PCs, the registration procedure for a new
network security code is available from a PC.
* For details on "My docomo", see the page just before the last page of this
manual.
PIN1 code/PIN2 code
Two security codes, PIN1 code and PIN2, can be set to a docomo UIM
card. These security codes are set to "0000" by default at the time of
subscription, but you can change the codes yourself (P. 64).
The PIN1 code is a 4- to 8-digit security code that is entered for user
recognition when the docomo UIM card is inserted into your FOMA
terminal or for each time that your FOMA terminal is turned on to
prevent unauthorized use by a third party.
By entering the PIN1 code, you can make outgoing calls, receive
incoming calls and operate your FOMA terminal.
The PIN2 code is a 4- to 8-digit security code that is used, for example,
for applying for issue of user certificates.
● When swapping with a docomo UIM card that has been used in
another FOMA terminal, use the previously set PIN1/PIN2 code. The
setting is "0000" if it has not been changed.
● If you enter the wrong PIN1/PIN2 code three times consecutively, the
code will be locked and cannot be used. If this happens, unlock it with
"PUK" (PIN Unlock Key).
PUK (PIN Unlock Key)
PUK (PIN Unlock Key) is an 8-digit number used to disable the PIN1
and PIN2 code locks. You cannot change the PUK yourself.
● If you enter the wrong PUK ten times consecutively, the docomo UIM
card will be locked. If this happens, contact a docomo shop.
Setting the PIN code
Set so that the PIN1 code must be entered when your FOMA terminal is
turned on.
1
→"Settings"→"Location & security"→"Set up SIM
card lock"
2 Select the "Lock SIM card" checkbox
3 Enter the PIN code, and tap "OK"
Note
● When entering the PIN code for the first time, enter "0000".
Changing the PIN code
● To change the PIN1 code, you must have already set the PIN code
(i.e. selected the "Lock SIM card" checkbox).
1
→"Settings"→"Location & security"→"Set up SIM
card lock"
2 Tap "Change SIM PIN"
■To change the PIN2 code
→"Settings"→"Location & security"→"Set up SIM card lock"
→"Change SIM PIN2"
3 Enter the old PIN code, and tap "OK"
4 Enter the new PIN code, and tap "OK"
5 Re-enter the new PIN code, and tap "OK"
68
Settings
Disabling the PIN lock
1 If the PIN1/PIN2 code is locked, tap "Emergency
call"
2 Enter "**05* [PUK] * [new PIN1/PIN2 code] * [new
PIN1 code/PIN2 code] #"
● For example, to change the PIN1 code to "7777" when the PUK is
88888888, enter "**05*88888888*7777*7777#".
Setting the screen lock
You can lock your FOMA terminal with a specific screen unlock pattern
(or unlock method) or security code to prevent it from being used by
other people.
Creating an unlock method
You can set so that a pattern must be entered to unlock the screen.
1
→"Settings"→"Location & security"→"Set unlock
method"
2 Tap "Pattern"
3 Read the explanation in the screen, and tap "Next"
4 When you have determined the pattern, tap "Next"
5 Slide your finger to at least four points vertically,
horizontally or diagonally to draw a pattern. When
you have drawn the pattern, release your finger
6 Tap "Continue"
7 Draw the pattern again, and tap "Confirm"
Note
● To disable display of the pattern when unlocking the screen,
→"Settings"→"Location & security"→deselect the "Use visible
pattern" checkbox.
● To enable vibration when entering the pattern,
→"Settings"
→"Location & security"→select the "Use tactile feedback"
checkbox.
● To change the screen unlock pattern,
→"Settings"→"Location &
security"→"Change unlock pattern".
● If you forget your screen unlock pattern, log in by your Google
account, and follow the on-screen instructions to make a new
pattern.
Setting the screen lock security code
You can set so that a security code must be entered to unlock the
screen.
1
→"Settings"→"Location & security"→"Set unlock
method"
2 Tap "Security code"
3 Enter the 4- to 8-digit security code, and tap
"Continue"
4 Enter the security code again, and tap "Confirm"
Note
● To change the screen unlock security code,
→"Settings"
→"Location & security"→"Change security code".
● If you forget your screen unlock security code, log in by your
Google account, and follow the on-screen instructions to make a
new pattern.
Manually locking the screen
1 Press
C
69
Settings
Unlocking the screen
1 Press
C or A
The key unlock screen is displayed.
2 Slide "Unlock" upwards to unlock the screen
The pattern entry screen or the security code entry screen is
displayed.
3 Enter the screen unlock pattern or the screen
unlock security code, and tap "OK"
Managing authentication information
You can install authentication information for accessing security-
protected Wi-Fi networks or VPNs or other certificates from the microSD
card. You can also set a password to certification information storage
for saving authentication information and certificates.
Setting a password to certification information
storage
1
→"Settings"→"Location & security"→"Set
password"
2 Enter the password
3 Enter the password again, and tap "OK"
Enabling authentication information and certificates
You can enable authentication information and certificates by allowing
applications on your FOMA terminal to access authentication
information storage set with a password.
● Set a password to certification information storage in advance.
1
→"Settings"→"Location & security"
2 Select the "Use secure credentials" checkbox
3 Enter the password for the authentication
information storage, and tap "OK"
Clearing authentication information storage
You can clear all authentication information or certificates from the
authentication information storage to reset the storage password.
1
→"Settings"→"Location & security"→"Clear
storage"
2 Tap "OK"
Installing authentication information or certificates
from the microSD card
1
→"Settings"→"Location & security"→"Install
from SD card"
2 Tap the authentication information/certificate you
want to install
3 If necessary, enter the password, and tap "OK"
4 Enter the name of the authentication information/
certificate, and tap "OK"
● If a password is not set to the authentication information storage,
follow the on-screen instructions to set the password.
70
Settings
Applications
Allowing installation of applications from
unknown sources
You can allow installation of applications received via email or sites
other than Android Market.
● To protect your FOMA terminal and personal data, download only
applications from trusted sources such as Android Market.
1
→"Settings"→"Applications"
2 Select the "Unknown sources" checkbox
3 Read the cautionary statement, and tap "OK"
Displaying downloaded files
You can display a list of files (applications, images, documents, etc.)
downloaded from web sites.
1
→"Browser"→M→"More"→"Downloads"
Note
● Applications downloaded from Android Market are not displayed.
Displaying operations allowed for FOMA
terminal applications
1
→"Settings"→"Applications"→"Manage
applications"
● M→tap "Filter" to display all applications or display only
currently running or downloaded applications.
● You can also sort applications by M→"Sort by size"/"Sort".
2 Select the application you want to display
3 Scroll to display allowed operations
● If all allowed operations are not displayed, tap "Show all".
Clearing application data or cache
1
→"Settings"→"Applications"→"Manage
applications"
● M→tap "Filter" to display all applications or display only
currently running or downloaded applications.
● You can also sort applications by M→"Sort by size"/"Sort".
2 Select the application, and tap "Clear data" or
"Clear cache"
Deleting installed applications
● We recommend deleting applications obtained from Android Market
from the Android Market screen.
● Applications pre-installed on your FOMA terminal cannot be deleted.
1
→"Settings"→"Applications"→"Manage
applications"
● M→tap "Filter" to display all applications or display only
currently running or downloaded applications.
● You can also sort applications by M→"Sort by size"/"Sort".
2 Select the application you want to delete
3 "Uninstall"→"OK"
4 Tap "OK" when uninstallation is completed
71
Settings
Continued on next page
Display running services
1
→"Settings"→"Applications"→"Running
services"
2 Tap the service name, and stop, change settings or
perform other operations as necessary
Using application development functions
1
→"Settings"→"Applications"→"Development"
● To use USB debugging functions, you must install a USB driver on
the PC.
For details on development functions, refer to product information
at the following site:
http://www.fmworld.net/product/phone/sp/android/develop/
● For details on software developer functions, such as USB
debugging and mock location, visit the following home page:
http://developer.android.com/
Disabling the backlight during charging
1
→"Settings"→"Applications"→"Development"
2 Select the "Stay awake" checkbox
Accounts & sync
Adding accounts
1
→"Settings"→"Accounts & sync"→"Add
account"
2 Select the account you want to add
● To add a Google account, scroll the screen downwards and tap
"Google".
3 Follow the on-screen instructions to add accounts
● You can select added accounts at the "Manage accounts" section
to set up each account.
■Corresponding applications and functions for each
account
Accounts displayed in the "Add account" list screen correspond to the
following applications and functions on your FOMA terminal.
Account Corresponding Application (Function)
mixi ・
STARMEMO composition (posting)
・
mixi palette for home screen (viewing and posting)
・
mixi palette for history (viewing and posting)
・
mixi palette for contacts (viewing and posting)
Twitter ・
STARMEMO composition (posting)
・
STARMEMO (viewing favorite tweets)
・
Twitter palette for home screen (viewing and posting)
・
Twitter palette for history (viewing and posting)
・
Twitter palette for contacts (viewing and posting)
Facebook ・
STARMEMO composition (posting)
Picasa*1
YouTube*2
Flickr
*1 This account is not used since posting (data uploading) to Picasa from the
media folder, camera and STARMEMO are performed by synchronization
of Google accounts.

72
Settings
*2 This account is not used since posting (data uploading) to Picasa from
YouTube, media folder, video recording, and STARMEMO are performed
by synchronization of Google accounts.
Note
● You can add multiple Google accounts to your FOMA terminal.
Note, however, that the calendar cannot be synchronized in your
second Google account onwards.
● Register the Google account set for logging into the Picasa web
album as the Google account for your FOMA terminal. After you
have registered a Google account for your FOMA terminal, Picasa
will not be displayed at the synchronization item of the Google
account for your FOMA terminal even if that Google account is
entered and a new Picasa web album account is acquired.
Removing accounts
1
→"Settings"→"Accounts & sync"
2 Select the account you want to remove
3 "Remove account"→"Remove account"
Note
● The first Google account you set and some other accounts cannot
be removed by the above procedure. To remove the first Google
account you set, you must reset your FOMA terminal (P. 69).
Setting automatically synchronized Google
applications
You can set automatic synchronization of your FOMA terminal and
Google online service contacts, calendar, Gmail, etc.
1
→"Settings"→"Accounts & sync"
2 Select the "Background data" checkbox
3 Select the "Auto-sync" checkbox
4 Select the Google account in the "Manage
accounts" section
5 Select the checkbox of the Google application you
want to automatically synchronize
Note
● When the "Background data" checkbox is selected, automatic data
communications by all applications currently installed on your
FOMA terminal will be allowed. Furthermore, if the "Auto-sync"
checkbox is selected, automatic synchronization of data by
applications will be allowed.
Starting synchronization manually
1
→"Settings"→"Accounts & sync"
2 Select the account you want to synchronize
3 M→"Sync now"
Canceling synchronization
1 Press
M during synchronization
2 Tap "Cancel sync"
73
Settings
Privacy
Using current location information
You can set to use the location information of your current location
when you use Google search or other Google services.
1
→"Settings"→"Privacy"
2 Select the "Use My Location" checkbox
Restarting your FOMA terminal
If data is not displayed normally or tapping or key operations are not
functioning properly, try restarting your FOMA terminal.
1 Hold down
C
The mobile phone option menu will be displayed. However, keep C
held down. A short while after the power is turned off, your FOMA
terminal will vibrate once and the notification LED will light green.
When you have confirmed lighting of the notification LED, release
your finger from C.
Resetting your FOMA terminal
You can reset your FOMA terminal to the state it was in when you
purchased it.
● Resetting will erase all data you have registered and applications you
have installed on your FOMA terminal since it was bought.
1
→"Settings"→"Privacy"→"Factory data
reset"→"Reset phone"
● When the screen lock is set, you must enter the screen unlock
pattern or security code.
2 Tap "Erase everything"
A short while after the reset is completed, your FOMA terminal will
be restarted.
SD card & phone storage
microSD card
● Install the microSD card or microSDHC card on your FOMA terminal
for use. If it is not installed, some functions, such as camera, music,
video (playback and download), and 1Seg (recording and playback)
will not be available.
● This FOMA terminal supports microSD cards up to 2 GB and
microSDHC cards up to 32 GB (as of November, 2010).
Note, however, that operation of all commercially available microSD
cards and microSDHC cards is not guaranteed.
● When accessing data on the microSD card, do not turn your FOMA
terminal off or subject it to shock or impact. Doing so might destroy
the data.
Note
● Format microSD cards or microSDHC cards only on the T-01C. Do
not format them on other models.
● Before use, also refer to the manual for the microSDHC card
(provided as a sample).
Installing/removing the microSD card
■Installing the microSD card
1 Insert the microSD card with its metal terminal side
face down until it locks into the insertion slot in the
orientation shown in the figure
microSD card slot
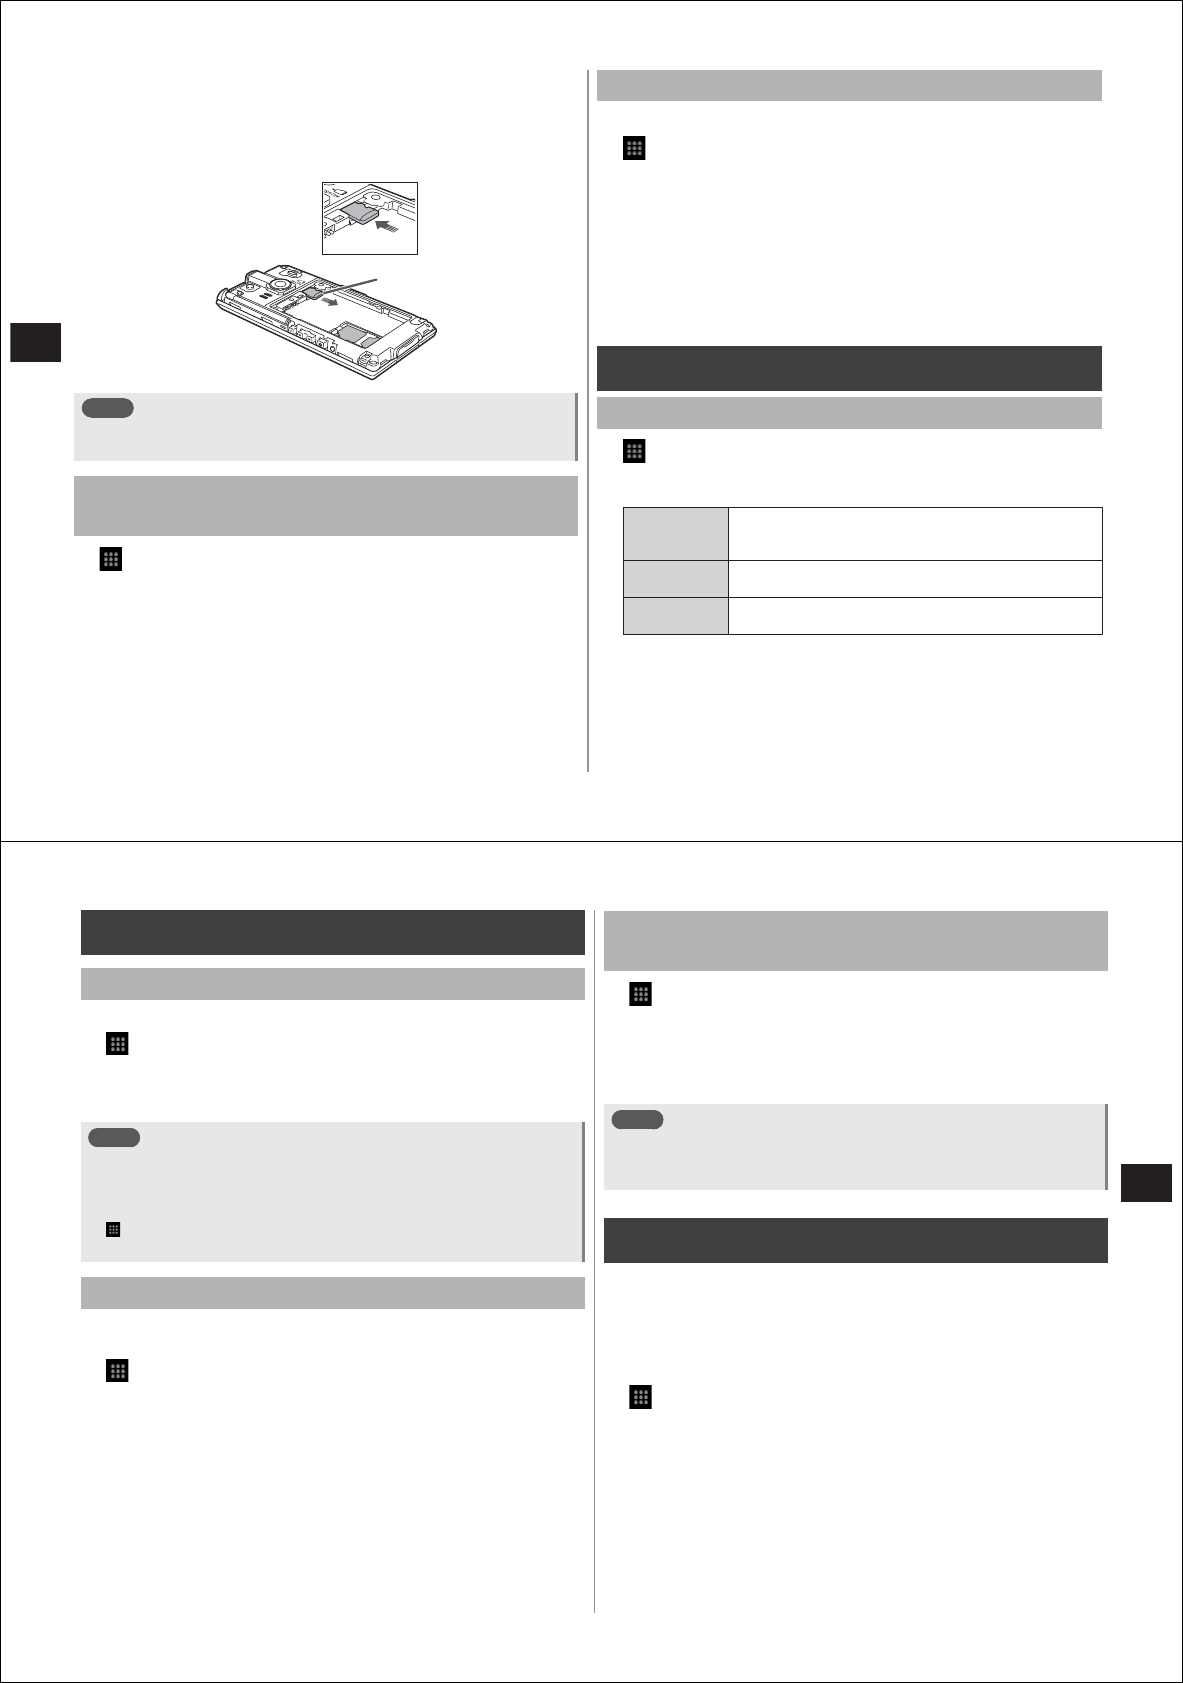
74
Settings
■Removing the microSD card
1 Lightly press in the microSD card and then release
(①)
2 Draw the microSD card out straight (②)
Note
● When removing the microSD card, it might suddenly jump out of
your FOMA terminal.
Checking the remaining memory on your FOMA
terminal and microSD card
1
→"Settings"→"SD card & phone storage"
The total capacity of the microSD card is displayed at the top of the
screen, and the remaining memory of your FOMA terminal is
displayed at the bottom of the screen.
①
②
Formatting a microSD card
● Note that all data on a microSD card will be erased if it is formatted.
1
→"Settings"→"SD card & phone storage"
2 Tap "Unmount SD card"
This enables the "Format SD card" option.
3 "Format SD card"→"Format SD card"
● When the screen lock is set, you must enter the screen unlock
pattern or security code.
4 Tap "Erase everything"
Search
Setting the quick search box
1
→"Settings"→"Search"
2 Set the items
Google
search
settings
Set whether or not to display Google search entry
candidates under the quick search box when entering
keywords.
Searchable
items
Selects the data in your FOMA terminal to be
searched.
Clear search
shortcuts
Clears the history of search candidates previously
selected in the quick search box.
75
Settings
Language & keyboard
Selecting English language display
You can select the display language to be used on your FOMA terminal.
1
→"設定 (Settings)"→"言語とキーボード (Language
& keyboard)"→"Select locale"
2 Tap "English"
Note
● Applications that support only Japanese will be displayed in
Japanese even if English is selected as the display language.
● To return the display language back to Japanese, perform the
following:
→"Settings"→"Language & keyboard"→"言語選択 (Select
language)"→"日本語 (Japanese)"
Setting the Android keyboard
You can set the key operation tone of the Android keyboard, entry
candidate display and other options.
1
→"Settings"→"Language & keyboard"→"Android
keyboard"
2 Select or deselect the "Vibrate on
keypress"/"Sound on keypress"/"Auto-
capitalization"/"Show suggestions"/"Auto-
complete" checkboxes
Registering a user dictionary for the Android
keyboard
1
→"Settings"→"Language & keyboard"→"User
dictionary"
2 M→"Add"
3 Enter the word, and tap "OK"
Note
● Words registered to the user dictionary for the Android keyboard
are not displayed as conversion candidates on the ATOK
keyboard.
Accessibility
You can enable the user assistance plug-ins which respond to user
operations with sound and vibration or read back text for you.
● At purchase, user assistance plug-ins are not registered. These can
be set by obtaining the required user assistance plug-in (SoundBack,
KickBack, TalkBack, etc.) from Android Market and installing it on
your FOMA terminal.
1
→"Settings"→"Accessibility"
2 Select the "Accessibility" checkbox
3 Select the checkbox of the plug-in you want to
enable
4 Read the cautionary statement, and tap "OK"
76
Settings
Text-to-speech
When a text readback plug-in (TalkBack, etc.) is installed on your FOMA
terminal, you can set the readback speed and language.
● The text readback function can be used when the display language of
your FOMA terminal is set to English (P. 71).
1
→"Settings"→"Text-to-speech"
2 Tap "Install voice data"
● "Install voice data" cannot be selected when voice data is already
installed.
3 Follow the on-screen instructions to install the
voice data
4 Set the items
Speech rate Sets the text readback speed.
Language Sets the voice unique to the language used for
reading back text.
● To check the settings, tap "Listen to an example" to play back a
sample voice.
● To enable the application or functions that link the settings to text
readback at all times, select the "Always use my settings"
checkbox.
Date & time
At purchase, there is no need to manually set the date and time since
date, time zone and time provided from the network are automatically
used.
Manually setting date, time zone and time
1
→"Settings"→"Date & time"
2 Deselect the "Automatic" checkbox
3 Tap "Set date"
4 Adjust the year, month and date, and tap "Set"
5 Tap "Select time zone" and select the time zone
6 Tap "Set time"
7 Adjust the time, and tap "Set"
● When the "Use 24-hour format" checkbox is deselected, tap "AM"
or "PM" to switch between morning and afternoon.
8 Select or deselect the "Use 24-hour format"
checkbox
9 Tap "Select date format" and select an item
77
Settings
System settings
Disabling activation of STARMEMO
composition by dD
1
→"Settings"→"System settings"→"Key assign"
2 Deselect the "STARMEMO start" checkbox
Adjusting the motion sensor
Adjust the sensor when it does not work properly.
1
→"Settings"→"System settings"→"Sensor
settings"→"Adjust the Motion Sensor"
2 Hold your FOMA terminal horizontal, and tap
"Adjust"
3 Tap "OK" when the adjustment is completed
Adjusting the Electronic Compass
You can adjust the Electronic Compass to indicate the correct direction.
1
→"Settings"→"System settings"→"Sensor
settings"→"Adjust the Electronic Compass"
2 Tap "Adjust"
3 Follow the on-screen instructions to repeat the
operation
4 Tap "OK" when the adjustment is completed
● It takes 30 seconds at most for the adjustment to be completed.
About phone
Checking your telephone number
1
→"Settings"→"About phone"→"Status"
Your telephone number is displayed at "My phone number".
Checking terminal information and version
information
1
→"Settings"→"About phone"
2 Checking items
Software
update
Updates the software to the latest version (P. 132).
Status You can check the battery level, phone number,
network name, network type, IMEI (unique serial
number assigned to your FOMA terminal), Wi-Fi
MAC address, and other information.
Battery use You can check the amount of battery power used for
each application.
Legal
information
You can check the open source license and Google
terms of service.
Model number You can check the model number of your FOMA
terminal.
Firmware
version
You can check the software (firmware) version.
Baseband
version
Kernel version
Build number
78
Messaging/Browser
Types of mail available on your FOMA
terminal
The following mail can be used on your FOMA terminal.
■Email
Mail accounts provided by mopera U and general service providers can
be set to your FOMA terminal so that email can be sent and received
just like you can on a PC.
■sp-mode mail
Image, melodies and other files can be attached to text messages and
sent and received between docomo i-mode terminals and PCs or
mobile phones made by other manufacturers. Mail addresses can be
specified to other parties, which means that mail transactions are
possible with anyone if the other party has an Internet mail address.
● sp-mode mail addresses comprise the @docomo.ne.jp domain name
(section of address on right side of @ mark).
■Gmail
Gmail is a Google online email service. Emails received and sent by
Gmail on your FOMA terminal can also be checked in a PC's browser.
■SMS
Short text messages addressed to a mobile phone number can be sent
and received.
Email
Mail accounts provided by mopera U or general providers can be set for
email.
Setting up a mopera U mail account
mopera U subscribers can use mopera U mail.
● Both of the POP and IMAP protocols can be used for the mail servers
receiving mopera U mail. mopera U mailboxes may be up about 50
MB in size.
■Using a POP server
1
→"Email"
2 Enter the mopera U mail address and mopera U
password
3 Tap "POP3"
4 Enter the mopera U user name and password, and
enter "mail.mopera.net" for the POP3 server
5 Tap the "Security type" field and then "None", or
select the security type
6 Check entered settings, and tap "Next"
7 Enter "mail.mopera.net" for the SMTP server, and
check the entered mopera U user name and
password settings
8 Tap "Next"
9 In the option settings screen, set the email check
frequency and other settings, and tap "Next"
10
In the mail account registration screen, enter the
name to be displayed in sent mail, and tap "Done"
79
Messaging/Browser
Continued on next page
Setting up a general provider mail account
● You must first obtain the information required for setting up the mail
account from the service provider you are using.
1
→"Email"
2 Enter the mail address and password, and tap "Next"
From here on, follow the on-screen instructions to set up the mail
account.
Note
● If automatic setting of the mail account does not complete, tap
"Manual setup" in step 2, and manually enter the account settings.
● With some service providers, "OP25B (Outbound Port 25
Blocking): spam mail transmission blocking" must be set. For
details, contact the service provider you are subscribed to.
● If you have already set a mail account and want to add on another
mail account, mM→"Accounts"→mM→"Add account" in the mail
list screen.
Setting reception for each mail account
Setting automatic checking of new email
1
→"Email"
● If you have multiple mail accounts, select the mail account in the
account list screen. To display the account list screen, M→
"Accounts".
2 M→"Account settings"
3 Tap "Email check frequency"
4 Tap "Never" or select the email check frequency
Note
● If connection to the mail server is set to be done at regular
intervals, charges will be incurred each time new mail is checked
when packet communication is used.
Setting notification of new email
1
→"Email"
● If you have multiple mail accounts, select the mail account in the
account list screen. To display the account list screen, M→
"Accounts".
2 M→"Account settings"
3 Set call notification items
Email
notifications
Sets whether or not to notify you that there is new
email by the notification icon on the status bar.
Select ringtone Sets the ringtone for notifying you of new email.
Vibrate Sets whether or not to notify you of new email by
vibration.
Composing and sending email
1
→"Email"
● To send mail from another mail account, select the mail account in
the account list screen. To display the account list screen, M→
"Accounts".
● If the integrated inbox is displayed, email is sent from the mail
account selected in the account list screen.
2 M→"Compose"
3 Enter the mail address in the "To" field
● To add a Cc or Bcc destination, M→"Add Cc/Bcc".
4 Enter the subject in the "Subject" field
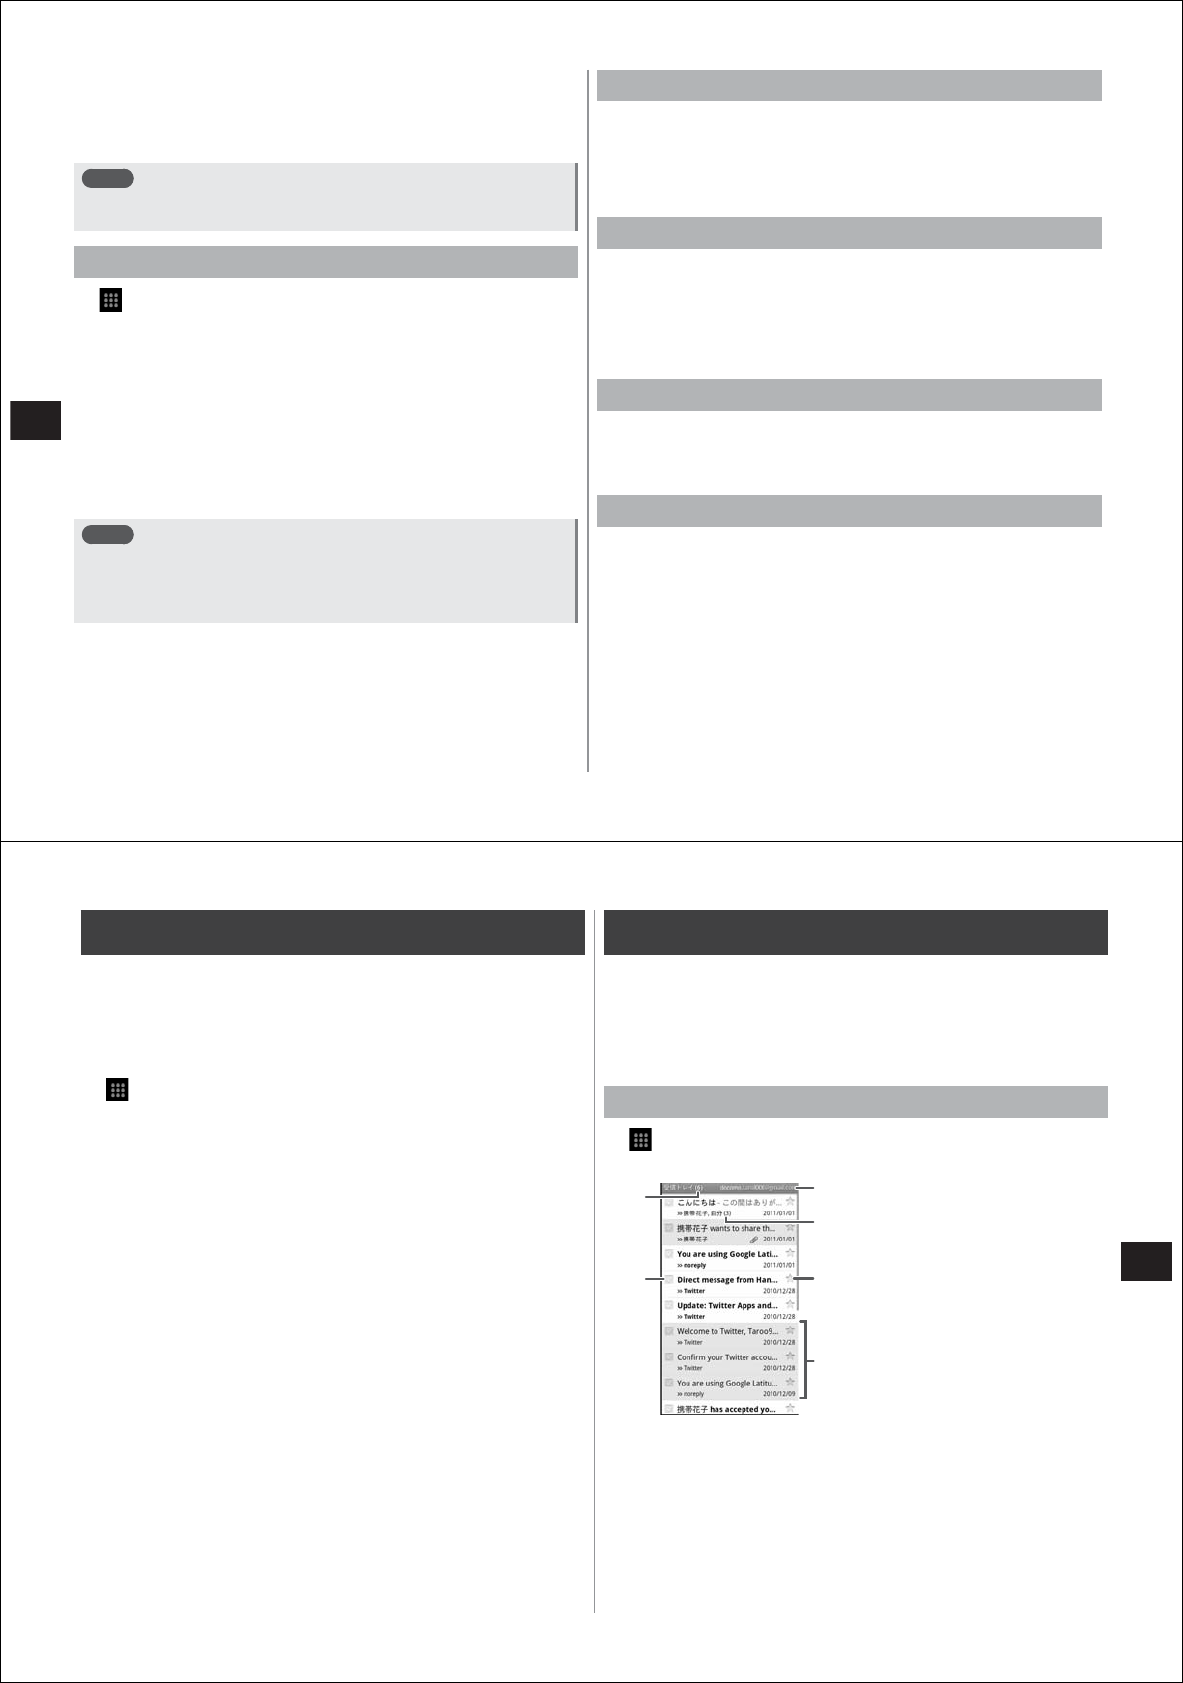
80
Messaging/Browser
5 Enter the message in the "Compose Mail" field
● To attach a file, M→"Attach"→select a file.
6 Tap "Send"
Note
● Email is handled as email from a PC. So, emails cannot be sent if
"Reject emails from PCs" is set on the recipient terminal.
Receiving and reading emails
1
→"Email"
● If you have multiple mail accounts, select the mail account in the
account list screen. To display the account list screen, M→
"Accounts".
● If you tap the "integrated inbox" in the account list screen, an inbox
containing a mixture of emails from all mail accounts will be
displayed. Each of the mail accounts is distinguished by a color
bar prefixing the email.
2 To refresh the inbox, M→"Refresh"
3 Tap the email you want to read to open it
Note
● If "Email check frequency" and "Email notifications" (P. 75) are set
in the account settings, the notification icon will be displayed on
the status bar. The inbox can be displayed by opening the
notification panel and tapping a notification.
Replying to emails
1 Open the email you want to reply to
2 Tap "Reply" or "Reply to all"
3 Enter a message, and tap "Send"
Forwarding emails
1 Open the email you want to forward
2 M→"Forward"
3 Enter the mail address of the forwarding destination
in the "To" field, and tap "Send"
Registering emails to STARMEMO
1 Open the email you want to register
2 M→"Add StarMemo"→"OK"
Deleting emails
1 Open the email you want to delete
2 Tap "Delete"
81
Messaging/Browser
sp-mode mail
You can send and receive email using e-mode mail addresses
(@docomo.ne.jp).
With this mail type, pictograms and deco-mail® can be used, and
automatic reception also is supported.
● For details on sp-mode mail, refer to the "Mobile Phone User's Guide
(sp-mode [Smartphone])".
1
→"spモードメール (sp-mode mail)"
From here on, follow the on-screen instructions.
Gmail
Gmail is a Google online email service. You can send and receive
emails using Gmail on your FOMA terminal.
● To use Gmail, you must set a Google account for your FOMA
terminal. If a Google account is not yet set, follow the on-screen
instructions that are displayed when Gmail is activated for the first
time.
Opening Gmail
1
→"Gmail"
A list of message threads is displayed in the inbox.
① Number of unread emails
② The same operation can be
performed on a group of emails by
selecting the checkboxes of
multiple message threads.
③ Currently displayed Gmail account
④ Number of emails contained in a
message thread
⑤ Tap to add a star.
⑥ Message threads with no unread
emails (gray background)
■About message threads
Gmail displays emails in groups as a message thread each time you
reply to an email. If the new emails are replies to existing emails, these
are grouped together in the same message thread. When the subject of
a new email or an existing email has been changed, a new message
thread will be created.
②
①③
④
⑤
Inbox
⑥
82
Messaging/Browser
Switching the Gmail account
1 In the inbox, M→"Accounts"
2 Select the Gmail account you want to display
Refreshing Gmail
1 In the inbox, M→"Refresh"
The inbox is refreshed with Gmail on the FOMA terminal and Gmail
on the website synchronized with each other.
Composing and sending email by Gmail
1 In the inbox, M→"Compose"
2 Enter the mail address in the "To" field
● To add a Cc or Bcc destination, M→"Add Cc/Bcc".
3 Enter the subject in the "Subject" field
4 Enter the message in the "Compose Mail" field
● To attach an image, M→"Attach"→select an image.
5 Tap "Send"
Note
● Email sent by Gmail is handled as email from a PC. So, emails
cannot be sent if "Reject emails from PCs" is set on the recipient
terminal.
Displaying sent emails
1 In the inbox, M→"View labels"
2 Tap "Sent"
Displaying new email
1 Tap the message thread containing unread email in
the inbox
Note
● When "Email notifications" (P. 79) is set, the notification icon will be
displayed on the status bar. The inbox can be displayed by
opening the notification panel and tapping a notification.
● Names set by the sender and not names saved as destinations are
displayed as the sender of received emails.
Searching emails
1 In the inbox, M→"Search"
2 Enter the keyword in the search box, and tap
Replying to emails
1 Display the email you want to reply to, and tap
"Reply" or "Reply to all"
● To display "Reply" or "Reply to all" if they are not displayed, scroll
down to the bottom of the screen.
2 Enter a message, and tap "Send"
83
Messaging/Browser
Forwarding emails
1 Display the email you want to forward, and tap
"Forward"
● To display "Forward" if it is not displayed, scroll down to the bottom
of the screen.
2 Enter the mail address of the forwarding destination
in the "To" field, and tap "Send"
Message thread operations
The following operations can be performed by tapping on a message
thread in the inbox for one second or more.
Item Description
Read Expands the message thread.
Archive Archives (stores) the message thread. Archived
message threads are not displayed in the inbox.
Mute Hides the message thread. Hiding message threads
that are not needed and whose transactions from here
on need not be displayed is a handy feature.
Mark unread/
Mark read
Marks a message thread as unread or read.
Delete Deletes a message thread.
Add star/Remove
star
Adds or removes a star from a message thread.
Change labels Adds or changes the label of the message thread.
Report spam Reports a received email as spam.
Note
● Archived or muted message threads no longer displayed in the
inbox can be displayed by mM→"View labels"→"All Mail".
● Labels cannot be made on your FOMA terminal. Make them at the
Gmail website.
Setting notification of new email
1 In the inbox, M→"Settings"
2 Set call notification items
Email
notifications
Sets whether or not to notify you that there is new
email by the notification icon on the status bar.
Select ringtone Sets the ringtone for notifying you of new email.
Vibrate Sets whether or not to notify you of new email by
vibration.
84
Messaging/Browser
SMS
You can send and receive text messages up to 70 double-byte
characters long (up to 160 single-byte characters comprising only
alphanumerics) addressed to a mobile phone number.
Composing and sending SMS
1
→"Messaging"→"New message"
2 Enter the mobile phone number to send the SMS to
in the "To" field
3 Enter the message in the "Type to compose" field
● To enter a pictogram, M→"Insert smiley"→select a pictogram.
4 Tap "Send"
Note
● You can exchange messages with users or non-docomo overseas
telecommunications carriers. Refer to "Mobile Phone User's Guide
[International Services]" or the "docomo International Services
website" for information on available countries and overseas
telecommunications carriers.
● For destinations of non-docomo overseas telecommunications
carriers, enter "+", the country code, and the recipient's mobile
phone number. Alternatively, enter "010", the country code and the
recipient's mobile phone number. (Add "010" to reply to SMS
received from abroad.) If the phone number begins with "0", omit
the "0". However, "0" must be included when making a call to some
countries or regions such as Italy.
When you have received an SMS
When you receive an SMS, the notification icon will be displayed on the
status bar. New SMS can be checked by opening the notification panel
and tapping a notification.
Note
● You cannot check for any SMS in the SMS center from your FOMA
terminal.
● SMS cannot be received when your FOMA terminal is low on
memory. Increase memory, for example, by deleting unwanted
applications (P. 67, P. 118).
Reading sent/received SMS
1
→"Messaging"
2 Tap the message thread containing the SMS you
want to read to open it
Replying to SMS
1
→"Messaging"
2 Open the message thread containing the SMS you
want to reply to
3 Enter a message, and tap "Send"
Forwarding SMS
1
→"Messaging"
2 Open the message thread and tap the SMS you
want to forward for one second or more
3 Tap "Forward"
4 Enter the mobile phone number of the forwarding
destination in the "To" field, and tap "Send"
85
Messaging/Browser
Registering SMS to STARMEMO
1
→"Messaging"
2 Open the message thread and tap the SMS you
want to register for one second or more
3 "Add StarMemo"→"OK"
Deleting SMS
■Deleting one SMS
1
→"Messaging"
2 Open the message thread and tap the SMS you
want to delete for one second or more
3 "Delete message"→"Delete"
■Deleting a message thread
1
→"Messaging"
2 Tap the message thread you want to delete for one
second or more
3 "Delete thread"→"Delete"
All the SMS in the message thread are deleted.
■Deleting all message threads
1
→"Messaging"→M→"Delete threads"→"Delete"
Setting SMS auto delete
1
→"Messaging"→M→"Settings"
2 Select the "Delete old messages" checkbox, and
tap "Message limit"
3 Enter the message limit for the number of SMS in
each message thread, and tap "Set"
Note
● You can protect SMS from being deleted by the following
operation:
→"Messaging"→open the message thread, and tap the SMS you
want to protect for one second or more→"Lock message"
Backing up SMS
You can back up SMS saved on your FOMA terminal to a microSD card.
1
→"Messaging"→M→"Settings"→"Backup"
2 "Backup"→"Start"
3 Tap "OK" when the backup is completed
Note
● To copy backed up SMS to your FOMA terminal tap "Restore"
→"Start" after step 1.
Setting new SMS notification
1
→"Messaging"→M→"Settings"
2 Set call notification items
Notifications Sets whether or not to notify you that there is new
SMS by the notification icon on the status bar.
Select ringtone Sets the ringtone for notifying you of new SMS.
Vibrate Sets whether or not to notify you of new SMS by
vibration.
86
Messaging/Browser
Google Talk
Google Talk is an online instant message service provided by Google.
You can enjoy chat with Google members by using Google Talk on your
FOMA terminal.
● To use Google Talk, you must set a Google account on your FOMA
terminal. If a Google account is not yet set, follow the on-screen
instructions that are displayed when Google Talk is activated for the
first time.
Online chat
Activating Google Talk
1
→"Talk"
The Friends list is displayed.
Adding new members
1 In the Friends list, M→"Add friend"
2 Enter the Google account of the member you want
to add
3 Tap "Send invitation"
Note
● Invitations waiting to be replied to are displayed on the Friends list
by mM→"Invites". If you accept or reject a party you received an
invitation from, that party will be deleted from the list of invitations
waiting to be replied to.
Accepting an invitation
1 In the Friends list, tap "Chat invitation"
2 Tap "Accept"
Setting online status
1 Tap at the top right of the Friends list
2 Select the online status you want to set
● If necessary, enter a status message in the "Status message"
field. Status messages you have entered are displayed as custom
messages the next time you select online status.
Note
● If you stop chatting midway for a while, the status icon sometimes
changes to a clock mark. This mark is no longer indicated if both
parts resume chat.
Starting chat
1 In the Friends list, tap the name of a friend you want
to chat with
The chat screen is displayed.
2 Enter the message in the "Type to compose" field
● To enter a pictogram, M→"More"→"Insert smiley"→select a
pictogram.
3 Tap "Send"
Switching between active chats
You can switch between chats when two or more chats are active.
1 In the chat screen, M→"Switch chats"
2 Select a member you want to chat with
87
Messaging/Browser
Set chat to off record
Chat messages are saved to the "Chat" label in Gmail. However, saving
can be disabled by setting chat to off record.
1 In the chat screen, M→"Chat off record"
All messages from here on will be off record.
Note
● To cancel off record, mM→"Chat on record" in the chat screen.
Ending chat
1 In the chat screen, M→"End chat"
Managing members
Members in the Friends list are displayed by online status (online, busy
and offline).
Depending on your settings, priority is sometimes given to only
members with a frequent email or chat history in the displayed Friends
list. To display all currently registered members, in the Friends list M
→"All friends".
Note
● To return the display to only members with a frequent email or chat
history, mM→"Most popular" in the Friends list.
Blocking members
You can block reception of messages sent from specific members.
1 In the Friends list, tap the name of the member you
want to block for one second or more
2 Tap "Block friend"
The blocked member is deleted from the Friends list.
Note
● To unblock, in the Friends list, mM→"Blocked"→select the member
to unblock→"OK".
Displaying member information
1 In the Friends list, tap the name of the member
whose information you want to display for one
second or more
● To display all members, M→"All friends".
2 Tap "Friend info"
● If you enter a nickname, the nickname will be displayed in the
Friends list.
3 When you have finished checking, tap "Done"
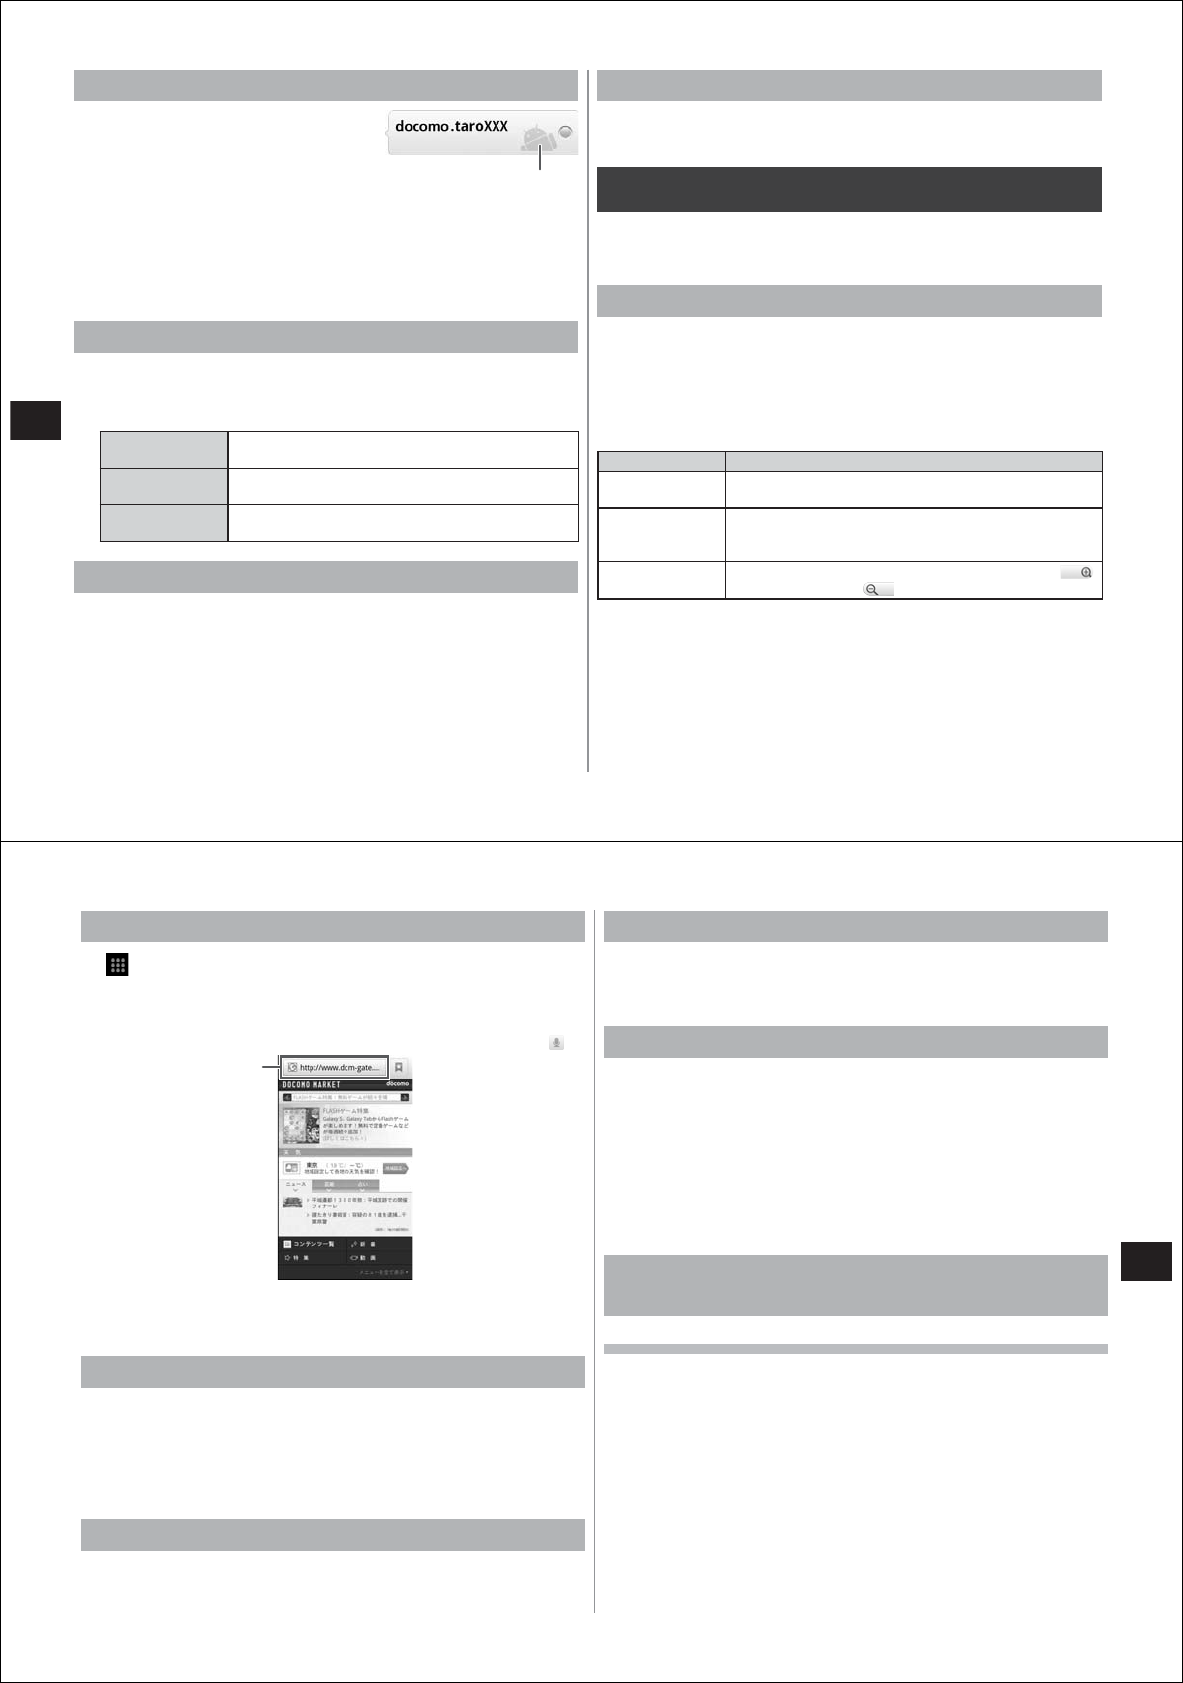
88
Messaging/Browser
About the mobile indicator
When the mobile indicator is displayed
at the right of a member's name in the
Friends list, you can tell that the member
is currently logged in from an Android
mobile phone.
To display the mobile indicator in the Friends list for other members, set
as follows:
1 In the Friends list, M→"More"→"Settings"
2 Select the "Mobile indicator" checkbox
Setting notification of new messages
1 In the Friends list, M→"More"→"Settings"
2 Set call notification items
IM notifications Sets whether or not to notify you that there is a new
message by the notification icon on the status bar.
Select ringtone Sets the ringtone for notifying you of new
messages.
Vibrate Sets whether or not to notify you of new messages
by vibration.
Setting automatic sign-in
You can set to sign in to Google Talk automatically when you turn on
your FOMA terminal.
1 In the Friends list, M→"More"→"Settings"
2 Select the "Automatically sign in" checkbox
Signing out
1 In the Friends list, M→"More"→"Sign out"
Using a browser
Your FOMA terminal can browse websites just like you can on a PC.
On this FOMA terminal, browsers can be used over a packet
transmission or Wi-Fi connection.
Operations in website display screen
■To set pages to the landscape/portrait screen display mode
You can switch the landscape/portrait screen display mode by changing
how you hold your FOMA terminal, horizontally or vertically (P. 30).
■Zooming in/out on pages
You can zoom in or out on pages by the following operations.
Operation Description
Pinch in/pinch
out
Spread two fingers at the part to zoom in, and bring
your two fingers together to zoom out. (P. 30)
Double-tap Double-tap (tap twice quickly) the part you want to
zoom in on. To return the display to its original
magnification, double-tap again.
Zoom control Flick the screen to display the zoom controls. Tap
to zoom in, and tap to zoom out.
■Scroll/pan
Scroll the screen up/down or left/right or pan in all directions to display
the desired part of the screen (P. 29).
Mobile indicator
89
Messaging/Browser
Activating the browser to display a website
1
→"Browser"
The preset home page is displayed.
2 Enter the URL or keyword in the address bar
● Voice search is possible by tapping the address bar and then .
3 Tap "Go", or select the web page to display from
the list of candidates
Opening a new browser window
You can open up to eight browser windows.
1 With the web page displayed, M→"Windows"
→"New window"
A new browser window opens, and the preset home page is
displayed.
Switching browser windows
1 With the web page displayed, M→"Windows"
2 Tap the browser window you want to display
Closing a browser window
1 With the web page displayed, M→"Windows"
2 Tap "×" at the top right of the browser window
Display web pages from history
1 With the web page displayed, M→"Bookmarks"
→"History"
2 Tap "Today", "Yesterday", "5 days ago", etc. to
expand the history for that period
● To display the history of frequently viewed web pages, tap "Most
visited".
3 Tap the history of the web page you want to display
Registering a bookmark to quickly display
a web page
Registering a bookmark
1 Display the web page you want to register
2 M→"Bookmarks"
A list of bookmarks is displayed.
● Tap M→"List view"/"Thumbnail view" to toggle between list
view and thumbnail view.
3 Tap "Add"
● In the list view, tap "Add bookmark".
4 Check/change the bookmark name, and tap "OK"
Address bar
90
Messaging/Browser
Displaying web pages from bookmarks
1 With the web page displayed, M→"Bookmarks"
2 Tap the bookmark you want to display
Editing a bookmark
1 With the web page displayed, M→"Bookmarks"
2 Tap the bookmark you want to edit for one second
or more
3 Tap "Edit bookmark"
4 Enter changes, and tap "OK"
Deleting a bookmark
1 With the web page displayed, M→"Bookmarks"
2 Tap the bookmark you want to delete for one
second or more
3 "Delete bookmark"→"OK"
Backing up a bookmark
You can back up bookmarks to a microSD card.
1 With the web page displayed, M→"More"
→"Settings"→"Backup"
2 "Backup"→"Start"
3 Tap "OK" when the backup is completed
Note
● To copy backed up bookmarks to your FOMA terminal, tap
"Restore"→"Start" after step 1.
Registering web pages to STARMEMO
1 Display the web page you want to register
2 M→"Add STARMEMO"→"OK"
Changing the web page display mode
Displaying web pages constantly in the landscape mode
1 With the web page displayed, M→"More"
→"Settings"
2 Select the "Landscape-only display" checkbox
Changing the default zoom
You can set the magnification for when a web page is double-tapped.
1 With the web page displayed, M→"More"
→"Settings"→"Default zoom"
2 Tap "Far"/"Medium"/"Close"
Changing the text size
1 With the web page displayed, M→"More"
→"Settings"→"Text size"
2 Tap "Tiny"/"Small"/"Normal"/"Large"/"Huge"
91
Messaging/Browser
Web page link operations
The following operations are possible when a link displayed on a web
page is selected.
Link Operation
URL ・
Tap the link to open the web page.
・
Tap the link for one second or more to register the
URL as a bookmark, send it by mail or copy it.
Email address ・
Tap the link to compose mail.
・
Tap the link for one second or more to copy the mail
address.
Address Tap the link to open the Google map and search for an
address.
Phone number Tap the link to call the other party's phone number.
Saving images displayed on a web page
1 With the web page displayed, tap the image you
want to save for one second or more
2 Tap "Save image"
● Saved images can be checked in the media folder (P. 93) or
download history (P. 66).
Copying text on a web page
You can copy text, and paste the copied text for use in other
applications, for example.
1 With the web page displayed, M→"More"
→"Select text"
2 Slide your finger over the text you want to copy
Selected text is highlighted in pink.
3 Release your finger from the screen
The text is copied to the clipboard.
● To paste copied text, tap the text insertion position in the text input
screen for one second or more, and tap "Paste".
Setting a home page
You can set the home page that is displayed when a new browser
window is opened.
1 With the web page displayed, M→"More"
→"Settings"→"Set home page"
2 Enter the URL to set as the home page, and tap
"OK"
Deleting history or cache
1 With the web page displayed, M→"More"
→"Settings"
2 "Clear cache"/"Clear history"/"Clear all cookie data"/
"Clear form data"/"Clear location access"/"Clear
passwords"→"OK"
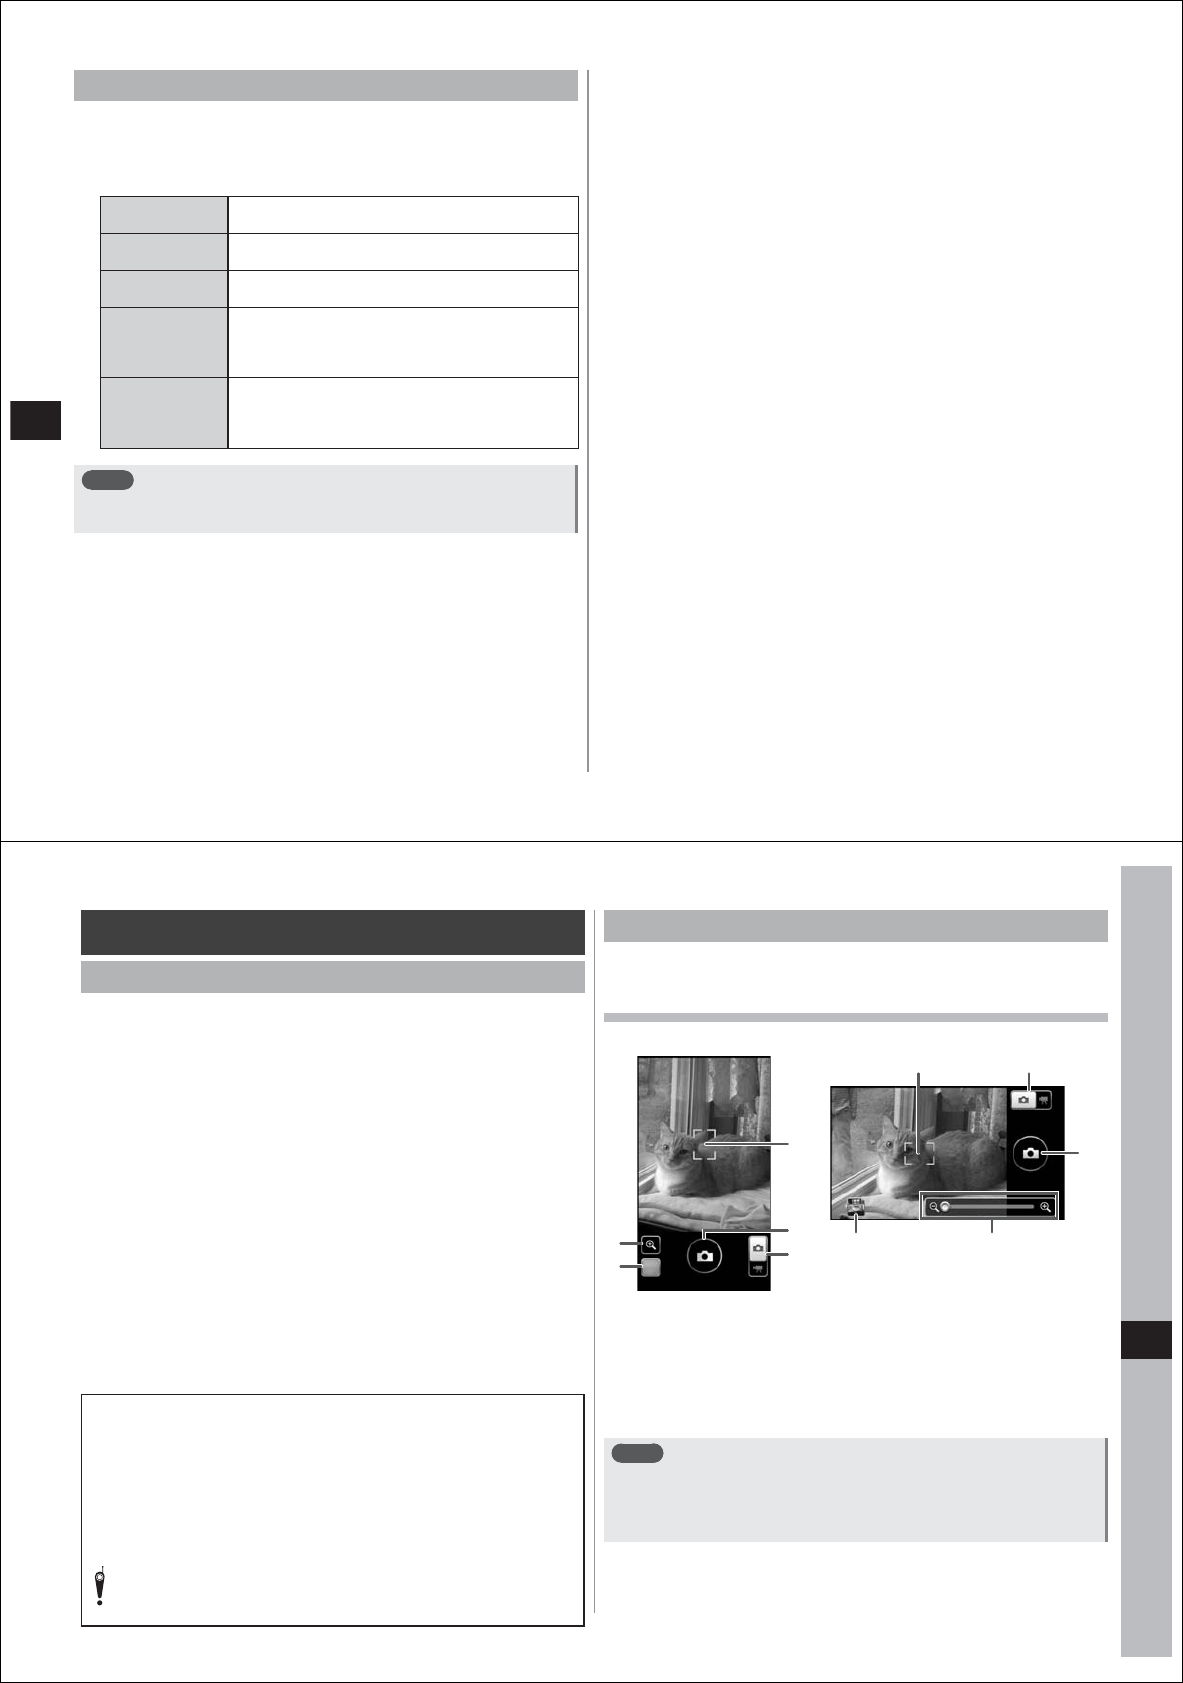
92
Messaging/Browser
Setting security
1 With the web page displayed, M→"More"
→"Settings"
2 Set the items
Enable
JavaScript
Deselecting this item can increase security.
Enable plug-ins Deselecting this item prohibits use of browser
extended functions and can increase security.
Accept cookies Deselecting this item to prohibit saving and reading
of cookies can increase security.
Remember
passwords
Deselecting this item to disable saving of user
names and passwords for sites that were entered
during browsing of web pages can increase
security.
Show security
warnings
When this item is deselected, a warning is
displayed if a problem in site security is detected.
To protect security, we recommend not deselecting
this item.
Note
● Some web services might no longer be available if cookies are
prohibited.
93
Multimedia
Taking photos with the camera
Before using the camera
● Although the camera is made with high-precision technology, some
pixels or lines might look constantly dark or bright. Further, white lines
and other noise such as random color pixels may easily appear in
images especially when shooting images in dimly lit surroundings.
This, however, is not a malfunction.
● When the camera is activated, stripes may appear on screen. This is
not a malfunction.
● The color and brightness of the subject in still pictures or video shot
with the camera may differ from the actual color and brightness.
● Images shot in shooting conditions including the sun, a light or other
strong light source may appear dark and distorted.
● Fingerprints or oil from your hands on the lens might prevent clear
still pictures or video from being shot. Wipe the lens with a soft cloth
before shooting images.
● Using the battery consumes a lot of battery power.
● The focus lock sound or shutter sound in still picture photography and
the start and end sounds in video photography sound even when the
manner mode is set.
● When taking close up photos, keep the distance between the lens
and the subject to about 10 cm or more.
Copyrights and rights of portrait
Images and audio recorded with your FOMA terminal are for personal
use and may not be used without the consent of the rightful person in
accordance with copyright laws. Please note that using or modifying
the likeness of other individuals without their consent infringe on their
rights of portrait. The recording of images or audio may be restricted
at concerts, performances and exhibits even when recorded for
personal use.
Please be considerate of the privacy of individuals around you
when shooting and sending pictures using a camera-enabled
mobile phone.
Operations in the shooting screen
Images can be taken with the camera both in landscape and portrait
mode.
Before shooting (viewfinder screen)
■Still pictures
① Displays the zoom bar
② Displays the previously shot still picture
③ Focus frame
④ Shutter
⑤ Switches between still picture/video photography
⑥ Zoom bar
Slide to the left and right to change the zoom
Note
● Video recording sometimes is activated (restarted) if video
recording is in operation when the camera is activated. If this
happens, switch to still picture photography using the selector
switch at ⑤.
①
②⑤
③
④②
③ ⑤
⑥
④
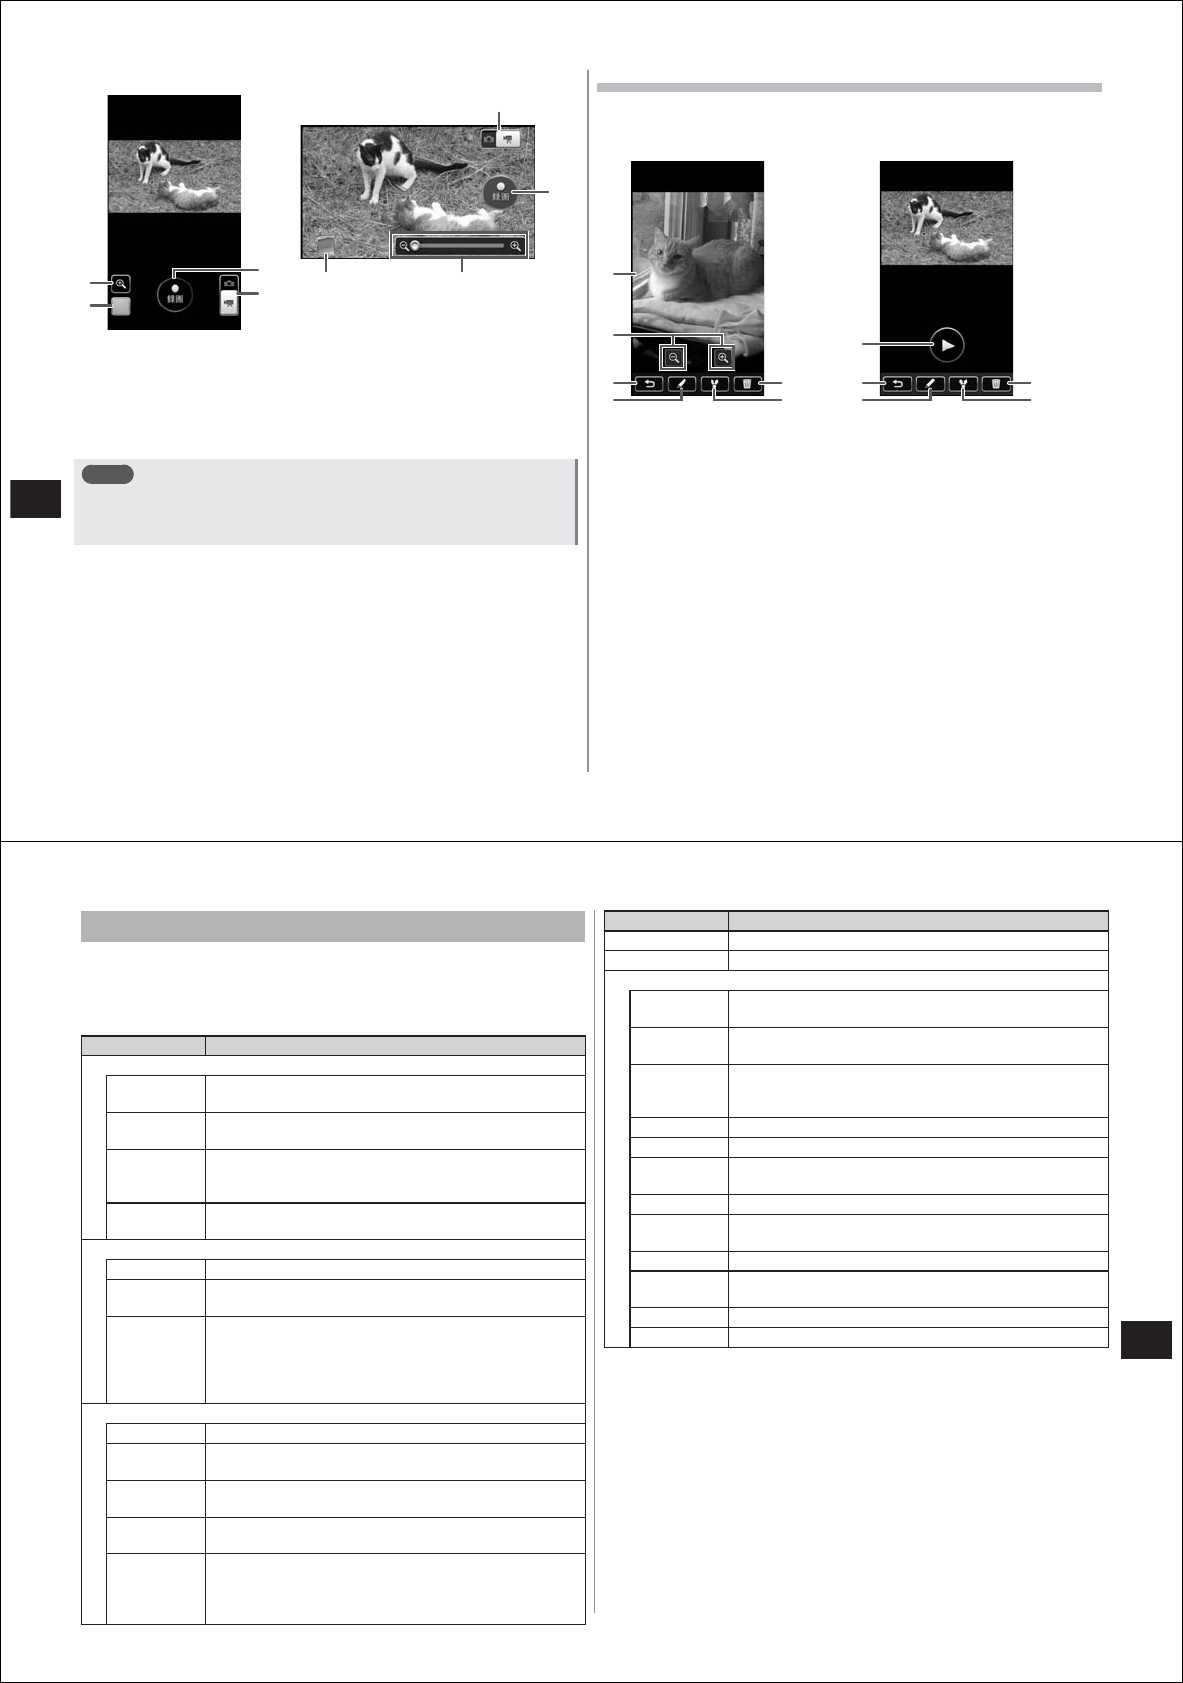
94
Multimedia
■Video
① Displays the zoom bar
② Plays back the previously recorded video
③ Starts recording
④ Switches between still picture/video photography
⑤ Zoom bar
Slide to the left and right to change the zoom
Note
● The camera sometimes is activated (resumed) if the camera is in
operation when video recording was activated. If this happens,
switch to video photography using the selector switch at ④.
After shooting (confirmation screen)
This screen is displayed when the "Auto View" or "Auto View" checkbox
is selected in the shooting settings menu.
●Still picture ●Video
① Flick to the left and right to display the previously shot still picture
② Plays back a recorded video
③ Zoom control
④ Returns to the viewfinder screen
⑤ Edits shot still pictures/video
⑥ Deletes shot still pictures/video
⑦ Shares shot still pictures/video or composes a STARMEMO
①
②⑤
④②
④
⑤
③
①
③
④⑥
⑦⑤
②
④⑥
⑦⑤
95
Multimedia
Shooting settings menu for still pictures
The following settings can be made by pressing M in the still picture
viewfinder screen.
● Items that cannot be selected in specific combinations are displayed
in gray.
Setting Item Description
Focus
Auto The focus frame moves to the tapped position, and is
then focused.
Face A person's face is automatically detected, and is then
focused.
Object
Tracking
The focus frame moves tracking the movement of the
subject that you selected by tapping, and is then
focused.
Micro Subjects at close distance are focused. Keep the distance
between the lens and the subject to about 10 cm or more.
Shutter
Auto Regular shutter mode
Smile Shot Smiling faces are detected, and the shutter is
automatically shut.
Self Timer The shutter shuts automatically after the preset time
elapses. This allows photos of yourself or group photos
with lots of people in them to be taken without the need
to actually hold your FOMA terminal. This feature can
also be used to prevent camera shake during shooting.
Capture
Auto Standard shooting mode
Perfect
Portrait
Reproduces complexion faithfully in the photo.
Burst Up to seven still pictures can be taken continuously
while the shutter button is held (tapped) down.
Frame Shot Takes photos with the frame of your choice around
them.
Panorama After pressing (tapping) the shutter button, move the
camera in the horizontal or vertical direction to take a
panorama shot so that green and white panorama
frames are overlapping.
Setting Item Description
Flash Switches the flash between Auto, On and Off.
Picture Size Specifies the resolution (image size).
Advanced
White
Balance
Adjusts coloring to match the surrounding light source.
Photo
Quality
Specifies the photo quality. Setting a higher photo
quality results in a larger image file size.
View Finder Sets whether to take shots in landscape/portrait mode,
or whether to automatically switch between the
landscape and portrait mode.
Show Grid Displays grid lines.
Auto View Displays the still picture you shot after it is saved.
Auto Fix Automatically performs digital correction on the still
picture you shot.
Auto Tagging Automatically tags the still picture you shot.
GPS
Location
Automatically tags position information onto the still
picture you shot.
Anti-Shaking Applies the camera shake correction function.
Anti-Banding Sets reduction of flickering caused by light from neon
lighting.
Self Timer Sets the time until the shutter automatically shuts.
About Checks the camera version and restrictions in use.
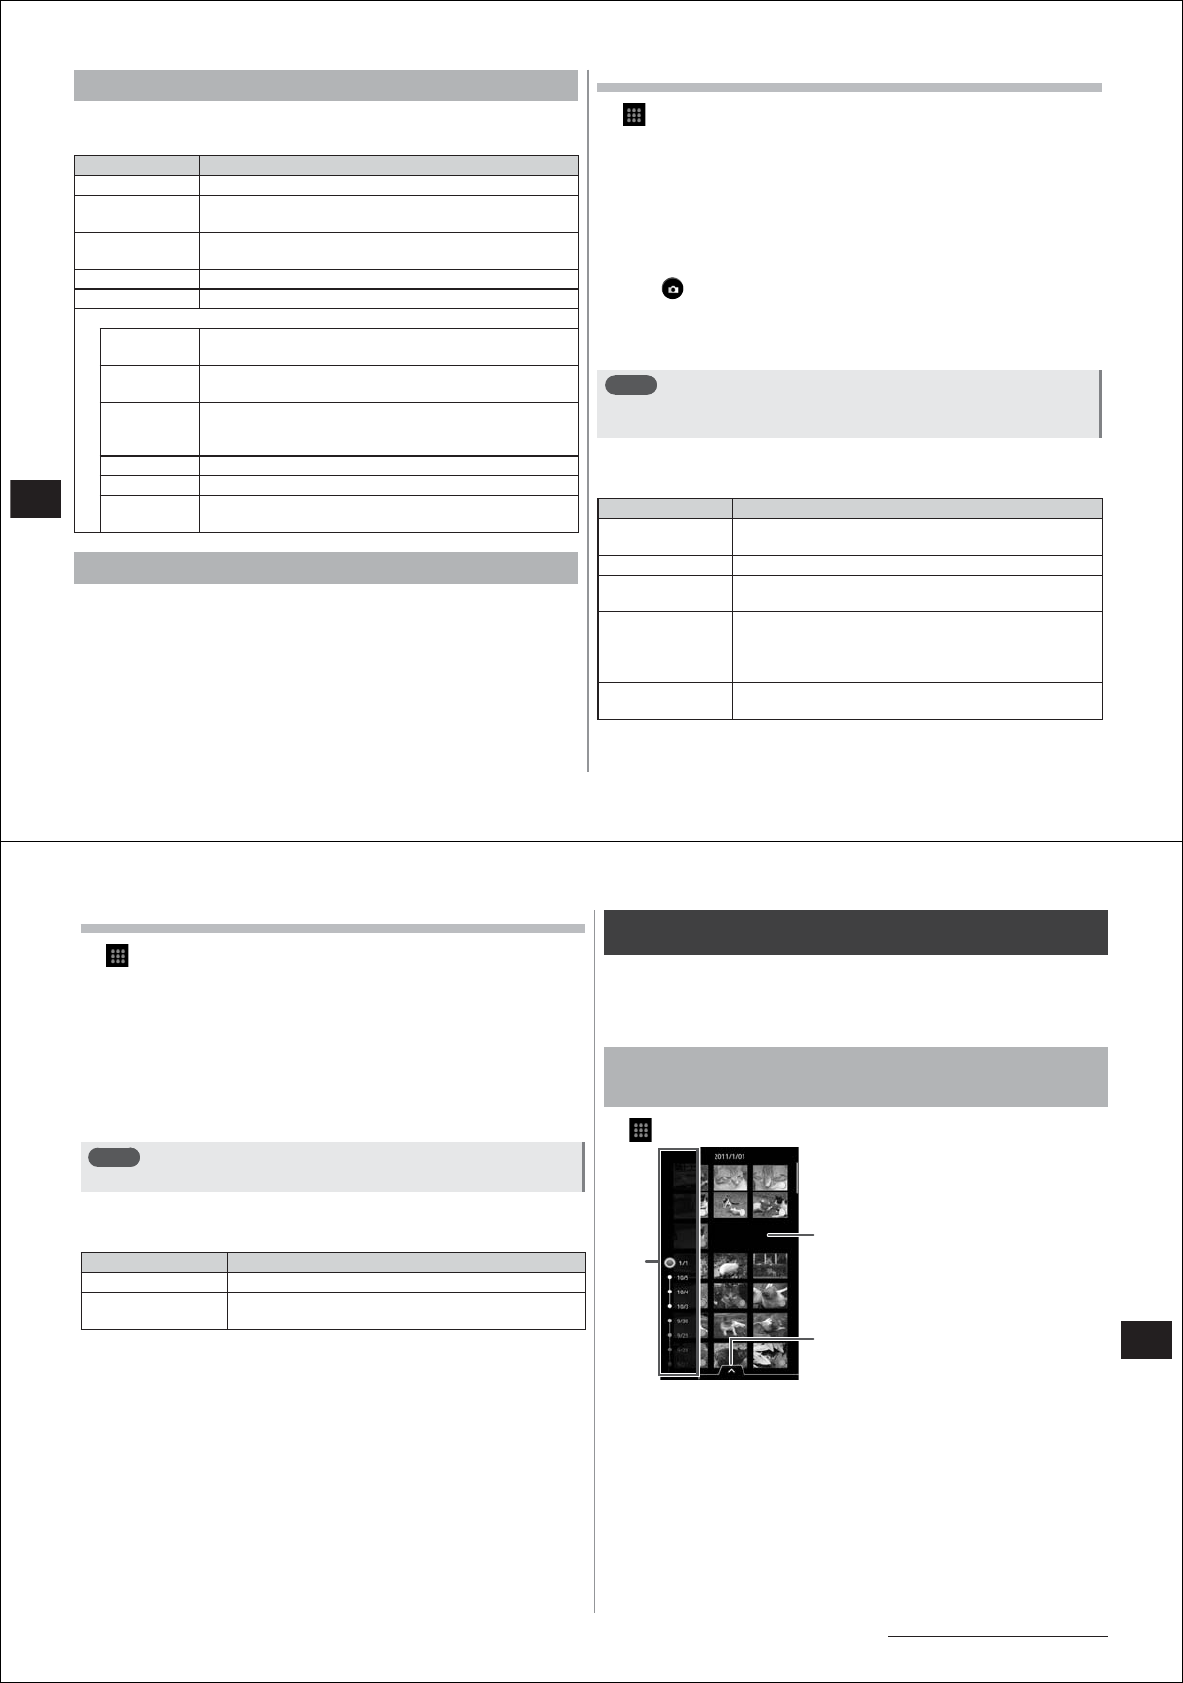
96
Multimedia
Shooting settings menu for videos
The following settings can be made by pressing M in the video
viewfinder screen.
Setting Item Description
White Balance Adjusts coloring to match the surrounding light source.
Video Duration Automatically ends recording after the preset time
elapses.
Audio Sets whether or not to record audio when recording
video.
Light Switches the light on/off.
Video Size Specifies the resolution (image size).
Advanced
Video
Quality
Specifies the photo quality. Setting a higher photo
quality results in a larger image file size.
Audio
Encoder
Specifies AAC or AMR codec.
View Finder Sets whether to take shots in landscape/portrait mode,
or whether to automatically switch between the
landscape and portrait mode.
Auto View Displays the video you shot after it is saved.
Anti-Shaking Applies the camera shake correction function.
About Checks the video recording version and restrictions in
use.
Taking pictures
Still pictures and video you take are automatically saved on the
microSD card. Insert the Micro SD card onto your FOMA terminal. For
details on the microSD card, see P. 70.
Shooting still pictures
1
→"Camera"
2 Display the subject on the viewfinder screen
● When focus is set to "Auto" or "Object Tracking", tap the position
or subject you want to focus on. When the subject is in focus, the
focus frame changes color to green.
● When focus is set to "Face" and the faces of two or more people
have been detected, tap the face of the person you want to focus
on.
3 Tap
The shutter sound sounds.
The confirmation screen is displayed if the "Auto View" checkbox is
selected in the shooting settings menu.
Note
● You can also lock focus by pressing dD halfway down.
● You can adjust the brightness by pressing eE/fF.
■Still picture confirmation screen option menu
The following operations can be performed by pressing M.
Item Description
Set Picture Sets the still picture you shot as wallpaper or the icon
(face shot) of a contact.
To MediaFolder Checks the still picture you shot in the media folder.
Details Displays the file information of the still picture you
shot.
Geo Tag Tags the still picture to indicate the exact location
where it was taken. When a still picture has a Geo Tag
attached, the location where it was taken can be
checked on a map.
Auto Fix Automatically performs digital correction on the still
picture you shot.
97
Multimedia
Continued on next page
Shooting video
1
→"Camcorder"
2 Display the subject in the viewfinder screen, and
tap "REC" to start recording
The recording start sound sounds.
3 Tap "STOP" to end recording
The recording end sound sounds.
The confirmation screen is displayed if the "Auto View" checkbox is
selected in the shooting settings menu.
Note
● You can adjust the brightness by pressing eE/fF.
■Video confirmation screen option menu
The following operations can be performed by pressing M.
Item Description
To MediaFolder Checks the video you recorded in the media folder.
Details Displays the file information of the video you
recorded.
Media Folder
Images shot with the camera or downloaded and saved to the microSD
card can be displayed and played back, or edited easily. Images can
also be tagged for sorting into categories, and the face detection
function can be used to make a personal album.
Opening the media folder to display/play back
images
1
→"Media Folder"
②
③
①
① Index bar
② Scroll up and down to select an
image
③ Tap to display the category tab
2 Display the category tab, and tap "All"/"Photo"/
"Video"/"People"/"Tag"
3 Specify the date on the index bar
● The index bar is displayed when a screen border is tapped in the
portrait display mode. It is always displayed at the bottom of the
screen in the landscape display mode.
● The index bar is not displayed when "People" is selected at step 2.
● The index bar for individual tags is displayed when "Tag" is
selected at step 2.
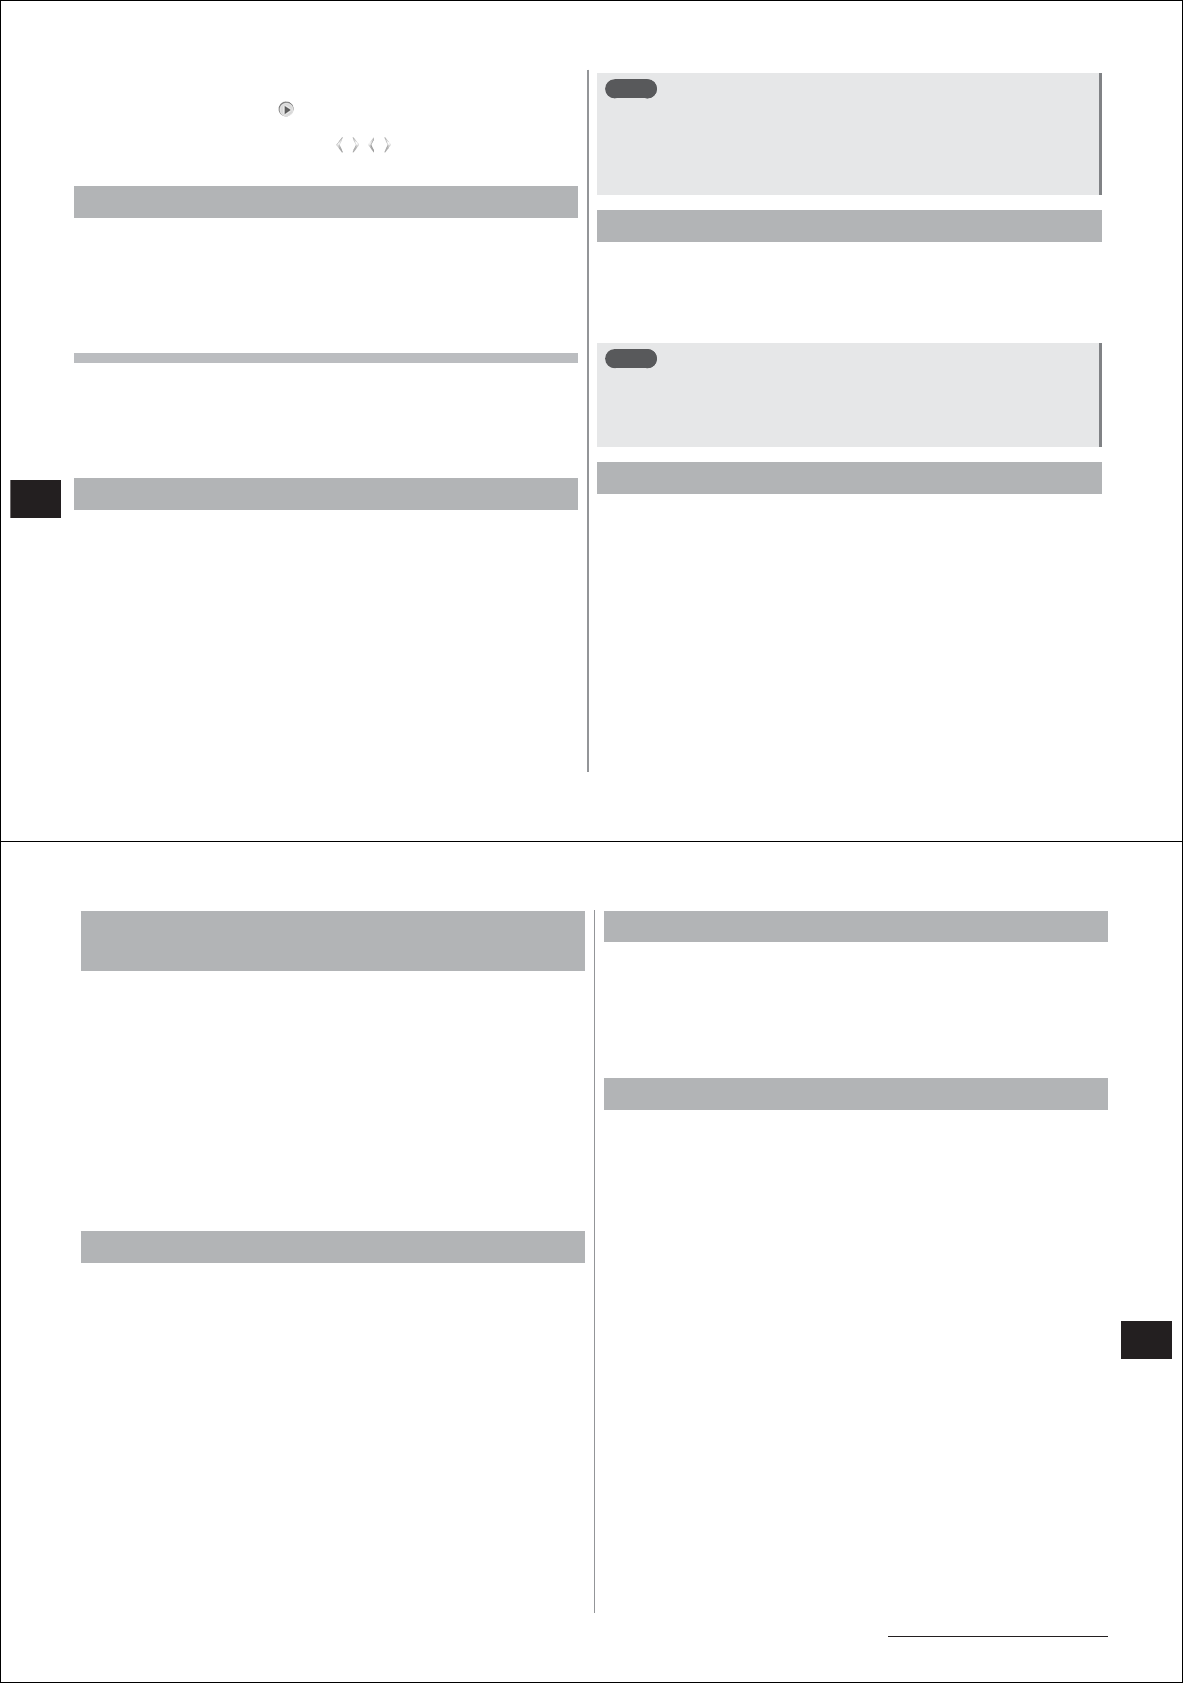
98
Multimedia
4 Tap the image to display it
● To play back video, tap .
● The previous or next image can be switched by flicking the screen
to the left or right, or by tapping / . / is displayed by tapping
the screen.
Playing back a slide show of still pictures
1 Open the media folder, and tap the still picture you
want to start the slideshow from
2 M→"Slideshow"
● To end the slideshow, tap the screen.
Setting a slideshow
1 Open the media folder, and tap "All"/"Photo"/"Tag"
2 M→"Setting"
3 Set the slideshow interval, transition and BGM
Tagging images
1 Open the media folder and tap the image you want
to tag
2 M→"Tag"
■To make new tags
"New tag"→enter the tag name→"OK".
■To select from existing tags
Select the desired tag.
Note
● In categories other than "People", multiple images can be tagged
as a group by the following operation.
mM→"Mark"→select the checkbox of the images you want to
tag→mM→"Tag"→select the tag or "New tag"→enter the tag
name→"OK"
Deleting images
1 Open the media folder, and tap the image you want
to delete
2 M→("More"→)"Delete"→"OK"
Note
● In categories other than "People", multiple images can be deleted
as a group by the following operation.
mM→"Mark"→select the checkbox of the images you want to
delete→mM→"Delete"→"OK"
Renaming image files
1 Open the media folder, and tap the image file you
want to rename
2 M→("More"→)"Rename"
3 Enter the new name, and tap "OK"
99
Multimedia
Continued on next page
Setting still pictures as wallpaper or the face
shot (icon) of a contact
1 Open the media folder, and tap the still picture you
want to set
2 M→"Set as"
3 Tap "Set as wallpaper" or "Set as contact icon"
● When "Set as contact icon" is tapped, select the contact.
4 Specify the display range
● To specify the position, drag the inside of the trimming frame, and
to zoom in/out, drag the corners of the trimming frame.
5 Tap "○"
Sharing images
You can send images by Bluetooth communications or e-mail, or upload
them to Picasa or YouTube. You can also create a STARMEMO.
1 Open the media folder, and tap the image you want
to share
2 M→"Share"
3 Select and operate each of the share options
● When "Create new STARMEMO" is selected, mail can be sent
from the STARMEMO compose screen or images can be
uploaded to a share site (P. 113).
Displaying image file information
1 Open the media folder, and tap the image whose
information you want to display
2 M→("More"→)"Detail"
3 When you have finished checking, tap "OK"
Creating personal albums
Photos of the same face can be automatically collected to create a
personal album.
1 Open the media folder, and tap "People"
Photos containing people's faces are automatically collected.
● It may take some time to scan all of the photos. If you tap the
screen during scanning, the message "Scanning XX/XXX" (where,
XX/XXX stands for number of scans/total number) is displayed so
that you can check progress.
2 Open unnamed images by tapping "Unnamed", and
tap the photos you want to put into the personal
album for one second or more
3 Tap "Name this person"
● The personal album can be linked to contacts by tapping "Link to
contacts" and selecting contacts.
4 Tap "Assign new name"
5 Enter the new name, and tap "OK"
Photos of the same face are automatically collected to make a
personal album.
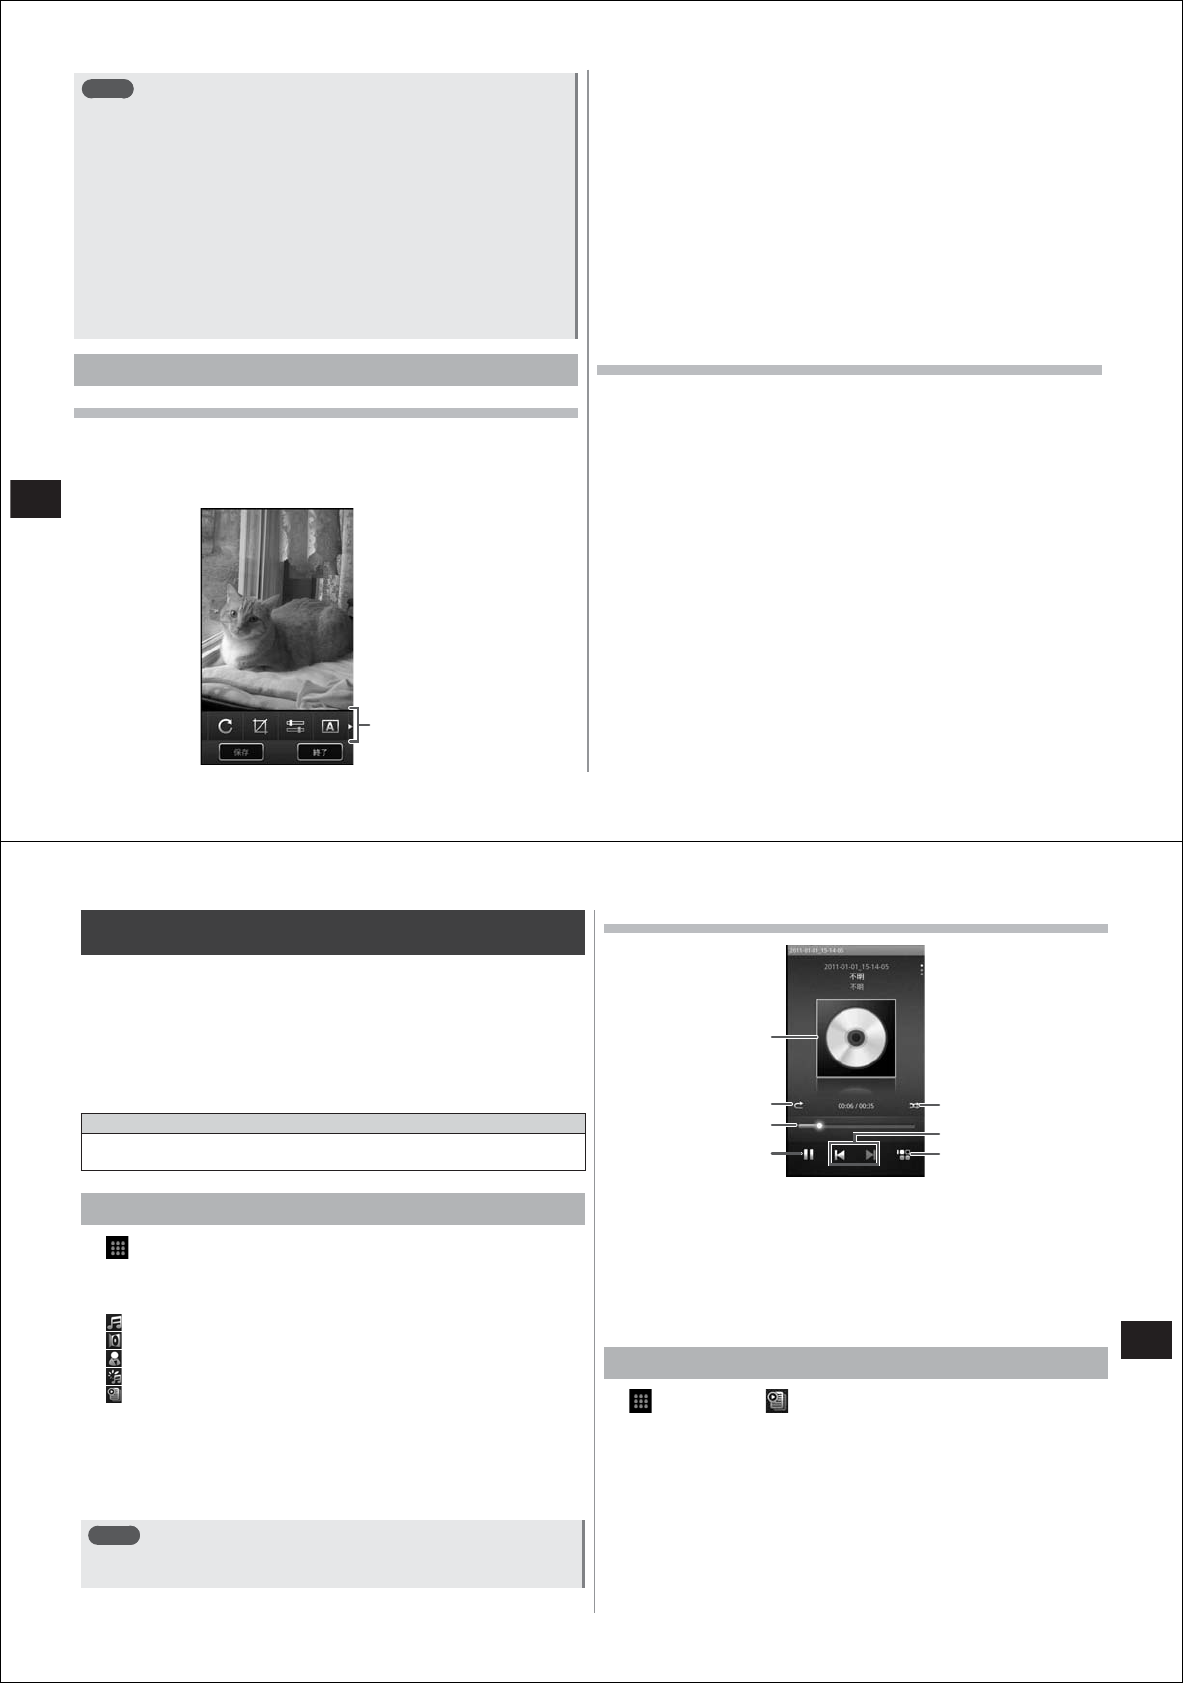
100
Multimedia
Note
● To add "Unnamed" photos to an existing personal album, select
the personal album after step 3.
● If the personal album contains photos other than the person in
question, tap that photo for one second or more, and tap
"Remove"→"OK".
● A photo of the personal album can be set as the cover photo of the
album by tapping that photo for one second or more and then
tapping "Set as cover".
● If the personal album contains multiple photos with "?" attached,
tap "Confirm", deselect photos other than the person in question,
and tap "Done".
● The other party can be contacted by tapping the personal album
linked to a contact for one second or more.
Editing images
Editing still pictures
1 Open the media folder, and tap the still picture you
want to edit
2 M→("More"→)"Edit"
Tool palette
3 Select the tool from the tool palette, and edit the
image
● Tools that are hidden can be displayed by flicking the tool palette
to the left or right.
● Tool names are displayed by tapping a tool for one second or
more.
● Item names are displayed by tapping an item in a tool for one
second or more.
4 When you have finished operating each tool, tap
"Done"
● To undo an operation, M→"Undo".
5 Tap "Save" when all editing is completed
Editing video
1 Open the media folder, and tap the video you want
to edit
2 M→"Edit"
■To cut video
Specify the range by dragging the slide tabs on the left and right.
・
To save the cut video as it is, "OK"→enter the file name→"OK".
■To splice multiple video
M→"Stitch". Drag the videos to the storyboard at the top of the
screen from the thumbnail area at the bottom of the screen. Drag
the videos on the storyboard to rearrange them.
・
To check the spliced video, M→"Preview".
■To attach BGM to video
M→"Background Music"→select the file→tap "Play music
only."/"Play music softer than video."/"Play music louder than
video.".
3 M→"Save"
4 Enter the file name, and tap "OK"
101
Multimedia
Listening to music
You can play back music saved on the microSD card using a music
player.
● For details on how to forward music files to the microSD card from a
PC, see "Operating data in the microSD card from a PC" (P. 115).
■File formats that can be played back
Some files sometimes cannot be played back even if the file format is
compatible.
File Format/Codec
WMA, AAC, MP3, AMR, OGG Vorbis, WAVE (PCM), MIDI, XMF/MXMF,
RTTTL/RTX, OTA, iMelody
Playing back music on a music player
1
→"Music"
2 Select the list
● When all songs list is selected, proceed to step 4.
: All songs list
: Album list
: Artist list
: List by genre
: Playlist
3 Select the item
● All songs in the item are played back by tapping the item for one
second or more and then tapping "Play".
4 Select the song
Note
● The noise reduction and speaker correction functions can be used
when playing back music (P. 62).
Operations in the playback screen
① Flick up and down to switch the screen display
Flick left and right to skip to the previous or next song
② Repeats or cancels repeat of all songs in item
③ Slide to the left or right to specify the playback position
④ Pause/playback
⑤ Shuffles/cancels shuffling of songs in items
⑥ Skips to next/previous song or returns to the start of the song
⑦ Displays a list of songs in items
Creating playlists
1
→"Music"→
The playlist screen is displayed.
2 Tap "New Playlist"
3 Enter the playlist name, and tap "OK"
①
②
③
④
⑤
⑦
⑥
102
Multimedia
Adding songs to playlists
1 Select the playlist in the playlist screen, and tap
"Add"
2 Tap the song you want to add to select it
3 Tap "Apply"
Removing songs from the playlist
1 Select the playlist in the playlist screen, and tap
"Remove"
2 Tap the song you want to delete to select it
3 Tap "Apply"
Searching related content
1
→"Music"
2 Select the list
3 Tap a song or item for one second or more
4 Tap "Search"
The "Search for xxx using:" (where, xxx stands for the keyword in
the search) screen is displayed.
5 Tap "Browser"/"Music"/"YouTube"
The content is searched in the media you specified.
Using the stereo earphones
Insert the stereo earphones into your FOMA terminal so that you can
listen to the playback sound of videos and music on earphones.
1 Insert the plug of the stereo earphones (sold
separately) into the stereo earphone jack on your
FOMA terminal
2 When the earphone connecting MIC selection
screen is displayed, tap "Phone MIC" or "Earphone
MIC"
● For details on setting MIC input, see P. 60.
Using YouTube
YouTube is a Google online video streaming service. You can play,
search and upload videos to this service.
1
→"YouTube"
Video is displayed in categories such as "Most viewed", "Most
discussed" and "Top rated".
: Records and uploads video
: Searches video by an entered keyword
: Displays detailed information
2 Tap a video to play it back
● Video playback controls are displayed on screen when you tap the
screen. You can specify the playback position by sliding the slider.
Plug of the stereo earphones
Stereo earphone jack
103
Multimedia
Note
● Video can be played back using the high image quality engine by
turning the REGZA setting on (P. 62).
● Video files of several hundred MB or more should be uploaded
from the PC. Uploading is sometimes not possible from your
FOMA terminal in some network environments.
1Seg
1Seg is a terrestrial digital TV broadcasting service for mobile devices,
and can receive data broadcasts with image and voice. It also allows
you to acquire more detailed program information, participate in quiz
programs, and do shopping on TV with ease.
For details on the "1Seg" service, check the following home page:
The Association for Promotion of Digital Broadcasting
http://www.dpa.or.jp/
■Using 1Seg
● 1Seg is a service provided by TV broadcasters (broadcast stations),
etc. Transmission charges are not incurred for receiving images,
voice and sound. For details on NHK viewing fees, contact NHK.
● Available information in the area of data broadcasting is "data
broadcasting" and "data broadcast site" information.
"Data broadcasting" information is carried in a broadcast, together
with images, voice and sound, and "data broadcasting site"
information is used to access sites provided by the TV broadcaster
(broadcast station).
Packet transmission charges are incurred when accessing a site such
as a "data broadcasting site" or others.
Some sites require information charges to be used.
Note
● Some data broadcasting areas sometimes cannot be browsed
depending on link destination.
104
Multimedia
■About signal
1Seg is one of the broadcasting services, and the receiving signal
(broadcast) differs from that of the FOMA service. For this reason, the
signal cannot be received at places where the broadcast does not reach
or while broadcasting is out of service, regardless of whether your
FOMA terminal is outside or inside the FOMA service area.
Also, in the following places, the signal status may become weak or the
signal may not be received even if your FOMA terminal is inside the
area of a terrestrial digital TV broadcasting service.
● Places that are far from the broadcast transmission tower
● Places where the signal is disrupted due to the landscape or
structures such as mountain areas or behind buildings
● Places where the signal is weak or does not reach, such as tunnels,
basements, or places inside buildings
To improve reception, fully extend the 1Seg antenna. Also, re-orient the
antenna, or hold your FOMA terminal away from or closer to your body
or move to another location so that reception can be improved.
Note
● Fit the antenna back inside its compartment inside your FOMA
terminal except during 1Seg operation. Holding conversations, for
example, with the antenna extended might result in unexpected
injury to your face or other parts of the body.
Starting up 1Seg
1
→"テレビ (TV)"
The 1Seg watching screen is displayed.
● When 1Seg is activated for the first time, read the license that is
displayed, then tap "I agree", and create a channel list suitable for
the region you will be watching (P. 102).
Note
● Pay attention to the following points when operating the 1Seg
antenna.
・
When re-orienting the 1Seg antenna, hold the 1Seg near its root
and thoroughly check the direction it is pointing.
・
When fitting the 1Seg antenna back inside its compartment
inside your FOMA terminal, make sure that it goes in straight.
● When 1Seg has been activated or a channel has been changed, it
might take time to acquire video or the data of data broadcasts due
to the properties of the digital broadcast.
● Video, voice or audio may be interrupted or stop depending on the
broadcast.
● Video can be watched using the high image quality engine by
turning the REGZA setting on (P. 62).
105
Multimedia
1Seg watching screen
Data broadcasts are displayed when your FOMA terminal is set to the
portrait display mode.
① TV image area
Tap to display the TV operation
screen
② Data broadcast area
③ Data broadcast operation buttons
④ Subtitle display
Note
● Do not directly tap inside the data broadcast area; tap the
operation buttons at the bottom of the screen for broadcast
operations.
● Your FOMA terminal can be locked to either the landscape display
mode or portrait display mode by tapping the watching screen for
one second or more. To unlock the display mode, tap the watching
screen for one second or more.
④
①
②
③
①
④
TV operation screen
The TV operation screen is displayed by tapping the TV image area in
the 1Seg watching screen.
① Channel, broadcast channel, program name
② Program list for channel being watched
Tap to display the program details
③ Channel select buttons
④ Channel switch
Tap for one second or more to start a channel search
⑤ Slide to the left to start recording/Slide to the right to end recording
⑥ Slide to the left and right to adjust the volume
Note
● Operations are also possible by the eE, fF and dD.
eE/fF: Volume adjustment/Press for one second or more to switch
channels
dD: Press for one second to start/end recording
①
②
③
⑤
⑥
④
106
Multimedia
Using TV links
With some data broadcasts, link information to a related site (TV link) is
sometimes displayed. Registering TV links lets you connect to related
sites later on.
Registering a TV link
1 Select an item that can be registered as a TV link in
the data broadcast area
● Procedures for registering TV links differ depending on the
program.
Displaying a registered TV link
1 In the 1Seg watching screen, M
→"TVリンク (TV link)"
2 Select a TV link
The registered site is accessed.
Note
● Expiration dates are sometimes set for TV links.
Deleting a TV link
1 In the 1Seg watching screen, M
→"TVリンク (TV link)"
2 Tap the TV link you want to delete for one second or
more
3 "
★削除★"→"★はい★"
Note
● To delete all TV links, mM→"★全件削除★"→"★はい★" after step 1.
Recording 1Seg
You can record video, audio, subtitles, and data broadcasts you are
watching, and save them on a microSD card preformatted in T-01C
format.
1 Display the TV operation screen (P. 100)
2 Slide to the left to the start recording
3 Slide to the right to end recording
Note
● In the following instances, recording either stops or cannot be
started.
・
When there is 2 MB or less free space on the microSD card
・
When there is 10% or less battery power remaining
・
When six hours has elapsed since start of recording
● Recorded TV programs are saved as data set with copyright
protection. They cannot be sent as e-mail attachments.
● Recorded TV programs having an extremely short (ten seconds or
less) recording time cannot be played back.
● Record TV programs in stable reception locations. TV programs
sometimes cannot be recorded if reception is unstable.
● The channel cannot be switched during recording.
● During recording, TV programs sometimes cannot be recorded
normally if other applications are activated.
● During recording, the camera and video recording cannot be
activated.
● If a communications service is activated during recording, 1Seg
reception might get worse or normal recording might no longer be
possible.
● Recording sometimes fails if the microSD card is not mounted or a
USB connection is made to mount the microSD card on the PC
during recording.
● Recording sometimes ends midway if the TV program currently
being recorded is a paid broadcast or copying is controlled, or if
your FOMA terminal has moved to a different broadcast area.
107
Multimedia
Playing back recorded TV programs
1 In the 1Seg watching screen, M→"録画リスト
(Recording list)"
2 Select the data
● If playback ended midway in the previous session, playback will
resume from where it left off.
● The following operations are possible by tapping the screen during
playback:
: Tap to go back by about five seconds. Tapping continuously
plays the TV program back continuously
: Tap to go forward by about 15 seconds. Tapping continuously
advances the TV program continuously
/ : Pause/playback
Setting 1Seg
1 In the 1Seg watching screen, M
→"設定 (Settings)"
2 Set the items
字幕表示
(Subtitle display)
Sets the subtitle display on/off.
字幕言語切替
(Subtitle language
selection)
Sets which subtitles are to be displayed in
programs with multiple subtitles.
主・副音声切替
(Main/sub voice
selection)
Switches between main audio and sub audio in
programs broadcast with sub audio.
音声切替
(Audio selection)
Sets which audio is to be listened to in
programs broadcast with multiple audio.
なめらかモード
(Smooth Mode)
Sets whether or not to use the function for
smoothing images. Setting this mode to on
increases battery consumption and shortens
the available watching time.
チャンネル設定
(Channel setting)
"Setting the channel" (P. 102)
放送用メモリ初期化
(Initialize broadcast
memory)
Erases information, TV links, etc. recorded by
data broadcasts.
Setting the channel
Creating channel lists
1 In the 1Seg watching screen, M
→"設定 (Settings)"→"チャンネル設定 (Channel
setting)"→"チャンネルリスト編集 (Edit channel list)"
2 Tap "未設定 (Not set)" for one second or more
3 Tap "作成 (Create)" and select an item
手動設定
(Manual setting)
Select the region you want to watch from the
list of regions to create a channel list.
自動設定
(Automatic setting)
Broadcast stations that can be received in your
location are automatically scanned to create
the channel list.
Switching the channel list
1 In the 1Seg watching screen, M
→"設定 (Settings)"→"チャンネル設定 (Channel
setting)"→"チャンネルリスト切替 (Select channel list)"
2 Select the channel list you want to receive
108
Multimedia
Adding broadcast stations to channel lists
1 Perform a channel search (P. 100)
2 When an unregistered broadcast station is found,
M→"設定 (Settings)"→"チャンネル設定 (Channel
setting)"→"チャンネル追加 (Add channel)"→"はい
(Yes)"
Deleting broadcast stations from a channel list
1 In the 1Seg watching screen, M
→"設定 (Settings)"→"チャンネル設定 (Channel
setting)"→"チャンネルリスト編集 (Edit channel list)"
2 Select the channel list you want to edit
3 M→"削除 (Delete)"
4 Select the checkbox of the broadcast station you
want to delete
5 "
削除 (Delete)"→"はい (Yes)"
Changing channel button allocations
1 In the 1Seg watching screen, M
→"設定 (Settings)"→"チャンネル設定 (Channel
setting)"→"チャンネルリスト編集 (Edit channel list)"
2 Select the channel list you want to edit
3 M→"並べ替え (Re-arrange)"
4 Drag to re-arrange the list
5 Tap "完了 (Done)"
Playing back terrestrial digital programs
You can watch terrestrial digital broadcast programs written on the
microSD card from Qosmio at high image quality (VGA class) even on
your FOMA terminal.
1 Write the terrestrial digital broadcast program to the
microSD card
2 Insert the microSD card into your FOMA terminal
3
→"テレビ (TV)"→M→"録画リスト (Recording
list)"
4 Select the terrestrial digital program
Note
● When writing terrestrial digital broadcast programs to the microSD
card from Qosmio, use an SD memory card adapter (sold
separately).
109
Multimedia
Linking to DLNA-compatible devices
Content saved on the microSD card for your FOMA terminal can be
played back on a DLNA-compatible TV or PC. Also, content on a DLNA-
compatible PC or network-connected HDD (NAS) can be played back
on your FOMA terminal.
● For details of operations on the DLNA-compatible device, refer to the
manual for the DLNA-compatible device.
Starting up the DiXiM server
1
→"DiXiM Server"
When the server is started up, the "DiXiM Server" checkbox is
selected.
Playing back content on other devices on your
FOMA terminal
● First, publicize the content on the DLNA-compatible device and
enable accessing from your FOMA terminal.
1
→"DiXiM Player"→"この端末で再生 (Playback on
this terminal)"
2 Select the DLNA-compatible device
3 Select the content you want to play back
Playing back content on your FOMA terminal
on other devices
● First, start up the DiXiM server.
1
→"DiXiM Player"→"TV、
PCで再生 (Playback on TV,
PC)"
2 Select the checkbox of DLNA-compatible devices to
be access enabled
Setting the DiXiM server
1
→"DiXiM Server"
2 Set the items
サーバー名*
(Server name)
Changes the name displayed at other DLNA-
compatible devices.
アクセス制御*
(Access control)
Enables accessing from newly connected
DLNA-compatible devices when the "Access right
initial setting" checkbox is selected.
When this checkbox is deselected, accessing
will be forbidden until this checkbox is selected
in the client device list.
画面ロック中の動作
(Operation during
screen lock)
When this checkbox is selected, server operation
is continued even while the screen is locked.
* These items can be selected when the "DiXiM Server" checkbox is
selected.
110
Convenient Functions
GPS
You can use the GPS function on your FOMA terminal and a compatible
application to check your current location or search for routes to your
destination.
Using the GPS function
● Note that DOCOMO is not liable for any damages that may occur as
a result of irregularities in the GPS system.
● Note that DOCOMO is not liable for pure economic loss if you cannot
confirm the positioning (communication) result with your FOMA
terminal because of failure, malfunction, error or external factors such
as power failure (including battery exhaustion).
● You cannot use your FOMA terminal as a navigation system for
aircraft, vehicles, persons, etc. For this reason, note that DOCOMO is
not liable for losses incurred by navigation performed by using
location information.
● You cannot use the FOMA terminal for use as a GPS for high
accuracy surveying. For this reason, note that DOCOMO is not liable
for losses caused by the error of location information.
● GPS is a service operated by the USA Department of Defense, so the
GPS radio wave condition may be controlled (accuracy degraded,
radio wave suspended, etc.) for reasons of US national security.
● Wireless communications products (mobile telephones, data
detectors, etc.) might interfere with satellite signals and cause signal
reception to become unstable.
● The displayed map based on the acquired location information
(latitude and longitude information) may be inaccurate because of the
legal system in each country and area.
■Difficult reception locations
Note that since GPS is using radio waves for satellites, under the
following conditions, radio waves might not be able to be received or
might be difficult to receive. Also, do not cover the area near the external
connector terminal of the GPS antenna with your hand during use.
・
In or under buildings
・
In bags or boxes
・
In or under dense tree growth
・
Inside cars or trains
・When people or objects are blocking your FOMA terminal
・
Under ground, in tunnels, or under water
・
In dense building or residential areas
・
Near high-tension lines
・
In bad weather such as heavy rain or snow
Enabling the location information service
Turning the GPS function on
1
→"Settings"→"Location & security"
2 Select the "Use GPS satellites" checkbox
Note
● When the "Use GPS satellites" checkbox is selected, highly
accurate location information can be measured. However, a good
field of view is required for this, and battery wear increases. We
recommend joint use with a current location search via a wireless
network.
111
Convenient Functions
Turning on location position search via a wireless
network
Your current location can be found based on information from a Wi-Fi
connection or a mobile network base station.
1
→"Settings"→"Location & security"
2 Select the "Use wireless networks" checkbox, and tap
"Agree" when the confirmation screen is displayed
● When the checkbox is selected, this is regarded as your having
agreed to the anonymous collection of position data by Google's
location information service. Data collection is carried out
regardless of whether or not the application is activated.
Using Google Map
You can display your current location, and search other places and
routes by Google Map.
● To use Google Map, a packet communications connection or Wi-Fi
connection is required.
● To measure your current location, the location information service
must first be enabled (P. 104).
● Google Map does not cover all countries and cities.
Displaying the current location
1
→"Maps"
2 M→"My Location"
A map with your current location as its center is displayed.
● Scroll or pan the map to display the part you want to view (P. 29).
● You can zoom in or out on the map by the following operations.
Pinch out/
pinch in
Spread two fingers at the part to zoom in, and bring
your two fingers together to zoom out (P. 30).
Double-tap Double-tap (tap twice consecutively) to zoom in.
Two finger
tap
Tap with two fingers to zoom out.
Zoom control Tap to zoom in, and tap to zoom out.
Activating Street View
● Some regions are not covered by Street View.
1 Touch the point whose Street View you want to view
in the map display for one second or more
2 Tap the displayed call-out
3 Tap
● In the Street View display, when M→"Compass mode" is
tapped to set to the Compass mode, the electronic compass on
your FOMA terminal and the Street View direction are interlocked.
Searching places of interest
1 In the map display, M→"Search"
2 Enter the place to search in the search column
● You can enter an address, city, business type or facility (e.g.
London, Art Gallery).
3 Tap or tap a search candidate
4 Tap the call-out on the map, and open detailed
information of that location and options
● When multiple results are found, tap the red dot on the map to
display the call-out.
● You can also tap at the bottom left of the map to display a list,
and tap the target location to open detailed information and options.
● Available options differ according to location.
Displaying layers
You can add road congestion information to the map display or switch
to the aerial photograph display.
1 In the map display, M→"Layers"
2 Select the item you want to display
● Traffic congestion conditions and route maps can be provided only
in limited regions.
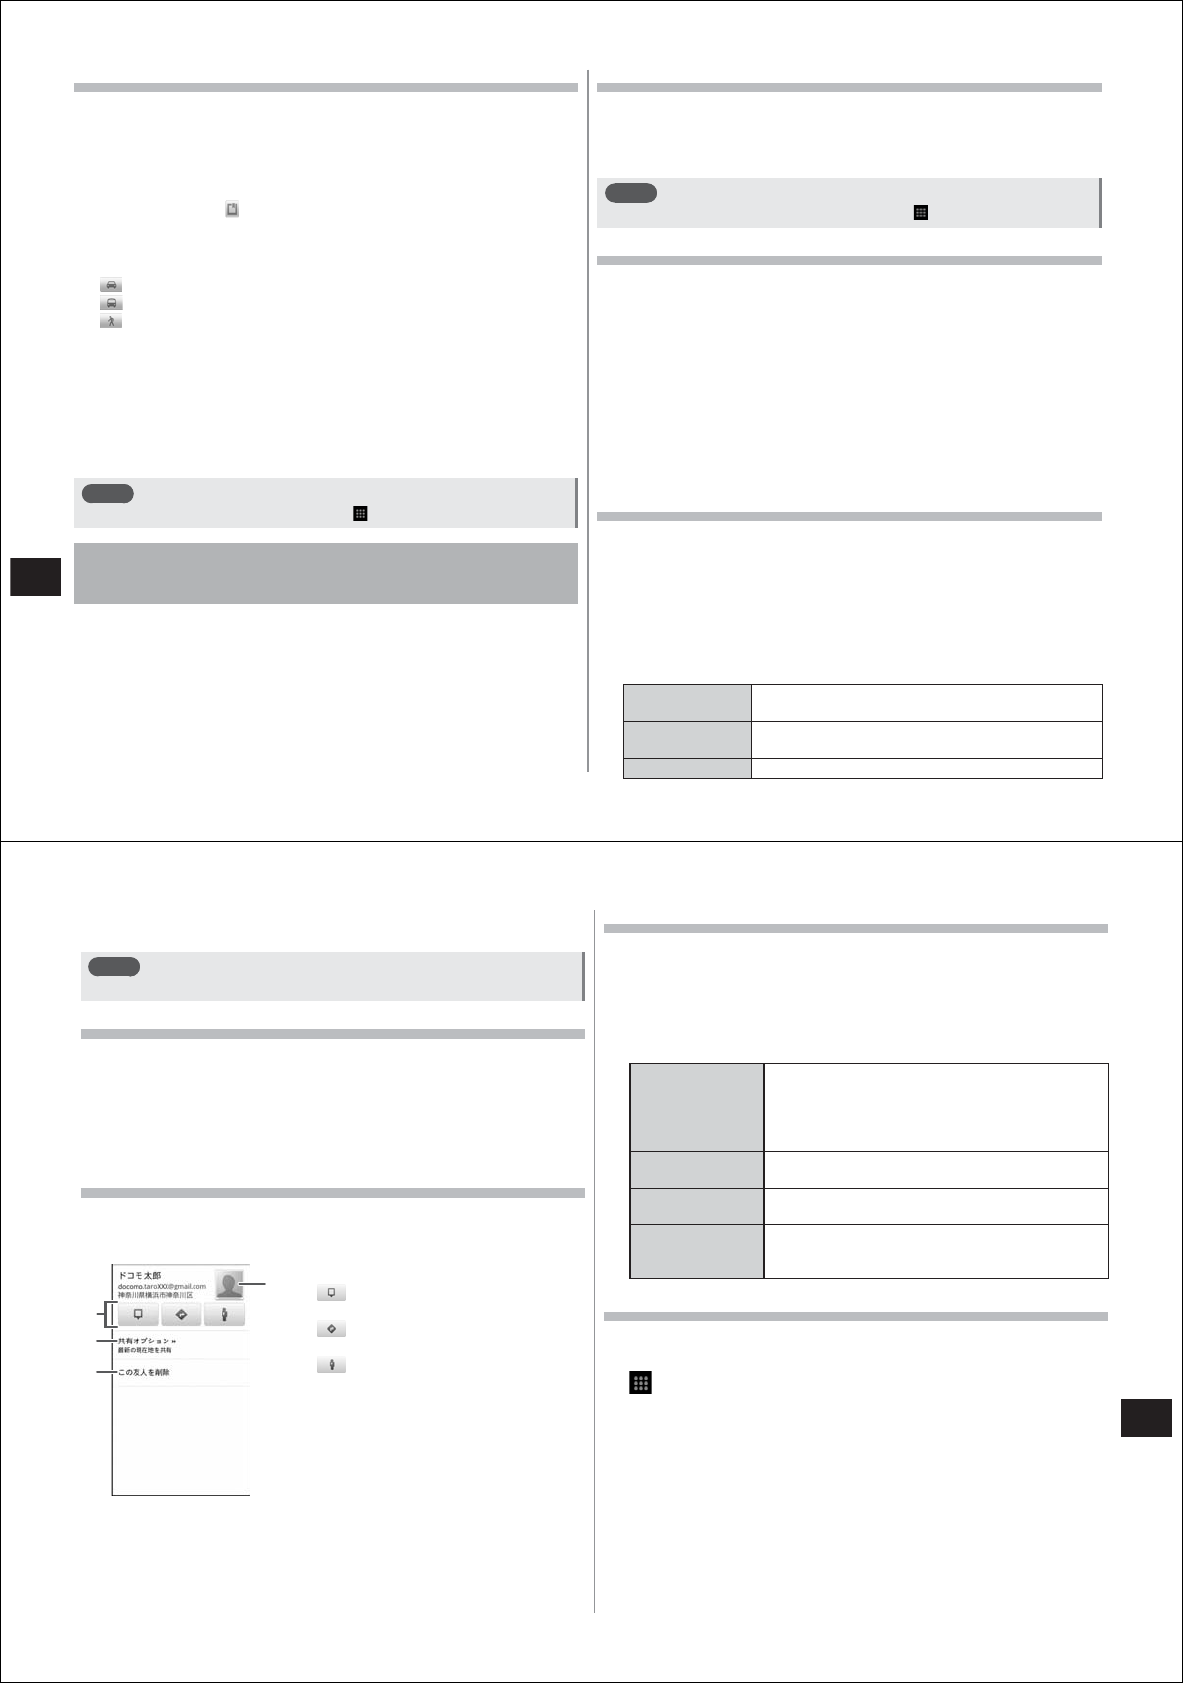
112
Convenient Functions
Acquiring route directions
1 In the map display, M→"Directions"
2 Enter the start point in the input field above and the
end point in the input field below
● You can also specify the address of a contact and location on the
map by tapping at the right of the input field.
3 Select how you will be moving (automobile, public
transport, on foot), and tap "Go"
: Automobile
: Public transport
: On foot
● When multiple routes are found by searching by public transport,
tap the preferred route.
4 Tap "Show on map"
5 Check the route on the map
● Tap the arrows displayed at the bottom of the map to proceed to
points along the route.
Note
● Routes can also be searched for by →"Navigation".
Checking a friend's current location by Google
Latitude
You can check where a friend is on the map by using Google Latitude.
● To use Google Latitude, you must set a Google account on your
FOMA terminal. If a Google account is not yet set, follow the on-
screen instructions that are displayed when Google Latitude is
activated for the first time.
● Location information is not automatically shared. You need to join
Google Latitude and invite a friend to provide their own location
information, or you must receive an invitation from that friend.
Joining Google Latitude
1 In the map display, M→"Join Latitude"
● When joining this service for the first time, read Google's privacy
policy, and tap "Allow & Share".
Note
● Google Latitude can also be activated by →"Latitude".
Inviting a friend to share location information
1 In the map display, M→"Latitude"
2 M→"Add friends"→"Select from Contacts"/"Add
via email address"
3 Select the checkbox of the target contact, or enter
the mail address
4 Tap "Add friends"
5 Select the checkbox of the other party to send the
share request to, and tap "Yes"
Accepting an invitation
When you have joined Google Latitude, you can accept invitations to
share location information by the following procedure.
1 In the map display, M→"Latitude"
2 Tap "X new sharing request"
● If you have multiple requests, select the desired request.
3 Select an item
Accept and
share back
You can both view each other's location
information.
Accept, but hide
my location
Though you can view your friend's location information,
your friend cannot view your location information.
Don't accept Your location information will not be shared.
113
Convenient Functions
4 Tap "Done"
Note
● Share requests can also be sent as emails (in English).
Checking your friends' current locations
Your friends' current locations are displayed when you open a map.
Your friends are all indicated by a photo icon, and an arrow shows their
approximate locations. If your friends have selected sharing of location
information at the city level, your friends' icon will not have an arrow but
the icon will appear in the center of the city.
Managing connections with friends and shared
information
Either tap the photo icon of a friend on the map and tap the call-out, or
tap a friend in the Google Latitude friends list to open the friend's profile.
The following operations are possible in the profile screen.
① Map options
: Checking your friend's current
location on a map
: Searching the route to your
friend's current location
: Searching the Street View of
your friend's current location
② Setting the share level of your current
location. If "Share only city level
location" is selected, your photo icon
will be displayed at the center of the
city on your friend's mobile phone.
③ Deleting the friend from the list and
stopping sharing of location
information
④ Tapping to display the personal
information screen of your friend, or
tapping to register the friend to
contacts
Managing privacy
You can set how you look to all friends.
1 In the map display, M→"Latitude"
2 Tap your name and then tap "Privacy"
3 Select an item
Detect your
location
When you move, Google latitude automatically
detects your location and refreshes the location
information. The refresh interval is determined
based on several factors, such as the charging
level of the battery pack or when you moved.
Set your location You can set the current location to disclose to
friends to a specific place.
Hide your
location
Your location information is not disclosed to any of
your friends.
Turn off Latitude Suspends Google Latitude and sharing of location
information. You can join Google latitude at any
time.
Using Places
You can quickly search for facilities, stores, etc. in the vicinity of your
current location.
1
→"Places"
2 Tap the facility or store you want to search
● You can add facilities or stores (museums, bookstores, etc.) not in
the list by tapping "Add".
3 Tap the target location from the search result list to
open detailed information and options
● Available options differ according to location.
②
③
④
Profile screen
①
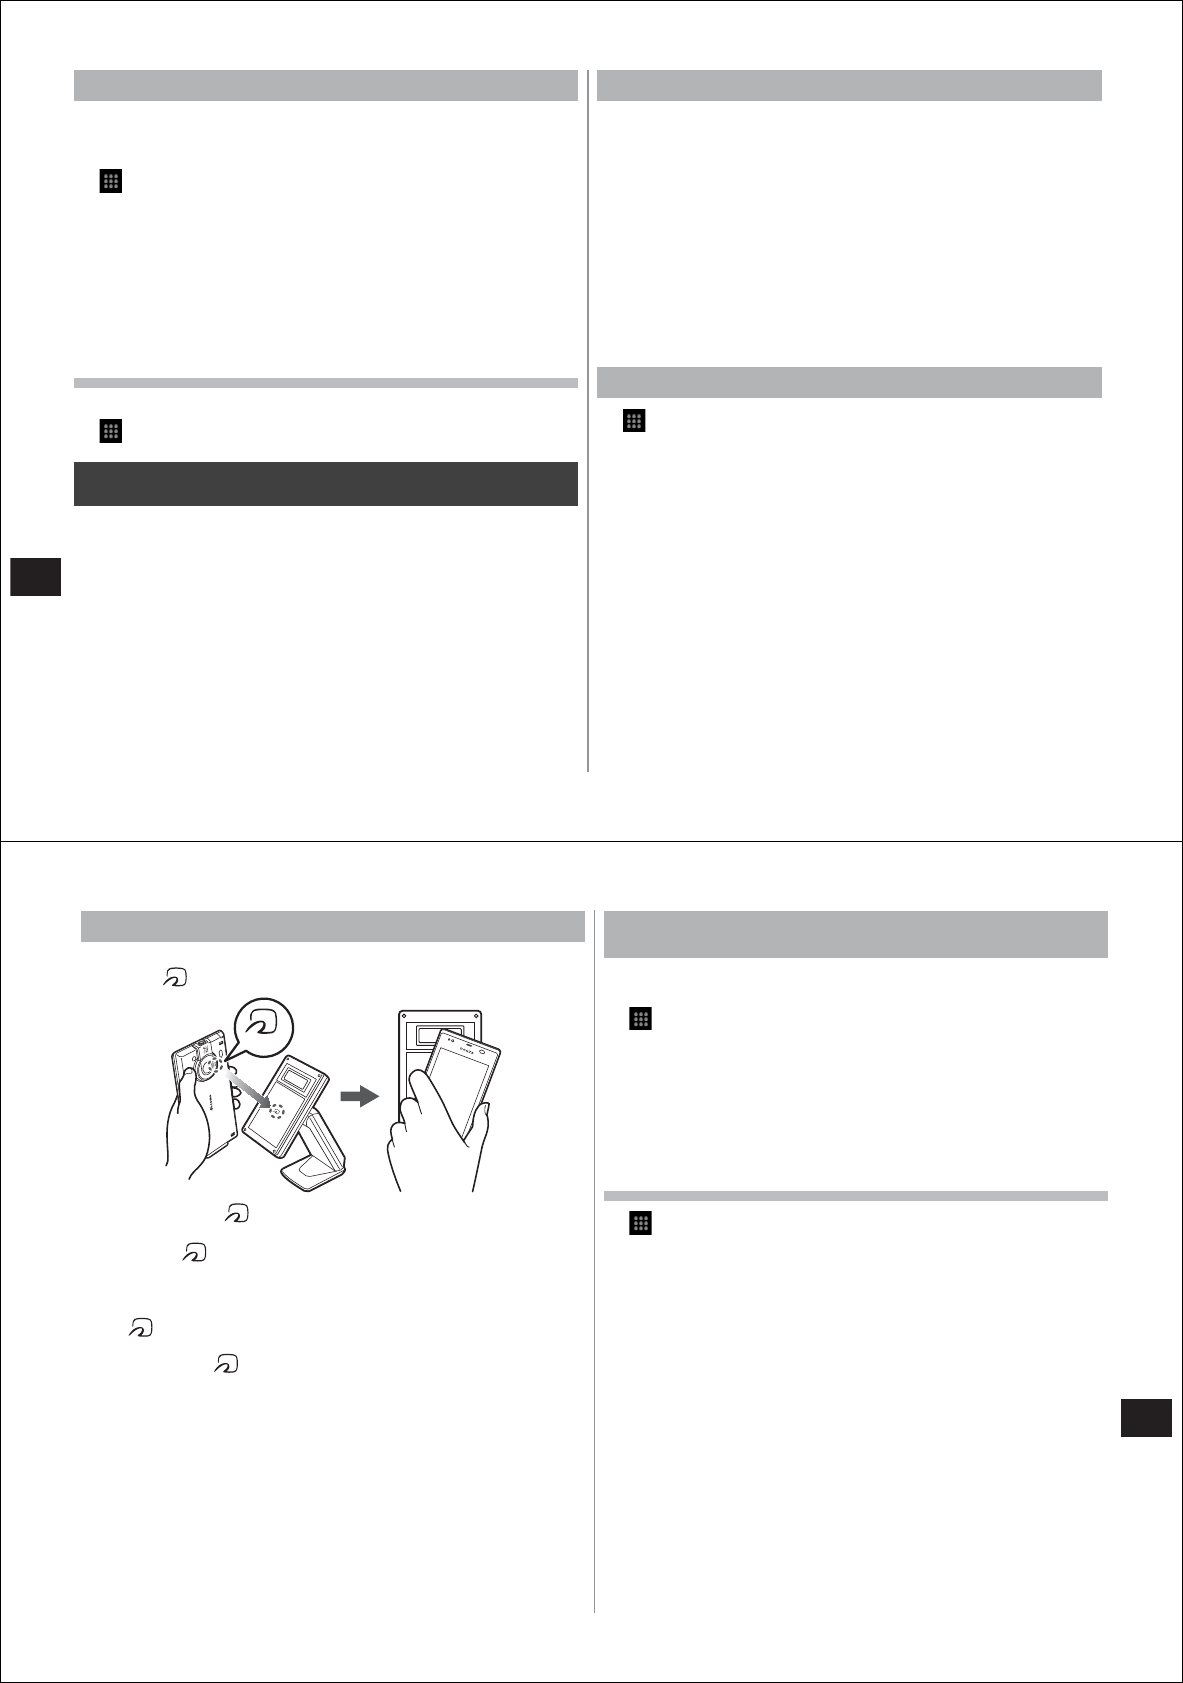
114
Convenient Functions
Using UkiUkiView
You can display icons representing emotion overlaid with a posted
message on a map or image of your current location taken with your
camera.
1
→"UkiUkiView"→"使ってみる (Trial use)"
2 Read the software licensing agreement, and tap "同
意する (Agree)"
3 Read the exemptions, and tap "同意する (Agree)"
4 Tap "まずは世界を体験する (First, experience the
world)" or "新規登録/ログインする (New/Login)"
From here on, follow the on-screen instructions.
Viewing how to use UkiUkiView
You can display Help and check how to use UkiUkiView.
1
→"UkiUkiView"→"ヘルプ (Help)"
Osaifu-Keitai
The Osaifu-Keitai function is incorporated in the IC card. It allows you to
pay, use coupons, or collect points, etc. simply by holding your FOMA
terminal up to the store's scanner.
Hold your FOMA terminal up to a scanner to access sites or home
pages, or use communications to obtain the latest coupon tickets,
charge electronic money or check payments and balance. The Osaifu-
Keitai function can also be used securely since it can be locked as a
measure for when your FOMA terminal is lost.
● To use Osaifu-Keitai compatible services, their use must be set in
sites or applications.
● For details on Osaifu-Keitai, refer to the "Mobile Phone User's Guide
(sp-mode [Smartphone])."
● The "iD設定アプリ (iD setup application)" for using iD/DCMX will be
downloadable from docomo market from February 2011.
When using Osaifu-Keitai
● Data (e.g. electronic money, points) inside the IC card is sometimes
lost or altered if your FOMA terminal malfunctions. (In principle, you
must erase the data yourself since DOCOMO is not responsible for
the data in your FOMA terminal if it must be handed in for repair, etc.)
For details on support, such as re-issue or recovery of data,
temporary receipt and replacement, check with your Osaifu-Keitai
service provider. Be sure to use backup services for backing up
important data.
● DOCOMO is not liable for any damages arising from loss or alteration
of data inside the IC card or other Osaifu-Keitai services in any
instances whatsoever, including malfunction and change of model.
● If your FOMA terminal is lost or stolen, immediately contact your
Osaifu-Keitai service provider for instructions on what to do.
Using Osaifu-Keitai
1
→"おサイフケータイ (Osaifu-Keitai)"
● When Osaifu-Keitai is activated for the first time, tap "★はい★" to
make the initial settings.
Service information is acquired to refresh the service list.
2 Select the service you want to use from the service
list.
3 Set up the service
● Make the required settings from the service site or application.
115
Convenient Functions
Holding your FOMA terminal up to the scanner
Your FOMA terminal can communicate with the scanner merely by
holding the mark up to the scanner.
● When holding the mark up to the scanner, bring it close to the
scanner gently without bumping it hard against the scanner.
● Hold up the mark so that it is parallel to the center of the scanner.
If the mark cannot be scanned even with it held in front of the center
of the scanner, lift up your FOMA terminal slightly, or move it
backwards/forwards or to the left/right.
● The mark sometimes cannot be scanned if there is a metal object
between the mark and the scanner. Also, note that stickers or other
objects near the mark might affect communications performance.
Locking the Osaifu-Keitai function
[Osaifu-Keitai lock setting]
When the Osaifu-Keitai function is locked, you can no longer use
Osaifu-Keitai services or acquire data from scanners.
1
→"おサイフケータイ (Osaifu-Keitai)"
2 M→"おサイフケータイ ロック設定 (Osaifu-Keitai
lock setting)"
3 Enter a 4- to 8-digit password
4 Enter the password again for confirmation, and tap
"OK"
Unlocking the Osaifu-Keitai function
1
→"おサイフケータイ (Osaifu-Keitai)"
2 M→"おサイフケータイ ロック設定 (Osaifu-Keitai
lock setting)"
3 Enter the password, and tap "OK"
mark
116
Convenient Functions
ToruCa
ToruCa is an electronic card that can be imported into mobile phones. It
can be acquired from scanners or sites as information about stores or
coupons, for example. Acquired ToruCa are saved in the "ToruCa"
application, and can be displayed, searched and refreshed using the
"ToruCa" application.
● For details on ToruCa, visit docomo market.
Note
● Regular packet communication charges are sometimes incurred
when acquiring, displaying or refreshing ToruCa.
● ToruCa provided for i-mode terminals sometimes cannot be
acquired, displayed or refreshed.
● The following functions sometimes are unavailable depending on
the IP (information service provider) setting:
Acquisition from scanners/refreshing/sending via email/move and
copy to microSD card/map display
● Even ToruCa that allow map display from ToruCa (details)
sometimes do not allow the map to be displayed from the ToruCa
list depending on the IP setting.
● ToruCa cannot be acquired from the scanner while the Osaifu-
Keitai function is locked.
● The same ToruCa cannot be acquired twice or more when the
duplicity check is set to "ON". To acquire the same ToruCa twice or
more, set the check to "OFF".
● When using email to send ToruCa, it is sent in the state before
ToruCa (details) were acquired.
● ToruCa received by email sometimes cannot be saved depending
on the mail application used.
● ToruCa sometimes cannot be acquired depending on the browser
used.
● When ToruCa are moved or copied to microSD card, they are
moved or copied in the state before ToruCa (details) were
acquired.
● The "ToruCa" application cannot be deleted.
● ToruCa sometimes cannot be acquired from a scanner if Osaifu-
Keitai initial settings have not been made.
Calendar
You can synchronize Calendar on your FOMA terminal with online
Google Calendar to manage schedules.
● To use Calendar, you must set up a Google account for your FOMA
terminal. If a Google account is not yet set up, follow the on-screen
instructions that are displayed when Calendar is activated for the first
time.
Displaying Calendar
1
→"Calendar"
The calendar screen is displayed.
● M→tap "Day"/"Week"/"Month"/"Agenda" to select the display
unit. Whichever display unit screen you are in, the display will
include today if M→"Today" is tapped.
● In the month display screen, tap a day containing a schedule. You
can check the schedule for that day.
● When you are using multiple calendars in online Google Calendar,
schedules are displayed in different colors for each calendar.
Setting the calendars to display
When you are using multiple calendars in online Google Calendar, you
can set the calendars to display on your FOMA terminal.
1 In the calendar screen, M→"More"→"My
calendars"
2 Select the checkboxes of the calendars you want to
display
Registering a schedule
1 In the calendar screen, M→"New event"
2 Enter the title, date/time, place, and details of the
schedule
117
Convenient Functions
3 When multiple calendars have been set, select the
calendar to register
4 If necessary, set guests and repeat interval
● You can send invitations to people you want to join in the schedule
by entering their mail addresses in the "Guests" field.
5 Select the notification time
● To set several notifications, tap to increase the number of
notifications.
6 Tap "Done"
Checking registered schedules
1 Tap the schedule you want to check in the calendar
screen
The schedule details screen is displayed.
● In the month display screen, tap the day containing the schedule
you want to check, and then tap the target schedule.
Changing schedule details
1 In the calendar screen, M→"Edit event"
● In the case of repeat schedules, tap "Change only this
event."/"Change all events in the series."/"Change this and all
future events.".
2 Enter the changes, and tap "Done"
Deleting schedules
1 In the calendar screen, M→"Delete event"
● In the case of repeat schedules, tap "Only this event"/"This &
future events"/"All events".
2 Tap "OK"
Dismissing or setting notification display to
snooze
You can set whether to dismiss notification or set notification to snooze
by the following operation when the preset notification time is reached
and is displayed on the status bar.
1 Open the notification panel and tap a notification
All schedules currently on hold are displayed.
● When you tap a schedule, the schedule details screen is displayed
and the notification is dismissed.
2 Tap "Dismiss all" or "Snooze all"
Dismiss
all
Dismisses all schedule notifications.
Snooze all All schedule notifications snooze for five minutes.
Changing calendar settings
1 In the calendar screen, M→"More"→"Settings"
2 Set the required items
Hide declined
events
Hides schedules that you declined to participate in.
Set alerts &
notifications
When "Alert" is selected, notifications are displayed
on the calendar screen in addition to the status bar.
When "Off" is selected, schedules are not alerted
or notified.
Select ringtone Selects the ringtone to sound when a notification is
made.
Vibrate Sets the vibration on/off.
Default
reminder time
Sets how many minutes before the scheduled start
time the notification is to be made.
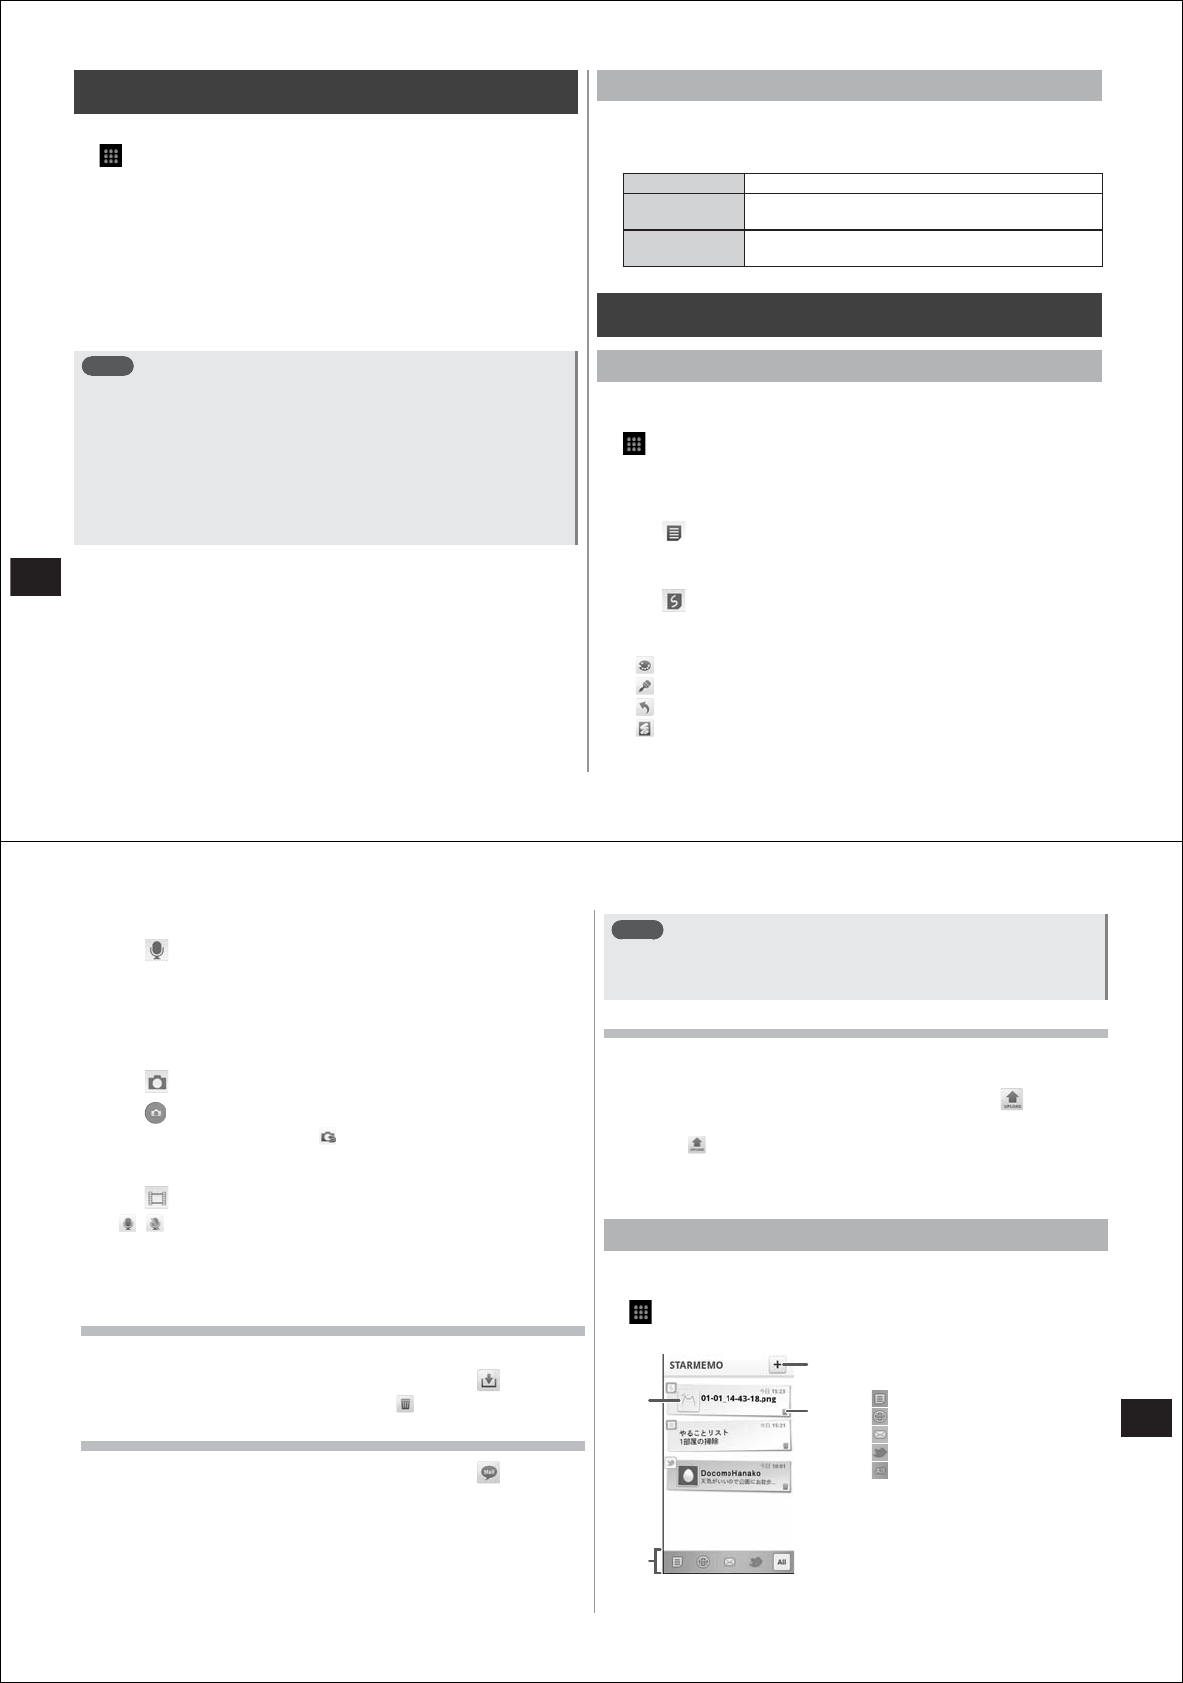
118
Convenient Functions
Alarm Clock
You can set an alarm to sound at a specified time each day of the week.
1
→"Alarm Clock"
The alarm screen is displayed.
2 Tap the alarm you want to set
The alarm setting screen is displayed.
3 Tap "Time" to set the alarm time
4 If necessary, set other items
5 Tap "Done"
Note
● Alarm on/off can be set by respectively selecting or deselecting
alarm checkboxes in the alarm screen.
● To delete an alarm, in the alarm setting screen mM→"Delete
alarm".
● To set three or more alarms, in the alarm screen mM→"Add
alarm".
● The clock can be changed by tapping the clock in the alarm
screen.
● To hide the clock, in the alarm screen mM→"Hide clock".
■Stopping alarms
When the preset alarm time is reached, the set alarm tone sounds, the
vibrator operates and the alarm notification screen is displayed. To stop
the alarm, tap "Dismiss" in the alarm notification screen.
■Setting/canceling snooze
When you tap "Snooze" in the alarm notification screen, the alarm will
sound again after a set time has elapsed.
To cancel snooze, open the notification panel and tap the snooze
notification.
Setting alarm options
1 In the alarm screen, M→"Settings"
2 Set the items
Alarm volume Sets the alarm volume.
Snooze
duration
Sets the snooze duration when snooze has been set
in the alarm notification screen.
Side button
behavior
Sets the operation (None/Snooze/Dismiss) when E,
F or D is pressed when the alarm sounds.
STARMEMO
Composing STARMEMO
You can compose five types of memos: text, handwritten, voice, photo,
and video.
1
→"Create new"
The STARMEMO compose screen is displayed.
■Composing text memos
1 Tap , and enter text
■Composing handwritten memos
1 Tap , and slide your finger over the screen to
draw a picture or write
● You can use the following tools:
: Selects the color
: Changes the line thickness
: Goes back one action
: Erases the drawing
119
Convenient Functions
■Composing voice memos
1 Tap
2 Tap "REC." to start recording
3 Tap "Stop" to stop recording
■Composing photo memos
1 Tap
2 Tap to take a photo
● To take the photo again, tap .
■Composing video memos
1 Tap
● / : Audio recording on/off
2 Tap "REC." to start recording
3 Tap "Stop" to stop recording
Saving composed memos
You can check saved memos by opening "STARMEMO".
1 In the STARMEMO compose screen, tap
● To discharge a memo without saving it, →"Ok".
Sending composed memos by email
1 In the STARMEMO compose screen, tap
● If necessary, select the mail activity (email or Gmail).
2 Enter the mail address and subject, and tap "Send"
Note
● To send text memos by SMS, mM→"Share"→"Messaging"→enter
the mobile phone number to send the SMS to in the "To" field→
"Send".
Uploading composed memos to a share site
You can upload composed memos to mixi, Facebook, Twitter, Flickr,
YouTube, or Picasa.
1 In the STARMEMO compose screen, tap or the
icon of the share site
● When is tapped, next tap the call-out icon.
2 If necessary, enter the text or perform other
required operations
Opening STARMEMO
You can check composed STARMEMOs, or registered emails or SMS,
web pages and tweets in STARMEMO.
1
→"STARMEMO"
Items are displayed in order beginning with the latest.
① Tap to display the details screen
② Filter tab
:Composed STARMEMO
: Web page
: email/SMS
: Favorite tweets from Twitter
: All items
③ Tap to activate STARMEMO
compose
④ Tap to delete an item
①
③
④
STARMEMO list screen
(All items)
②
120
Convenient Functions
■Operations in the details screen
The following operations can be performed in the details screen that is
displayed by tapping an item in the STARMEMO screen.
Icon Operation
(handwritten memo/photo memo/video
memo)
Displays/plays back from
Media Folder
(video memo) Plays back
/ (voice memo) Plays back from the
beginning/stops
(text memo/handwritten memo) Edits
(web page) Connects to the site
(favorite tweets)
(email/SMS) Opens email/SMS
Note
● Items can be batch-deleted in the STARMEMO list screen
by mM→"Delete All".
● You can send by email or Bluetooth communications and upload to
share sites in the details screen by mM→"Share".
● Video memos played back by tapping cannot be paused. To
pause or perform other operations during playback, play back from
Media Folder.
● Your Twitter account is synchronized in the favorite tweet details
screen or list screen by mM→"Refresh".
Evernote
Evernote is a service that allows you to save various information, such
as content from web sites or photos you have taken, memos for ideas,
etc., to a server, and search and view this information when required.
You can save or view information from your FOMA terminal, PC or other
devices.
● An Evernote account is required to use this application.
● To use this service for the first time, you must download the Evernote
application from Android Market (P. 116).
● Packet transmission charges are sometimes incurred separately to
download the application.
Installing Evernote
1
→"Evernote"
2 Tap "Evernote for Androidをダウンロードする
(Download Evernote for Android)"
● When the Android Market terms of service are displayed, read the
terms and tap "Accept".
3 Follow the on-screen instructions to install
Evernote
121
Convenient Functions
Calculator
1
→"Calculator"
● M→"Advanced panel" displays the function pad. To display the
arithmetic operation pad, M→"Basic panel".
● You can also toggle between the function pad and arithmetic
operation pad by flicking to the left and right.
● You can copy-and-paste mathematical expressions by tapping on
the mathematical expression display field for one second or more.
● To clear an entered character, tap "CLEAR". To clear an entire
mathematical expression, tap "CLEAR" for one second or more.
Mosimo Camera
If you take videos or photos with Mosimo Camera, it can automatically
detects subject's movement or faces, and attach special effects to them.
1
→"mosimo camera"
2 Tap "Movie Effects" or "Photo Effects"
3 Select the special effect
4 Shoot video or take a photo
Viewing how to use Mosimo Camera
1
→"mosimo camera"→"How to Play"
● Tap "Watch the how to use digest" to play back video.
● To check how to shoot video and photos, cautions when detecting
faces, etc., scroll the screen downwards.
Operating data in the microSD card
from a PC
When your FOMA terminal and PC are connected by the PC connection
USB cable T01 (provided), the microSD card in your FOMA terminal is
recognized as a removable disk by the PC, and data on the microSD
card can be read and written on the PC.
● When an application that uses the microSD card is running on your
FOMA terminal, close the application before mounting the microSD
card on the PC.
1 Connect your FOMA terminal and the PC by the PC
connection USB cable
2 Open the notification panel, "USB connected"
→"Mount"
3 On the PC, open "マイ コンピュータ (My Computer)"
or "コンピュータ (Computer)", and select the
appropriate "リムーバブルディスク(Removable disk)"
The data in the microSD is displayed.
4 Drag-and-drop files between your FOMA terminal
and the PC
Note
● When the microSD is mounted on the PC, applications such as
Camera that use the microSD cannot be used.
122
Convenient Functions
Safely disconnecting the PC connection USB
cable
● Do not disconnect the PC connection USB cable during data
transfers. Doing so might damage or destroy the data.
1 Open the notification panel, "Turn off USB storage"
→"Turn Off"
2 Disconnect the PC connection USB cable
PhoneBookCopy
You can copy contact data between your FOMA terminal and the
microSD card.
Exporting contacts to microSD card
You can back up contacts in the docomo account on your FOMA
terminal to the microSD card.
1
→"PhoneBookCopy"
● When PhoneBookCopy is activated, read the software licensing
agreement, and tap "同意する (Agree)"
2 "
エクスポート (Export)"→"開始 (Start)"→"OK"
Importing contacts from microSD card
You can register contacts in the microSD card to the docomo account
on your FOMA terminal.
1
→"PhoneBookCopy"→"インポート (Import)"
2 Select the contact data you want to import
3 "
上書き (Overwrite)"/"追加 (Add)"→"OK"
Copying contacts in other accounts to the
docomo account
You can copy contacts in other accounts such as Gmail to the docomo
account.
1
→"PhoneBookCopy"→"docomoアカウントへコピー
(Copy to docomo account)"
2 Select the account you want to copy
3 "
上書き (Overwrite)"/"追加 (Add)"→"OK"
Searching for information in your
FOMA terminal or web pages
1 In the home screen, tap the quick search box (P. 31)
● You can also do this by A→M→"Search".
2 Enter the keyword
Search candidates are displayed according to the text you enter.
3 Tap the search candidate
● If the selected search candidate is an application on your FOMA
terminal, that application is activated.
● When the target search candidate is not displayed, tap "Search
the web" to search the web page.
Using voice search
1 Tap at the right of the quick search box
● You can also do this by →"Voice Search".
2 Speak the keyword into the microphone (MIC)
123
Convenient Functions
Using Android Market
By using Android Market, you can directly access useful applications or
fun games that can be downloaded and installed on your FOMA
terminal. You can also send feedback or opinions about applications.
● To use Android Market, you must set a Google account for your
FOMA terminal. If a Google account is not yet set, follow the on-
screen instructions that are displayed when Android Market is
activated for the first time.
1
→"Market"
The Android Market screen is displayed.
● When Android Market is activated for the first time, read the
Android Market terms of service and tap "Accept".
Note
● Be sure to check the security of the application, then install it at
your own risk. Your FOMA terminal may be infected with a virus or
data may be damaged.
● DOCOMO is not liable for malfunctions caused by applications you
have installed. Repairs in this case will be charged for even within
the warranty period.
● DOCOMO is not liable for any disadvantage brought to you or any
third party due to the application you installed.
● With some applications, Internet connections and communications
are performed automatically. Note that packet communication
charges might be higher in this case.
Using Android Market Help
1 In the Android Market screen, M→"Help"
Searching and installing applications
Multiple methods are available to search applications on the Android
Market home page. On the web site, featured applications, lists of
application items classified by category, game lists, and a link to search
are displayed.
Select a subcategory by scrolling featured items in the vertical direction
or selecting from "Apps" or "Games". In each subcategory, applications
can be displayed as "Top paid", "Top free" or "Just in".
1 In the Android Market screen, search the
application
2 Tap the application you want to install, and check
price, general assessment, user opinions, and other
information in the details screen
3 Tap "Install"
● To buy an application, see "Buying applications" (P. 117).
● If the application must access the data or functions of your FOMA
terminal, a screen prompting which functions will be used by that
application will be displayed.
Be careful about installing applications that access many functions
or a significant amount of data. Once you select "OK" in this
screen, you are responsible for the consequences of using this
application on your FOMA terminal. To agree to the terms of use
of this application, tap "OK".
4 To check download progress, tap the application
being installed in the list screen
● To cancel the download, tap "Cancel download".
When installation is completed, is displayed on the status bar.
Note
● The icon of the installed application is displayed on the application
menu (P. 31).
● Installed accessibility plug-ins can be enabled in the accessibility
service list screen (P. 71).
124
Convenient Functions
Buying applications
Buy charged applications before downloading them. These applications
can be used on a trial basis for 24 hours. If you do not request a refund
within 24 hours of purchase, your credit card will be charged.
● Payments for applications are once only. Charges are not incurred for
uninstalling or redownloading an application once it has been
downloaded.
1 In the Android Market screen, search for the
application and tap the application you want to buy
2 Tap "Buy"
● If the application must access the data or functions of your FOMA
terminal, a screen prompting which functions will be used by that
application will be displayed.
Be careful about installing applications that access many functions
or a significant amount of data. Once you select "OK" in this
screen, you are responsible for the consequences of using this
application on your FOMA terminal. To agree to the terms of use
of this application, tap "OK".
3 When buying for the first time, log into the Google
Checkout payment and billing service
● If you do not have a Google Checkout account, fill in the form.
Google Checkout is a fast, secure and useful way to buy
applications from your FOMA terminal. For details about Google
Checkout, visit:
https://Checkout.google.com/m/helpCenterTerms?type=help&pli=1
● Set screen lock to ensure the security of your FOMA terminal (P. 64)
since the Google Checkout PIN is stored on your FOMA terminal.
4 When multiple credit card accounts are used for
your Google Checkout account, select one of the
accounts
5 Select the "Refund Policy", "Google Checkout
Billing and Privacy Policy", read these documents,
and press R
6 After you have agreed with the Google Checkout
service conditions, tap "Buy now" at the bottom of
the screen
When installation is completed, is displayed on the status bar.
■Requesting a refund
You can request a refund within 24 hours of the purchase of the
application if you are not satisfied with it. The application is deleted, and
you are not charged. In addition, note that you can request a refund
only once for each application. If you requested a refund for a
purchased application in the past and purchase the sample application
again, a second refund request will not be available.
Deleting applications
1 In the Android Market screen, tap "Downloads"
2 Select the application you want to delete
3 "Uninstall"→"OK"
● When "Uninstall & refund" is not displayed for charged
applications, this means that the free trial period has ended.
4 Select the answer in the survey form that best fits
the reason, and tap "OK"
125
Convenient Functions
Using docomo market
In docomo market, you can easily access DOCOMO recommended
sites and handy applications.
1
→"docomo market"
The browser is activated, and "DOCOMO MARKET" is displayed.
Note
● To use docomo market, packet communication (3G/GPRS) or a
Wi-Fi Internet connection is required.
● Packet communication charges are incurred separately for
connecting to docomo market and downloading applications
introduced in docomo market. Also, packet communications is
sometimes performed automatically with some downloaded
applications.
● Some of the applications introduced on docomo market are
charged.
● DOCOMO is not liable for any damages caused by sites introduced
on docomo market or for information acquired from these sites.
● DOCOMO is not liable for contents, conformance with purpose of
use and reliability of applications introduced on docomo market.
● Some applications that you install may cause your FOMA terminal
to run unstably, or may send your location information or personal
information registered on your FOMA terminal to outside via the
Internet and the information may be used improperly. For this
reason, thoroughly check the provider and the running status of
the application, etc. before using it.
● The copyrights of materials (documents, photographs, illustrations,
video, audio, software, etc.) posted on this site are the property of
DOCOMO or other third parties, and are protected by the Copyright
Act as well as other laws and agreements. Excluding the extent of
quotation and reproduction for private use that is approved in the
Copyright Act, the reproduction, adaptation or public transmission
of copyrighted material is prohibited without the consent of the
party owning the copyright.
Displaying Office documents or PDF
files
You can open Office documents (Word, Excel and PowerPoint) and
PDF files, or check folders on microSD cards.
You can open the following files:
Supported files Extension
doc file (Word) .doc
xls file (Excel) .xls, .xlsx
ppt file (PowerPoint) .ppt
pdf file (PDF) .pdf
1
→"Document Viewer"
2 Tap "Folders" or "Supported files" to open the
folder, or select the file type
3 Tap the file you want to open
The view screen is displayed.
● Pan the screen to display the part you want to view (P. 29).
● Zoom in or out by pinching out or in (P. 30).
● Icon tools are displayed by tapping the screen, and the following
operations are possible:
/ : Displays the previous or next page (sheet)
: Displays the zoom control
: Specifies the display range
: Goes back to the file list
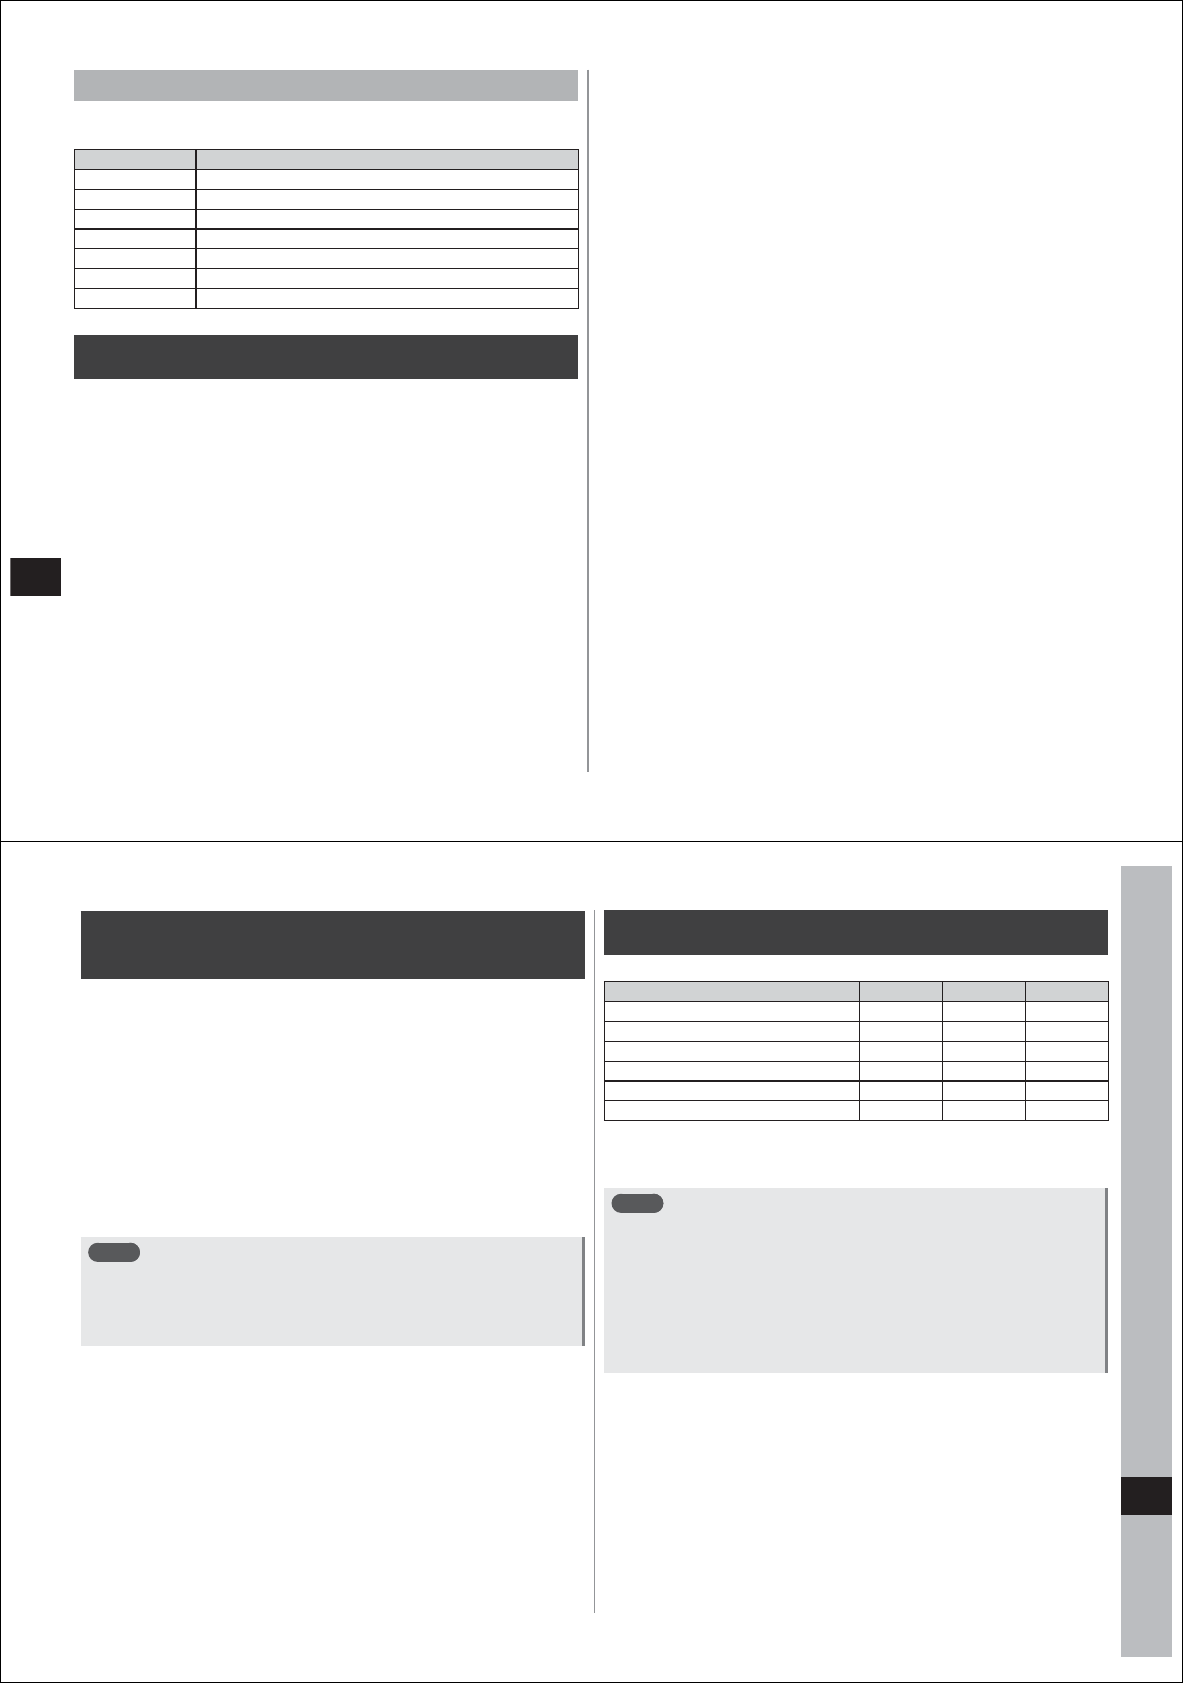
126
Convenient Functions
View screen option menu
The following operations can be performed by pressing M in the
view screen for each file:
Item Description
Go to Displays the specified page.
Find Searches text strings.
Page display Sets the page display mode.
Copy Copies text from Office documents to the clipboard.
Settings Makes file display settings.
Properties Displays PDF file properties.
About Displays version information and license information.
USB host function
This FOMA terminal has a built-in USB host function. This function
allows you to use commercially available USB devices by connecting
the USB cable for external device connection T01 (sold separately) to
the external connector terminal.
● For details on the USB host function, refer to the manual for the USB
cable for external device connection T01.
127
Overseas Use
Outline of international roaming
(WORLD WING)
International roaming (WORLD WING) is a service that enables you to
use the same FOMA terminal as you use in Japan in the service area of
docomo affiliated overseas telecommunications carriers without
changing your phone number and mail address. You can use voice
calls, SMS and sp-mode mail without any changes in settings.
● Available area
You can use your FOMA terminal in the 3G network and GSM/GPRS
network service areas. You can also use your FOMA terminal in
countries and regions that support 3G850MHz/GSM850MHz. Check
available area before use.
● Refer to the following before using your FOMA terminal overseas.
・
"Mobile Phone User's Guide [International Services]"
・
DOCOMO International Services website
Note
● For country codes, international call access number and universal
number international prefix, refer to "Mobile Phone User's Guide
[International Services]" or the "DOCOMO International Services
website".
Available services
(○: Available, ×: Unavailable)
Communication service 3G GSM GPRS
Voice call ○○○
SMS*1○○○
sp-mode mail ○×○
e-Mail ○×○
Browser ○×○
GPS position location*2○×○
*1 Enter the same phone number as used in Japan when sending to a FOMA
terminal.
*2 Packet transmission charges are charged for GPS positioning.
Note
● Some services are not available depending on the
telecommunications carrier or network. Refer to "Mobile Phone
User's Guide [International Services]" or the "DOCOMO
International Services website" for information on available
countries and regions, and telecommunications carriers.
● At purchase, "Data roaming" is set to off. To use services or
applications that use packet communications overseas, set "Data
roaming" to on (P. 123).
128
Overseas Use
Preparation for use
Check before departure
Check the following in Japan before using your FOMA terminal
overseas.
Subscription
Check the status of your WORLD WING subscription. For details,
contact the "docomo Information Center" on the last page of this
manual.
Charging the battery
Overseas use may require more battery power than use in Japan.
● For precautions for handling the AC adapter (sold separately), see P. 7.
● For details on charging with the AC adapter (sold separately), see
P. 23.
Charges
Overseas charges (call charges, packet transmission charges) differ
from those in Japan.
● If you set the access point to "mopera U
(スマートフォン定額)
(mopera
U (Smartphone flat-rate))", switching of the access point is required
(P. 123).
● The specifications of your FOMA terminal are such that some
communications are automatically performed, such as
communications for checking the latest software version or
communications for maintaining a connection with the server. Also,
packet communications is sometimes performed automatically with
some applications. Note that packet communications charges when
used overseas are sometimes higher.
Preparations
sp-mode mail
Mail functions can be stopped or the size of received sp-mode mail can
be limited. For details, refer to the "Mobile Phone User's Guide (sp-mode
[Smartphone])".
Network service settings
When you are subscribed to network services, you can use voice mail,
call forwarding, number notification request, and other network services
even overseas. Note, however, that some network services are
unavailable.
● To use network services overseas, "Remote operation settings" must
be started. For details on remote operation settings, refer to the
"Mobile Phone User's Guide [International Services]".
● "Remote operation settings" can also be performed at overseas
destinations.
● Also some network services that allow setting, delete and other
operations are sometimes not available depending on the overseas
telecommunications carrier.
129
Overseas Use
Checking in the country you are visiting
Your FOMA terminal automatically connects to the available
telecommunications carrier when you have arrived in the country you
are visiting and you turn the power on.
Connection
If your FOMA terminal moves outside the currently used service area
when "Network operator" in "Mobile networks" is set to "Select
automatically", your terminal automatically searches and connects to
another available telecommunications carrier.
Display indication
● The currently used network type is displayed on the status bar.
: 3G (packet) network
: GPRS network
: EDGE network
● The currently connected telecommunications carrier can be checked
on the notification panel.
Date/time setting
If the
→"Settings"→"Date & Time"→"Automatic" checkbox is selected,
your FOMA terminal receives time and time difference information
automatically from the currently connected overseas
telecommunications carrier, and corrects the time and time differences
on the terminal.
● The correction timing differs depending on the telecommunications
carrier.
● To set these differences manually, deselect the "Automatic" checkbox,
and set each of "Set date", "Select time zone" and "Set time" (P. 72).
Inquiries
● When your FOMA terminal or the UIM card is lost or stolen overseas,
promptly contact docomo and conduct the procedure for canceling
use of the service from the country you are visiting. For inquiries, see
the "docomo Information Center" on the last page of this manual.
Note that transmission/calling charges after your FOMA terminal or
the UIM card is lost or stolen are incurred by the subscriber.
● To use a landline phone, etc., the "international call access number"
or "universal number international prefix" of the country you are
visiting is required.
Check after homecoming
Your FOMA terminal automatically connects to the FOMA network after
you return home. If it fails, perform the following setting.
● Set "Network mode" in "Mobile networks" to "GSM/WCDMA
Automatic" (P. 123).
● Set "Network operator" in "Mobile networks" to "Select automatically"
(P. 123).
130
Overseas Use
Setting for overseas use
At purchase, your FOMA terminal is set to automatically search for and
switch to available networks.
Follow the procedure below to manually switch networks.
Setting the network type (mode)
1
→"Settings"→"Wireless controls"
→"Mobile networks"→"Network mode"
2 Select the mode
WCDMA only The 3G network is used.
GSM only The GSM network is used.
GSM/WCDMA
Automatic
The available network is automatically switched
to.
Note
● If the 3G network and GSM/GPRS network of the same
telecommunications carrier are searched for simultaneously when
the mode is set to "GSM/WCDMA Automatic", a connection is
made to the 3G network.
● When the mode was set to "GSM only" in the country you visited,
set the mode to "GSM/WCDMA" after returning home.
Manually setting the telecommunications carrier
1
→"Settings"→"Wireless controls"
→"Mobile networks"→"Network operator"
Available networks are searched for and displayed.
2 Select the network of the telecommunications
carrier you want to use
Note
● When the telecommunications carrier is set manually in the country
you visited, set "Network operator" to "Select automatically" after
returning home.
Setting data roaming on
1
→"Settings"→"Wireless controls"
→"Mobile networks"
2 Select the "Data roaming" checkbox, and tap "OK"
Switching the access point
If you set the access point to "mopera U(スマートフォン定額)
(mopera
U (Smartphone flat-rate))", switching of the access point is required
overseas to connect to a network.
1
→"Settings"→"Wireless controls"
→"Mobile networks"→"Access Point Names"
2 M→"New APN"
3 "New"→enter the name of the network profile to
create→"OK"
4 "APN"→enter "mopera.net"→"OK"
5 M→"Save"
6 Tap the radio button of the access point created in
the access point name screen
Note
● Before returning home, switch the access point to "mopera U(ス
マートフォン定額)
(mopera U (Smartphone flat-rate))" (P. 26). Be
sure to set this since packet transmission charges might be higher
if your FOMA terminal is used without switching the access point.
131
Overseas Use
Making/receiving calls in the country
you are visiting
Making a call outside the country you are
visiting (including Japan)
You can make a call from the country you are visiting to another country
by using the international roaming service.
● For information about available countries, telecommunications
carriers, etc., refer to the "DOCOMO International Services website".
1
→"Phone"
2 Add "+" (tap "0" for one second or more), enter
country code, area code (city code) and the other
party's phone number
● When the area code (city code) begins with "0", omit the "0" when
dialing (include "0" when making a call to some countries or
regions such as Italy).
● When the other party you are calling uses "WORLD WING"
overseas, enter "81" as the country code regardless of whether or
not you are in the country you are visiting.
● When selecting from the country list and entering "+ country
code", enter the area code (city code) and the telephone number,
and press M→"Add Country code"→country.
● To make a call to Japan, enter the telephone number including the
city code, and press M→"Phone Call to Japan".
3 Tap "SEND"
Note
● Country codes can be registered by
→"Phone"→mM
→"Country code setting".
Making a call in the country you are visiting
You can make a domestic call to a landline phone or mobile phone in
the country you are visiting in the same way as you do in Japan.
1
→"Phone"
2 Enter a phone number
● Start with the area code (city code).
● When the party you are calling is using "WORLD WING", make
the call as an international call to Japan (by entering the country
code "81" (Japan)) even when making a call in the country you are
visiting.
3 Tap "SEND"
Receiving calls in the country you are visiting
You can receive a call in the same way as you do in Japan.
Note
● When a call is received during international roaming, the call is
forwarded from Japan whichever country it is from. Calling charges
to Japan are incurred by the caller and receiving charges by the
receiver.
Having calls made to your FOMA terminal
■Having calls made to your FOMA terminal from Japan
To receive an international call from Japan, have your phone number
dialed as a domestic call in Japan.
■Having calls made to your FOMA terminal from countries
other than Japan
Because the call goes via Japan, have the international call access
number and "81" prefixed to your number regardless of your location.
International call access number of the country of the
caller-81-90 (or 80)-XXXX-XXXX
132
Appendix/Index
Introducing options and related
equipment
Combine your FOMA terminal with various optical accessories (sold
separately) for expanded personal and business use. Some products
may not be available in certain areas. For details, contact a docomo
shop or retailer.
For details on options, refer to the manual for each device.
・Battery Pack T03
・Back Cover T04
・FOMA charging microUSB adapter T01
・Desktop Holder T02
・PC connection USB cable T01
・USB cable for external device connection T01
・FOMA AC Adapter 01/02*
・FOMA DC Adapter 01/02*
・FOMA AC Adapter 01 for Global use*
・FOMA Dry Battery Adapter 01*
・Wireless Earphone Set 02
・Bone conduction microphone/receiver 02
・FOMA Portable Charging Adapter 02
・Carry Case 02
* The FOMA charging microUSB adapter T01 is required for connecting to
your FOMA terminal.
To use
the adapter overseas, equipment, such as a plug adapter suited to
the power outlet at the country you are visiting, is required.
Troubleshooting (FAQ)
Initial checks if you think you have a problem
● First, check whether the software must be updated. If it is needed,
update the software (P. 132).
● If there is no improvement in problems even after checking the
following items, feel free to contact the "docomo Information Center"
on the last page of this manual or a repair center specified by
DOCOMO.
Category Symptom Check location
Reference
page
Power
Your FOMA
terminal does
not turn on
● Is the battery pack attached
properly?
● Make sure that the battery has
not run out.
P. 20,
P. 22
Charging
Cannot charge
the battery
(Notification
LED does not
light or it
flashes)
● Is the battery pack attached
properly?
● Is the power plug of the adapter
inserted into the power outlet or
the cigarette lighter socket
properly?
● When using the AC adapter
(sold separately), is the
connector of the FOMA
charging microUSB adapter
T01 properly connected to your
FOMA terminal and AC
adapter?
● When using the desktop holder,
are the charging terminals on
your FOMA terminal dirty?
Wipe off any dirt from the
terminal section with a dry
cotton swab.
● When using the PC connection
USB cable T01 (provided), is
the PC turned ON?
● If calling, transmitting or another
function is performed for a long
time while charging the battery,
your FOMA terminal may heat
up and the notification LED
may flash. If this happens, wait
for your FOMA terminal to cool
down before starting charging
again.
P. 20,
P. 23
133
Appendix/Index
Category Symptom Check location
Reference
page
Heats up during
operation or
charging
● Your FOMA terminal, battery
pack or adapter might heat up,
for example, during operation
or charging, or when watching
1Seg for a long time while
charging the battery. However,
continue use since there is no
problem in terms of safety.
P. 4
Terminal
operation
Battery usage
time is short
● Has the battery pack been left
outside the service area for a
long time?
Outside the service area, more
electric power than usual is
used since the signal is
searched to make
communications possible.
● The battery pack usage time
differs according to the
operating environment and
battery deterioration level.
● The battery pack is a
consumable product. The
service time per charge
gradually decreases every time
the battery pack is charged.
Buy a new specified battery
pack if the usage time becomes
much shorter, even after being
fully charged, than when the
battery was first bought.
P. 10,
P. 22
Power turns off/
Your FOMA
terminal
restarts
● Dirty terminals on the battery
pack may result in poor
connections and loss of power.
Wipe with a dry cotton swab.
P. 9
Category Symptom Check location
Reference
page
Normal
operations are
not possible by
tapping
● Are you operating with a gloved
finger?
● Are you operating the touch
screen with the tips of your
fingernails or with an object?
● Is a protective sheet stuck to
the display?
Operations sometimes cannot
be performed properly with
some types of protective
sheets.
The T-01C display uses an
electrostatic type touch panel.
Operations are performed by
directly touching the screen with
your fingers.
P. 28
Terminal
operation
Operations are
not possible
even though
the power is
turned on
● Is the PIN code entry screen
displayed?
Enter the PIN code.
P. 64
Operations are
not possible
even though
the screen is
unlocked
● Is the screen unlock pattern or
screen unlock security code
entry screen displayed?
Enter the screen unlock pattern
or screen unlock security code.
P. 64
No operation
even by
pressing keys
● Is your FOMA terminal in the
Sleep mode?
Press C or A to cancel the
Sleep mode.
P. 24
Slow screen
response when
the touch panel
is tapped or
keys are
pressed
● This sometimes happen when
a large amount of data is saved
on your FOMA terminal, or
when a large amount of data is
transferred between your
FOMA terminal and the
microSD card.
−
134
Appendix/Index
Category Symptom Check location
Reference
page
Your FOMA
terminal
operations are
slower/
Application
operation is
unstable/Some
applications are
not activated
● Operation becomes unstable if
your FOMA terminal is running
out of memory. When memory
is running low and the warning
message is displayed, delete
unwanted applications to
secure extra memory.
P. 70
No operations
even by tapping
the screen
● Turn the power off then on
again.
P. 24
Terminal
operation
Data is not
displayed
normally/
Normal touch
panel
operations are
not possible
● Restart your FOMA terminal. P. 69
The docomo
UIM card is not
recognized
● Is the docomo UIM card
inserted in the correct
orientation?
P. 19
The clock is not
correct
● The clock sometimes becomes
incorrect if your FOMA terminal
is left on for a long time.
Make sure that date and time
"Automatic" settings are on,
and then turn your FOMA
terminal off then back on again
in a good-reception area.
P. 72
Connections
Calls cannot be
made
● Is the docomo UIM card
correctly inserted into your
FOMA terminal?
● Did you enter the telephone
number starting from the city
code?
● Is the Airplane mode enabled?
P. 19,
P. 54
Category Symptom Check location
Reference
page
Ringtone does
not sound
● Is the ringtone volume set to
"0"?
● Is the Public mode or Manner
mode set?
● Is the Voice Mail Service or Call
Forwarding Service ring time
set to "0 seconds"?
P. 49,
P. 52,
P. 53,
P. 59,
P. 60
Connections
Connections
cannot be made
(the "out of
service"
indication does
not disappear
even after
moving into the
service area, or
calls cannot be
made/received
even though
reception is not
bad)
● Turn your FOMA terminal off
then back on again, or re-insert
the battery pack or the docomo
UIM card.
● Depending on the signal
properties, making or receiving
calls may not be available even
though signals are strong and
four-bar antenna icon is shown
(). Move to another place
and call again.
● In crowded places, heavy
telephone/mail traffic may be
caused and make it difficult to
get a connection depending on
the state of the incoming
signal. If this happens, "Please
wait for a while" is displayed
and the busy signal is played.
Either move to another place or
call again later.
P. 19,
P. 20,
P. 24
Screen
Display is dark ● Adjust the brightness setting
"Brightness".
● Is your FOMA terminal in the
ECO mode?
P. 61,
P. 62
Sound
During a
conversation,
the other party's
voice is difficult
to hear or is too
loud
● Have you changed the in-call
volume?
P. 43
135
Appendix/Index
Category Symptom Check location
Reference
page
Mail
The notification
icon indicating
new mail does
not appear
● Are email and Gmail "Email
notifications" set to off?
● Is SMS "Notifications" set to
off?
P. 75,
P. 79,
P. 81
Camera
Still picture or
video shot with
the camera is
out-of-focus
● Make sure that the camera lens
is not misted up or dirty.
● Set the focus mode to "Face"
when taking photos of people.
● Take photos using the "Anti-
Shaking" function.
P. 89,
P. 91,
P. 92
1Seg
Cannot watch
1Seg
● Are you outside the terrestrial
digital TV broadcasting service
area or in a poor reception
area?
● Have channel settings been
made?
P. 98,
P. 102
Osaifu-
Keitai
Cannot use
Osaifu-Keitai
● IC card functions are no longer
available regardless of the
Osaifu-Keitai lock setting when
the battery pack is removed.
● Is Osaifu-Keitai lock setting
activated?
● Are you holding the part of your
FOMA terminal with the
mark up to the scanner?
P. 109
Category Symptom Check location
Reference
page
Out-of-service
is displayed,
and the
international
roaming service
is unavailable
● Are you outside the
international roaming service
area or in a poor reception
area?
● Refer to "Mobile Phone User's
Guide [International Services]"
or the "docomo International
Services website" for
information on available service
areas or telecommunications
carriers.
● After moving outside Japan,
switch the network type (mode)
to "GSM/WCDMA Automatic" or
a supported network. When
"GSM/WCDMA Automatic" is
set in Japan, turn your FOMA
terminal off then back on again.
P. 123
Overseas
use Making/
receiving calls
suddenly
becomes
unavailable
during overseas
use
● Check your accumulated use at
"docomo Information Center".
For "International roaming
service (WORLD WING)", the
approximate limit of use fees is
set in advance. If this limit is
exceeded, all services are
stopped. In this case, pay the
accumulated use fees to
resume services.
● Check the network type (mode).
When "GSM/WCDMA
Automatic" is set, special
networks cannot be received
and are unavailable. Change
the setting to a network
("WCDMA only" or "GSM only")
that can be connected to where
you are visiting.
Last
page of
this
manual,
P. 123
136
Appendix/Index
Category Symptom Check location
Reference
page
Overseas
use
The other
party's
telephone
number is not
notified/A
different
telephone
number from
that of the other
party is notified/
Functions for
using registered
contact details
or Caller ID
notification are
not activated
● The Caller ID is not displayed
on your FOMA terminal even
though the other party has
made the call with notification
of the caller ID if the network
being used or
telecommunications carrier
does not notify. Also, a different
telephone number from that of
the other party is notified
depending on the used network
or telecommunications carrier.
−
Data is not
transferred
● Are you using a USB hub?
Operation may not be normal if
a USB hub is being used.
−
Data
management
Data saved on
the microSD
card is not
displayed
● Re-insert the microSD card. P. 7 0
Bluetooth
function
Cannot connect
to a Bluetooth
device/Cannot
find a Bluetooth
device even if
searched for
● The Bluetooth device
(commercially available) must
be registered from your FOMA
terminal after the Bluetooth
device is set to standby. To
delete a registered Bluetooth
device (commercially available)
and register it again, delete the
registered device on both the
Bluetooth device and your
FOMA terminal.
P. 57
Category Symptom Check location
Reference
page
Bluetooth
function
Calls cannot be
made from your
FOMA terminal
with an external
device such as
car navigation or
hands-free
device
connected
● Calls may not connect to a
number if you are making
multiple calls to a other party
who does not answer or is
outside the service area. If this
happens, turn your FOMA
terminal off then back on again.
P. 24
Error messages
Error message Description/Remedy
Reference
page
Enter PIN code This is displayed if your FOMA
terminal is turned on when the
PIN code is enabled. Enter the
correct PIN code.
P. 64
Incorrect PIN code!
Attempts Remaining
:X
This is displayed when an
incorrect PIN code is entered.
Enter the correct PIN code.
P. 64
Security code does not
match. Try again.
This is displayed when the
screen unlock security code is
in error. Enter the correct
security code.
P
. 65
No SIM card. This is displayed when your
FOMA terminal is turned on
without the docomo UIM card
inserted correctly. Make sure that
the docomo UIM card is inserted
correctly.
If the docomo UIM card is not
inserted correctly, voice calls
including emergency calls (110,
119, 118) cannot be made in
Japan.
P. 19
137
Appendix/Index
Error message Description/Remedy
Reference
page
Low Battery Level. Shutdown
the device.
The battery level is low. Charge
the battery pack.
P. 23,
P. 24
Please wait for a while This is displayed when the line is
restricted or a connection error
has occurred. If this problem is
not resolved, restart your FOMA
terminal and try again.
P. 69
It is not able to change
setting due to the Eco-mode.
Please charge the phone or
turn off the Eco-mode.
This is displayed when an
attempt is made to change the
"Brightness"/"Screen timeout"
brightness settings and
"Bluetooth"/"Wi-Fi" wireless
settings while the Eco mode is
activated with the
"Brightness"/"Backlight off"/
"Bluetooth"/"Wi-Fi" Eco mode
settings enabled.
P. 62
TV audio is not supported. This is displayed on the
notification panel when a
Bluetooth earphone or wireless
headphone not compliant with
the SCMS-T standard is
connected.
P. 56
Warranty and After-Sales Service
Warranty
● Make sure that the warranty card is included with your FOMA terminal
at the time of purchase. Check the name of the retailer, the date of
purchase, and the necessary details filled in on the warranty card. Be
sure to keep it in a safe place. Contact the retailer if any necessary
details on the warranty card are not filled in. The warranty period
without charge is one year from the date of purchase.
● Note that the specifications of this product and its accessories are
subject to complete or partial change without prior notice in the
interest of product improvement.
● Information registered on your FOMA terminal, such as contacts, may
be lost or damaged if your FOMA terminal is damaged, repaired, or
mishandled. It is recommended that you keep a memo of information
such as contacts.
* This FOMA terminal allows you to save contact data to the microSD card
using the phonebook copy tool.
After-Sales Services
If you have problems with your FOMA terminal
Before requesting repairs, see "Troubleshooting" in this manual.
If problems persist, contact the "docomo Information Center" on the last
page of this manual.
If your FOMA terminal needs repairs after contacting
DOCOMO
Bring your FOMA terminal to a repair shop specified by DOCOMO.
Note, however, that the repair shop is open only during business hours.
Also, be sure to bring the warranty card with you. Note that it may take
several days to repair depending on the damage.
138
Appendix/Index
■During the warranty period
● Your FOMA terminal will be repaired without charge in accordance
with the terms of the warranty.
● When bringing your FOMA terminal in for repair, be sure to bring the
warranty card. Even during the warranty period, a fee will be charged
for repairs of malfunctions or damage caused by your improper
handling (damage of LCD and connector), or when no warranty card
is presented.
Repairs for damages caused by the use of devices and accessories
other than those specified by DOCOMO will also incur a fee even
during the warranty period.
■Repairs may not be possible in the following
circumstances.
● When a repair shop has judged that your FOMA terminal has been
exposed to water (e.g. when the water detection sticker has reacted)
● As a result of inspection, when damage from water exposure,
condensation, sweat, or other liquids are found, or when the internal
circuit board is damaged or deformed (Repairs may not be possible
when the external connector terminal, stereo earphone terminal, LCD,
etc. are damaged, or when the housing is cracked.)
* Even when repairs are possible, repair charges will be incurred
because the warranty does not cover such damage.
■After the warranty period has expired
Charged repairs will be carried out upon request.
■Replacement parts
Performance parts for repair of your FOMA terminal (parts required to
maintain the functionality of your FOMA terminal) will be kept in stock
basically for six years following discontinuation of production. Note,
however, that there may be cases when repair is not possible due to
shortage of replacement parts depending on the faulty part. Repairs
may be possible even after this period has passed, depending on the
faulty part. Contact the "docomo Information Center" on the last page of
this manual.
IMPORTANT!
● Never attempt to modify your FOMA terminal or its accessories.
・
Doing so might cause fire, bodily harm or malfunction.
・
If your FOMA terminal has been modified, it will only be accepted for
repair as long as you agree that we restore it to its original state.
Note, however, that repairs may be refused depending on the extent
of the modification.
The following cases may be considered as modifications:
・Stickers, etc. are applied to the LCD or keys.
・Decorations are stuck to your FOMA terminal with adhesive.
・Exterior parts are replaced with non-authentic DOCOMO parts.
・
Repairs for any malfunction or damage caused by such
modifications will incur fees, even during the warranty period.
● Do not peel off the nameplate sticker attached to your FOMA terminal.
If the content of this nameplate sticker cannot be verified due to it
being intentionally peeled off or replaced invalidating its function as a
certification, repairs may be refused because conformity to technical
standards cannot be determined.
● Information stored on your FOMA terminal, such as the settings of
various functions, may be cleared or reset if your FOMA terminal is
damaged, repaired or mishandled. If this occurs, please re-enter the
information or re-specify the settings.
● On FOMA terminals returned for repair, the MAC address for Wi-Fi
and the Bluetooth address may be changed regardless of the faulty
part.
● The following sections of your FOMA terminal contain parts that
generate magnetic waves. Keep ATM cards and other objects likely to
be affected by magnetic waves away from your FOMA terminal.
Cards may become unusable.
Used sections: Speaker, earpiece
● Although your FOMA terminal has waterproof properties, if the inside
of your FOMA terminal becomes wet or moist, immediately turn it
OFF, remove the battery pack and take it to a repair shop. Not,
however, that your FOMA terminal may not be repaired depending on
its condition.
139
Appendix/Index
Memory dial (Contacts function) and downloaded
information
Created, imported or downloaded data may be altered or lost when your
model is changed or your FOMA terminal repaired. DOCOMO is not
liable for alteration and loss of this data. Also, DOCOMO may, at its
convenience, exchange your FOMA terminal for a substitute in lieu of
repairs. However, in that case, DOCOMO cannot transfer this data to
the replacement product except for some data.
Software update
Software update
Connect the T-01C to the network to check if a software update is
necessary. If it is, download the software using packet communications
to update the software.
Check the DOCOMO home page to see if software updates are
necessary.
There are three software update modes "Auto-update", "Now update"
and "Reserve update".
Auto-update: New software can be downloaded automatically and
rewritten at a preset time.
Now update: Software is updated immediately.
Reserve update: Software is updated automatically at the preset time if
you reserve the time to install update packages.
Note
● You can update software even if your FOMA terminal contains
contacts, camera images or downloaded data. However, data that
could be lost due to the state of the T-01C (malfunction, damage,
water exposure, etc.) and so on cannot be protected. It is
recommended that important data be backed up before software
updates. Note, however, that some data such as downloaded data
cannot be backed up.
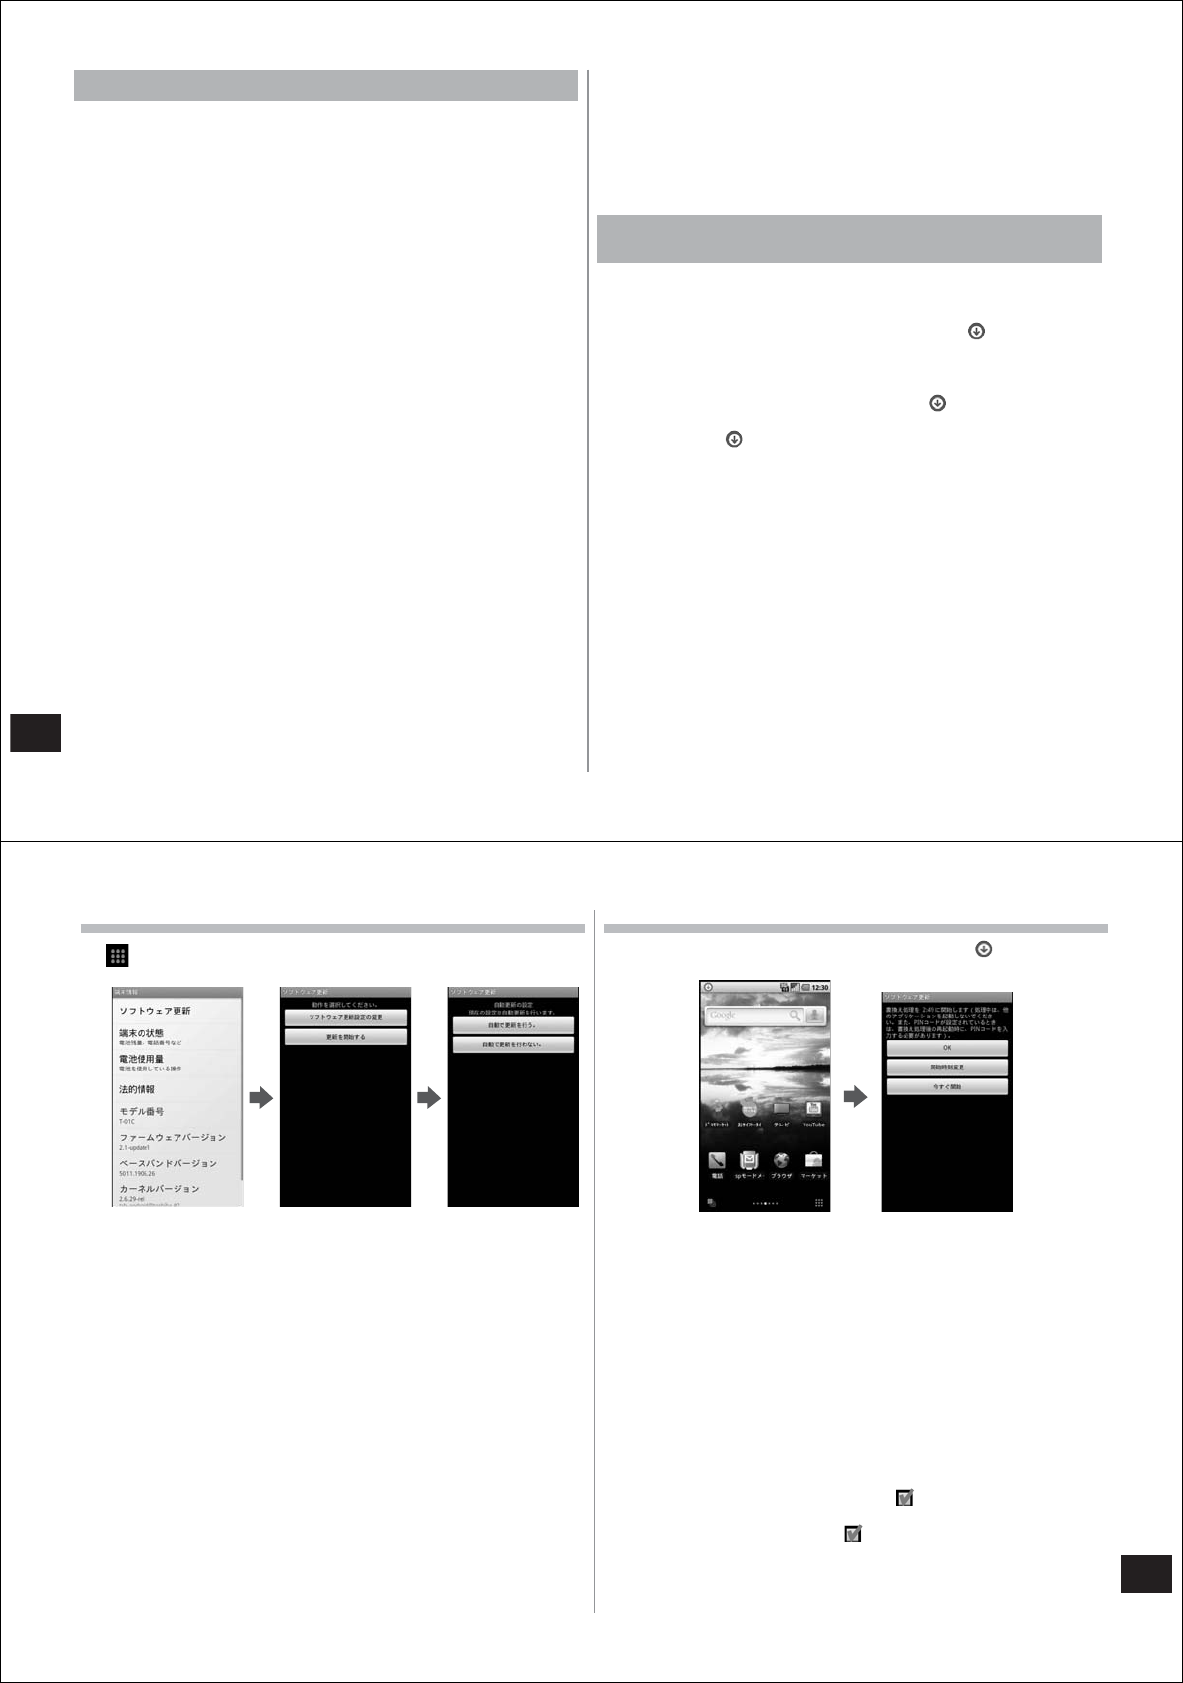
140
Appendix/Index
Using software update
● Do not remove the battery pack while the software update is in
progress. Doing so might result in the update failing.
● Recharge the battery before updating the software.
● The software cannot be updated in the following cases:
・
During a call or when your FOMA terminal is outside the service area
・
During international roaming
・
While your FOMA terminal is in the Airplane mode
・
While your FOMA terminal is connected to a Wi-Fi network
・
While mounted and connected via USB, during OS version upgrade,
during MTP connection
・
When the date and time are set incorrectly
・
When there is insufficient battery power for the software update
・
When there is insufficient free space for the software update
● Software updates (downloading and rewriting) might take time.
● During a software update, outgoing calls cannot be made, incoming
calls cannot be received, and various communications functions and
other functions are unavailable. (During a download, voice calls can
be received.)
● During a software update, your FOMA terminal performs SSL/TLS
communications with the server (DOCOMO site).
● It is recommended that you update software at locations with a strong
signal (four antenna bars displayed) and while you are not moving.
* If reception status weakens and the download is interrupted when you are
downloading software, update the software again at a location where
reception is good.
● If the software has already been updated, "No update is needed." is
displayed when the software update is checked.
● SMS that were received during the software update are stored at the
SMS center.
● When updating software, information unique to your T-01C (model,
serial number, etc.) is automatically sent to the server (DOCOMO
software update server). Sent information is used only for software
updates by DOCOMO and not for other purposes.
● If a software update fails, "Rewrite failed" is displayed, and all other
operations may no longer be possible. If this happens, bring your
FOMA terminal to a repair shop specified by DOCOMO.
● When the PIN code is set, the PIN code entry screen is displayed
during restart of your FOMA terminal after rewriting the software, and
you must enter the PIN code.
● During a software update, do not activate other applications.
Updating software automatically
[Auto-update]
New software can be downloaded automatically and rewritten at a
preset time.
At purchase, the Auto-update setting is set to "Automatic Update".
When your FOMA terminal is ready for rewriting, the (software
update available) notification icon is displayed on the status bar. You
can confirm the rewrite start time, change the rewrite start time, and
select whether or not to rewrite the software right away.
When the rewrite start time is reached with the (software update
available) notification icon displayed, the software is automatically
rewritten, and the (software update available) notification icon
disappears.
If there is insufficient battery power or a voice call is in progress when
the rewrite start time is reached, the software update will not be started
and will be performed at the same time the following day.
Software cannot be updated automatically when the automatic update
setting is set to "Manual Update" or while updating software by Now
update.
141
Appendix/Index
Setting Auto-update
1
→"Settings"→"About phone"→"Software
update"→"Configure the software update"
2 Select the action to be performed when update
software notification is received
● To update the software automatically: "Automatic Update"
● To not update the software automatically: "Manual Update"
Actions when software update is required
When the software is automatically downloaded, the (software
update available) notification icon is displayed on the status bar.
1 Open the notification panel and tap the notification
2 Select the rewrite method
● When a software update is required, the rewrite start time is
displayed.
■Tap "OK"
● The screen returns to the standby screen. Rewriting is started
when the preset time is reached.
■ Step 1 of "Sets Time"→"Reserving a time to update the
software" (P. 136)
● Set the time to execute installation of the update package.
■ Step 1 of "Starts update"→"Updating software immediately"
(P. 135)
● Rewriting is started immediately.
● When the rewrite is complete, the (software update
completed) notification icon is displayed on the status bar.
● Once you have checked the notification icon, it disappears.
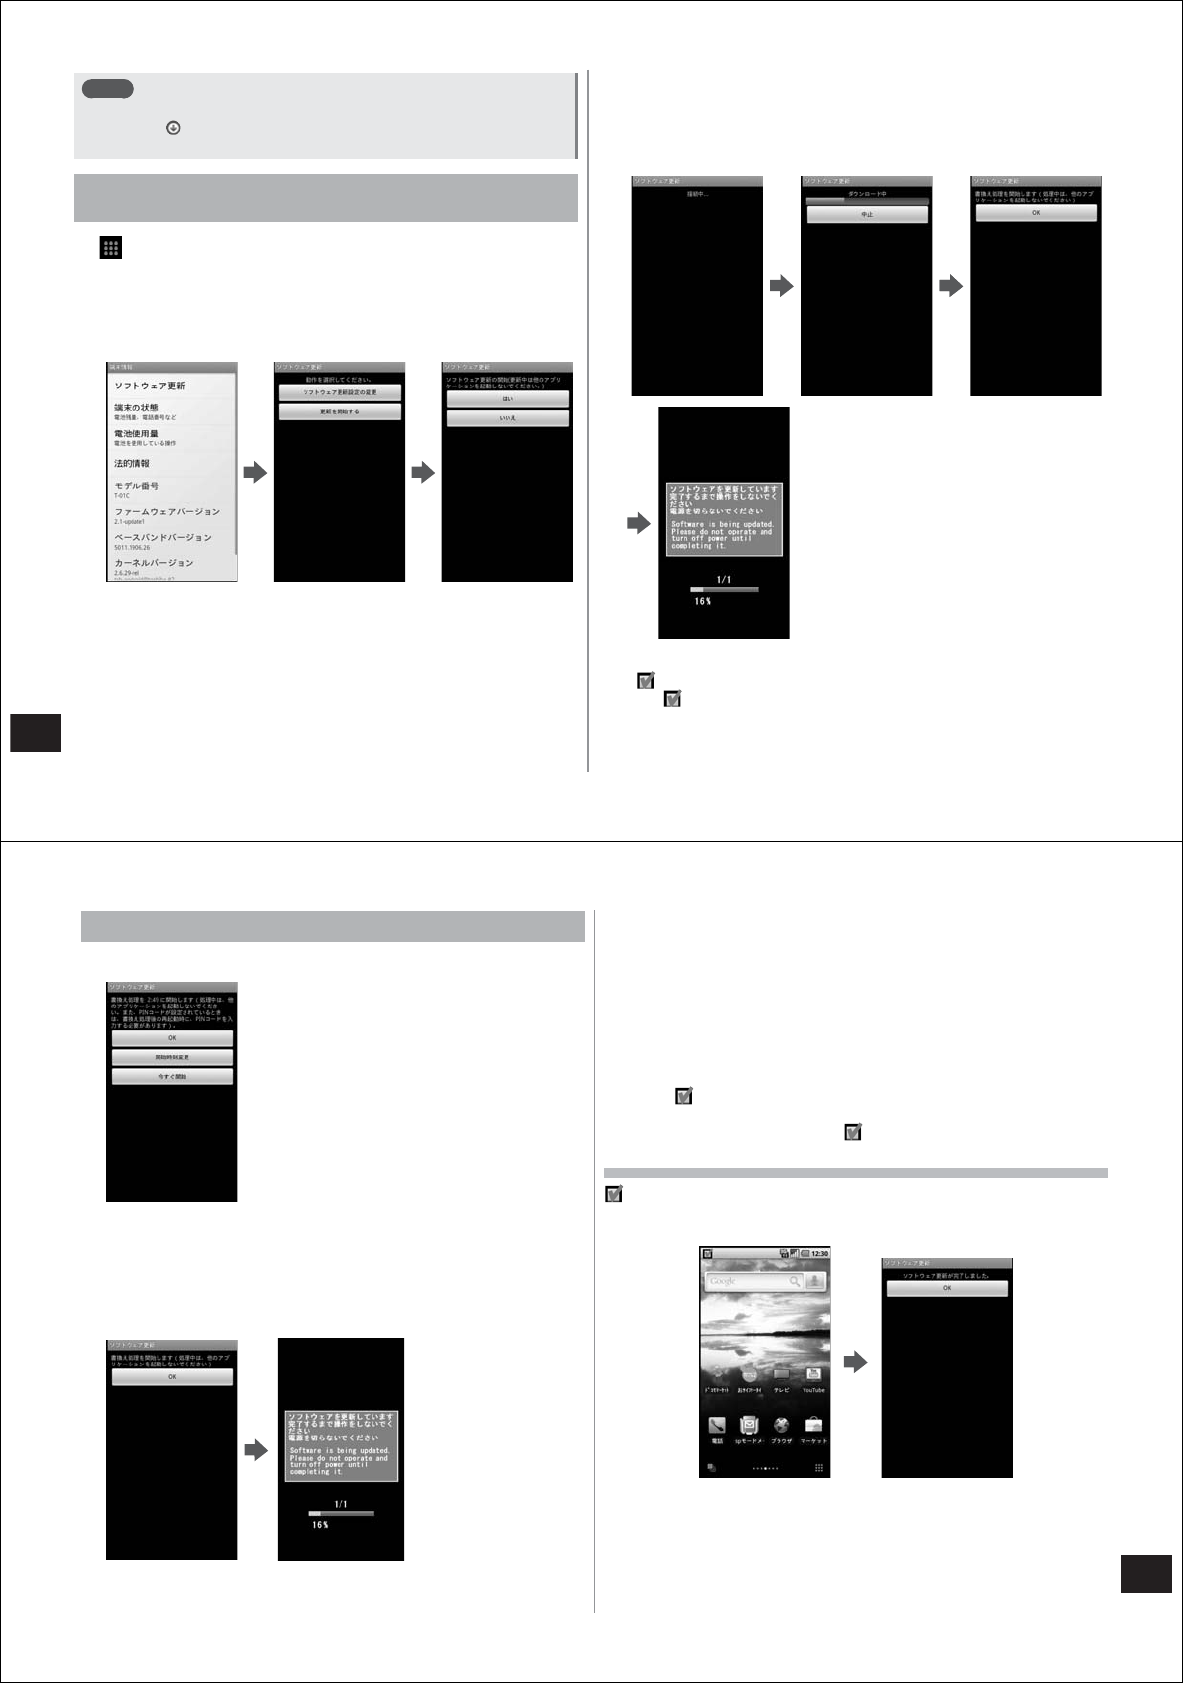
142
Appendix/Index
Note
● If the software update could not be activated at the auto-update
time, the (software update available) notification icon is
displayed on the status bar.
Activating software update
[Now update]
1
→"Settings"→"About phone"→"Software
update"→"Start the software update"→"Yes"
● The software update is automatically updated when the download
is started.
● If you cancel a download midway, data downloaded till then is
deleted.
● When the software update is not needed, "No update is needed."
is displayed.
● If your FOMA terminal is in international roaming or out of the
service area, "Failed to start update. Due to no network or
roaming." is displayed.
● If there is insufficient battery power for a software update, "Failed
to start update. Due to low battery. Please recharge and retry
later." is displayed.
2 Tap "OK"
● Your FOMA terminal restarts and the update starts.
● During an update, all key operations are disabled. The update also
cannot be canceled.
● Your FOMA terminal restarts automatically twice during an update.
3 The standby screen is displayed
● will be displayed on the status bar. Once you have checked
the notification icon, it disappears.
143
Appendix/Index
Updating software immediately
1 "Starts update"→"★はい★"
2 When "Ready for update." is displayed, tap "OK"
● Rewriting starts automatically about three seconds after "Ready
for update." is displayed.
● During a rewrite, all key operations are disabled. The rewrite also
cannot be updated.
● When rewriting ends, your FOMA terminal restarts automatically.
3 After your FOMA terminal restarts, the software
update starts automatically
● During an update, all key operations are disabled. The update also
cannot be canceled.
● About five seconds after the update ends, your FOMA terminal
restarts automatically.
4 Open the notification panel and tap the notification
● The software update ends, and the standby screen is displayed.
● The (software update completed) notification icon is displayed
on the status bar to indicate that the software update is completed.
Once you have checked the notification icon, it disappears.
Post-update display
is displayed on the status bar of the standby screen. When you
open the notification panel, a message indicating that the software
update is completed is displayed.

144
Appendix/Index
Reserving a time to update the software
[Reserve update]
You can preset a time to update the software if you want to specify a
separate time for installing the update package.
1 Tap "Sets Time"
● The rewrite start time setting screen is displayed.
● The displayed time is the same as the time on your FOMA
terminal.
2 Enter the desired time, and tap "OK"
● Set the time.
● Tap "+"/"-" to change the update time, and tap "OK".
When the reserved time is reached
1 When "Ready for update." is displayed, tap "OK"
● The software update starts automatically about three seconds
after "Ready for update." is displayed.
● Before the software starts, make sure that the standby screen is
displayed and that your FOMA terminal is in a place with a strong
signal.
● When there is insufficient battery power for the software update at
the reserved time, the software update will be performed at the
same time the following day.
● The software will not be updated while mounting with a USB
connection, during OS version upgrade, during MTP connection at
the reserved time.
● When an alarm, etc. is set at the same time as the reserved time,
priority will be given to the software update.
● When the T-01C is turned off during the time reserved for the
software update, the software update will be performed at the
same time as the reserved time when the T-01C is turned on
again.
145
Appendix/Index
Main specifications
■Package
Product name T-01C
Size Approx. 126 (H) x 62 (W) x 11.9 (D) mm
Weight Approx. 149 g (with battery pack attached)
Memory ROM 1024 MB
RAM 512 MB
Continuous
standby
time
FOMA/3G At rest (automatic): approx. 370 hours
Mobile (automatic): approx. 330 hours
Mobile (3G fixed): approx. 330 hours
GSM At rest (automatic): approx. 250 hours
Continuous
talk time
FOMA/3G Approx. 280 minutes
GSM Approx. 260 minutes
Charging time by FOMA
AC Adapter (sold
separately)
When FOMA charging microUSB adapter T01
is used: approx. 200 minutes
When desktop holder is used: approx.
160 minutes
Charging time by FOMA
DC Adapter (sold
separately)
When FOMA charging microUSB adapter T01
is used: approx. 200 minutes
When desktop holder is used: approx.
160 minutes
LCD Type TFT
Size Approx. 4.0 inches
Number of
colors
262,144
Number of
pixels
480 (H) x 854 (V) (full wide VGA)
Image
pickup
device
Type CMOS
Size 1/2.5 inch
Effective camera pixels Approx. 12.2 million
Max. recorded pixels Approx. 12 million
Digital zoom Max. approx. 4x (20 steps)
Music
playback
WMA file Continuous playback time: approx. 680
minutes (compatible with background
playback)
MP3 files Continuous playback time: approx. 660
minutes (compatible with background
playback)
Wireless LAN IEEE802.11b/g-compliant
Bluetooth
Function
Compatible
version
Bluetooth standard Ver.2.1 + EDR*1
Output Bluetooth standard Power Class 1
Distance with
no
obstructions in
sight*2
Within approx. 10 m
Compatible
profiles*3
HFP, HSP, OPP, HID, A2DP, AVRCP, PBAP,
SDP
*1 This FOMA terminal and all Bluetooth devices have been confirmed as
being compatible with the Bluetooth standard by methods determined by
Bluetooth SIG, and have acquired certification. Note, however, that
operation methods may differ according to the properties and specifications
of connected devices, and that data communications sometimes cannot be
performed even if connections are made.
*2 Changes according to objects obstructing devices and signal reception.
*3 These are created by standardizing connection procedures for Bluetooth
communications according to individual product properties.
● Continuous talk time is an estimate of the time that you can talk on
your FOMA terminal when the signal can be sent and received
normally.
● Continuous standby time is an estimate of the time when the signal
can be received normally.
The standby time may be reduced by about half depending on the
battery charging status, functions used, temperature and other
operating environment conditions, and signal strength (no signal or
weak signal).
146
Appendix/Index
● Talk time (communications) and standby time are shortened when
and Internet connection is used. The talk time (communications) and
standby time are also shortened when email is composed or
applications are activated even if you are not talking or an Internet
connection is not made.
● The continuous standby time at rest is the average available time in
an at rest state when the signal can be received normally.
● The continuous standby time when mobile is the average available
time in an area where the signal can be received normally, and in an
At rest, Mobile and Outside the service area state.
● Charging times were calculated when this FOMA terminal was turned
off and the battery pack was charged in a completely run down state.
The charging time increases when the battery pack is charged while
your FOMA terminal is turned on.
■Battery pack
Product name Battery Pack T03
Battery Lithium-ion
Nominal voltage 3.7 V
Nominal capacity 1300 mAh
File format
Still pictures and video shot on your FOMA terminal are saved in the
following file formats.
Type File format Extension
Still pictures JPEG jpg
Video 3GPP 3gp
■Approximate number of still pictures that can be shot
Resolution Number that can be saved on microSD card (2 GB)
640×480 (VGA) Approx. 20480
854×480 (FWVGA) Approx. ●●●●●
2592×1944 (5M) Approx. ●●●●●
4000×3000 (12M) Approx. ●●●●●
* Shooting conditions, zoom: not used, image quality: normal
■Approximate video shooting time
Resolution
Shooting time that can be saved on microSD card (2 GB)
320×240 (QVGA) Approx. ●●● minutes
640×480 (VGA) Approx. 340 minutes
848×480 (FWVGA) Approx. ●●● minutes
1280×720 (HD) Approx. ●●● minutes
* Shooting conditions, zoom: not used, image quality: normal, type:
video+audio
■Approximate 1Seg recording time
Recording time that can be saved on microSD card (2 GB)
Approx. 600 minutes
* Changes according to the amount of free space on the microSD card and
content of program (size of data broadcast, etc.) to be recorded.
147
Appendix/Index
Specific absorption rate (SAR) of
Mobile phones
This model [T-01C] mobile phone complies with Japanese technical
regulations and international guidelines regarding exposure to radio
waves.
This mobile phone was designed in observance of Japanese technical
regulations regarding exposure to radio waves (*1) and limits to
exposure to radio waves recommended by a set of equivalent
international guidelines. This set of international guidelines was set out
by the International Commission on Non-Ionizing Radiation Protection
(ICNIRP), which is in collaboration with the World Health Organization
(WHO), and the permissible limits include a substantial safety margin
designed to assure the safety of all persons, regardless of age and
health condition.
The technical regulations and international guidelines set out limits for
radio waves as the Specific Absorption Rate, or SAR, which is the value
of absorbed energy in any 10 grams of tissue over a 6-minute period.
The SAR limit for mobile phones is 2.0 W/kg. The highest SAR value for
this mobile phone when tested for use at the ear is 0.487 W/kg. There
may be slight differences between the SAR levels for each product, but
they all satisfy the limit.
The actual SAR of this mobile phone while operating can be well below
that indicated above. This is due to automatic changes to the power
level of the device to ensure it only uses the minimum required to reach
the network. Therefore in general, the closer you are to a base station,
the lower the power output of the device.
This mobile phone can be used in positions other than against your ear.
This mobile phone satisfies the international guidelines when used with
a carrying case or a wearable accessory approved by NTT DOCOMO,
INC.(*2) In case you are not using the approved accessory, please use
a product that does not contain any metals, and one that positions the
mobile phone at least 1.5 cm away from your body.
The World Health Organization has stated that present scientific
information does not indicate that there are harmful effects attributed to
the use of mobile devices. They recommend that if you are worried
about your exposure then you can limit your usage or simply use a
hands-free kit to keep the mobile device away from the head and body.
Please refer to the WHO website if you would like more detailed
information.
http://www.who.int/docstore/peh-emf/publications/facts_press/fact_english.htm
Please refer to the websites listed below if you would like more detailed
information regarding SAR.
Ministry of Internal Affairs and Communications Website:
http://www.tele.soumu.go.jp/e/sys/ele/index.htm
Association of Radio Industries and Businesses Website:
http://www.arib-emf.org/index02.html (in Japanese only)
NTT DOCOMO, INC. Website:
http://www.nttdocomo.co.jp/english/product/sar/
FUJITSU LIMITED Website:
http://www.fmworld.net/product/phone/sar/
*1: Technical regulations are defined by the Ministerial Ordinance Related to
Radio Law (Article 14-2 of Radio Equipment Regulations).
*2: Regarding the method of measuring SAR when using mobile phones in
positions other than against the ear, international standards (IEC62209-2)
were set in March of 2010. On the other hand, technical regulation is
currently being deliberated on by national council. (As of November, 2010)
148
Appendix/Index
FCC notice
This device complies with part 15 of the FCC Rules. Operation is
subject to the following two conditions: (1) This device may not cause
harmful interference, and (2) this device must accept any interference
received, including interference that may cause undesired operation.
Note:
This equipment has been tested and found to comply with the limits for
a Class B digital device, pursuant to part 15 of the FCC Rules. These
limits are designed to provide reasonable protection against harmful
interference in a residential installation. This equipment generates,
uses, and can radiate radio frequency energy and, if not installed and
used in accordance with the instructions, may cause harmful
interference to radio communications. However, there is no guarantee
that interference will not occur in a particular installation. If this
equipment does cause harmful interference to radio or television
reception, which can be determined by turning the equipment off and
on, the user is encouraged to try to correct the interference by one or
more of the following measures:
- Reorient or relocate the receiving antenna.
- Increase the separation between the equipment and receiver.
- Connect the equipment into an outlet on circuit different from that to
which the receiver is connected.
- Consult the dealer or an experienced radio/TV technician for help and
for additional suggestions.
Warning
The user is cautioned that changes or modifications not expressly
approved by the manufacturer could void the user's authority to operate
the equipment.
FCC RF exposure information
This model phone is a radio transmitter and receiver.
It is designed and manufactured not to exceed the emission limits for
exposure to radio frequency (RF) energy set by the Federal
Communications Commission of the U.S. Government.
The guidelines are based on standards that were developed by
independent scientific organizations through periodic and thorough
evaluation of scientific studies. The standards include a substantial
safety margin designed to assure the safety of all persons, regardless
of age and health.
The exposure standard for wireless handsets employs a unit of
measurement known as the Specific Absorption Rate, or SAR. The SAR
limit set by the FCC is 1.6 W/kg.
The tests are performed in positions and locations (e.g., at the ear and
worn on the body) as required by the FCC for each model.
The SAR value for this model handset when tested for use at the ear is
0.502 W/kg and when worn on the body, as described in this user guide,
is 0.666 W/kg.
149
Appendix/Index
Body-worn operation
This phone was tested for typical body-worn operations with the back of
the phone kept at a distance of 1.5 cm from the body. To maintain
compliance with FCC RF exposure requirements, use accessories that
maintain a 1.5 cm separation distance between your body and the back
of the phone. The use of belt clips, holsters and similar accessories
should not contain metallic components.
The use of accessories that do not satisfy these requirements may not
comply with FCC RF exposure requirements, and should be avoided.
The FCC has granted an Equipment Authorization for this model
handset with all reported SAR levels evaluated as in compliance with
the FCC RF emission guidelines. SAR information on this model
handset is on file with the FCC and can be found under the Display
Grant section of http://www.fcc.gov/oet/ea/fccid/ after searching on FCC
ID YUW-TU12-J01.
Additional information on Specific Absorption Rates (SAR) can be found
on the Cellular Telecommunications & Internet Association (CTIA)
website at
http://www.phonefacts.net.
Declaration of Conformity
The product "T-01C" is declared to conform with the essential
requirements of European Union Directive 1999/5/EC Radio and
Telecommunications Terminal Equipment Directive 3.1(a), 3.1(b) and
3.2.
The Declaration of Conformity is found on
http://www.fmworld.net/product/phone/doc/
(Japanese only)
This mobile phone complies with the EU requirements for exposure to
radio waves.
Your mobile phone is a radio transceiver, designed and manufactured
not to exceed the SAR* limits** for exposure to radiofrequency (RF)
energy, which SAR* value, when tested for compliance against the
standard was 0.386 W/kg. While there may be differences between the
SAR* levels of various phones and at various positions, they all meet***
the EU requirements for RF exposure.
* The exposure standard for mobile phones employs a unit of measurement
known as the Specific Absorption Rate, or SAR.
** The SAR limit for mobile phones used by the public is 2.0 watts/kilogram
(W/kg) averaged over ten grams of tissue, recommended by The Council
of the European Union. The limit incorporates a substantial margin of
safety to give additional protection for the public and to account for any
variations in measurements.
*** Tests for SAR have been conducted using standard operating positions
with the phone transmitting at its highest certified power level in all tested
frequency bands. Although the SAR is determined at the highest certified
power level, the actual SAR level of the phone while operating can be well
below the maximum value. This is because the phone is designed to
operate at multiple power levels so as to use only the power required to
reach the network. In general, the closer you are to a base station
antenna, the lower the power output.
150
Appendix/Index
Export Administration Regulations
The Japanese Export Administration Regulations ("Foreign Exchange
and International Trade Law" and its related laws) will be applied to this
product and its accessories under certain conditions. The Export
Administration Regulations are also applied. To export or reexport this
terminal and its accessories, conduct all legally required procedures at
your own risk and expense. For details on the procedures, contact the
Ministry of Economy, Trade and Industry or the US Department of
Commerce.
Intellectual property right
Copyrights
The rights of the creators and their creations, such as music, images,
computer programs, databases, etc., are protected by the Copyright
Act. Reproduction of works such as these can be done only for the
purpose of individual or home use. Legal or financial penalties may be
incurred for "infringement of copyright" or "infringement of author's
individual rights" for use of materials without the copyright holder's
permission for other than the above purposes, such as of reproduction
(including conversion of data format), alteration, transfer of
reproductions, and distribution on a network. If you make reproductions,
etc. using this product, please strictly observe the Copyright Act and be
mindful of appropriate use. Furthermore, this product is equipped with
camera functions. Please be mindful of appropriate use in the same
way as above also for recordings made using these camera functions.
Rights of portrait
Right of portrait is the right to assert your not having your photograph
taken by other parties without your consent, or having taken
photographs posted or used otherwise without your consent. Right of
portrait includes individual rights granted to everybody and property
rights (publicity rights) intended for economic gain such as in the case
of TV and film personalities. Accordingly, bear in mind appropriate use
of camera functions since the taking, posting and distribution of other
people's images and TV and film personalities' images without their
permission is an illegal act.
151
Appendix/Index
Trademarks
The company names and product names appearing in this manual
are trademarks or registered trademarks of their respective
holders.
● "FOMA", "Deco-mail", "i-mode", "i-αppli", "WORLD CALL", "WORLD
WING", "mopera U" and "ToruCa" are trademarks or registered
trademarks of NTT DOCOMO, INC.
● (The) microSDHC logo is a trademark of SD-3C, LLC.
● The Bluetooth word mark and logos are owned by the Bluetooth SIG,
inc. and any use of such marks by NTT DOCOMO, INC. is under
license. Other trademarks and trade names are
those of their respective owners.
● Wi-Fi® is a registered trademark of Wi-Fi Alliance.
● "Catch Phone (Call waiting service)" is a registered trademark of
Nippon Telegraph and Telephone Corporation.
● Adobe and Flash are either registered trademarks or trademarks of
Adobe Systems Incorporated in the United States and/or other
countries.
● Excel® and PowerPoint® are trademarks or registered trademarks of
Microsoft Corporation in the U.S.A. and other countries.
● Microsoft® Word is a product name of Microsoft Corporation in the
U.S.A.
● This product contains NetFront Browser and NetFront Document
Viewer of ACCESS CO., LTD.
ACCESS, the ACCESS logo, and NetFront are registered trademarks
or trademarks of ACCESS CO., LTD. in the United States, Japan and/
or other countries.
Copyright (c) 2010 ACCESS CO., LTD. All rights reserved.
This software is based in part on the work of the Independent JPEG
Group.
● "DCMX" and the "DCMX" logo are registered trademarks of NTT
DOCOMO, INC.
● "iD" is a registered trademark of NTT DOCOMO, INC.
● ATOK® is a registered trademark of JustSystems
Corporation in Japan and other countries.
● ArcSoft and the ArcSoft logo are registered
trademarks of ArcSoft, Inc. in the United States,
P. R. China, EU, and Japan.
● REGZA, REGZA Phone, Mobile REGZA Engine, and REGZA LINK
are trademarks of TOSHIBA CORPORATION.
● Qosmio is a registered trademark or trademark of TOSHIBA
CORPORATION.
● SPB is a trademark of SPB Software Inc.
● FeliCa is a contactless IC card technology developed by Sony
Corporation. FeliCa is a registered trademark of Sony Corporation.
● is a registered trademark of FeliCa Networks, Inc.
● "mosimo camera®" is registered trademark of AITIA
Corporation.
● Copyright(C) 2010 DigiOn, Inc. All rights reserved.
DiXiM is a registered trademark of DigiOn, Inc.
● StationMobile® is trademark of PIXELA
CORPORATION.
● Twitter is a trademark of Twitter, Inc., and is used under license.
● Facebook is a trademark of Facebook, Inc.
● Flickr is a trademark of Yahoo! Inc.
● "mixi" and "mymixi" are trademark and/or registered trademark of
mixi, Inc.
● Google, Google logo, Gmail, Gmail Logo, Picasa, Picasa Logo,
YouTube, and the YouTube Logo are trademarks of Google, Inc.
● All other company names and product names are trademarks or
registered trademarks of respective companies referred to in this
manual.
152
Appendix/Index
More
Under the MPEG-4 Visual Patent Portfolio License, customers have
licensed permission for the following use of this product to engage in
non-profit personal use. Other uses are not permitted.
● Recording MPEG-4 Visual standard video (henceforth referred to as
MPEG-4 Video)
● Playing back MPEG-4 Video that a customer engaged in personal
and non-profit activities has recorded
● Playing back MPEG-4 Video obtained from a provider licensed by
MPEG-LA
When using for promotion, in-house use, profit use, and other intended
uses, contact MPEG LA. LLC.
● This product is licensed under the AVC patent portfolio license for the
personal and noncommercial use of a consumer to (i) encode video
in compliance with the AVC standard (henceforth referred to as AVC
video) and/or (ii) decode AVC video that was encoded by a consumer
engaged in a personal and noncommercial activity and/or was
obtained from a video provider licensed to provide AVC video. No
license is granted or shall be implied for any other use. Additional
information may be obtained from MPEG LA, L.L.C.
See HTTP://WWW.MPEGLA.COM
● This product is licensed under the VC-1 Patent Portfolio License for
the personal and noncommercial use of a consumer to (i) encode
video in compliance with the VC-1 standard (henceforth referred to as
VC-1 video) and/or (ii) decode VC-1 video that was encoded by a
consumer engaged in a personal and noncommercial activity and/or
was obtained from a video provider licensed to provide VC-1 video.
No license is granted or shall be implied for any other use. Additional
information may be obtained from MPEG LA, L.L.C.
See HTTP://WWW.MPEGLA.COM
End User License Agreement
The following is a legal software license agreement between you, the
software end user, and ArcSoft, Inc. Carefully read this license
agreement before using the relevant ArcSoft software ("Software").
Installing the Software on a computer or other hardware device
indicates that you have read this license agreement and agree to its
terms.
1. Grant of License. This license permits you to use one copy of the
Software included in this package or product on any single computer.
For each software licensee, the program can be
“in use”
on only one
computer or hardware device at any given time. The Software is
“in
use”
when it is either loaded into RAM or installed into the hard disk or
other permanent memory of a computer or other hardware device. A
special license permit from ArcSoft is required if the program is going to
be installed on a network server for the sole purpose of distribution to
other computers. You may not modify, translate, reverse assemble,
decompile, disassemble or otherwise attempt (i) to defeat, avoid,
bypass, remove, deactivate or otherwise circumvent any software
protection mechanisms in the Software, including without limitation any
such mechanism used to restrict or control the functionality of the
Software, or (ii) to derive the source code or the underlying ideas,
algorithms, structure or organization from the Software (except to the
extent that such activities may not be prohibited under applicable law).
2. Copyright. The Software contained in this package or device is
protected by United States copyright laws, international treaty
provisions, and all other applicable national laws. The Software must be
treated like all other copyrighted materials (e.g. books and musical
recordings). This license does not allow the Software to be rented or
leased, and the written materials accompanying the Software (if any)
may not be copied.
3. Ownership. Title, ownership rights, and all intellectual property
rights in and to the Software and any accompanying documentation,
and any copy of the foregoing, shall remain the sole and exclusive
property of ArcSoft and/or its third party licensors. You agree to abide by
the copyright law and all other applicable laws. You acknowledge that
the Software contains valuable confidential information and trade
secrets of ArcSoft and/or its third party licensors.
153
Appendix/Index
4. Warranty Disclaimer. NO WARRANTIES, EITHER EXPRESS OR
IMPLIED, ARE MADE WITH RESPECT TO THIS SOFTWARE,
INCLUDING BUT NOT LIMITED TO THE IMPLIED WARRANTIES OF
MERCHANTABILITY AND FITNESS FOR A PARTICULAR PURPOSE
AND WARRANTIES FOR NON-INFRINGEMENT OF INTELLECTUAL
PROPERTY, AND ARCSOFT EXPRESSLY DISCLAIMS ALL
WARRANTIES NOT STATED HEREIN. YOU ASSUME THE ENTIRE
RISK AS TO THE QUALITY AND PERFORMANCE OF THE
SOFTWARE. SHOULD THE SOFTWARE PROVE DEFECTIVE, YOU,
AND NOT ARCSOFT OR AN AUTHORIZED RESELLER, ASSUME
THE ENTIRE COST OF NECESSARY SERVICING, REPAIR, OR
CORRECTION. SOME STATES DO NOT ALLOW THE EXCLUSION
OF IMPLIED WARRANTIES, SO THE ABOVE EXCLUSION MAY NOT
APPLY TO YOU. THIS WARRANTY GIVES YOU SPECIFIC LEGAL
RIGHTS, AND YOU MAY ALSO HAVE OTHER RIGHTS THAT VARY
FROM STATE TO STATE.
YOUR SOLE REMEDY AND THE ENTIRE LIABILITY OF ARCSOFT
ARE SET FORTH ABOVE. IN NO EVENT WILL ARCSOFT BE LIABLE
TO YOU OR ANY OTHER PERSON FOR ANY DAMAGES,
INCLUDING ANY INCIDENTAL OR CONSEQUENTIAL DAMAGES,
EXPENSES, LOST PROFITS, LOST SAVINGS, OR OTHER
DAMAGES ARISING OUT OF USE OF OR INABILITY TO USE SUCH
SOFTWARE.
5. No Liability for Consequential Damages. In no event shall ArcSoft
be liable for any damages whatsoever (including but not limited to
damages for loss of business profits, business interruption, loss of
business information, or any other pecuniary loss) which results from an
inability to use this Software, even if ArcSoft, Inc. has been advised of
the possibility of such damages. Because some states/jurisdictions do
not allow the exclusion or limitation of consequential or incidental
damages, the above limitations may not apply to you.
6. Export. Subject to permission of the appropriate United States or
foreign licenses, export or re-export the product incorporating the
Software is able to be made.
7. U.S. Government Restricted Rights. If you are a unit or agency of
the United States government, the Software and related documentation
are deemed to be "commercial computer software”
and "commercial
computer software documentation," respectively, pursuant to DFAR
Section 227.7202 and FAR Section 12.212(b), as applicable. Any use,
modification, reproduction, release, performing, displaying or disclosing
of the Software and/or the related documentation by the United States
government shall be governed solely by the terms of this Agreement
and shall be prohibited except to the extent expressly permitted by the
terms of this Agreement. Any technical data provided that is not covered
by the above provisions is deemed to be
“technical data commercial
items”
pursuant to DFAR Section 227.7015(a). Any use, modification,
reproduction, release, performing, displaying or disclosing of such
technical data shall be governed by the terms of DFAR Section
227.7015(b).
8. High Risk Activities. The Software is not fault-tolerant and is not
designed or intended for use in hazardous environments requiring
fail-safe performance, or any other application in which the failure of the
Software could lead directly to death, personal injury, or severe physical
or property damage (collectively, "High Risk Activities"). ARCSOFT
EXPRESSLY DISCLAIMS ANY EXPRESS OR IMPLIED WARRANTY
OF FITNESS FOR HIGH RISK ACTIVITIES.
9. Termination. Your rights with respect to the Software may be
terminated, either immediately or after a notice period not exceeding
thirty (30) days, upon unauthorized copying of the Software or failure to
comply with the restrictions contained in this license agreement. Upon
termination of the license, you shall cease to use thereof.
10. Governing Law. If this product was purchased in the United
States, this Agreement is governed by the laws of the state of California;
otherwise, local laws may apply.
154
Appendix/Index
Adobe Flash Lite™ End User License Agreement
(i) a prohibition against distribution and copying, (ii) a prohibition against
modifications and derivative works, (iii) a prohibition against
decompiling, reverse engineering, disassembling, and otherwise
reducing the software to a human-perceivable form, (iv) a provision
indicating ownership of software by this device manufacturer and its
suppliers, (v) a disclaimer of indirect, special, incidental, punitive, and
consequential damages, and (vi) other industry standard disclaimers
and limitations, including, as applicable: a disclaimer of all applicable
statutory warranties, to the full extent allowed by law, a limitation of
liability not to exceed the price of this product, and/or a provision that
the end user's sole remedy shall be a right of return and refund, if any,
from this device manufacturer.
Open Source Software
This product contains Android software developed by Google Inc. and
the following open source software complying with Apache License,
Version 2.0 (http://www.apache.org/licenses/).
● httpmime-4.0.1.jar
● httpmime-4.1-alpha2.jar
● apache-mime4j-0.6.jar
● signpost-commonshttp4-1.2.1.1.jar
● signpost-core-1.2.1.1.jar
This product contains software complying with GNU General Public
License (GPL), GNU Lesser General Public License (LGPL), etc. For
more information, refer to the following website.
http://www.fmworld.net/product/phone/sp/android/develop/
RSS rules of use
"News RSS Reader" palette
● The "News RSS Reader" palette uses the RSS (Rich Site Summary)
provided by the following RSS providers.
● RSS distributed by the "News RSS Reader" palette is operated in
accordance with terms of service by the following RSS providers.
● DOCOMO does not guarantee RSS distributed by respective
companies.
● RSS distributed by respective companies is subject to suspension or
stoppage without notice at the convenience of the following RSS
providers.
● Terms of service of RSS distribution by respective companies are
subject to change without notice at the convenience of the following
RSS providers.
● Check the terms of service and conditions of use of each RSS
provider at the following web pages.
RSS providers and terms of service
● ITmedia +D
http://www.itmedia.co.jp/info/rule/
● The Asahi Shimbun Co.
http://mini.asahi.com/rssinfo.html
● Impress Watch
http://k-tai.impress.co.jp/cda/rss/ktai.rdf
● CNET Japan
http://japan.cnet.com/info/feed/
● nikkei BPnet
http://www.nikkeibp.co.jp/info/rss/
● Yahoo Japan Corporation.
http://dailynews.yahoo.co.jp/fc/
155
Appendix/Index
Copyright (c) 2000-2010 CBS Interactive, Inc. All Rights Reserved.
'CNET' and 'CNET News.com' are trademarks of CBS Interactive, Inc.
Copyright (c) 2010 ASAHI INTERACTIVE, Inc. All rights reserved. No
reproduction or republication without written permission.
156
Appendix/Index
Index
★保留★
157
Appendix/Index
158
Appendix/Index
159
Appendix/Index
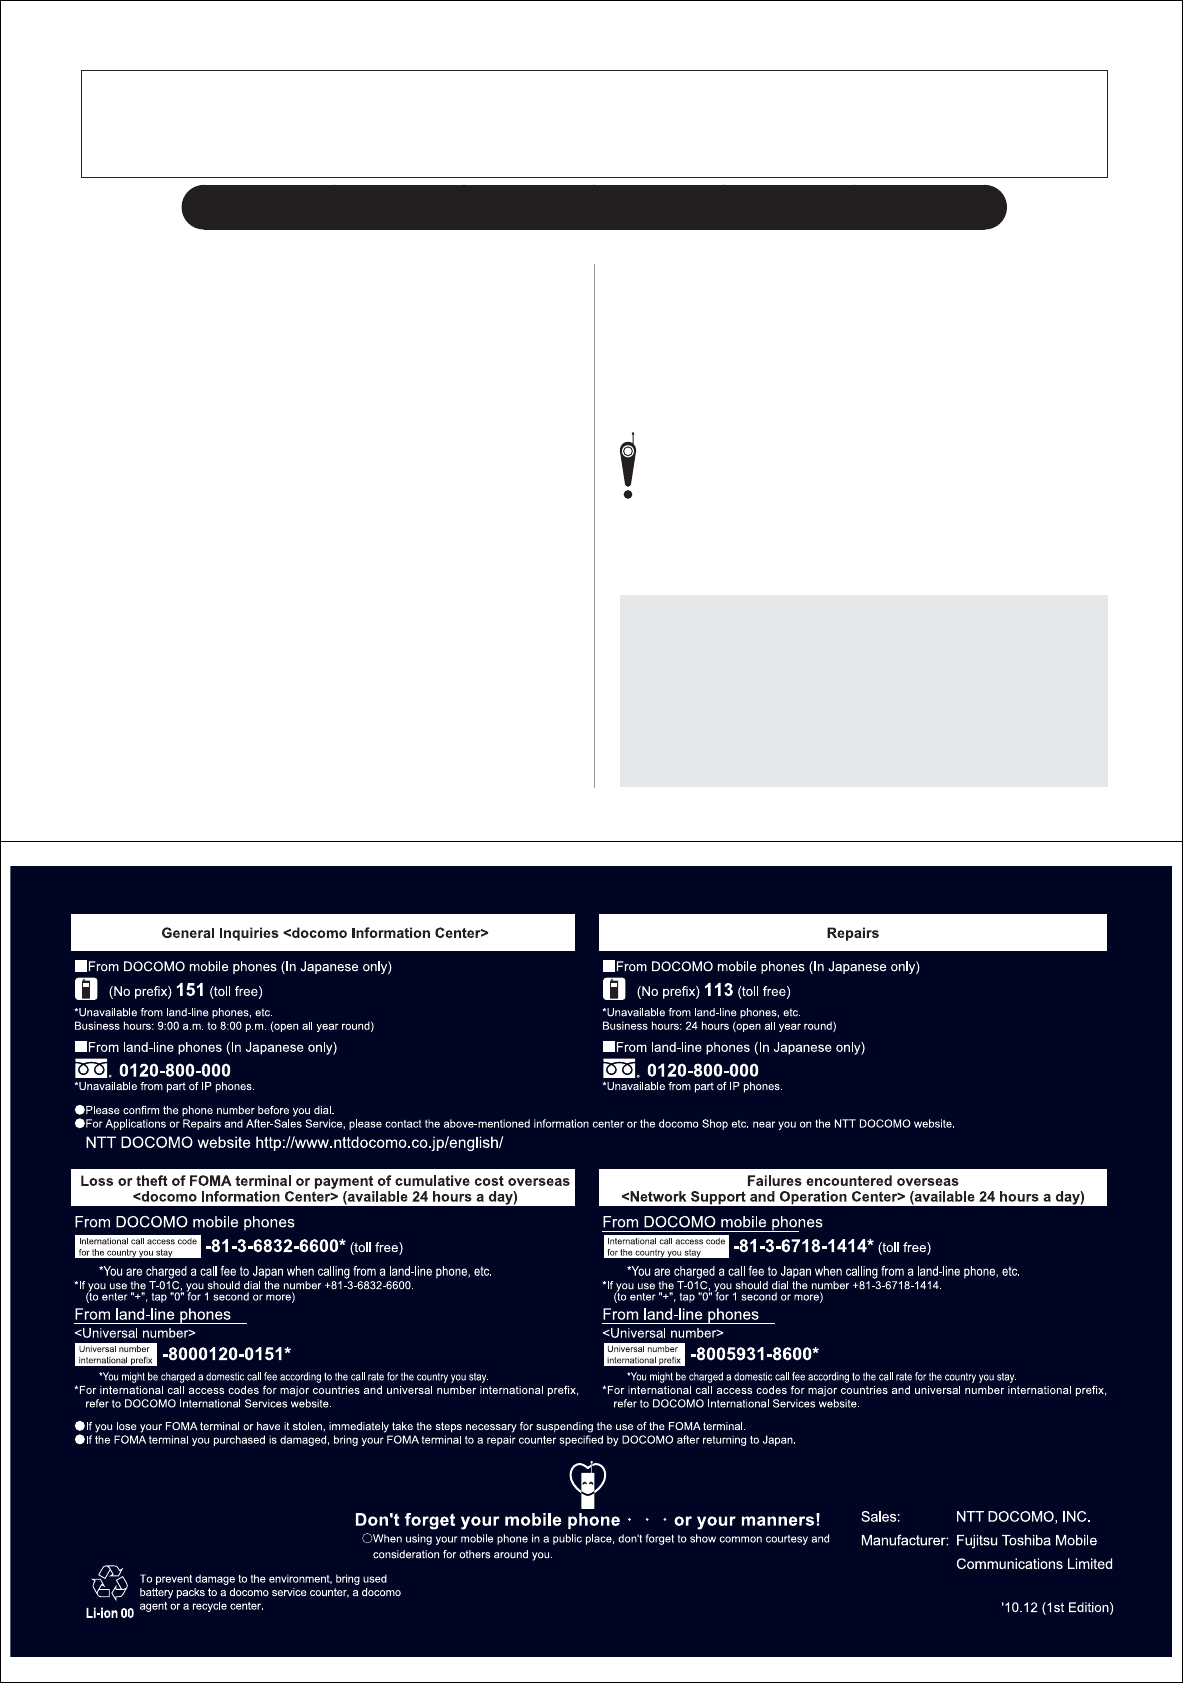
Check/change the subscription, apply for various services, and request various information materials online.
My docomo (http://www.mydocomo.com/) ⇒各種お申込・お手続き (Various Applications/Procedures) (in Japanese only)
* You will need your "docomo ID/Password" to access the site.
* If you do not have or you have forgotten your "docomo ID/Password", contact the "docomo Information Center" on the last page of this manual.
* The site may not be available depending upon the content of your subscription.
* You may not be able to access some site services due to system maintenance, etc.
Using mobile phones with good manners!
When using your FOMA terminal, please be considerate of those around you.
Turn off your FOMA terminal in the
following places
■ When in an area where use is prohibited
Be sure to turn off your FOMA terminal on an aircraft and in a
hospital.
* There are people outside hospital wards who also use electric
medical equipment. Be sure to turn off your FOMA terminal in
lobbies and waiting rooms.
■ When in crowded places such as rush-hour trains in
case somebody nearby is using an implanted cardiac
pacemaker or implanted cardioverter-defibrillator
Your FOMA terminal may adversely affect the operation of such
equipment.
Set Public mode in the following places
■ While driving
Using a mobile phone in hand while driving is regarded as a
punishable act.
* This excludes unavoidable situations such as helping an injured or
sick person or maintaining public safety.
■ When in public places such as theaters, movie
theaters, or museums.
Use of your FOMA terminal in quiet places will annoy others.
Be careful of where you use your FOMA terminal
and the volume of your voice and ringtone
■ When using your FOMA terminal in a restaurant or a
hotel lobby, lower your voice and other sounds.
■
In crowded places, be careful not to obstruct other pedestrians.
Be considerate of the privacy of
individuals around you
Please be considerate of the privacy of individuals around you
when shooting and sending pictures using a camera-enabled
mobile phone.
The following functions will help you to
keep good manners in public
There are useful functions you can use to set your FOMA terminal not
to answer incoming calls, and to silence all sounds.
[Manner mode]→P. 59
Silences the ringtone, music, video and other sounds from your
FOMA terminal.
[Public mode (Drive mode/Power off)]→P. 53
The caller hears a guidance message stating that the receiver is
driving or is in a place where the receiver should turn off the power,
and cannot answer the call.
[Vibrator]→P. 60
Notifies incoming calls by vibration.