Fujitsu F09B2 Mobile Phone User Manual
Fujitsu Limited Mobile Phone Users Manual
UserManual.wiki
>
Fujitsu
>
F09B2 User Manual
Users Manual
Navigation menu
Upload a User Manual
Namespaces
Wiki Guide
HTML
PDF
Info
Views
User Manual
Discussion / Help
Navigation
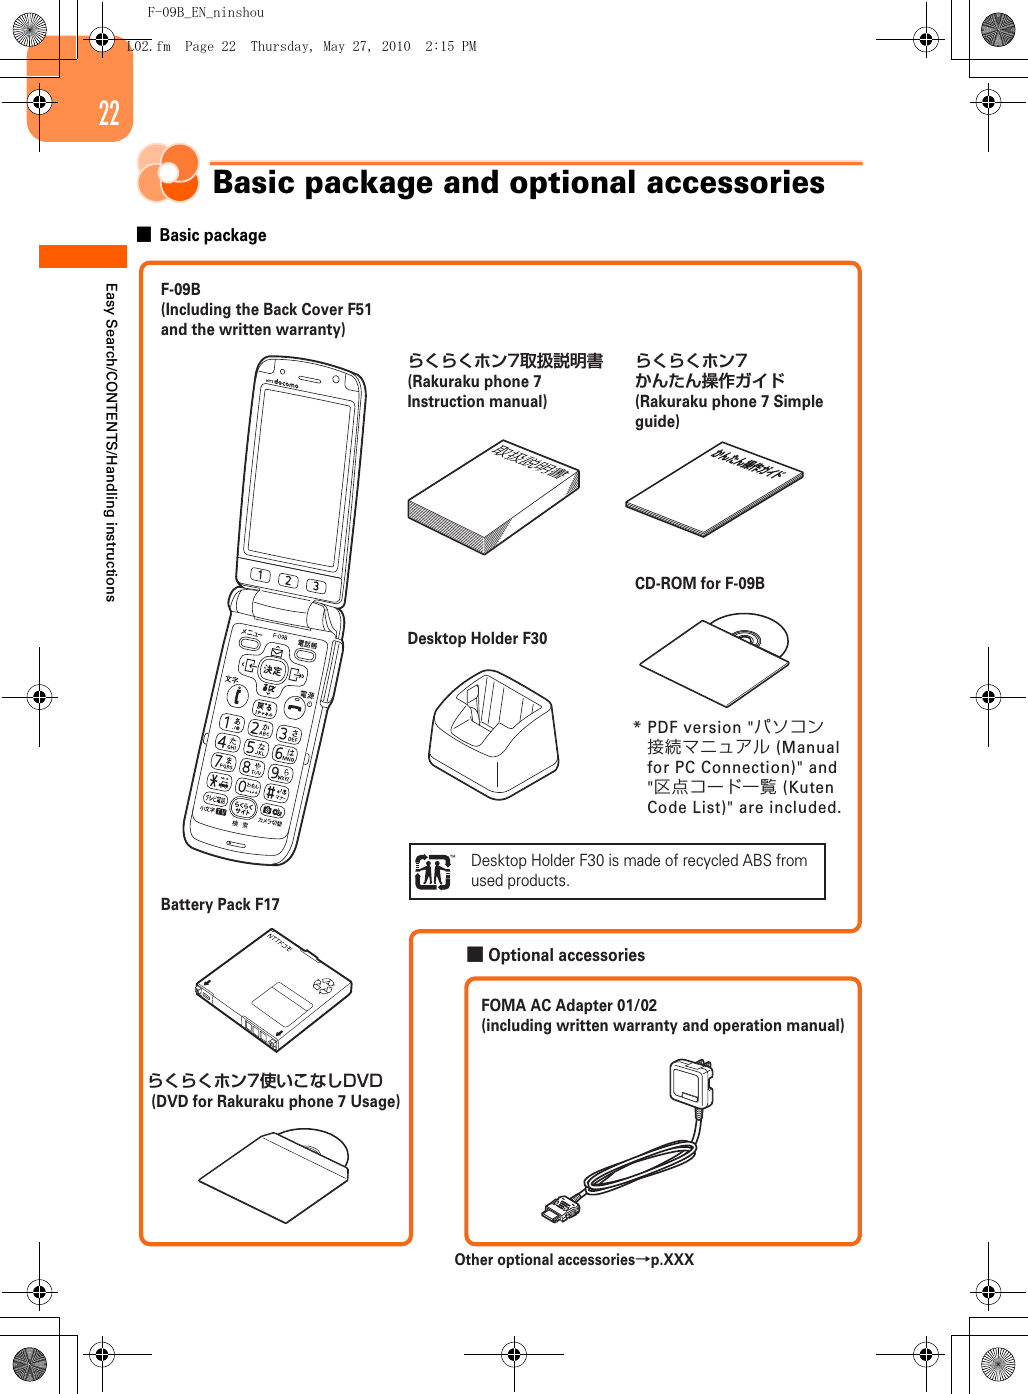
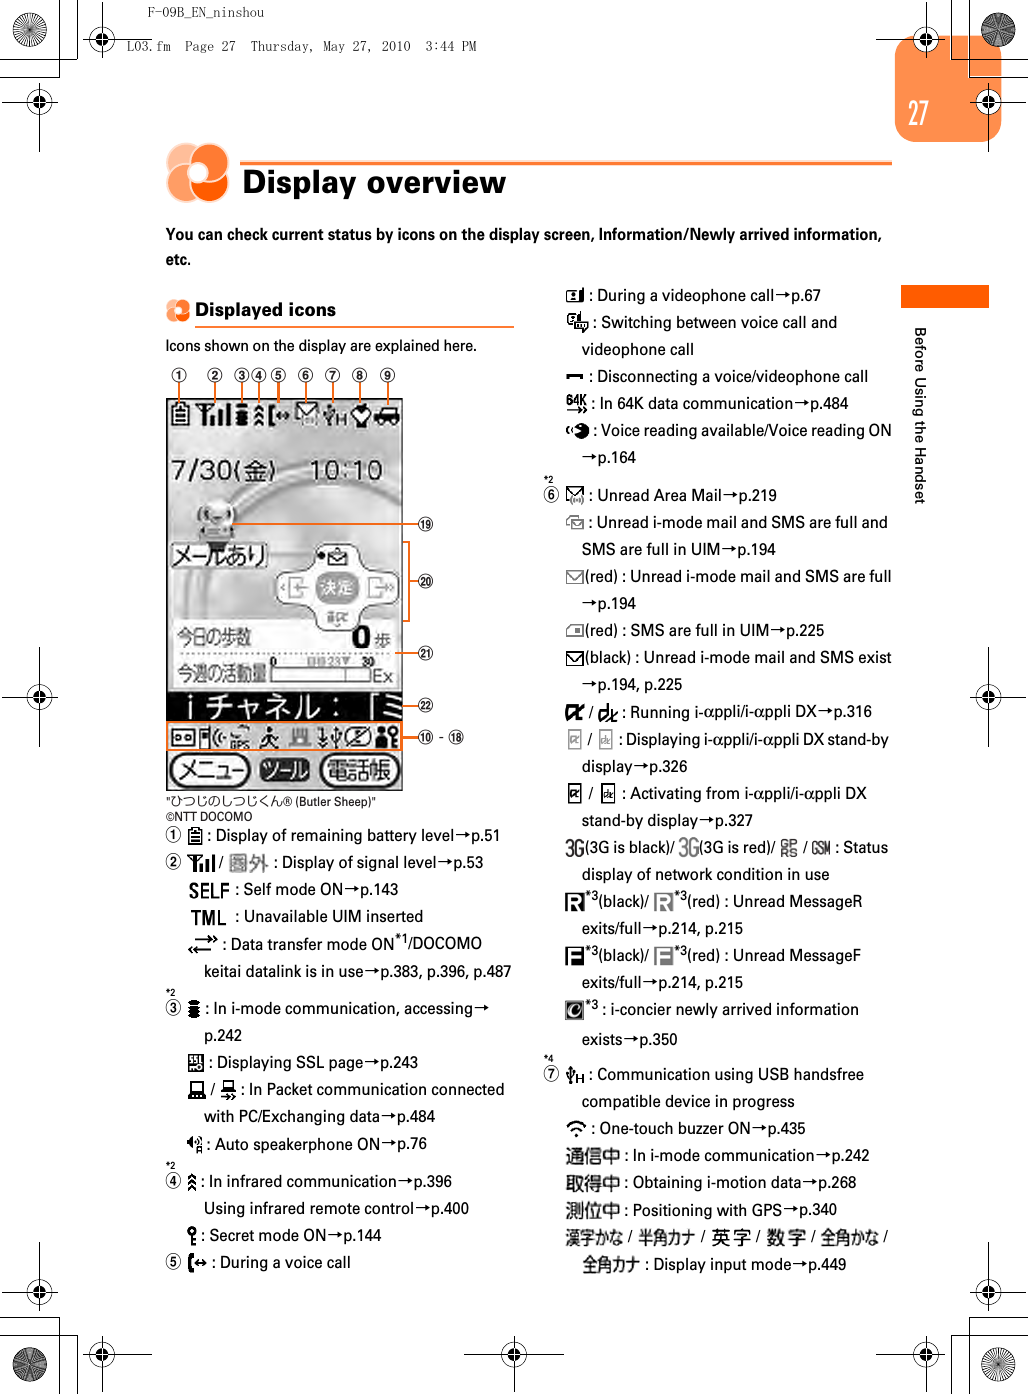
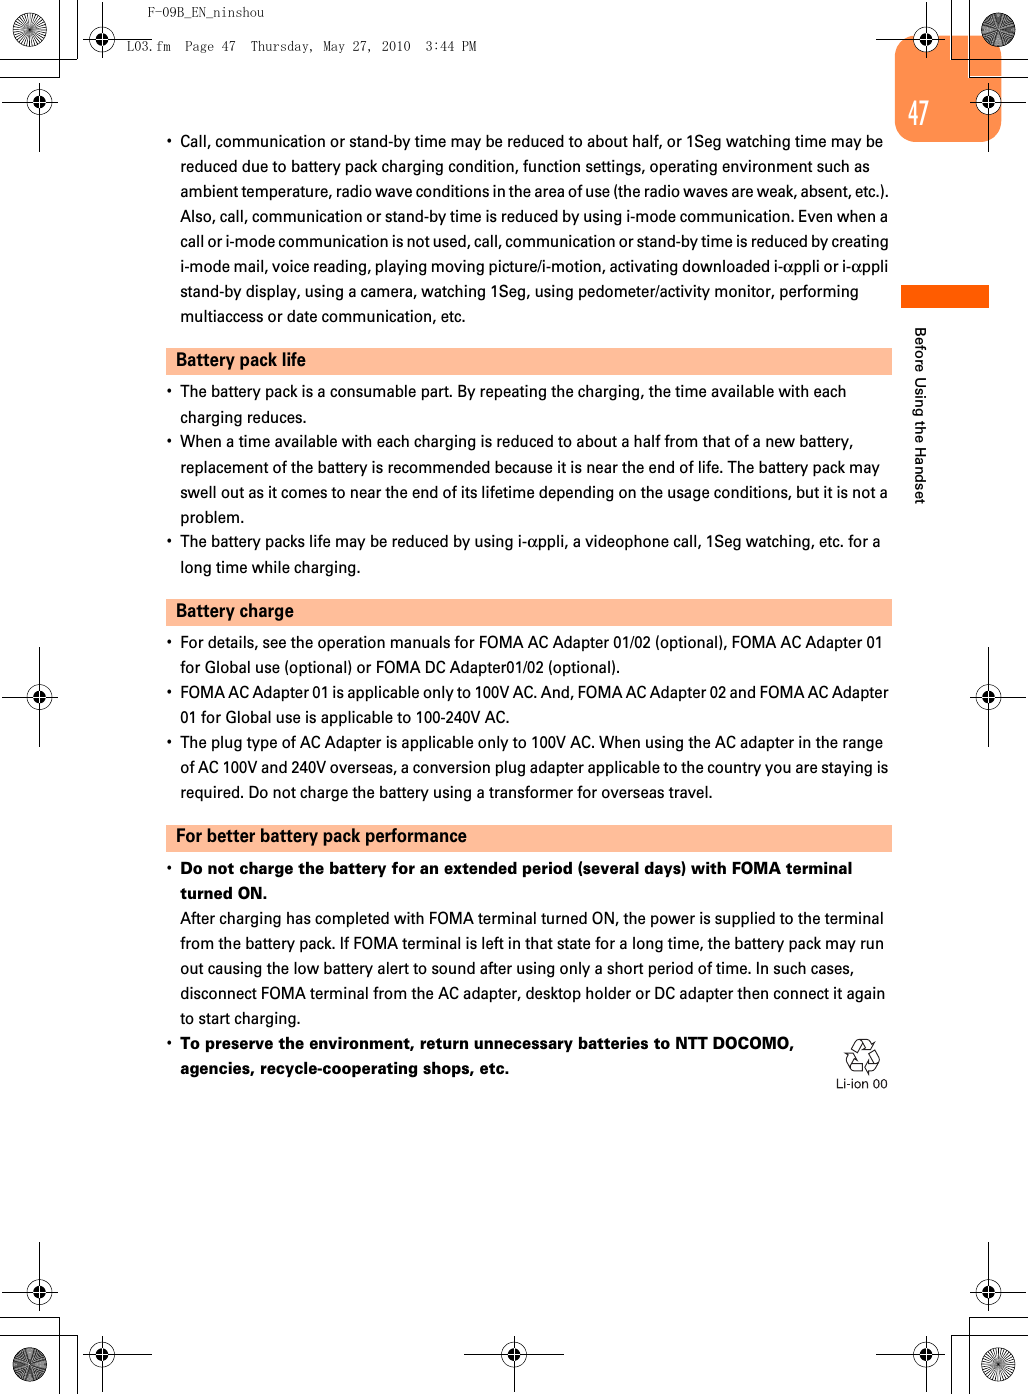
![F-09B_EN_ninshou9Easy Search/CONTENTS/Handling instructionsVarious security settingsOmakase Lock*Omakase Lock is a service that locks FOMA terminal on request from the subscriber. Even if the holder of FOMA terminal is different from its subscriber, the terminal may be locked on request from the subscriber.→p.143* If you are the member of docomo Premier Club, you can use the service any number of times with no commission. If you are not the member of docomo Premier Club, you are charged for the service (however, you are not charged if you subscribe to this service at the same time as service interruption or during interruption.). For precautions and detailed procedure for using this service, refer to "Mobile Phone User's Guide [i-mode] FOMA version".Data Security Service*This is a service to back up the phonebook with automatic update. This service allows you to store phonebook, images or mails saved in FOMA terminal to Data Center and restore the saved data in case of misplacement of FOMA terminal etc. You can also send broadcast notice when you change your mail address. A PC (My docomo) provides you with more convenient usage.→p.152* This is an optional service to be charged requiring subscription. For precautions and detailed procedure for using this service, see "Mobile Phone User's Guide [i-mode] FOMA version".Other convenient functionsWaterproofness/DustproofnessFOMA terminal is provided with waterproofness of IPX5 and IPX7 and dustproofness of IPX5 by firmly closing the external connection jack cap and installing the back cover in a locked state.→p.18You can call or send/receive mail in the rain, bathroom, etc. If the terminal is soiled with mud, dirt, etc., you can wash it in tap water.Omakase cameraBacklight, brightness, camera shake, skew, etc. are corrected automatically. Also, a subject is automatically focused according to its movement so that you can easily shoot a clear picture using macro shooting or normal shooting.→p.281Super clear-voice 3 and Voice slowing"Super clear-voice 3 (=Voice clear)" changes the way to emphasize sound according to surrounding noise to let you hear other party's voice easily in various places. "Voice slowing" also makes it easier to hear other party's voice by adjusting the speed of other party's voice. →P999Bar code reader and magnifierUsing macro shooting function, you can use FOMA terminal as a bar code reader or magnifier.Using bar code reader, you can obtain information.→p.293One-touch buzzerBy sounding a large-volume buzzer by using a switch in emergency situation, you can notify the people around you of your current location. Also, by sounding the one-touch buzzer, you can automatically make a voice call or use GPS function to notify your current location.→p.435Infrared communicationWith devices that infrared communication function is equipped, you can exchange phonebook, photograph, etc.→p.396Pedometer/Activity monitorYou can use FOMA terminal as a pedometer or activity monitor to calculate the walked distance, consumed calories, burnt fat, activity amount, etc. In addition, you can automatically send information in the pedometer/activity monitor to the same destination on the same time every day (Pedometer auto-send mail).→p.404Healthy life diaryYou can manage data obtained by a manometer and body composition meter, and the data can be graphed into a comprehensible chart. Also, by using "からだカルテ (Medical body record)", you can get advice about health from measured result.→p.410Omakase random stand-by screenYou can set a mail address and subject to a distributor of a stand-by image so that the image attached to mail is automatically saved and displayed on the stand-by display when the received mail matches the criteria.→p.127L02.fm Page 9 Thursday, May 27, 2010 2:15 PM](https://usermanual.wiki/Fujitsu/F09B2/User-Guide-2595272-Page-9.png)
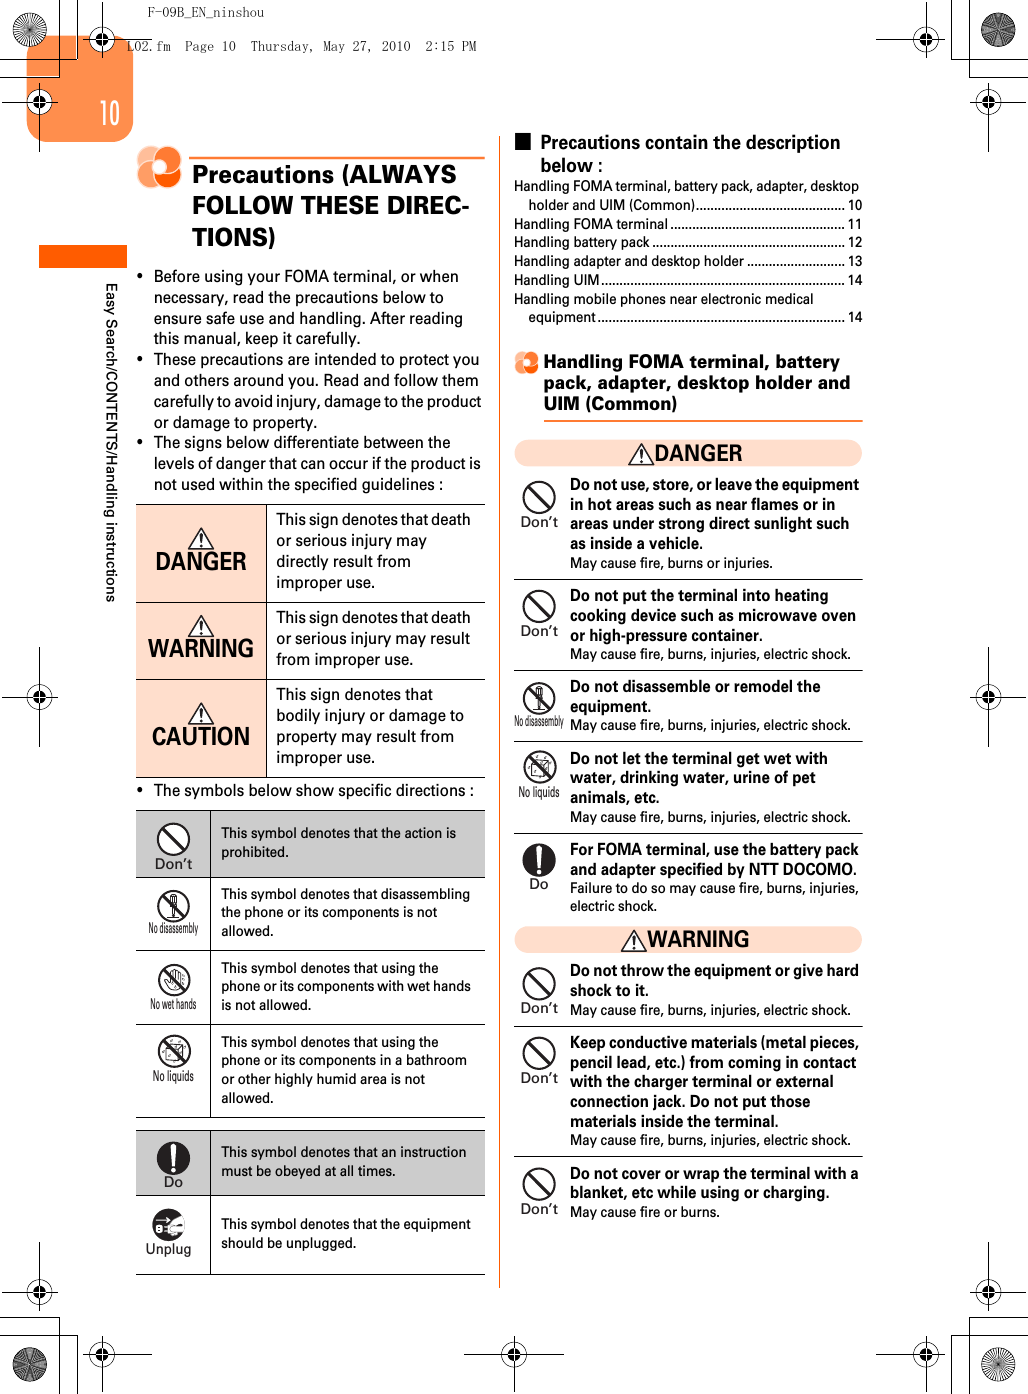

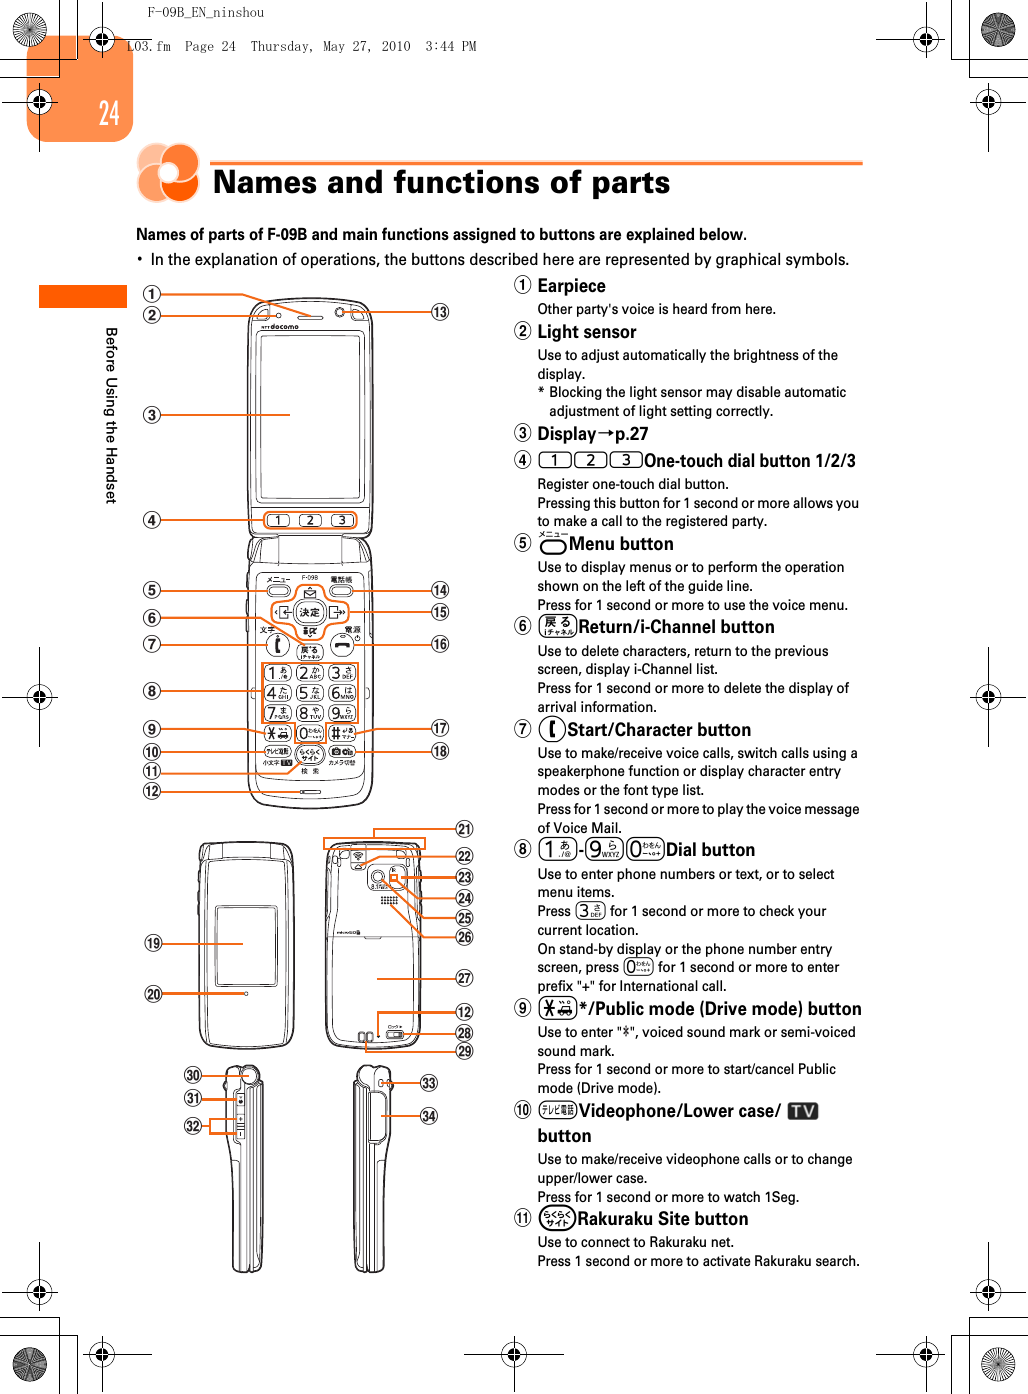

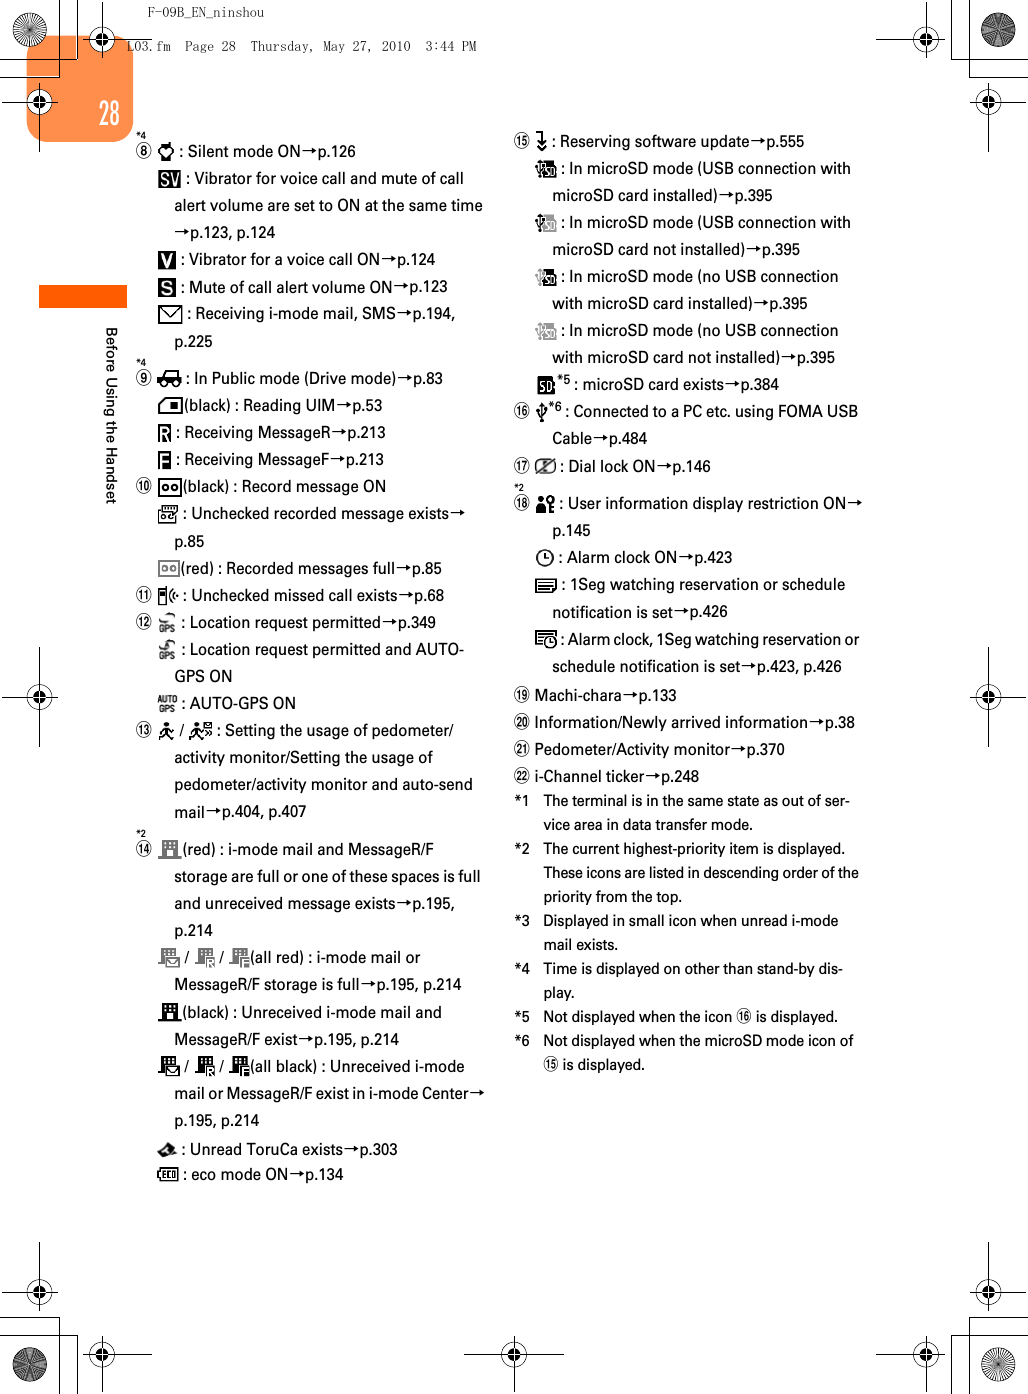

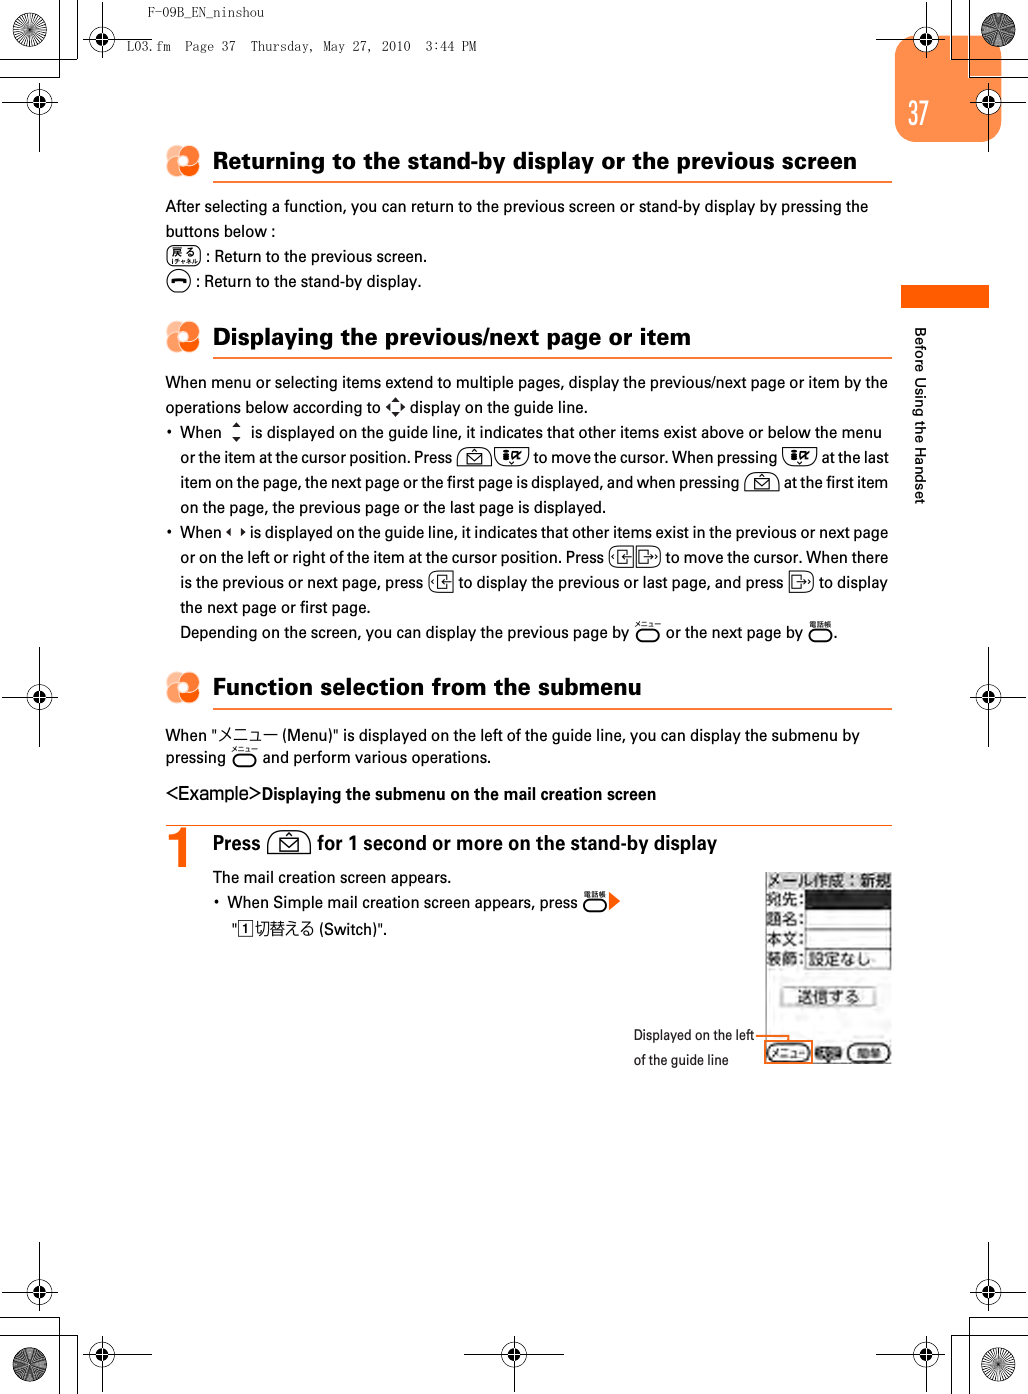
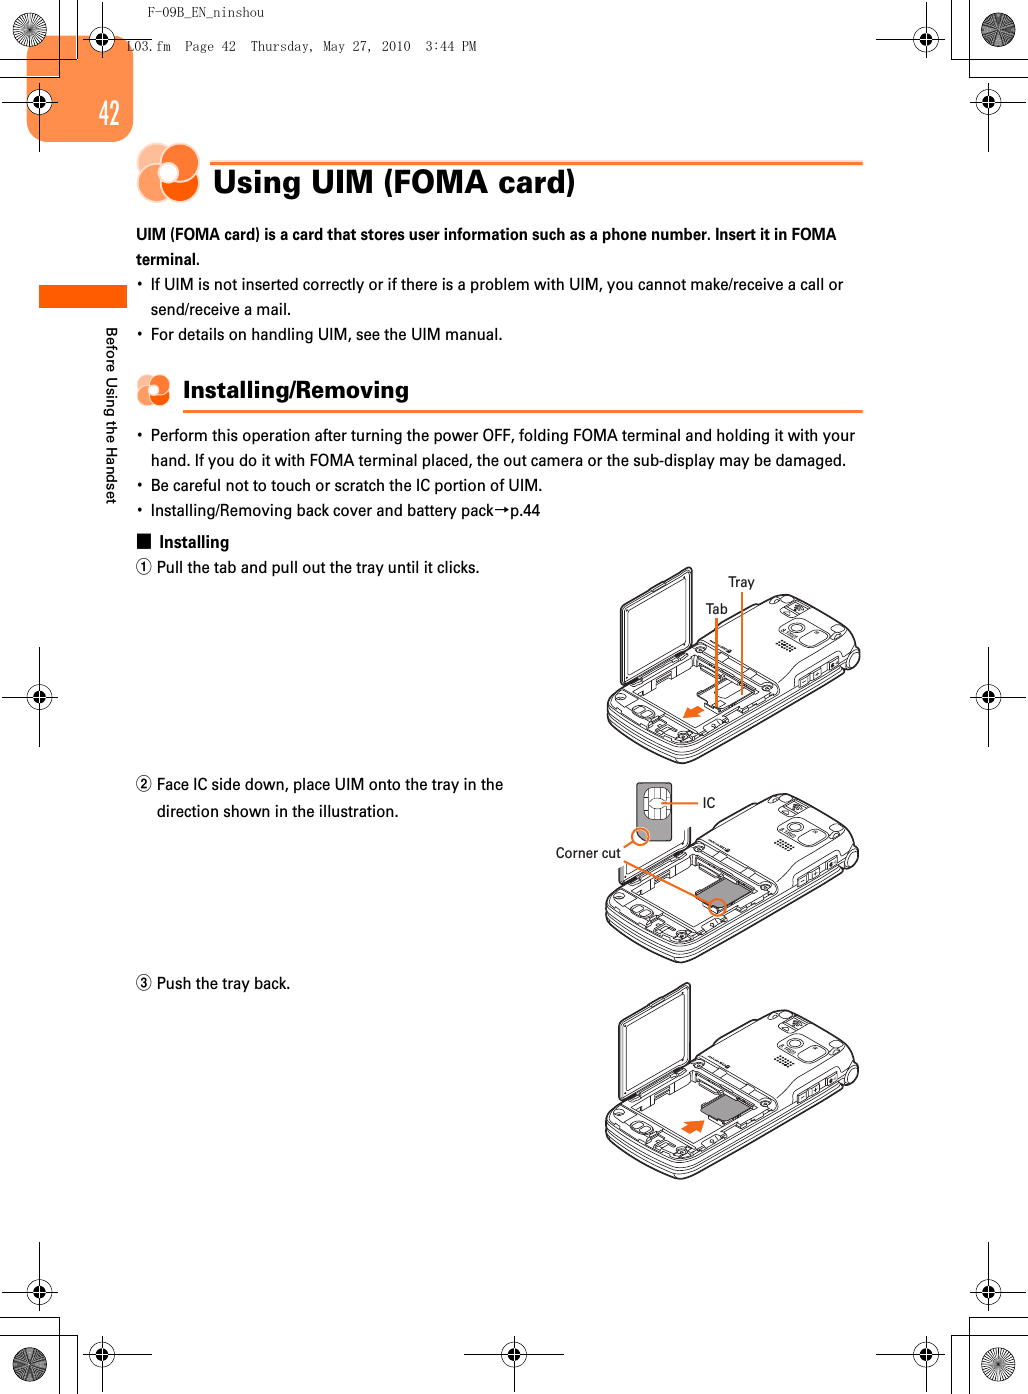
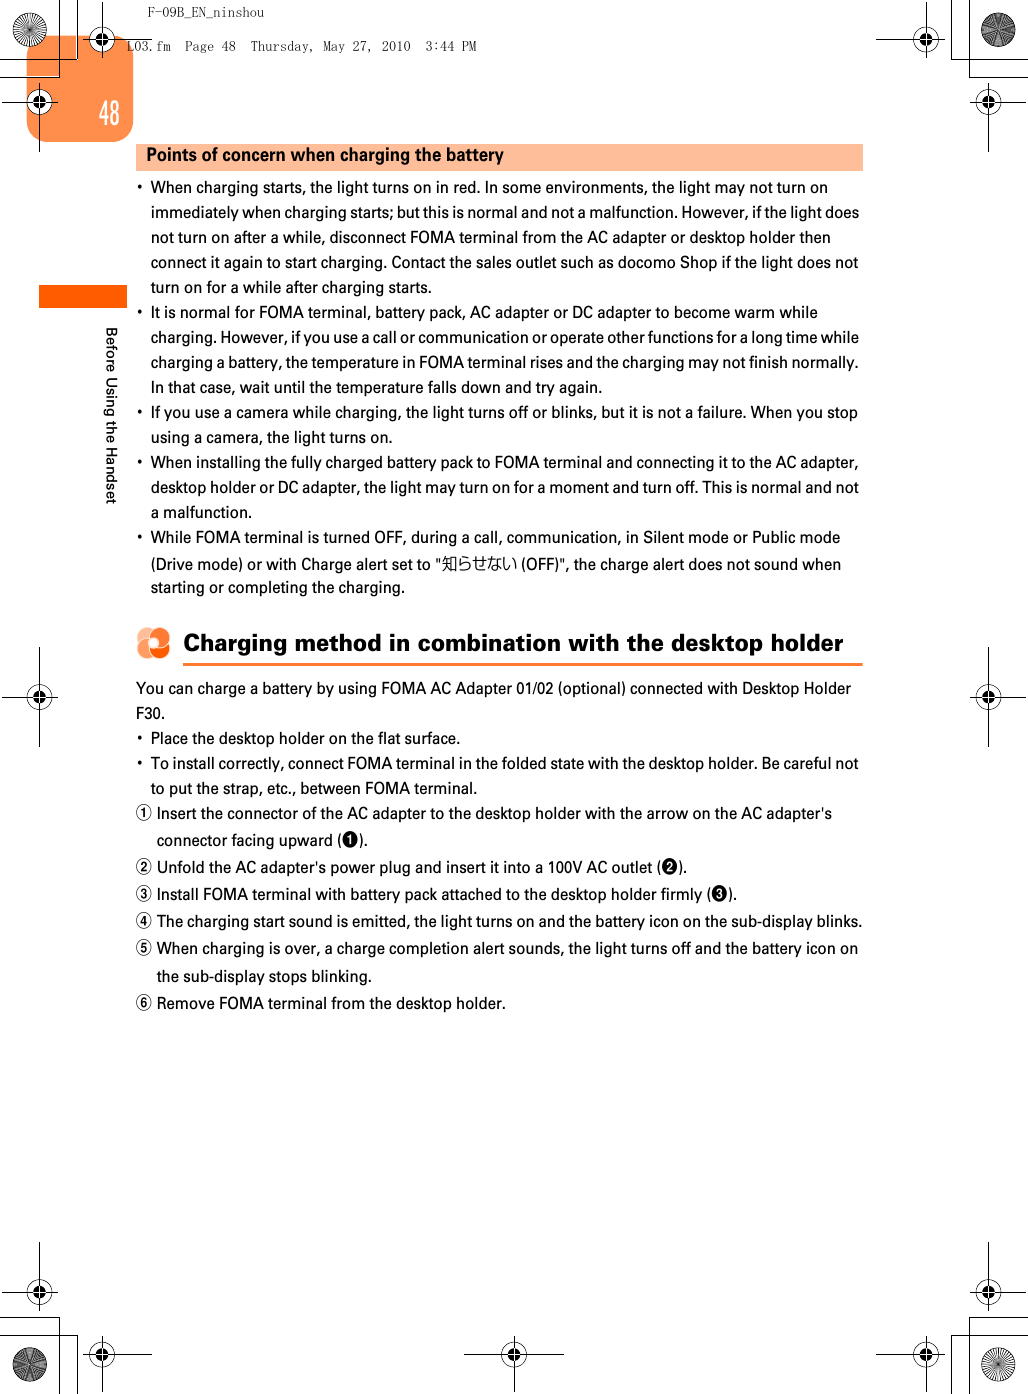
![F-09B_EN_ninshou41Before Using the HandsetSearch from phenomenon or error message or search contact information.1On the operation guide screen, "c困った時には (Troubleshooting)"ePress any of "a故障かな?と思ったら (Troubleshooting)" - "c問い合わせ先 (Contact information)"eSelect a title or messageePress gSearch convenient usage of mobile phone.1On the operation guide screen, "d便利な使いかた (Convenient usage)"eSelect a titleePress gViewing operation guide screen and basic operations are explained here.<Image to be inserted>aFunction outline : Outline of function is displayed.bOperation steps : Operation steps of function are displayed. For some functions, you can execute function by pressing [この機能を使う (Use this function)].c"→参照 (→Reference)" : Select and press g to jump to a relevant explanation screen.dRelevant function : Select a content relevant to current function from the list and press g to jump to an explanation screen.e[この機能を使う (Use this function)] : Select and press g to execute a searched function. When the function is executed, the operation guide ends.f[→お知らせ (Information)] : Select and press g to display information relevant to the function.・When "大きく (Large)" or "小さく (Small)" appears in the guide line, press m to change the character size to display. When "タイトル (Title)" appears, press p to check a title.Searching from "困った時には (Troubleshooting)"Searching by "便利な使いかた (Convenient usage)"Guide screen explanation and operationsL03.fm Page 41 Thursday, May 27, 2010 3:44 PM](https://usermanual.wiki/Fujitsu/F09B2/User-Guide-2595272-Page-41.png)

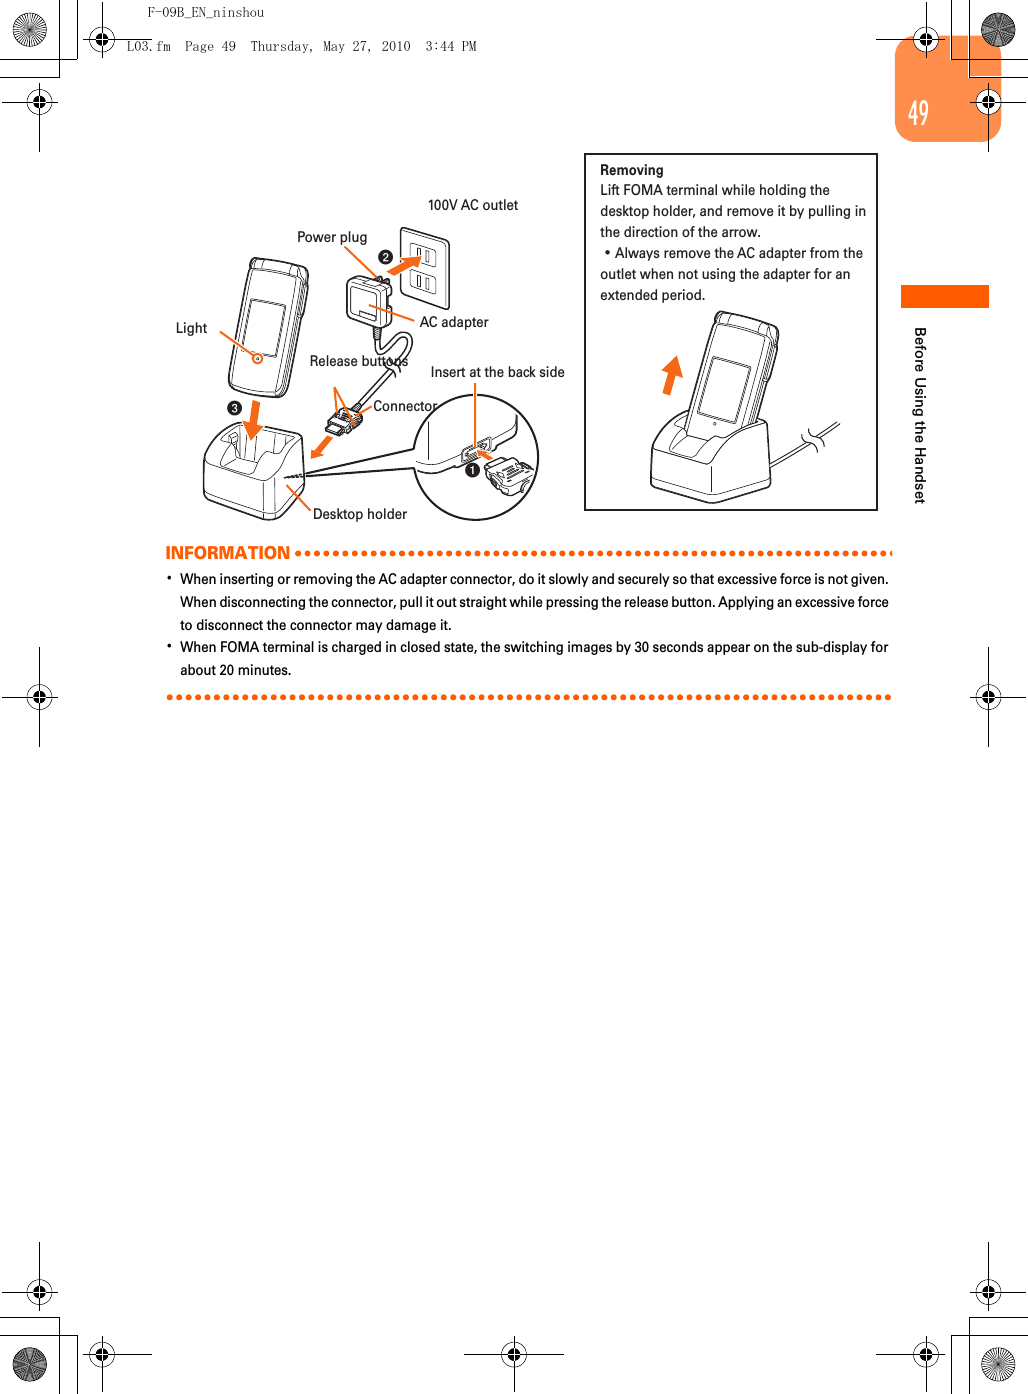

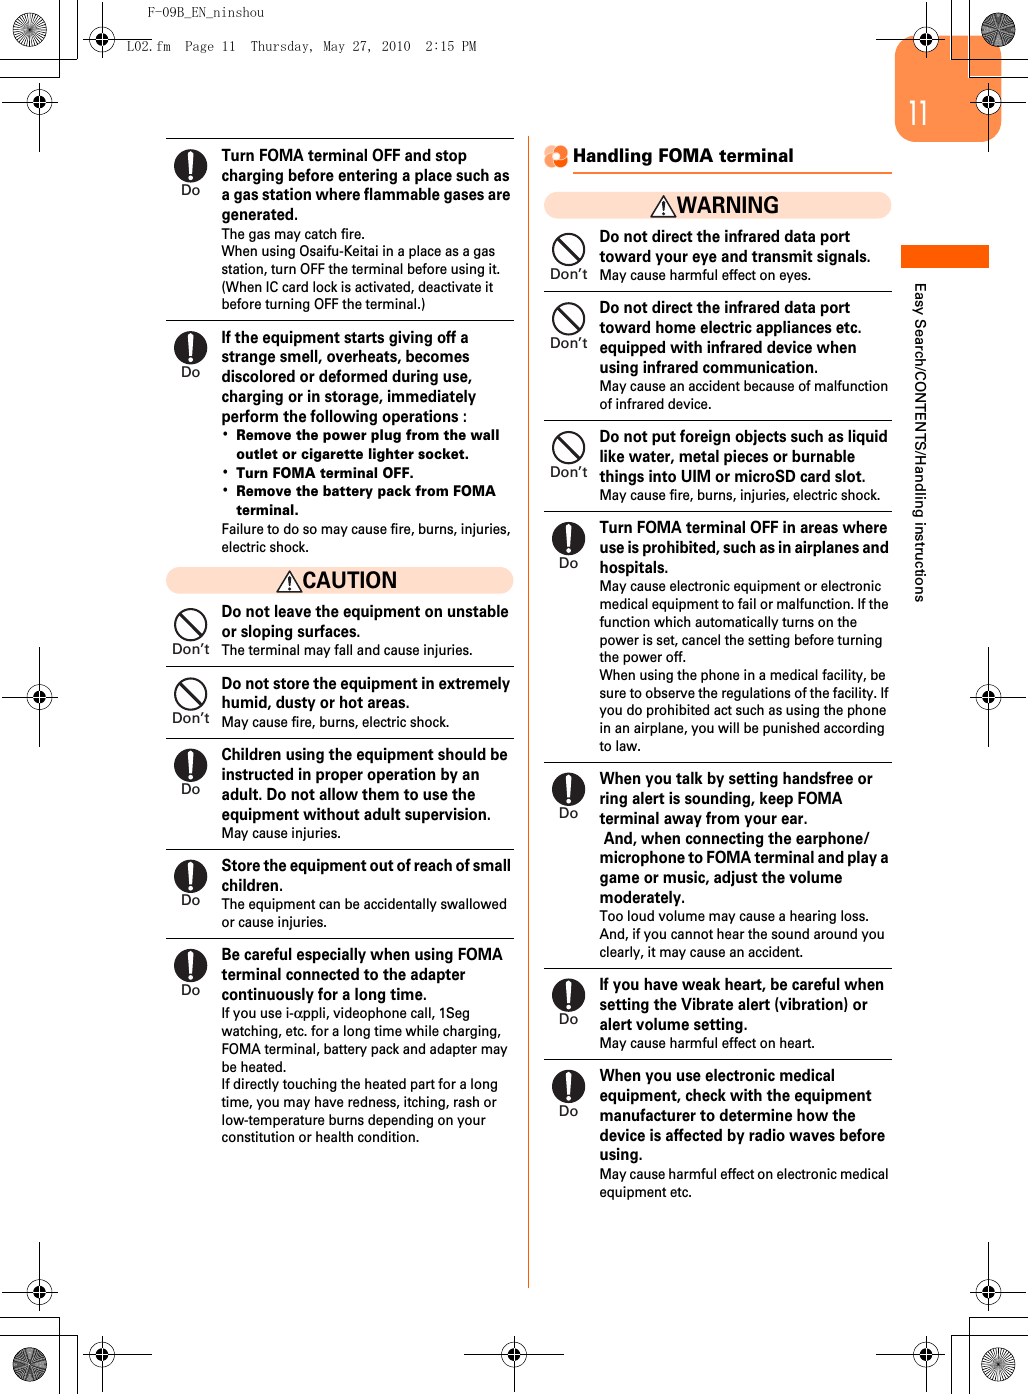
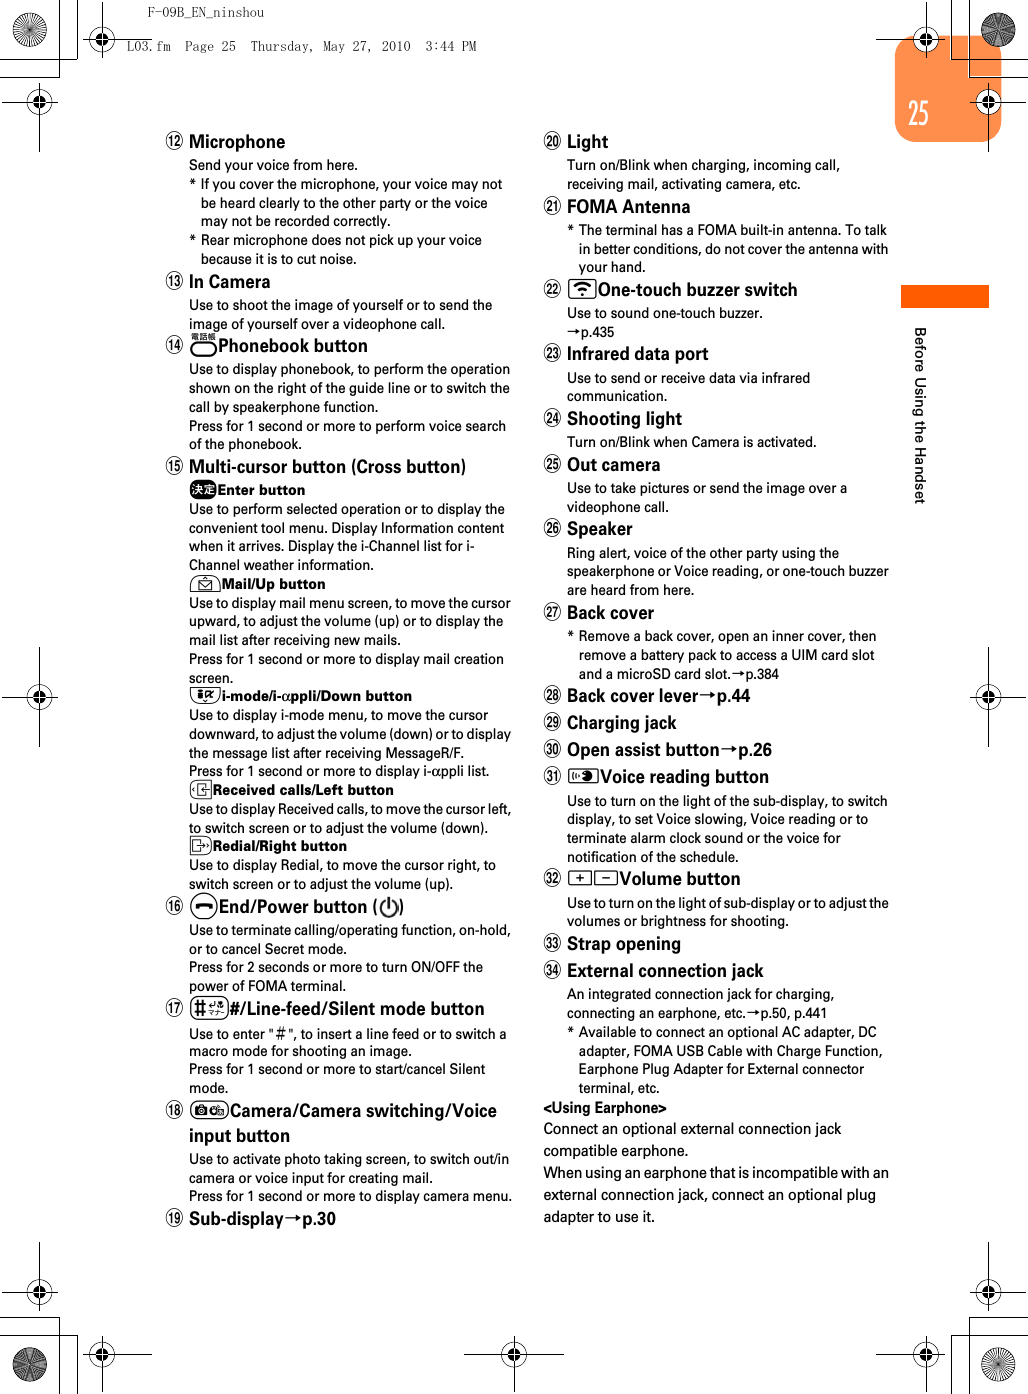
![F-09B_EN_ninshou59Before Using the HandsetCaller ID notificationNotifying your phone number to the other partyYou can set FOMA terminal to display your number (Caller ID) on the other party's terminal when making a call. <発信者番号通知 (Caller ID notification)>・For details, see "Mobile Phone User's Guide [Network Services]".・Caller ID is your important information. Carefully consider if you want to include caller ID information when making a call.・It is displayed when other party's phone supports Caller ID display.・Caller ID notification is unavailable outside the service area or where radio waves are hard to reach. Do it in locations with good radio wave conditions.・Each time you make a call, you can set either to notify/not notify caller ID.→p.691On the stand-by display, me"*設定を行う (Set)"e"#その他の設定を行う (Other settings)"e"a発信者番号通知を使う (Use caller ID notification)"ePress "a発信者番号通知を設定する (Set caller ID notification)"2Press "a通知する (Notify)"The terminal is connected to the network, and a message appears indicating that the Caller ID notification is set. Press g to return to the menu screen.Checking the settings1On the stand-by display, me"*設定を行う (Set)"e"#その他の設定を行う (Other settings)"e"a発信者番号通知を使う (Use caller ID notification)"ePress "b発信者番号通知設定を確認する (Check caller ID notification setting)"2Press "a確認する (Check)"The terminal is connected to the network, and the settings are displayed. Press g to return to the menu screen.If you set or operate multiple Caller ID notification methods simultaneously, the caller ID notification operations are performed in the following priorities. Note that the displayed contents and the actual dialing method of notifying/not notifying may differ.aWhen "186"/"184" is prefixed to the phone number of the other party→p.69bWhen notifying/not notifying of Caller ID is selected from the submenu when dialing→p.70cWhen setting Caller ID notification→p.59Priority of Caller ID notificationL03.fm Page 59 Thursday, May 27, 2010 3:44 PM](https://usermanual.wiki/Fujitsu/F09B2/User-Guide-2595272-Page-59.png)