Funk Electronic Piciorgros TMO100 TMO-100 SCADA and Telemetry Modem for TETRA Infrastructures User Manual Beipackzettel TMO 100 engl
Funk-Electronic Piciorgros GmbH TMO-100 SCADA and Telemetry Modem for TETRA Infrastructures Beipackzettel TMO 100 engl
Contents
- 1. Instruction Leaflet TMO-100_engl
- 2. TMO-100_E_V1.821.pdf
- 3. User manual
- 4. User guide
- 5. User manual update
- 6. User Manual
Instruction Leaflet TMO-100_engl
!!!!!!!!!!!!!!!!!!!!!!!!!!!!!!!!!!!!!!!!!!!!!!!!!!!!!!!!!!!!!!!!!!!!!!!!!!!!!!!!!!!!!!!!!!TMO%100!!!!!!!!!!!!!!!!!TMO%100!!! !!!!!!!!!!!!!!!!!!!!!!!!!!!!!!!!!!! !
!!!!!!!!!!!!!!!!!!!!!!!!!!!!!!!!!!!!!!!!!!!!!!! ! !!!!!!!!!!!!!!!!!!!!!!!!!!!!!!!!!!!!!
Changes and Modifications
Any changes or modifications not explicitly approved by Funk-Electronic
Piciorgros GmbH as the responsible party for compliance could void the end
user's authority to operate the equipment.
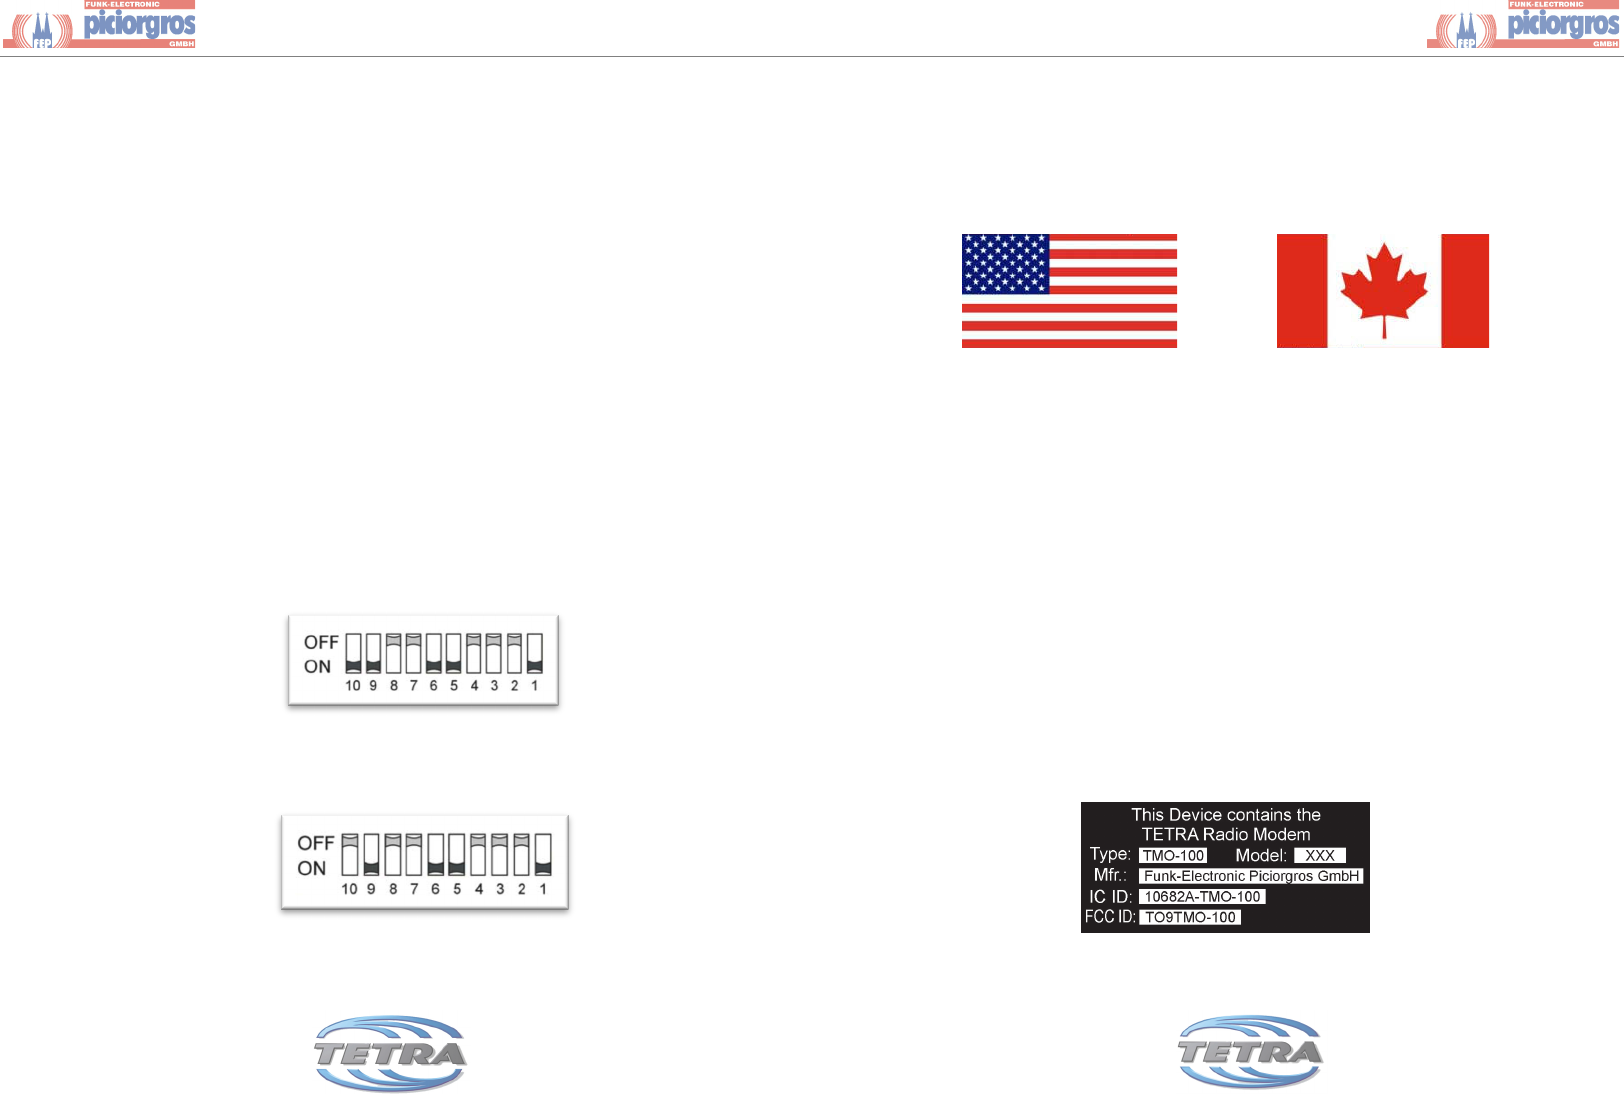
Label on the backside of the TMO-100 (USA)
Label on the backside of the TMO-100 (Canada)
TMO-100 - Set-up and Configuration Manual
(Read before first operation)
TETRA Network Parameter:
Frequency Range: __________________
ISSI: __________________
MCC: __________________
MCN: __________________
COM-Port and AUX-Port Parameter :
Ethernet Port Parameter
Ethernet Port: Access to the embedded Web Server
Default IP-Address: 192.168.0.199
Default User Name: user (lower case)
Default Password: user (lower case)
Power Supply:
Left: Enclosure Ground (electrical earth)
Middle: + 12 Volt to + 24 Volt (+/- 20%)
Right: GND, 0 Volt from Power Supply
Quick Start Guide:
(1) Connect the TMO-100 to power Supply (12 or 24 Volt, electrical earth not
necessary for configuration)
(2) PWR LED and OK LED should be on, if OK flashes please refer to the
Technical Manual.
(3) If the device is not yet configured to your TETRA Network, a yellow LED
!
Funk%Electronic!Piciorgros!GmbH!
Claudiastrasse!5!
51149!Cologne!*!Germany!
!
www.tetramodem.com!
info@piciorgros.com!
!!!!!!!!!!!!!!!!!!!!!!!!!!!!!!!!!!!!!!!!!!!!!!!!!!!!!!!!!!!!!!!!!!!!!!!!!!!!!!!!!!!!!!!!!!TMO%100!!!!!!!!!!!!!!!!!TMO%100!!! !!!!!!!!!!!!!!!!!!!!!!!!!!!!!!!!!!! !
!!!!!!!!!!!!!!!!!!!!!!!!!!!!!!!!!!!!!!!!!!!!!!! ! !!!!!!!!!!!!!!!!!!!!!!!!!!!!!!!!!!!!!
should step from right to left on the RF display. If it cannot connect, or if
it is still scanning it will repeat this permanently.
(4) Connect the Ethernet Port to your computer. Any Ethernet cable can be
used.
(5) Start your Web Browser and enter 192.168.0.199
(6) You will see the start screen from the TMO’s Web Server
(7) Enter the password and the username both as “user” (lower case)
(8) Select “TETRA” from the left menu
(9) Select “Parameter” and set the desired TETRA parameter then press
“Apply”
(10) If the [RESTART] Button appears, press it to restart the device with the
new parameter
(11) If the device is logged to you TETRA Network, you should see an LED-
chain (left to right) displayed in the RF-Field
Resetting the device to factory default
All System Parameter will be reset to the factory default if the DIP switches will
be set to the following combination (check carefully ON and OFF!)
Step one: Disconnect the device from Power Supply:
Step two: Set the DIP-switches to the following combination:
Step three: Connect the power supply. The RF LED’s will now step from left
to right, indicating the Reset condition.
Step four: Now set DIP10 from ON to OFF
The device is now resetting. The RF bar graph indicates that by different LED
flashing.
When the Reset is completed, the PWR and the OK LED will be constantly ON,
and the RF-LED’s will be OFF. Then turn all DIP switches back to OFF.
Requirements for using the TMO-100 in the USA or in Canada
This device complies with part 15 of the FCC Rules. Operation is subject to the
following two conditions:
(1) This device may not cause harmful interference, and
(2) this device must accept any interference received, including interference that
may cause undesired operation.
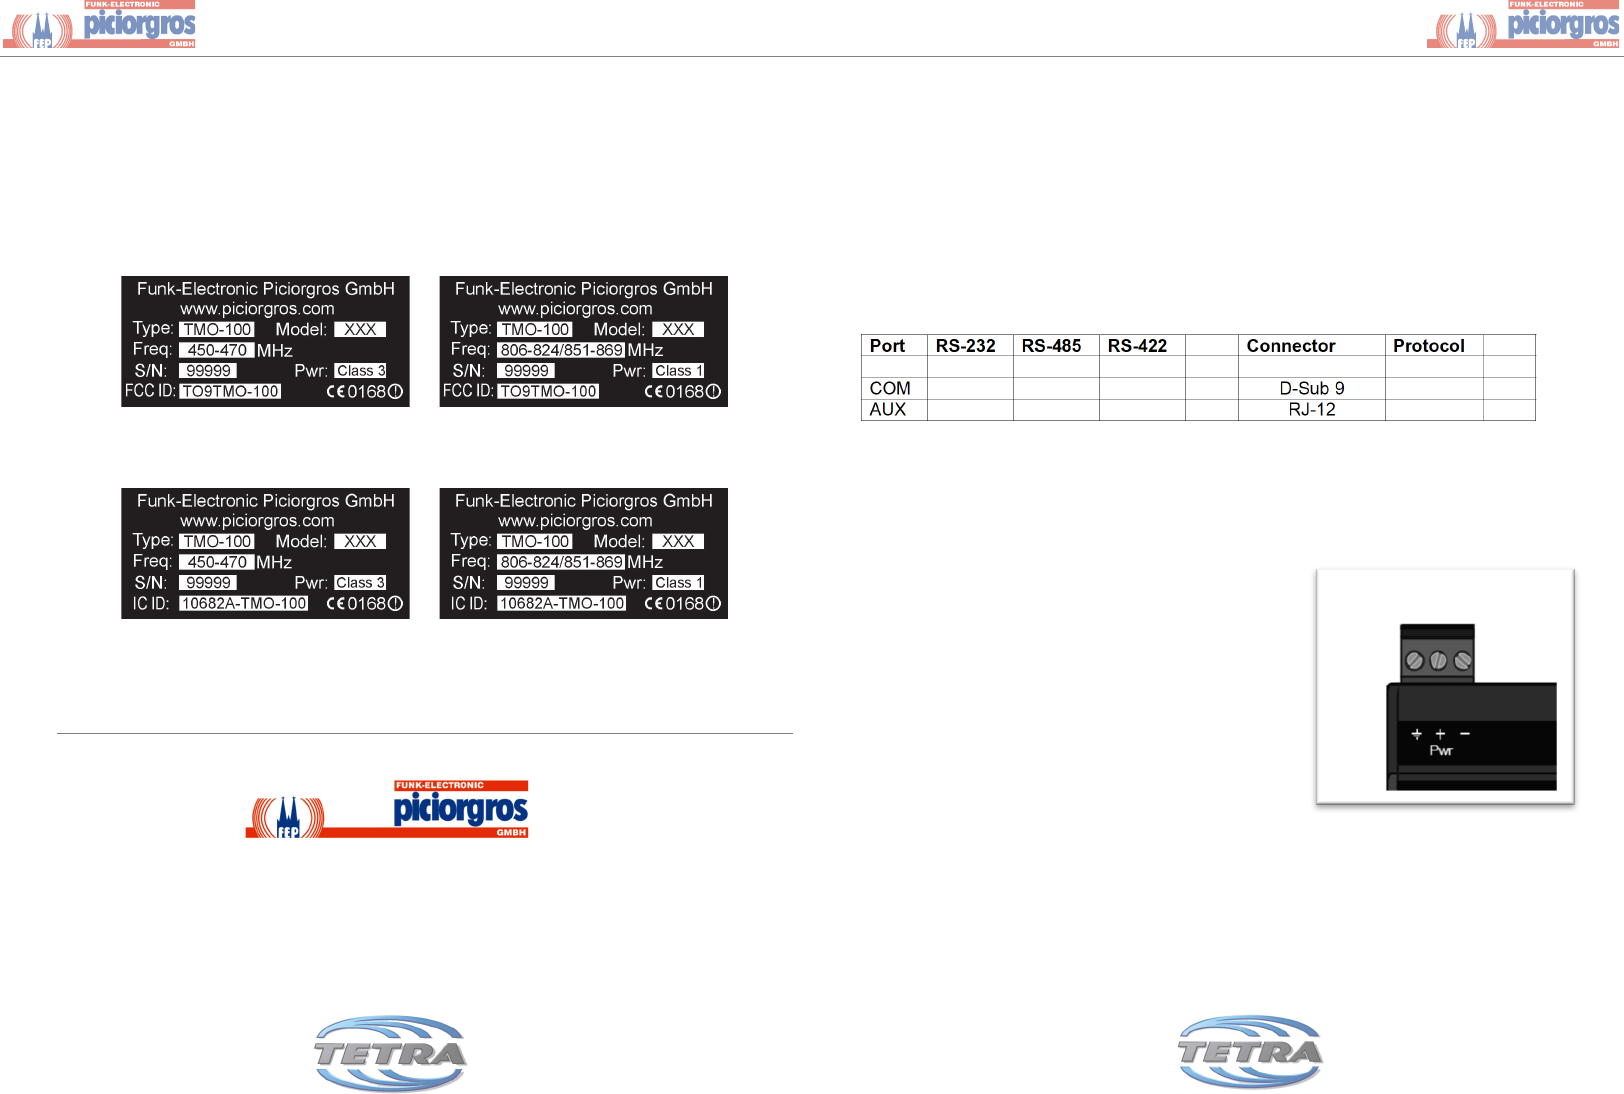
Labeling
As the TMO-100 usually will be installed on a DIN rail inside an enclosure and
the label on the backside will not be visible, the second label (see inside of the
TMO-100 box) has to be placed outside of the cabinet where it is readable. If this
second label gets lost or damaged the following should be an example how to
create one.
Outside Label
This is the label that has to be placed on the outside of the enclosure, if the label of
the TMO-100 is not readable