G Tek Electronics PWG600 Personal Wireless Gateway User Manual Revised 0122
G-Tek Electronics Corporation Personal Wireless Gateway Revised 0122
Contents
- 1. User Manual
- 2. User Manual Revised 0122
User Manual Revised 0122
- 1 -
G-Tek
GSM / VoIP Phone
Model: PWG-600
User Manual

PWG-600 User Guide
- 2 -
TABLE OF CONTENTS
K
KN
NO
OW
WI
IN
NG
G
Y
YO
OU
UR
R
P
PW
WG
G-
-6
60
00
0......................................................................................... 4
KEYS AND SCREEN LAYOUT ........................................................................................... 5
SIDE & TOP VIEW............................................................................................................ 8
INCOMING CALL ALERT OPTION ....................................................................................... 9
DISPLAY INDICATORS.................................................................................................... 10
G
GE
ET
TT
TI
IN
NG
G
S
ST
TA
AR
RT
TE
ED
D.................................................................................................... 11
SIM CARDS ................................................................................................................... 11
PIN LOCK SIM.............................................................................................................. 11
CHANGE PIN................................................................................................................. 11
USB INTERFACE ........................................................................................................... 11
CHARGING..................................................................................................................... 11
BATTERY ....................................................................................................................... 11
LCD .............................................................................................................................. 12
REAL TIME CLOCK ........................................................................................................ 12
M
MA
AI
IN
N
F
FU
UN
NC
CT
TI
IO
ON
NS
S....................................................................................................... 13
MAKING AN OUT GOING CALL ...................................................................................... 13
MAKING A CALL ............................................................................................................. 13
Making a call using the phone book directory features.................................... 13
Speed dialing a phone number............................................................................ 14
Assigning a phone number to a speed dialing key:.......................................... 14
MAKING AN EMERGENCY CALL ..................................................................................... 15
ANSWERING OR REJECTING AN INCOMING CALL........................................................... 15
OTHER FUNCTIONS DURING A CALL .............................................................................. 16
Call Waiting (VoIP Call Only) ............................................................................... 16
Call Forwarding (VoIP Call Only)......................................................................... 17
Call Barring (VoIP Call Only)................................................................................ 18
Caller Id (VoIP Call Only)...................................................................................... 19
Send DTMF tone.................................................................................................... 19
Reject a call............................................................................................................. 19
Put a call on hold.................................................................................................... 20
Have a Conference................................................................................................ 20
Ending a call............................................................................................................ 20
AUTOMATIC KEY LOCK................................................................................................... 20
MANUAL KEY LOCK........................................................................................................ 20
POWER SAVING ............................................................................................................. 20
MAKING BALANCE ENQUIRY ......................................................................................... 21
CONNECTING A WIRED HEADSET .................................................................................. 21
SETTING SPEAKER PHONE VOLUME.............................................................................. 21
SETTING MICROPHONE VOLUME................................................................................... 22

PWG-600 User Guide
- 3 -
SETTING THE LCD SLEEP INTERVAL............................................................................ 22
TURNING ON THE KEYPAD LIGHT.................................................................................. 22
SETTING THE DATE AND THE TIME ................................................................................ 22
Setting the time....................................................................................................... 22
SETTING LCD BACKLIGHT ............................................................................................ 23
ALARM CLOCK............................................................................................................... 24
RESTORE FACTORY DEFAULTS.................................................................................... 24
U
US
SI
IN
NG
G
T
TH
HE
E
M
ME
EN
NU
US
S..................................................................................................... 25
ACCESSING A MENU ...................................................................................................... 25
LIST OF THE MENUS ...................................................................................................... 25
M
ME
EN
NU
U
F
FU
UN
NC
CT
TI
IO
ON
NS
S...................................................................................................... 37
PHONEBOOK ................................................................................................................. 37
MESSAGES .................................................................................................................... 38
Writing and sending a message........................................................................... 38
Viewing details of sent items................................................................................ 40
CALL LOGS.................................................................................................................... 41
TONES......................................................................................................................... 43
Setting ring tones: .................................................................................................. 43
SETTING RING TONE PROFILES..................................................................... 44
SETTINGS .................................................................................................................. 46
General Configuration ........................................................................................... 46
WiFi Settings........................................................................................................... 46
Setting VoIP profiles .............................................................................................. 50
Setting GPRS parameters .................................................................................... 53
Pairing a Bluetooth headset with PWG-600 ...................................................... 53
INFORMATION .......................................................................................................... 54
Viewing network statistics..................................................................................... 54
Viewing the GPRS Data Count............................................................................ 55
Viewing the Firmware Version and other information ...................................... 56
Upgrading Firmware Using the USB Download Mode..................................... 57
CONNECTING PWG-600 WITH A PDA (PERSONAL DIGITAL ASSISTANT)................... 60
DOWNLOADING POLYPHONIC RING TONES FROM A PDA............................................. 61
SETTING SOS NUMBERS .............................................................................................. 62
B
BR
RO
OW
WS
SI
IN
NG
G
T
TH
HE
E
I
IN
NT
TE
ER
RN
NE
ET
T
W
WI
IT
TH
H
A
A
P
PD
DA
A
T
TH
HR
RO
OU
UG
GH
H
B
BL
LU
UE
ET
TO
OO
OT
TH
H........... 63
BROWSING THE INTERNET USING GPRS..................................................................... 63
CONNECTING TO THE GPRS NETWORK USING A PDA ............................................... 66
BROWSING THE INTERNET USING WIFI........................................................................ 67
A
AD
DD
DI
IT
TI
IO
ON
NA
AL
L
I
IN
NF
FO
OR
RM
MA
AT
TI
IO
ON
N.................................................................................. 69
FCC REGULATION ........................................................................................................ 69
EUROPEAN REGULATION............................................................................................... 70
RF EXPOSURE REGULATION (SAR) ............................................................................. 70

PWG-600 User Guide
- 4 -
K
KN
NO
OW
WI
IN
NG
G
Y
YO
OU
UR
R
P
PW
WG
G-
-6
60
00
0
Thank you for your purchase of the PWG-600 Personal Wireless Gateway. Using
the wireless handset you can now connect to GSM/GPRS, WiFi, VoIP networks,
and Bluetooth devices.
The PWG-600 is able to function as a GSM phone as well as a VoIP phone and
also as a modem to access WiFi (802.11b) and GPRS networks.
Some of the significant features of PWG-600 are as follows:
PWG-600 works as a standalone device. You can use PWG-600 without a
PDA (Personal Digital Assistant) or a Laptop.
PWG-600 has a keypad and an LCD. Hence PWG-600 functions as a
simplified GSM phone or a WiFi IP Phone to make and receive VoIP calls
without using a PDA or a laptop or a headset.
PWG-600 has a USB terminal. You can connect PWG-600 to any PC /
Laptop / notebook and provide wireless data connectivity at a higher rate
using WiFi or GPRS networks.
PWG-600 User Guide
- 5 -
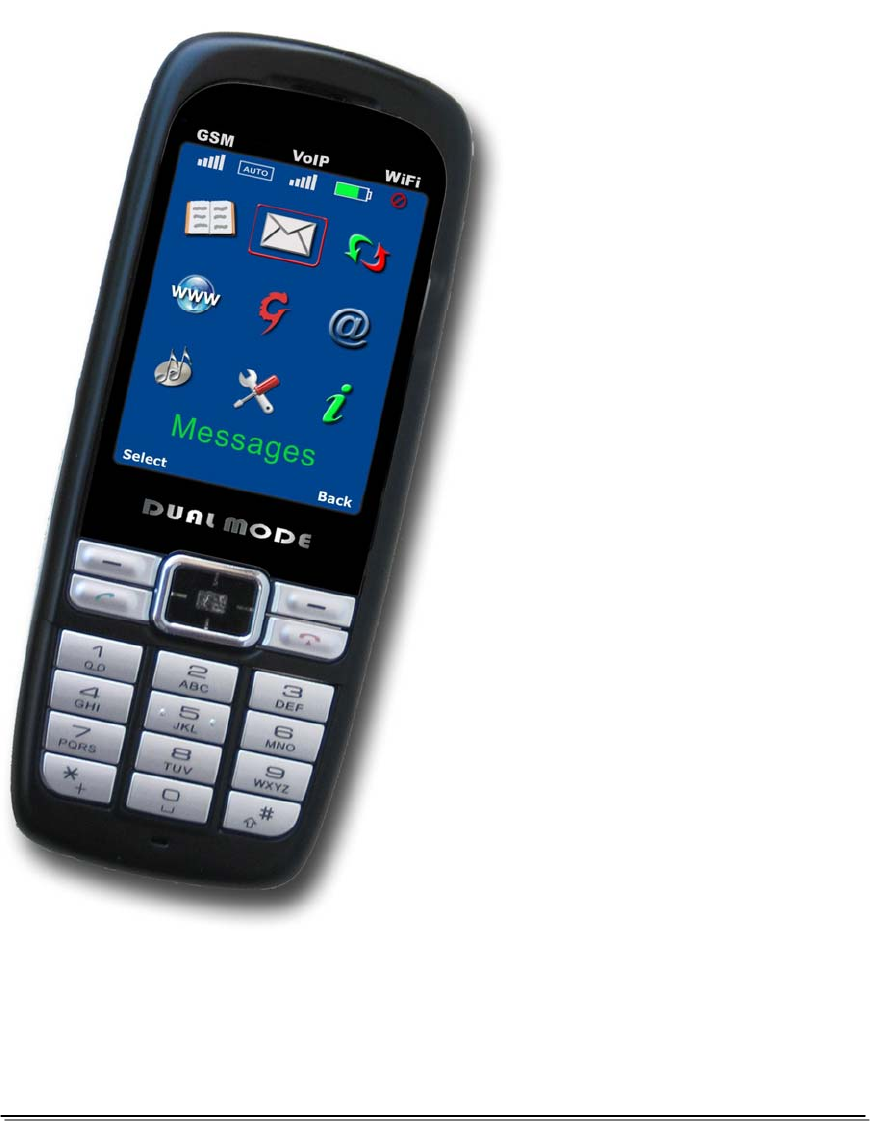
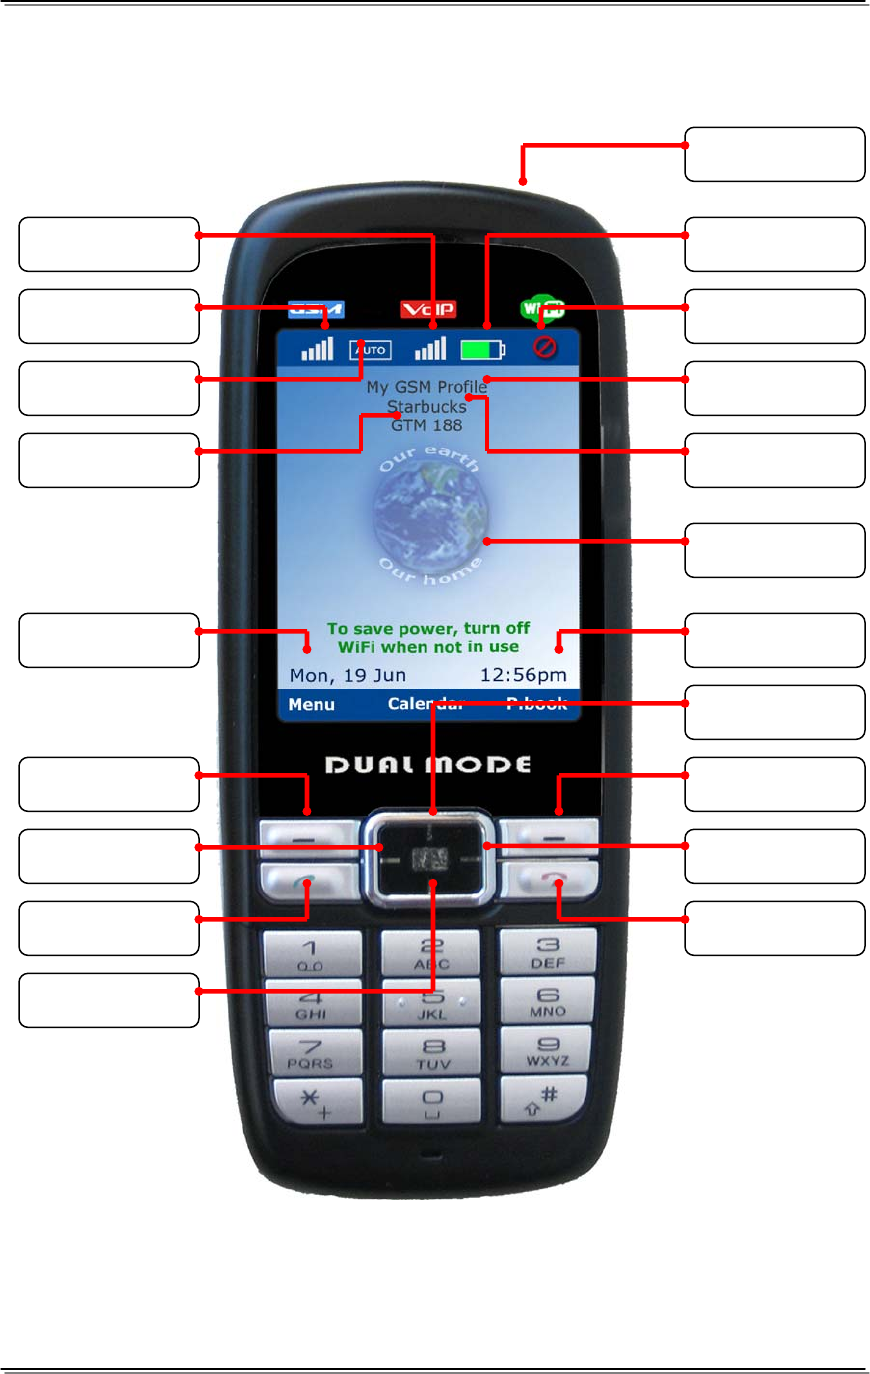
Keys and Screen Layout
Reject
GSM / VoIP /
Back / Backspace
Up / Calendar
Time Date
Menu / Select
WiFi On / Off
Accept
Down / Contact
Desktop Area
VoIP Profile
Outgoing Call
GSM Status
VoIP Status Battery Status
WiFi Status
GSM Profile
WiFi Profile
Power Key

PWG-600 User Guide
- 6 -
The description of the keys shown above is as follows:
Power key: Switches the phone “On” and “Off”. This key can also be used to
stop an alarm.
“Menu /Select” key: This key is used for menu selection. When pressed, the
key performs the function that was selected.
WiFi On/Off key: Press this key to activate WiFi. Press again to turn off WiFi.
GSM/VoIP/Auto key: This key is used to select GSM or VoIP as outgoing call
option.
• GSM: Press this key once. “GSM” is displayed. (Or press this key
successively until “GSM” is shown). An icon is displayed indicating that
GSM has been selected as outgoing call option.
• VoIP: Press this key twice. “VoIP” is displayed. (Or press this key
successively until “VoIP” is shown). An icon is displayed indicating that
VoIP has been selected as outgoing call option.
• Auto: Press this key thrice. “Auto” is displayed. (Or press this key
successively until “Auto” is shown). An icon is displayed indicating that
Auto mode has been activated for outgoing call option. The Auto mode is
used to switch between VoIP and GSM. If the Auto mode is selected,
PWG-600 uses VoIP for making outgoing calls. If a WiFi hotspot is
unavailable or VoIP is not registered, you are asked if you wish to use
GSM. If selected, GSM is used as the outgoing call option.
Up/Calendar key: This key has two main functions:
• Calendar: From the desktop, press this key to view the Calendar and date
and time settings
• Up: Press this key to scroll up.
Down/Contact key: This key has two main functions:
• Contact: From the desktop, press this key to view the phonebook contact
list
• Down: Press this key to scroll down.
Back/Backspace/Phonebook key: This key has three functions.
• Back: Press this key to go to the previous menu.
• Backspace: Press this key to delete a character to the left of the cursor
while typing characters.
• Phonebook: From the desktop, press this key to view the phonebook sub
menu.
Accept key: This is a multi-function key.
• Accept: Press this key to accept an incoming call.

PWG-600 User Guide
- 7 -
• Call: Press this key to dial a phone number. Enter the number first, and
then press the Accept key to dial the phone number.
• Call log: From the desktop, press this key to view the dialed call log.
Reject key: This key has two functions.
• Reject: Press this key to reject an incoming call.
• Terminate: Press this key to terminate an active call.
Reset Key: When the reset key is pressed, the parameters that are not saved in
Flash get erased. The reset key is shown in the following page.
Key: Press this key two times successively to enter the character ‘+’.
Key: Press the numeric key ‘1’ to enter a ‘.’ and a ‘:’. The first press displays
‘.’. Two successive presses display ‘:’.
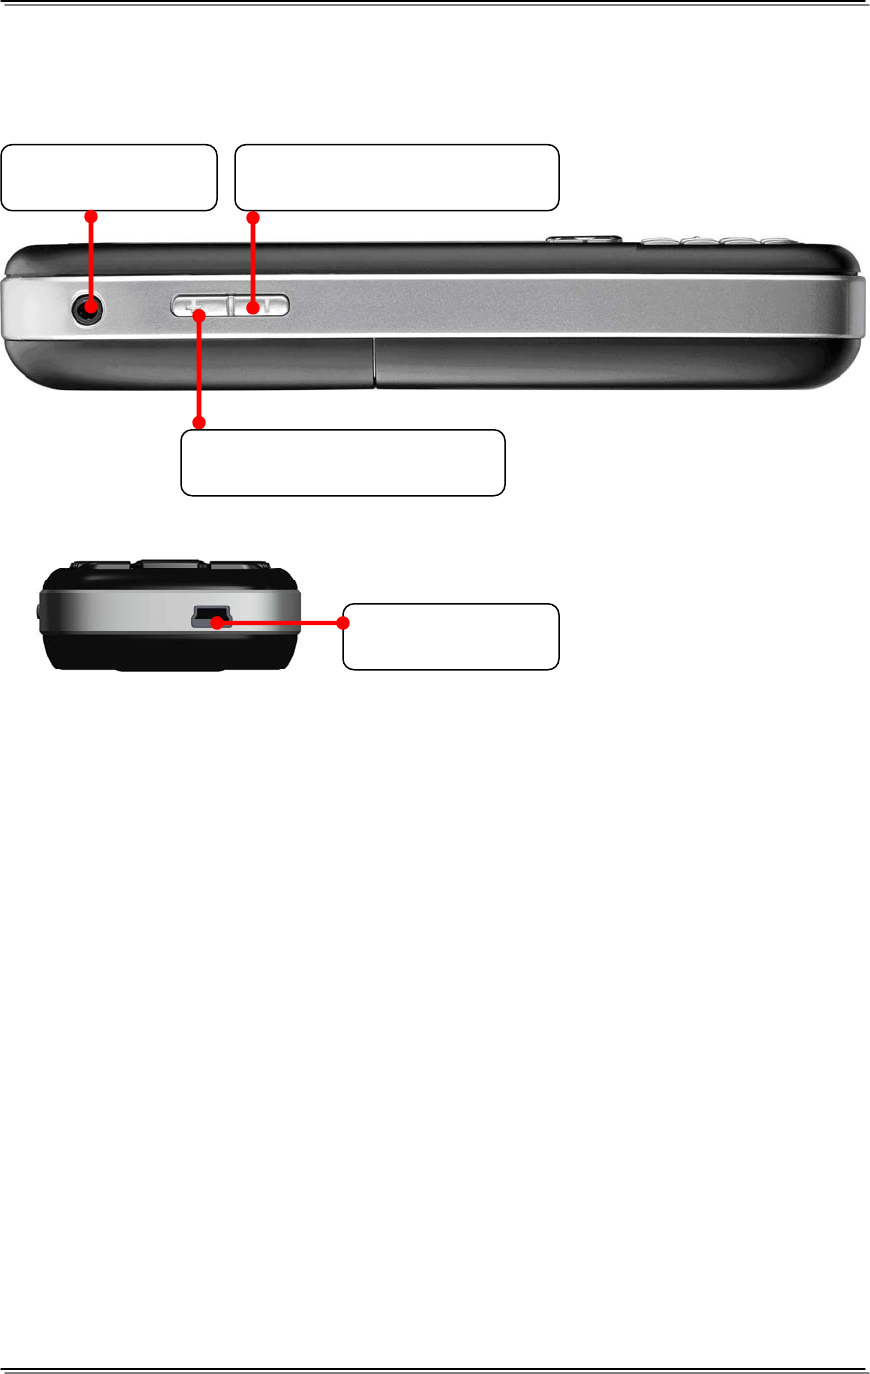
Volume increase key:
• Increases the audio volume if pressed while a call is in progress.
• Increases the ring tone volume if pressed during the reception of an
incoming call while the incoming call alert is heard.
• Enters the USB download mode: Press the volume decrease key before
you turn on PWG-600, and then press the reset key. The phone enters the
USB download mode.
Volume decrease key:
• Decreases the audio volume if pressed while a call is in progress.
• Decreases the ring tone volume if pressed during the reception of an
incoming call while the incoming call alert is heard.
• Enters the USB download mode: Press the volume decrease key before
you turn on PWG-600, and then press the reset key. The phone enters the
USB download mode.
NOTE: The volume keys are also used to make an emergency call. To read
how to make emergency calls, please see “Error! Reference source not
found.”.
PWG-600 User Guide
- 8 -
Side & Top View
Volume Decrease
Decreases the volume when pressed
Volume Increase
Increases the volume when pressed
Wire headset socket
USB Terminal

PWG-600 User Guide
- 9 -
Tones
You can set the key beep to hear tones while pressing the keys on the keypad.
The steps to turn the key beep on are as follows:
• From the desktop press the “Menu” key.
• Navigate using the navigational keys and select the “Tones” menu. Select
the “Tones” menu by pressing the “Select” key.
• Select “Profiles” and press the “Select” key.
• Select “General” and press the “Select” key.
• Select the “Key Beep” option and press the “Select” key.
• Select the “On” option and press the “Select” key.
• Select the “Activate” option and press the “Select” key to turn on the key
beep.
You can also hear the following preset tones:
• A special tone is heard when the battery strength falls, when the WiFi
signal strength falls, or when the GSM strength falls.
• When the WiFi connection is established a single beep is heard. When the
WiFi connection is discontinued two successive beeps are heard.
• When PWG-600 is turned on and is ready for use, a special tone called
“Happy Tone” is heard.
• A specific tone is heard when an emergency call is made. Another specific
tone is heard when the emergency call is ended.
• When a Bluetooth connection is interrupted a specific ring tone called
“Crying tone” is heard.
Incoming call alert option
PWG-600 is in the “Ring mode” by default. You can set any of the following
modes as incoming call alert option:
The steps to set the ringing mode are as follows:
• From the desktop, press the “Menu” key.
• Using the navigational keys, navigate and select the “Tones” menu. Press
the “Select” key to select the “Tones” menu.
• Select “Profiles” and press the “Select” key.
• Select “General” and press the “Select” key.
• Select “Alert Type” and press the “Select” key.
o Disable
o Ringer
o Vibrator
o Ring + Vibr
o Ring after Vibr
• Select the alert mode you want and press the “Select” key.

PWG-600 User Guide
- 10 -
Display indicators
The indicators related to the various phone functions are displayed in the screen
as shown.
1. Displays the strength of GSM signal in the locality.
2. Displays the outgoing call option. The ‘GSM’ indicates that the current
outgoing call option is GSM. ‘VoIP’ indicates that the outgoing call option
is VoIP. ‘Auto’ indicates that the outgoing call option is Auto.
Note: When the outgoing call option is being set to ‘Auto’ and if you dials a
number, the PWG-600 will first attempt to place the call via VoIP and if it
fails, it will attempt to place the call via GSM.
3. Displays the VoIP signal strength and whether it is able to be registered to
a SIP server. The presence of five bars indicates the strongest signal and
the presence of a single bar indicates the weakest signal. The presence
of the “ “ indicates that the WiFi is turned off.
4. Displays the charge level of the battery. The presence of all the five bars
indicates that the battery is fully charged or has 100% charge. Charging is
indicated by moving charging bar.
5. Displays the strength of WiFi signal available at current location. The
presence of five bars indicates the strongest signal and the presence of a
single bar indicates the weakest signal. The presence of the “ “ that
the WiFi is turned off.
6. Displays that a new message has been received.
The following are displayed below the icons labeled as 1, 2, 3, 4 and 5.
1. The GSM carrier service is displayed in the first row below the icons.
2. The name of the WiFi access point is displayed in the second row.
3. The name of the current VoIP profile is displayed in the third row.
4. Date is displayed at the bottom left corner.
5. Time is displayed in the bottom right corner.
1 2 3 4 5
1 New SMS 6

PWG-600 User Guide
- 11 -
G
GE
ET
TT
TI
IN
NG
G
S
ST
TA
AR
RT
TE
ED
D
SIM cards
Two SIM cards can be inserted into PWG-600. However, only the selected SIM
card remains active. The SIM card is used for GSM authentication.
PIN Lock SIM
The SIM card lock protects your subscription from unauthorized use. Most SIM
cards are locked at the time of purchase. If the SIM card lock is on, you will have
to enter a 'PIN' (Personal Identity Number) each time you turn on the PWG-600.
Change PIN
If you had entered the PIN incorrectly for three successive times, the SIM card
will be blocked.
To unblock the SIM card, you must enter the 'PUK' (Personal Unblocking Key).
The Network service provider supplies the PIN details and the PUK details.
To change the ‘PIN’:
• From the desktop, press the “Menu” key. Press the “Down” key to
navigate to the “Settings” sub menu and press the “Select” key
• Press the “Down” key to navigate to the “Gsm Settings” sub menu and
press the “Select” key
• Press the “Down” key to navigate to the “Change SIM Pin” item and press
the “Select” key
• Key in the old ‘PIN’ and press the “Select” key
• Key in the new ‘PIN’ and press the “Select” key to confirm changes of the
new ‘PIN’
Note: The SIM card lock only protects the subscription and does not protect
PWG-600 from unauthorized use. If you had entered the PIN incorrectly for three
successive times, the SIM card will be blocked. To unblock the SIM card, you
must enter the 'PUK' (Personal Unblocking Key). The Network service provider
supplies the PIN details and the PUK details.
USB Interface
A computer is WiFi enabled if PWG-600 is connected to it using a USB 1.1/2.2
enabled terminal.
Charging
Battery of PWG-600 will be charged through USB.
Battery
Type Talk time Standby
Li-Ion 4 hours (approximately) 100 hours

PWG-600 User Guide
- 12 -
LCD
PWG-600 has a color TFT display with a white LED backlight.
LCD Specifications
Colors 262K colors
Resolution 240 pixels (w) x 320 pixels (h)
Pixel size 00.141mm (w) x 0.141mm (h)
Real Time Clock
PWG-600 has an inbuilt real time clock (RTC) module that keeps track of the
date and time.
The RTC maintains minutes, hours, day, date, month, and year information. The
date at the end of the month is automatically adjusted for months having less
than 31 days, including corrections for leap year.
The clock operates in 12-hour format with am/pm indicator.

PWG-600 User Guide
- 13 -
M
MA
AI
IN
N
F
FU
UN
NC
CT
TI
IO
ON
NS
S
Making an Out Going Call
You can make GSM or VoIP calls using PWG-600. The steps to select the type
of Out Going Call are as follows:
z From the desktop, press the “Menu” key.
z Using the navigational keys, navigate and select “Settings”. Press the
“Select” key to select the “Settings” menu.
z Select “General” and press the “Select” key.
z Select “Outgoing Call” and press the “Select” key. The following sub menus
are displayed when you selected “Outgoing Call”.
GSM: Select “GSM” and press the “Select” key to set the outgoing call
as GSM calls.
VoIP: Select “VoIP” and press the “Select” key to set the outgoing call
as VoIP calls.
Auto: Select “Auto” and press the “Select” key to set the outgoing call
as Automatic.
Note: When the outgoing call mode is set to Automatic, and when you
place a call, the phone will attempt to make calls using VoIP. If the
number is not reachable, it will prompt a confirmation message to place
the call via GSM.
Making a call
1. Key in the phone number.
Note: If you key in an incorrect digit, press the “Back” key to delete the
character to the left of the cursor.
2. Press the “Accept” key to call the number.
3. Press the “Reject” key to terminate the call.
Making a call using the phone book directory features
You can make calls using the phone book. The storage capacity of the phone
book depends on the SIM card memory.
To make a call:
1. From the desktop, press the “Menu” key.
2. Select “Phonebook” and press the “Select” key. The following options are
shown.
a. Add New Contact
b. Search Contact
c. Delete Contacts
d. Edit Contact
e. Assign Speed dial

PWG-600 User Guide
- 14 -
3. Select “Search” and press the “Select” key.
4. A screen titled “Search” is displayed. Key in the first few letters of the
name. Press the “Select” key to search the contact.
Note: If the numbers ‘123’ are displayed at the bottom then it indicates that
the number keys can be used to enter numbers. Press the ‘#’ key to use
the number keys to enter alphabets.
5. Press the “Accept” key to call the number after the name and number to
be called are displayed.
6. Press the “Reject” key to terminate the call.
Speed dialing a phone number
If you have assigned a phone number to one of the number keys, you can call
the number as follows:
• Press the number that has been assigned to the phone number (hotkey)
from the numeric keypad.
• Press the “Accept” key to call the number.
• Press the “Reject” key to terminate the call.
NOTE: You can also speed dial a number by pressing and holding the hotkey for
sometime.
Assigning a phone number to a speed dialing key:
• From the desktop, press the “Menu” key.
• Select the “Phonebook” menu and press the “Select” key. The following
options will be displayed:
o Add New Contact
o Search Contact
o Delete Contact
o Edit Contact
o Assign Speed Dial
• Select “Assign Speed Dial” and press the “Select” key.
Note: Press this button to assign a hot key to a contact. A list showing the
hotkeys (2-9 only) and names of the contacts is shown. Select a contact
name and press the “Select” key to assign the corresponding hot key to it.
The following submenus are displayed if you select a contact to which a
hotkey has already been assigned.
o Modify: Press this button to change hot key assigned to a contact.
A list showing the hotkeys (2-9 only) and names of the contacts is
shown when you select Modify.
Select a hotkey that has a contact name displayed next to it and
press the “Select” key to assign that hotkey to another contact. The
list of contacts is displayed. Select a contact and press the “Select”
key to assign the hotkey to that contact.
o View: Select “View” and press the “Select” key to view the phone

PWG-600 User Guide
- 15 -
number of the contact to which the hotkey has been assigned.
o Delete: Select “Delete” to delete a contact assigned to a hotkey.
NOTE: The speed dial details are saved into the Flash memory.
Hence, they do not get erased when you remove the battery.
Making an Emergency call
You can make an emergency call to a number that has been previously set in the
SOS numbers setting. You can save up to three emergency numbers.
To make an emergency call:
Press and hold the “Volume increase” key and the “Volume decrease” key
simultaneously for a minimum time of three seconds.
The first SOS number is dialed. If the call is answered, the call gets established
and you can have a voice conversation with the called party.
One of the following may take place when a call does not get established:
1. If the call remains unanswered by the called party, the second SOS
number is dialed. If the call is answered, the call gets established and you
can have a voice conversation with the called party.
If the call remains unanswered, the third SOS number is dialed. If the call
is answered, the call gets established and you can have a voice
conversation with the called party.
If the call to the third number remains unanswered, the emergency call
operation is cancelled. Repeat the same procedure to initiate the
emergency call again.
2. If the GSM carrier service for the currently inserted SIM card is unable to
establish a call, then the second SIM card is activated automatically.
PWG-600 tries to make an outgoing call to the first SOS number through
the GSM carrier service of the second SIM card.
If the call is answered, the call gets established and you can have a voice
conversation with the called party.
If the GSM carrier service is unable to establish the call, the emergency
call operation is cancelled. Repeat the same procedure to initiate the
emergency call again.
Answering or rejecting an incoming call
Press the “Accept” key to answer an incoming call OR press the “Reject” to reject
an incoming call.

PWG-600 User Guide
- 16 -
Other functions during a call
Call Waiting (VoIP Call Only)
You can answer a VOIP call while you have another call in progress if you have
activated the Call Waiting function.
To answer the call waiting press the “Accept” key. The first call is put on hold.
To activate the Call waiting function perform the following steps:
• From the desktop, press the “Menu” key.
• Select the “Settings” option using the “Down key” and press the “Select”
key. The following options are displayed when you select “Settings”:
o General Configuration
o WiFi Settings
o VoIP Settings
o GSM Settings
o Gprs Settings
o Bluetooth Settings
• Select “VoIP Settings” using the “Down key” and press the “Select” key.
The following options are displayed when you select “VoIP”:
o General
o Call Control
o Profiles
• Select “Call Control” using the “Down key” and press the “Select” key. The
following options are displayed when you select “Call Control”:
o Call Waiting
o Call Forward
o Call Barring
o Caller Id
o Dtmf
o Prefix Dial
• Select “Call Waiting” using the “Down key” and press the “Select” key. The
following options are displayed when you select “Call Waiting”:
o Off
o On
• Select “On” or “Off” and press the “Select” key
NOTE: All Call control options on Local UI are for VOIP (multiparty) calls. If
during a VoIP call, if a contact is trying to call you, from a GSM network, the
following message appears on the screen,
“CallerId Calling on GSM Drop all Calls?”
Press the “Reject” key to drop the calls. Press “Accept” key to answer the
GSM call. This will also terminate the VoIP call.
During a GSM call, if a contact is trying to call you from a VoIP network, the
following message appears on the screen,

PWG-600 User Guide
- 17 -
“CallerId Calling on VoIP Drop all Calls?”
Press the “Reject” key to drop the calls. Press “Accept” key to answer the
VoIP call. This will also terminate the GSM call.
Note: If calls (GSM/VoIP) are in progress, and there is an incoming call from
another protocol, the vibrator of the PWG units gets activated automatically.
This is to indicate to the user that there is another incoming call from another
protocol.
Call Forwarding (VoIP Call Only)
You can forward a (VOIP) call if you have activated the Call Forward function.
The steps to enable Call forward are follows:
• From the desktop, press the “Menu” key.
• Select the “Settings” option using the “Down key” and press the “Select”
key. The following options are displayed when you select “Settings”:
o General Configuration
o WiFi Settings
o VoIP Settings
o Gsm Settings
o Gprs Settings
o Bluetooth Settings
• Select “VoIP Settings” using the “Down key” and press the “Select” key.
The following options are displayed after you selected “VoIP Settings”:
o General
o Call control
o Profiles
• Select “Call Control” using the “Down key” and press the “Select” key. The
following options are displayed when you select “Call Control”:
o Call Waiting
o Call Forward
o Call Barring
o Caller Id
o Dtmf
o Prefix Dial
• Select “Call Forward” using the “Down key” and press the “Select” key.
The following options are displayed when you select “Call Forward”:
o When Busy
o No Reply
o Unconditional
When Busy: When this option is selected, the call is forwarded to the

PWG-600 User Guide
- 18 -
corresponding phone number if the calling party finds your PWG busy.
No Reply: When this option is selected, the call is forwarded to the
corresponding phone number if an incoming call remains unanswered.
Unconditional:
• Select one of the above and press the “Select” key.
Call Barring (VoIP Call Only)
This option allows barring of (VOIP) incoming as well as outgoing calls.
The steps to activate Call barring are as follows:
• From the desktop, press the “Menu” key.
• Select the “Settings” option using the “Down key” and press the “Select”
key. The following options are displayed when you select “Settings”:
o General Configuration
o WiFi Settings
o VoIP Settings
o Gsm Settings
o Gprs Settings
o Bluetooth Settings
• Select “VoIP Settings” using the “Down key” and press the “Select” key.
The following options are displayed when you select “VoIP Settings”:
o General
o Call Control
o Profiles
• Select “Call Control” using the “Down key” and press the “Select” key. The
following options are displayed when you select “Call Control”:
o Call Waiting
o Call Forward
o Call Barring
o Caller Id
o Dtmf
o Prefix Dial
• Select “Call Barring” using the “Down key” and press the “Select” key. The
following options are displayed when you select “Call Waiting”:
o Select “Incoming” and press the “Select” key and the PWG will bar
all incoming VoIP calls
o Select “Outgoing” and press the “Select” key and the PWG will bar
all outgoing VoIP calls
• Select one of the above and press the “Select” key.

PWG-600 User Guide
- 19 -
Caller Id (VoIP Call Only)
This option allows you to activate the (VOIP) Caller Id facility.
The steps to enable the Caller Id are as follows:
• From the desktop, press the “Menu” key.
• Select the “Settings” option using the “Down key” and press the “Select”
key. The following options are displayed when you select “Settings”:
o General Configuration
o WiFi Settings
o VoIP Settings
o Gsm Settings
o Gprs Settings
o Bluetooth Settings
• Select “VoIP Settings” using the “Down key” and press the “Select” key.
The following options are displayed when you select “VoIP Settings”:
o General
o Call Control
o Profiles
• Select “Call Control” using the “Down key” and press the “Select” key. The
following options are displayed when you select “Call Control”:
o Call Waiting
o Call Forward
o Call Barring
o Caller Id
o Dtmf
o Prefix Dial
• Select “Caller Id” using the “Down key” and press the “Select” key. The
following options are displayed when you select “Caller Id”:
o Disable
o Enable
• Select “Disable” and press the “Select” key to disable the Caller Id facility.
• Select “Enable” and press the “Select” key to enable the Caller Id facility.
Send DTMF tone
You can send a DTMF tone using the Alpha-numeric keys during call progress.
• Enter the number using the Alpha-numeric keys from the keypad and
press the accept key of PWG-600.
• To delete the number entered press the “Back” key. The character to the
left of the cursor is deleted when you press the “Back” key. After all the
characters are deleted, press the “Back” key to go back to the call list.
• Answer a call
Reject a call
Select the contact or the number whose call you want to reject from the call list
and press the reject key. During the incoming call alert (hearing of the ring tone)
press the Reject key to reject a call.

PWG-600 User Guide
- 20 -
Put a call on hold
During a call you can put a caller on hold by pressing the “Hold” key. To cancel
“Hold” feature, press the “Retrieve” key.
Have a Conference
You can have a conference call using PWG-600. The calls that were put on hold
get added to the current conversation. The steps to add a caller to the current
conversation are as follows:
• Press the “Hold” key. The following options are displayed when you press the
“Hold” key:
o Hold
o Conference (Conference option is only for calls on GSM)
o Transfer (Transfer option is only for calls on VOIP)
o End Call
• Select “Conference” and press the “Select” key.
Note: Transfer option is only for calls on VOIP
Ending a call
During a call conversation, press the “drop call” key to end the call.
Automatic key lock
You can lock the keypads to prevent the keys from being pressed accidentally,
for example, when your phone is in a bag or in the pocket.
To activate automatic key lock feature if it is not yet enabled, do the following:
• From the desktop, press the “Menu” key.
• Select “Settings” using the “Down” key and press the “Select” key.
• Select “General Configuration” and press the “Select” key.
• Navigate to “Keypad Lock” and press the “Select” key.
• Choose the desired settings using the “Up” or “Down” key and press the
“Select” key to activate the automatic key lock.
Note: Select “Disable” to disable automatic key lock feature.
Manual key lock
To manually lock the keypads, press the “Menu” key and then press the “ ”
immediately.
If the keypad is being locked, press the “Menu” key and then press the “ ”
immediately unlock the keypad.
Power saving
You can set power saving mode in the PWG-600. In power saving mode the
handset consumes less power. To activate power saving mode:
• From the desktop, press the “Menu” key.
• Select “Settings” using the “Down key” and press the “Select” key.

PWG-600 User Guide
- 21 -
• Select “General Configuration” and press “Select” key.
• Select “Powersaving” using the “Down” key and press the “Select” key.
The following options are then displayed.
o Enable/Disable
Select “Enable” and press the “Select” key to activate power saving
mode. Selecting “Disable” disables the power saving mode.
Note: For maximum power consumption, please turn off WiFi if not
needed.
• Select “LCD Backlight” using the “Down” key and press the “Select” key.
The following options are then displayed.
o “On”: Select this option to turn on the LCD backlight when the unit
goes to power saving mode.
o “Off”: Select this option to turn off the LCD backlight when the unit
goes to power saving mode.
o Select “Brightness” to adjust the LCD backlight brightness using the
“Down” key and press the “Select” key. There are 3 levels of
brightness, level one being the dimmest while level 3 the brightest.
Select the required LCD backlight brightness required and press
the “Select” key.
Note: For maximum power consumption, please turn off WiFi if not needed.
Making Balance Enquiry
Enter *212# and press the “Accept” key to find out the balance talk time. This is
the talk time that is remaining in your GSM account.
Note: This feature is operator dependent and the numbers may differ from the
above example. Please consult your GSM operator manual on how to make
balance enquiry via SMS.
Connecting a wired headset
Connect a wired headset to the WHS (Wired Headset) terminal on the PWG-600
handset. This is shown on page Error! Bookmark not defined.. You can answer
an incoming call from a WHS if no Bluetooth enabled headset is paired with
PWG-600.
Setting speaker phone volume
You can set the volume of the speaker to a desired level.
To set the volume of the speaker:
• From the desktop, press the “Menu” key.
• Select “Settings” using the “Down key” and press the “Select” key.
• Select “VoIP Settings” and press the “Select” key.
• Select “General” and press the “Select” key.
• Select “Speaker Volume” using the “Down key” and press the “Select” key.
Ten volume levels are displayed ranging from Level 1 to Level 10.
• Select a volume level and press the “Select” key.

PWG-600 User Guide
- 22 -
Setting Microphone volume
To set the volume of the microphone:
• From the desktop, press the “Menu” key.
• Select “Settings” using the “Down key” and press the “Select” key.
• Select “VoIP Settings” and press the “Select” key.
• Select “General” and press the “Select” key.
• Select “Mic Volume” using the “Down key” and press the “Select” key.
Eight volume levels are provided ranging from Level 1 to Level 8.
• Select a volume level and press the “Select” key.
Setting the LCD Sleep Interval
This menu allows you to set the time interval for which the LCD display remains
ON or OFF. To set the LCD sleep interval:
• From the desktop, press the “Menu” key.
• Select “Settings” using the “Down key” and press the “Select” key.
• Select “General Configuration” and press the “Select” key.
• Select “LCD sleep interval” using the “Down key” and press the “Select”
key. Time intervals are provided from 20 seconds to 160 seconds.
• Select a time interval from the list and press the “Select” key.
Turning on the Keypad Light
You can turn on or turn off the keypad light by performing the following steps:
• From the desktop, press the “Menu” key.
• Select “Settings” using the “Down key” and press the “Select” key.
• Select “General Configuration” and press the “Select” key.
• Select “Keypad Light” using the “Down key” and press the “Select” key.
Two options are displayed.
o Off
o ON
• Select “Off ” and press the “Select” key to turn off the Keypad Light.
• Select “ON” and press the “Select” key to turn on the Keypad Light.
Setting the date and the time
You can set the time and the date. PWG-600 displays the date and time on the
screen after the LCD sleep interval if the power on mode is set. If the power on
mode is set as OFF, the screen remains blank after the LCD sleep interval until
PWG-600 remains idle.
Setting the time
The steps to set time are as follows:
• From the desktop, press the “Calendar” key of PWG-600.
• Select “Settings” using the “Select” key. The following submenus appear:
o Set time & date
o Set alarm

PWG-600 User Guide
- 23 -
• Select “Set time & date” and press the “Select” key.
o Enter the hours and press the “Up” key if only one digit is being
entered in this field
o Enter the minutes and press the “Up” key if only one digit is being
entered in this field
o Enter the seconds and press the “Up” key if only one digit is being
entered in this field
o Select “AM” or “PM” using the “Up” or “Down” key and press the
“Select” key
Note: The time shown is in 12 hour time format
Setting the date
The steps to set the date are as follows:
• From the desktop press the “Calendar” key of PWG-600.
• Select “Settings” using the “Select” key. The following submenus appear:
o Set time & date
o Set alarm
• Select “Set time & date” using the “Down key” and then press the “Select”
key.
o Navigate to the date column by using the “Down” key
o Enter the Day number and press the “Up” key if only one digit is
being entered in this field
o Enter the Month number and press the “Up” key if only one digit is
being entered in this field
o Enter the Year number and press the “Up” key
o Press the “Select” key to save the date
Setting LCD backlight
If PWG-600 is idle, the LCD light does not turn On. The LCD backlight turns “On”
during an incoming call and on any key press. You can turn the LCD backlight to
“Off” or “On” by performing the following steps:
• From the desktop, press the “Menu” key.
• Select “Settings” using the “Down key” and press the “Select” key.
• Select “General Configuration” and press the “Select” key.
• Select “LCD Sleep mode” using the “Down key” and press the “Select”
key. Two options are displayed.
o Enabled
o Disabled
• Select “Enabled” and press the “Select” key to turn off the LCD backlight
when PWG-600 is inactive.
• Select “Disabled” and press the “Select” key to turn on the backlight.
Note: Turning on the LCD backlight continuously will consume more power

PWG-600 User Guide
- 24 -
Alarm Clock
You can set an alarm using PWG-600.
The steps to set an alarm are as follows:
• From the desktop, press the “Calendar” key.
• Select “Settings” using the “Down key” and press the “Select” key.
• Select “Set Alarm” and press the “Select” key.
• If the Alarm Clock has previously been set, a menu with two options will
be displayed.
o Turn Off
Select this option and press the “Select” key to turn off the
alarm clock.
o Adjust Time
Select this option and press the “Select” key to adjust the
alarm clock time.
• Select “Alarm Clock” using the “Down key” and press the “Select” key. A
screen titled “Alarm Clock” is displayed showing the previously set alarm
time.
• Press the “Select” key. The following sub menus are displayed when you
press the “Select” key.
o Adjust: Select “Adjust” and press the “Select” key to adjust the
alarm time. A screen titled “Adjust Time” appears when you select
“Adjust”.
Key in the alarm in hours (and press the “Down” key if only
one digit is being entered in the hours field).
Key in the alarm in minutes (and press the “Down” key if
only one digit is being entered in the hours field).
Select “AM” or “PM” and press the “Select” key.
Press the “Menu/Select” key to set the alarm clock.
o Off: Select “Off” and press the “Select” key to turn off the alarm.
Restore Factory Defaults
You can reset some of the menu settings to their original values.
• From the desktop, press and hold the “Menu” key and reset the device.
• This restores the Factory Default values.

PWG-600 User Guide
- 25 -
U
US
SI
IN
NG
G
T
TH
HE
E
M
ME
EN
NU
US
S
Accessing a menu
• From the desktop press the “Menu” key will show the PWG-600 Main
Menu.
• Navigate to the required menu item and press the “Select” key to select
the menu. For example, Phonebook and press the “Select” key to select
it. If the submenu contains further submenus repeat this step.
List of the menus
1. Phone Book
a. Add New Contact
b. Search Contact
c. Delete Contacts
i. Select the Contacts to be deleted and press the “Select” key
to delete the Contact.
d. Edit Contact
2. Messages
a. Write New SMS
b. Incoming SMS
c. Sent SMS
3. Call Logs
a. Missed Calls
b. Received Calls
c. Dialed Calls
d. Delete Logs
i. All call records
ii. Missed Calls
iii. Received Calls
iv. Dialed Calls
4. Tones
a. Ringtone
b. Ring Volume
c. Alert Type
d. Key Beep
e. Profiles
i. General
• Ringtone
o Standard Ring
o Bell Ring
o UK Tone
o Love Story
o Safari

PWG-600 User Guide
- 26 -
o Wild Flower
o Blue Night
o Celebration
o Clear Water
o Pianist
• Ring Volume
o Level 1 ~ Level 5
• Alert Type
o Disable
o Ringer
o Vibrator
o Ring + Vibr
o Ring after Vibr
• Key Beep
o On
o Off
• Edit Name
• Activate
ii. Silent
• Ringtone
o Standard Ring
o Bell Ring
o UK Tone
o Love Story
o Safari
o Wild Flower
o Blue Night
o Celebration
o Clear Water
o Pianist
• Ring Volume
o Level 1 ~ Level 5
• Alert Type
o Disable
o Ringer
o Vibrator
o Ring + Vibr
o Ring after Vibr
• Key Beep
o On
o Off
• Edit Name
• Activate
iii. Meeting
• Ringtone
o Standard Ring

PWG-600 User Guide
- 27 -
o Bell Ring
o UK Tone
o Love Story
o Safari
o Wild Flower
o Blue Night
o Celebration
o Clear Water
o Pianist
• Ring Volume
o Level 1 ~ Level 5
• Alert Type
o Disable
o Ringer
o Vibrator
o Ring + Vibr
o Ring after Vibr
• Key Beep
o On
o Off
• Edit Name
• Activate
iv. Outdoor
• Ringtone
o Standard Ring
o Bell Ring
o UK Tone
o Love Story
o Safari
o Wild Flower
o Blue Night
o Celebration
o Clear Water
o Pianist
• Ring Volume
o Level 1 ~ Level 5
• Alert Type
o Disable
o Ringer
o Vibrator
o Ring + Vibr
o Ring after Vibr
• Key Beep
o On
o Off
• Edit Name

PWG-600 User Guide
- 28 -
• Activate
v. Pager
• Ringtone
o Standard Ring
o Bell Ring
o UK Tone
o Love Story
o Safari
o Wild Flower
o Blue Night
o Celebration
o Clear Water
o Pianist
• Ring Volume
o Level 1 ~ Level 5
• Alert Type
o Disable
o Ringer
o Vibrator
o Ring + Vibr
o Ring after Vibr
• Key Beep
o On
o Off
• Edit Name
• Activate
5. Settings
a) General Configuration
i. Out Going Call
• GSM
• VoIP
• Auto
ii. Powersaving
• Enable/Disable
o Disable
o Enable
• LCD Backlight
o On
o Off
• Brightness
o Level 1 ~ Level 3
iii. LCD sleep interval
• 20 sec
• 40 sec
• 60 sec

PWG-600 User Guide
- 29 -
• 80 sec
• 100 sec
• 120 sec
• 140 sec
• 160 sec
iv. LCD sleep mode
• Enable
• Disable
v. Keypad light
• Off
• On
vi. Keypad lock
• Disable
• 1 min
• 2 min
• 5 min
• 10 min
• 15 min
vii. Wall paper
• Lake view
• Sweet home
• Sunrise
• Hills
• Clear Beach
• Love Birds
• Princess
• Sunset
viii. Switch Off Tone
• Off
• On
b) WiFi Settings
i. General
• WiFi on/off
o Off
o On
• WiFi Connectivity
o Automatic
o Manual
ii. Profiles
• Manual
o Configuration
o Operating mode
Ad-HOC
Infrastructure

PWG-600 User Guide
- 30 -
o Channel
ch 1 ~ ch 11
o User Name
o Password
o ESSID
o Auth. Protocol
Off
SIM1 based
SIM2 based
EAP-MD5
EAP-MSCHAPv2
o Encryption
o Protocol
Disable
64bit Open
128bit Open
64bit WEP
128bit WEP
o Webkey
Key #1 ~ Key #4
o Advanced
o Power Saving
Off
On
o RTS/CTS Threshold
o Frag Threshold
o Transfer Rate
Auto
1 Mbps
2 Mbps
5.5 Mbps
11 Mbps
o Use DHCP
Yes
No
• Default
o Configuration
o Operating mode
Ad-HOC
Infrastructure
o Channel
ch 1 ~ ch 11
o User Name
o Password
o ESSID
o Auth. Protocol
Off

PWG-600 User Guide
- 31 -
SIM1 based
SIM2 based
EAP-MD5
EAP-MSCHAPv2
o Encryption
o Protocol
Disable
64bit Open
128bit Open
64bit WEP
128bit WEP
o Webkey
Key #1 ~ Key #4
o Advanced
o Power Saving
Off
On
o RTS/CTS Threshold
o Frag Threshold
o Transfer Rate
Auto
1 Mbps
2 Mbps
5.5 Mbps
11 Mbps
o Use DHCP
Yes
No
• IP Addr
• Subnet Mask
• Default GTWY
• Primary DNS
• Alternate DNS
• Default
o Configuration
o Operating mode
Ad-HOC
Infrastructure
o Channel
ch 1 ~ ch 11
o User Name
o Password
o ESSID
o Auth. Protocol
Off
SIM1 based
SIM2 based

PWG-600 User Guide
- 32 -
EAP-MD5
EAP-MSCHAPv2
o Encryption
o Protocol
Disable
64bit Open
128bit Open
64bit WEP
128bit WEP
o Webkey
Key #1 ~ Key #4
o Advanced
o Power Saving
Off
On
o RTS/CTS Threshold
o Frag Threshold
o Transfer Rate
Auto
1 Mbps
2 Mbps
5.5 Mbps
11 Mbps
o Use DHCP
Yes
No
• IP Addr
• Subnet Mask
• Default GTWY
• Primary DNS
• Alternate DNS
• Default
o Configuration
o Operating mode
Ad-HOC
Infrastructure
o Channel
ch 1 ~ ch 11
o User Name
o Password
o ESSID
o Auth. Protocol
Off
SIM1 based
SIM2 based
EAP-MD5
EAP-MSCHAPv2

PWG-600 User Guide
- 33 -
o Encryption
o Protocol
Disable
64bit Open
128bit Open
64bit WEP
128bit WEP
o Webkey
Key #1 ~ Key #4
o Advanced
o Power Saving
Off
On
o RTS/CTS Threshold
o Frag Threshold
o Transfer Rate
Auto
1 Mbps
2 Mbps
5.5 Mbps
11 Mbps
o Use DHCP
Yes
No
• IP Addr
• Subnet Mask
• Default GTWY
• Primary DNS
• Alternate DNS
• Default
o Configuration
o Operating mode
Ad-HOC
Infrastructure
o Channel
ch 1 ~ ch 11
o User Name
o Password
o ESSID
o Auth. Protocol
Off
SIM1 based
SIM2 based
EAP-MD5
EAP-MSCHAPv2
o Encryption
o Protocol

PWG-600 User Guide
- 34 -
Disable
64bit Open
128bit Open
64bit WEP
128bit WEP
o Webkey
Key #1 ~ Key #4
o Advanced
o Power Saving
Off
On
o RTS/CTS Threshold
o Frag Threshold
o Transfer Rate
Auto
1 Mbps
2 Mbps
5.5 Mbps
11 Mbps
o Use DHCP
Yes
No
• IP Addr
• Subnet Mask
• Default GTWY
• Primary DNS
• Alternate DNS
c) Voip Settings
i. General
• Voip on/off
o Off
o On
• Stun Server
• Speaker Volume
o Level 1 ~ Level 10
• Mic Volume
o Level 1 ~ Level 10
• Preferred Codec
o GSM
o aLaw
o uLaw
o G726
o G729
o G723.1
ii. Call Control

PWG-600 User Guide
- 35 -
• Call Waiting
o Off
o On
• Call Forward
o When busy
o Off
o On
o No reply
o Off
o On
o Unconditional
o Off
o On
• Call Barring
o Incoming
o Off
o On
o Outgoing
o Off
o On
• Caller Id
o Disable
o Enable
• Dtmf
o Inband
o Outband
• Prefix Dial
o Disable
o Enable
iii. Profiles
• Default0 ~ Default9
o User Number
o Authorization name
o Password
o Registrar
o Domain Name
o Outbound Proxy
o Mail Addr
o Edit Profile Name
o Activate
o Restore Defaults
d) Gsm Settings
i. General
• GSM Service
o Off

PWG-600 User Guide
- 36 -
o On
• Sim Switch
o SIM 1
o SIM 2
• Speaker Volume
o Level 1 ~ Level 10
• Mic Volume
o Level 1 ~ Level 10
• Pinlock SIM
• Change SIM Pin
e) Gprs Settings
i. Access Pt Name
ii. IP Address
f) Bluetooth Settings
i. Headsets
• Find headsets
• Paired Headsets
6. Status
a. IMEI Number
b. Bluetooth Address
c. MAC Address
d. Version
e. WiFi Status
f. SSID
g. Channel
h. Tx Rate
i. Signal Strength
j. Link Quality
k. MAC

PWG-600 User Guide
- 37 -
M
ME
EN
NU
U
F
FU
UN
NC
CT
TI
IO
ON
NS
S
Phonebook
You can edit the details of the contacts present in your phone book with this
option.
The steps to edit phone records are as follows:
• From the desktop, press the “Menu” key.
Note: The Phonebook can also be accessed using the hotkey. From the
desktop, press the “P.book” key.
• Using the “Navigation” key, navigate to the “Phonebook” menu and press
the “Select” key.
• Select “Edit Contact” and press the “Select” key
• Using the “Up/Down” key, navigate to the contact that you want to edit and
press the “Select” key.
Note: To search for a contact, use the key pads to enter the first character
of the said contact and the cursor will jump, highlighting the first available
contact with that character.
• Enter the Contact Name and press the “Next” button.
Note: If you made a mistake, press the “Clear” button. Holding down the
“Clear” button for a few seconds also deletes all characters in the entry
box.
• Enter the Phone Number and press the “Next” button to save changes.
The following options are shown when you press the “Select” key.
• Add New Contact
• Search Contact
• Delete Contacts
• Edit Contact

PWG-600 User Guide
- 38 -
1. Select “Search” and press the “Select” key.
A contact list screen is displayed. Key in the first letter of the saved
contact with the phone number. The alphabet ‘ABC’ are displayed at the
bottom. This indicates that the alphabet keys can be used to search the
contact. To enter numbers, press ‘#’ until the “ABC” is changed to “123”
and vice versa.
2. After the contact has been found, press the “Options” key or press the
“Back” key to go back to the phonebook list. The following options are
available:
a. Edit Contact
b. Delete Contact
c. Assign Speeddial
d. Unassign Speeddial
3. Select “Edit” and press the “Select” key.
4. Enter the name and press “Next” key.
5. Enter the phone number and press “Next” key to save the contact.
Messages
Using the SMS service (Short Message Service) you can send and receive text
messages.
Writing and sending a message
To send a message:
1. From the desktop, press the “Menu” key.
2. Navigate to the “Messages” menu icon using the “Navigational” keys and
press the “Select” key.
3. The following submenus are displayed when you selected “Messages”
a. Write New SMS
b. Incoming SMS
c. Sent SMS
4. Select “Write New SMS” and press the “Select” key.
5. Type the SMS using the key pad and press the “Next” key after you’ve
completed the SMS.
Note: Below are the keys that could be useful during SMS operation.
• The maximum number of characters per SMS is set at 160 and the
remaining characters will be shown as you type the SMS.
• Press and hold down the “Clear” key for a few seconds to clear off
any characters on the screen.
• Press the “#” key to toggle the big, small or number alphabets
• Press the “*” key to toggle extra characters like comma,
multiplication symbols, dollar sign, percentage sign etc.

PWG-600 User Guide
- 39 -
6. Key in the phone number of the recipient and press the “Option” key.
7. Select “Send Message” and press the “Select” key or select the “Contacts”
to send the SMS using the existing phonebook contacts.
8. A confirmation screen will be shown. Press the “Send” key to confirm
sending the SMS.
9. A message will be shown on the screen to indicate that the message had
been sent.
Viewing the details of the received messages
When you receive a message the desktop will show “New message: 1” to
indicate that a new message has been received.
To view the details of a received message:
1. From the desktop, press the “Show” key OR select “Menu” key and then
navigate to the “Messages” menu and press the “Select” key.
2. The following submenus are displayed when you select “Messages”.
a. Write New SMS
b. Incoming SMS
c. Sent SMS
3. Select “Incoming SMS” and press the “Select” key. A list of contact names
(for messages received from persons whose numbers are added in the
contact list) and numbers (for messages received from persons whose
numbers are not present in the contact list) is shown.
4. Select a name or number and press the “Read” key. The with the following
format will be shown
a. Sender
b. Date
c. SMS Contents
5. Press the “Options” key and a menu with the following options will
displayed.
• Delete Message
a. Select “Delete Message” and press the “Select” key. A “Confirm
Deletion” confirmation message will be shown.
b. Press the “Ok” key to confirm deletion or press the “Cancel” key to
keep the message.
• Forward Message
a. Select “Forward Message” and press the “Select” key. The SMS
message will be shown and you can edit the contents of the SMS.
b. Press the “Send” key and a screen to enter the phone number will
be shown. Enter the recipient’s number and press the “Options”
key.
c. Press the “Send Message” key and then press the “Select” key.
d. A “Confirm Sending” confirmation message will be shown. Press

PWG-600 User Guide
- 40 -
the “Send” key to confirm sending of the message or press the
“Clear” key to cancel the message sending.
• Reply
a. Select “Reply” and press the “Select” key. A blank SMS screen will
be shown.
b. Key in the SMS and press the “Send” key to send a reply to the
sender.
Note: The difference between “Forward Message” and the “Reply”
message is that the “Forward Message” will re-use the contents of the
message whereas the “Reply” message will start from a fresh new
screen.
• Save Number
a. Select “Save Number” and press the “Select” key. A blank Contact
Name screen will be shown.
b. Key in the Contact Name and press the “Next” key
c. Key in the Contact Number and press the “Next” key to add the
contact to the Contact list.
Viewing details of sent items
1. From the desktop, press the “Menu” key.
2. Using the navigational keys navigate and select “Messages” and press the
“Select” key. The following submenus are displayed when you selected
“Messages” menu.
a. Write New SMS
b. Incoming SMS
c. Sent SMS
3. Select “Sent SMS” and press the ”Read” key.
4. Press the “Options” key for more options or press the “Back” key to go
back to the “Sent SMS” lists. The following submenus are displayed when
you selected the “Options” submenu.
• Forward Message:
a. Select “Forward” and press the “Select” key to forward the
message.
Note: The message to be forwarded will be shown and you can edit
the contents of the message prior sending.
b. Once editing is completed, press the “Send” key.
c. Enter the number of the person you want to forward the message to
or press the “Options” for more options.
d. Select the option “Send Message” and press the “Select” key. A
confirmation screen will be shown and press the “Send” key to send

PWG-600 User Guide
- 41 -
the SMS if the phone number is correct.
• Delete Message:
a. Select “Delete Message” and press the “Select” key to delete the
message. A delete confirmation screen will be shown.
b. Press “Ok” to confirm deletion.
Call Logs
This option provides you with a list of the missed calls, received calls, and dialed
calls.
• From the desktop, press the “Menu” key.
• Navigate to the “Call log” option using the navigational keys and press the
“Select” key.
This option allows you to check missed calls, received calls, and dialed
calls.
• The following options appear when you selected the “Call log” function:
o Missed calls
Select “Missed calls” and press the “Select” key.
A list of phone numbers that have not been attended
appears. You can save up to 20 records depending upon the
SIM card memory. If there are none, then a message is
displayed indicating that there are no missed calls. Press the
‘Accept’ key to call a number. OR
Select a phone number using the up or down keys and press
the “Select” key. The following options appear when you
select a phone number.
Call: Select “Dial” using arrow keys and press the “Select”
key to call the selected phone number.
Delete: Select “Delete” using arrow keys and press the
“Select” key to delete the selected phone number.
Save: Select “Save” using arrow keys and press the “Select”
key to save the selected phone number in the Phonebook.
o Received Calls
Select “Received Calls” and press the “Select” key.
A list of phone numbers that have been received and
answered appears. You can save up to 20 records
depending upon the SIM card memory. If there are none,
then a message “List empty” is displayed indicating that
there are no received calls. Press the ‘Accept’ key to call a
number. OR
Select a phone number using the up or down keys and press

PWG-600 User Guide
- 42 -
the “Options” key. The following options appear when you
select a phone number.
Call Back: Select “Call Back” using arrow keys and press
the “Dial” key to call the selected phone number.
Save: Select “Save” and press the “Save” key. Enter the
Contact Name and press the “Next” key. Enter the Contact
Number and press the “Next” key to save the number to your
contact list.
Send SMS: Select “Send SMS” using arrow keys and press
the “Send” key to send SMS. Enter the SMS message to be
sent and press the “Send” key.
o Dialed Calls
Select “Dialed Calls” and press the “Select” key.
A list of phone numbers that have been successfully dialed
appears. You can save up to 20 records depending upon the
SIM card memory. If there are none, then a message is
displayed indicating that there are no dialed calls. Press the
‘Accept’ key to call a number. OR
Select a phone number using the up or down keys and press
the “Options” key. The following options appear when you
select a phone number.
Call Back: Select “Call Back” using arrow keys and press
the “Dial” key to call the selected phone number.
Save: Select “Save” and press the “Save” key. Enter the
Contact Name and press the “Next” key. Enter the Contact
Number and press the “Next” key to save the number to your
contact list.
Send SMS: Select “Send SMS” using arrow keys and press
the “Send” key to send SMS. Enter the SMS message to be
sent and press the “Send” key.
o Delete Logs
Select “Delete Logs” and press the “Select” key. A list of
options will be displayed when the “Select” key is pressed.
All call records: Select “All” and press the “Select” key to
delete all the numbers present in the Call Logs. A delete
confirmation message will be displayed. Press “Ok” key to
confirm deletion OR press the “Cancel” key to abort
cancellation.
Missed Calls: Select “Missed Calls” and press the “Select”
key to delete the missed call list. A delete confirmation
message will be displayed. Press “Ok” key to confirm
deletion OR press the “Cancel” key to abort cancellation.
Received Calls: Select “Dialed” and press the “Select” key
to delete the dialed number list.
Dialed Calls: Select “Received” and press the “Select” key

PWG-600 User Guide
- 43 -
to delete the received number list.
Note: A delete confirmation screen will be displayed when
the Delete Logs submenu is chosen. Press “Ok” key to
confirm deletion or press the “Cancel” key to abort deletion.
The call log details are saved to the local memory and will be
erased if the battery is removed.
TONES
Setting ring tones:
You can set a ring tone to PWG-600 using this option.
The steps to set a ring tone are as follows:
1. From the desktop, press the “Menu” key.
2. Navigate to the “Tones” menu using the navigational keys and press the
“Select” key.
3. The “Tones” submenu will be displayed with the following options:
• Ring tone: Select “Ring tone” and press the “Select” key. The
following ring tones are displayed.
o Standard Ring
o Bell Ring
o UK Tone
o Love Story
o Safari
o Wild Flower
o Blue Night
o Celebration
o Clear Water
o Pianist
Select the desired ring tone using the “Up” or “Down” key and
press the “Select” key to activate the ring tone.
• Ring Volume: Select “Ring Volume” and press the “Select” key.
The following ring volumes are displayed.
o Level 1 ~ 5
Select the desired ring volume using the “Up” or “Down” key and
press the “Select” key to activate the ring volume.
• Alert Type: Select “Alert Type” and press the “Select” key. The
following alert types are displayed.
o Disable: Select “Disable” and press the “Select” key to
disable the ringer and vibrator.
o Ringer: Select “Ringer” and press the “Select” key to
enable the ringer. A selected ring tone is played
whenever an incoming call is received.
o Vibrator: Select “Vibrator” and press the “Select” key to

PWG-600 User Guide
- 44 -
enable the vibrator. The PWG-600 vibrates whenever an
incoming call is received.
o Ring + Vibr: Select “Ring + Vibr” and press the “Select”
key to enable both the ringer and vibrator. The PWG-600
rings and vibrates whenever an incoming call is received.
o Ring after Vibr: Select “Ring after Vibr” and press the
“Select” key. The PWG-600 rings after the vibrator turns
on whenever an incoming call is received.
Select the desired alert type using the “Up” or “Down” key and
press the “Select” key to activate the alert type.
• Key Beep: Select “On” to activate the key beeping function
whenever a key is press or “Off” to deactivate this function.
o Off
o On
• Profiles: Select “Profile” and press the “Select” key. The
following profiles are displayed.
o General
o Silent
o Meeting
o Outdoor
o Pager
Select the desired profiles using the “Up” or “Down” key and
press the “Select”. Then navigate to the “Activate” and press the
“Select” key to activate the selected profile.
SETTING RING TONE PROFILES
You can activate, personalize and edit a ring tone profile as follows:
1. From the desktop, press the “Menu” key.
2. Using the navigational keys select “Tones”, then press the “Select” key
and the following options appear.
o Ring tone
o Ring Volume
o Alert Type
o Key Beep
o Profiles
3. Select “Profiles”, then press the “Select” key and the following options
appear:
o General
o Silent
o Meeting
o Outdoor
o Pager

PWG-600 User Guide
- 45 -
4. Select the profile that you want to activate or personalize and press the
“Select” key. The following submenus are displayed when a profile is
selected.
a. Ring tone: Select “Ring tone” and press the “Select” key to
personalize the ring tone. The following options are displayed:
o Standard Ring
o Bell Ring
o UK Tone
o Love Story
o Safari
o Wild Flower
o Blue Night
o Celebration
o Clear Water
o Pianist
Select the desired ring tone using the “Up” or “Down” key and press
the “Select” key to activate the ring tone.
b. Ring Volume: Select “Ring Volume” and press the “Select” key.
The following ring volumes are displayed.
o Level 1 ~ 5
Select the desired ring volume using the “Up” or “Down” key and
press the “Select” key to activate the ring volume.
c. Alert Type: Select “Alert Type” and press the “Select” key. The
following alert types are displayed.
o Disable: Select “Disable” and press the “Select” key to
disable the ringer and vibrator.
o Ringer: Select “Ringer” and press the “Select” key to enable
the ringer. A selected ring tone is played whenever an
incoming call is received.
o Vibrator: Select “Vibrator” and press the “Select” key to
enable the vibrator. The PWG-600 vibrates whenever an
incoming call is received.
o Ring + Vibr: Select “Ring + Vibr” and press the “Select” key
to enable both the ringer and vibrator. The PWG-600 rings
and vibrates whenever an incoming call is received.
o Ring after Vibr: Select “Ring after Vibr” and press the
“Select” key. The PWG-600 rings after the vibrator turns on
whenever an incoming call is received.
Select the desired alert type using the “Up” or “Down” key and
press the “Select” key to activate the alert type.

PWG-600 User Guide
- 46 -
d. Key Beep: Select “On” to activate the key beeping function
whenever a key is press or “Off” to deactivate this function.
o Off
o On
e. Edit Name: Select “Edit Name” and press the “Select” key to
change the name of a profile. Key in the desired profile name and
press the “Select” key.
f. Activate: Select “Activate” and press the “Select” key to activate
this profile.
SETTINGS
The “Settings” menu allows you to configure the phone features. The “Settings”
menu can be access from the desktop by pressing the “Menu” key and using the
navigational keys to select “Settings” and press the “Select” key.
The “Settings” screen is displayed as shown:
o General Configuration
o WiFi Settings
o VoIP Settings
o GSM Settings
o GPRS Settings
o Bluetooth Settings
General Configuration
By selecting the “General Configuration” sub menu the following menus are
displayed:
o Outgoing Call
o Powersaving
o LCD sleep interval
o LCD sleep mode
o Keypad light
o Keypad lock
o Wallpaper
o Switchoff tone
WiFi Settings
You can set WiFi parameters using this option.
1. From the desktop, press the “Menu” key and using the navigational keys
select “Settings” and press the “Select” key. The “Settings” screen is
displayed as shown:
o General Configuration
o WiFi Settings

PWG-600 User Guide
- 47 -
o VoIP Settings
o GSM Settings
o GPRS Settings
o Bluetooth Settings
2. Using the navigational keys, select “WiFi Settings” and press the “Select” key.
Two options are then displayed.
a. General: Selecting this option displays two submenus.
o WiFi On/Off: Select this menu and press the “Select” key.
The following options are displayed.
• On: Select “On” and press the “Select” key to turn
WiFi On.
• Off: Select “Off” and press the “Select” key to turn
WiFi Off.
o WiFi Connectivity: The PWG-600 is capable of scanning for
WiFi access point “automatically” or “manually”. Select “WiFi
connectivity” and press the “Select” key. Two options are
then displayed.
• Automatic: Select this option and press the “Select”
key. The PWG-600 checks for WiFi access point in
the vicinity and automatically connects to any
available WiFi access point.
• Manual: Select this option and press the “Select” key.
Then press the “Select” key to start to manually
scanning for access point. The PWG-600 will then
scans for WiFi access point and displays a list of
available access point. Select an access point and
press the “Select” key to attempt to get connected to
the access point.
b. Profiles: A single manual profile and three default profiles are
provided. Select Profiles and press the “Select” key to set parameters.
The following options appear.
o Manual: You can set the parameters of manual profile if you
select “Manual” and press the “Select” key. The following
submenus are displayed when you selected “Manual”.
• Configuration: Select “Configuration” and press the
“Select” key to configure the following parameters.
o Operating Mode
Ad-Hoc
Infrastructure
o Channel
ch 1 ~ ch 11
o User Name: For authentication purposes
o Password: For authentication purposes
o ESSID: Enter the ESSID (Extended Service
Set Identification). This is the ID that you must

PWG-600 User Guide
- 48 -
enter and shall match the ID on the designated
access point that you want to connect to on the
WiFi network.
o Auth. Protocol
Off
SIM1 based
SIM2 based
EAP-MD5
EAP-MSCHAPv2
• Encryption: Select “Encryption” and press the
“Select” key to configure the following parameters.
o Protocol: Select any of the following options
and press the “Select” key.
Disable
64 bit Open
128 bit Open
64 bit WEP
128 bit WEP
o WEP Key: Select this option, key in the WEP
encryption key and press the “Select” key.
Key #1 ~ Key #4
Note: Please consult your network administrator for more
information on setting up the network security of your PWG-600
device.
• Advanced: Select “Advanced” and press the “Select”
key to configure the following parameters.
o Power Saving:
On: Turning this option to “On” enables
power saving mode and prolongs the
battery consumption during WiFi
operation.
Off: Turns off power saving mode during
WiFi operation.
Note: Setting the power saving to “On” will
enable power saving mode only if the access
point supports power saving mode.
o RTS/CTS Threshold: Select this option and
key in the RTS/CTS threshold setting and
press the “Select” key.
o Frag Threshold: Select this option and key in
the frag threshold setting and press the
“Select” key.

PWG-600 User Guide
- 49 -
o Transfer Rate: Select this option and select
the desired data transfer rate.
Auto
1 Mbps
2 Mbps
5.5 Mbps
11 Mbps
o Use DHCP (Dynamic Host Configuration
Protocol): Select this option and then select
“Yes” to set the PWG-600 to operate using
server assigned IP (Internet Protocol) address
OR;
o Select “No” to manually fixed assignment of IP
address for this device on the network. If this
option is selected, a list of options will be
displayed:
IP Addr (Address): Select this option
and key in the desired IP address for
this device on the network.
Subnet Mask: Select this option and
key in the desired subnet mask for this
device on the network.
Note: A typical class C network will have
a default “255.255.255.0” as the subnet
mask.
Default GTWY (Gateway): Select this
option and key in the desired gateway.
Note: A gateway is typically a device on
the network that has the key or access
to the internet.
Primary DNS (Domain Name Server):
Select this option and key in the desired
primary domain name server.
Alternate DNS: Select this option and
key in the desired alternate domain
name server.
Note: All devices connected to the IP network
requires a uniquely identified IP address to
registers itself onto the network.
Note: Please consult your network administrator for more

PWG-600 User Guide
- 50 -
information on setting up the PWG-600 device on your network.
o A total of three WiFi profiles are available with the profile
name default and can be set. The settings are discussed in
“Setting WiFi parameters”
o Edit Profile Name: Select “Edit Profile Name” to change the
profile name.
o Activate: Select “Activate” to activate a “Default” profile.
Setting VoIP profiles
You can set parameters for using the VoIP profile using this option.
1. From the desktop, press the “Menu” key and using the navigational keys
select “Settings” and press the “Select” key.
2. Select “VoIP Settings” and press the “Select” key. The following
submenus appear when you select “VoIP Settings”.
a. General: Selecting this option displays the following submenus:
• VoIP On/Off: Turns VoIP On or Off
• Stun Server: Enter the address of the STUN server
• Speaker Volume: Select “Speaker Volume” and press the
“Select” key. Select a volume level and press the “Select”
key. Ten volume levels are provided ranging from Level 1 to
Level 10. Select a speaker volume level and press the
“Select” key.
• MIC Volume: Select “Microphone Volume” and press the
“Select” key. Ten volume levels are provided ranging from
Level 1 to Level 10. Select a microphone volume level and
press the “Select” key.
• Preferred Codec: The following codecs are available.
GSM
a Law
μ Law
G726
G729
G723.1
Select a codec and press the “Select” key.
b. Call Control: Selecting this option displays the following
submenus:
i. Call Waiting: Select “Call waiting” if you want to activate call
waiting while another call is in progress. The following
options are displayed:
On: Select ‘On’ to enable call waiting.
Off: Select ‘Off’ to disable call waiting.
• Call Forward: To read how to activate call forward, please
see “Error! Reference source not found.” section.
• Call Barring: Select Call Barring and two options will be

PWG-600 User Guide
- 51 -
shown.
Incoming: Bars all incoming call when this option
is set to “On”
Outgoing: Bars all outgoing call when this option
is set to “On”
• Caller ID: When set to “On” it shows the caller phone
number.
• DTMF: DTMF is short for “Dual Tone Multi Frequency”.
Select DTMF and press “Select” key. The following
submenus are displayed.
Inband: Select “Inband” if the person you are
calling supports PSTN network only.
Outband: Select “Outband” if the person you are
calling linked to a VoIP server.
• Prefix Dial: Enable or disable prefix dialing using this option.
A prefix dial number can be set after prefix dialing is
enabled.
c. Profiles: Ten default profiles are provided. Default0~Default9.
Select a default profile and press the “Select” key. The following
options are displayed.
• Default0~Default9:
o User Number: Sets the phone number of the VoIP
extention and may be use for authentication purposes
with the VoIP Server.
o Authentication Name: Sets the authentication name for
authentication purposes with the VoIP Server.
o Password: Sets the password for authentication
purposes with the VoIP Server.
o Registrar: Sets the VoIP Server Registrar address
o Domain Name: Sets the VoIP Server Domain name
address
o Outbound Proxy: Sets the VoIP Server outbound proxy
address
o Mail Addr: Sets the VoIP Server mail address
o Edit Profile Name: Select this option to assign a user-
friendly name to the profile.
o Activate: Select “Activate” and press the “Select” key if
you want to make the selected profile active.
o Restore Defaults: Select this option to restore the
original settings for the selected VoIP profile.

PWG-600 User Guide
- 52 -
Setting GSM parameters
GSM stands for “Global System for Mobile Communication”. You can set
parameters for using GSM as follows:
1. From the desktop, press the “Menu” key and select “Settings”. Press the
“Select” key to select the “Settings” menu.
2. Select “GSM Settings” and press the “Select” key. The following
submenus appear when you selected “GSM Settings”.
a. GSM Service (On/Off): Select “On” to activate GSM service. Select
“Off“ to turn off GSM service.
b. SIM Switch: Two SIM cards are provided, namely, SIM 1 and SIM
2. Select the SIM card that you want to activate and press the
“Select” key.
Note: Only one SIM card can be active. The inactive SIM (even
though is in the phone) will not be able to make or receive
calls/SMS unless it is made active.
c. Speaker Volume: Select the “Speaker Volume” and press the
“Select” key to set the speaker volume. Select a volume level you
want and press the “Select” key. Ten volume levels are provided
ranging from “Level 1” to “Level 10”. Select “Off” to turn off the
speaker.
d. Microphone Volume: Select “Microphone Volume” and press the
“Select” key to set the microphone volume. Ten volume levels are
provided ranging from “Level 1” to “Level 10”. Select a volume level
you want to set and press the “Select” key.
e. PIN lock SIM: Sets the PIN authentication to “On” or “Off”. When
the PIN lock SIM is being turned “On”, where applicable the phone
will request for PIN authentication before the phone can continue
with other operations.
f. Change SIM PIN: Sets the PIN authentication password and where
applicable the phone will request for PIN authentication before the
phone can continue with other operations.
Caution: If the incorrect PIN number is entered for more than three
times, the SIM will be in a “lock” state and will need to be “unlock”
using a PUK (Personal Unlock Key). The PUK number can be
found on the registration details of the SIM card or alternatively you
can contact your GSM service provider for the PUK details.

PWG-600 User Guide
- 53 -
Setting GPRS parameters
GPRS (General Packet Radio Service) is a network service that allows your
handset to be used for sending and receiving data over an Internet protocol (IP)
based network. You can set parameters for using GPRS as follows.
1. From the desktop, press the “Menu” key and select “Settings”. Press the
“Select” key to select “Settings” menu.
2. Select “GPRS” and press the “Select” key. The following submenus are
displayed when you selected the “GPRS” menu.
a. Access Point Name: Select this option and press the “Select” key
to set the name of the GPRS access point.
b. IP Address: Select this option and press the “Select” key to set the
IP address of the GPRS access point.
Pairing a Bluetooth headset with PWG-600
The Bluetooth PIN is used to authenticate two Bluetooth devices (that have not
previously exchanged link keys) with each other and create a trusted relationship
between them. If entered by the user, it is referred to as the ‘Bluetooth Passkey’.
This process of authenticating two Bluetooth devices is called pairing.
A paired Bluetooth headset can be used while making outgoing calls. Once the
headset has been paired, voice is enabled on the headset only for outgoing calls.
During an incoming call, a ring is heard on the paired Bluetooth headset. Press
the button on the Bluetooth headset to accept the call. Press the same button to
terminate the call.
The procedure to pair a Bluetooth headset with PWG-600 is as follows:
1. Put the headset in pairing mode. For example, press and hold the key of
the Bluetooth headset. An intermittent display of the LED takes place.
2. From the desktop, press the “Menu” key and using the navigational keys,
select “Settings” menu and then select “Bluetooth Settings”.
3. Select “Headset” and press the Select” key. The following submenus are
displayed.
a. Find Headset
b. Paired Headset
4. Select “Find Headset” and press the “Select” key. PWG-600 searches for
the available headsets within the Bluetooth range and displays a list of
their Bluetooth names.
5. Select the Bluetooth name of the headset you want to pair with PWG-600,
and press the “Select” key. A screen titled “PIN entry” appears on the
PWG-600 screen.
6. Enter the corresponding PIN (for example, type “0000” if the PIN is
specified as “0000”) and press the “Select” key.
7. Select “Paired headset” and press the “Select” key. The paired headset is
shown in the list of paired devices.

PWG-600 User Guide
- 54 -
INFORMATION
Viewing network statistics
You can view the transfer rate, SSID, WiFi strength, Link quality, Network mode,
Encryption status, and MAC address.
• From the desktop, press the “Menu” key.
• Select “Info” icon and press the “Select” key.
The following parameters are displayed when you selected the “Info” icon. Press
the “Next” key to view and scroll between pages.
Page 1: Phone Information
o IMEI Number: Shows the IMEI number
o Bluetooth Address: Shows the Bluetooth MAC address
o MAC Address: Shows the MAC address of the phone.
o Version: Shows the firmware version of the phone.
Page 2: Network Information
o WiFi Status: Shows the percentage of the WiFi signal.
o SSID: Displays the SSID of the connected access point.
o Channel: WiFi is available in various frequency bands that are
available in different channels. The channel shows you the current
channel the WiFi is connected to.
o Transmit Rate: Displays the rate at which data transfer is taking
place.
o Signal Strength: Shows the percentage of the VoIP signal
o Link Quality: Displays the quality of linking in percentage.
o MAC: Displays the MAC address
Page 3: Battery and connection information
o Bluetooth Strength: Displays the strength of the Bluetooth
networks.
o GSM Strength: Displays the strength of the GSM signal.
o VoIP Strength: Displays the strength of the VoIP signal.
o Battery Strength: Displays the battery strength.

PWG-600 User Guide
- 55 -
Viewing the GPRS Data Count
The GPRS Data Count displays the data transfer rate during data transmission
and during data reception.
To view the GPRS Data Count:
• From the desktop, press the “Menu” key and select “Info”. Press the
“Select” key and the following items are displayed.
GSM Strength
o GSM Strength
o WiFi Status
o Channel
o Transfer Rate
o GPRS Data Count
o SSID
o WiFi Strength
o Link Quality
o Network Mode
o Enc Status
o Device MAC Addr
o AP MAC Address
o Battery Strength
o Auth Status
o VoIP Strength
o Bluetooth Strength
o Version Number
o IMEI Number
o BT Address
• Select “GPRS Data Count” and press the “Menu /Select” key. The data
transfer rate is displayed.

PWG-600 User Guide
- 56 -
Viewing the Firmware Version and other information
To view the version of the current Firmware:
• From the desktop, press the “Menu” key.
• Using the navigational keys select “Info” and press the “Select” key. The
following information items are displayed. Press the “Next” key to go to
next page.
Page 1: Device Info
o IMEI Number
o Bluetooth Address: Bluetooth MAC address of the PWG-600
o MAC Address: The PWG-600 internal network chip MAC address
o Version: Firmware version
Page 2: WiFi Info
o WiFi Status:
o SSID:
o Channel: Channel or frequency the PWG-600 is connected to the
WiFi network
o Signal Strength: The percentage of signal strength of the WiFi
Network. Zero means the PWG-600 is with least signal strength
whilst one hundred denotes the highest level of signal strength.
o Link Quality:
o MAC Address: The MAC address of the Access Point that the
PWG-600 is connected to.
Page 3: Other Info
o Bluetooth Strength
o GSM Strength
o VoIP Strength
o Battery Strength

PWG-600 User Guide
- 57 -
Upgrading Firmware Using the USB Download Mode
The USB download mode is used for firmware upgrading. In order to upgrade the
firmware, the following are required which are provided to you with PWG-600:
• USB Driver files named “usbser.inf” and “usbser.sys”
• The USB firmware upgrade program file “Uploader_usb.exe”
• Firmware file named “bundle.bin”
The Firmware file “bundle.bin” and the “Uploader_usb.exe” file must be saved in
a single folder in your PC. When the “Uploader_usb.exe” file is run, it will look for
the “bundle.bin” file in the same folder.
The steps to enter the USB Download mode for firmware upgrading are as
follows:
1. Turn off the PWG-600 and remove the battery.
2. Press and hold down the “Volume decrease” key and at the same time
insert the battery into the battery compartment. The phone will then enter
the “Firmware Upgrade” mode with a message titled “Firmware upgrade
(USB)” appearing on the PWG-600 screen.
3. Connect a mini USB cable from the USB terminal of PWG-600 to a USB
port on your PC. A message appears on the PC screen asking for the
USB drivers. An installation wizard starts, guiding you with the USB driver
installation.
4. Note the COM port number for the inserted USB cable from Device
Manager under System Properties in your PC. It appears under the “Ports”
folder as “WIM Comm port (COM 7)” if ‘7’ is the <COM port number>.
5. The “Uploader_usb.exe” file shall be run from the command prompt as
follows:
a. Type “uploader_usb.exe <COM port number>” in the command
prompt and press the “ENTER” key on your keyboard.
b. For example, if the COM port obtained in step 2 is ‘7’ type
“uploader_usb.exe 7” and press the “ENTER” key.
6. The upgrade status is shown. Please wait while the firmware upgrade is
completed. The unit will restart once the firmware upgrade is completed.
CAUTION: DO NOT REMOVE THE BATTERY OR TURN OFF THE
DEVICE WHILE THE FIRMWARE UPGRADING IS TAKING PLACE.
REMOVING THE BATTERY DURING THE FIRMWARE UPGRADING
MAY CAUSE THE FIRMWARE UPGRADE TO FAIL, CAUSING THE
PHONE UNABLE TO BOOT UP.

PWG-600 User Guide
- 58 -
Browsing the Internet with a PC
You can use PWG-600 to browse the Internet, check e-mails using WiFi network
or using GPRS network.
If WiFi is available, then browsing takes place through the WiFi network. If WiFi is
unavailable, GPRS network is automatically selected for browsing.
• Connect the PWG-600 to the PC through the USB cable.
• A USB COM port is created. To find the COM port,
o Click “Start”, point to “Settings”, and select “Control Panel”. A
screen titled “Control Panel” is displayed when you select “Control
Panel”.
o Double-click the “System” icon. A screen titled “System” is
displayed.
o Click the “Hardware” tab and click the ‘Device Manager’ button. A
screen titled “Device Manager” is displayed when you select
‘Device Manager’.
o Expand the column named “Ports”. The port with the caption “WIM
Comm Port” is the USB COM port. Please memorize this COM
port.
• Click “Start”, point to “Settings”, and select “Control Panel”. A screen titled
“Control Panel” is displayed when you select “Control Panel”.
• Click the “Phone and Modem Options” icon. A screen titled “Phone and
Modem Options” is displayed.
• Click the “Modems” tab.
• Click “Add”.
• Select “Don’t detect my modem; I will select it from a list” and click ‘Next’.
A screen titled “Install New Modem” is displayed.
• Select “Standard 33600bps Modem” and click ‘Next’.
• Select the USB COM port, which is got in “step d” and click ‘Next’.
• Click Finish.
• If a message “Digital signature not found. Do you want to continue with the
installation?” appears, click ‘Yes’ and then click ‘Finish’.
• This completes the installion of the Modem on the USB COM port.
• To set up a new Dial-up connection, click “Start”, point to “Settings”, and
select “Control Panel”. A screen titled “Control Panel” is displayed when
you select “Control Panel”.
In case of Windows 2000 follow the steps below.
• Click the “Network and Dial-up Connections” icon. A screen titled “Network
and Dial-up Connections” is displayed.
• Double-click the “Make New Connection” icon. A network connection
Wizard guides you in setting up a new connection. Click ‘Next’.
• Select “Dial-up to the Internet” and click ‘Next’.
• Select “I want to setup my Internet connection manually, or I want to

PWG-600 User Guide
- 59 -
connect through a local area network (LAN)” and click ‘Next’.
• Select “I connect through a phone line and a modem” and click ‘Next’. If
you have more than one Modem installed, a screen titled “Choose
Modem” is displayed.
• Select the Standard 33600bps Modem installed on the USB COM port and
click ‘Next’.
• The telephone number to use is “*99#“. Don’t select the “Use area code
and dialing rules”. Click ‘Next’.
• Enter the PWG-600 Mobile number in the username field and click on OK.
You will be asked about the password. The password field can be left
blank. If the password is left blank, it will ask to confirm. Click on ‘Yes’.
Then click ‘Finish’.
• Enter a name for the new connection to save your settings and click
‘Next’.
• A message “Do you want to set up an Internet mail account now?” is
displayed after you click ‘Next’. Click ‘Yes’ if you wish to set up the Internet
mail account. Click “No” if you wish to set up the Internet account later.
Click ‘Next’ and then click ‘Finish’.
In case of Windows XP follow the steps below.
• Click the “Network Connections” icon. A screen titled “Network
Connections” is displayed.
• Click on the “Create a new connection” in the Network Tasks. A
network connection Wizard guides you in setting up a new connection.
Click “Next”. Select “Connect to the Internet” and click “Next”.
• Select “Set up my connection manually” and click “Next”.
• Select “Connect using dial-up modem” and click “Next”. If you have
more than one Modem installed, a screen titled “Select a Device” is
displayed.
• Select the Standard 33600bps Modem installed on the USB COM port
and click ‘Next’.
• Enter a name for the new connection to save your settings and click
“Next”.
• Enter the number “*99#”.
• Enter the PWG-600 Mobile number in the username field and click on
OK. You will be asked about the password. The password field can be
left blank. If the password is left blank, it will ask to confirm. Click on
“Yes”. Then click “Finish”.
When you want to browse the internet, click “Start”, point to “Settings”, and select
“Control Panel”. A screen titled “Control Panel” is displayed when you select
“Control Panel”. Click the “Network and Dial-up Connections” icon. A screen titled
“Network and Dial-up Connections” is displayed. Click the connection that you
created.
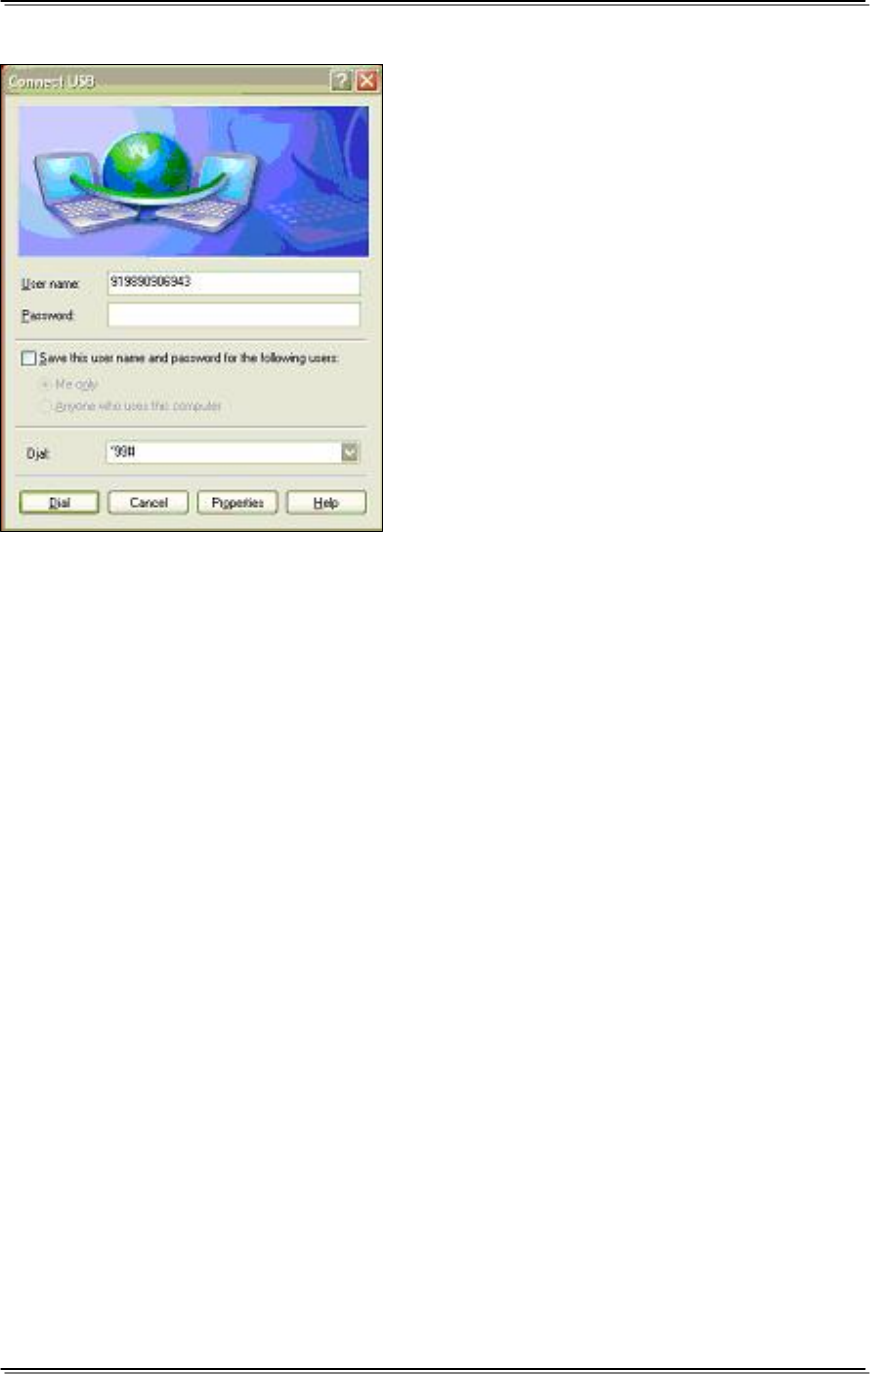
PWG-600 User Guide
- 60 -
• Click on the “Properties” button.
• In the General Tab, connect using
the modem that you installed on the
USB COM port. In the same Tab
click ‘Configure’.
• Unselect all the ‘Hardware features’.
Click ‘OK’. Then again click ‘OK’.
Then click ‘Dial’. The Dial-up
connection is setup.
Note: The procedure is the same while
browsing through WiFi or GPRS.
PDA Functions Using PWG-600
Connecting PWG-600 with a PDA (Personal Digital Assistant)
You can connect a PDA with PWG-600 through Bluetooth. Once connected, you
can perform all PWG-600 functions like making calls, receiving calls, sending
SMS, and receiving SMS.
The steps to connect the PDA with PWG-600 are as follows:
Using “Bluetooth Manager” on your PDA, attempt to locate (inquire for)
the Bluetooth devices in the vicinity.
• Select PWG-600 from the list of devices displayed.
• Pair the PDA with PWG-600 and enter the PIN when prompted.
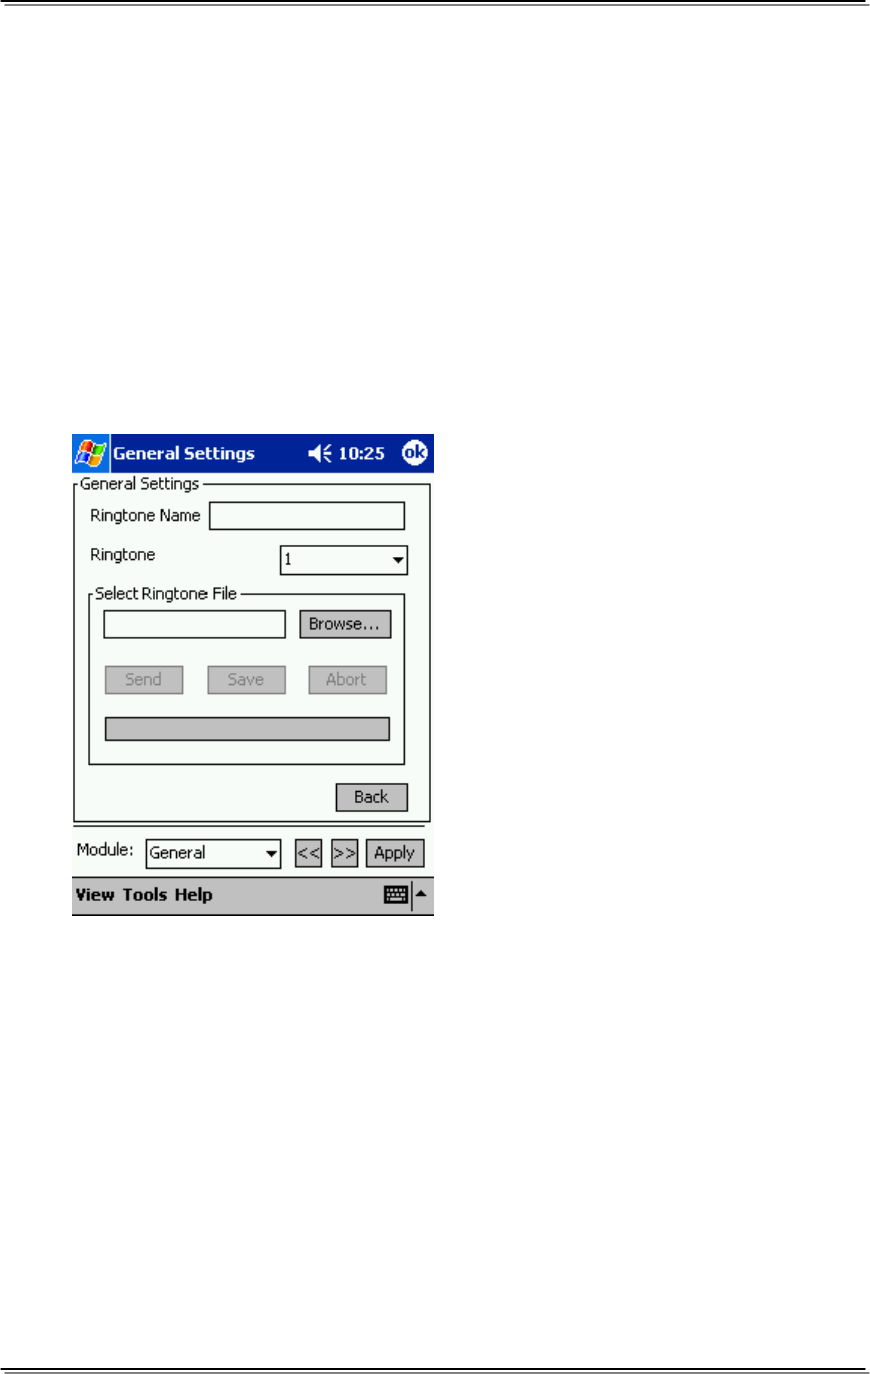
PWG-600 User Guide
- 61 -
Downloading polyphonic ring tones from a PDA
You can download polyphonic ring tones on your PWG-600 from a PDA. The
PDA must be Bluetooth enabled and must be paired with PWG-600.
The steps to download polyphonic ring tones are as follows:
• Press the “Config.Stat” button on the start up screen of “WIM for PDA”. A
screen titled “Profiles” is displayed.
• Click the radio button next to “Expert” and click “Edit Profiles”. A screen
titled “Bluetooth Settings” is displayed.
• Click the drop down arrow next to the “Module” field, select “General” and
click the ‘Next’ button. A screen titled “General Settings” is displayed.
• Click the ‘Next’ button four times. A screen titled “General Settings” is
displayed.
• Enter the name of the ring tone
in the “Ring tone” field.
• Click the drop down arrow next
to the “Ring tone” field and
select a desired ring tones.
• Click the “Browse” button next
to the “Select Ringtone File”
and select the “.wav” file of the
corresponding ring tone that
you want to download.
• Click the “Send” button to begin
download. Click “Save” to save
the ring tone on PWG-600.
• Click “Abort” to discontinue the
download.

PWG-600 User Guide
- 62 -
Setting SOS numbers
The international default SOS number is 112 which is network independent. In
the event of an emergency, please dial 112. The 112 can only work if there is at
least GSM network available.
You can set three emergency numbers (using PDA WIM) on PWG-600 to make
calls during an emergency. The PDA must be Bluetooth enabled and must be
paired with PWG-600.
The steps to set SOS numbers from the PDA are as follows:
• Press the “Config.Stat” button on the start up screen of “WIM for PDA”. A
screen titled “Profiles” is displayed.
• Click the radio button next to “Expert” and click “Edit Profiles”. A screen
titled “Bluetooth Settings” is displayed.
• Click the drop down arrow next to the “Module” field, select “GSM” and
click the ‘Next’ button. A screen titled “GSM Settings” is displayed.
• Enter the SOS numbers in the respective fields and click ‘OK’. The
previous screen appears when you click ‘OK’.
• Click ‘Apply’ to save the numbers.
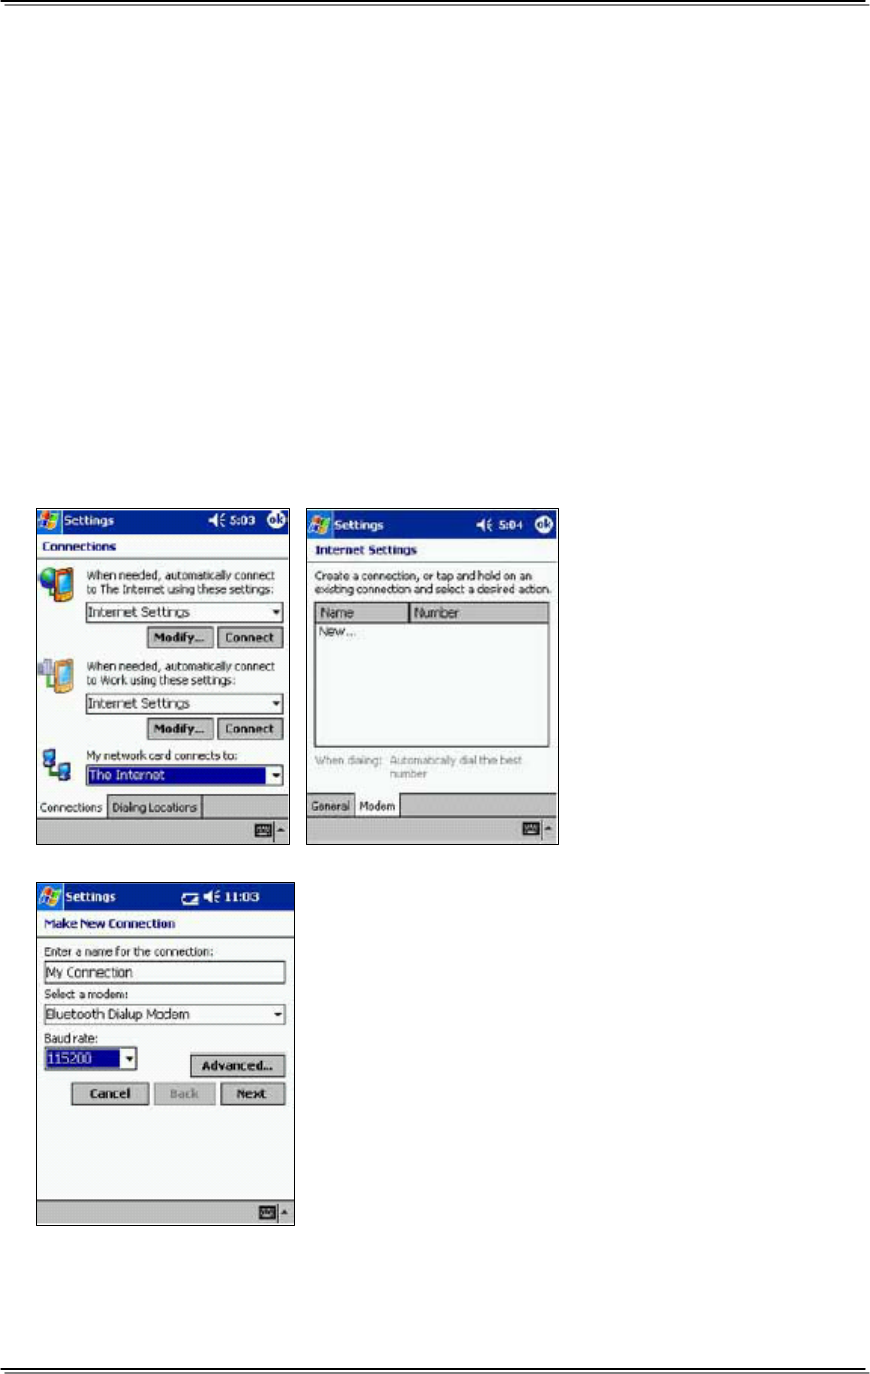
PWG-600 User Guide
- 63 -
B
BR
RO
OW
WS
SI
IN
NG
G
T
TH
HE
E
I
IN
NT
TE
ER
RN
NE
ET
T
W
WI
IT
TH
H
A
A
P
PD
DA
A
T
TH
HR
RO
OU
UG
GH
H
B
BL
LU
UE
ET
TO
OO
OT
TH
H
You can browse the Internet using a Bluetooth enabled PDA that has been
paired with PWG-600. Here PWG-600 functions as a modem. You can browse
the Internet using GPRS or WiFi networks.
Browsing the Internet using GPRS
In order to use GPRS, you have to set up a new connection on the PDA.
To set up a new connection:
• Create a new Internet connection on the PDA. To make a new
connection, click “Start”, point to “Programs”, then point to “Settings” and
click the “Connections tab”. A screen titled “Connections” is displayed.
• Click the “Modify’”
button and a
screen entitled
“Internet Settings”
is displayed.
•
• Click on “New” and
a screen entitled
“Make New
Connection” is
displayed.
• Enter the name of the connection in the
“Enter a name for the connection” field.
• Click the drop down arrow next to the
“Select a modem” field and select Bluetooth
Dialup Modem.
• Select the baud rate as 115200.
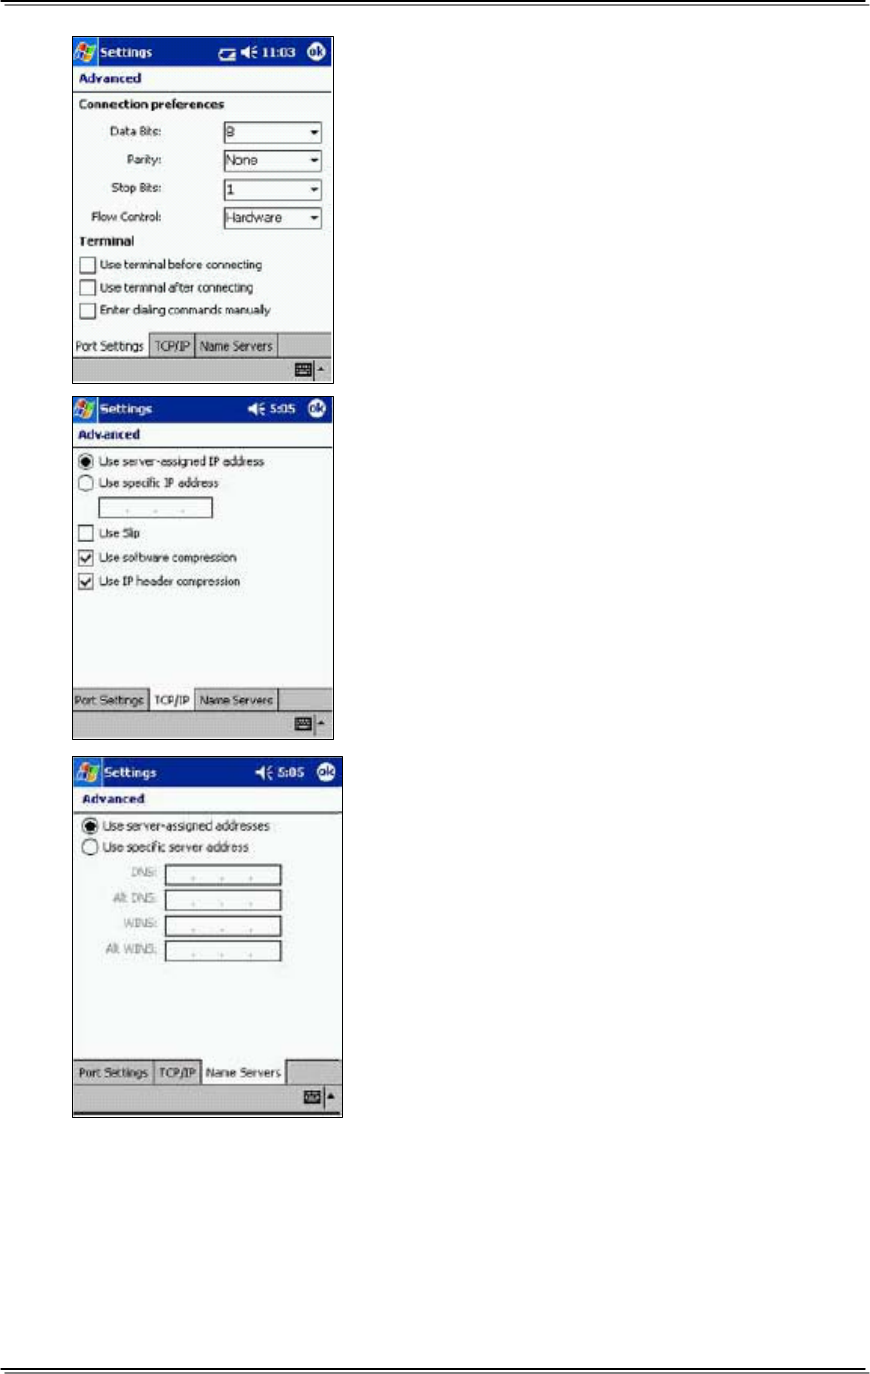
PWG-600 User Guide
- 64 -
• Click the ‘Advanced’ button. A screen
titled “Advanced” is displayed.
• Click the ‘TCP/IP’ button. A screen
showing the details of ‘TCP/IP’ is
displayed.
• Click the “Name Server” button. A
screen showing the details of “Name
Servers” Screen is displayed.
• Click on the “OK” button on the title bar.
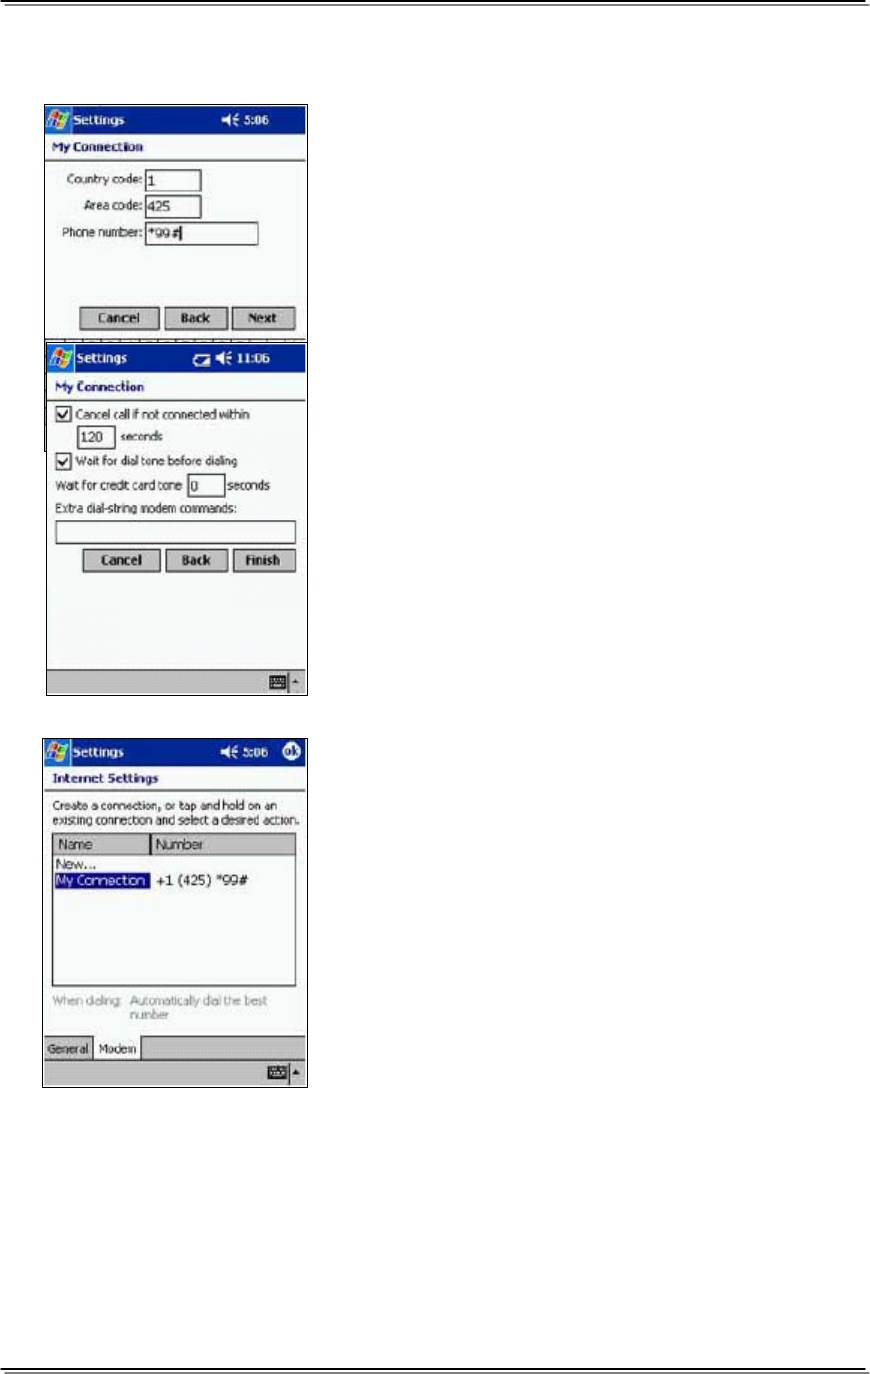
PWG-600 User Guide
- 65 -
A screen titled “My connection” is displayed if you entered “My connection”
as the name of the new Internet connection.
• Enter the country code, area code and the
phone number to connect to the GPRS
network. The network service provider
provides these details.
• Click the ‘Next’ button. A screen titled “My
Connection” is displayed.
• Click the ‘Finish’ button.
A screen titled “Internet settings” is then displayed.
This completes the steps to make a new
connection.
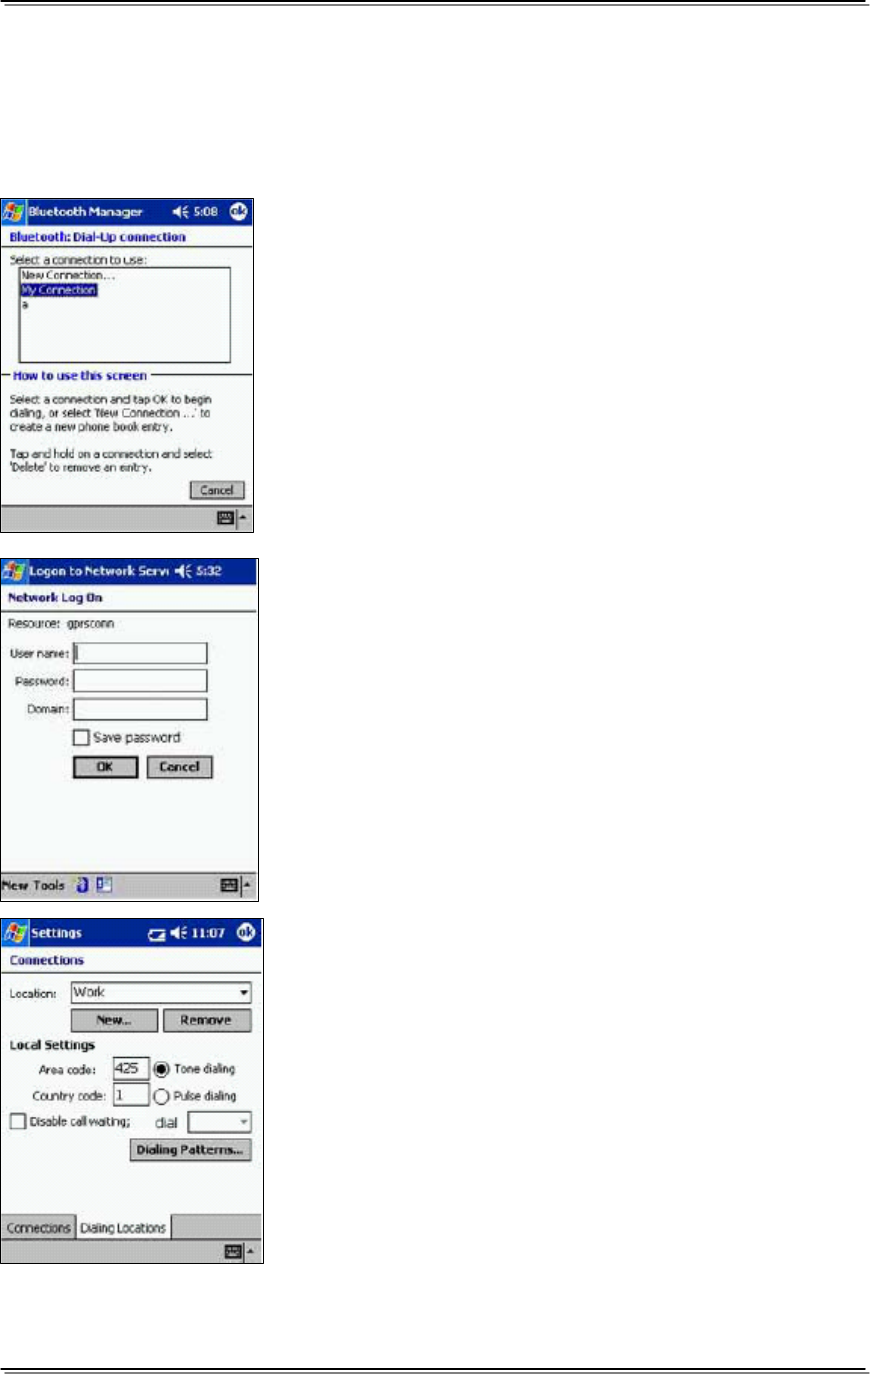
PWG-600 User Guide
- 66 -
Connecting to the GPRS Network using a PDA
In order to connect to the GPRS network through the PDA please perform the
following steps:
• Using Bluetooth manager from your PDA, select
the device that you want to connect. Make a
DUN (Dial up networking) connection to that
device. The procedure to make a DUN
connection depends on the Bluetooth card used
and the corresponding software.
• “Bluetooth Connection” screen will be displayed.
• Select the Connection that you created and click
the “ok” button.
A Login Screen is displayed as shown in Fig. 9.12.
• Enter the Username and the Password to login
to the network. The service provider provides
the User Name and the Password.
• Click the “OK” button.
• A screen titled “Connections” is displayed when
you click “OK” as shown.
• Click on the ‘Dialing patterns’ button.
PWG-600 User Guide
- 67 -
• A screen titled “Dialing patterns” is displayed.
• Enter "G" for local call, long distance calls, and
international calls.
• Click “OK”. The connection to the network takes
place.
NOTE: This procedure and also the screens shown are
for a specific SIM Card only. The procedure and the
screens will be different for a different SIM card.
Browsing the Internet using WiFi
In order to browse the Internet using WiFi, you must set up WiFi on PWG-600.
This can be done from the PDA as well as from the PWG-600.
The steps to set up Internet using WiFi on the PDA are as follows:
• Switch WiFi to “On”: Click the WiFi General Tab to turn WiFi “On” and
then click on the “Apply” button
• Manual mode: Click the WiFi General Tab to select the Manual Mode.
Click the ‘Apply’ button. Click the “Site Survey” Tab. Click the ‘Rescan’
button. A list of the available networks is shown. Select a network and
click ‘Connect’.
• Auto mode: Click the “WiFi General” Tab to select the Auto Mode. Click
the “Apply” button.
NOTE: Before switching to the Auto mode, please set the appropriate
profiles.
• To set WEP keys click the WiFi Encryption Tab and set Encryption to “On”
or “Off”.
• Select the type of Encryption.
• Set the WEP key to use and click the “Apply” button.
• Click the WiFi Configuration Tab to set Authentication “On” or “Off”.
• Set the Username and Password (if required).
• Click the “Apply” button.
• To set Static IP click the WiFi Network tab. Deselect the DHCP check box.
Set the desired IP, subnet mask, default gateway and the DNS server in
the corresponding fields and click the “Apply” button.
• To set Dynamic IP click the WiFi Configuration tab. Select the DHCP
check box and click the “Apply” button.
• To set the “Power Saving” mode, click the WiFi Advanced tab. Set the
Power saving option as “On” or “Off” and click the ‘Apply’ button.

PWG-600 User Guide
- 68 -
• To set a new profile click each WiFi Configuration tab and set the
parameters for the profiles.
• Click the WiFi Profiles tab and enter the name that you want to set for the
profile in the “Profile Name Edit” box. Select the profile in which you want
to save the new profile.
• Click the “Save profile” button and click the “Apply” button.
• To edit an existing profile click each WiFi Profiles tab and click the “Load
Profile” button to load the parameters of that profile.
• Click each WiFi Configuration tab to set parameters for each profile.
• Click the WiFi Profiles tab and enter a name for the profile in the Profile
Name Edit box.
• Select the profile into which you wish to save the new profile.
• Click the “Save profile” button and click the “Apply” button.
• To delete profiles click each WiFi Profiles tab and select the profile you
wish to delete. Click the “Delete profile” button and click the “Apply”
button.
To browse the Internet using WiFi:
• Connect to an available WiFi network Manually or Automatically.
• Set up a DUN (Dial Up Networking) connection.
• Click the “Internet Explorer” icon from your desktop to browse the Internet.
NOTE: To browse the Internet using WiFi, enter the same username and
password that you had entered when setting the WiFi parameters.

PWG-600 User Guide
- 69 -
A
AD
DD
DI
IT
TI
IO
ON
NA
AL
L
I
IN
NF
FO
OR
RM
MA
AT
TI
IO
ON
N
You can browse the Internet using a Bluetooth enabled PDA that has been
paired with PWG-600. Here PWG-600 functions as a modem. You can browse
the Internet using GPRS or WiFi networks.
FCC Regulation
Th
is
model
phon
e com
p
lies with part 15 o
f
the FCC
Rules. Operati
on is subject to the
condition that
this
device does not cause
harmful interference.
This
device complies with Part
15 of the FCC Rules.
Operation is subject to the
following
two conditi
ons: (1)
this device ma
y not
cause harmful interference a
nd (2)
this device must
accept any i
n
terferenc
e
received,
incl
uding interference that may
cause undesired ope
ra
tion.
Th
is equip
m
ent has
been
te
sted and found to comply with the limit
s for a Class
B digital
dev
i
ce, pursuant to
Part 1
5
of th
e FCC Rules. T
h
ese limits are designe
d to
provide
reasonable
protecti
on ag
ainst h
a
rm
ful
interf
er
ence
in a residential installation.
This equipment gener
ates, uses and
can radiate radio frequency en
erg
y
a
nd, if
not installed
and used in
accordance with the instruc
tions, m
a
y
cause harmful interference to radio
comm
uni
cations.
However, there
is no guarant
ee that
interference will
not
occur
in a particular installa
t
i
on
If
th
is eq
uipm
en
t d
o
es
cause
harmful
inte
rference to radio or
television
recep
tion, wh
ich can be
determin
ed by
turning the equipm
ent off and on, the user is encouraged to try to correct the
interference by one or more of the following measures:
o
Reorient or relocate the receiving antenna.
o
Increase the separation between the equipment and the receiver.
o
Connect the equipment to an outlet on a circuit different from that to which the
receiver is connected.
o
C
onsult the dealer
or an
experienced radio/TV
tech
nician for
help
.
Change
s or
mo
difica
tion
s not
expressl
y approved by
th
e party
respo
n
sible for comp
liance
co
uld voi
d
th
e user‘s
authority
to operate the equipment.
The antenna(s) used for thi
s
transmitter must not be
co-
loca
ted o
r
operatin
g
in
conju
n
ctio
n
with any o
t
her
antenna or
transmitter.
Th
is
EUT
is in co
mpliance
with
SAR for gen
e
ral
popu
la
tion u
n
controlled expo
sure limits
in
ANSI
/IEE
E C95.1
-
1999 and has been tested in
accordance
with the
mea
suremen
t
method
s
and p
r
o
ce
dures specified in OET Bul
letin 65
Su
pplem
ent
C.

PWG-600 User Guide
- 70 -
European regulation
Products with the CE mark
comply with
the Radi
o &
Telecommunication Terminal
Equipment
Directive (1999/
5/EEC), the Electromagnetic
Compati
b
ility Directive (89/
33
6/EEC) a
nd the
Low
Vo
ltage
Directive (73/23/
EEC) -
as amended
by Directive 93/68/
ECC -
issued by the
Comm
issio
n
of th
e Europ
ean Commu
nity.
Compliance wi
th these directiv
es
implies conformi
ty to
the following European Standards:
o
1999/
5/EEC Radio &
Telecommunication
Terminal
Equi
pment Directive
(R&TTE
)
EN
301 511
o
S
pecific Absorption Ra
te (
S
AR) Standard: EN
50360
, EN 5036
1
o
73/23/EEC Low Voltage
Directive (LVD)
Standard:
EN 6
0950:2000
o
89/336/EEC Electromagnet
i
c
Compatibility (EMC-
Directive) Standard:
EN30
1489-
1/7
o
T
he ma
nufacturer cann
o
t
be held
resp
onsible
for modifications made
by th
e user
and
the
consequenc
es thereof, which may alter the conformity of
the
product with
the mark.
RF exposure regulation (SAR)
Th
is
mod
e
l pho
ne m
eets the g
o
vern
ment’s requirements for
exposure to rad
i
o waves.
Thi
s
pho
ne
is designed
and
manufactured not to exceed th
e emission limits for expo
sure
to
radio
frequen
c
y (RF) energy
set
b
y
the Fed
e
ral
Comm
unications Comm
issio
n
of th
e U.S.
Governm
e
nt.
Th
e FCC has g
r
an
ted
an Eq
uipmen
t Authoriza
t
ion
for
this mode
l pho
ne with al
l re
ported
SAR
levels evaluated as in compliance with the FCC RF
exposu
r
e guidelin
es. SAR
info
rm
ation
on
this m
odel p
hone
is on file wi
th the FCC and
can
b
e
foun
d und
er the Display Grant section of
http://www.fcc.gov/
oet/fccid a
fter searching on FCC ID: Q3MPWG600
For bo
dy worn o
p
eratio
n, this pho
ne ha
s
been tested
and meets
the FCC RF exposure
guidelines for
use with an accessory
that contains
no metal and
positions the
han
d
set a
minim
u
m of 8.5
mm from the bo
dy. Use
of
other enha
ncemen
ts may no
t ensure
compl
i
ance
with
FCC RF exposure g
u
idelin
es.
If you d
o
no
t u
s
e
a bod
y-
worn accessory
and are not
holding the phone at the
ear, p
o
sition
th
e handse
t a m
i
nimu
m of 8.5
mm fro
m
your b
ody
when th
e ph
one is switched
on.
Copyright © 2006 by G-TEK Electronic Group
All rights reserved