G4S Technology S813E S813 Enrolment Reader User Manual C Group4 PDF folder Readers s813 enrollment eps
G4S Technology Limited S813 Enrolment Reader C Group4 PDF folder Readers s813 enrollment eps
User manual
Installation and User Instructions for S813 Enrollment Readers
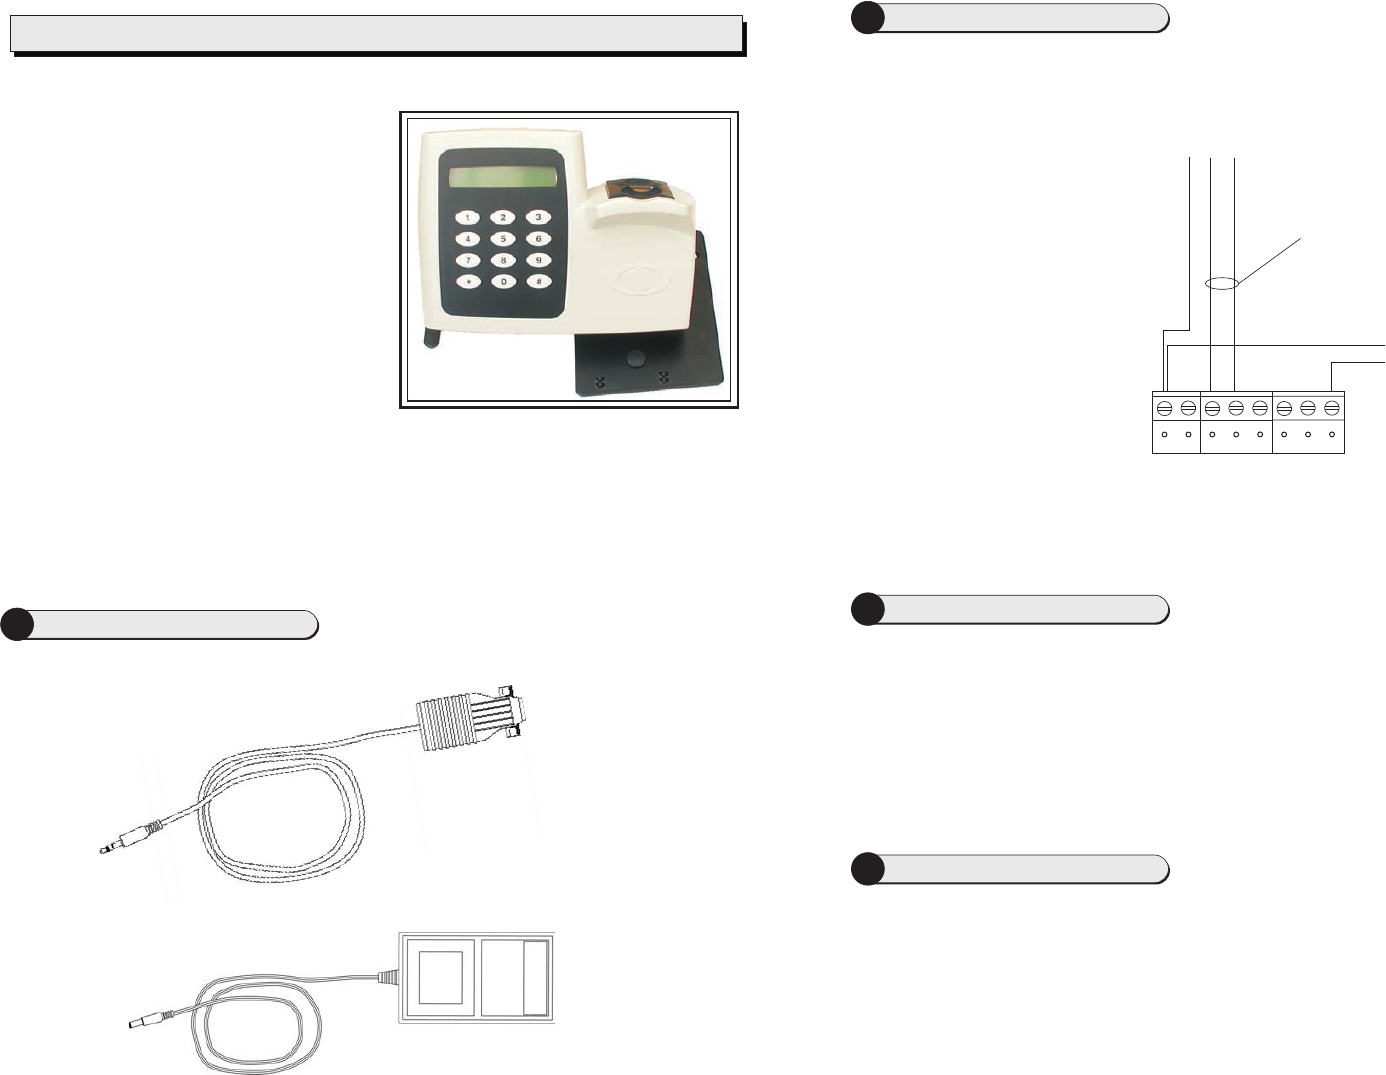
The S813 Enrollment Reader is used to capture
fingerprints, and to encode Philips
Philips
S813
®®
MIFARE or
MIFARE DESFire contactless smart cards.
The connects to a serial port of a controlling
Security Management System (SMS) PC using the
supplied cable.
Insert the jack plug
into the socket on
the back of the
reader bracket.
Insert the power
plug into the socket
on the back of the
reader bracket.
Connect the 12Vdc
power source to the
mains supply.
Connect to a serial port
of a PC installed with the
SMS software. Set up the
port in the Install/Client
Ports screen of the SMS
software.
To use the enrollment reader:
1. Log in to the SMS software at the PC that the reader is connected to.
2. Start the fingerprint enrollment procedure from the
. Follow the prompts.
3. Start the encoding procedure from the
Fingerprint Enrollment screen, accessed
through the Badge tab of the Card Holders screen
Fingerprint Enrollment screen. When prompted, present
the card to be encoded under the finger pad of the reader (tabs are provided on the base plate
if you prefer to rest the card against the reader). You will hear a "bleep" when the card has
been encoded.
Note: Refer to the enrollment guidelines overleaf.
4Enrollment Procedure
2Reader Connections
1Installation
This illustration shows the
connections from the reader to
the RS232-to-RS485 converter
and power supply. There should
be no need to make these
connections yourself - use the
supplied cables.
S813 Reader TB1
XMT-
G
XMT+
RS232-to-RS485
Converter
0V
0V
TX+
TX-
I/0
Do not use
RX+
RX-
+12V
12V
Twisted pair
Note the apparent reverse in
polarity between the converter
and reader (from "-" to "+" and
vice versa)
12Vdc power
3Reader Links and Switches
The following links are provided on the reader's PCB:
LK1 (Audio feedback) - Set to "0" for sound off. Set to "1" for sound on.
LK2 (TERM) - Ensure that this link has been removed.
LK3 (TEST) - Ensure that this link has been removed.
Ensure that all bit switches in SW2 (RDR ADDR) are set to the OFF position.
9600-0334. Installation and User Instructions for S813
Enrollment Readers, Issue 1.1 30th January 2004. Group 4
Technology, 2003-2004.
FCC Notice: This device complies with Part 15 of the FCC Rules.
Operation is subject to the following two conditions: (1) This device
may not cause harmful interference, and (2) this device must
accept any interference received, including interference that may
cause undesired operation.
Any unauthorized modification to this device may void the authority
of the user to operate it.
All trademarks acknowledged. Philips and MIFARE are registered
trademarks of Philips Electronics, N.V.
©Specifications
Input voltage: 9-14V.
Input current: 250mA @ nominal 12Vdc supply.
Operating temperature: 32 to 122 F (0 to 50 C).
Operating humidity: 15 to 90%, non-condensing.
Maximum encoding range: 1" (25mm).
Approvals: EN50133, R&TTE, IP605.
For internal use only.
°°
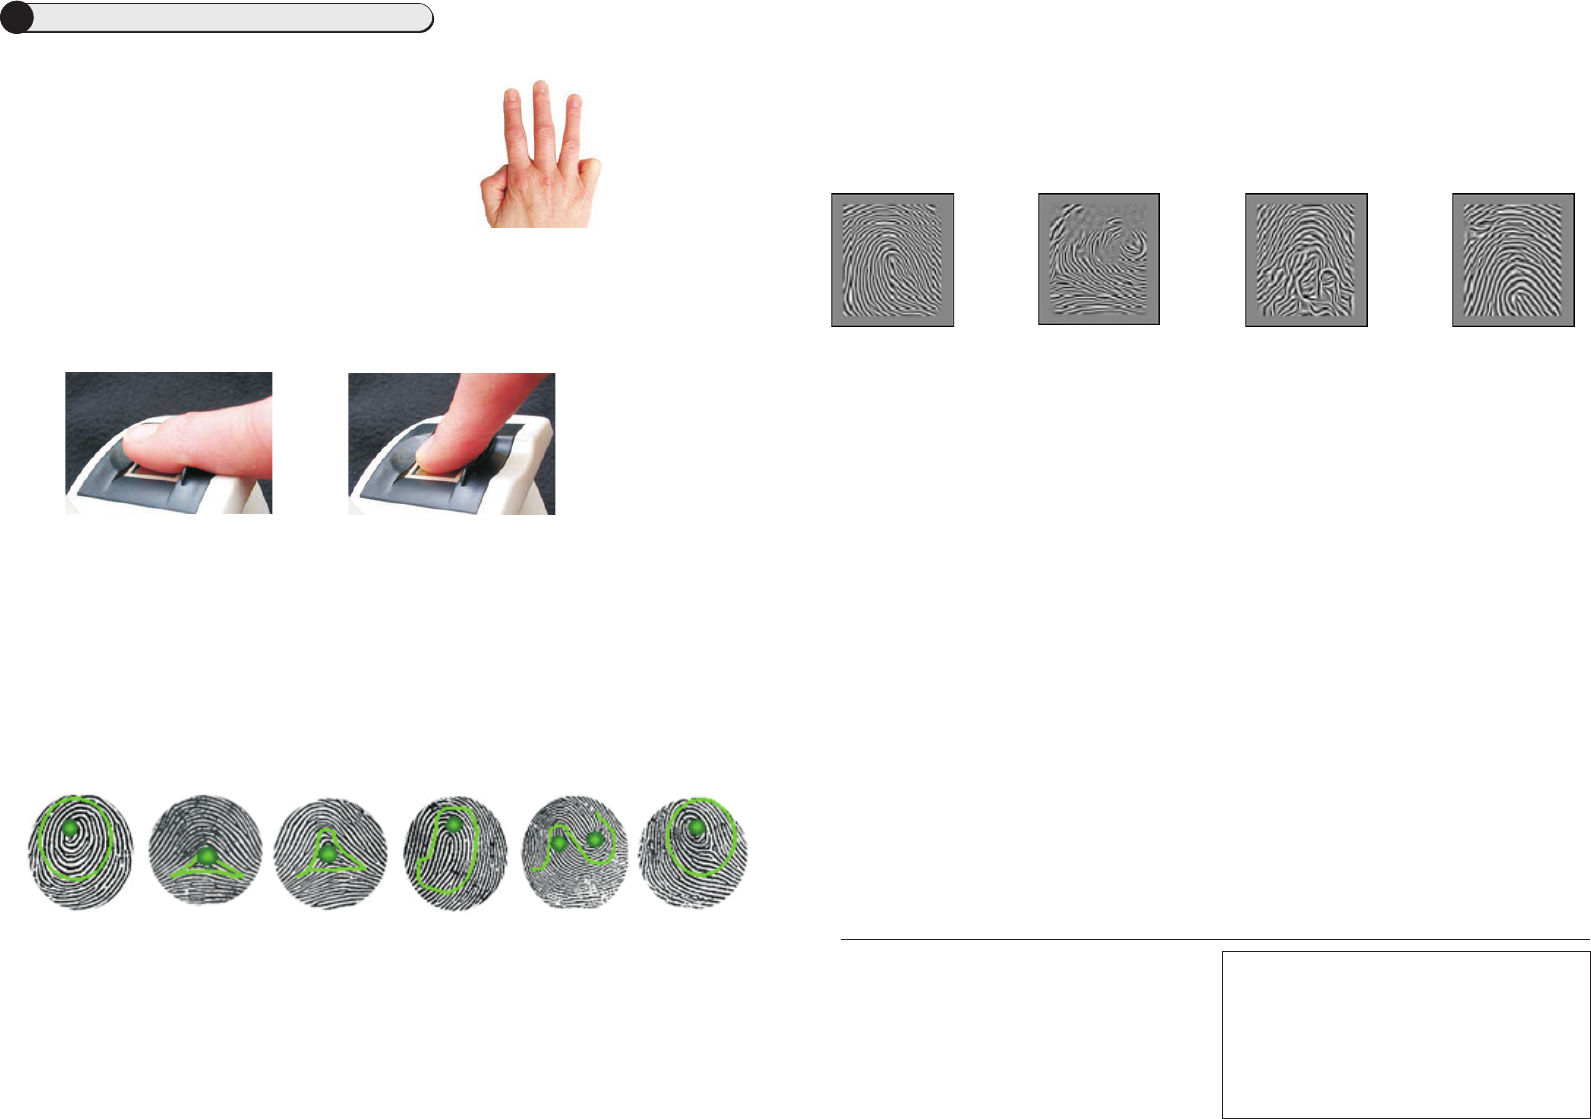
Use the following tips to ensure good enrollment.
F - Set the Acceptance Threshold
When a fingerprint is presented to an S813 Fingerprint Reader during an access-control transaction, it
is compared against the fingerprint stored on the card and a score is produced. The closer the match,
the higher the score. To gain entry, the score calculated by the reader must be greater than or equal to
the acceptance threshold specified in the Fingerprint Enrollment screen.
The default acceptance threshold is specified in the Configure/Preferences screen. You can specify a
different value by selecting in the Fingerprint Enrollment screen. The
specified value is stored on the card during encoding.
Too high a value may result in a reader not being able to confirm identity. Too low a value may
result in poor security.
You cannot change the acceptance threshold to be less than the minimum allowed setting in your
user privileges (Configure/User/Accounts).
The card-level acceptance threshold can be overridden for a specified reader in the
Install/Devices/Readers screen. This may be useful for readers in high-security areas.
Custom Acceptance Threshold
Note:
!
!
!
Quality:
Content:
Good.
Core is
properly centered.
Surface area and ridge
pattern are well defined.
Quality:
Content:
More pressure
is needed to improve
the image. Enroll again.
Core is
properly centered.
Quality:
Content:
Poor - ridges
are not well defined.
Enroll using a different
finger that provides a
better image.
Core is
properly centered, but is
not well defined.
Quality:
Content:
Good.
Core is not
centered. The same
finger should be
enrolled again.
5Tips for Good Fingerprint Enrollment
D - Check the Displayed Fingerprint Core
Check the displayed fingerprint in the Fingerprint Enrollment screen. Make sure that the fingerprint
core is centered in the Fingerprint Image box. Here are examples of typical cores:
A - Use the Correct Fingers
Use index, middle or ring fingers (not thumbs or little fingers):
B - Place Finger Correctly
Make sure each finger is placed with the first joint of the finger resting on the raised ridge at the front
of the sensor. Cover as much of the sensor area as possible with the finger:
C - Apply Moderate Pressure
Too much pressure may cause smudging of the fingerprint. Too little pressure may prevent the ridge
patterns from being captured.
Examples:
E - Check the Quality and Content
Manually check the quality and content of each fingerprint displayed in the Fingerprint Enrollment
screen.
The Quality and Content indicators show estimated quality and content scores. The indicators are
shown in green if the estimated scores match or exceed the minimum values set in the Configure/
User/Accounts screen. The indicators are shown in red if this is not the case.
INCORRECT
û
CORRECT
ü